How long can it take to fit one nut?....................TWO AND A HALF HOURS!!!
As my seat belts are fixed to both sides to the seast, the seat mountings to my chassis floor need to be particularly strong. I made a set of load spreader plates from 40x5mm flat steel bar for all 8 seat fixings, and with my son's help began fitting them.
We were able to locate and fit the nuts into the front runners and screw the bolt up into them quite easily, but the back ones certainly tested our patience!
The Audi A4 seats I have used are brilliant to sit in, but they were not designed to be installed into a Marlin Cabrio with very limited access. There is around 100mm maximum clearance at the back of the my seats to the rear chassis cross member, but then the seat runner is hidden a fuirther 100mm underneath and inboard of the seat back. So to fit a nut in the runner meant offering it up blind, by contorting hand and arm, and imagining where i might be.......and that was the easy bit!
We could push the nut along the runner with a finger end, and then line it up over the fixing hole from beneath the car with a screw driver, and even get the bolt started into the nut. However, because I had chosen nyloc nuts to make sure they never vibrate lose, it meant we had to hold the nut quite firmly whilst tightening the bolt head. This was where our problems began.
The passenger seat went in OK, but the drivers seat was a b****y nightmare!
The nut is positioned inside the Audi's narrow U shaped seat runner, so fitting a spanner is a non starter. My normal approach to this situation is to jam a screwdriver between the nut whatever it is close to, to stop it rotating but, because of the limited space and the angle we were working at, this proved impossible: believe me we tried everything!
After two hours of trying and failing our patience was being sorely tested - but they say the darkest hour is just before dawn, and the Marlin ingenuity gene kicked in. I decided I would make a special thin spanner:

The first version did not work as I made the side too thin, and it just splayed open when we tried to tighten the bolt. The Mark 2 version, seen above, worked perfectly. After 21/2 hours struggling we were able to do it up within a couple of minutes.
Quite satisfying in a perverse sort of way!
Big Milestone
From the day I took delivery of my kit it has stood on a pair of home made mobile chassis stands. (Marlin offer to hire these but at their extortionate rates, and my slow build it would have doubled the cost of my build!). These stands have been fantastic, making access underneath easy, and to move the car around to get better access to each side. If any one is considering, or in the middle of, a major restoration I can not recommmend these mobile stands enough.
Fitting the seat spreader plates was the last task major I needed to perform under my car, so the time had finally arrived when I could take the momentous step of lower my Cabrio down from its stands, and hopefully dispense with them for good.
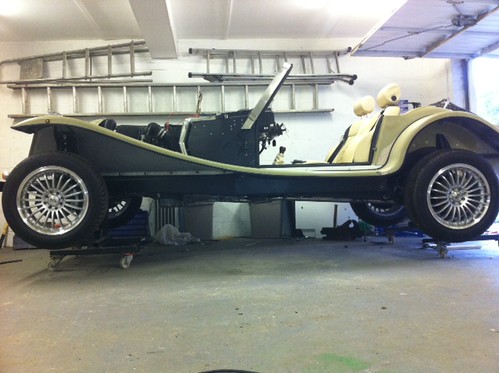
Before finally going ahead, I decided to change my wheel/tyres to narrower ones which will go through IVA without concern - my intended wheels are marginal on width relative to the wing sides.
My donor Sierra pepperpot alloys are in remarkably good condition, but two of the tyres were bald, so I bought a pair of scrapyard steel wheels and tyres for £10 the pair. I know they look awful, but the IVA test does not legislate against poor style or taste ......... yet!
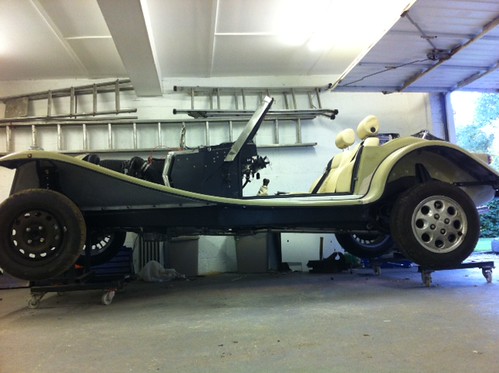
Off Its Stands
So finally...................
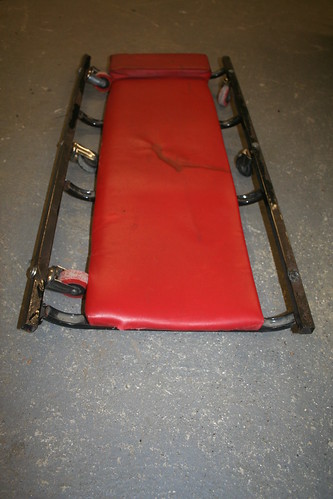
Sad End to "My Best Marlin Birthday Present"
It was quite fitting that the same weekend I took my car off its stands, my mechanics crawler board, which has been my best "Marlin Birthday Present" - and I've had a few - gave up the ghost and fell apart. It has been brilliant - again thoroughly recommended if you have a flat floor to work on. It made life so much easier.
Honey, I've Shrunk the Cabrio
After 7 years of seeing my Cabrio on stands it now looks awfully small, and very low sat on its own wheels - its going to take some getting used to.
Sump clearance was always going to be an issue, as it is with most Marlins. With these gash wheels I have 140mm (5 1/2"), and reckon with my chosen wheels and tyres this will go up to around 155mm (6"), though it may settle to below this. There is not much I can do, other than resort to a special sump and pump feed, which will cost a fortune.

Not having to fit CATs has been a real bonus - my exhaust seems to be fine despite running the length of the car under the chassis.
Count Down To IVA
My list of "Jobs to do before IVA" has ceased to be so infinitely long that I have dared to create a definitive spreadsheet of tasks and times to complete. At the beginning of the weekend there were 23 items: and I reckoned I had around 70 hours work to do before I felt it would have a fighting chance of passing .
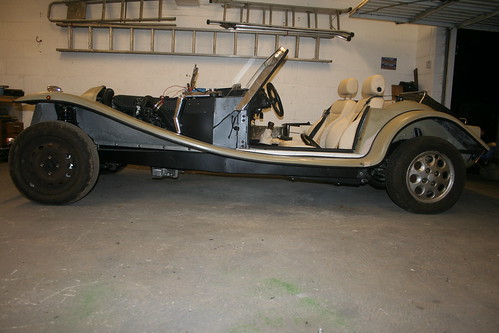
Rear Wing Extension
The rear wings on a Cabrio do not meet the IVA requirement to cover the rear tyre down an imaginary horizontal line 150mm above the wheel centre line: extensions are required:
These were easy to make from stainless (ally would have been easier still, but I felt would be too soft, and not look like they were meant to be permanent. Stainless would go with the rest of my Cabrio, but is a pig of a job to drill for fixings, so I decided to glue them on using thick black body underseal gunge and clamps. Hopefully it will not prove too succesful, as I expect to "fall off" post IVA.
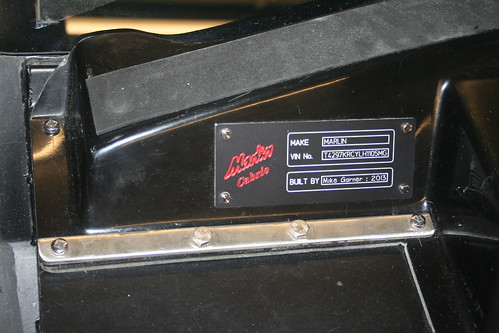
VIN Plate
What a pain!
Some time ago I decided it might be a good idea to contact my intended VOSA test station to seek their views on how to present my Cabrio, and hopefully have them "on-side" on my test day. One of the items that came up in conversation with Andy (we are on first name terms!) was the VIN plate. He takes a very literal view of the IVA rules, and insisted the only two details that must appear on a VIN - "The Make of Car", and "The Chassis Number" should appear in a separate box, with the "Make" in CAPITALS, at least 3.5mm high. There must be nothing else in the same box - not even "Cabrio".
So this is the result, a minimalist VIN plate with a separate box for the essential information, and another for the non essential blurb!
Despite the trials and tribulations along the way, I'm pleased with it:
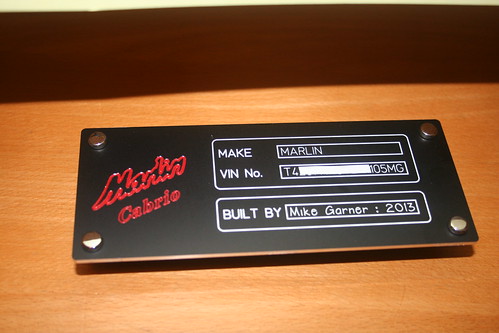
(Many thanks to Jason for helping with the design)
My tester had better not have any objections to it!!
Oh, and of course, it has to be located on the offside in an easily accessible position!
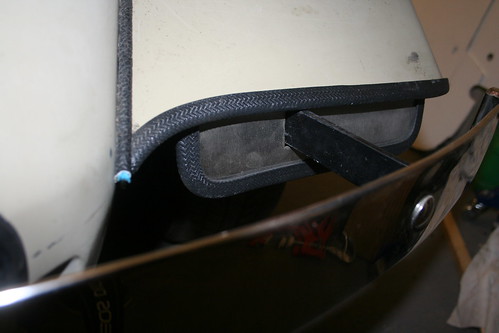
The steel bar over the heater cowl is a stiffener I've added to help strengthen the pedal box at the rear. It works very well, preventing its rotation and flexing when the brake is applied.
And at the end of the weekend, I've knocked off two jobs and 7 hours from my list............and I've still got 23 jobs and 70 hours work, as I found two other tasks that I'd over looked! Will I ever get there?!