Mr T - Well it was the beautiful Spyder #66 that got me into this mess in the first place!
 Gary
Gary - My attempt to finish the fibre glassing under the 'tarp would have made a much better picture.
 Axel
Axel - They are self tapping screws, but I still drill separate pilot holes to avoid cracking the body shell which takes extra time.
 Scottie
 - Cheers, although at this point in the build, I will settle for looking "finished" or "on the road", rather than fabulous.
CarNoob - I know it sounds odd, but the "cut & shut" has actually improved the symmetry in sections of the humps (see below).
It is not easy to see in the photo, but the rear passenger side of the body shell is also slightly lower than the driver's side.
( This is something I remember
Oxford fixing on his build. )
So, as I said before, by the time I add the spare hump, the "ups & downs" across the whole of the rear may well look very "odd".

But if I ever want to finish the car, I just have to pick the big battles and let a lot of other things just go.
- - - - - - - - - - - - - - - - - - - - - - - - - - - - - - -
Every day has its cloud - Part 1
I started the day by taking a tape measure to the inside of the wheel arches.
( So it was spooky to see
CarNoob's question later on. )
At this point the width of the two arches arches is very similar.
Passenger side - Original

Driver's Side - Stretched

Although I must confess it isn't a close match across the whole arch, but "it is what it is".
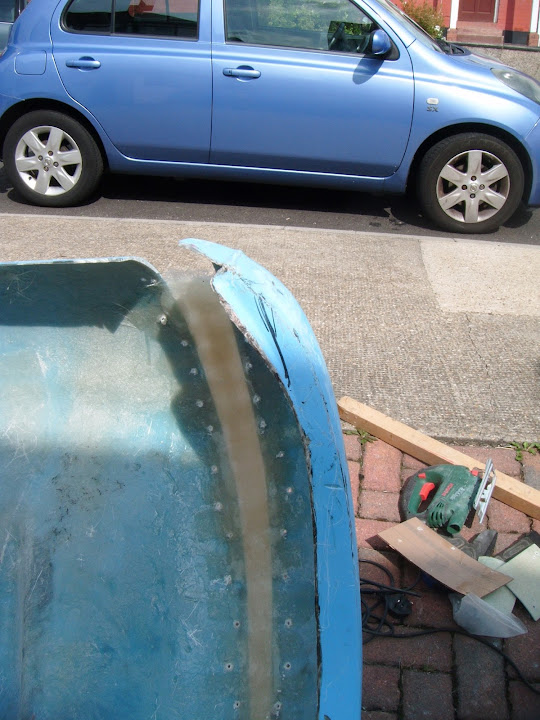
First job was to remove the brackets and hardboard to leave...
The original gaping wound.

And the latest gash.

Sad as it sounds, I'm still getting a kick out the fact the fibreglass repairs holds everything together.
The next job was to minimise the impact of the different rear arch "sweeps".
As this is what the passenger side looked like.


But the driver's side was "sticking up" too much following the cut & shut.


The view along the inside edge also helps highlight the difference.

So the passenger side got a very light trim.

But I cut a much bigger chunk out of the driver's side.


Note:
You can see I needed to cut "down" quite a bit, so I could extend the same body shell profile from the left (as you look at the photo).
End of Part 1...