Quote:
Originally Posted by Mike

Peter
Its good to hear you are making progress with your servo now that you have successfully installed your beast of an engine! 
I hope you will as pleased with your new found brakes. Sounds like you will need them!!
Mike |
OK, so here's an update of my installation.
You've all seen it all before so I'll try to focus on my own installation differences and ideas.
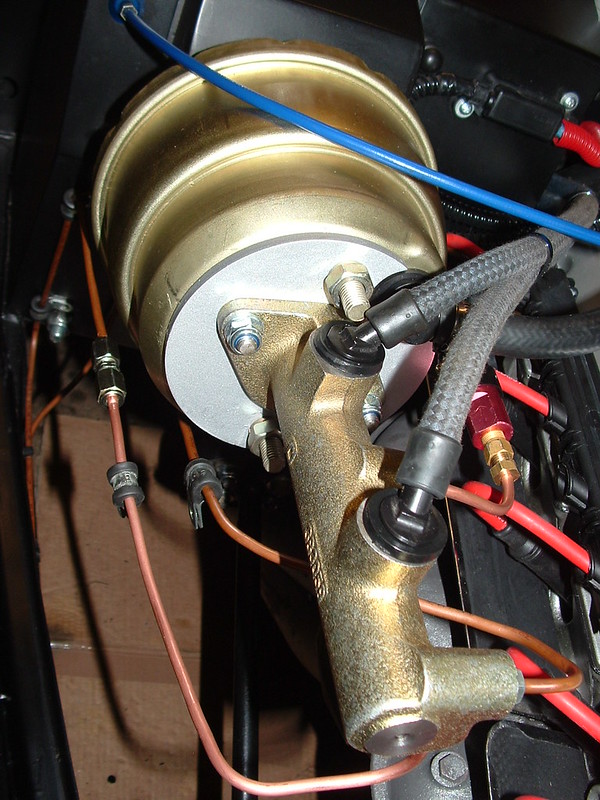
Here is the new dual diaphragm servo installed with Mike's adaptor plate. This made fitting the Ford M/C a doddle.
I was lucky that my original reservoir pipes were long enough. I good tip I got from Robin was to use the BMW rubber seals on the m/c. One of my front brake pipe was long enough to be reformed to reach the new position. The other was extended alongside of the servo.
 Brake Servo Upgrade
 by
marlinpeter, on Flickr
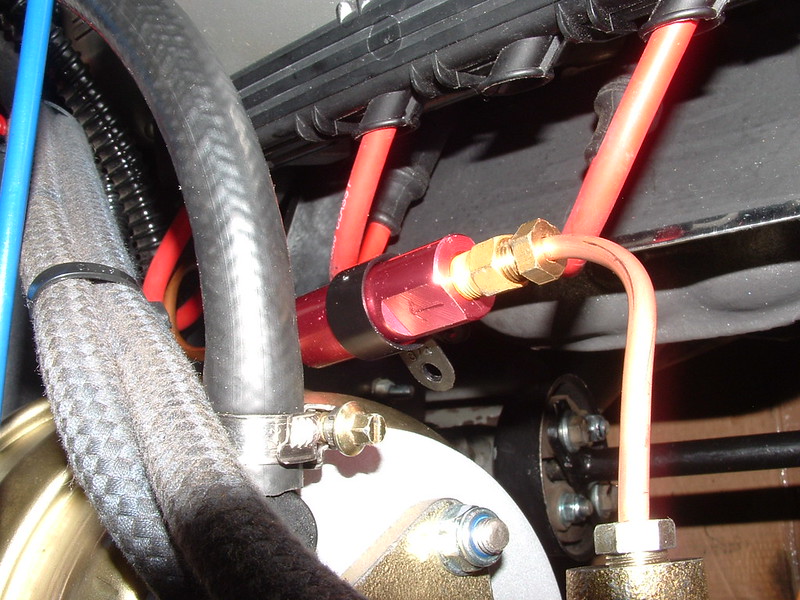
This is a Residual Pressure Valve that I have fitted as I have rear drum brakes. These should not be used if you have disk brakes at the back. The Servo supplier recommends fitting one of these if you have drums at the back and disk brakes at the front.
 Brake Servo Upgrade
 by
marlinpeter, on Flickr
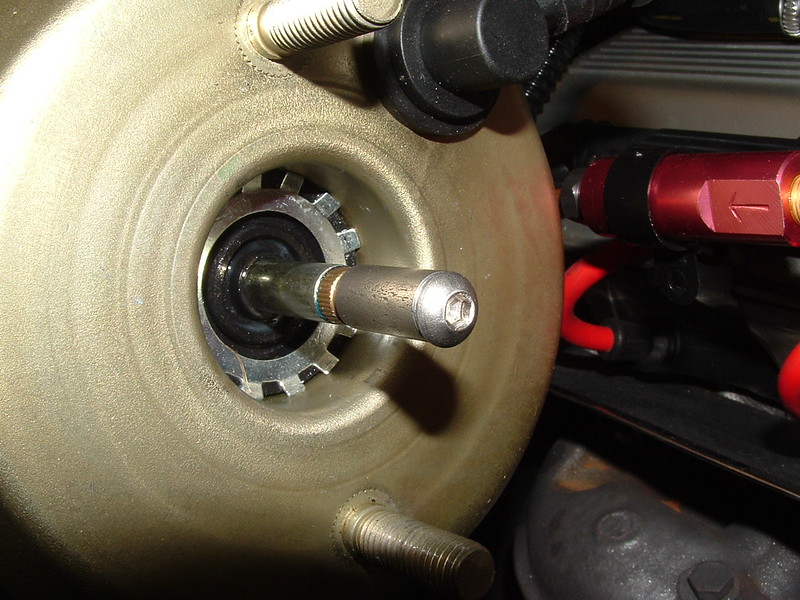
As you all know, you have to extend the plunger that goes into the m/c. This is my version using a M6x40mm button head screw and a short length of M6 threaded tube that I bought for £1.50. No lathe or drilling, just bolt it together. This picture is with the brake pedal fully depressed so that I could get to the locking ring.
 Brake Servo Upgrade
 by
marlinpeter, on Flickr
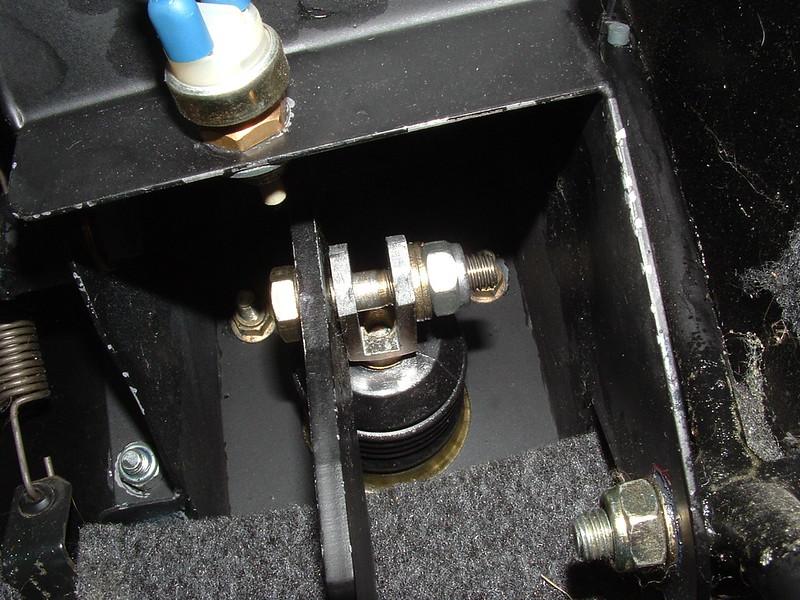
With my failing eyesight and vari focals I can't see much close up in the foot-well. Most of this was assembled by feel and I use my digital camera to check everything is installed correctly. The servo clevis is alongside the brake pedal as that is how Marlin designed the Sportster pedal box. I should have modified the brake pedal to move it across but the bolt holding the pedal does not come out in situ so that would mean removing the whole pedal box which I decided was overkill. I think it will be fine like this. This picture is with the brake pedal fully depressed.
 Brake Servo Upgrade
 by
marlinpeter, on Flickr
The next picture is with the pedal in its normal rest position. I set the clevis pin up at the same dimension as the old metro servo and extension which in my case was 130mm. I shortened the clevis pin coupler by about 20mm as it was too long under full compression.
 Brake Servo Upgrade
 by
marlinpeter, on Flickr
I've made some brackets to support the pipes hanging in free air which are being painted before final fitting. Then I've got to refill and bleed the system.
I need to wheel the car out the garage to be able to get to each wheel for bleeding so it won't be until it stops raining!!
