|
|
| Sammio Builds and discussions Sammio bodied car builds and specials |

28th April 2014, 18:09
|
 |
Senior Member
|
|
Join Date: Feb 2012
Location: Wembley, London
Posts: 5,056
|
|

Mac - Thanks again for your kind offer. 
Unfortunately, I need to do the coating in two stages around the bonding of the body shell (underside 'before' & inside 'after').
By doing the underside first, I'll have a better understanding of the roller vs. brush finish for the inside.
a big scary monster - Thanks for taking the time to join the forum to post your message.
I have always been happy for people who know more than me to make suggestions for my build.
So I'll have a look into the stone chip stuff as I know others have used it on their builds.
- - - - - - - - - - - - - - - - - - - - - - - - - - - - - - -
Another Busy Day - Part 1:
I made sure I got all my chores done before lunch so I could take advantage of the dry weather forecast for the afternoon.
First job was to remove the body shell and then the rear framework so I could paint it.

There are a few bits left to paint on the frame, but I need this side to be dry, so I can flip it over.
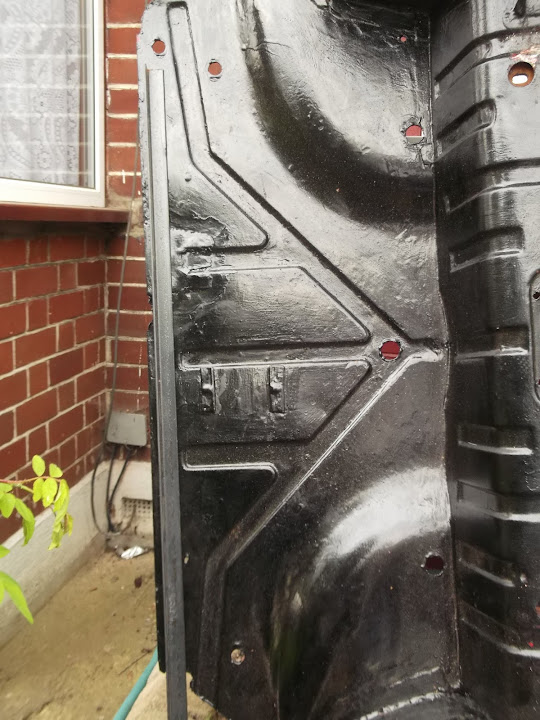
With the framework out of the way I turned my attention back to the chassis.
I had bought a heavy duty 19mm drill bit which was marginally smaller than the crush tubes.

After expanding the 4 holes I'd already drilled in the chassis, I switched to a hand file for the final bit.

This gave me as close to a friction fit as my manual tools (& skills) would allow & all 4 tubes were in.

I marked the tubes and cleaned up the metal where I was going to weld them.

I also cleaned up the holes on the chassis & it was nice to see shiny metal under the paint.

As the rolling chassis is parked on a sloping drive, it is not easy to see what is straight.
So I used a "L" shaped ruler to keep the tube perpendicular to the chassis when I was welding it.

Don't ask me how, but I managed to blow apart the welding tip's shield. 

Thankfully I had a spare, so soon all four tubes were welded into position.

Then I cut the tubes off with my angle grinder before cleaning up the top surface.


A quick spray of etch primer over the top completed stage one of this chassis mod.

I still need to drill 4 holes in the bottom rail of the chassis through these crush tubes.
At least by doing it this way mean I know the holes will line up. 
End of Part 1....

|
28th April 2014, 18:11
|
|
Senior Member
|
|
Join Date: Feb 2012
Location: Wembley, London
Posts: 5,056
|
|
Another Busy Day - Part 2:
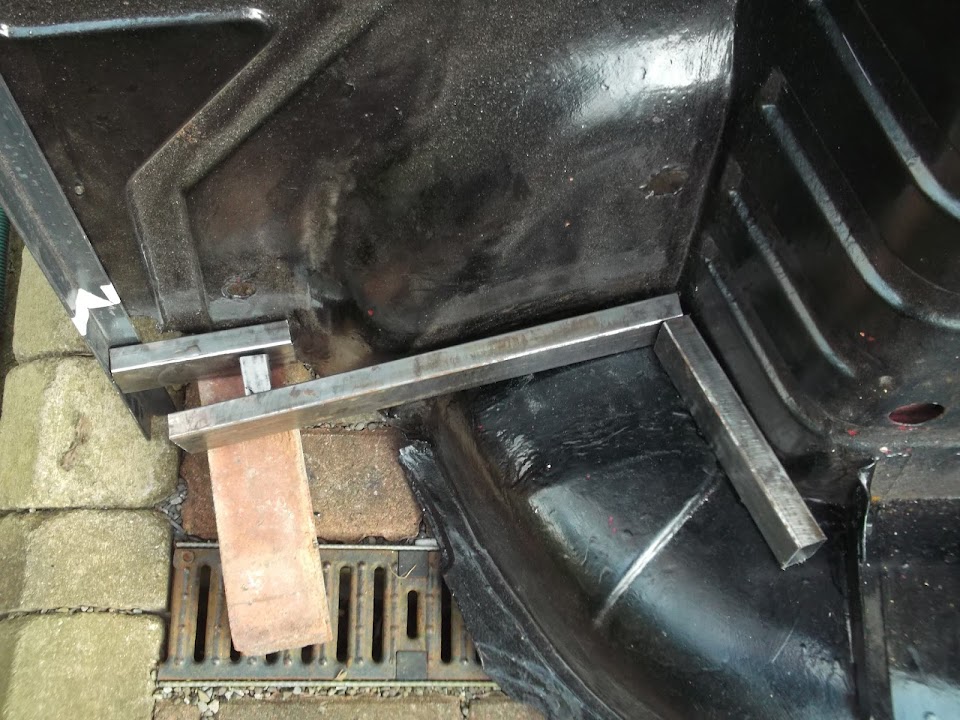
There was another "little" job required on the chassis and now seemed a good time to tackle it.
The rear frame work fouled the existing fuel & brake lines the first time I test fitted it.
So these lines have been hanging off the chassis ever since.

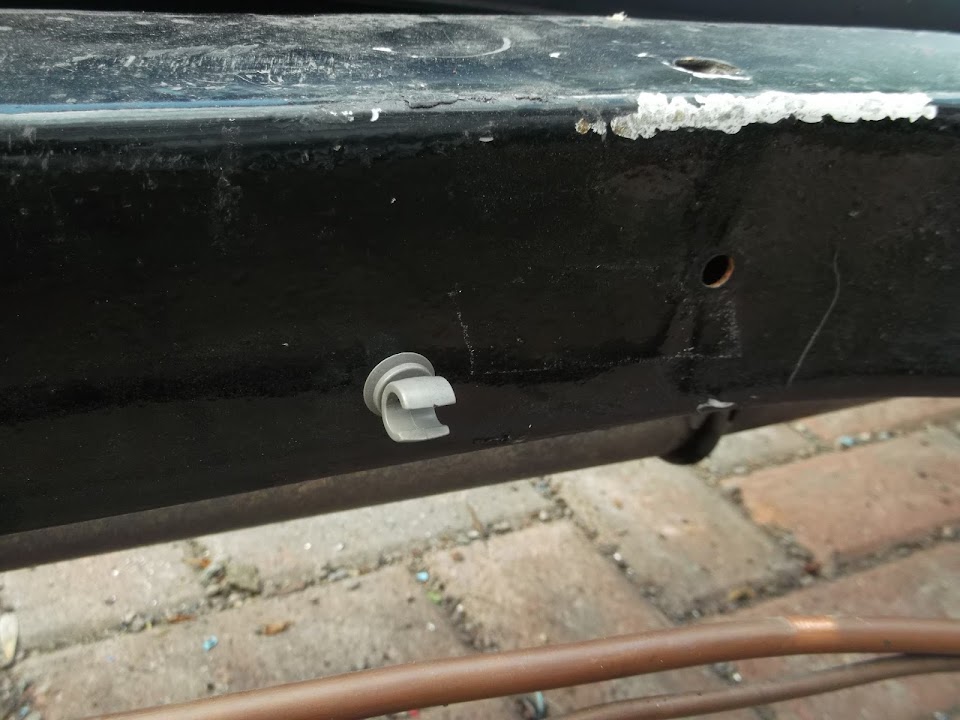
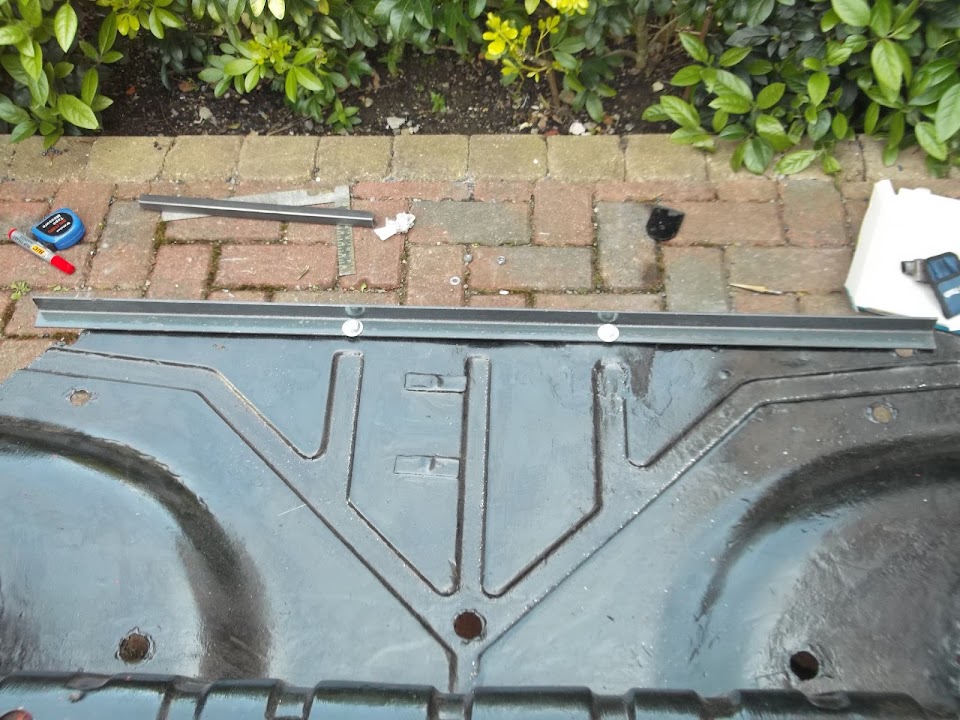
As a rough guide, the frame work is about the same depth as the ruler in this photo.

And you can just about make out the original hole for the fuel line clip on the bottom right hand corner of the ruler.
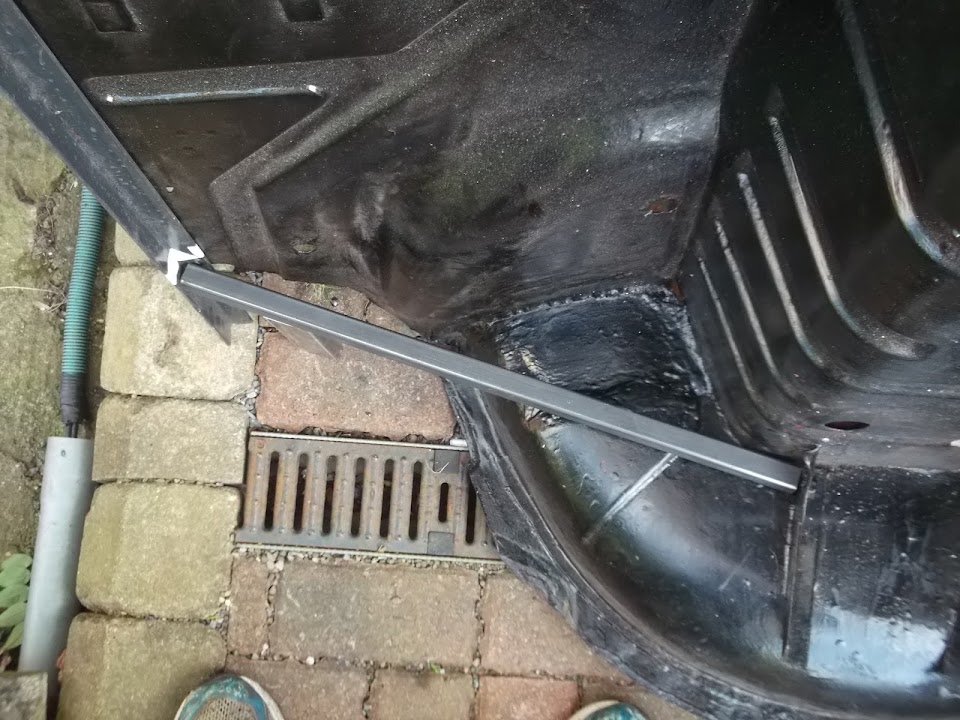
I will be supporting the fuel & brake lines using two types of clips.

The one of the left fixes the fuel line to the chassis & the one on the right joins the brake line to the fuel line.
There is also a bracket fixed to the end of the chassis which would also need lowering.

I couldn't really get my drill into the small space available near the existing fixing hole in the chassis.
So I simply drilled a "higher" hole in the bracket which will do the same job of lowering the hard lines.

Although when I refitted the lines to the bracket I realised I need to fix it to the chassis first.
( As the top nut & bolt are now in line with the new hole. )

After a bit of drilling, all the fuel line clips are in and out of the way of the frame.
I also added two more of the dual line clips to give a better spacing between the chassis clips.

The hard lines are still hanging loose at the moment.

But I want to touch up the paint on the chassis before I clip them into place.
This was actually quite a time consuming job, but I am very happy to cross if off the "To Do" list.
Quick Question:
What do people generally do with "surplus" holes in the chassis?
Do they need to be plugged, filled, left alone?
As I want to do more painting on both the chassis and the rear frame I kept them apart.
In the absence of any framework, the body shell is now "slammed".
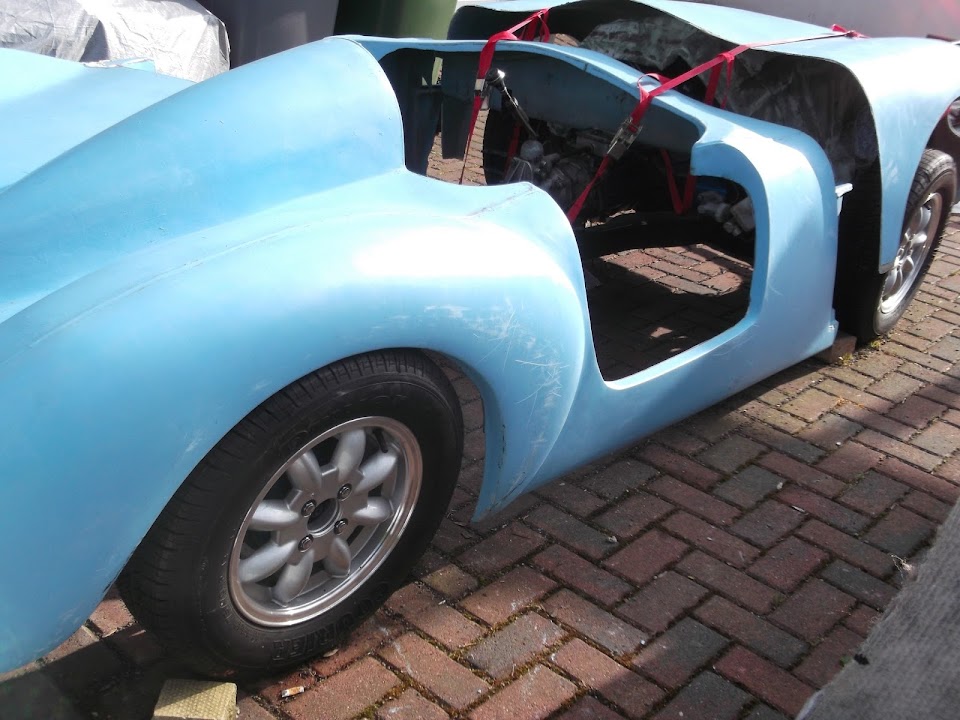
But my collection of big parts under another cover is getting a bit silly.
( Especially as this particular cover seems to have no water resistant properties at all.


I know I packed up with the sun still shining, but it was dinner with my family time which takes priority.
Mind you, by this point I was seriously knackered and glad to have an excuse to call it a day.
Until next time, take care, Paul. 
|
28th April 2014, 19:01
|
|
Senior Member
|
|
Join Date: Apr 2014
Posts: 198
|
|
You are most welcome Paul, I very much enjoy reading your cordite antics you should be praised for attentive blogness? I took some photographs first thing but I fear your build will be on its second mot before I could make the time to sort the rigmarole of posting them. The brand I last used is £4.32 if you search eBay for stonechip, whilst taking pics I noticed that a bumper I had made out of 3 mm thick hollow section with frenched in tubes for the rear lights (so plenty of ground down welds)which has been lent up outside since October and had only received a light brush coating of a zinc primer and a couple of coats of stone chip still looks like the day I painted it apart from an area I had missed or chipped. My tip is keep the aerosols warm I sat mine in a Pringles tube of hot water whilst working outside in winter after warming through for a few hours in the aga warming oven.
|
29th April 2014, 18:15
|
|
Senior Member
|
|
Join Date: Feb 2012
Location: Wembley, London
Posts: 5,056
|
|
a big scary monster - Cheers, I enjoy reading detailed build threads, so thought it was only fair I did the same.
I also figured if a ham fisted amateur like me can build one of these cars outside, then anyone could.
Especially as the Ribble Navigator is a much better kit all round and most of the work I have done is not required.
- - - - - - - - - - - - - - - - - - - - - - - - - - - - - - -
Still Chipping Away - Part 1
I test fitted the floors to the frame so I could mark up and drill the holes for the pop rivets.

The first thing I noticed was that one of the holes I'd drilled on the driver's side floor was not going to work.
The position of the cross frame rail leaves a gap from floor to frame.

With the floor removed it is easy to see the slight drop in the "factory" set up.

Whereas the new passenger side section that I welded in sits flush.
( Surely luck, rather than judgement. )

So I simply drilled a new hole in the floor a bit further inward.
( The gap will be filled by the bonding paste, so I'm not going to worry about it. )

With all the other holes required marked up I could start drilling the frame.

I stuck the rivets in just to make sure that the holes in the floor & frame lined up.

I will be bonding the floor to the frame, so the rivets are just going to help hold everything in place when the time comes.

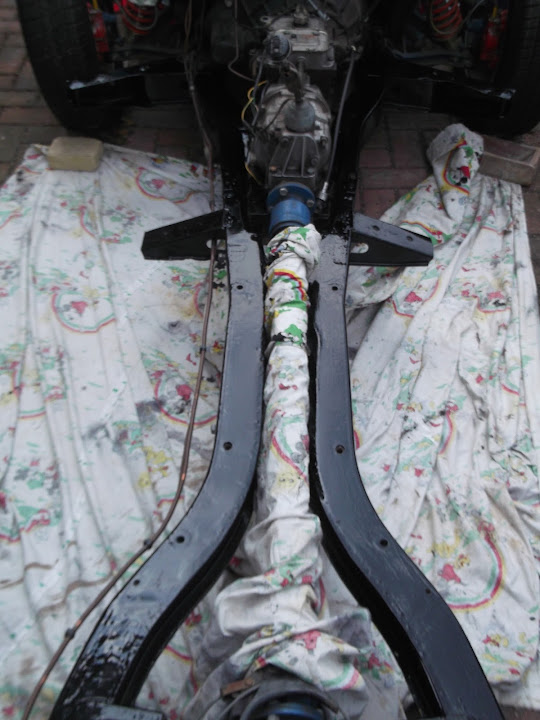
Then I cleaned up the chassis ready to put some paint on where the frame and bulkhead will sit.
This was the overall view "before".

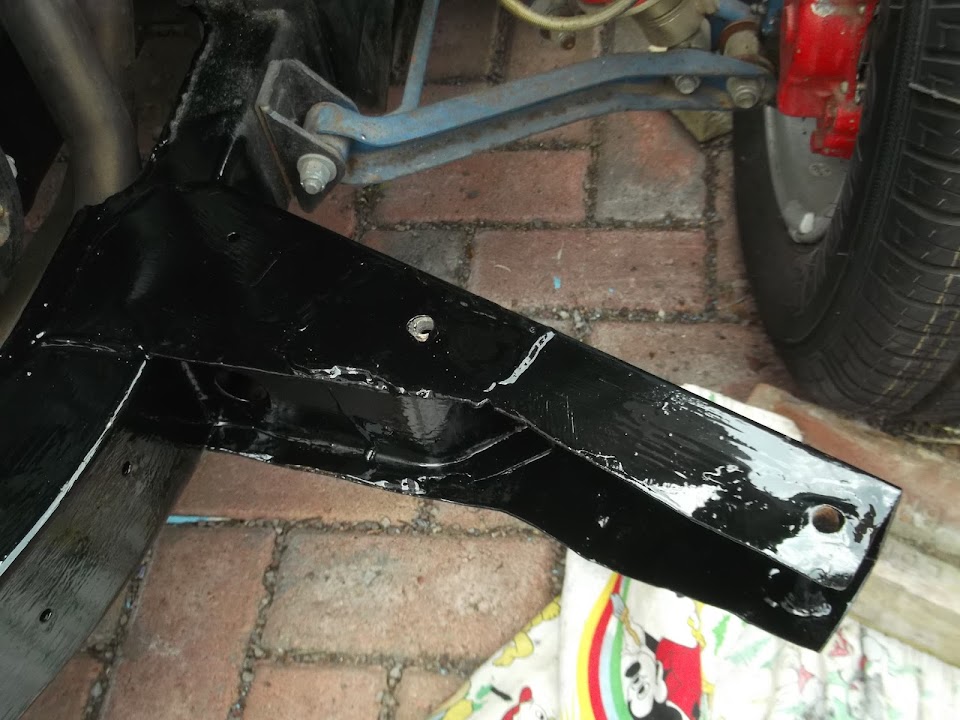
The rear bulkhead mounting point.

The front bulkhead mounting point.

Dare I say the previous owner had left a bit of over spray from the body shell on the chassis too.

After a coat of Hammerite smooth, the whole thing looked a lot better.


While the paint was out I touched up the floors where I was drilling the holes.

I also got to finish off the last bits of the framework.

End of Part 1....
|
29th April 2014, 18:18
|
|
Senior Member
|
|
Join Date: Feb 2012
Location: Wembley, London
Posts: 5,056
|
|
Still Chipping Away - Part 2
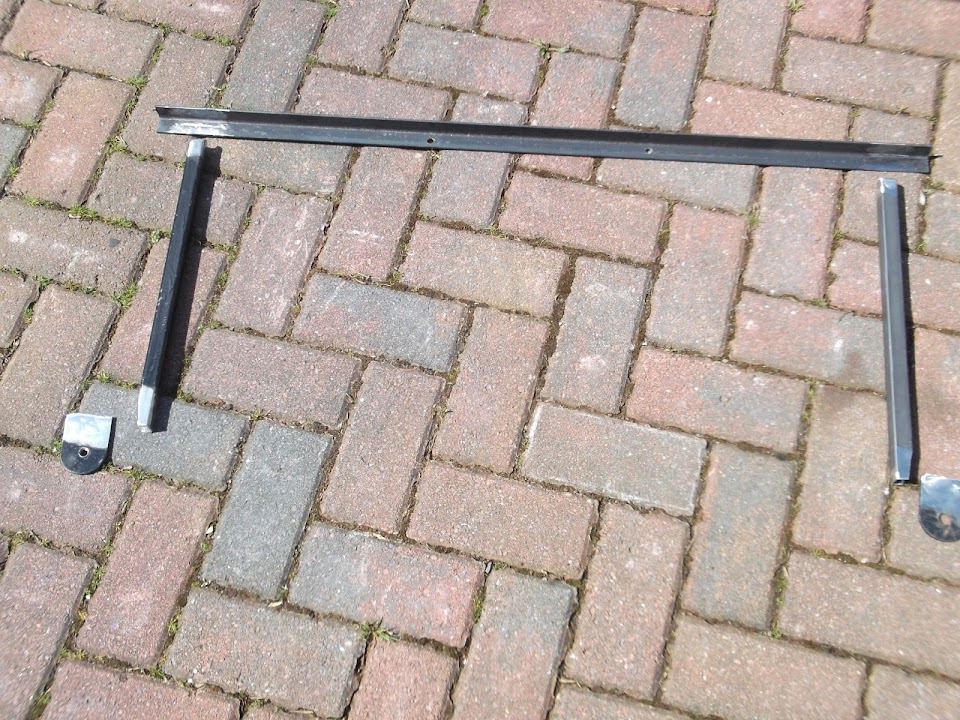
The final thing I started working on today was building a support bracket for mounting the exhaust.
On my original donor, the bolts for the twin tail pipes went through the floor here.

Whilst I will still have the floor section as part of my rear wheel arches arrangement, it currently has no strength.
So I wanted to use a length of angle iron across the floor that the silencer bolts would go through.
And then come up with something that would support the angle iron.

Note:
At this point I didn't want to drag the arches out, so I just worked around where there are being stored.
So the angle iron is just resting on the floor for the photo and is not in its final position.
In keeping with my recycling tradition, I dug out the length of box section that cross braced the rear framework when it was delivered.
After a bit of cleaning, it looked like this.

Then I cut it into sections, but, again, it was impossible to photo what I was planning with the floor on its side.
So this is the part of the rear axle cover that I would be welding the bracket to.

This would allow me to weld either side of the box section.
I've just rested the box section in place for the following photos so you get the general idea of what I was planning.
Plan A

The join from the angle iron to the box section parallel to the floor would have been cut to fit in the gap.
But at this point it occurred to me that I might be building something that would foul the rear end of the bodywork.
So Plan B
This time, the section parallel to the floor would be shortened to leave a small over hang to the joining section below.
By now I was starting to worry that this was a bit of engineering over kill.
Perhaps I just needed to run a length of box section from the wheel arch to the angle iron.
( With a suitable bracket to allow it to be bolted through the wheel arch like the seat belt mounting. )
Even though I don't know what form it will take, I am planning to have a working boot in the car.
So although the Spitfire floor is currently unsupported, I would be able to fibre glass it to the inside of the body shell through a boot opening.
It is possible that this would provide enough strength in the floor for the exhaust to be no problem just bolted to the floor.
As always, your wisdom and guidance would be much appreciated.
After a good run at the build over the last few days I now need to take a short break for some family get togethers.
I'm currently working on a list of jobs that need to be done to put all the big pieces together once and for all.
( Bulkhead, rear frame, floors & rear wheel arches. )
So until next time, take care, Paul.
|
29th April 2014, 18:21
|
|
Senior Member
|
|
Join Date: Apr 2012
Posts: 1,163
|
|
Nice to see your making progress as my ECU woes have started to take their toll..grrrrr The last option looks to be the simplest and easiest to implement and looks plenty strong enough mate.
TTFN
Mac
|
30th April 2014, 18:57
|
|
Senior Member
|
|
Join Date: Feb 2012
Location: Wembley, London
Posts: 5,056
|
|
Mac - Cheers, I think I will follow KISS principles for the exhaust support.
- - - - - - - - - - - - - - - - - - - - - - - - - - - - - - -
Tidying Up...
My sole aim for today was to remove all the evidence that I am building a car from inside the house.
So all this "stuff" had to go.

Plus the usual "welder behind the sofa".

Then there were the floors in the porch that had to head back to the shed.

The porch also has the last pile of tools & parts to be returned to the summerhouse.

Then after an epic cleaning session the dining room (and the rest of the house) was ready.

We've had a great afternoon and will be doing something very similar on Friday too. 
If I get the chance I will be able to "tidy up" the driveway between now and then.
( Which will involve putting the bulkhead back on the chassis, along with the rear wheel arches. )
I've almost finished my "To Do" list for the next stage of work, but as expected it is a bit longer than I hoped.
The only other thing I managed to do today was copy and paste more stuff into the "useful info" thread.
It is actually quite reassuring to be reminded of just how many people are working away on these kits.
Until next time, take care, Paul.
|
30th April 2014, 20:27
|
|
Senior Member
|
|
Join Date: May 2013
Posts: 2,161
|
|
Its coming on really well Paul!
Great stuff.
|
1st May 2014, 15:18
|
|
Senior Member
|
|
Join Date: Feb 2012
Location: Wembley, London
Posts: 5,056
|
|
Scottie - Thanks, getting these big "jigsaw" pieces sorted out will be a major step forward.
But you know as well as I do, that it is bound to take longer than I expect to do the work required.
- - - - - - - - - - - - - - - - - - - - - - - - - - - - - - -
Bloody Typical!
Glorious sunshine all day yesterday when I was on domestic chore duties.
Wet and miserable all day today when I have some time available to play with the car. 
Still I could get a few small jobs done while taking shelter from the rain.
I cleaned the old blue paint of some of the bulkhead mounting bolts.

After some cleaning and some new washers, the full set now looks like this.

Another recent Ebay purchase was a bag of self tapping Tek/Tech(?) screws that came with a matching drive socket.

I hadn't picked up on the fact the socket has a magnetic head, but that makes using the screws so much easier.

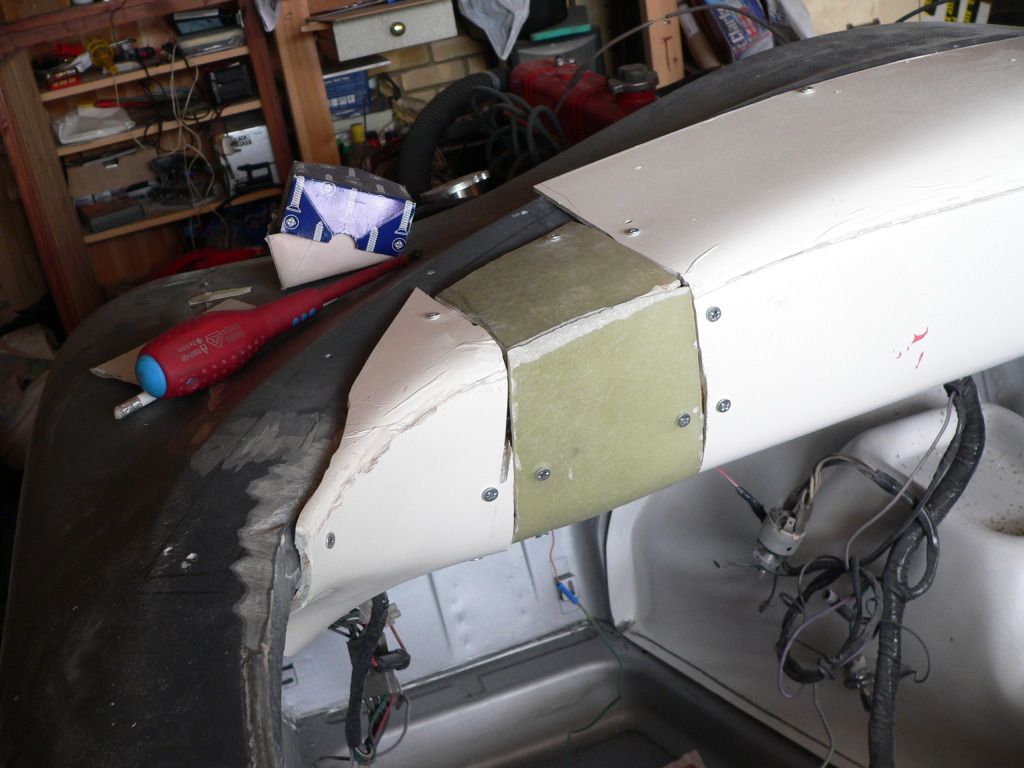
The first job for this lot will be to fix the outer door skins back onto the body shell from the outside.
Which will allow me to cut away the rest of the door opening lip and fibreglass them into place from the inside.
But as I've never done anything like this before I decided to do some experiments with some fibreglass off cuts.
So I drilled a few holes.

Using the screws was very straight forward and they certainly hold everything together nicely.


I know that there will be a lot of "cutting & shutting" required when I start on the body work which is quite daunting for me.
However, I do take comfort from the fact that lots of other builders have done this kind of work before.
Clearly Tribute are masters at this, given how nice their cars end up, despite starting like this.
 Mac
Mac also had a nice example of a repair carried out from the "inside".


Similarly, you can not tell that Mr T's dash started off looking like this.
Depending on the weather, I might get a chance to refit the bulkhead & rear arches tomorrow morning. 
Cheers, Paul.
|
2nd May 2014, 14:29
|
|
Senior Member
|
|
Join Date: Feb 2012
Location: Wembley, London
Posts: 5,056
|
|
Small Jobs Against The Clock - Part 1
I am expecting a "gaggle" of 8 schoolgirls to arrive any minute for a pizza, DVD & popcorn night.
So I'd better be quick.
My first priority for the day was to get the house ready for my daughters' guests.
( Thankfully I'd done most of the hard work on Wednesday. )
Then I tried to get as many small jobs as I could done on the car while the sky remained black throughout. 

I sorted out the chassis bracket that supports the fuel and brake hard lines.

This allowed me to fix the lines back to the chassis.


Next I added some rolled up masking tape to my rubber washers.

That way I could "stick" them to the chassis while I tried to but the bulkhead back on.
( All my previous attempts at doing this myself have ended with these washer all over the place. )


I managed to get the bulkhead into position without scraping the new chassis paint.
Then I bolted the bulkhead into place, although some bolts were more of a pain than others.
It quickly became clear that I would also need to use these original spacers on two of the fixings.

They were needed on the "outside" of the bulkhead mounting point.


Next I drilled through the crush tubes so the frame fixing bolts can pass through.

I still need to clean up the bottom edge of the chassis, but was trying to limit the tools I took out.
I will cut the bolts down to size once I have test fitted everything.
Unfortunately I had an epic fail with another plan to cut a bolt down to size.
I didn't notice that the new bolts I ordered switched from fully threaded to part threaded as the length increased.

By now I had also put the rear arches back on the chassis and this is where the arches are bolted down originally.

But the "feet" of the rear frame work need to sit on top of the arches like so.
( Obviously welding these feet back on to the frame is still on my to do list. )

Even allowing for adding a rubber ring, these bolts are too long.
End of part 1.
Last edited by Paul L; 2nd May 2014 at 21:14..
|
2nd May 2014, 14:30
|
|
Senior Member
|
|
Join Date: Feb 2012
Location: Wembley, London
Posts: 5,056
|
|
Small Jobs Against The Clock - Part 2
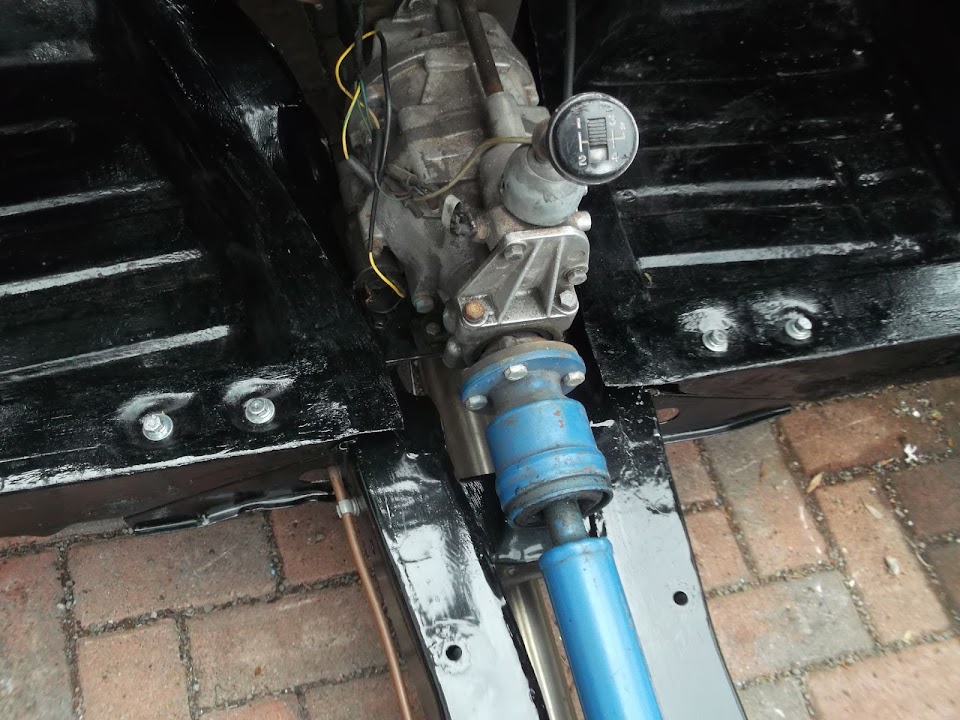
Just before I but the arches on I checked how this cover plate fitted.

Because I need to modify it so that it will fit over the longer studs fitted to the lowering block.

Next I re-fitted the twin tail pipes.

I just needed to remember to allow enough room so that they do not foul the chassis.
( Not a great photo. )

Then I could mark up where the support bracket met the floor.

And drill pilot holes in the floor in preparation for starting to make the supporting brace.

Then it was another mad dash to put everything again.
And with just the rear framework off the chassis, the drive has been tidied up too.

Thankfully the rain finally arrived while I was typing this up.
Right, got to go, Paul.
Last edited by Paul L; 3rd May 2014 at 18:06..
Reason: Typo
|
3rd May 2014, 20:25
|
|
Senior Member
|
|
Join Date: Feb 2012
Location: Wembley, London
Posts: 5,056
|
|
Slow, but steady - Part 1
I enlarged the holes in the boot floor until they matched the size of the tail pipe supporting bolts.

My plan for the exhaust support makes use of this recess in the rear wheel arch.

I just needed a cardboard template to make a "washer" to fit.

The template also gave me the position of the hole required through the wheel arch.
I then test fitted one of the "feet" I recycled from the original Cordite bulkhead framework.

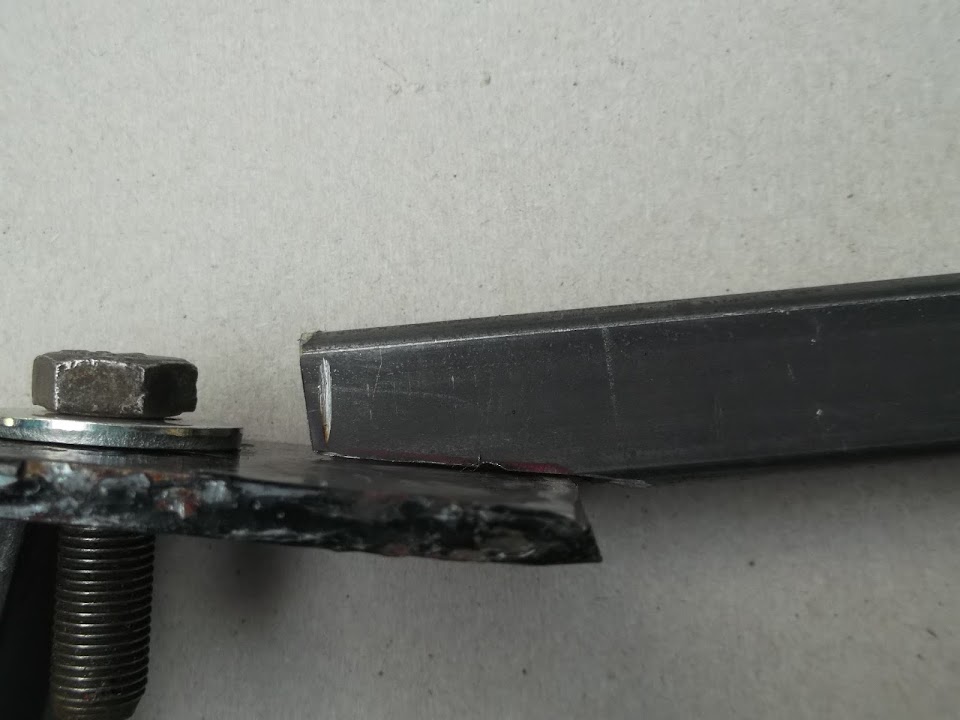
I gave the length of angle iron a small trim.

I then drilled matching holes in angle iron to align with the holes in the boot floor.
I then trimmed some box section to make a nice join with the angle iron.
( I'm just using the small cut off bit to give the general idea in the photo. )

In order to keep the box section "square" to the angle iron I also needed to trim the end that joined the "foot".
It was around this time when I was trying to enlarge the hole in the other "foot" that I broke my drill. 
Given the fact I would have to pack everything away in order to go and get a new one I found more jobs for my grinder.
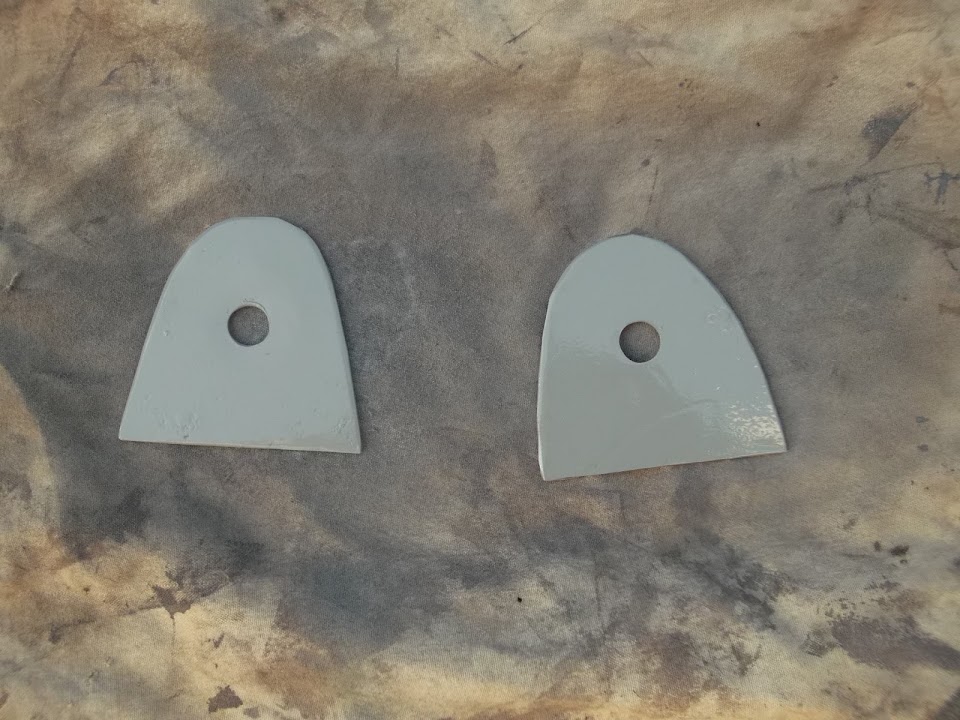
I cleaned up all the parts for the exhaust support bracket.
I cut out and cleaned up the "washers" to fit the recess in the wheel arch.

I even cut out and cleaned up 4 big square washers to sit under the chassis when the frame is bolted on.

Obviously all the items in the last two photos still needed holes at this point.
So I had to bite the bullet, pack up & head off to my nearest B&Q....
End of part 1.
|
3rd May 2014, 20:25
|
|
Senior Member
|
|
Join Date: Feb 2012
Location: Wembley, London
Posts: 5,056
|
|
Slow & Steady - Part 2
I had an absolute traffic nightmare getting just a few miles up the road and back.
The drill I picked was obviously a popular item to be stolen as I had to get someone to unlock the chain & padlock keeping it on the shelf.
The B&Q man then "escorted" to the till and stayed with me until I paid for it (I kid you not ).
Then another person had to remove the alarm tags from around the box and finally I was on my way.
So here in my new toy.

Which means I will no longer spend ages trying to find this...

The drill was great, but I quickly discovered the drill bit I wanted to use had also bitten the dust.
At this point there was no way I was going back to the shops, so I finished these three holes with a hand file.

This is how the "washer" sits on the inside of the wheel arch (I will be painting it).

I tightened the bolt through the arch to the point where I could just about move the "foot".
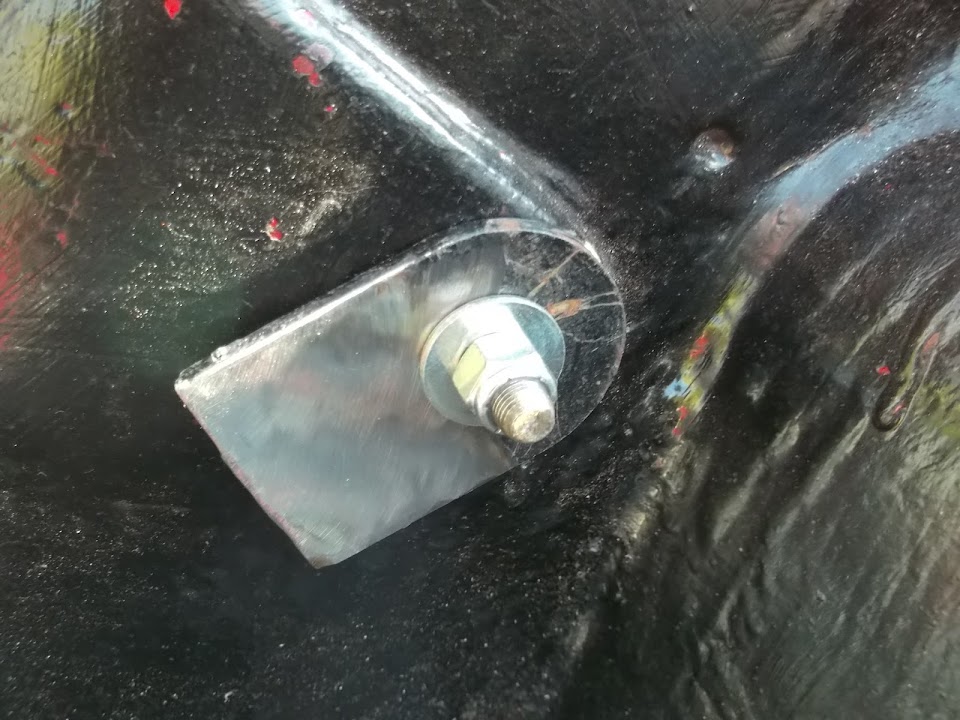
I used my trusty set square to make use the box section was at the right angle.

Then I tack weld all the pieces into place.

Before removing the bracket completely to finish off the welding.

There was just enough time to get some etch primer on and leave the bracket to dry on one of our wheely bins.

I also got some primer on one side of the wheel arch washers.
Working out a way of fitting the twin tail pipes has been on my "To Do" list since the day I first test fitted the frame.
So although it took a long time to sort out, I am very happy it is now done & just needs paint.
Until next time, take care, Paul.
|
4th May 2014, 18:21
|
|
Senior Member
|
|
Join Date: Feb 2012
Location: Wembley, London
Posts: 5,056
|
|
Minor Tinkering...
Took my daughters to see "Spiderman 2" in the morning, before my wife joined us for a family lunch out.
We then had a lazy afternoon, before they all went off to see my wife's sister and I had a small chance to play outside.
There were a few minor mods I wanted to make to the exhaust support bracket...
The first was to drill three extra holes so I can bolt the boot floor to the bracket without the tail pipes in place.

Then I needed to cap the end of the box section around the "feet" on both sides.


With those odd jobs complete I could start painting the bracket.

I also did one side of the wheel arch washers.

So not a lot done, but at least I have progressed another inch towards the finish line.
Cheers, Paul.
|
5th May 2014, 19:09
|
|
Senior Member
|
|
Join Date: Feb 2012
Location: Wembley, London
Posts: 5,056
|
|
Bank Holiday Monday
Another day where family came first, and as always, I've no problem with that.
Got some paint on the other side of the exhaust support bracket.

Plus the other side of the wheel arch spacers & one side of the chassis bolt spacers.

I did manage to pick up a new drill bit this morning, so I will add bolt holes in these at some point.
I only had limited time available to start one other job, so I picked the wheel arch / lowering block cover.

I cut the "cover" section out.

I then cut a section out from one of my lowered floor pan off cuts.

Unfortunately, this was not quite long enough to wrap all the way around the cover.
So I bend it around as best I could, knowing I would need a final "patch".

Then I welded the top of the cover to the new "side" section.

Then welded that to the bottom sections.
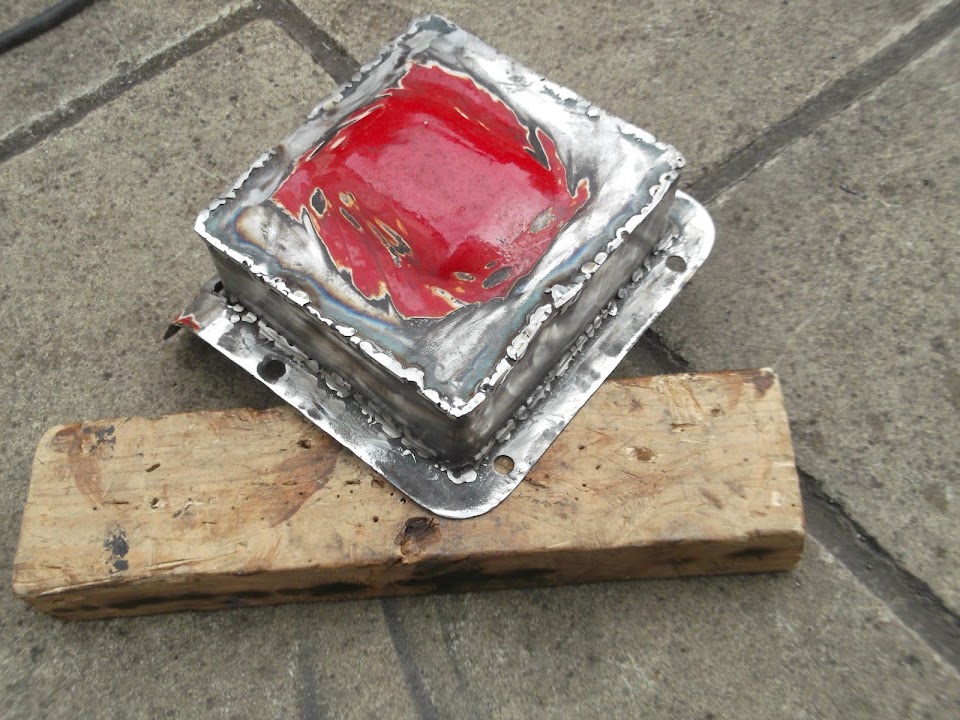
Then I was just left with a small patch to fill in the hole.
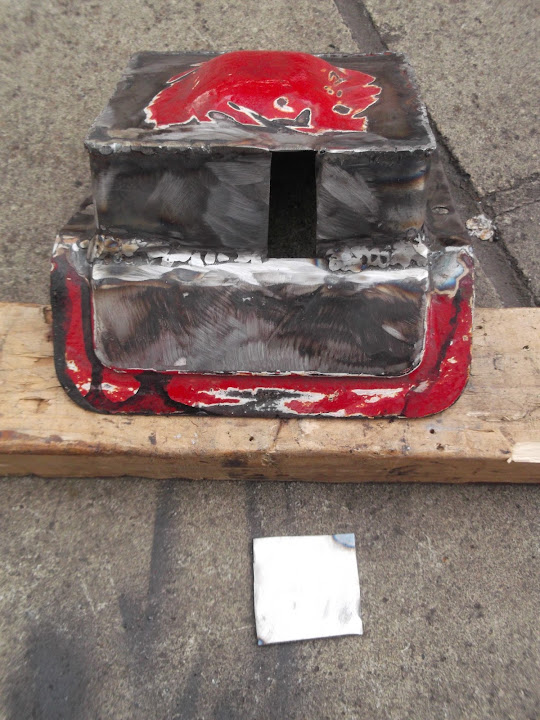
When that was welded in the cover looked like this.
In my defence, it was very windy outside today and that didn't help my welding at all.
Just had enough time to get some etch primer on this.

I will smoother this mess with some filler which will make it look a bit nicer.
Then it was time for a family BBQ, just the four of us for a change.
Although the fact one of our neighbours was using a "slash & burn" technique to clear their garden didn't help.
In fact, the time I spend outdoors to day counts as the equivalent of a 60 a day habit.
Take care, Paul.
|
6th May 2014, 14:41
|
|
Senior Member
|
|
Join Date: Feb 2012
Location: Wembley, London
Posts: 5,056
|
|
Stoneleigh 2014
Nice to see some photos from the show appearing on the forum.
It was a shame I couldn't make it this year, as it was a chance to meet some of the forum regulars.
At this point, I can't even guarantee that my car will be ready for the 2015 show.
Small Progress Report
This morning, I was able to get some paint on the other sides of my various washers.

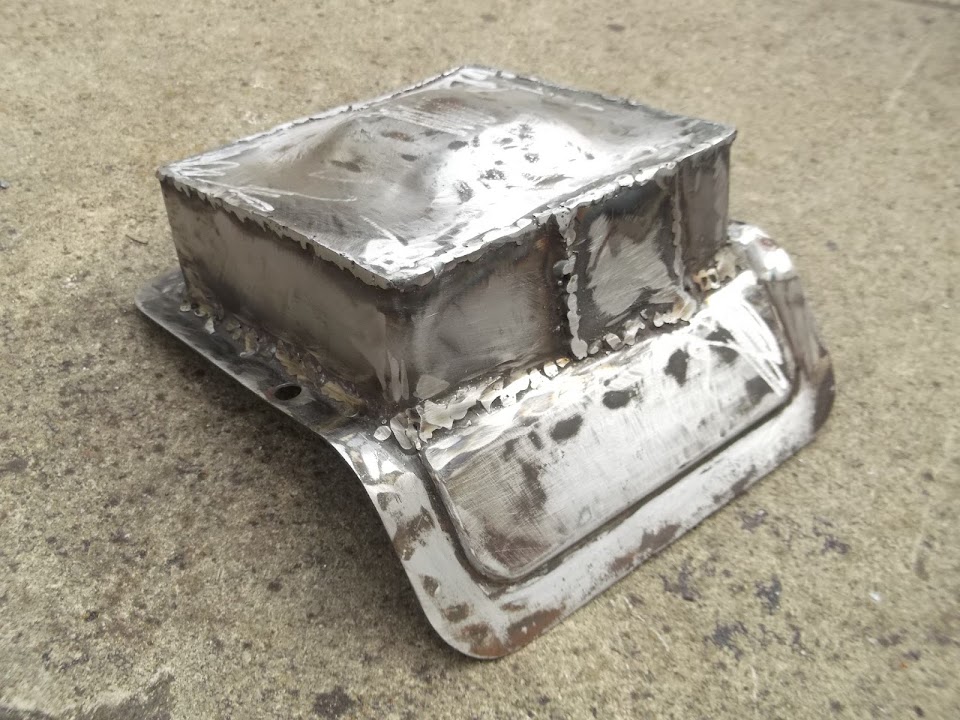
I also got some filler on my modified wheel arch cover panel.


By late afternoon the filler had set nicely, so I smoothed it out a bit both inside & out.


Then it was time for another coat of etch primer.

As always, it still looks a bit rough & ready, but it should be water tight and that is all that matters to me.
Non car related work is going to take priority for a few days now.
I might be able to get the odd small thing done (like painting this cover panel).
But I will not be able to tackle any of the big "jigsaw" pieces for a while.
Still, I've made pretty steady progress recently, so I have to be happy with that.
So until next time, take care, Paul.
|
6th May 2014, 15:14
|
|
Senior Member
|
|
Join Date: May 2013
Posts: 2,161
|
|
Congrats on your new toy Paul!
Long may it last, a few be the injuries sustained with use!!
Build coming along well. I am impressed by the spring cover
thingy! Good job.
|
8th May 2014, 15:22
|
|
Senior Member
|
|
Join Date: Feb 2012
Location: Wembley, London
Posts: 5,056
|
|
Scottie - Cheers.
I really like my new "chuckless" drill it does speed things up a bit.
As for modifying the panel, I'm pleased with how confident I am about cutting & welding these days.
( Still not great at welding, but at least I know that the joins will hold. )
- - - - - - - - - - - - - - - - - - - - - - - - - - - - - - -
Busy doing nothing...
Well, nothing to do with the car anyway.
With very little time to spare, this has been my progress.
Day 1
 Day 2
Day 2

I guess that is still marginally better than nothing.
Cheers, Paul.
|
8th May 2014, 17:25
|
 |
Senior Member
|
|
Join Date: Dec 2013
Posts: 839
|
|
Every little job is another job closer to being finished, keep it up Paul (the work that is). 
Your welding looks good and will hold, as they say practice makes perfect. |
10th May 2014, 13:47
|
|
Senior Member
|
|
Join Date: Feb 2012
Location: Wembley, London
Posts: 5,056
|
|
Swifty - Cheers.
I will try to take the positive from every job I can tick off the "to do" list.
- - - - - - - - - - - - - - - - - - - - - - - - - - - - - - -
Soaked...
Given the weather forecast I wasn't planning to start any work today.
But the glorious sunshine lulled me in into a false sense of security.
To give you an idea of the recent rain fall, this is what greeted me with I took the cover off.
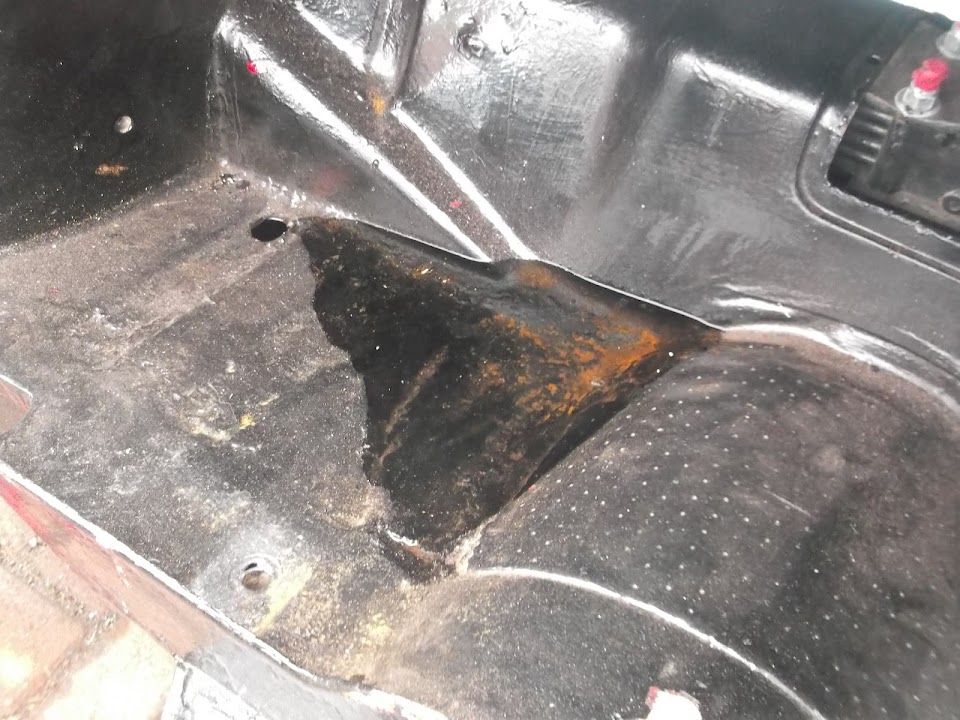
So it seems neither of the two covers I bought are even vaguely waterproof.
I have a heavy duty tarpaulin on order and I really hope that will keep the water out.
Anyway, back to today's jobs, I marked up the boot floor for the three bolt holes required.

After drilling them and applying a quick lick of paint the floor was ready.

Following WCA's rant about his bonnet catch, I made sure to copper slip my bolts.

Then I simply bolted the exhaust support bracket into place.
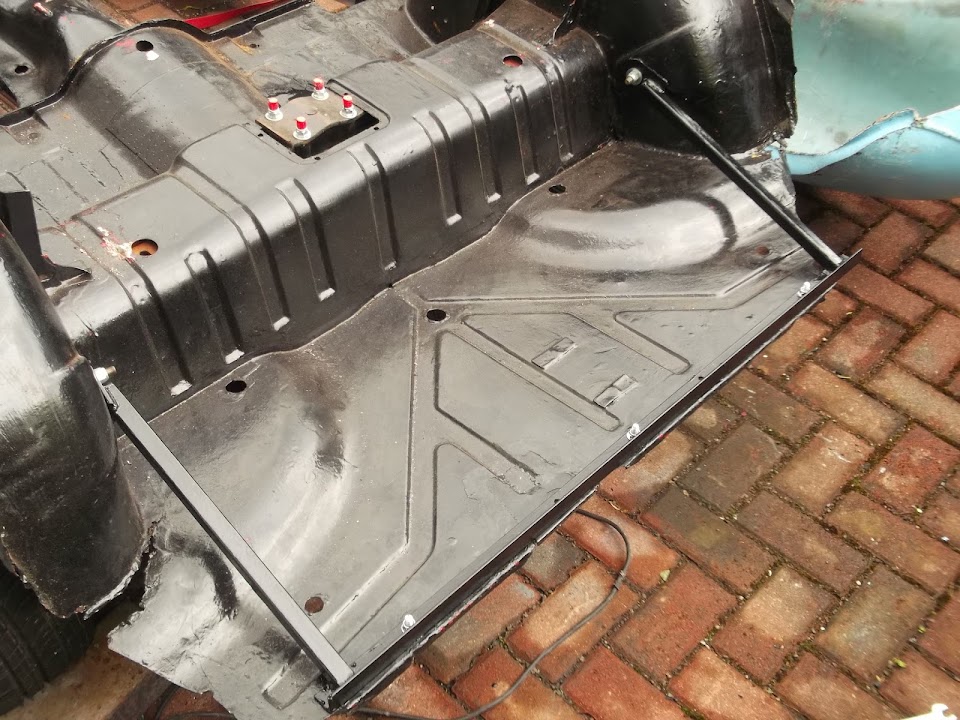
With the five bolts (2 x rear wheel arch + 3 x floor) tightened up, the whole thing does feel very solid.
I put some masking tape on the underside of the hand brake panel.
Not a great photo, but I could get a thin pen through the chassis crush tubes to mark the panel.

Then I lifted the rear arches up enough to drill pilot holes from below.
Before putting the rear arches back into position, so I could judge the final hole sizes from above.
I pushed the frame fixing bolts through just to confirm everything lined up.


You can see that is had started to rain by this point and I had to stop.
( Using an electric drill plugged into an extension lead in the rain is not a good idea. )
By the time I've got the body shell on and then the covers on top of that I was drenched.
But as Swifty said, every job done helps me along the way to the finish.
So until next time, take care, Paul.
|
|
Currently Active Users Viewing This Thread: 1 (0 members and 1 guests)
|
|
|
 Posting Rules
|
You may not post new threads
You may not post replies
You may not post attachments
You may not edit your posts
HTML code is Off
|
|
|
All times are GMT +0. The time now is 08:13.
|


 Linear Mode

