|
|
| Sammio Builds and discussions Sammio bodied car builds and specials |

1st August 2014, 14:09
|
|
Senior Member
|
|
Join Date: Apr 2012
Posts: 1,163
|
|
perfect timing, I'm stuck in Worthing for the weekend staring at a progress bar so this will come in very handy!
|
8th August 2014, 09:17
|
 |
Senior Member
|
|
Join Date: Dec 2013
Posts: 839
|
|
Good news had confirmation from Andy that my body will be delivered this sunday so i can move onto the next stage.
Also bought five wire wheels and tyre's off flebay for a great price, just need to get the hub adapters to complete.
Will post pictures of body soon.
See you all soon.
|
10th August 2014, 20:04
|
|
Senior Member
|
|
Join Date: Dec 2013
Posts: 839
|
|

The body arrived this afternoon and managed to roughly fit it to the chassis to try and give me an idea of what is required to make the shell symmetrical.
IMG_4564.jpg
Cut the bulk head to fit around the bell housing so that the tub sat onto the sub frame then loosely fitted the bonnet which slightly fowls the original bonnet hinge brackets, i think these will have to be removed soon.
The original wheels are still fitted as i need the hub adapters to fit the 14 inch spoke rims. The wheel centers were used as the datum points to get the body as close to a correct position before looking at the alignment issues.
IMG_4573.jpg IMG_4572.jpg
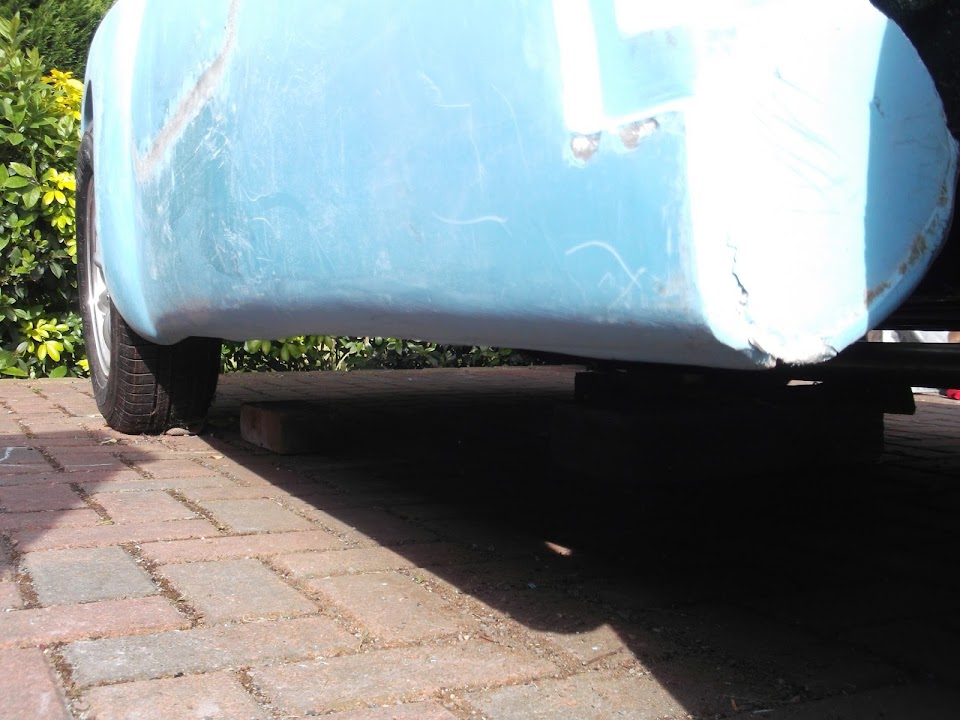
One area that requires attention is the drivers side lower bulk head. The first image illustrates the bulk head to tyre gap on the drivers side and the second image is the passenger side, you can see there is a considerable difference of about 50mm. After checking various points on the shell to find where the problem lay i decided to cut away some of the drivers bulk head which will prevent the 14 inch wheels from fouling the body.
IMG_4578.jpg
Body now cut with the flap roughly pulled in so as to be able to glass the gap up which will be my first attempt using fibreglass.
Tomorrow paying a local supplier of fibreglass a visit to purchase a few supply's.
Last edited by swifty; 12th August 2014 at 21:17..
Reason: typo
|
10th August 2014, 20:15
|
|
Senior Member
|
|
Join Date: Dec 2013
Posts: 839
|
|
Another area that requires slight alteration is the rear wheel arch leading edge.
IMG_4570.jpg IMG_4571.jpg
The first image is the passenger side which sticks out a good 60mm further than the second image shows of the drivers side.
I have a few questions to the old hands at fibreglassing. Around the body are a few things that i am not too sure about.
IMG_4585.jpg
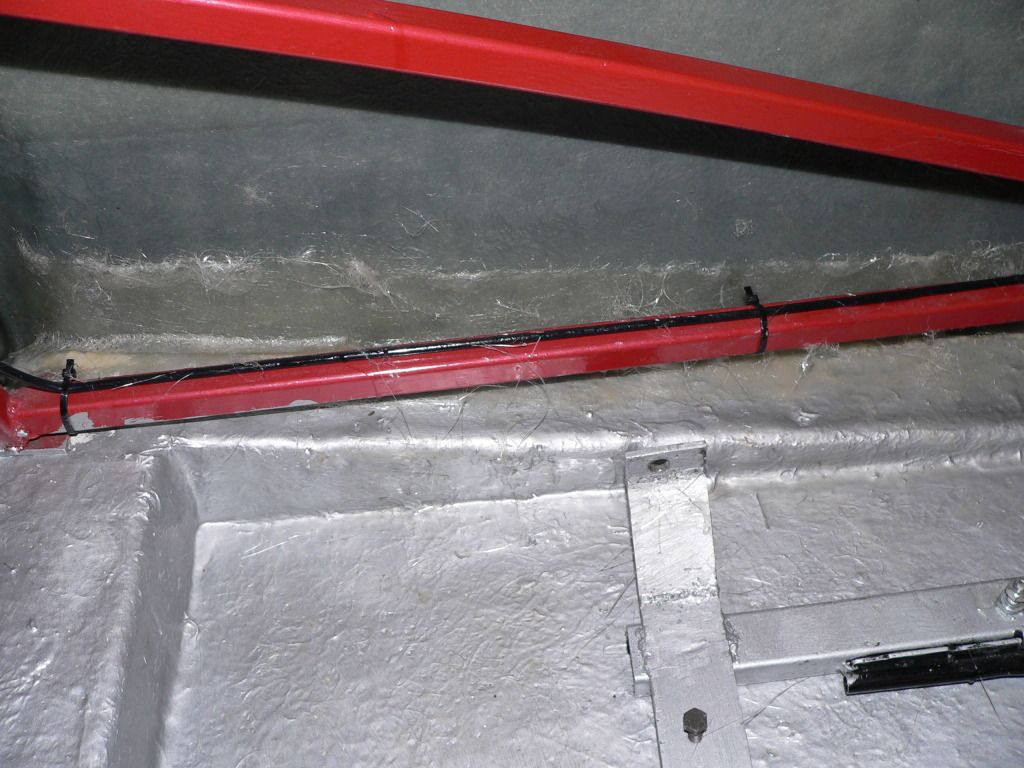
This looks like the gel coat colouring has reacted to something and crinkled up. The outer surface has a clear coat over it but should i do something to this area to prevent any further issue once a layer of paint has been applied or is it ok to leave as is.
IMG_4583.jpg
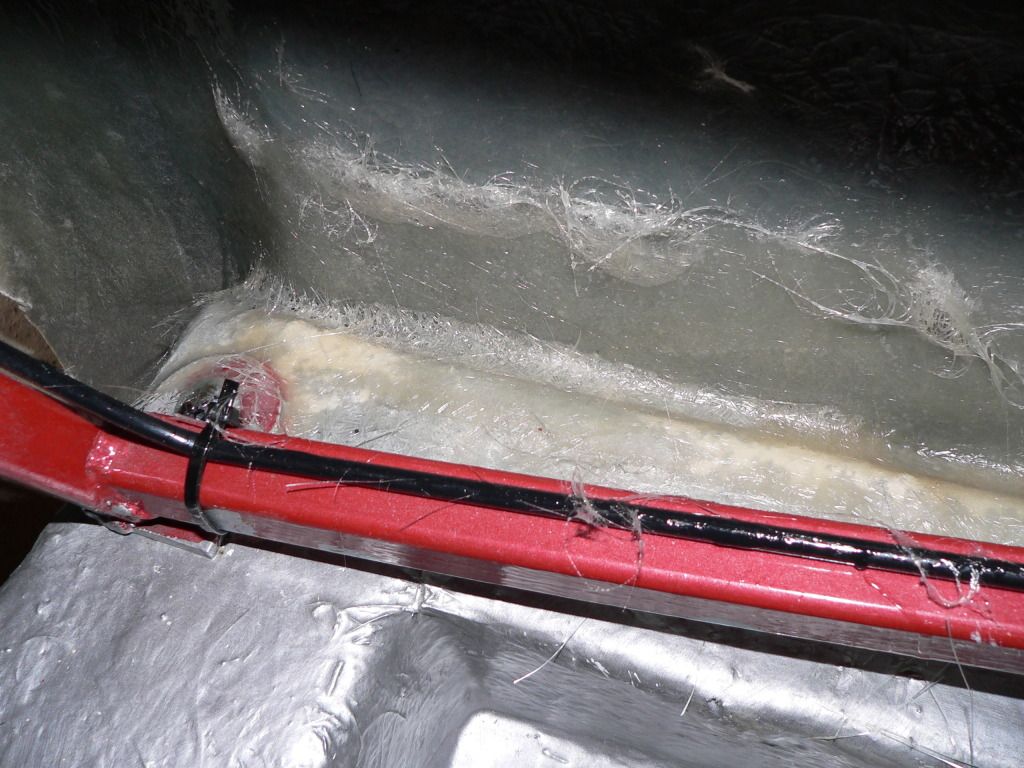
This area had a bubbled surface which i removed to reveal the glass mat below which looks like it had not been impregnated with resin. My question here is do i fill in with fibreglass filler or gel coat or is there something else required.
I was thinking that to start with 10Kg 300g csm and 25 kg resin will be more than enough to make the body good or is this not enough?
I am now starting to think ahead about bonding the body to the chassis, i have looked at two products to use as a cushion between the body and frame the first is polyurethane PU40 sealant from Tool station for £3.92 a tube and secondly Roof and Gutter mastic from tool station for £2.10 tube. Both don't fully dry out so remain flexible but i am more drawn to the polyurethane product as it mentioned it's used in the caravan and auto industry.
Has anybody used these or another product.
Last edited by swifty; 10th August 2014 at 20:40..
Reason: typo
|
10th August 2014, 20:52
|
|
Senior Member
|
|
Join Date: Apr 2012
Posts: 1,163
|
|
Swifty,
1. The rear quarter stretch is covered in my build thread ill try and find where and post a link.
2. The reacted area will be fine if just sanded down and a light skim with some bridging or flexible filler.
3. The dry area, if its not all the way through then again just top it off with bridging filler. If its dry all the way through then try and bleed some resin into it.
4. I use PU adhesive a lot in all my builds it is very very strong and flexible. Gets my vote. Glad you got your shell. Did you get an invoice with it? you'll need it for submitting the paperwork.
Mac
|
10th August 2014, 20:56
|
|
Senior Member
|
|
Join Date: Apr 2012
Posts: 1,163
|
|
|
10th August 2014, 21:02
|
|
Senior Member
|
|
Join Date: Dec 2013
Posts: 839
|
|
Thanks for advice Mac.
Yes i did get an invoice from Andy as that went through my mind also about proof for DVLA.
When keying the fibreglass surface what grit do you recommend.
Thanks for the link to your solution, so you pulled the drivers side rear wing out, i can see the difference in my photos from one side to the other i had thought about pushing the passenger side leading edge in also as the way it sticks out on my body does not look good. Will have to give it some more thought. Is the green stuff fibreglass filler?
Last edited by swifty; 10th August 2014 at 21:21..
|
11th August 2014, 09:38
|
 |
Senior Member
|
|
Join Date: Feb 2012
Location: Wembley, London
Posts: 5,056
|
|
Swifty - Good to see your body shell has arrived. 
From the photos it looks like you can really see the difference between the new body shell buck & the old bonnet one.
( My body shell looks more like your bonnet. )
Sorry I can't help much with your body shell alignment issues, given the wholesale butchery going on in my build.  Mac
Mac had already covered the other surface questions you had, but I can confirm the green stuff is this...

As I bought the same stuff as Mac uses.
The other point to bare in mind when ordering the resin is it's recommended life span of 3 months.
I've only just finished the first 5kg roll of CSM I bought and you've seen how much work I've had to do.
So maybe start with smaller quantities to begin with and see how you get on.
Good luck, Paul. 
|
11th August 2014, 10:53
|
|
Senior Member
|
|
Join Date: Apr 2012
Posts: 1,163
|
|
Paul, I wouldn't worry too much about the resin age, the stuff I used at the weekend was at least 3 years old! it set up just fine, if your resin is a bit old just make sure you mix it thoroughly before dispensing and sometimes warming it up a bit will make it easier to mix up.
HTH
Mac
Swifty, I usually use 80 grit to scuff things up before glassing. I also make sure I wipe the area down with Acetone 3 or 4 times in quick succession before glassing sometimes it will soften the surface of the surrounding area that you will be bonding too. Just make sure its had enough time to flash off before you start.
HTH
Mac
|
11th August 2014, 20:22
|
|
Senior Member
|
|
Join Date: Dec 2013
Posts: 839
|
|
Paul Thanks for the info by the time i read your comment i had already bought 25kg of resin so i hope it shelf life is longer than a couple of months.
Viatron Thanks for the info, i did wipe the surface down with acetone after roughing it up. When i was in my local fiberglass supplier John Dickens walked in so i asked him a few questions and in the conversation he mentioned that when bridging a gap with csm the edges are chamfer so that the mat get a good hold.
A question about the body side lower edges, what you would call the sills. Is the flat edged of the fiberglass that runs along the bottom supposed to fasten to the steel section of the sub frame, or is this flat edge removed and fiberglass wrapped around the steel section onto the body lower surface.
The reason i ask is to me the body will sit high if the flat edge of the fiberglass is used to fasten the body to the sub frame.
|
12th August 2014, 07:22
|
|
Senior Member
|
|
Join Date: Feb 2012
Location: Wembley, London
Posts: 5,056
|
|
Quote:
Originally Posted by swifty

...Is the flat edged of the fiberglass that runs along the bottom supposed to fasten to the steel section of the sub frame, or is this flat edge removed and fiberglass wrapped around the steel section onto the body lower surface...
|
Swifty – The moulding lip was already removed when my body shell was delivered.
So in my case, the bottom of the shell tucks under the bottom of my framework.

Well it did after I’d butchered the scuttle.
My plan is to fibreglass the frame / floor to the inside of the body shell.
This is how Mister Towed did this on his car.
However, Mac kept a bit of the moulding lip, but added a plate to “lower” the sides of the frame.
…rivet and glue some 3mm plate to the sides of the frame to give me the extra surface area to joint the body to the frame using rivets and PU adhesive…
 …The Ali drop plates I fitted to the frame earlier worked nicely and allowed the bottom of the body to actually drop slightly below the frame and also gave a good surface to bond and rivet to. Plenty of the gooey stuff later and voila!...

Hope that helps, Paul.
PS
Mac is right about old resin, as I am still using stuff that is almost 2 years old.
However, I do find the “refresher” resin is easier for me to work with.

|
12th August 2014, 13:50
|
|
Senior Member
|
|
Join Date: Apr 2012
Posts: 1,163
|
|
yep uses a thick Ali drop plate on mine as I wasn't convinced that gobs of fibreglass would be solid enough or easy to do once everything was in place
Mac
|
12th August 2014, 20:52
|
|
Senior Member
|
|
Join Date: Dec 2013
Posts: 839
|
|
Paul and Viatron Thanks for the info, i think a little bit more thought on the positioning of the sill is required and TBH i need the larger wheels fitted before any major work is started.
I did how ever stand the spoke wheels against the car and it looks like they are going to fill the wheel arches so there may be clearance issues but wont know this until the hub adapters arrive in the next few days hopefully. Also the hub center is slightly higher for the larger wheels compared to the smaller fitted wheels so that will lift the body up giving a bit more clearance.
IMG_4591.jpg IMG_4592.jpg
Last edited by swifty; 12th August 2014 at 21:09..
|
14th August 2014, 07:50
|
|
Senior Member
|
|
Join Date: Feb 2012
Location: Wembley, London
Posts: 5,056
|
|
Swifty - I like the black wire wheels.
When Phil fitted a set to his car, it looked very mean.

Good luck, Paul.
|
14th August 2014, 08:22
|
|
Senior Member
|
|
Join Date: Jun 2011
Location: birchington, kent
Posts: 1,769
|
|
But that blue and black really stands out...
|
14th August 2014, 19:17
|
|
Senior Member
|
|
Join Date: Dec 2013
Posts: 839
|
|
The blue and black combo does look good although its not the colour i had in mind at the moment.
I am looking around for a sheet of polycarbonate to make the screen and thought that 4mm thickness will be ok, does anybody have other thoughts on this?
Also am i correct that the drivers eye line has to be above the screen top edge?
Last edited by swifty; 14th August 2014 at 20:02..
|
14th August 2014, 20:48
|
|
Senior Member
|
|
Join Date: Feb 2012
Location: Wembley, London
Posts: 5,056
|
|
Swifty - I have an unused screen from my kit if it is any use to you.
I also have one spare side screen, as I will be cutting the other one up to make my rear view mirror deflector.
Obviously the shape of the MkII screen may not be the same as the MkI.
Either way, I can measure the thickness of the screen tomorrow.
My understanding is that you (or rather the MOT tester) must be able to see over the screen.
Hope that helps, Paul.
|
14th August 2014, 21:28
|
|
Senior Member
|
|
Join Date: Dec 2013
Posts: 839
|
|
Paul I'm looking to do something slightly different to the standard screen but thanks for the offer.
I suppose that when you take the car for its MOT you may need a booster cushion in case the MOT guy is a little on the short side, or may be a whoopy cushion. 
|
15th August 2014, 20:28
|
|
Senior Member
|
|
Join Date: Dec 2013
Posts: 839
|
|
Next installment of goodies arrived today.
IMG_4596.jpg
Hub adapters and spinners for 14 inch mgb wire wheels, one slight problem the nuts i order have not been included so after a telephone call they are now on the way with a free upgrade to stainless nuts, hopefully they will arrive tomorrow so that i can start on the body chopping if not i can always butcher the original nuts as a temp fix.
First bit of Fiberglas to the bulk head completed. The clutch slave cylinder on the straight six was fouling the body slightly when i was trying to centralize the body to the chassis.
IMG_4597.jpg
Hopefully the weather will be kind tomorrow so that i can work outside to cut the body into shape.
|
16th August 2014, 20:40
|
|
Senior Member
|
|
Join Date: Dec 2013
Posts: 839
|
|
My nuts finally arrived, ooh err missus.
Fitted the hub adapters today which was a very straight forward job.
IMG_4599.jpg IMG_4600.jpg
A couple of picture for those that are not sure what the hub adapters are, the black item bolted to the hub is the adapter, the nuts and splines were greased with copper slip along with the taper seat on the back of the wheel center hub. To tighten the nuts i had to use a wooden handle (pic 2) to stop the hub from turning as the brakes are not connected at the moment.
IMG_4601.jpg
All four spoke wheels fitted, the ride height has been increased by 30mm form the original spitfire wheels.
Welded the floor from underneath to the sub frame as one piece per side, i will probably put a second internal floor in ally to give a neater finish, sealed all edges with polyurethane as a good measure.
Last edited by swifty; 17th August 2014 at 07:22..
|
|
Currently Active Users Viewing This Thread: 1 (0 members and 1 guests)
|
|
|
| Thread Tools |
|
|
| Display Modes |
 Linear Mode Linear Mode
|
 Posting Rules
|
You may not post new threads
You may not post replies
You may not post attachments
You may not edit your posts
HTML code is Off
|
|
|
All times are GMT +0. The time now is 23:31.
|


