|
|
| Tribute Automotive Builds Discuss your Tribute kit build |

11th November 2012, 18:45
|
 |
Senior Member
|
|
Join Date: Oct 2010
Posts: 1,622
|
|
Quote:
Originally Posted by seanick

Oh xxxxxxxxx and xxxxx it!
The grp I did on fri eve still hasn't gone off. Silly me, I used a mixing pot and brush left overfrom epoxying a deck on a boat. Although I rinsed it well in acetone it has upset the polyester and its all still soft. I will havevto pull it off, clean it and  start again! |
I hate it when that happens  Did you forget the catalyst? It can happen to the best of us when you are in a hurry, if in doubt I put another lot in and work twice as fast!!!  |
11th November 2012, 19:00
|
 |
Senior Member
|
|
Join Date: Nov 2011
Location: Emsworth
Posts: 810
|
|
I think it was a combo of epoxy contaminated brush and pot, and a bare minimum of cat. Nipped out after lunch and got it off. It was like plucking a chicken, and went on for ever. Loads of rag and acetone and its as good as its going to get. Re gelled and then came home. Kids now asleep, time to get down there and re-do it. Its put me ba  ck three days . |
11th November 2012, 19:17
|
|
Senior Member
|
|
Join Date: Oct 2010
Posts: 1,622
|
|
Quote:
Originally Posted by seanick
I think it was a combo of epoxy contaminated brush and pot, and a bare minimum of cat. Nipped out after lunch and got it off. It was like plucking a chicken, and went on for ever. Loads of rag and acetone and its as good as its going to get. Re gelled and then came home. Kids now asleep, time to get down there and re-do it. Its put me ba ck three days . |
It's all worth it in the end  |
11th November 2012, 21:11
|
|
Senior Member
|
|
Join Date: Nov 2011
Location: Emsworth
Posts: 810
|
|
All back together again. 4% catalyst and its gone already.
Rear vents glassed too on the inside.
|
12th November 2012, 19:31
|
|
Senior Member
|
|
Join Date: Nov 2011
Location: Emsworth
Posts: 810
|
|
Pulled the former out. Da daaa! One gutter and seal mount. Just needs cutting down a bit and a bit of fettling!
[IMG] 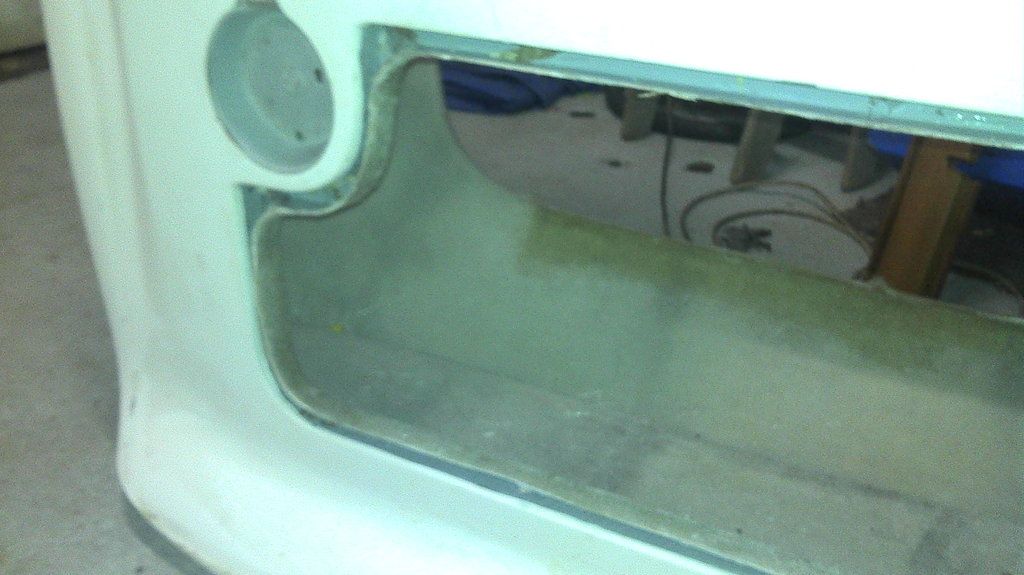 [/IMG]
let it rain!!  |
13th November 2012, 23:10
|
|
Senior Member
|
|
Join Date: Nov 2011
Location: Emsworth
Posts: 810
|
|
 A long evening....
Made reasonable progress this eve. Cut the new boot lip down to size, and filled and faired it. Trial fitted the old seal, then trimmed up the boot lid and inner moulding. Put them ib position the added a couple of self tappers through the two so I can glass them together in exactly the right place.
As the body was off filled and faired the vents behind the door pillar. They will be seen from the inside so have filled over the grp and faired it in.
A bit mire work to the rear vents, doubling the thickness of the cut edge ti make look mire substantial.
Finally did a bit of tweaking to the l.h. door shut so it will match my chosen seal.
[IMG] 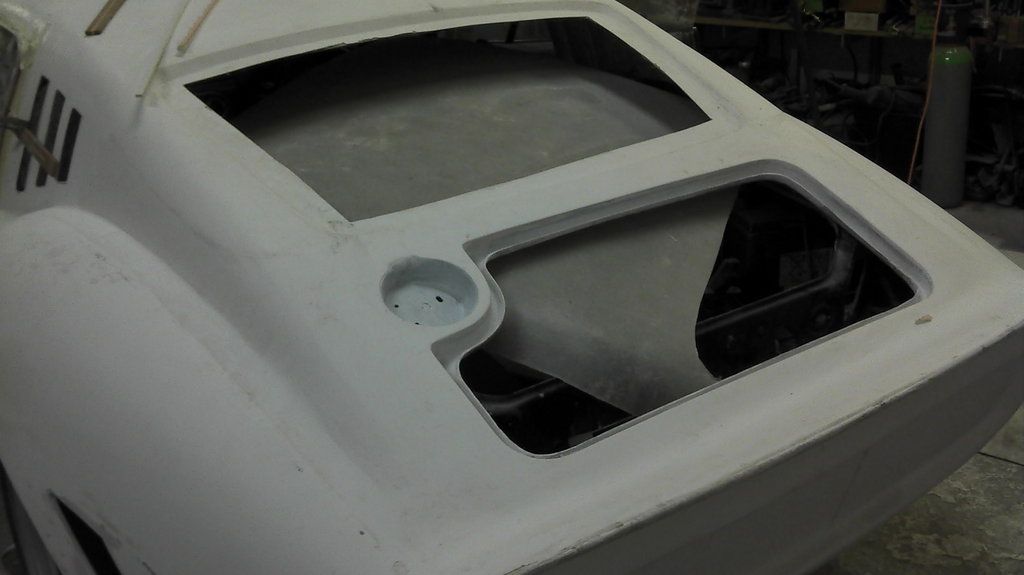 [/IMG] |
15th November 2012, 22:53
|
|
Senior Member
|
|
Join Date: Nov 2011
Location: Emsworth
Posts: 810
|
|
Good sticky session this eve.
Put a border of timber around the vents and glassed around them. Put a few mire layers around the door shuts, added some woven rovings to the arch so when one looks through the rear vents it will have the carbon look (will paint black!).
Chopped of the rear flange left over from moulding and glassed in a small one up the otherway to stiffen the rear valance a bit.
Finally glassed in three strips of 6mm ply to the underside of the roof to space off the headlining and give an air gap.
Quote:
[IMG]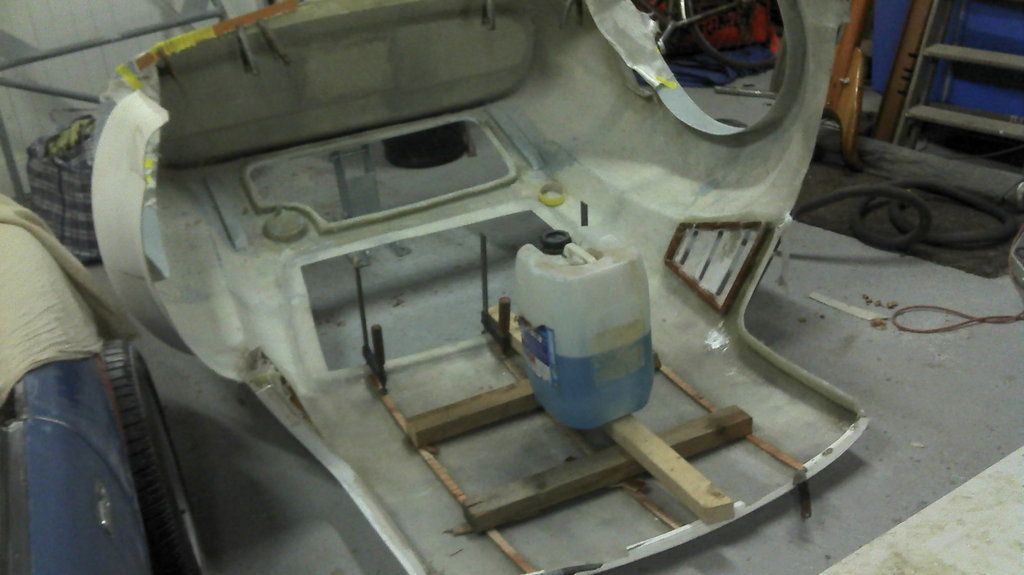 [/IMG] [/IMG]
|
|
16th November 2012, 05:34
|
 |
Senior Member
|
|
Join Date: May 2011
Location: Somerset
Posts: 1,671
|
|
Sounds like you're enjoying yourself then! 
With your boot gutter are you going to fit any drain holes? The only reason I ask is that while I was in the garage last night getting used to my new toy I spotted some random tubes in the engine bay and when I followed them back they were connected to drain holes on the boot and engine cover seal shuts exactly like what you've just added. So I thought it worth mentioning, just in case as its quite spooky timing! |
16th November 2012, 07:55
|
 |
Senior Member
|
|
Join Date: Dec 2011
Location: Devon
Posts: 550
|
|
Really interesting thread to follow with lots of info. A truly professional build with lots of thought and ingenuity. An inspiration to many I am sure.
|
16th November 2012, 16:41
|
|
Senior Member
|
|
Join Date: Nov 2011
Location: Emsworth
Posts: 810
|
|
Quote:
Originally Posted by davecymru
Sounds like you're enjoying yourself then!
With your boot gutter are you going to fit any drain holes? The only reason I ask is that while I was in the garage last night getting used to my new toy I spotted some random tubes in the engine bay and when I followed them back they were connected to drain holes on the boot and engine cover seal shuts exactly like what you've just added. So I thought it worth mentioning, just in case as its quite spooky timing! |
Thanks Lambo-dave, I will drill some holes, but want to fit the exhaust first so it misses it. Thought it was too tricky to mould a hose tail to into the gutter, but its not to late to add them so I may. To knackered this eve though!
@ Froggyman, thanks, I thought no-one was watching!!
Sort of aiming to get the rear upholstered then shell fitted early next week.....  |
16th November 2012, 17:42
|
|
Senior Member
|
|
Join Date: Oct 2010
Posts: 1,622
|
|
Quote:
Originally Posted by seanick
I thought no-one was watching!!
|
Nick, just look at the "viewed" figure against your tread! I think a lot of people are watching! Great work, it's clear that you have wealth of experience from you boat building day job  |
16th November 2012, 18:48
|
|
Junior Member
|
|
Join Date: Nov 2012
Posts: 12
|
|
IT looks great, many hours and hard work! 
I know something in mechanics stuff(I've done few engine swaps etc) but I had never done nothing in fiberglass.
Love how mx250 looks like, but I'm a little bit scared, that I won't be able do it on my own. Can someone PM me some tips or webs where I can learn more about it before I will order kit... 
p.s sorry for my english
Last edited by andyPL; 16th November 2012 at 18:53..
|
16th November 2012, 19:13
|
|
Senior Member
|
|
Join Date: Nov 2011
Location: Emsworth
Posts: 810
|
|
@ Chris, thanks Chris, praise from the Messiah!  Have you managed to piece your A352 jigsaw back together yet?
@ Andy, do bear in mind that I have done far more GRP work than is actually nessercery. There is no need to do any major work to the standard Tribute kit, it just fits perfectly and once its bonded and riveted on there is no real need for more GRP work. The only reason I am tweaking the kit is because I have my own idea of how I want it to look. There are penny of ways to skin a cat (apparently, I have never tried!!), and just like most kits, they all end up a bit different.
There are quite a few grp laminating guides on YouTube.
Last edited by seanick; 16th November 2012 at 19:44..
|
16th November 2012, 20:41
|
|
Junior Member
|
|
Join Date: Nov 2012
Posts: 12
|
|
ok thanks a lot...
I will read a litle bit more about it and order kit in january...
My friend want to sell an turbo miata and I have to think about it twice...a lot of cash : http://otomoto.pl/mazda-mx-5-turbo-2...C25023366.html
thanks again and I'm looking forward for more pictures of your car |
16th November 2012, 21:37
|
|
Senior Member
|
|
Join Date: Oct 2010
Posts: 1,622
|
|
Quote:
Originally Posted by seanick
Have you managed to piece your A352 jigsaw back together yet?
|
Just posting some pictures up in a minute. We are taking the car to the Haynes Motor Museum at Sparkford on Sunday! |
17th November 2012, 08:31
|
|
Senior Member
|
|
Join Date: Jul 2012
Location: Near Penzance cnwll
Posts: 146
|
|
Hi Andy
Just to add to what Seanick said. I have been doing a little fibre glassing on my car and it is not difficult ,just messy.Youtube has a lot of videos and if you follow the instructions on the tin it will work.
As for your donor. That is a very pretty Miata. I think a mechanically good ugly MX5 would be a lot cheaper, and as you are going to pull it apart and cover the whole body. I think I would save the money for the extras needed to make it look great.
With any donor MX5 they rust, take your time and have a good look at the sills and wheel arches, in fact all the underneath.
goodluck
Roger
Quote:
Originally Posted by andyPL
ok thanks a lot...
I will read a litle bit more about it and order kit in january...
My friend want to sell an turbo miata and I have to think about it twice...a lot of cash : http://otomoto.pl/mazda-mx-5-turbo-2...C25023366.html
thanks again and I'm looking forward for more pictures of your car |
|
17th November 2012, 09:36
|
|
Senior Member
|
|
Join Date: Nov 2011
Location: Emsworth
Posts: 810
|
|
I agree with Peeps. I have had a look at the advert, it looks far to good. What you need is a scruffy mx5 that is covered in dents, but as little rust as poss on the rear of the sills. The rear arches all get covered so even those can be poor and just trimmed and welded up.
You can get very good mx5s over here for 750 GBP!
|
17th November 2012, 09:42
|
|
Senior Member
|
|
Join Date: Jul 2012
Location: Leeds, UK
Posts: 104
|
|
I got mine for just over £700, it needed it's sills doing and a pair of headlights for it's MOT.
This time of year there will be plenty bargains out there!!!
|
17th November 2012, 09:47
|
|
Senior Member
|
|
Join Date: Jan 2012
Location: Falkirk, Scotland
Posts: 100
|
|
Item 140883536627 on UK eBay looks very tidy and is very cheap (at the moment...) even factoring the cost of travel and driving it back to Poland it would still be better value for money! I'm sure there will be similar deals for LHD models on the continent.
Last edited by BazMason; 17th November 2012 at 09:51..
|
17th November 2012, 19:11
|
|
Senior Member
|
|
Join Date: Nov 2011
Location: Emsworth
Posts: 810
|
|
Another few hours this afternoon and I have dry fitted the glass to the rear. The hole in the car is the size of the glass less 6mm, so I taped it in place, marked it out, then marked out 6mm smaller. After cutting out I checked the rubber fitted.
[IMG] 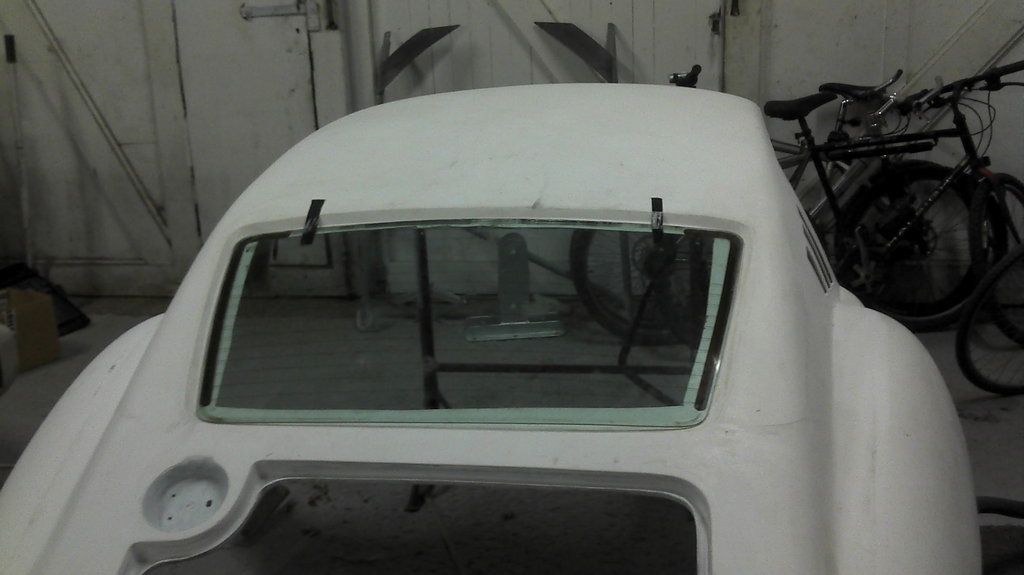 [/IMG]
[IMG] 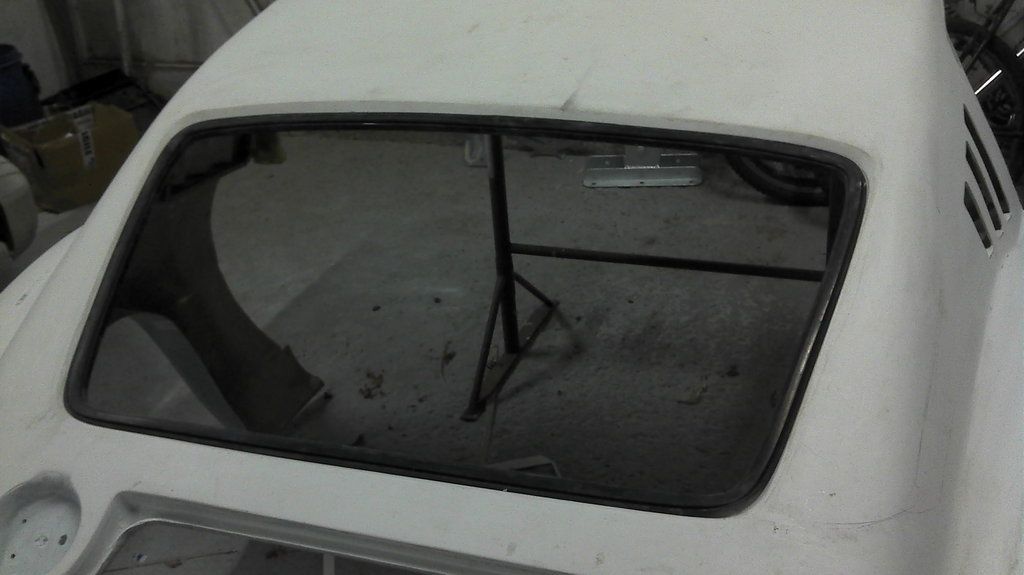 [/IMG]
Also had a final cut and sand of various new bits of GRP , tidying up the door edges, fitting the headlining etc. So glad to finish that as the dust is horrid. How do you cope with it Chris??.
Finally ran wires for two extra interior lights and the heated rear window. Taped in place then stuck them in with a lodge of polyurethane sealant. It would be REALLY annoying if they were to rattle!!
[IMG] 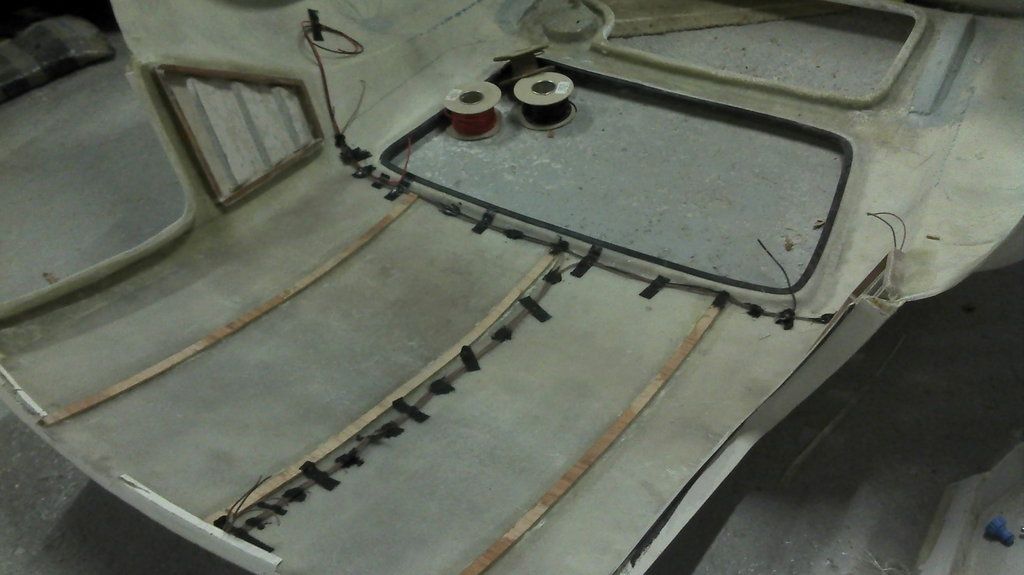 [/IMG] |
|
Currently Active Users Viewing This Thread: 1 (0 members and 1 guests)
|
|
|
 Posting Rules
|
You may not post new threads
You may not post replies
You may not post attachments
You may not edit your posts
HTML code is Off
|
|
|
All times are GMT +0. The time now is 19:52.
|


 Linear Mode

