|
|
| Tribute Automotive Builds Discuss your Tribute kit build |

30th September 2016, 09:33
|
 |
Senior Member
|
|
Join Date: Jun 2011
Posts: 935
|
|
Jag - as far as I know when I enquired when modifying my mx5 based "Roadster"
A Monocoque (combined body/chassis) can not be modified in any way without requiring SVA/IVA.
Anything that is bolted or screwed can be removed but nothing else.
Of course it is whether the examiner spots the modification, for example your cut rear panel for your boot. The Blackwidow SPR modifies the metalwork but passed an IVA.
I would think that the real time anyone would look so close is in the event of an accident and the insurance investigators will be much more thorough
|
2nd October 2016, 15:01
|
 |
Senior Member
|
|
Join Date: Jan 2014
Location: Egham, Surrey
Posts: 1,780
|
|

Gapping the bonnet and rear door shuts.
The gap around the bonnet is excessive and the rear door shuts are rounded rather than nice and sharp.
I positioned the bonnet making the front and off side nice and tight meaning I would only have to fix 2 sides rather than 4. 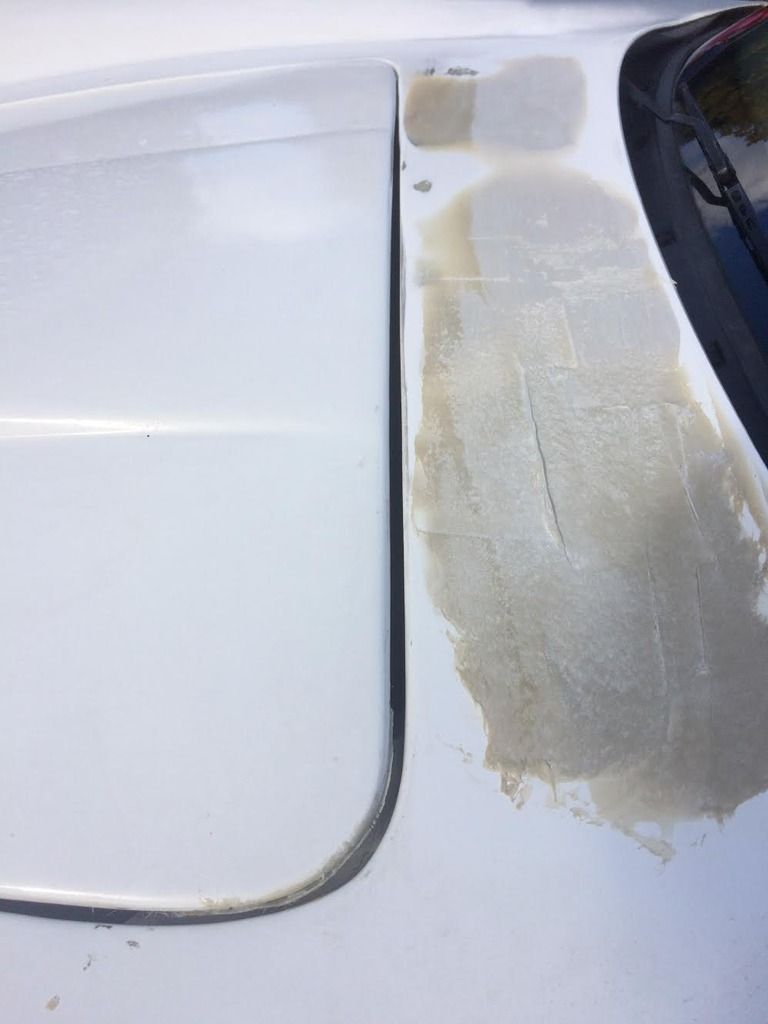
 I decided to go with 2mm gaps, not because I'm being clever, it's simply the thickness of the alloy sheet offcuts that I have. Simply fit them in the gap and hold them in place with some packing. Then push some GRP paste in the gap pushing it down firmly. On the corners I found the best thing was builders band again, just cover it in electrical tape to stop it fro sticking. Very easy to bend for the corners but too flexible for the straights.
When it has gone off lift the bonnet and you should see this.
 The pink being the GRP paste. Remove the bonnet and apply a fillet of GRP paste with your finger underneath the bonnet to give it some more strength. I sanded everything with 80 grit first to give it a key.
I then went around the underneath edge with a mini belt sander to level it all up.
Trial fitted and the gap is great, just ran a long bed sander around the edge to level it all up.
Finally a coat of colour matched flow coat to tidy the underneath up, looks much better.
 I will be using it on all of the underside of the bonnet and boot lid. Not as nice as proper paint but takes no time at all to do.
I now just need to get the front of the bonnet level before final filling on the top. The back is fine but the front sits too low, the two front pins are hard up against the GRP so it cannot be lifted any higher. Need to get my thinking cap on to come up with a work around.
Final gaps, just need to fill and contour the top surface.
The rear door gap was done in the same way.
Last edited by Jaguartvr; 2nd October 2016 at 15:14..
|
2nd October 2016, 15:45
|
|
Senior Member
|
|
Join Date: Oct 2013
Location: norfolk
Posts: 691
|
|
Quote:
Originally Posted by Jaguartvr

Gapping the bonnet and rear door shuts.
The gap around the bonnet is excessive and the rear door shuts are rounded rather than nice and sharp.
I positioned the bonnet making the front and off side nice and tight meaning I would only have to fix 2 sides rather than 4.
I decided to go with 2mm gaps, not because I'm being clever, it's simply the thickness of the alloy sheet offcuts that I have. Simply fit them in the gap and hold them in place with some packing. Then push some GRP paste in the gap pushing it down firmly. On the corners I found the best thing was builders band again, just cover it in electrical tape to stop it fro sticking. Very easy to bend for the corners but too flexible for the straights.
|
Nice work - but if it's hard up against 2 edges with a 2mm strip in the other edges, does that mean the gap all round is 1mm? or have you also spaced the 2 other sides with the 2mm ali? |
2nd October 2016, 16:54
|
|
Senior Member
|
|
Join Date: Jan 2014
Location: Egham, Surrey
Posts: 1,780
|
|
It looks the same all the way round but I'm not that fussy that I'm going to measure it!
Just been for my first test drive, nothing fell of but the grill is touching the fan under hard acceleration so will have to find a way to work around that.
Did get flashed and waved at from a Ferrari! Had too laugh, they are however 10 a penny around here as we have Marenello's at the end of the road.
|
2nd October 2016, 21:40
|
|
Member
|
|
Join Date: May 2015
Location: Lincolnshire
Posts: 85
|
|
Nice work. I've bonded in my 'inner' bonnet, but will leave a groove around the outside, so it will look OK. This has saved me all the hassle with catches/hinges and a rain channel. It also avoids the risk of scratching the paint if it's not hinged (when removing or replacing it)I'm also going for wider panel gaps, maybe 3mm.
|
3rd October 2016, 07:12
|
|
Senior Member
|
|
Join Date: Jan 2014
Location: Egham, Surrey
Posts: 1,780
|
|
I think bonding the bonnet is is probably the way to go. I did see a 250 at a show, it had great paint except in the bonnet shuts, small point but my eyes went straight to it. I might paint the bonnet shut area first and then bond the bonnet in. Shame as the rear fittings work well but there is less room at the front to do the same.
|
3rd October 2016, 07:16
|
 |
Senior Member
|
|
Join Date: Nov 2014
Location: Norwich, Norfolk
Posts: 412
|
|
The bonnet is bonded in on mine and I'm pleased we did as the lines all look nice now.
|
3rd October 2016, 07:47
|
|
Senior Member
|
|
Join Date: Jan 2014
Location: Egham, Surrey
Posts: 1,780
|
|
Looks like bondage is the way to go, I'll give the wife the good news!
|
3rd October 2016, 11:35
|
|
Senior Member
|
|
Join Date: Jan 2014
Location: Egham, Surrey
Posts: 1,780
|
|
Bugger. Filled it up with petrol today and it took ageeeeees. No leaks but the pipe fills up with petrol so you have to fill it very slowly, it's as it the anti glug pipe isn't working.
On the positive side, it doesn't appear to be leaking and there is no petrol smell.
Been over to my painter and he has pointed out loads of extra bits that will need my attention, quite depressing. Hoping to get it into the oven for 40 minutes this afternoon, probably be even more depressed after that.
|
3rd October 2016, 11:43
|
 |
Senior Member
|
|
Join Date: Apr 2016
Location: Camberley
Posts: 972
|
|
A safe system is a great place to start any fixes from though. I guess a comparison of your panels with Jeff's (ignoring the other changes) gives an indication of how much effort has to go into this. Be sure to take pics of the car from all angles when sorted but before painting so we know what to aim for.
As has been said elsewhere, hats off to the professional preppers.
|
3rd October 2016, 11:59
|
|
Senior Member
|
|
Join Date: Nov 2014
Location: Norwich, Norfolk
Posts: 412
|
|
Slow filling is something I've had to get used to. The main problem is if I forget to put a cloth around the cap and it then blows back petrol over the paintwork.
Oh how we suffer for our art!
Bob.
|
3rd October 2016, 12:05
|
|
Senior Member
|
|
Join Date: Apr 2016
Location: Camberley
Posts: 972
|
|
Is this just another male ageing symptom along with slow run-off?
|
3rd October 2016, 12:07
|
|
Senior Member
|
|
Join Date: Jan 2014
Location: Egham, Surrey
Posts: 1,780
|
|
|
6th October 2016, 15:17
|
|
Senior Member
|
|
Join Date: Jan 2014
Location: Egham, Surrey
Posts: 1,780
|
|
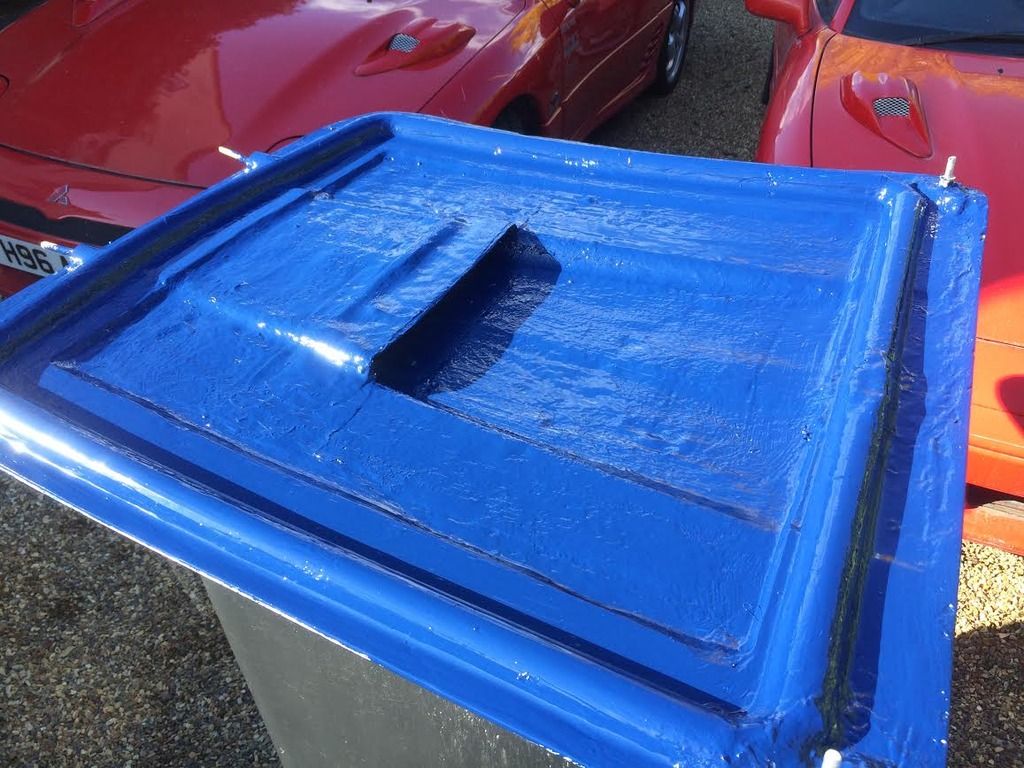
Bonnet Gapping.
Have been finishing off the bonnet gapping and levelling. With the pates I made for the back of the bonnet it is possible to get it flush with the main bonnet. At the front one of the bonnet pins is to low so I cannot raise it up. Halfway along each side it sits about 5mm too low. I cut the font bonnet pin off, re drilled another hole and repositioned it. For the side adjustment I cut a 3mm plate for each side, drilled and tapped a 8mm hole so that I could use a bolt to adjust the height. 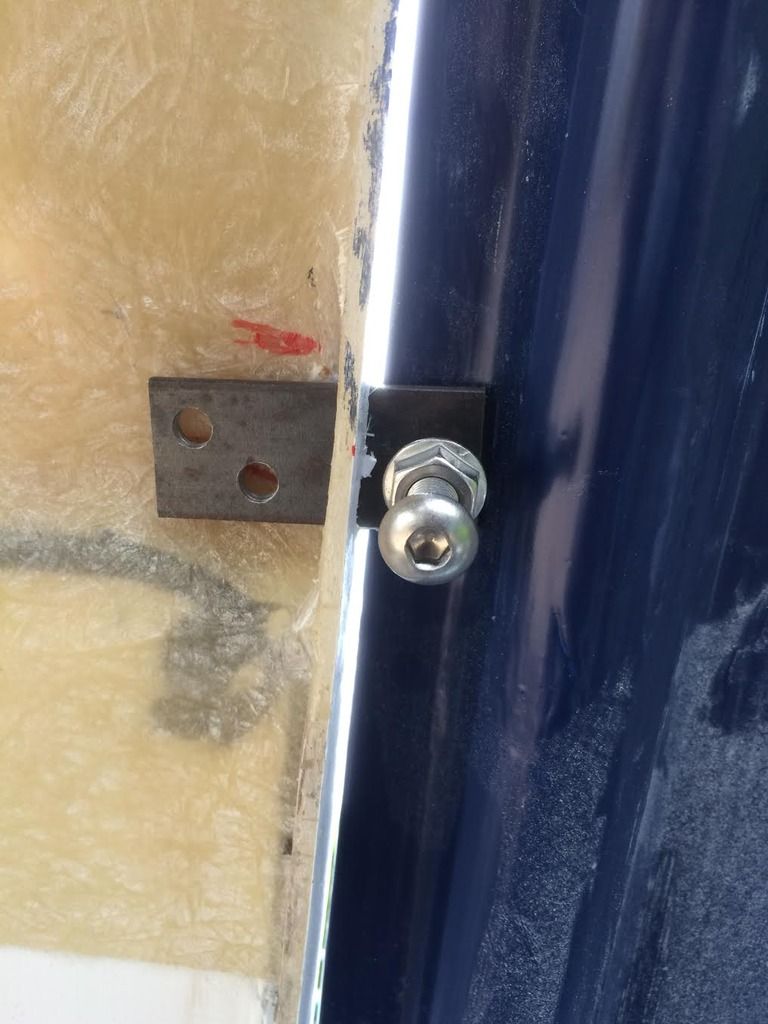
I drilled two holes in the other end so the GRP paste would grip it and I will go over it with some GRP woven tape.
Seen from the top 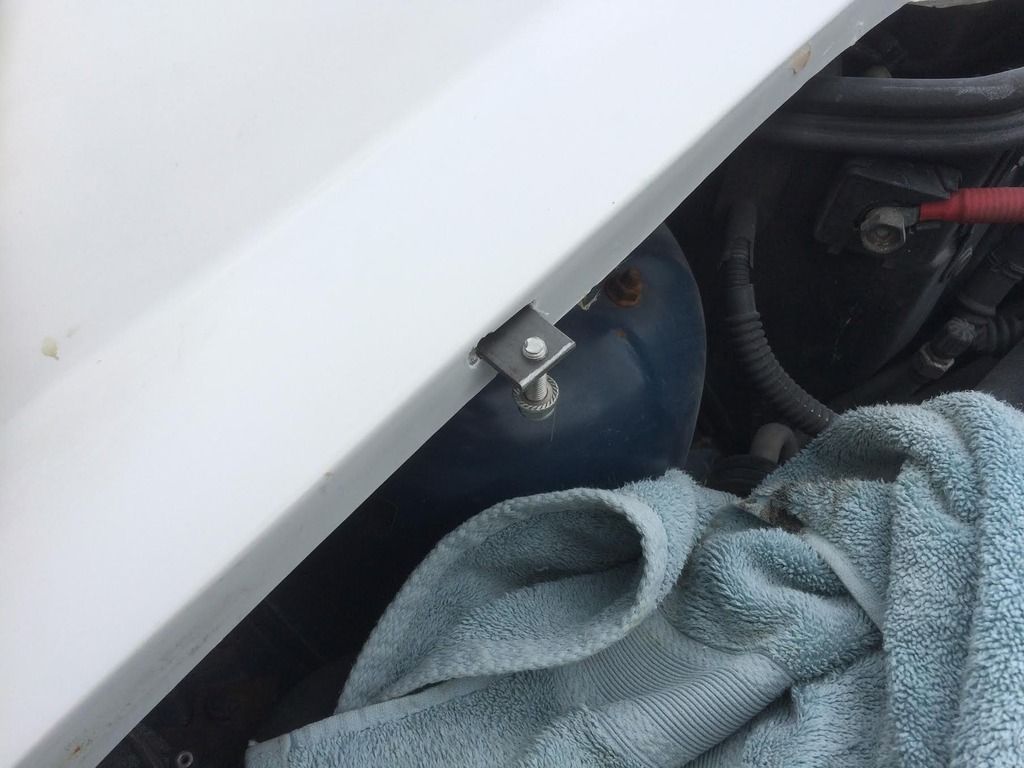
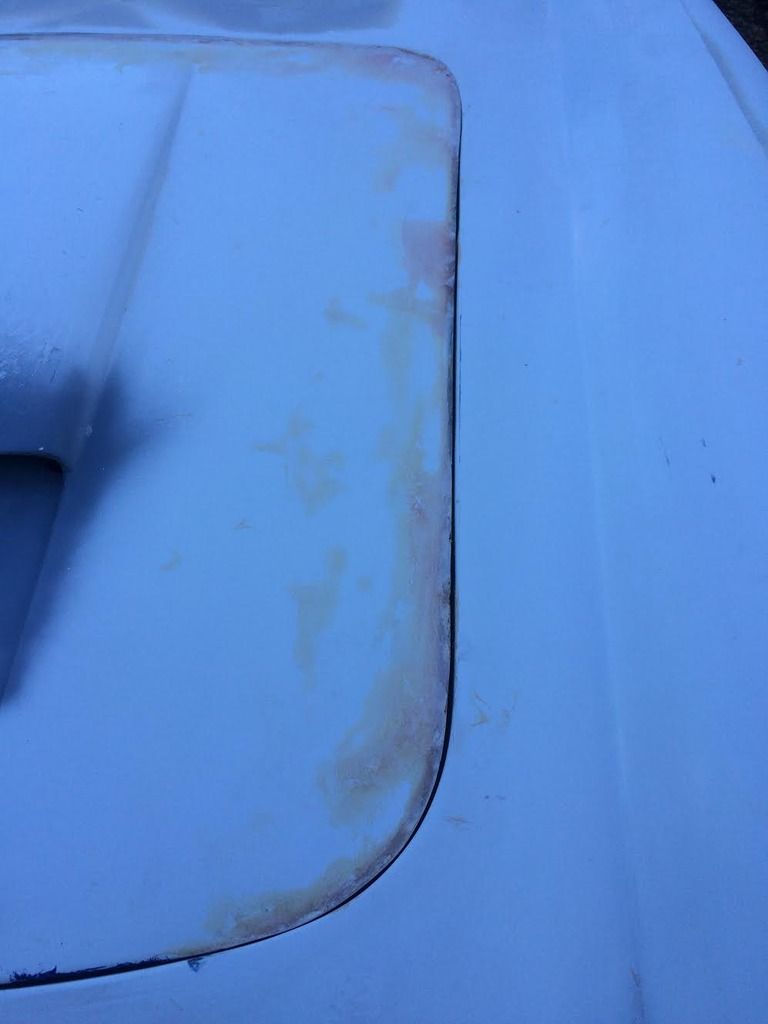
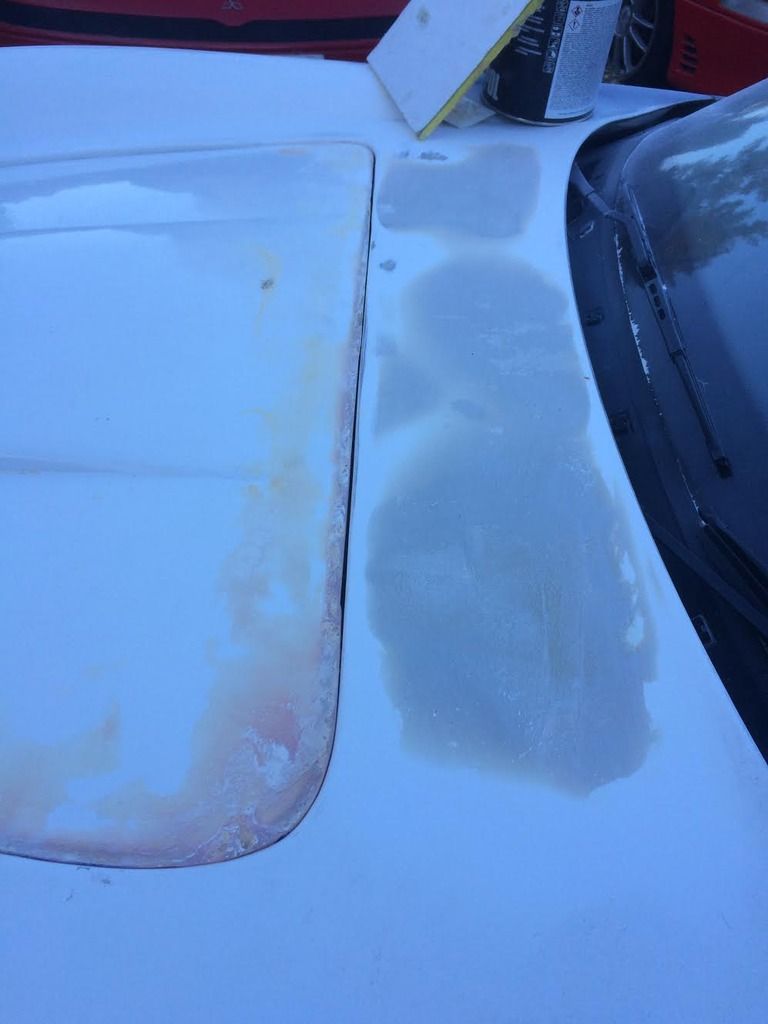
Having got the bonnet as flat as possible I filled the edges and flatted it all down. 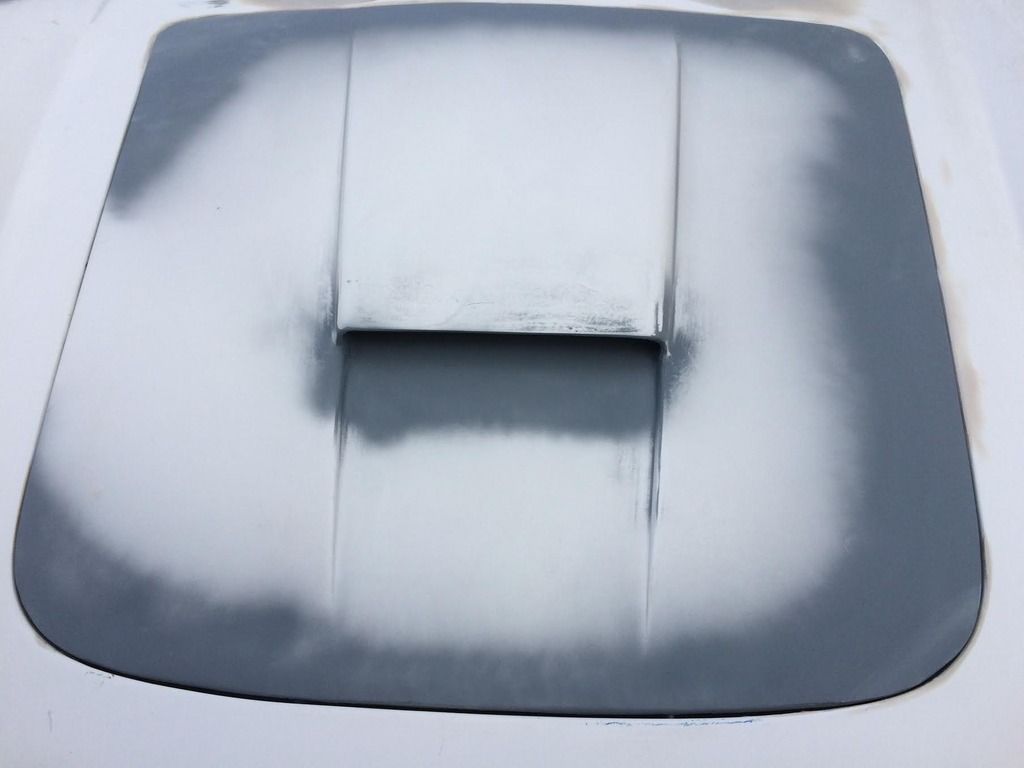
Pretty pleased with the result. At the moment the way the bonnet is attached there is no adjustment, I just need to open out the two rear bolt holes fractionally and it will give me some wiggle room for final adjustment. I think 2mm all round is about what I will end up with.

|
6th October 2016, 15:38
|
|
Senior Member
|
|
Join Date: Apr 2016
Location: Camberley
Posts: 972
|
|
Looking forward to seeing this tomorrow
|
6th October 2016, 15:58
|
|
Senior Member
|
|
Join Date: Jan 2014
Location: Egham, Surrey
Posts: 1,780
|
|
Forgot the best bit, my inset bonnet grill, gives some real depth. 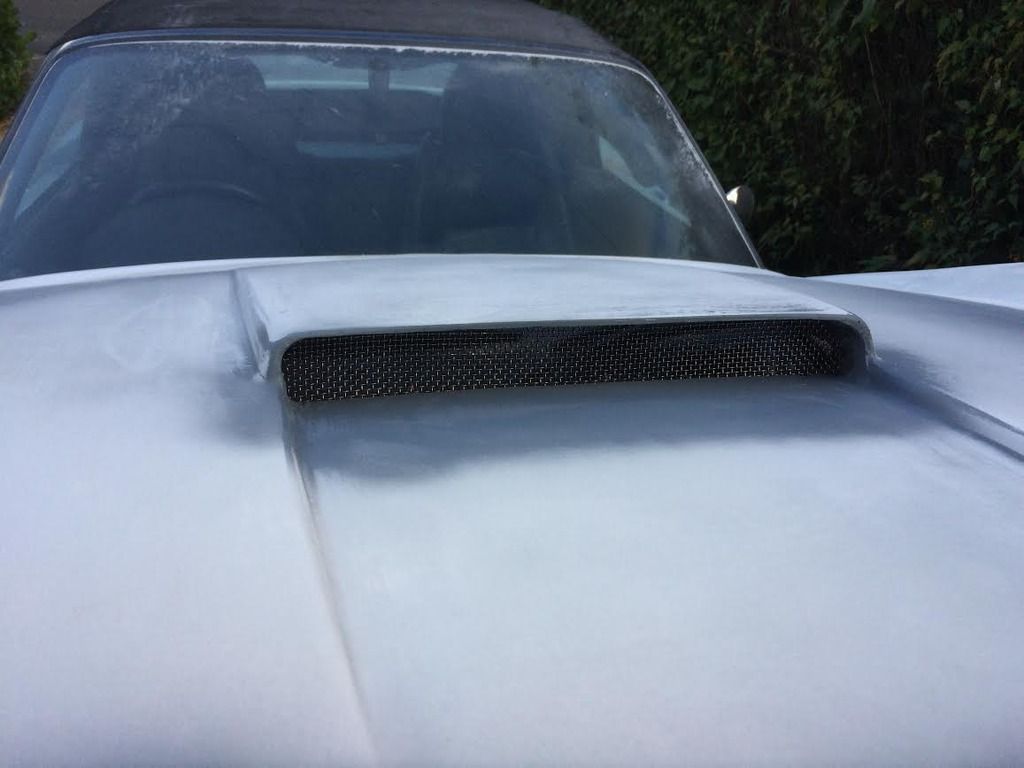
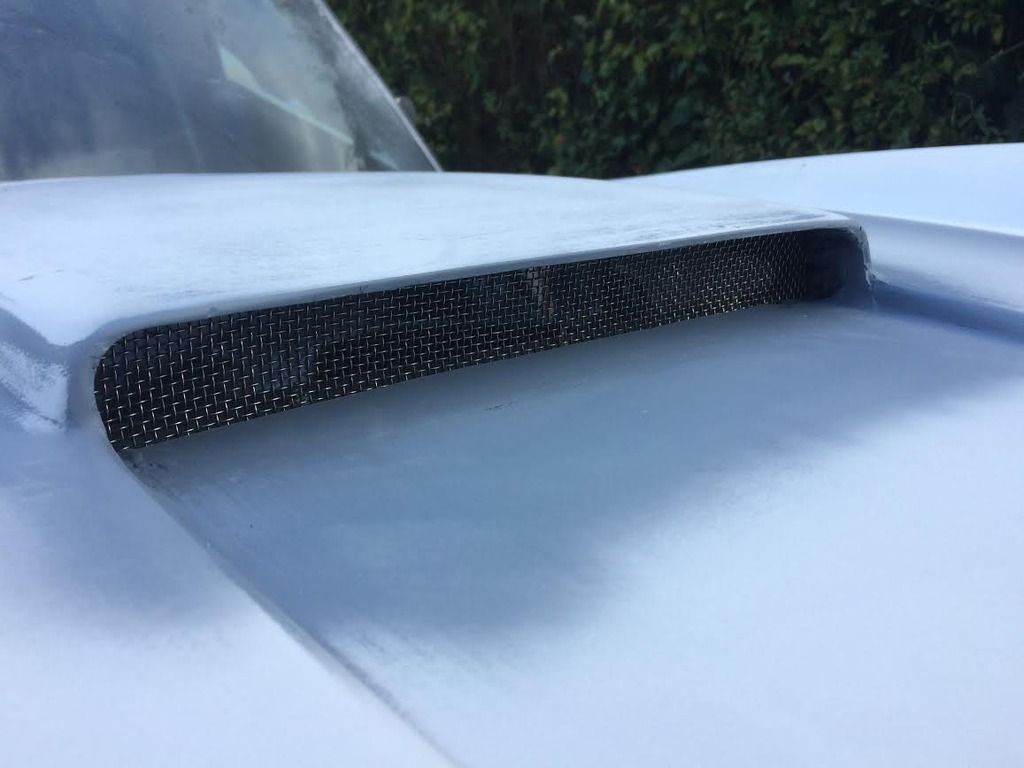
Set about 1cm back from the opening, it's commercial stainless draining mesh. £6.99 for a 30cm square inc post, I should get the bonnet and all 4 brake vents out of it.
See you tomorrow |
9th October 2016, 11:37
|
|
Senior Member
|
|
Join Date: Jan 2014
Location: Egham, Surrey
Posts: 1,780
|
|
Reflectors, fog light and reversing lights
Have been pondering what to use, I like the rectangular Lucas reflectors that most people use but didn't want extra lights for reversing and fog light. I always think the ones that bolt on underneath look like a cheap 1970's accessory.
So cunning plan needed.
I bought 2 super bright LED bulbs for the reversing lights and an LED tail and brake light for the fog light.
Drilled a 5mm hole central to one side of the reflector, then opened it up with a 10mm and finally 24mm. This allows the LED domes to suck though the reflector but the metal surround won't go through so it acts as a stop. In-between the domes I painted the white surface by just dropping some red paint in with a cocktail stick. I then coloured the white domes with a red felt tip pen, this makes the bulb look red but when illuminated it shows white. One on either reflector for the reversing lights. I had bought a red LED bulb for the fog light but a tail/brake light bulb wired so that both come on proved to be brighter. I sanded the domes flat and then polished them back up on a buff.
I then glued this bulb to the back of the reflector after peeling away the reflector tape. I used a hot glue gun for the bulbs, LED's don't get hot so they should stay put.
From a distance you can't tell they have been modified. Not perfect but I'm happy with the results 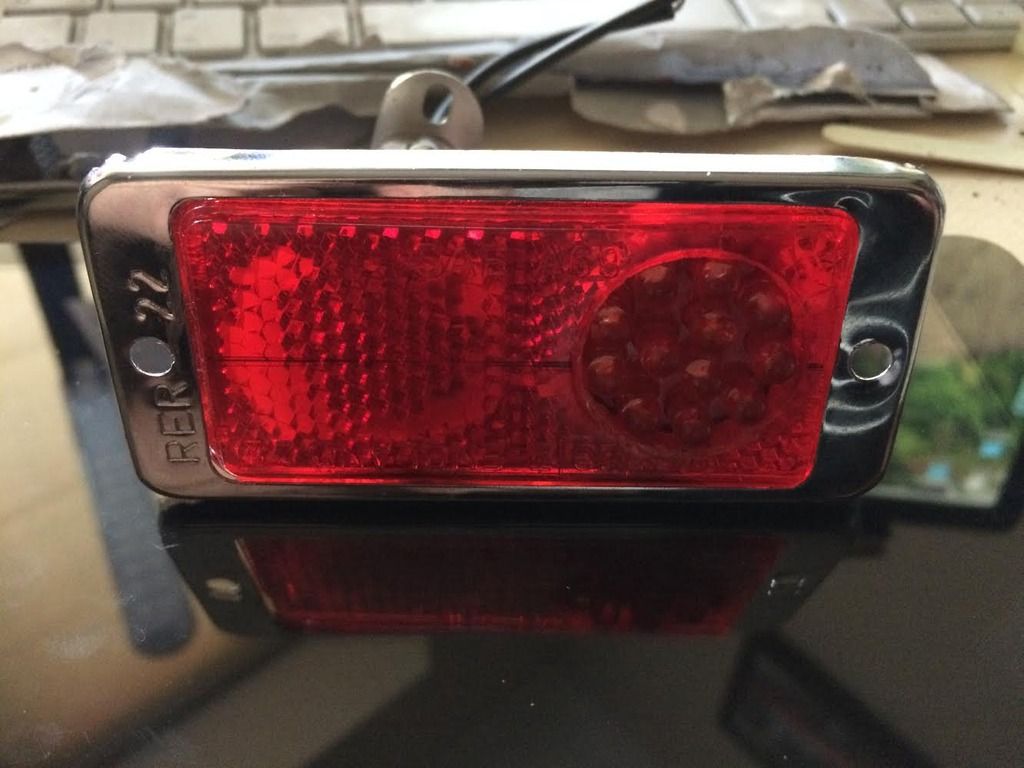 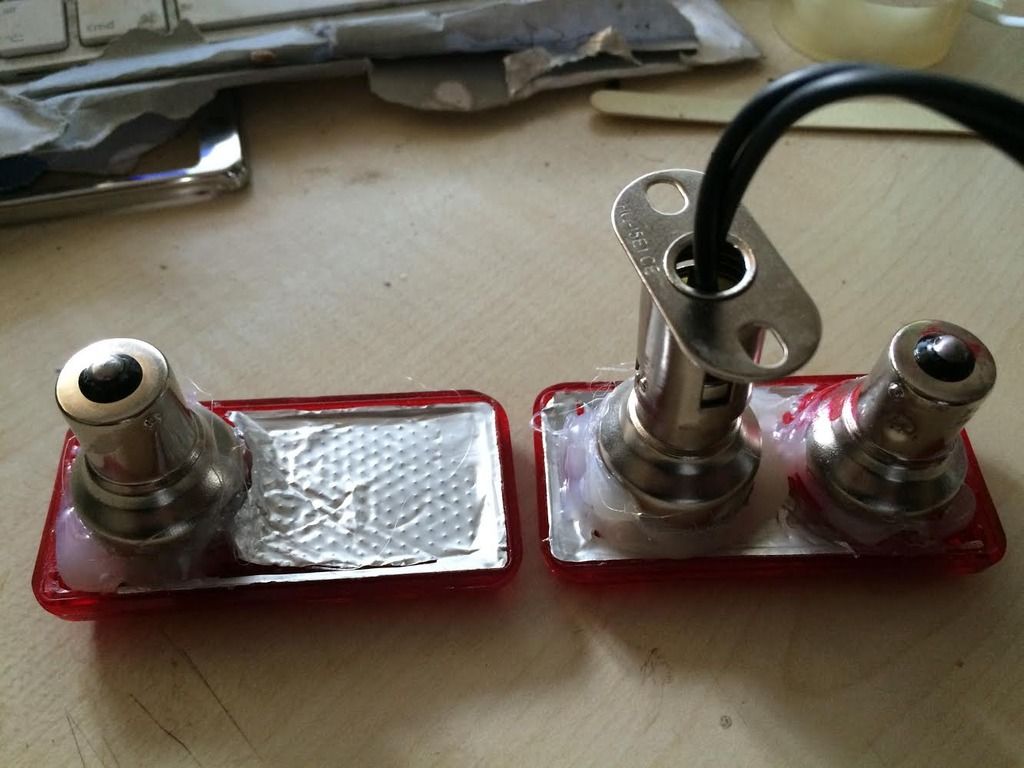 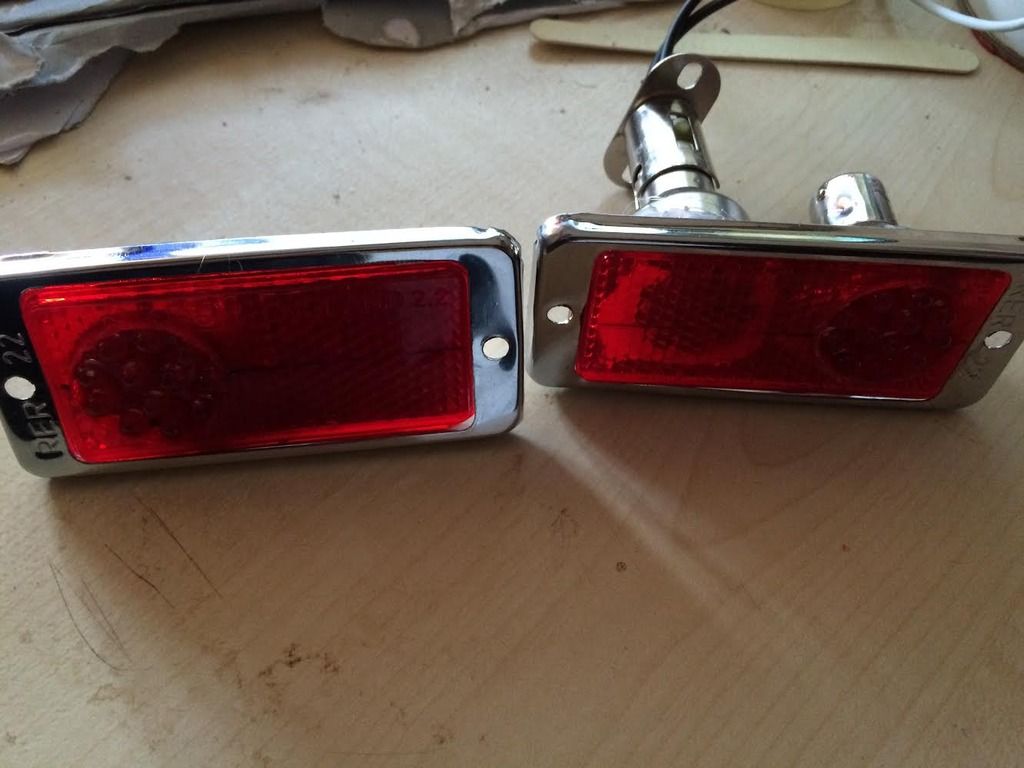
The reflectors won't be very good now so I'm thinking of fitting some small mudflats with small reflectors on them. Now of course I'm fitting tacky 1970's accessories!
Last edited by Jaguartvr; 9th October 2016 at 11:40..
|
9th October 2016, 16:15
|
|
Senior Member
|
|
Join Date: Aug 2012
Posts: 2,142
|
|
Quote:
Originally Posted by Jaguartvr
Bonnet Gapping.
Have been finishing off the bonnet gapping and levelling. With the pates I made for the back of the bonnet it is possible to get it flush with the main bonnet. At the front one of the bonnet pins is to low so I cannot raise it up. Halfway along each side it sits about 5mm too low. I cut the font bonnet pin off, re drilled another hole and repositioned it. For the side adjustment I cut a 3mm plate for each side, drilled and tapped a 8mm hole so that I could use a bolt to adjust the height.
I drilled two holes in the other end so the GRP paste would grip it and I will go over it with some GRP woven tape.
Seen from the top
Having got the bonnet as flat as possible I filled the edges and flatted it all down.
Pretty pleased with the result. At the moment the way the bonnet is attached there is no adjustment, I just need to open out the two rear bolt holes fractionally and it will give me some wiggle room for final adjustment. I think 2mm all round is about what I will end up with. |
Good idea with the adjusting bolt . It might be wise to put a spreader plate under the bonnet where the bolt touches the GRP otherwise you might get star cracking in the future. GRP doesn't like being stressed with point loadings.
|
9th October 2016, 17:42
|
|
Senior Member
|
|
Join Date: Jan 2014
Location: Egham, Surrey
Posts: 1,780
|
|
My painter said the same thing. I'm going to put a couple of slices in and put some GRP tape over the joins
Last edited by Jaguartvr; 10th October 2016 at 07:11..
|
9th October 2016, 17:56
|
|
Senior Member
|
|
Join Date: Jan 2014
Location: Egham, Surrey
Posts: 1,780
|
|
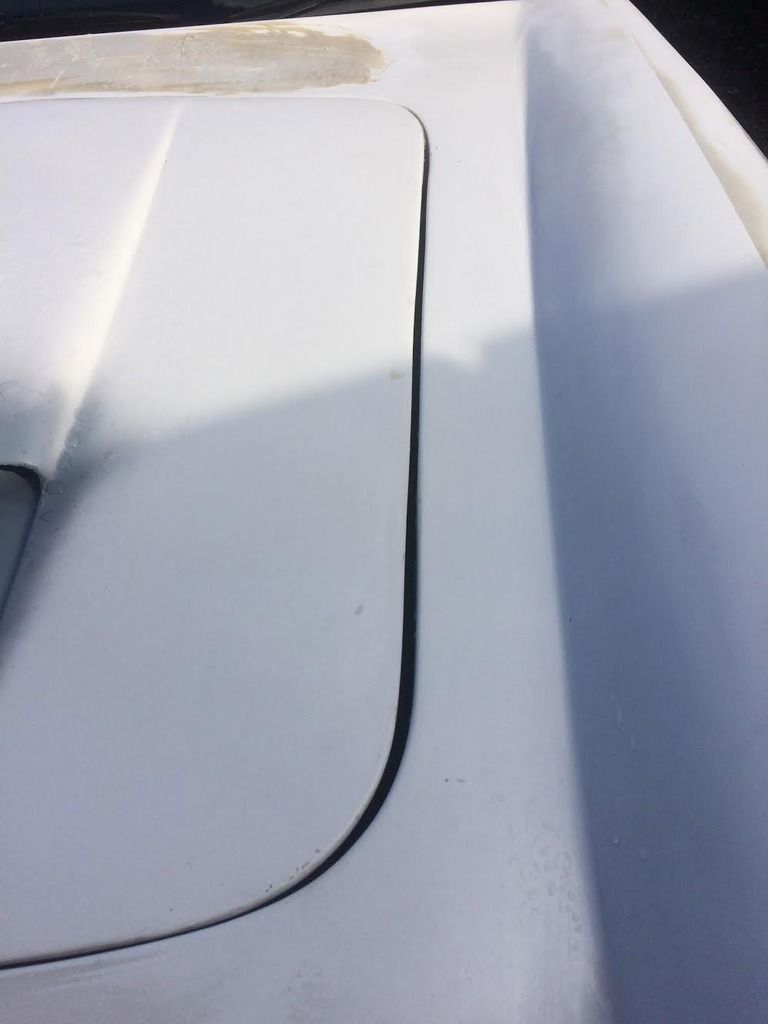
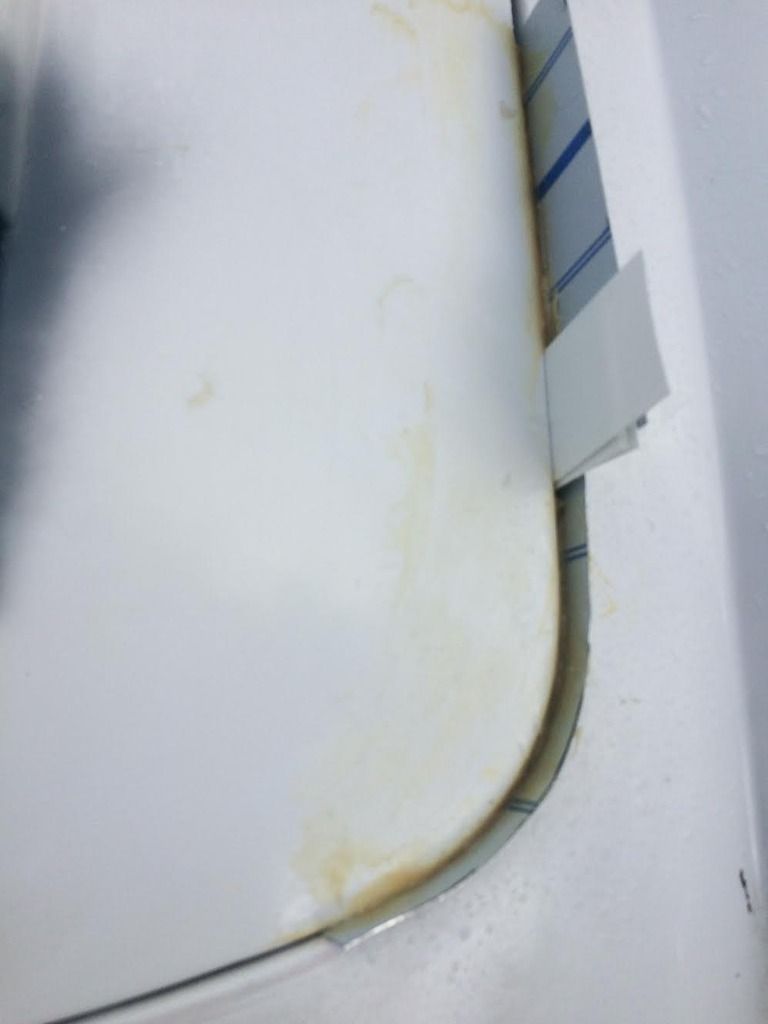
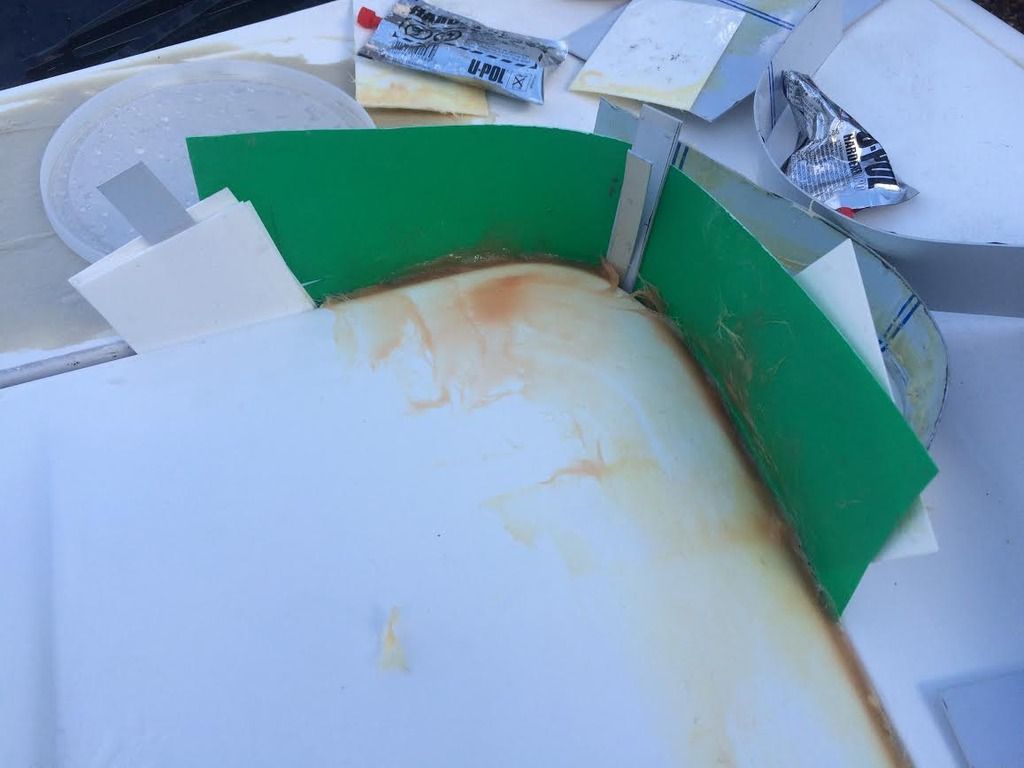
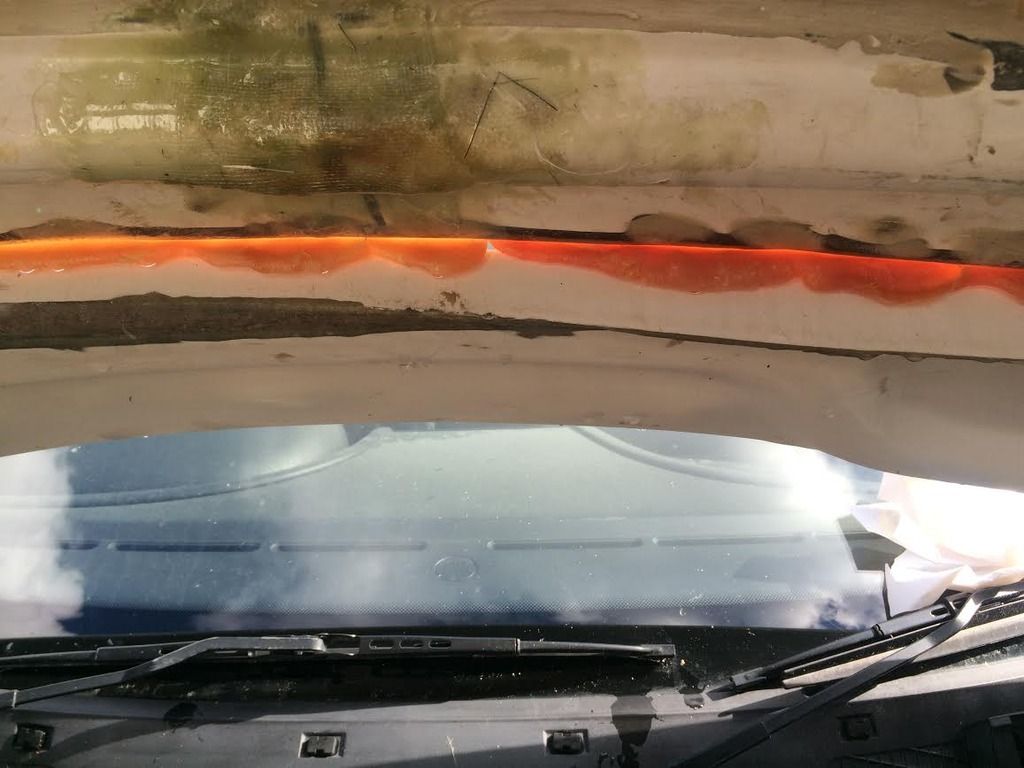
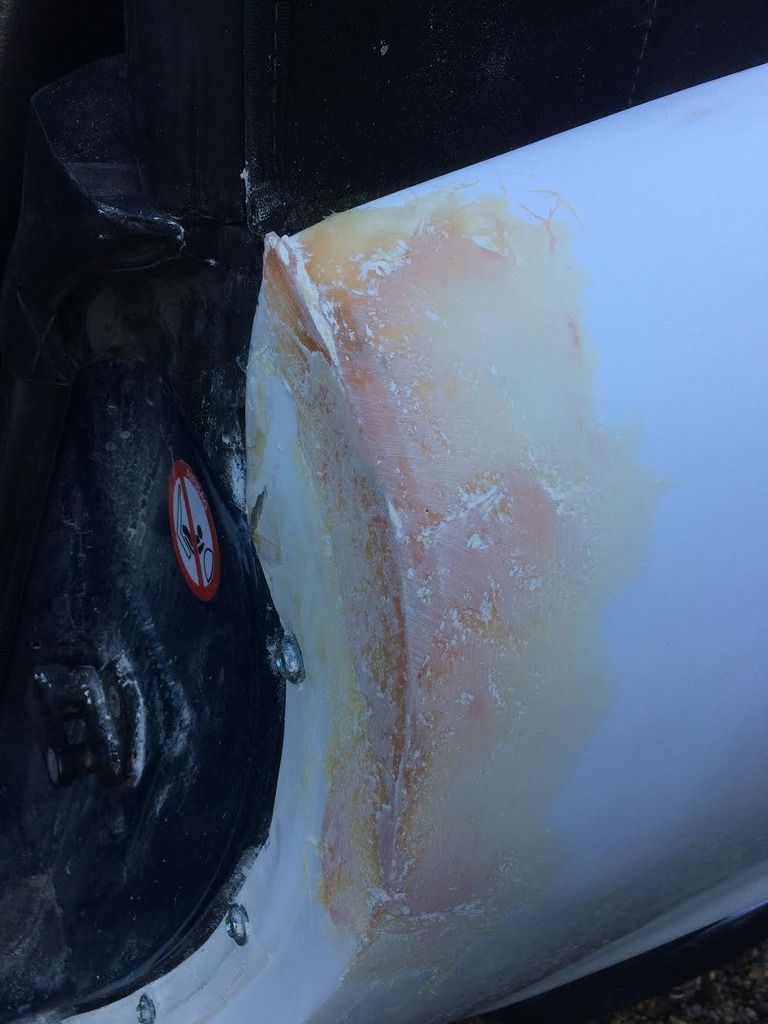
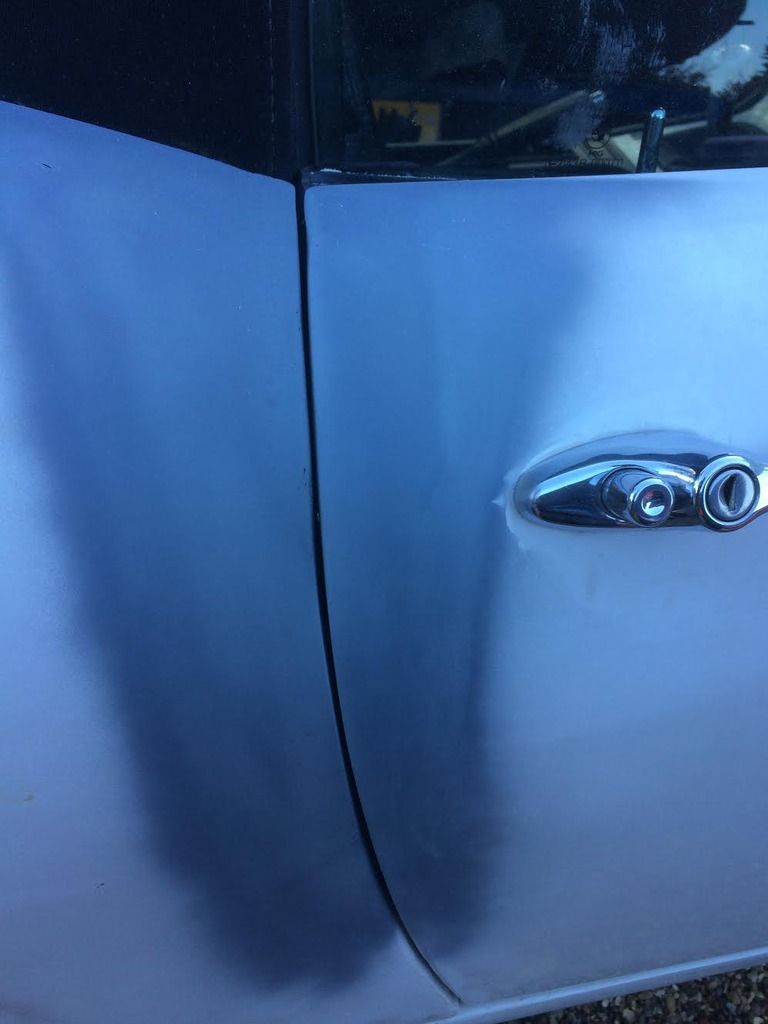
Door window weather strips.
I wanted to try and avoid the alloy strips on the door tops, it alway reminds me of "kit car" and I also want to use the alloy strip under the doors mounted on the sill so it will hide the front and rear wing join. Having both strips fitted would just look too much.
There is quite a gap between the door top and the glass, especially at the front. This turned out to be a bit a pig of a job and I had to build the area up 3 times to get both the right curvature on the top and the right angle at the rear to mount the weather strip too.
Not quite finished but nearly there. Just taped some plastic 90 degree angle to the top of the door and then backfilled with GRP paste. 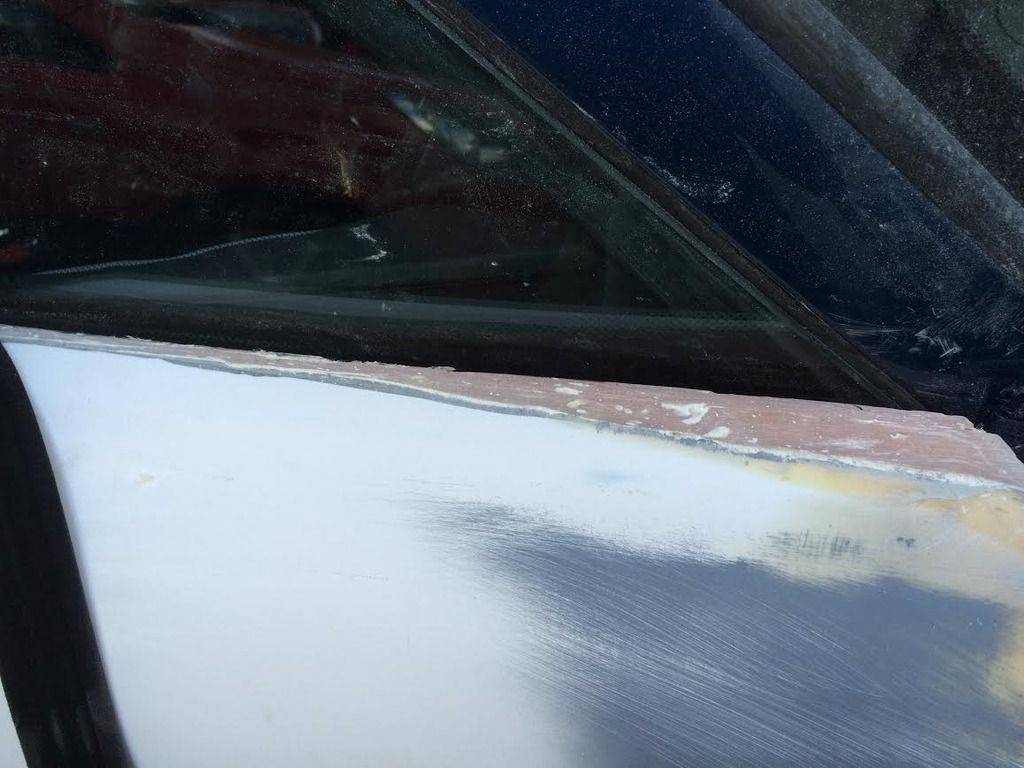 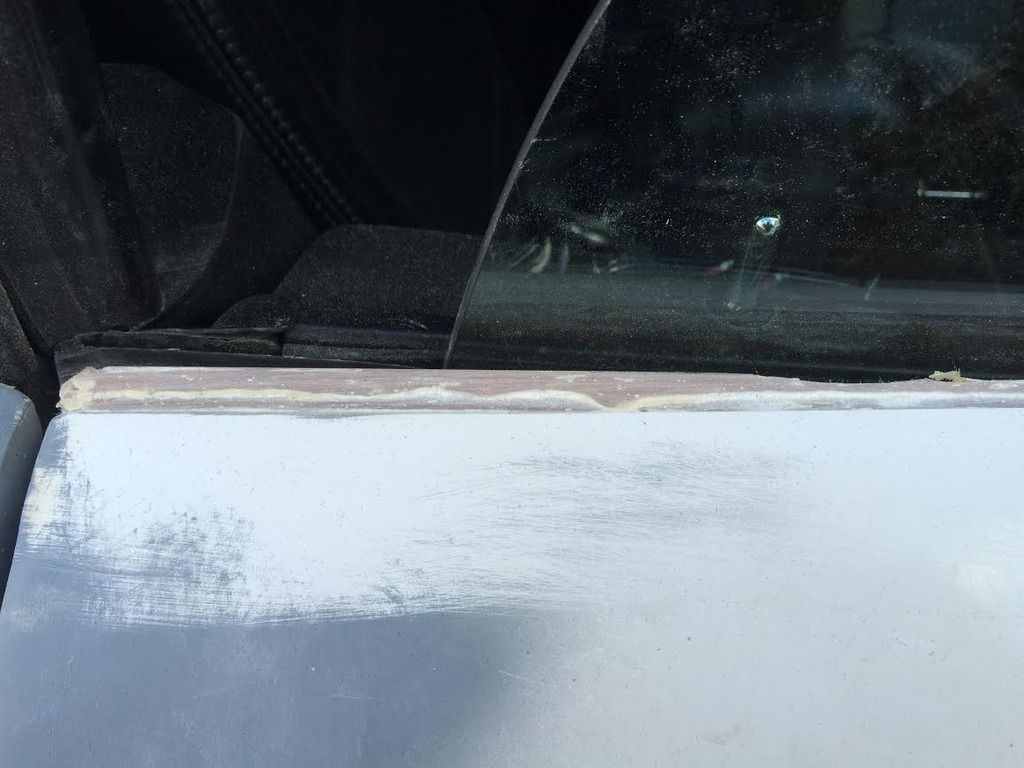 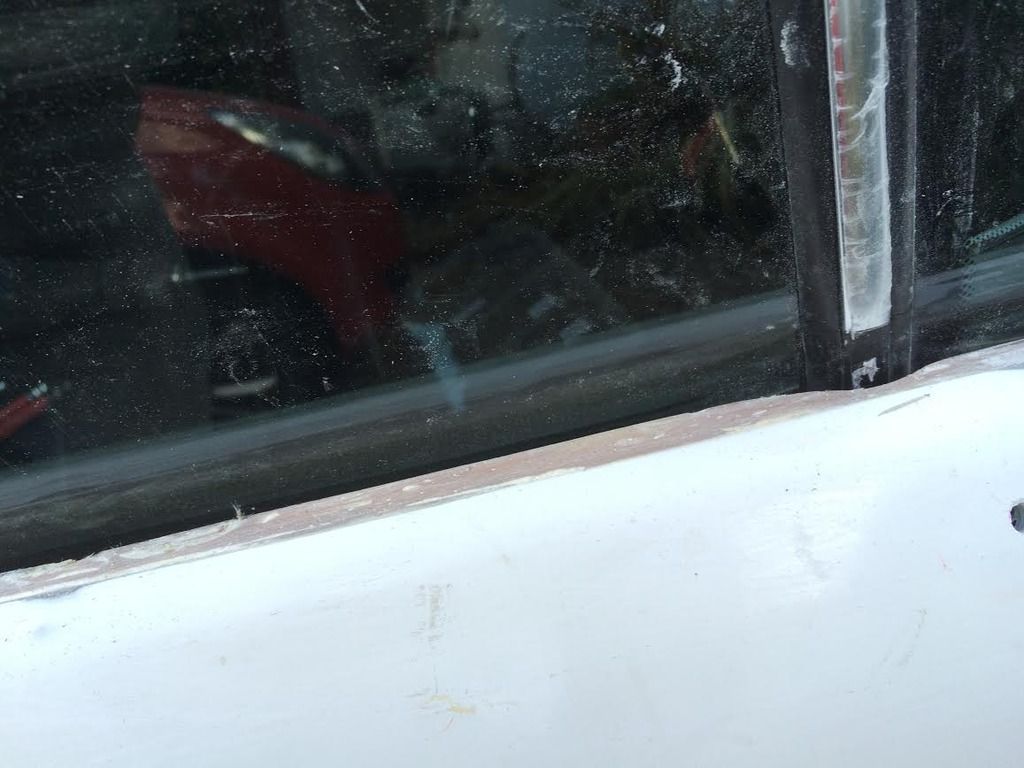 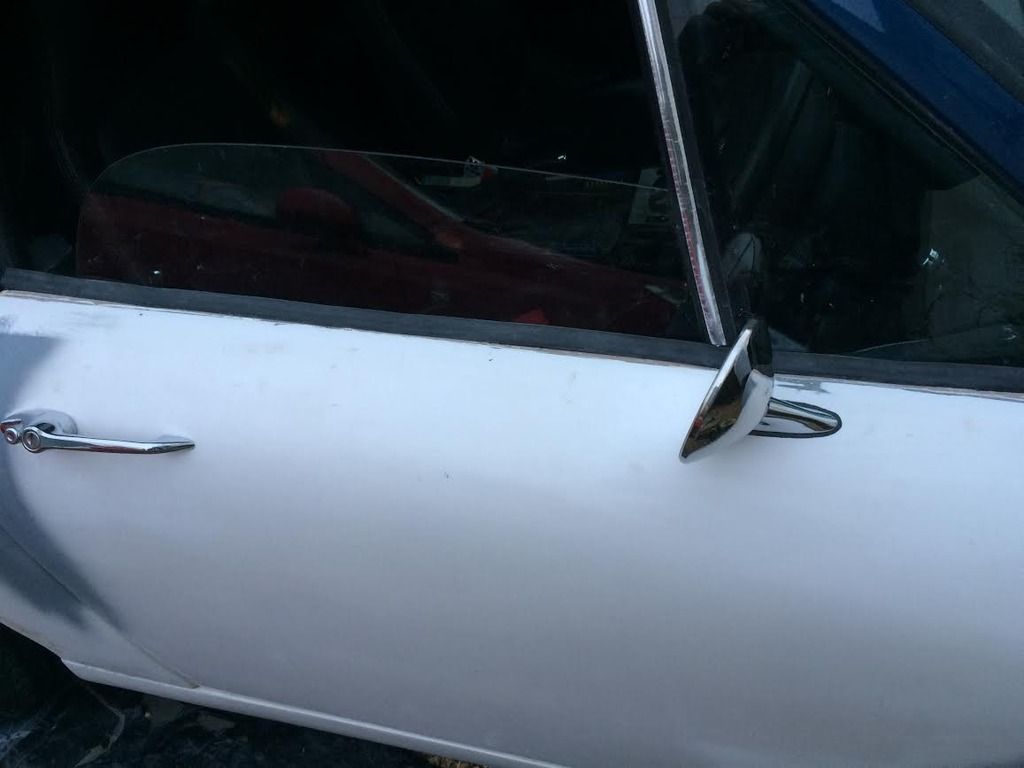
Does look much more "factory" I think the reason for there being such a large gap at the top of the doors is that they were designed for the coupe with the sliding window arrangement. May a point for the MK2!
Last edited by Jaguartvr; 10th October 2016 at 07:34..
|
|
Currently Active Users Viewing This Thread: 1 (0 members and 1 guests)
|
|
|
 Posting Rules
|
You may not post new threads
You may not post replies
You may not post attachments
You may not edit your posts
HTML code is Off
|
|
|
All times are GMT +0. The time now is 17:20.
|


 Linear Mode

