|
|
| Sammio Builds and discussions Sammio bodied car builds and specials |

22nd March 2013, 07:40
|
|
Senior Member
|
|
Join Date: Apr 2012
Posts: 1,163
|
|
T, where did you get your dash moulding from?
|
22nd March 2013, 07:44
|
 |
Senior Member
|
|
Join Date: Dec 2011
Posts: 656
|
|
T, That's pretty much what we were thinking. If we can get away without changing the existing moulds but add a separate piece it opens the options at very little risk.
|
22nd March 2013, 08:44
|
 |
Senior Member
|
|
Join Date: Jul 2011
Posts: 5,328
|
|
Quote:
Originally Posted by Viatron

T, where did you get your dash moulding from?
|
Courtesy of Mr Gary Janes.
He took a moulding from his developmental 550 Spyder with the intention of using it on another project. He then sold on the Spyder demonstrator, moulds and jigs so he could concentrate on Orca for a while, but kept the spare dash.
When I posted my intention to try to recreate something like the 550 or 356 dash from scratch, Gary offered me his ready made one for a bargain price including delivery (less than the price of a decent meal for one!) It took a little modification to fit but I'm very pleased with the minimalistic, production car look it's given my dash.
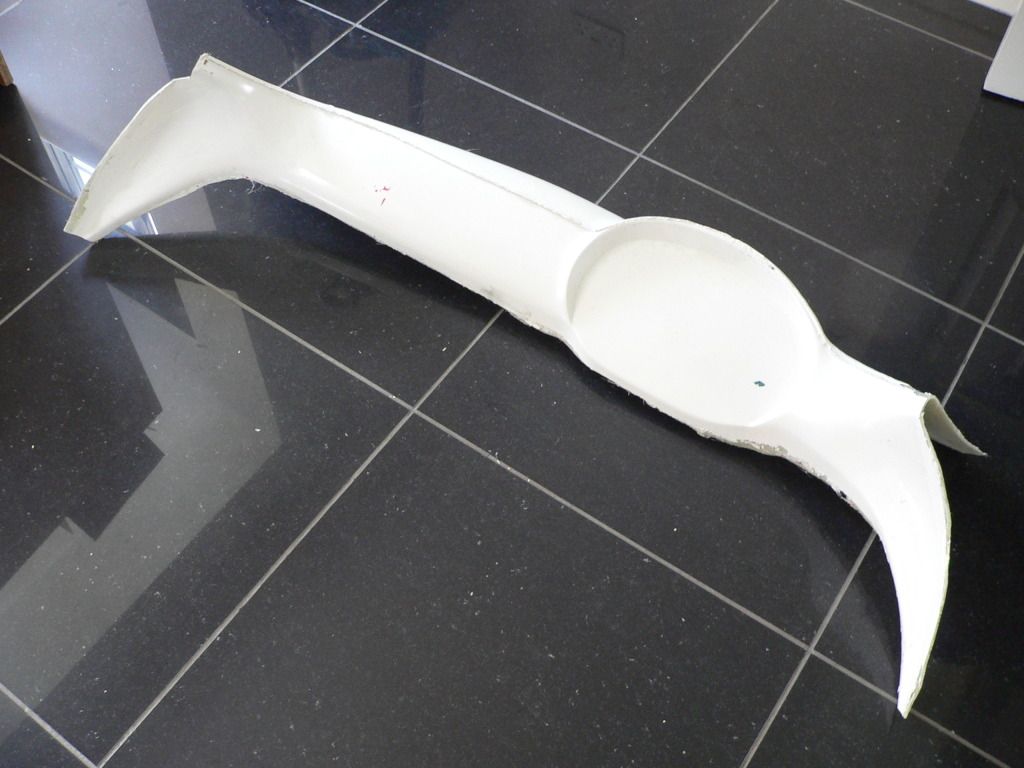
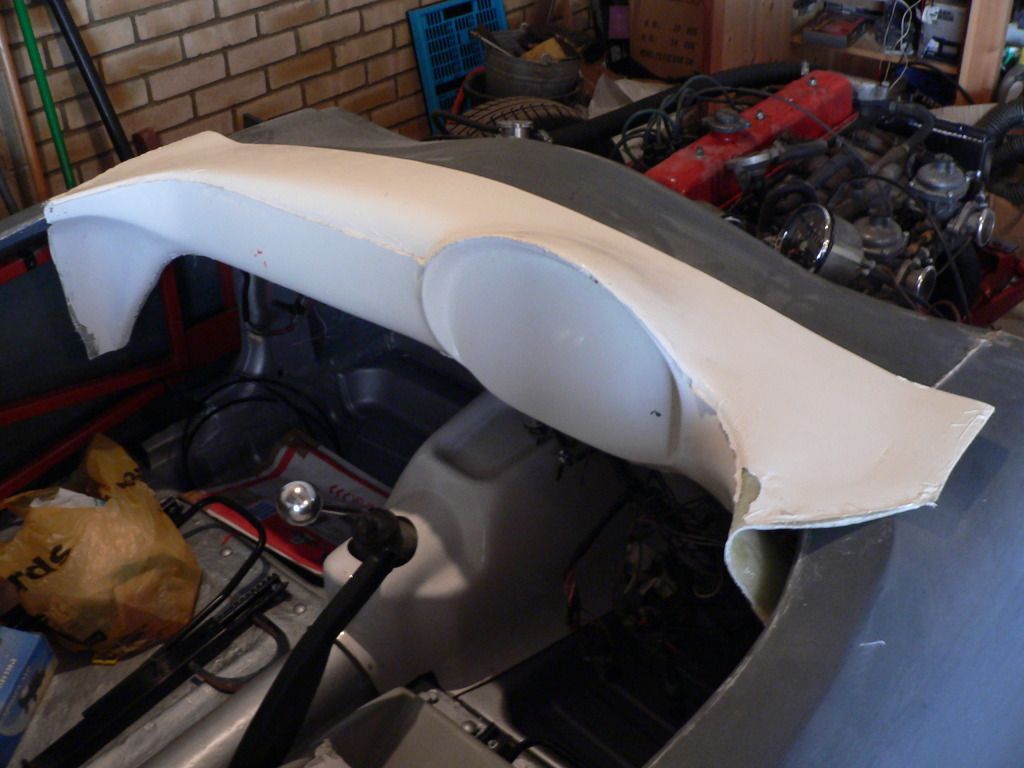
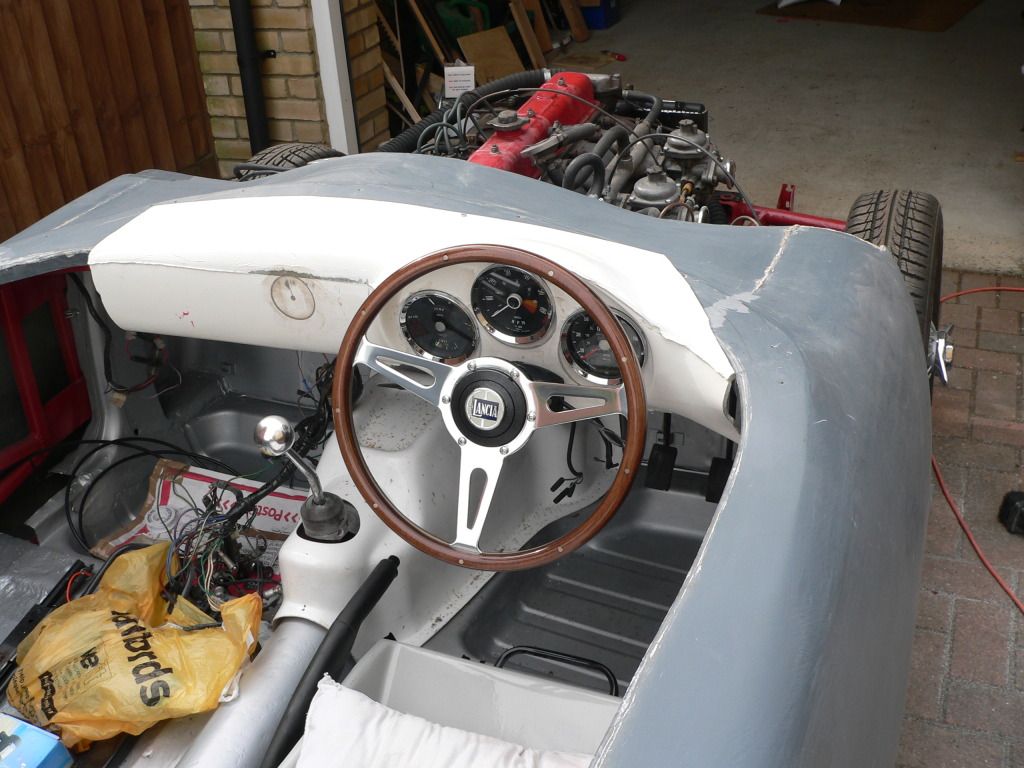
I'm no expert on fibreglass moulding, but I think it'd be worth the Andys' while to source a Porsche dash to take a moulding from, modify it to suit and offer it as an option. I'd have happily paid £100 for mine (just don't tell Gary that)  |
22nd March 2013, 18:35
|
 |
Senior Member
|
|
Join Date: Feb 2012
Location: Wembley, London
Posts: 5,056
|
|
Just got in from a curry out with my family and I must say I do love this forum.  Mr T
Mr T - Your step by step guide is a really big help.
Which is one of the reasons I like to put as much detail as I can into this thread.
Given the weather, Saturday might be a "shopping" for odds & ends day.
I'll just pray for a break on Sunday to start giving the shell a once over.
( I just need to dig out my thermals.  )
Cheers, Paul.  |
23rd March 2013, 05:45
|
|
Senior Member
|
|
Join Date: Feb 2012
Location: Wembley, London
Posts: 5,056
|
|
Not really the photo of the body shell in the daylight I had in mind.
Still, the supermarket opens soon so I can get my domestic chores done early.
Plus I need to pick up my own car from the garage (MOT) at 8.30am.
Then I'll try to get a few bits for the body shell before the weather gets much worse.
Cheers, Paul. |
24th March 2013, 10:28
|
|
Senior Member
|
|
Join Date: Feb 2012
Location: Wembley, London
Posts: 5,056
|
|

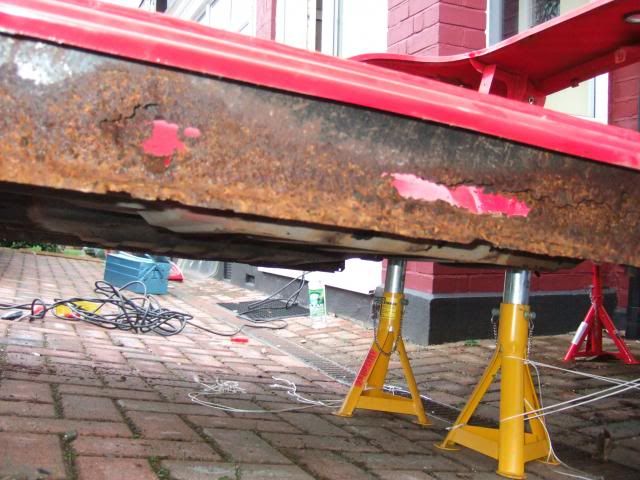
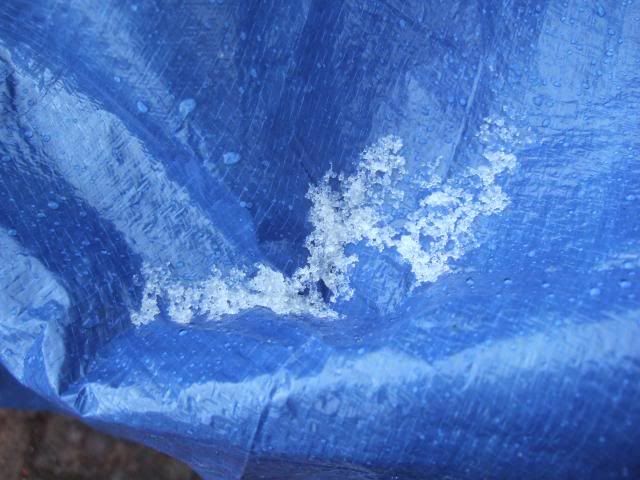
Caught a very short break in the weather this morning.
I had to clean some snow & ice off the tarpaulin before I could remove it & reveal...
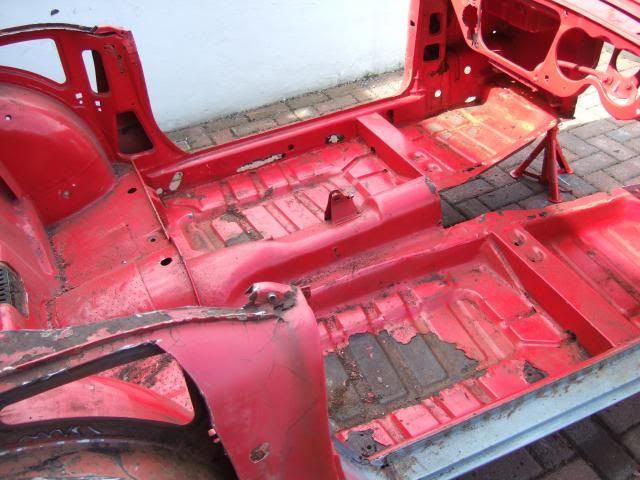
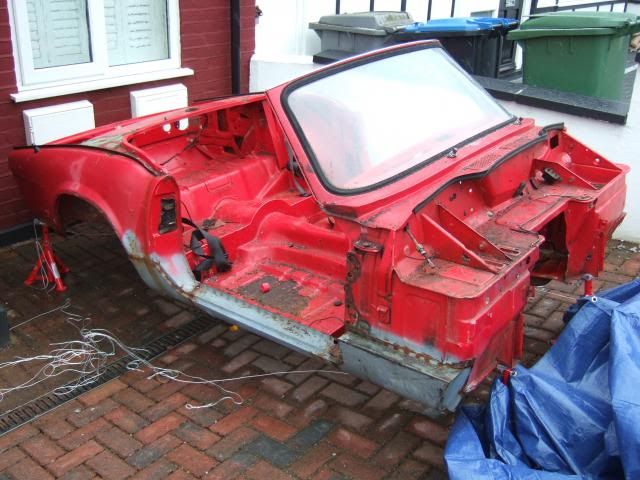 Body Shell Investigation:
I wanted to assess the state of the body shell in two sections:
- The back end behind the cockpit, as that still remains the main reason for buying the whole shell.
- The rest of the body work to see whether it is worth repairing & using for the "fast" build approach.
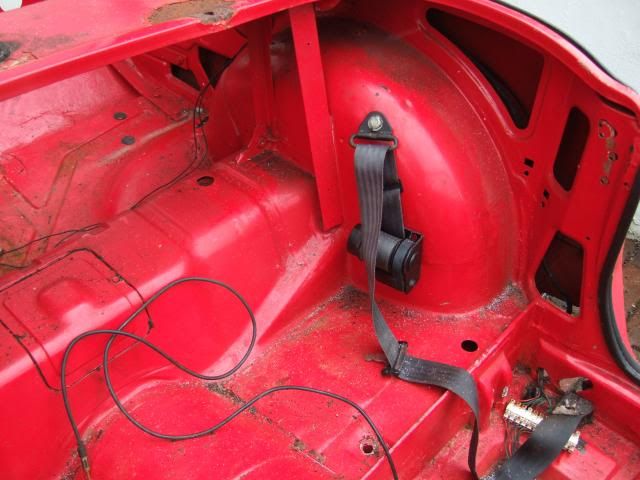
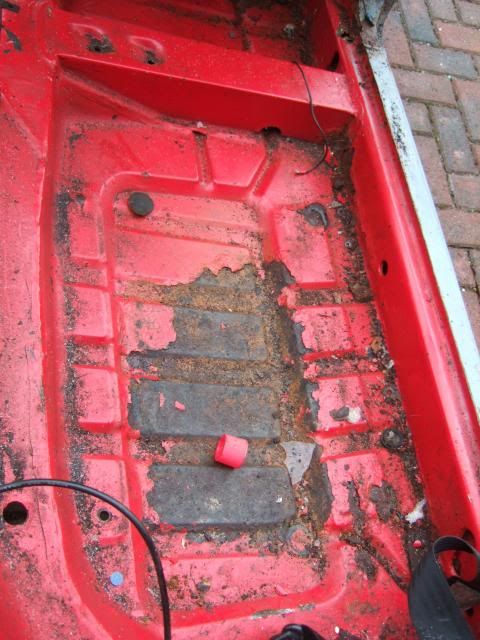
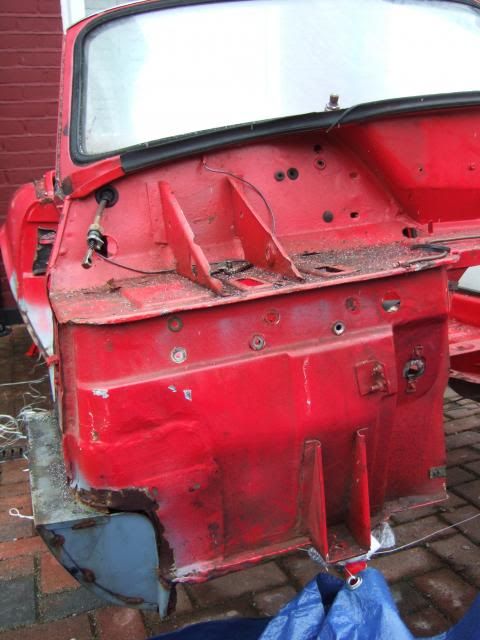
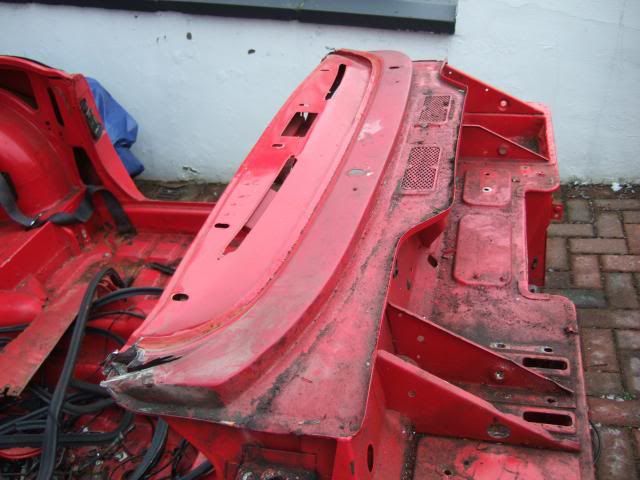
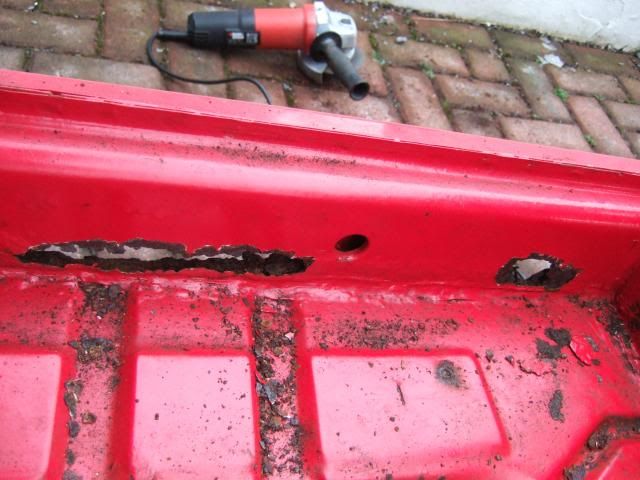
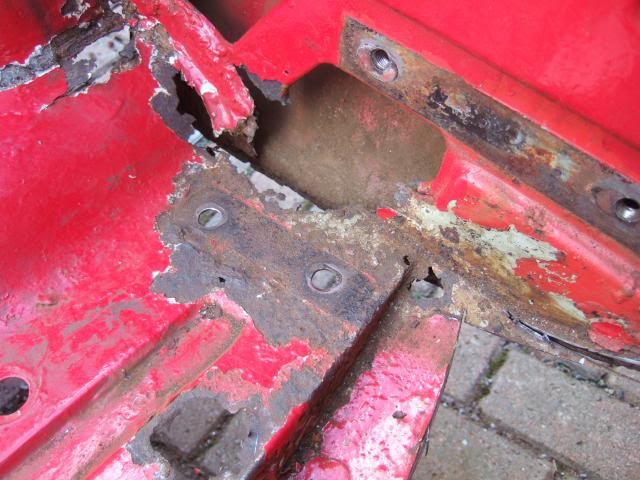
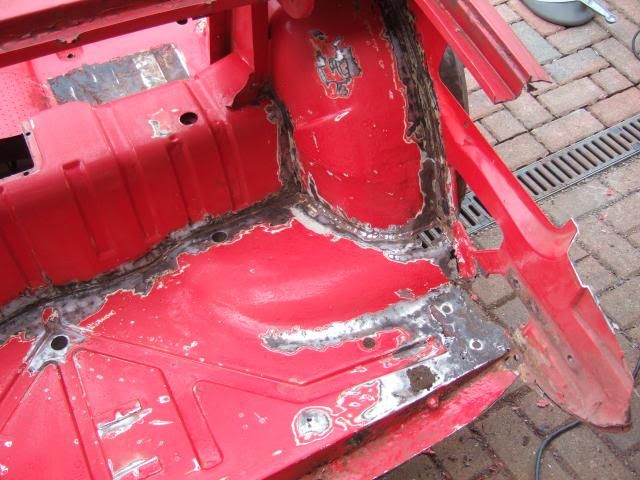
Rear Section:
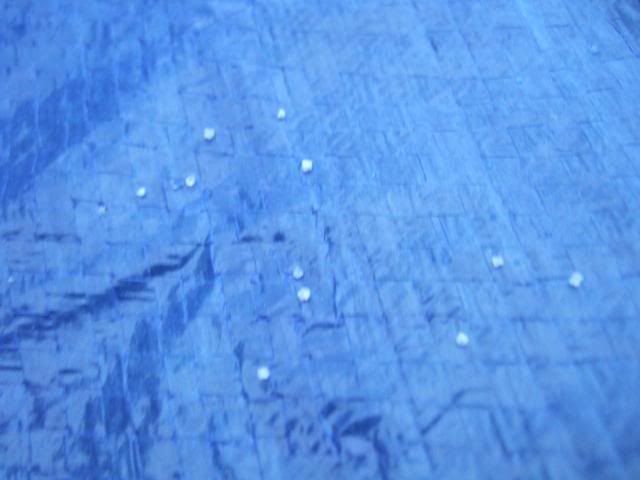
There are three holes rusted through in the boot floor that will need to be sorted out.
Although I need to take some measurements first as I might need to cut here anyway.
( The rear of the Cordite body shell is shorter that the Spitfire. )
Driver's side - Left of white circle (just some rubbish) in photo
Centre section - Below & left of spare wheel mount
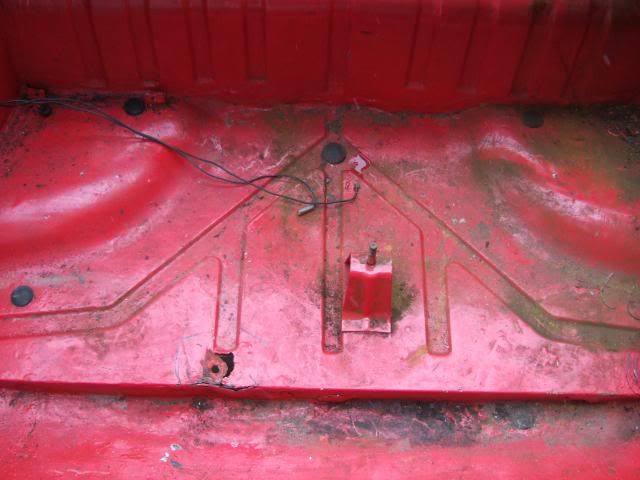
Passenger side - Biggest hole where boot floor joins wheel arch
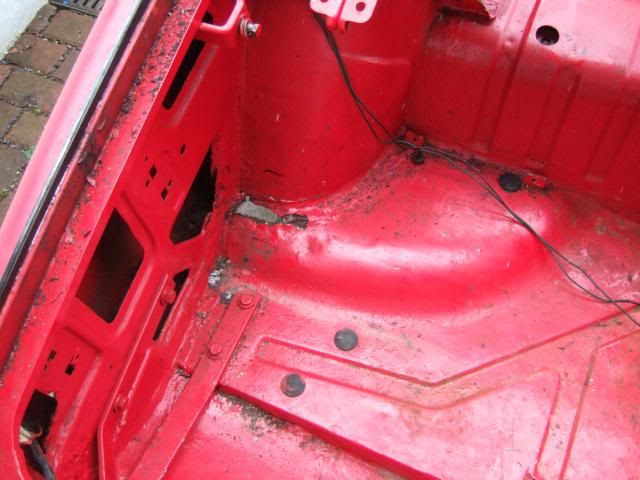
The wheel arches on the cockpit side are in better shape and appear to be pretty solid.
( Including around the seat belt mounting points. )
 Rest of Body Shell:
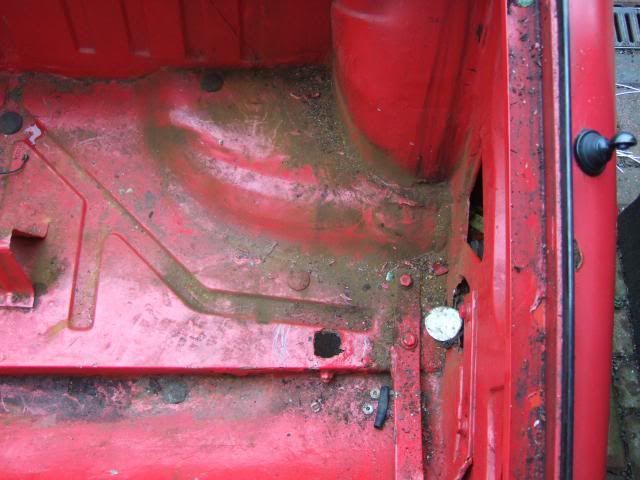
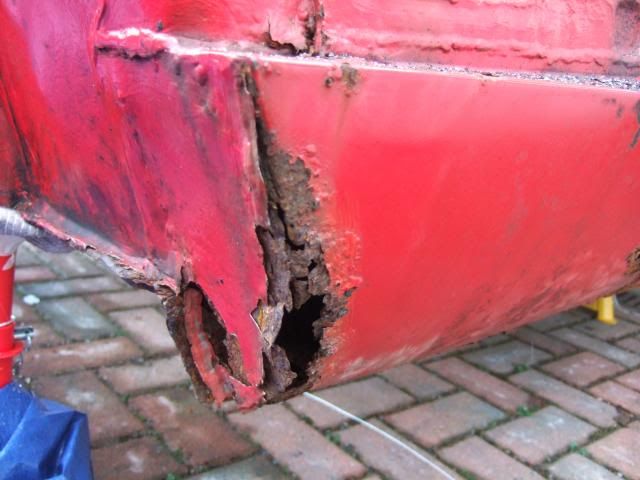
Starting with the "Ugly"…
The passenger side sill panel below & around door cut out area is either missing completely, or rotting.
The "Bad" includes driver's side floor & front foot well which are rusted through in places.
And the new sill on the driver's side looks like it was welded to a rusty panel behind.
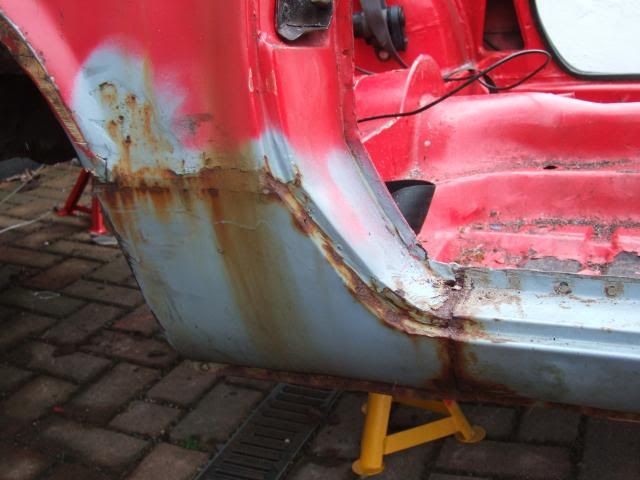
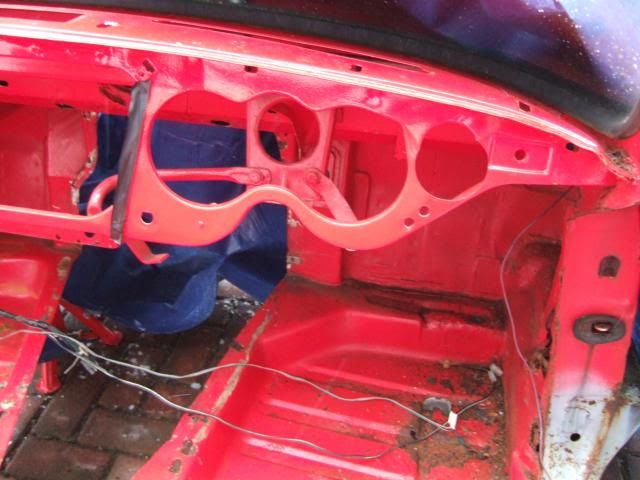
Still, at least the "Good" includes both bulk heads…
And the passenger side floor looks like it is a new panel.
The dash seems intact, but more importantly the steering column mounts are OK.
 Overall
Pretty rusty in places, but at the very least the rear section could be used.
Next Steps:
Remove the windscreen (mainly to reduce the visual impact of the tarpaulin on my neightbours).
Remove all the various bits and pieces left attached to the shell (seat belts, etc.).
Start cleaning up some of the surface rust to see just how bad the worst areas are.
Cut out all the rot, which will at least let me see what I have left to play with.
Quick Question:
What ever I do, I will need to cover a lot of metal with paint.
I saw a bulk tin of this stuff while looking for something else the other day...
http://www.wickes.co.uk/invt/241223/?source=123_75
Could this be used on the body shell, either underneath or "sunny side up"?
Not sure I'm going to get another chance to play outside today.
( I was getting snowed on as I tried to put the tarpaulin back on. )
So until next time, take care, Paul.

|
24th March 2013, 16:30
|
|
Senior Member
|
|
Join Date: Jul 2011
Posts: 5,328
|
|
I went with Tetroseal as it was recommended on a number of classic car forums as being very effective. It's also cheaper than the Wickes stuff if you shop around -
http://www.ebay.co.uk/itm/TETROSEAL-...item4cf9da7fc5 |
24th March 2013, 17:15
|
|
Senior Member
|
|
Join Date: Feb 2012
Location: Wembley, London
Posts: 5,056
|
|
OK, just got in after a brief session outside.
The good news is that is has stopped snowing, the bad news is it is very cold out there.
Body Shell Preparation - Step One:
The first thing I did was remove the last bits of windscreen wiper parts still attached.
Then realised I wasn't going to be cutting any where near here anyway.
( I came back in for a look at the Ribble Navigator photos on here just to double check. )
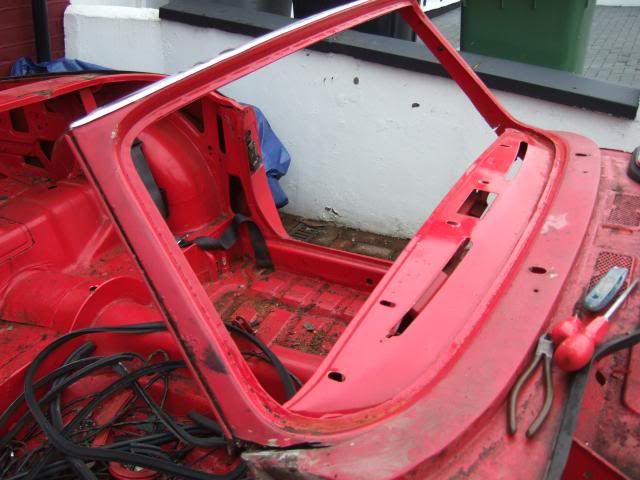
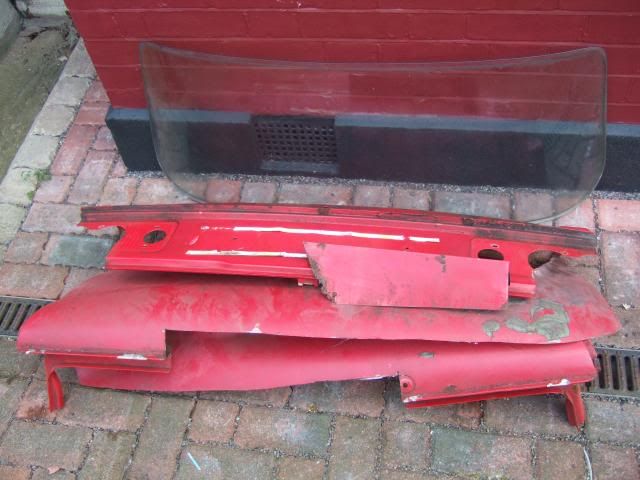
Plan A was to remove the windscreen & the frame around it in one go.
However, I quickly realised it would be easier to see what I was doing without the glass.
So after lots of huffing & puffing I finally managed to pull the inside seal away...

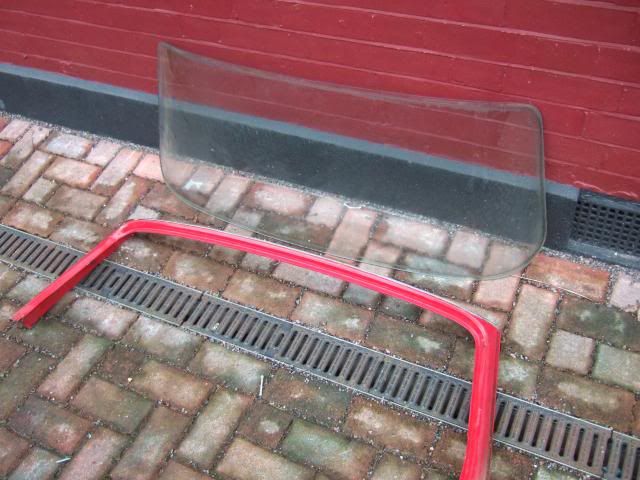
With that gone, the outside seal wasn't much trouble and I was left with this...
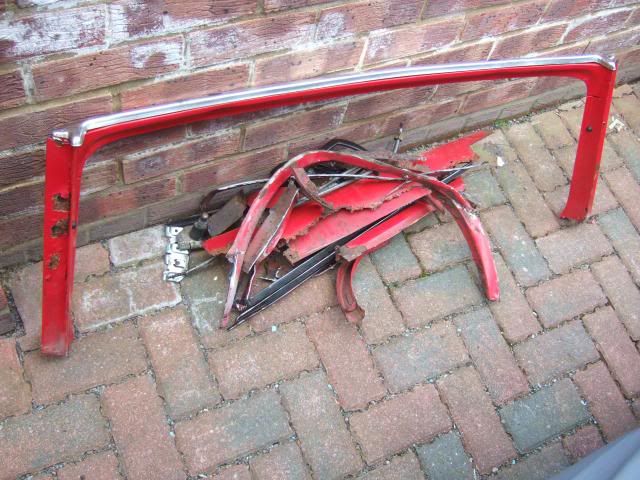
Then it was back with the angle grinder and off with the frame...
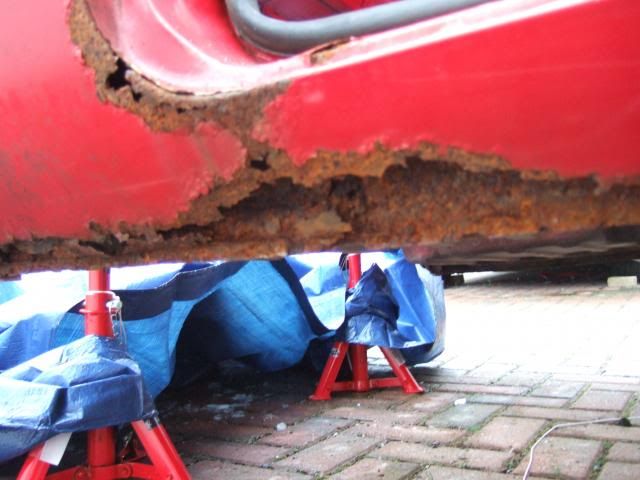
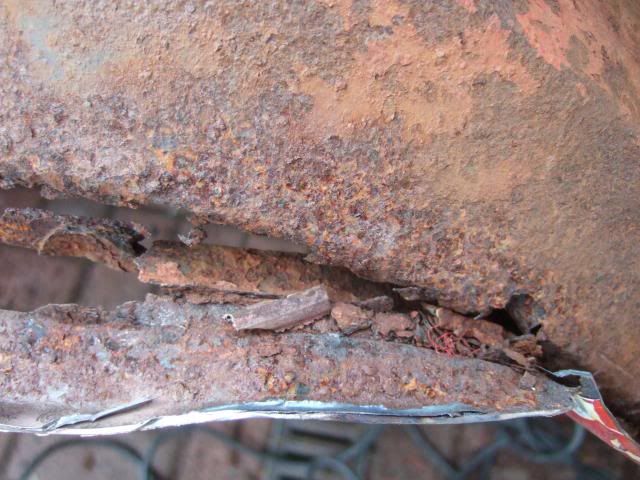
But while I had the angle grinder out, I removed what was left of the passenger side sill.
While that was bad, what it was hiding was worse and the rot along the edge is bad.
This was all pushed out with my fingers and very little effort...
I also went around the shell removing all the bits that had been left behind...
I will take a wire brush on the end of my drill to all the rusty areas to clean them up.
As I need to see just how much good metal there is left to play with before a final decision.
But at this stage it doesn't look too good for the whole shell being used I'm afraid. 
( Using just the rear section like DonnySoutherner is definitely possible)
Looking on the bright side, at least the neighbours have a slightly better view now.
Right, I'm off for a hot shower as despite typing this up, I'm still cold.
Cheers, Paul.
Replies:
Mr T - Thanks for the link.
I was due to look up Tetroseal for the inside of the fibre glass shell.
I just didn't pick up on the fact you could use it any where on the car.
|
26th March 2013, 21:12
|
|
Senior Member
|
|
Join Date: Feb 2012
Location: Wembley, London
Posts: 5,056
|
|
A Complete Kit! 
First of all, a big Thank You! to AndyP57 for these final parts needed to complete my kit.
( Delivery guy dropped them off at 9.20pm, so I guess he is having a long day. )
These items were either missing from my original delivery, or arrived "used" / damaged & needed replacing.
In addition, Andy has been kind enough to include some "extras" to make up for the long delays.
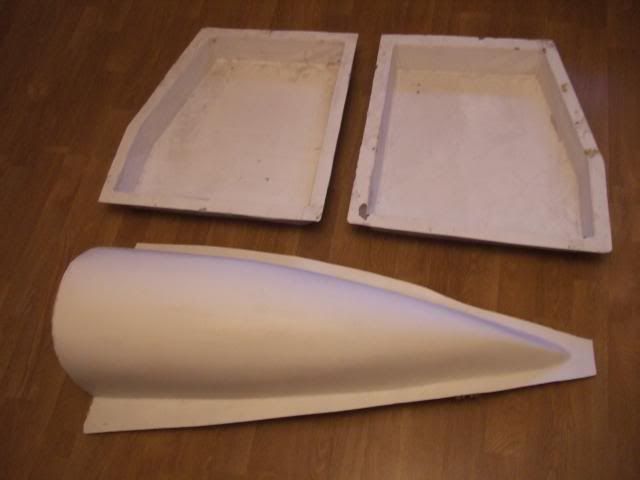
So I now have a new Ribble "independent" hump to fit on the passenger side of my body shell.
I must stress that these problems were not of Andy's making & it was a real shame he inherited them.
( Based on Mikmiglia's post the other day, the situation Andy took over was clearly worst than I thought. )
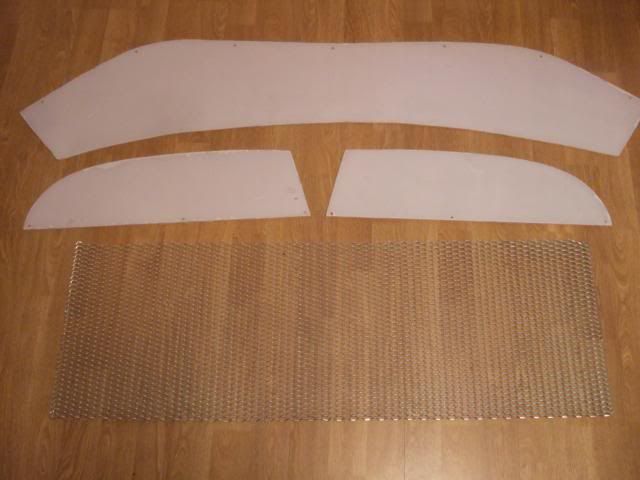
I believe my front foot wells & side screens came from Chap68's car (the 2012 Stoneleigh demonstrator).
All three pieces of perspex arrived with no protective film on them & were chipped / permanently stained.
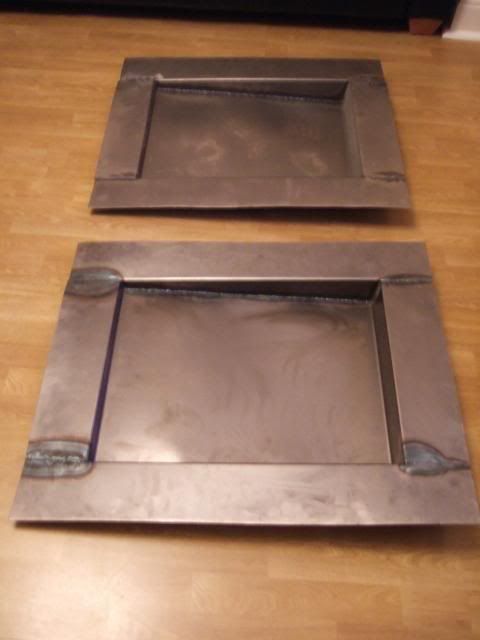
It took over 4 months for my lowered floor pans to arrive (after Andy collected them personally from Poole).
By which time the edges were so warped they didn't sit flush with the frame, so Andy's upgraded these too.
My beer grate grille never arrived at all & has since been discontinued, so I can't have one of those now.
Instead, I have the new Ribble 'diamond wire mesh' style grille which you can just see in one of the photos above.
( Sorry it isn't a very good photo. )
I must confess that the 9 month wait since the initial kit delivery has been pretty soul destroying at times.
Which is why I've always appreciated the messages of help & encouragement I've had on this build thread.
It was this forum's community spirit that drew me to this kit in the first place & you have kept my spirits up.
I figured that RANTING & RAVING about things outside my control would only increase my stress levels.
But now I can simply draw a line under everything associated with the last days of the original Sammio Co.
I know the Cordite's replacement (Navigator) will be a better kit & I wish Andy & "Ribble Kits" all the best.
Frankenstein's Cordite:
Continuing a "Glass Half Full" approach to tackling my build has lead me to consider another build option.
I am sure that the rot in the middle of my Spitfire body shell will get worse when I attack it with a wire brush.
I might be able to save it by adding various lengths of box section to brace / support it, but it’s a long shot.
However, I revisited the "Getting Started" photos on the Ribble website & Mr T's chassis restoration.
And what occurred to me was the possibility of adopting a "semi-fast" build approach for my Cordite…
Use a cut down Spitfire bulk head in place of the front section of internal framework & fibre glass bulk head.
As this area needs the most modification work & this approach would replicate the Spyder/Pilot kit builds.
Then I could use the "rear" internal framework as originally intended with my new metal lowered floor pans.
Finally, I would still be able to use DonnySoutherner's approach of fitting the rear section of Spitfire shell.
With the added benefit of leaving the hand brake panel still connected to this rear section for added strength.
Send your answers to the "What could possibly go wrong?" question on a postcard to the usual address. 
Until next time, take care, Paul.
Replies:
Viatron - That stuff will certainly look good on your car.
|
27th March 2013, 12:13
|
|
Member
|
|
Join Date: Apr 2012
Posts: 45
|
|
Good news Paul, i've also been in the same position as you with the same bits missing.
AndyP57, does this mean my parts will be with me soon?
|
27th March 2013, 12:16
|
|
Senior Member
|
|
Join Date: Dec 2011
Posts: 656
|
|
Yes Craig. All backlogs are being sorted as soon as I can now we're in production phase.
|
27th March 2013, 12:18
|
|
Member
|
|
Join Date: Apr 2012
Posts: 45
|
|
Yey |
28th March 2013, 20:19
|
|
Senior Member
|
|
Join Date: Feb 2012
Location: Wembley, London
Posts: 5,056
|
|
CraigT & AndyP57 - I'm sure everyone will be glad to see the back of the last few "legacy" issues.
At which point, the only way is forward, which has to be good news for Ribble Kits and its new customers.
- - - - - - - - - - - - - - - - - - - - - - - -
Easter Weekend:
I have been given my wife's blessing to spend a big chunk of time on the car over this long weekend.
I really need to make some progress on this rusty body shell, as it is actually sitting in her parking spot!
So I headed outside as soon as I got in from work this evening to start the ball rolling...
Body Shell Preparation:
I started by moving the shell forward a bit with the help of my wife using a trolley jack as I lifted the front.
( I hadn't spotted we'd left the shell too close to our external meter boxes, so their doors couldn't open. )

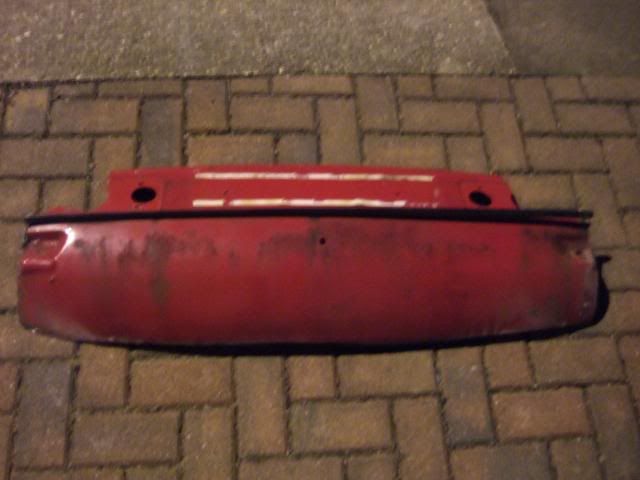
What ever my final build choice, I am going to use the rear section of body work, so that is where I started.
I removed two of the brackets that support the bumper first, I'll do the other two brackets in the morning.
( Both had nuts that wouldn't budge & it will be easier to see what is going on in the day light. )

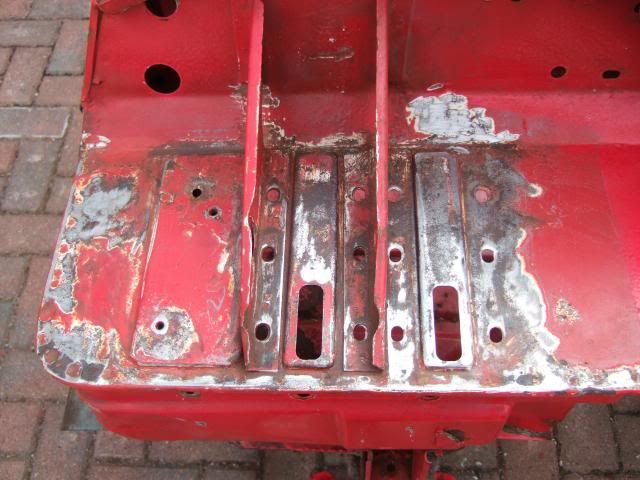
Then I double checked the distance from the silencer mounts to the rear of the Cordite body shell.
( My twin silencers are simply pushed into place at the moment. )
These are the mounting bolts in my original donor, so I can see how much boot floor is actually required.
( Although I will still follow my traditional "it's easier to cut off more, than add some back" approach. )


Again, regardless of which build route I take, I will need to cut out sections from both of the rear wings.
But I want to take a few measurements from both my Cordite & Spitfire shells before I go to town on them.
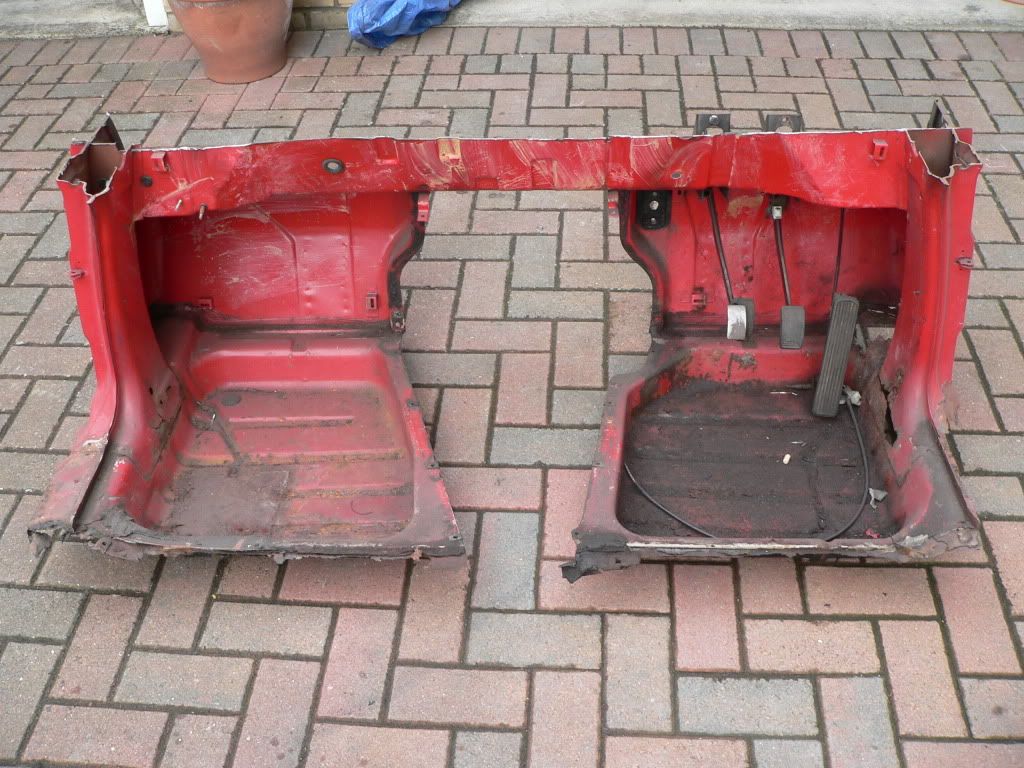
So for now, I decided to remove just enough from both sides to take out the section of boot floor cleanly.
Note the wavy cutting line, shortly after that I got a torch out so I could see what I was doing.
After this I called it a night as I didn't want to disturb the neighbours with my angle grinder too much.
Although I figured they would prefer early Thursday evening to first thing Good Friday morning!
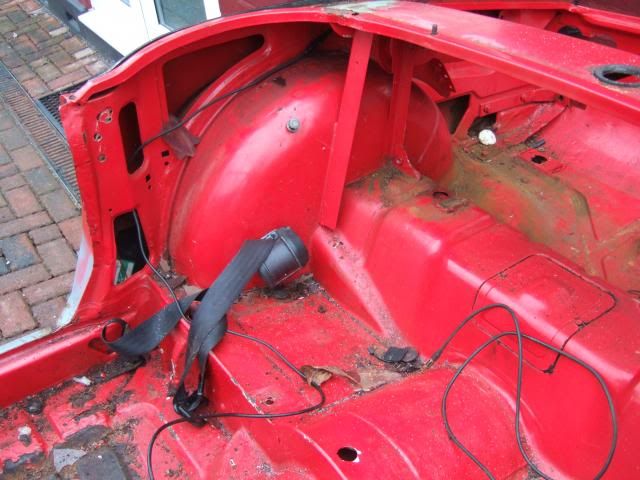
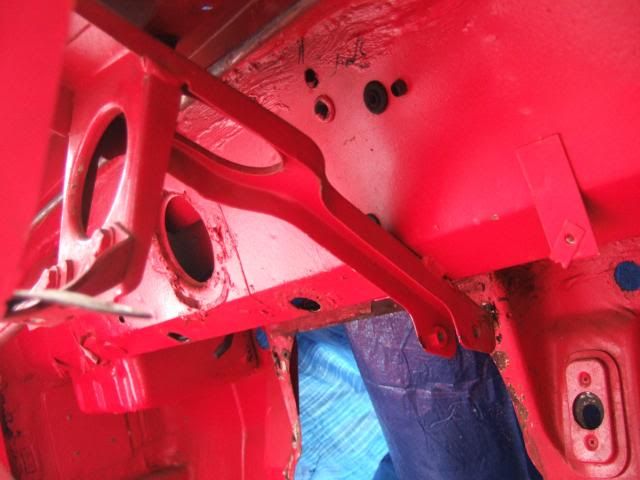
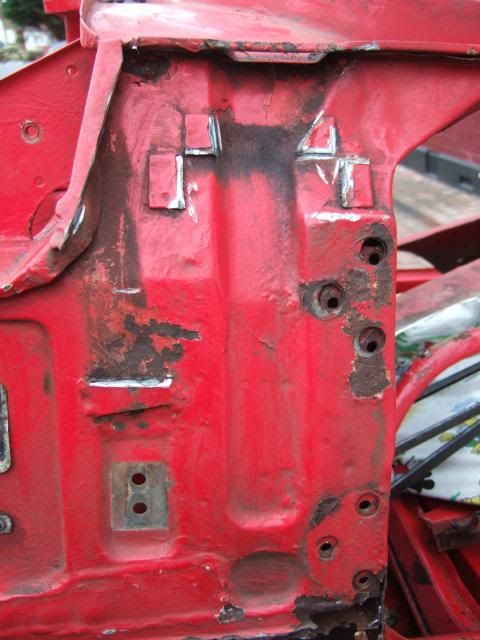
Frankenstein's Cordite - More Thoughts:
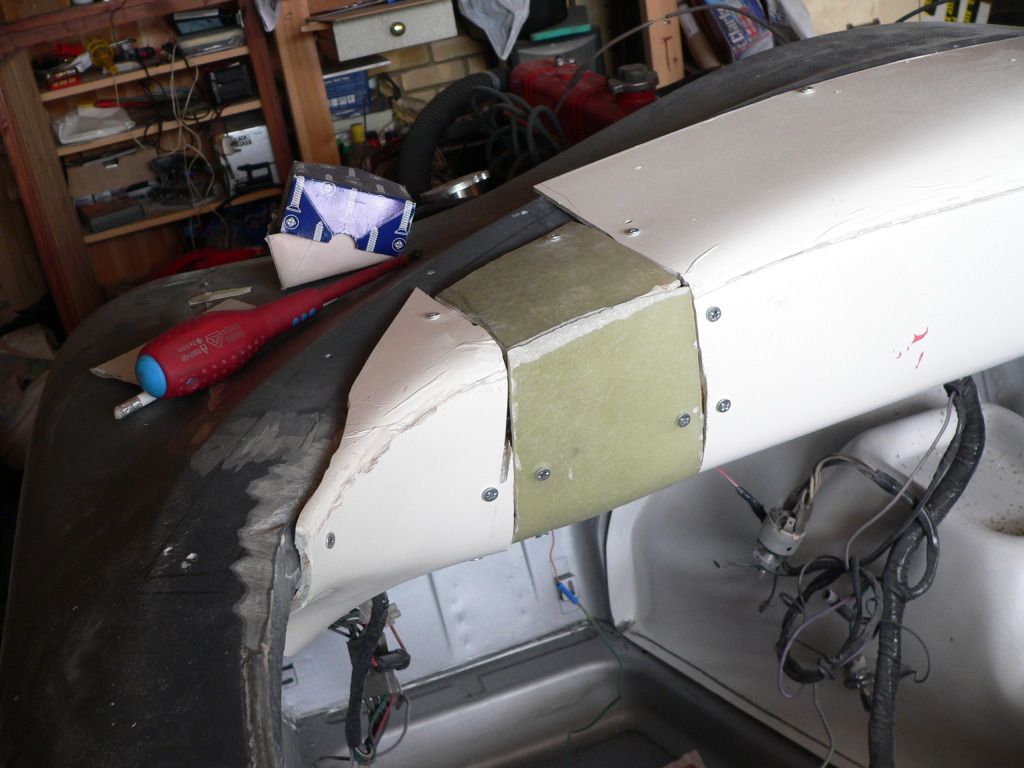
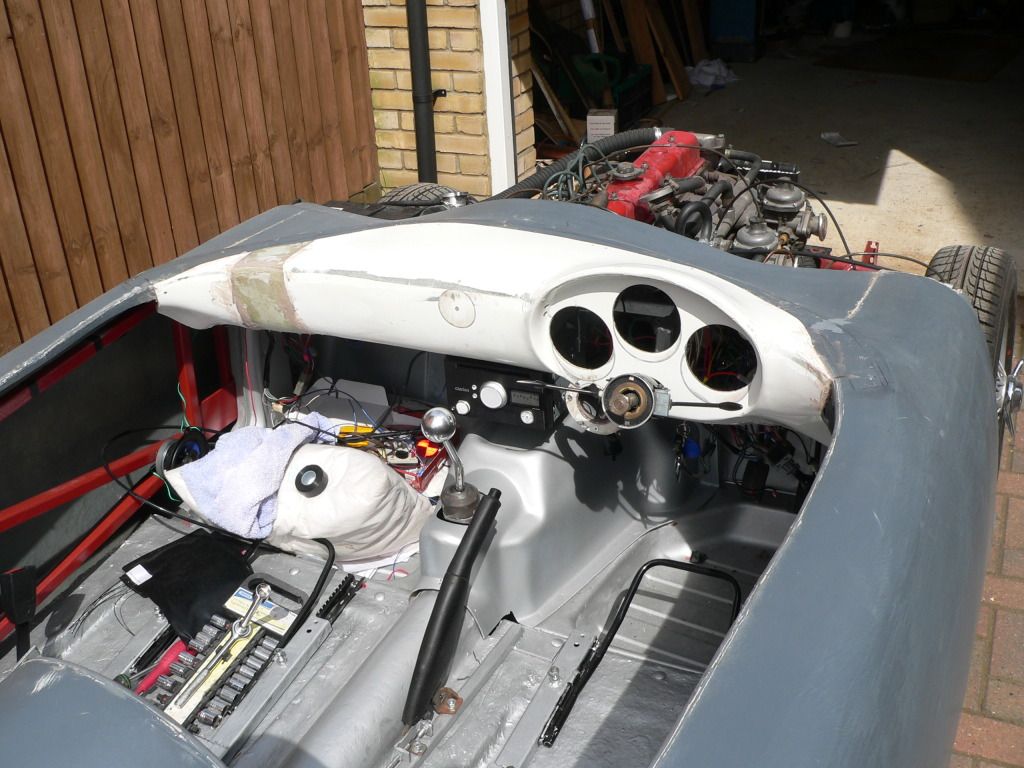
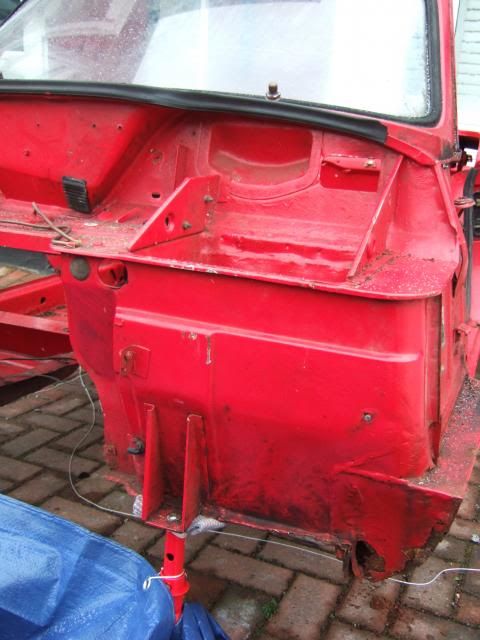
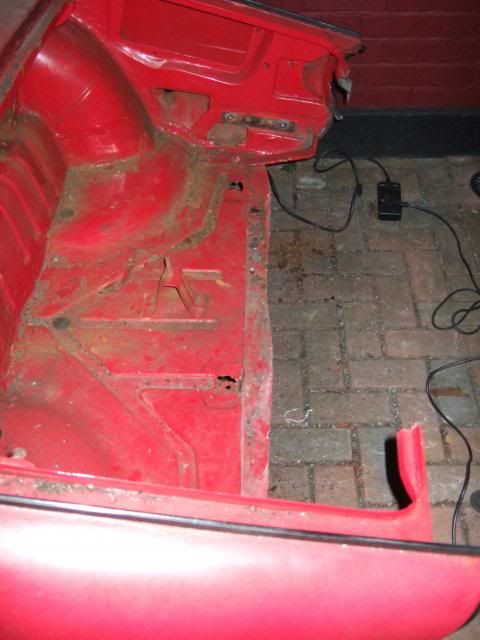
I came across this bulk head photo from Mister Towed's build and this was a big help visually…
( Spooky how we have matching colours and drives! )
If I do go down the Frankenstein route, I'm planning to leave a lot more of the Spifire bulk head in place.
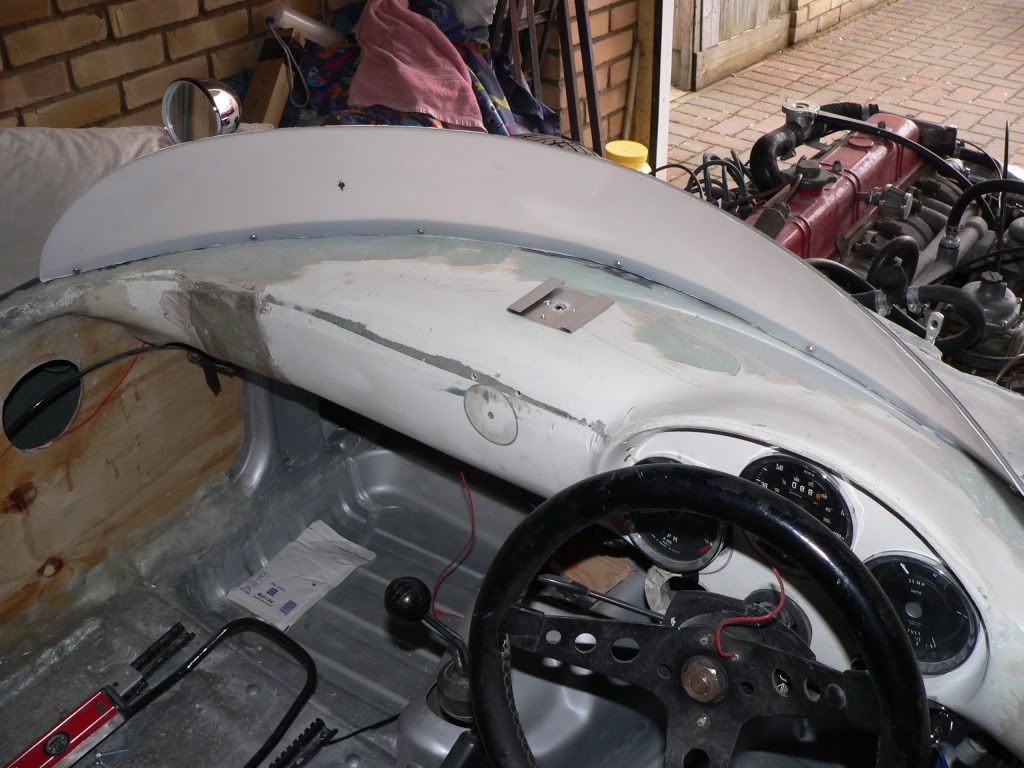
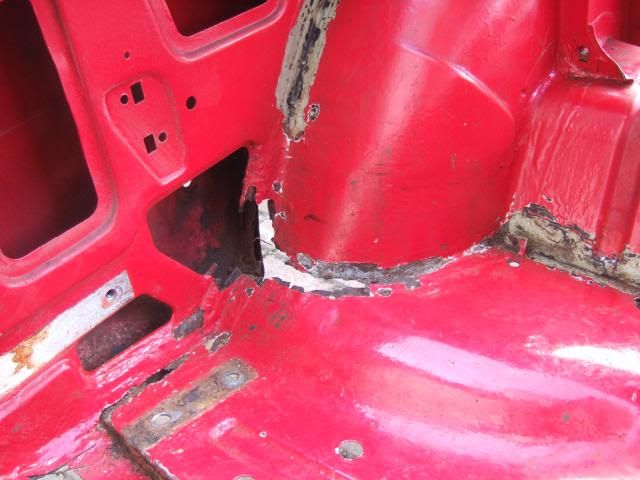
I would include the chassis mounting section before the foot wells (as seen in middle of the photo of my shell below).
Also the top of the bulk head over the dash area, as this is where the steering column mounts are.
From what I know, the Spyder framework bolts to the separate bulk head to hold everything in place.
So that would be something I would need to sort out, but hopefully well within my limited welding abilities.
Overall, I feel happier knowing 2/3rds of this shell could be used, even if the mid-section turns out to be scrap!
Quote of the Week...
... goes to Ian Cheshire, B&Q's Chief Executive, following their lower profits linked to the bad weather.
"…If you are a real optimist, we had the wettest summer for 100 years last year and March has been the
worst for 50 years, so we are clearly on an upward trajectory…"
Hopefully there will be more work to report on tomorrow, cheers, Paul.
PS
Angle grinding in the dark was pretty spectacular in terms of sparks flying everywhere.
|
29th March 2013, 11:29
|
|
Senior Member
|
|
Join Date: Feb 2012
Location: Wembley, London
Posts: 5,056
|
|
Body Shell Preparation - Continued:
I had a chance to make an early start, but didn't want to disturb the peace, so I picked "quiet" jobs.
I started by applying a liberal coating of WD40 to the last 2 rear bumper brackets & the seat belt mounts.
While I left them to soak, I started to clean / degrease the front bulk head area which has stuff caked on.
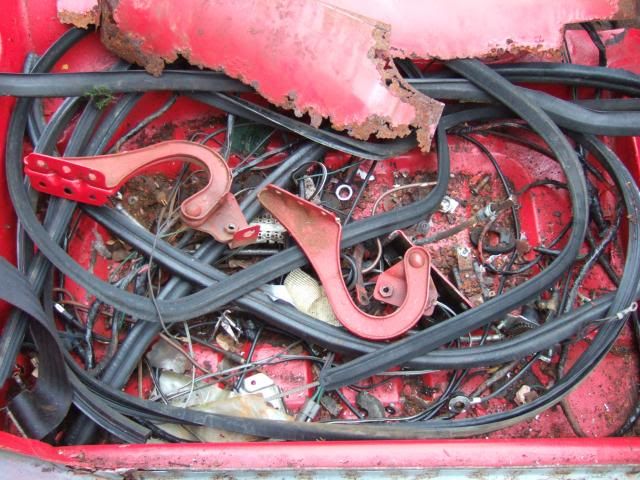
I also removed a few more of the remaining bits & pieces still attached to the shell.
By the time I'd got the bumper brackets & seat belts off the pile of "stuff" in the middle was building up.

I will go thought this later & put any potentially useful bits in a box.
I'll also put the windscreen (wrapped in the dust sheet) & cut out metal in the shed for now.
One seat belt bracket is rusted in completely and the floor it is attached to is coming away too.
So I'll cut that out when I start making noise after lunch.
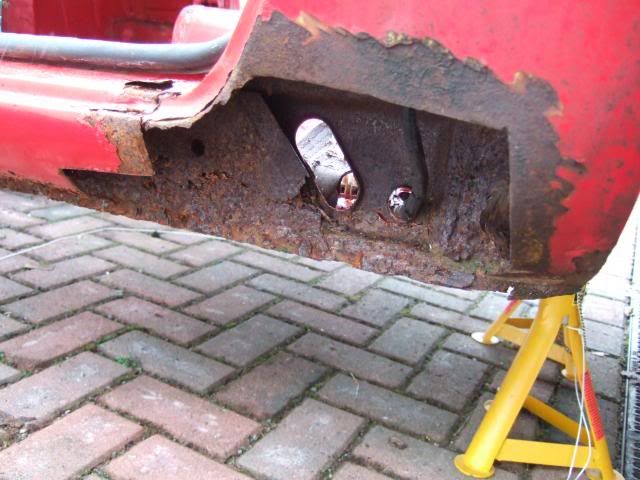
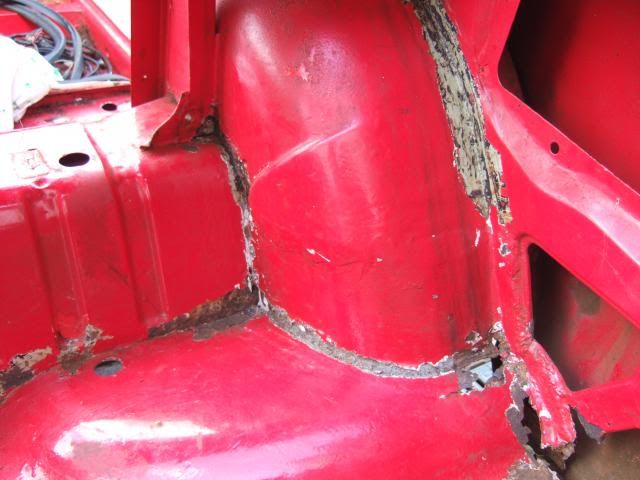
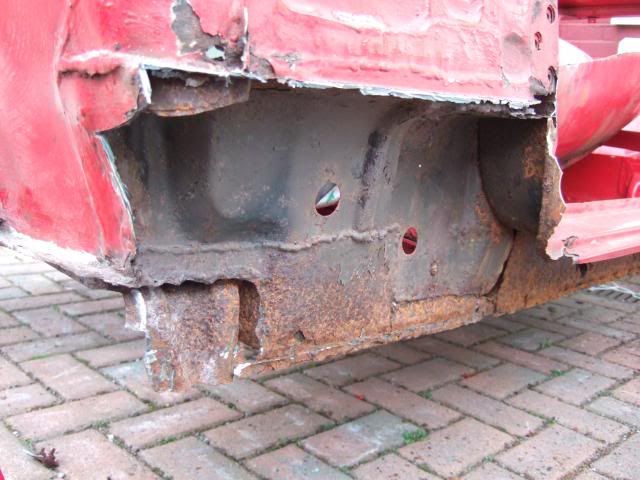
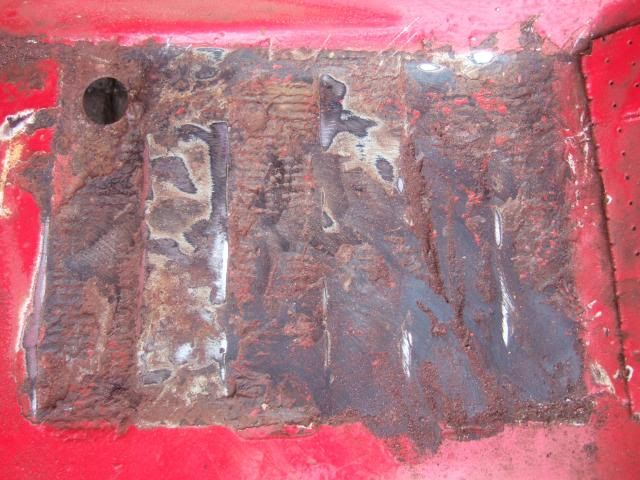
One of the bumper brackets was also pretty stuck in, but did come out eventually.
Unfortunately it revealed another huge rusty area...
Poking around with a screwdriver also revealed a large amount of mastic type sealant.
In some cases this has protected the metal behind, in others it has helped rot the metal.
But the most unusual discovery during my rust removal work was this...
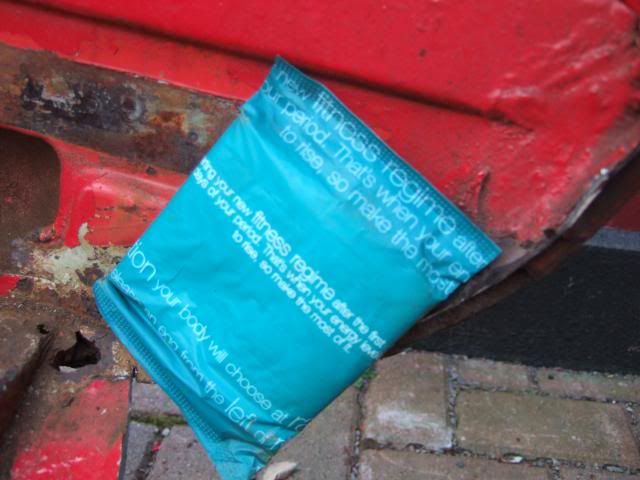
Don't ask me what a sanitary towel was doing jammed inside the rear wing.
Well there doesn't seem to be much to show for my morning's work.
But I will clean up more of the body work this afternoon with a wire brush on my drill.
I just need to warm up a bit.
Cheers, Paul.
|
29th March 2013, 14:49
|
 |
Senior Member
|
|
Join Date: Jan 2012
Location: Poole, Dorset
Posts: 615
|
|
Paul, your 'special find' looks more modern than the 70's so I can safely assume it was not a factory fitment! I know they used wadding covered with plastic as vibration damping...... 
Obviously your car had one careful lady owner......  |
29th March 2013, 17:00
|
|
Senior Member
|
|
Join Date: Jun 2011
Location: birchington, kent
Posts: 1,769
|
|
Could you use it as a kneeling pad?
|
29th March 2013, 18:38
|
|
Senior Member
|
|
Join Date: Feb 2012
Location: Wembley, London
Posts: 5,056
|
|
Body Shell Preparation - Continued:
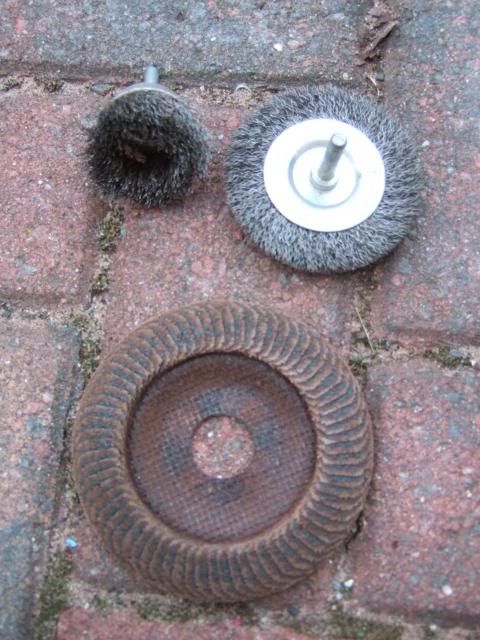
Attempting to tidy up the rust & old paint with various wire brushes in my drill just did not work.
More on that later, instead I measured the distance between the wheel arches on both the Cordite & Spitfire.
The Cordite is around 143cm at its widest point, which makes the Spitfire just a few cm wider.
( Which seems consistent with the "fast build" Navigator photo where the arches are just poking out. )
I did the cutting in stages so I wouldn't cut through anything I wasn't supposed to in error.
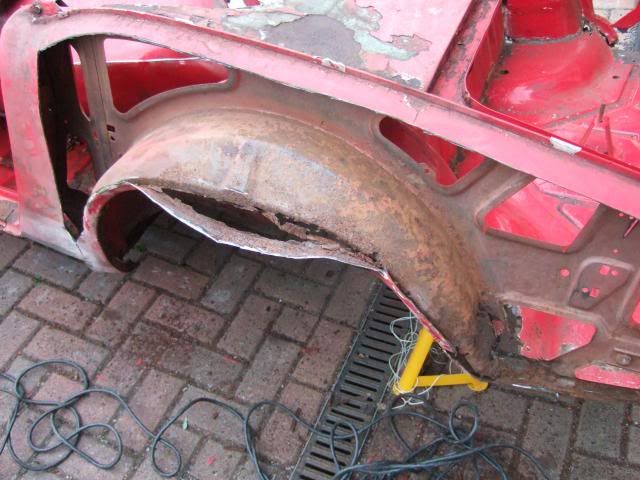
This gave me a much better view of what I was doing & I kept the arches as wide as practical.
Overall, the arches were in pretty good condition behind the wing, passenger side was worst.
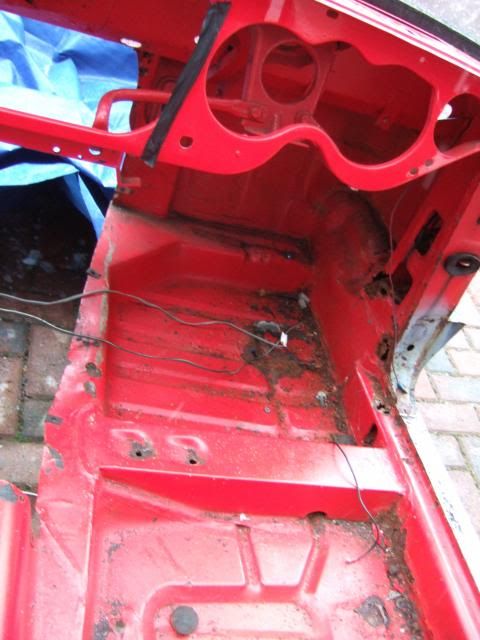
Driver's Side:
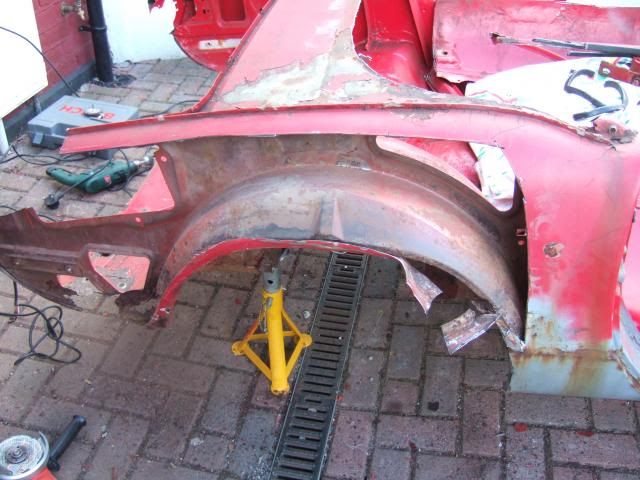


Passenger Side:

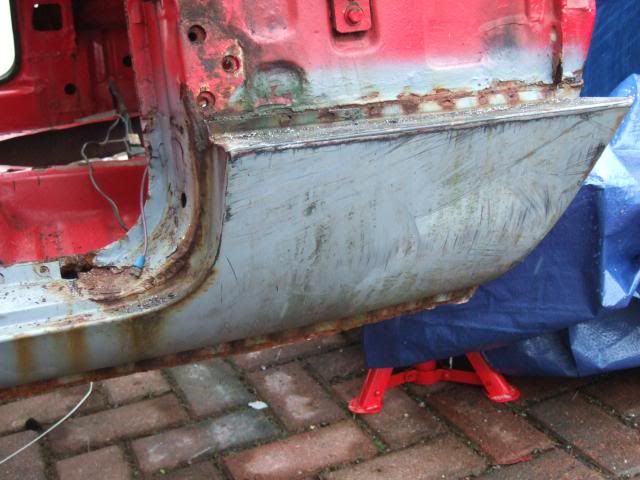
While the angle grinder was out, I tidied up the lower bulk head corner on the passenger side.
The sill was already rotten, so it was better to remove all that was left of it.
I also removed a few of the brackets that I don't need & which seem to be water traps.
I also removed the lip that the soft top poppers are attached to as it was a rusty mess.

So instead of tidying up the pile of stuff in the middle of the car, I'd made it worse!
I then did a quick bit of shopping for some rust treatment & a sanding disc for my grinder.
This was definitely the right tool for the job compared to the wire brushes...
So I went around the boot & some of the other rusty sections to clean them up.
Unfortunately, by this time the light was fading & the weather turning, so I call it a night.
I was just putting the tarpaulin back on when the hail stones started, so good timing.
The plan for tomorrow is to prep both the front & rear sections for some painting.
I know I still have repair work to do, but I want to start treating / protecting the rust ASAP.
Take care, Paul.
Replies
Cheers chaps, it may have had one careful lady owner, but that was definitely a long time ago!
|
30th March 2013, 14:00
|
|
Senior Member
|
|
Join Date: Feb 2012
Location: Wembley, London
Posts: 5,056
|
|
More Body Shell Prep.
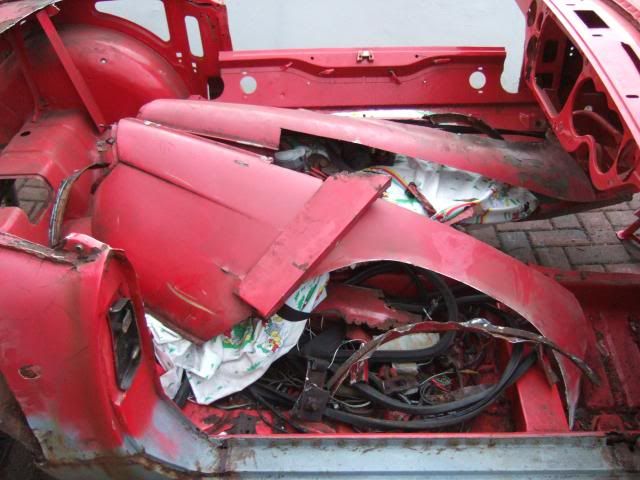
With my self imposed "no power tools before noon" rule, I started the morning tidying up.
So I have my "Hang on to for now pile" (which needs to be carried through the house later)...
My metal recycling pile (council here are very strict on what you can throw away)...
My box of bits that may come in handy later...
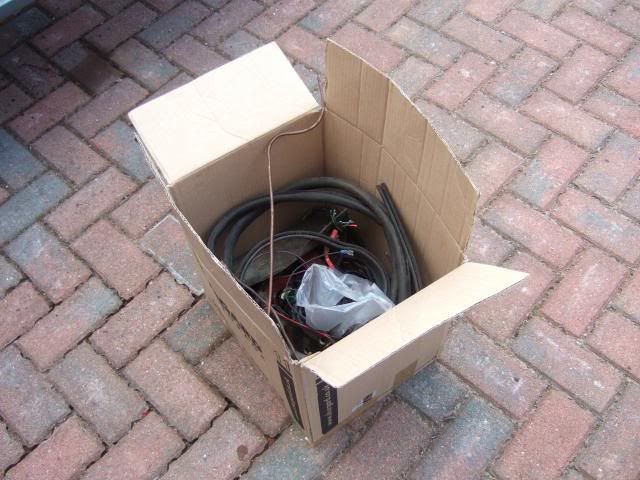
Everything else was swept up & put in the bin, leaving me with a shell I could at least see...
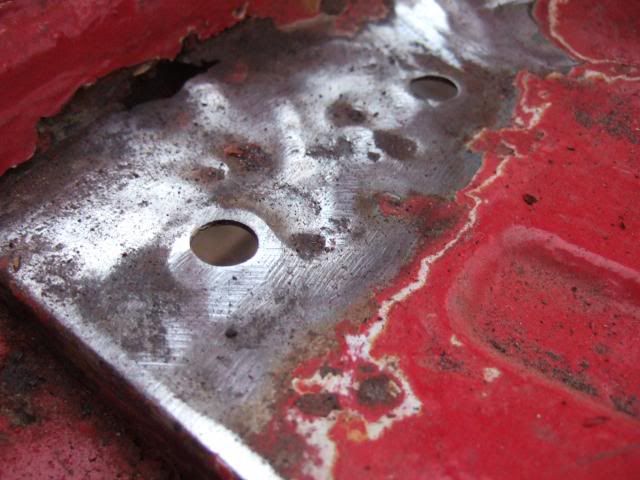
I then continued to clean up the old paint with sandpaper, scraper & screwdriver.
This is what one section of the bulk head looks like now...
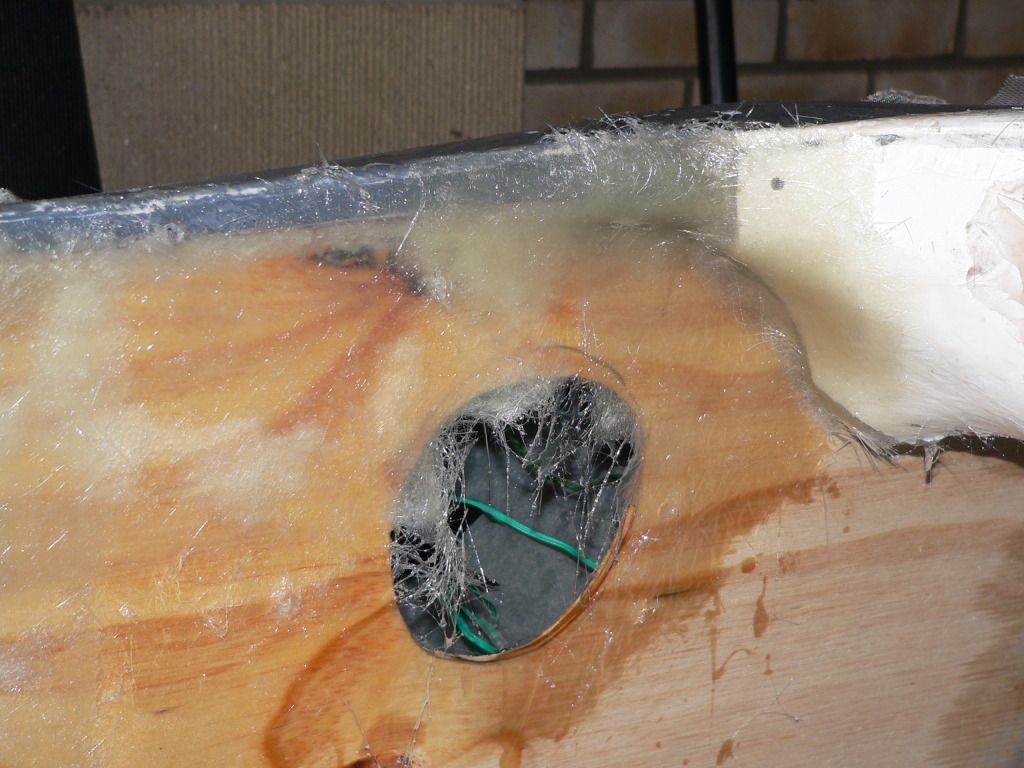
One corner of one of the three "pads" stuck on the shell had lifted...
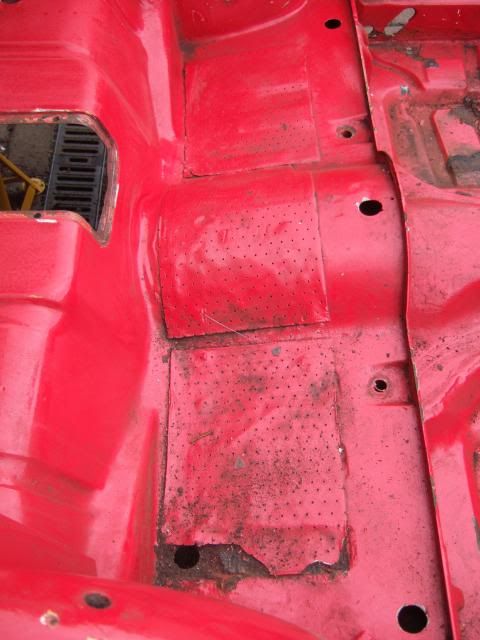
So I thought I should remove the whole thing just to check everything was OK underneath.
A lot of huffing & puffing later I had one pad off by which time I could use my grinder to clean it.
Everything seems sound enough as the sticky goo used to put them in place seems water tight.
So I'm going to leave the other two pads where they are & simply paint over them.
With the grinder out I finished tidying up the first sections that I am going to treat / paint.
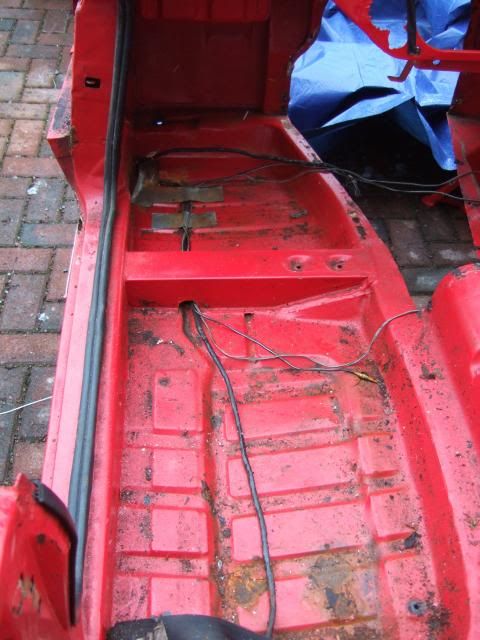
This is the boot area now...

I bought this stuff the other day although I've never used it before.
It seems very easy to use as it looks like milk when you start brushing it on...
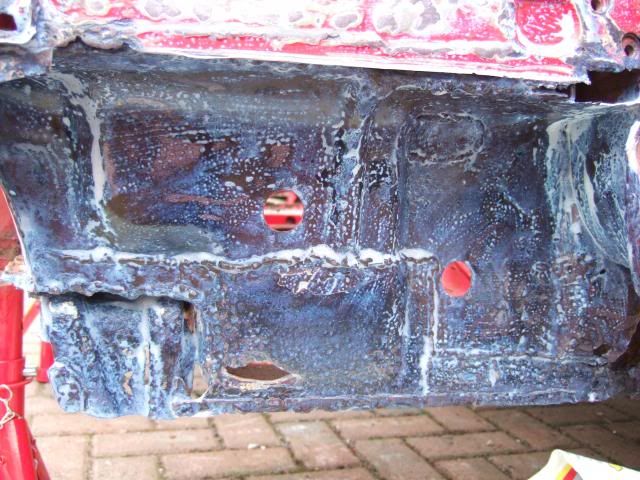
But then turns a blue/black colour when it has started to treat the rust...

While I was waiting for the areas I treated to dry, I started on some of the other areas.
I just brushed on Wickes metal protection paint (see previous link) to tidy things up a bit.
( I know the Tetroseal stuff Mr T recommended was cheaper,
but I couldn't get any delivered in time due to the Bank Holidays. )
Well I have warmed up enough to head back out and see it how the rust treatment it doing.
( It recommends you get a top coat painted over it after 3 hours. )
I hope to have more photos later on this evening, Paul.
|
30th March 2013, 16:16
|
|
Senior Member
|
|
Join Date: Feb 2012
Location: Wembley, London
Posts: 5,056
|
|
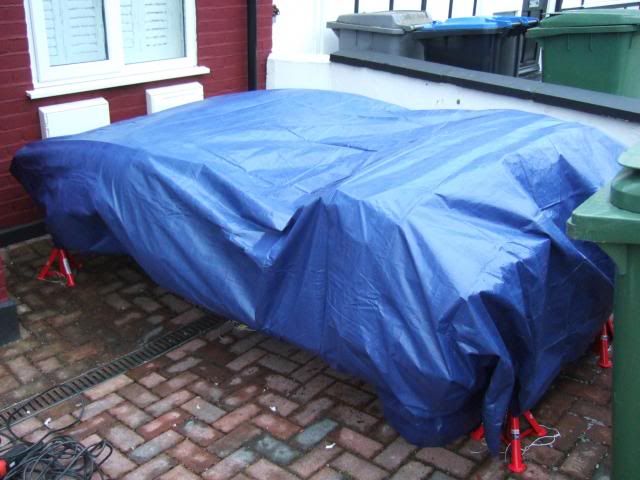
Bloody Weather! 
Just about to start painting when it starts to rain, so I stuck the tarpaulin back on.
Then I quickly carried the "hang on to" pile through the house before they got too wet.
( Dragging wet car parts through the house is never a good idea! )
I then moved the trolley jack & a few other bits from the porch to the summerhouse.
As the porch is currently packed with tools, extension lead, paint tins, etc.
At which point the rain stopped, but it didn't look very promising.
So I did a few other domestic chores while waiting to see how it would go.
Eventually it looked like it was brightening up so I took a chance.
But hedged my bets by only unwrapping a section of the tarpaulin at a time...

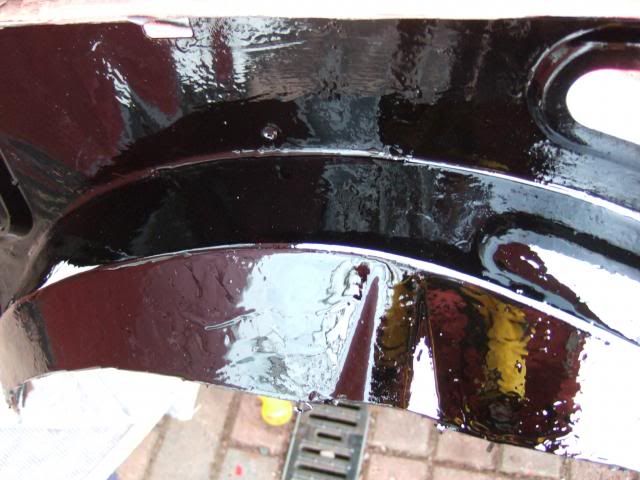
I did manage to paint the inside of the boot.
I also did the lower section of the passenger side bulk head.
( See rust treatment photo above. )
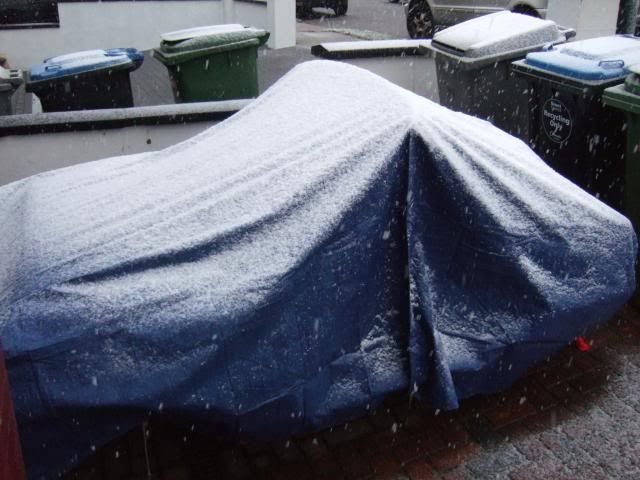
I just about finished the pedal mounting section of bulk head when the sleet arrived!
So the "after" photos will have to wait for another day as they are under this...
We have a family lunch planned for tomorrow, so may not get a chance to do anything.
But hopefully I will get a bit more done on Bank Holiday Monday (weather permitting).
Until then, take care, Paul.
|
|
Currently Active Users Viewing This Thread: 2 (0 members and 2 guests)
|
|
|
 Posting Rules
|
You may not post new threads
You may not post replies
You may not post attachments
You may not edit your posts
HTML code is Off
|
|
|
All times are GMT +0. The time now is 12:25.
|


 Linear Mode

