Are you madabout kit cars      
 "We've Got Kit Cars Covered" Information about Madabout-Kitcars.com Contact Madabout-Kitcars.com         Home of UK kit cars - madabout-kitcars.com Various kit car write ups All the latest kit car news Kit car related and general discussion

Search
Manufacturers
Kit Cars
Kit Car Data sheets
Picture Gallery
SVA Knowledgebase
Clubs & Communities
Build cost estimator
Kit cars for sale
Knowledge Base 
KitcarUSA.com
Classic-Kitcars.com
 

Go Back   Madabout Kitcars Forum > Mad Build Area > Sammio Builds and discussions

Sammio Builds and discussions Sammio bodied car builds and specials

Reply
 
Thread Tools Display Modes
  #1021  
Old 20th June 2014, 17:00
Paul L's Avatar
Paul L Paul L is offline
Senior Member
 
Join Date: Feb 2012
Location: Wembley, London
Posts: 5,056
Paul L is on a distinguished road
Default

Gary, Mr T, Scottie & Dave - Thanks chaps, I'll try to cover your points in the post below.

- - - - - - - - - - - - - - - - - - - - - - - - - - - - - - -

Thinking Time:
I been on sick child duty for most of the day, so whilst I've not worked on the car, I have been thinking about it.

Now whether that is a good, or a bad, thing remains to be seen.

Oddly my thoughts started when Phil9 put this picture of his car up this morning.


It reminded me that those curves across the bonnet / scuttle were one of the things that drew me to the car in the first place.

I guess I had reached the point where I had given up on the idea of making my car look that good.

It is true to say I wouldn't have dreamed of butchering the body work the way I did when I started.

But the cold reality is that the body shell would simply not fit over the bulkhead in its original form.

And the bulkhead is being used to overcome other problems with the Cordite framework and Cordite fibreglass bulkhead.

So the next compromise was that if I wanted the bottom edge of the body work to look OK, the cutting had to start.

I knew that if I changed the bulkhead that I would have to butcher the bonnet to match.

However, I had figured that if I was able to make a simple curved bulkhead / bonnet lip then it would be easier for me to match.

It was actually Micky1mo's "hybrid" that gave me hope that this was possible.

In his case, the bonnet still retains all of the nice curves at the front.


But it all flattens out to a simple bonnet / bulkhead edge at the back.


I will come on to my latest idea for the bulkhead in a minute...

But before I get to that, I have decided to "fix" the passenger side to provide a straight/square line across the bulkhead.

Obviously that is yet more work, but this build is not likely to be finished any time this year, so why compromise now?

Given how much work I have to do on the body shell's bulkhead, why build it wonky to save time?

In my head, the current bonnet shape couldn't work because the body shell wouldn't fit.

But I may have missed a trick when I was trying to solve this "3-D puzzle" yesterday.

Let's go back to these photos...


What I keep missing is the fact that the bonnet lip would actually have been "ahead" of the Spitfire bulkhead.

So if the length of wood can join both sides without fouling, then a thin slice of the entire original bonnet lip could have remained.
( With a thin section of scuttle filling the area to the left of the wood before it reached the bulkhead. )

There is still the problem with the fact that the curves of the body shell dip below the line of the Spitfire bulkhead.

However, it might be possible to "sculpt" the scuttle from that original the bonnet lip back over the Spitfire bulkhead in some way.

Now clearly this is not going to look as good at the original, flowing, shape, but please see point #1, this shape doesn't fit.

So my next experiment will be to see what the current profile of the bonnet looks like if I simply join the two cut ends of the body shell together.

In order to do this I will add a "barrier" layer to the inside of the bonnet and then build up a layer of fibreglass over the top.

This should give me the shape required for the bonnet lip and I will see what I can do with that.

It is certainly worth spending some time looking at the options based on everyone's advice.

Finally I think there will be some sort of "Wembley scoop" required for the brake master cylinder.
( I was actually looking at how Mr T made the scoop in his reply when I was re-reading his build the other day. )

So even if no physical work was done today, I might be making some small progress.

Cheers, Paul.
Reply With Quote
  #1022  
Old 20th June 2014, 19:11
Viatron Viatron is offline
Senior Member
 
Join Date: Apr 2012
Posts: 1,163
Viatron is on a distinguished road
Default

Paul, why not give Andy a call, its as easy to layup just a piece of the body as it is a whole one, if he could do you a deal on just the top third of the scuttle area it might save you some work ?
Reply With Quote
  #1023  
Old 22nd June 2014, 06:56
Paul L's Avatar
Paul L Paul L is offline
Senior Member
 
Join Date: Feb 2012
Location: Wembley, London
Posts: 5,056
Paul L is on a distinguished road
Default

Mac - Thanks for that suggestion, as I didn't think of that option.

- - - - - - - - - - - - - - - - - - - - - - - - - - - - - - -

Saturday:
Most of the day was spent drinking beer in the sunshine at my friends' BBQ.
( Thankfully my wife was driving. )

So although I didn't get a chance to write it up yesterday, I did do some more mock up work.

I started by highlighting a section of scuttle based Mac's idea.


But before I spoke to Andy I wanted to test my theory about the gap in front of the Spitfire bulkhead.

So I needed yet another cardboard template and I used the bonnet itself to generate the pattern.


The bulkhead lip would be lower than this bonnet outline because there of the gap where the bonnet closes.
( Edge of bonnet at top of photo and off cut from original bonnet lip at the bottom of the photo. )


After cutting out the profile I simply taped both ends to the edges of the body shell.


The template did fit in the gap like so.


But when you look at this from the front it is clear that it is too low.


So I tried raising the profile a little, then a lot.


But as I was fixing one area I was messing up another.


At this point I was reminded that the bonnet can't be sitting high above the engine!

So I decided to abandon the template and see what I could do with the bonnet itself.

Unfortunately, this is as close as I can get the bonnet at the moment.


Because I am still waiting to cut these brackets off.


Note:
I have written to the DVLA again trying to get confirmation that these can be treated as "brackets".
This would allow me to remove them and still retain an "unmodified chassis" under the re-body rules.

The best I could do was hold the bonnet in place like so.


Which still left me a few inches short at the back.


However, this was still close enough for me to see what I needed to do to make this work.

The top of the bonnet will pretty much line up with the original Spitfire bonnet line.


Although my crude attempt to use cardboard to show the curve required looks rubbish.


It did give me hope that a gentle curve from the edges of the bonnet to the bonnet centre could be made.

Note: I really have taken on board everyone's feedback about keeping the original bonnet profile.

And I certainly don't wish to appear like I am ignoring the advice given by people with more experience than me.

So I hope I have shown that the practical problems I am facing are leading me to a modified bonnet profile solution.

The other thing that occurred to me was that Micky1mo's "hybrid" was an ex-Ribble project.

This was the body shell that Ribble used to test out a Tribute style build using a cut down Spitfire.


Initially, the fact that the original bonnet profile is retained over the top of the Spitfire bulkhead looks encouraging.

However, I never did see a decent "side on" photo of the way the body shell was sitting.

But as I re-look at the photo above now, I can see the bottom of the bonnet lip is marginally below the top of the bulkhead sill.

Now whilst I don't have that sill in place, you can see that the bottom of my bonnet lip now sits a lot lower than that.


So I believe Ribble abandoned this build approach because the front of the body shell pointed upwards.

( Obviously any feedback from AndyP57, or AndyP85, on this would be most welcome. )

The simple fact is that the shape of the Cordite bulkhead is not compatible with the Spitfire bulkhead so compromise is required.

I have no idea if I can actually do a decent job of building a new scuttle from scratch, but I guess we will soon find out.

With a bit of luck I will get a chance to start on this later today.

Take care, Paul.
Reply With Quote
  #1024  
Old 22nd June 2014, 07:26
Viatron Viatron is offline
Senior Member
 
Join Date: Apr 2012
Posts: 1,163
Viatron is on a distinguished road
Default

Paul, if the front horns are making life miserable why not do what I have done, drill the spot welds out and remove them. If you need an inspection then just re attach them with a couple of self tappers and touch up with a bit of paint, they can then, fall off again after the inspection Another thing that might help is some relatively thin fibreglass sheet, it can be bent easily and with a bit of heat from a heat gun can be formed into quite tight bends ? If you want ill ask Next door to lay up a piece next time hes doing anything, probably get it done for a beer? I would do it myself but the laminating table has disappeared under a pile of junk!
Good Luck
Mac
Reply With Quote
  #1025  
Old 22nd June 2014, 08:35
Scottie22 Scottie22 is offline
Senior Member
 
Join Date: May 2013
Posts: 2,161
Scottie22 is on a distinguished road
Default

Paul, I really feel for you on this one!
What a sod to find out that it won't fit at this stage.

In the picture where you have the cardboard former attached to the bulkhead, and it can plainly be seen that the Spit is too high?

I would be real tempted to cut away the dash top, and do a lot of welding with cross bracing etc, to actually lower it so the body fits. Is that not possible?
Reply With Quote
  #1026  
Old 22nd June 2014, 08:40
a big scary monster a big scary monster is offline
Senior Member
 
Join Date: Apr 2014
Posts: 198
a big scary monster is on a distinguished road
Default

Hi Paul , does your brain hurt? Remember a few posts ago you wrote of a raising panel for your fly screens. Have a Google I think it was an mg TD had a lovely curved bulk head dash top. Now you need to get the bonnet as close as possible to position get a chair and a pencil and pad and sit and stare is it feasable to to meld the cordite bonnet to flow to aero screen fly screen mounds. If you have a trade window manufacturer or upvc ancillary trades supplier nearby they do upvc trim panel many widths and thin and flexible it is ideal to diy Frankenstein gaps like tribute do and costs pennies. Have a productive day. Ed.
Reply With Quote
  #1027  
Old 22nd June 2014, 09:09
Mister Towed's Avatar
Mister Towed Mister Towed is offline
Senior Member
 
Join Date: Jul 2011
Posts: 5,328
Mister Towed is on a distinguished road
Default

Hi Paul, can you just remind me (and yourself?) why you wanted to keep the Spitfire bulkhead? Wasn't it to make it a quicker and easier build?

Is it too late to have a rethink and remove it - maybe Andy or Mike Miglia could do you a deal on a 'glass replacement (there are some similarities in the original designs I believe) or go with Scottie's idea of radically cutting and shutting the bulkhead to fit the body/bonnet?

Just remember the military adage - no plan survives first contact with the enemy - so abandoning your initial idea and coming up with an alternative is sometimes the only way to achieve success.
Reply With Quote
  #1028  
Old 22nd June 2014, 17:12
Scottie22 Scottie22 is offline
Senior Member
 
Join Date: May 2013
Posts: 2,161
Scottie22 is on a distinguished road
Default

You can do it Paul, you have all the skills you need, hack the bulkhead to the shape you need to match the bonnet, and go for it mate!
Reply With Quote
  #1029  
Old 22nd June 2014, 17:37
micky1mo's Avatar
micky1mo micky1mo is offline
Senior Member
Enthusiast
 
Join Date: Dec 2006
Posts: 1,130
micky1mo is on a distinguished road
Default

Hi Paul, you have to remember I used the original Spitfire bonnet edge to line up the original windscreen scuttle.
This was then bonded to the Ribble bonnet giving the extra length .

As I am a wear the original Ribble bonnets are built to long and have to be cut back. Did you cut your bonnet back before or after you decided to use the Spitfire bulkhead?

Right now I have a Spitfire bonnet that's FOC, your welcome to come and cut off the wanted section .
I also have some thin fiberglass sheet which might help.

Swindon, Wiltshire, 10 min from J16,M4.
Reply With Quote
  #1030  
Old 22nd June 2014, 17:38
Paul L's Avatar
Paul L Paul L is offline
Senior Member
 
Join Date: Feb 2012
Location: Wembley, London
Posts: 5,056
Paul L is on a distinguished road
Default

Mac - I'll hang on to those brackets a bit longer, in the vain hope of getting a reply from the DVLA.
Thanks for the heat gun tip, as I saw tlrtone use a thin fibreglass sheet as a basis for his bonnet scoop.
So I might give that a go and see how I get on for now, rather than get professional help.

Scottie - If I chopped the bulkhead down to match the bonnet shape I'd cause other problems.
I would quickly run out of space for the dials, steering, heater hoses, etc. even the fuse box would be in the way.
So I am stuck fixing one problem while causing another problem somewhere else for a bit longer.

Ed - This build has been hurting my brain for a long time now, but this is something else.
I think that uPVC strips may be an ideal way for me to build up some of the shapes I need.

Mr T - Are you sitting comfortably? Then I'll begin...

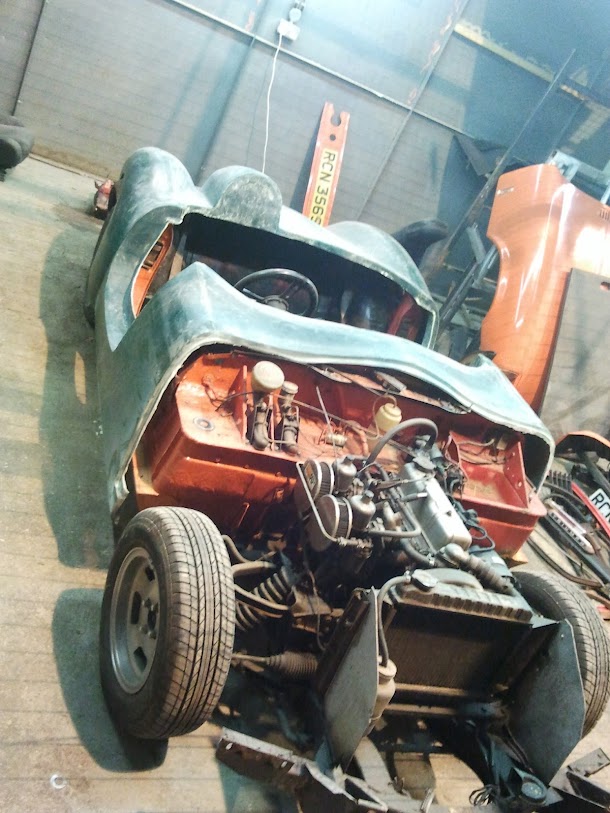
Well my plan for building this kit certainly didn't survive first contact with the Spitfire rolling chassis!
Bizarrely, my decision to use the Spitfire bulkhead actually slowed the build down and made it harder to do.
However, given all the problems I had, I really felt this was the only way I could make the kit work at all.

If you remember AndyP57 effectively shut the Cordite production line down and started again.
The new Navigator model has a different body shell and different internal framework to go with it.

What I should have done is return the whole lot as "not fit for purpose" and got a refund.
But Andy had only just taken over the company this mess wasn't really his fault.
So I decided to support him, keep the kit, and try to build it to the best of my ability.

I would use the faults as an excuse to learn how to weld and work with fibreglass.
Clearly I had no idea just how much work I would be required to sort out all the issues.

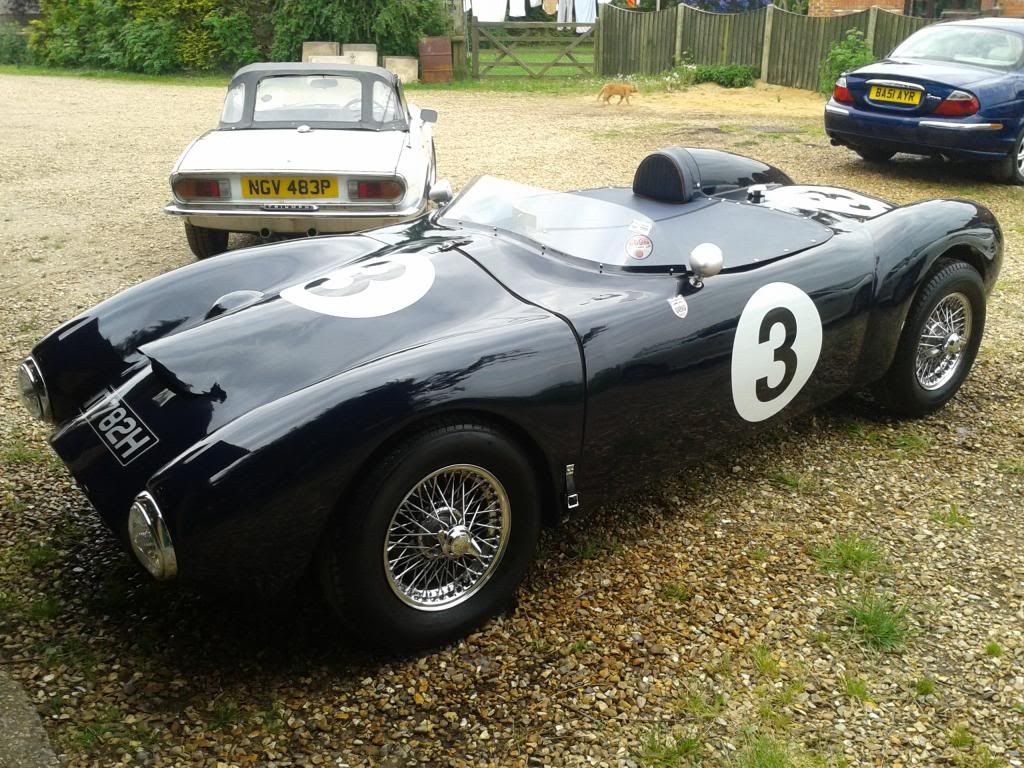
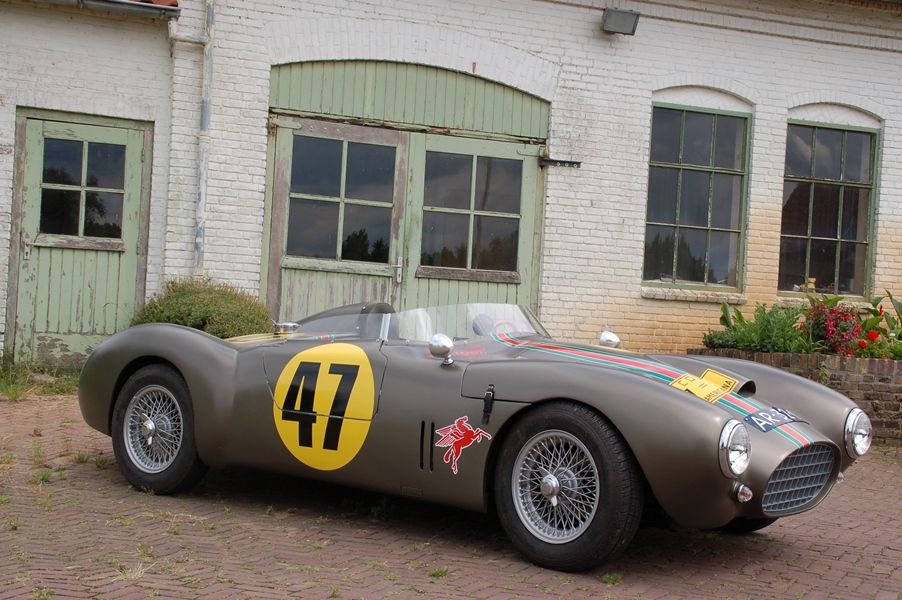
I know that the "revised" lines of my car will not look as good as a "standard" Sammio / Ribble.
But if I can ever reach the point when this car is on the road, I'll live with being the "inbred, hillbilly cousin" of the family.

I certainly hope I am not coming across as someone simply ignoring good advice.
I really do appreciate all the time and effort people have taken to reply to this build thread.

- - - - - - - - - - - - - - - - - - - - - - - - - - - - - - -

A Start...
I dug out my brake pedal.


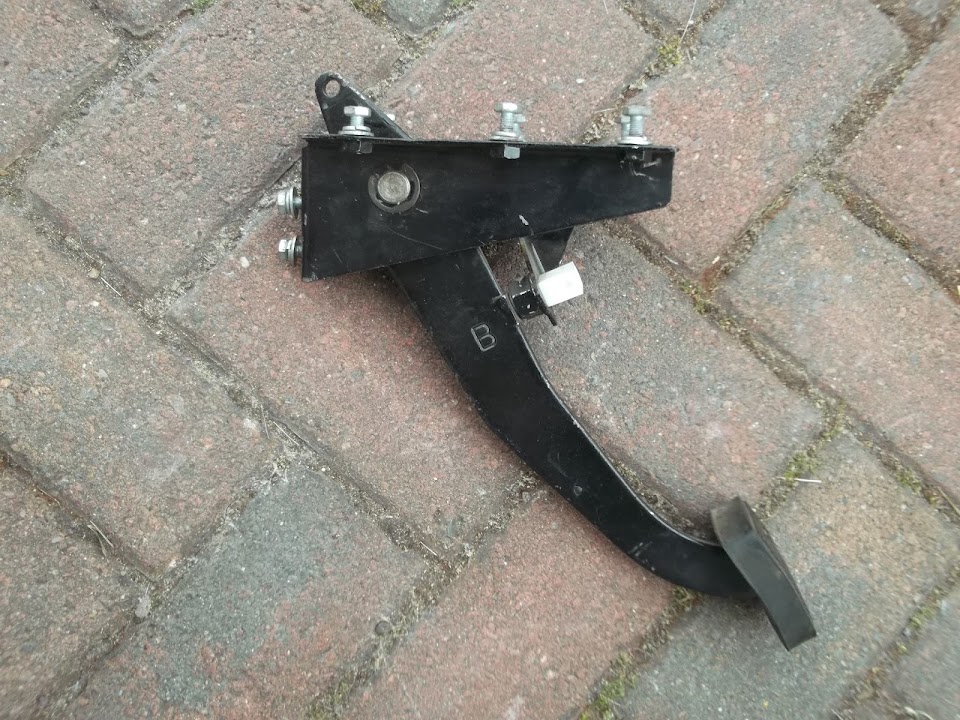
Then bolted the master cylinder to it just so I knew where the top of it would be.


Then I marked up the hardboard template I made the other day using the bulkhead as my reference.


I then realised I could use the "off cut" from that template on this part of the bulkhead.


So I marked that up too, then the two panels were ready to be jigsawed.


After cutting they looked like this.


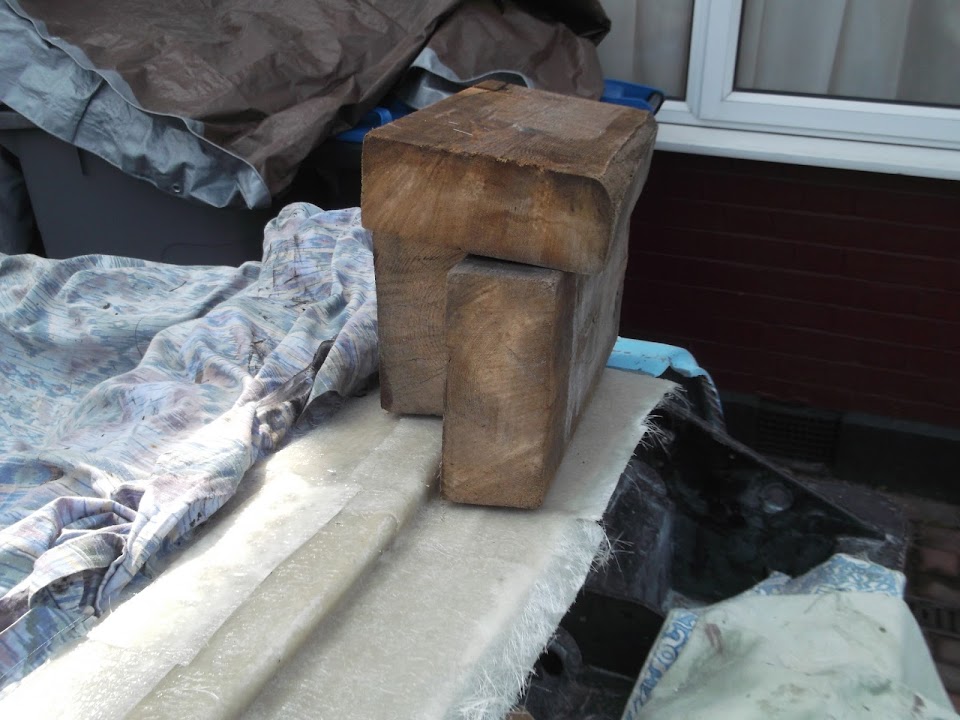
Then after applying some parcel tape & weighing the ends down I was ready.


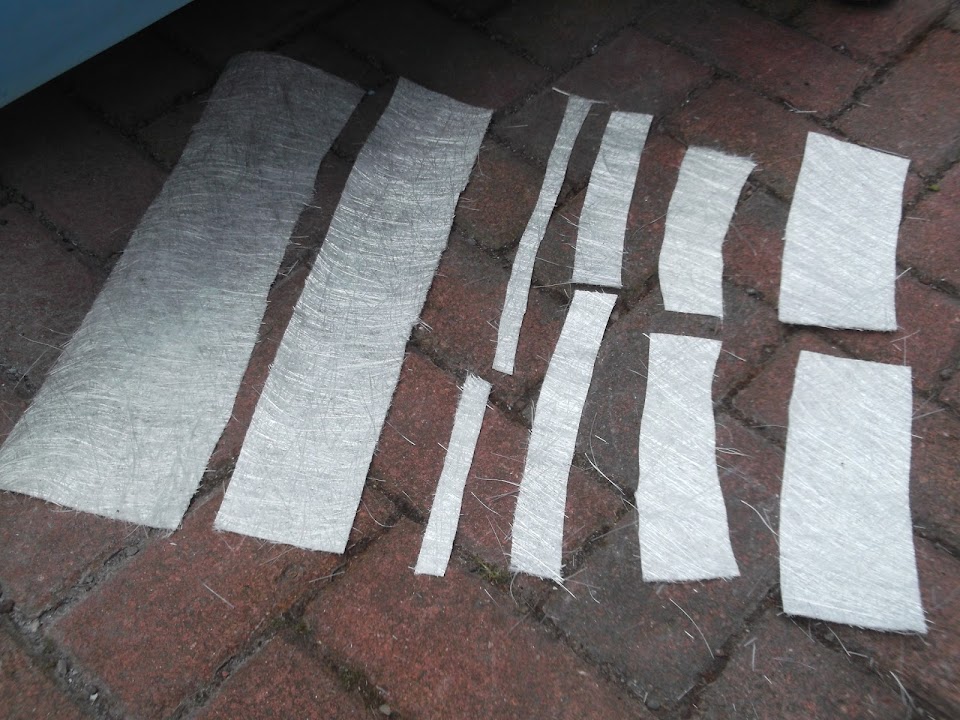
I cut out a selection of matting for the start of the centre section.


After the second round of fibreglass I had this to show for my efforts.


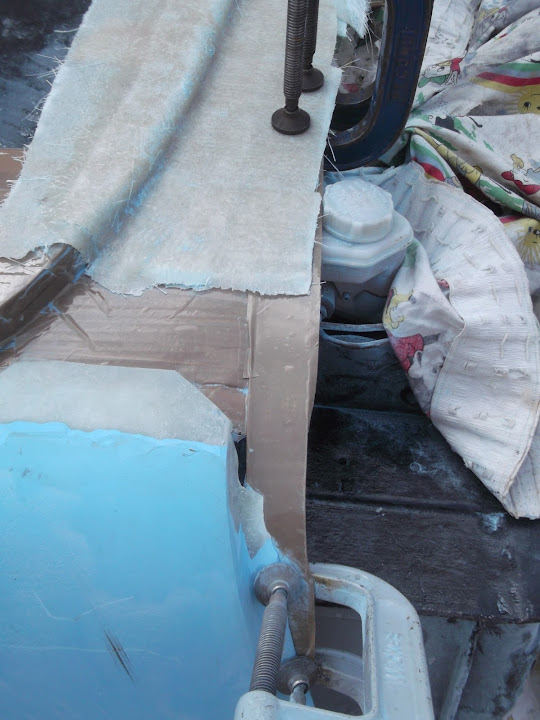
Once that was set I added an off cut of hard board to the top of the master cylinder.


This should ensure that the body shell clears this with ease.

Then I was able to weigh down the ends of the body shell like so.


So that the hardboard was pinned down by the top edges.


Note: I needed to do a bit more trimming of the body shell "lip" so the hardboard could pass through.

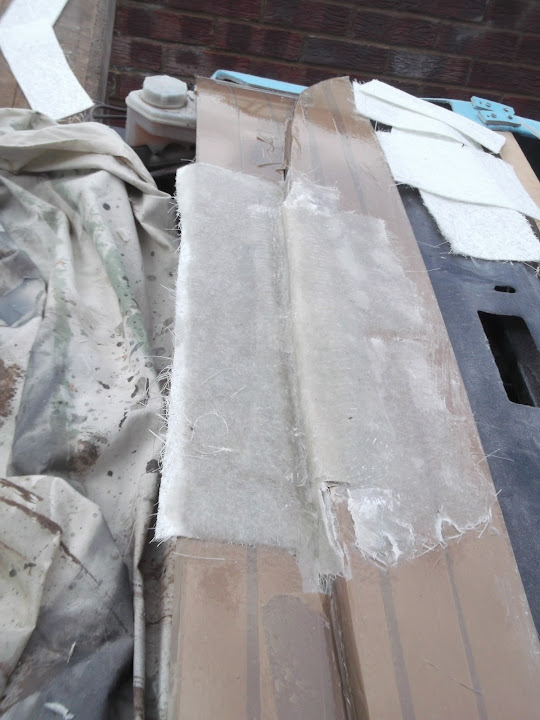
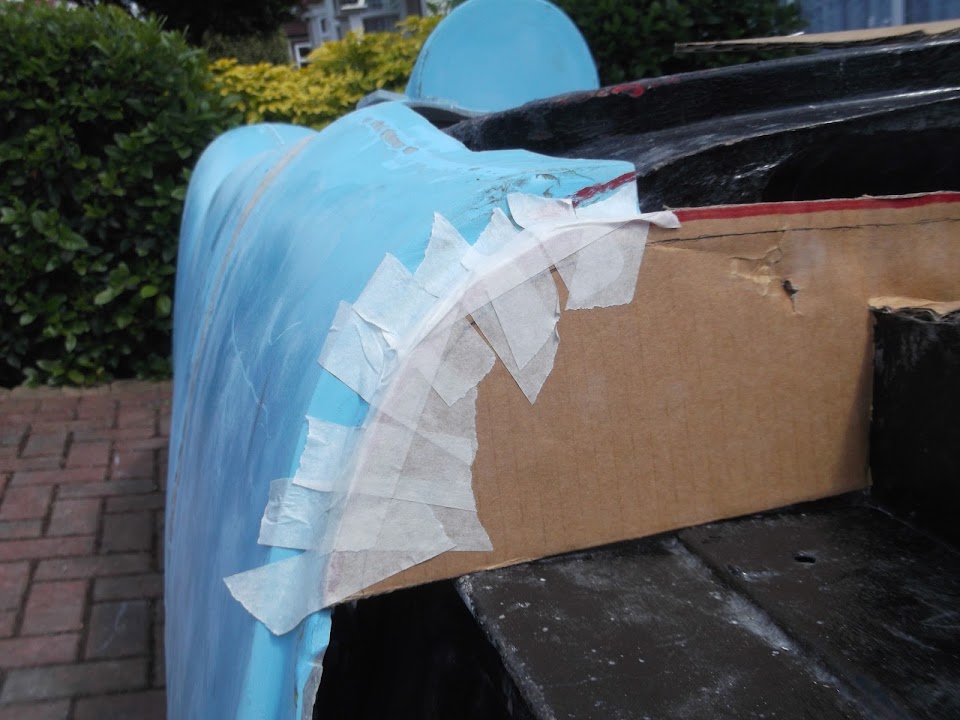
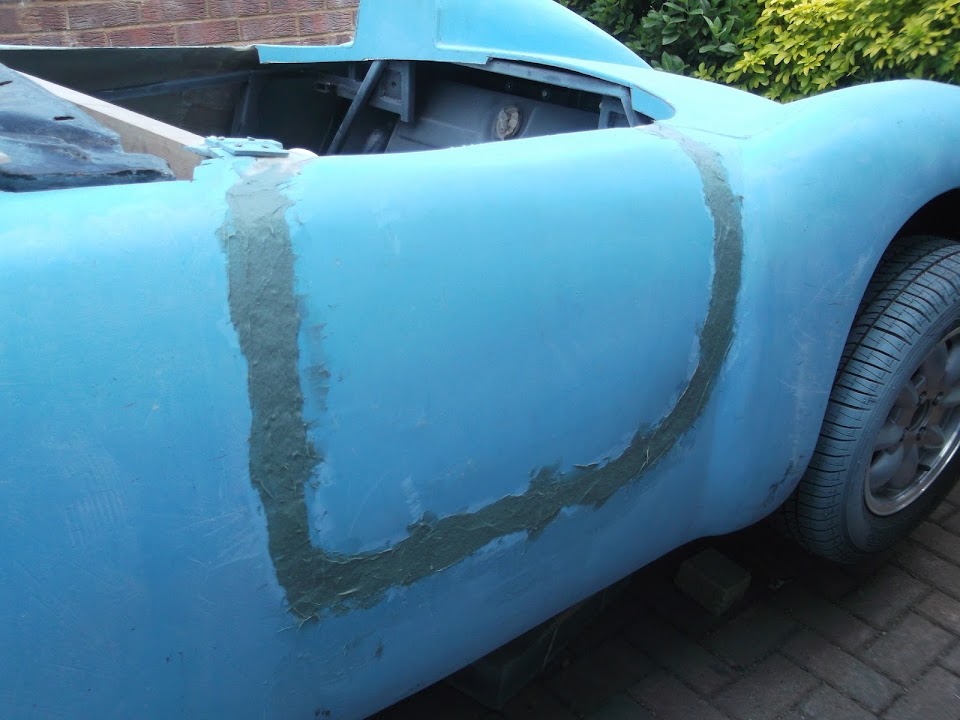
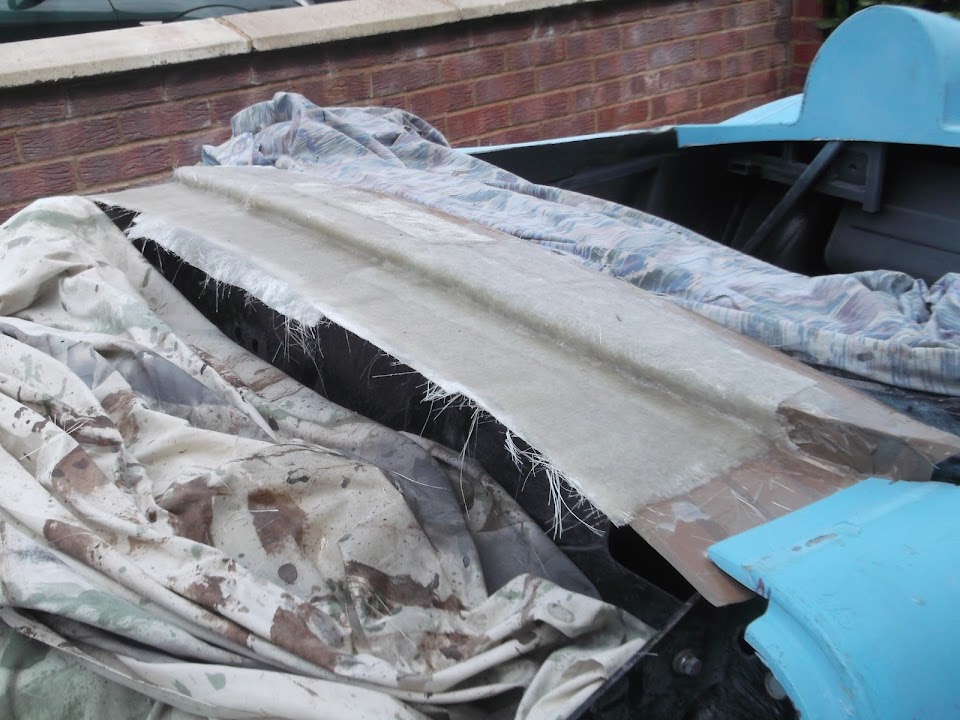
After a couple of layers of matting had been added I was left with this.


Now it has taken me a long time to get my head around how this will work.

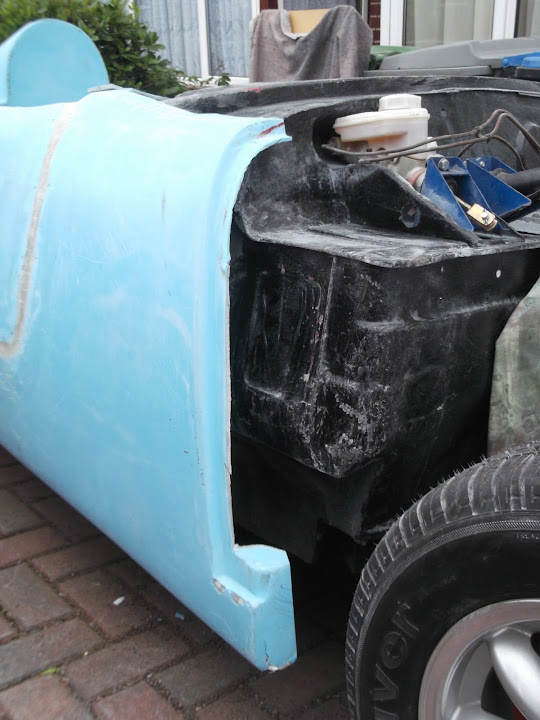
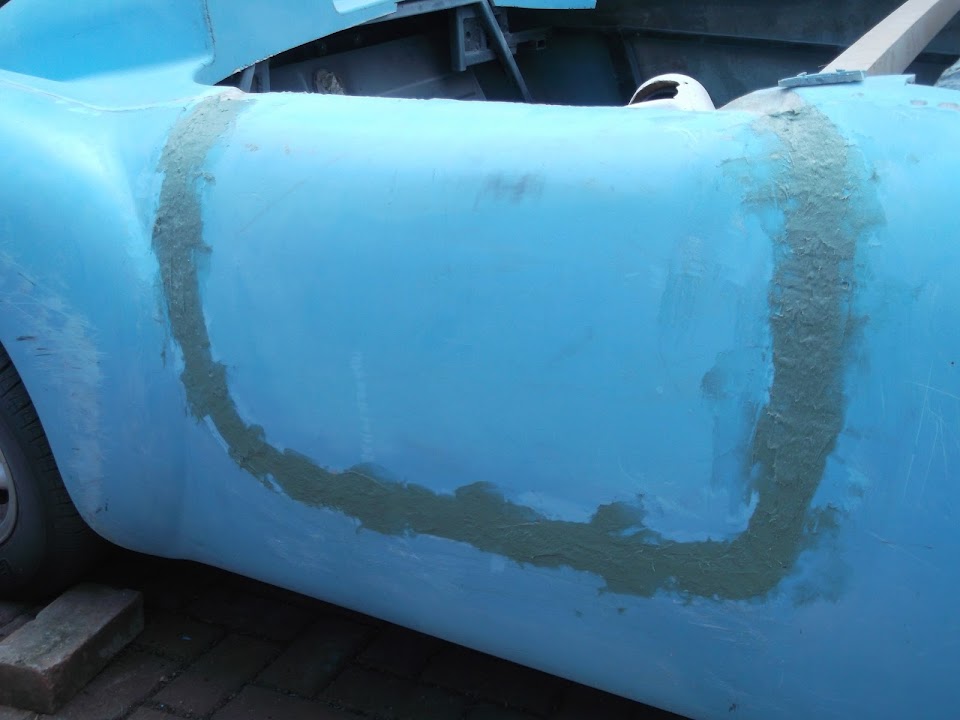
But the piece you see above is both the bonnet lip and a body shell locating edge.

When the hardboard is removed I will be left with something that fits on top of the Spitfire bulkhead.

This will be the "unseen" bottom surface of the scuttle, regardless of the final shape on the top surface.

Note:
I can't join the two sides of the body shell to this new piece until the hardboard is removed.

But I will be adding some more matting over the top before I worry about doing that bit.

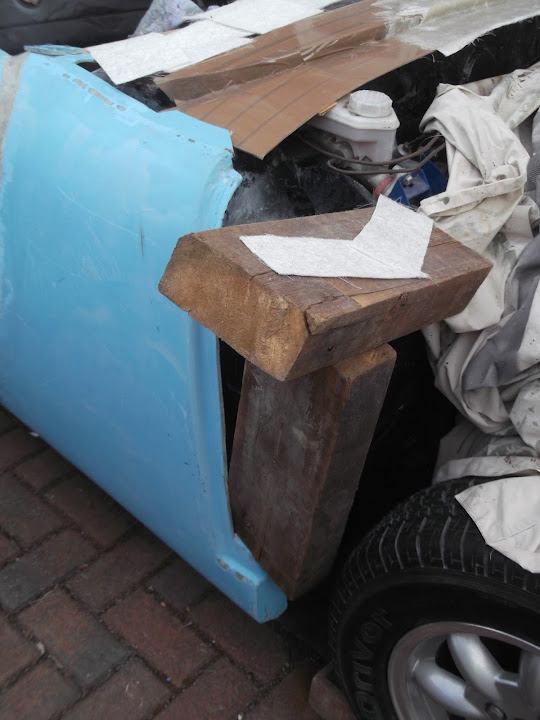
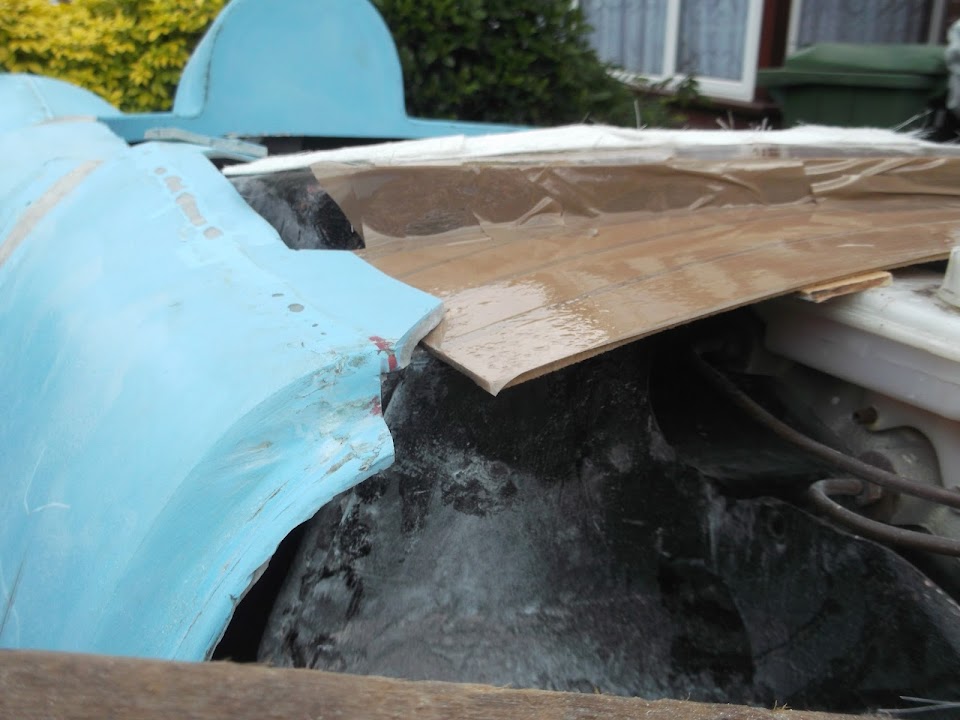
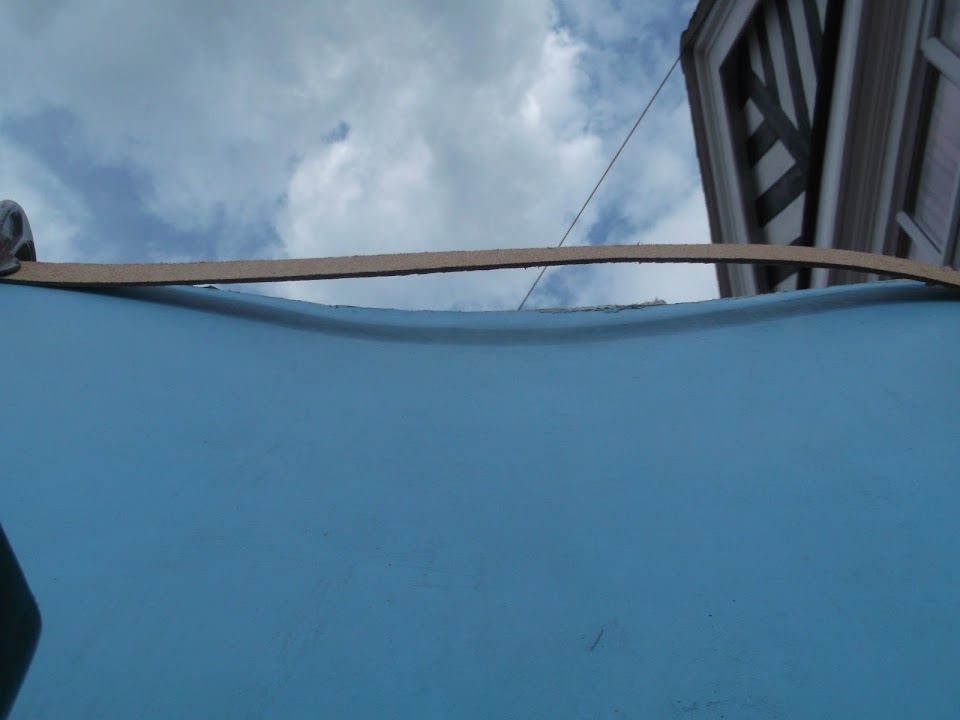
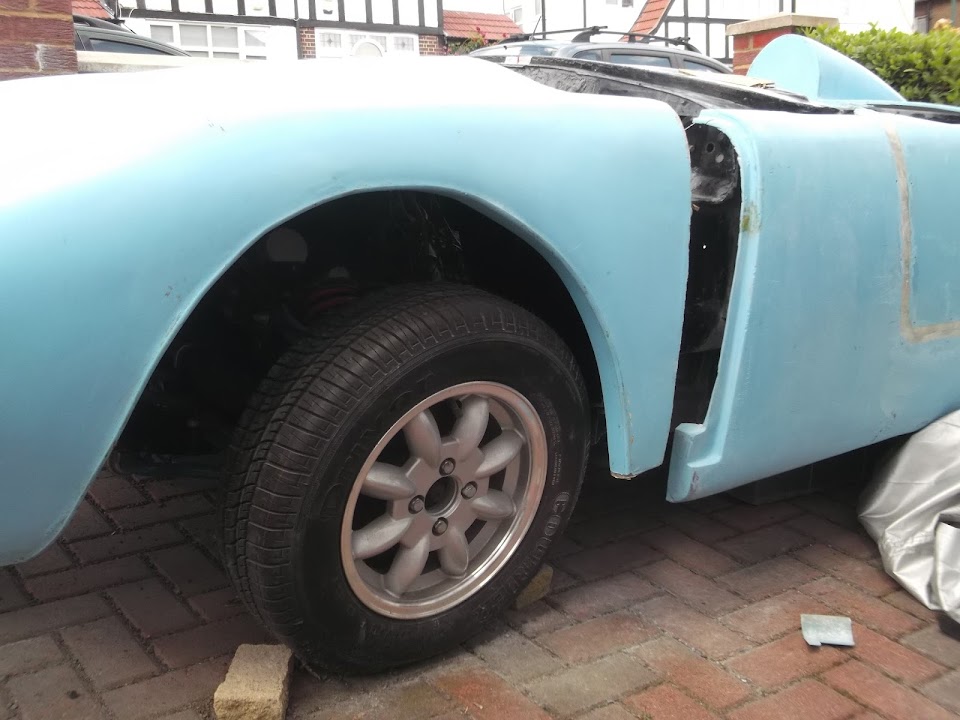
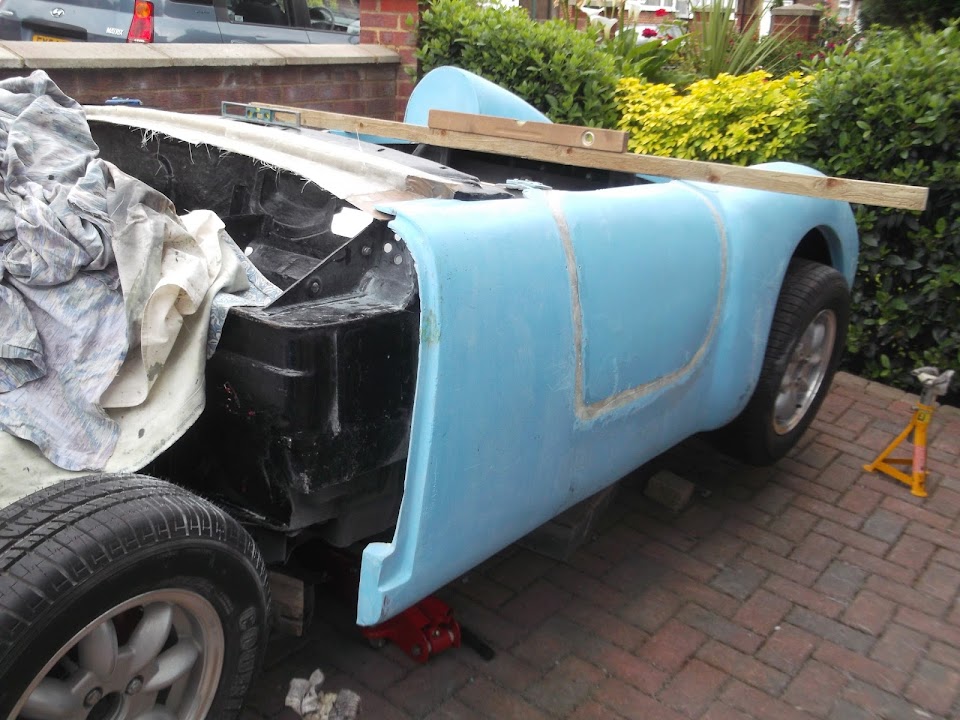
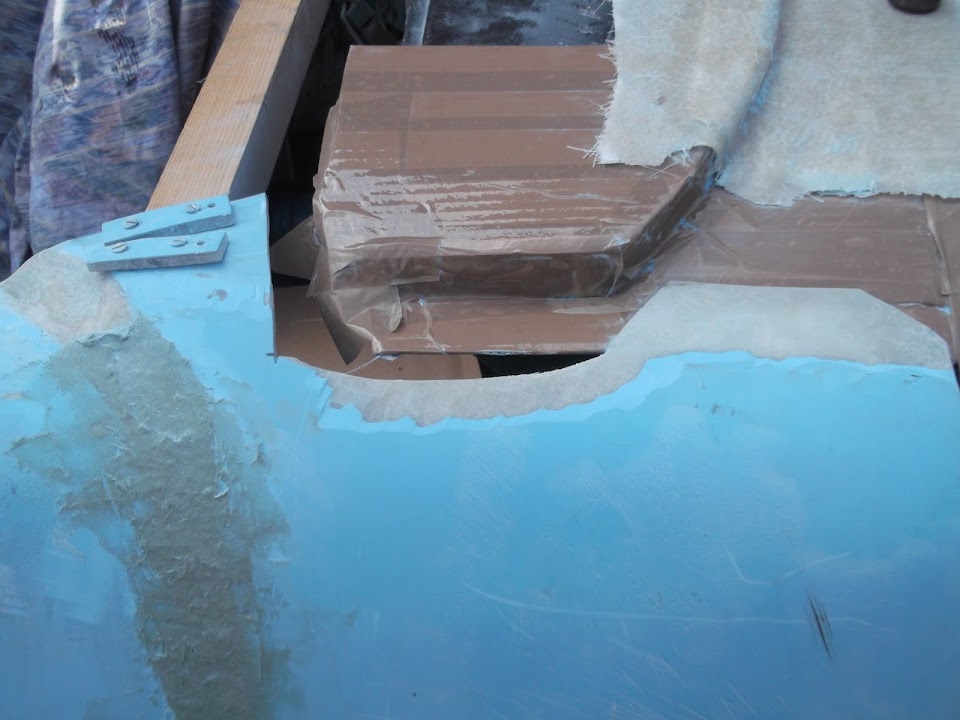
Finally I clamped a thin strip of hardboard to the bonnet to get a better idea of different profiles.


The gap is around 4 cms at its biggest point (centre of bonnet on left of photo, edge of bonnet on right).


After today's effort I am reasonably confident I can re-join the two sides of the body shell back together which is at least something.

Until next time, take care, Paul.
Reply With Quote
  #1031  
Old 22nd June 2014, 18:05
davecymru's Avatar
davecymru davecymru is offline
Senior Member
 
Join Date: May 2011
Location: Somerset
Posts: 1,671
davecymru is on a distinguished road
Default

I may have only followed "some" of what you are planning as my head started to hurt, but by no means will you be the hill-billy relative with all the hard work and effort you're putting in to getting the car _you_ want!


Damn that sounded cheesy... apologies, but it's Cider o'clock down ere in Somersetshireland
Reply With Quote
  #1032  
Old 22nd June 2014, 19:36
oxford1360 oxford1360 is offline
Senior Member
 
Join Date: Mar 2012
Posts: 1,152
oxford1360 is on a distinguished road
Default

Paul, as you know, I have mounted my bodywork lower than others. As a result I have very little space for instruments. When I have finished scratching my beard, I'll let you know. Keep going!
Reply With Quote
  #1033  
Old 22nd June 2014, 20:02
a big scary monster a big scary monster is offline
Senior Member
 
Join Date: Apr 2014
Posts: 198
a big scary monster is on a distinguished road
Default

Good work Paul when I look at the picture looking up the gap of hardboard to the sky I can picture exactly what I wrote this morning the curves you love on your bonnet blending up into 2 bumps for the aero screens. Can't wait to see this at stoneleigh next year,intact I intend to buy you a beer. I have loads of lengths of the upvc infill strip about 3mm thick varying from 2" to about 10" wide I asked my courier driving friend this aft if he was going anywhere near London this week and he said I doubt it I'm in the Italian lakes for 3 weeks.
Reply With Quote
  #1034  
Old 22nd June 2014, 21:50
Scottie22 Scottie22 is offline
Senior Member
 
Join Date: May 2013
Posts: 2,161
Scottie22 is on a distinguished road
Default

Paul, whatever you do, you will make a success of it, I know.

Please do not sell your self short, your car may well be better
Than the Ribble/Navigators already around. It most certainly will be special and also unique, as your own creation

I am looking forward to seeing the ugly duckling emerge as the swan!

Keep at it, I believe you have the whole Forum backing you!
Reply With Quote
  #1035  
Old 22nd June 2014, 22:11
Scottie22 Scottie22 is offline
Senior Member
 
Join Date: May 2013
Posts: 2,161
Scottie22 is on a distinguished road
Default Message

Hello again Paul, its a bit late, but I just received an email from Big scary monster, and he sent me a picture, requesting that I pass it on to you.

He says it is the rear of a Porche, but his idea was that if you perhaps made something similar, it may help to graft the scuttle to the bonnet.
Here is what he sent me:

[IMG][/IMG]
Reply With Quote
  #1036  
Old 23rd June 2014, 15:10
Paul L's Avatar
Paul L Paul L is offline
Senior Member
 
Join Date: Feb 2012
Location: Wembley, London
Posts: 5,056
Paul L is on a distinguished road
Default

Micky - Thanks for your very generous offer, but I am actually keeping the Cordite bonnet the standard length.

The following isn't as high tech as Scottie's updates, but I hope it will make things a bit clearer...

I will need to reshape the end of the bonnet is a similar way to your car, but my bonnet will be shorter.


You were able to re-use the final edge of the Spitfire bonnet as you cut away more of the Navigator body shell.

However, I am trying to keep the original sides of the Cordite body shell in place, like so.


So what I am currently working on is building a bonnet lip for the body shell that will extend beyond the Spitfire bonnet shut line.


I will then build the rest of the bonnet shut line and the rest of the scuttle around that lip.

I hope that makes some sense, as I can hardly get my head around what I am trying to do myself.

Dave - Well this project has certainly driven me to drink at times!
( Hopefully the explanation above makes things a bit clearer. )

Oxford - I'm sure a man of your skills will find a suitable place for all your instruments.
I wanted to re-use my Spitfire dash to by-pass the need for skill, and that means I can't butcher the bulkhead.

Ed - I will definitely try my best to get some sort of flow around the aero screens.

Scottie - Thanks mate, I know we'll both get there in the end (touch wood).
The way I look at it, Michiel has just raised the bar for the "Swan" standard.


If my car only looked like a distance "dirt poor, inbred, hillbilly" relative of this one, I'd still be happy.

- - - - - - - - - - - - - - - - - - - - - - - - - - - - - - -

Project Hillbilly - Part 1:
I started the day by jacking the car up in an attempt to get a level playing field to align the body shell.


However, I should have know better than to bring spirit levels, straight edges & a tape measure out.

Instead I will adopt the true Sammio "you can't see both sides at the same time' ethos and carry on.

To cheer myself up a bit I added some fibreglass filler to the door gaps, after I had cleaned them up a bit first.


I've bought a tub of the stuff that Mac is using.


But based on Andreas' Tribute build I may have under estimated the quantity of filler required!


Question:
What sort of electric sander would you recommend for filler / body work?

- - - - - - - - - - - - - - - - - - - - - - - - - - - - - - -

Then it was time to cut out some more matting and do the next round of fibre glassing on the scuttle area.


Then I left everything to set for a while

End of Part 1...

Last edited by Paul L; 23rd June 2014 at 16:22.. Reason: Typo
Reply With Quote
  #1037  
Old 23rd June 2014, 15:12
Paul L's Avatar
Paul L Paul L is offline
Senior Member
 
Join Date: Feb 2012
Location: Wembley, London
Posts: 5,056
Paul L is on a distinguished road
Default

Project Hillbilly - Part 2:
My plans for the afternoon changed when the dark clouds returned and it felt like rain was coming.


So I was just about to put all the covers back on when I took at chance with my scuttle base.

I carefully peeled the whole thing off the bulkhead.


Then I took even more care to remove the hardboard from the fibreglass.
( This is the view from the under side. )


I can not quite believe it myself, but I have actually made something solid out of fibreglass.

A quick test fit over the bulkhead and it sits there very nicely.


This design will provide me with a large surface area to apply bonding paste to.

The lip even clears the back of the brake master cylinder.


The next stage will be to join the driver's side of the body shell to this "middle" section.

In order to do this I will simply have to commit to a "best fit" alignment and get on with it.

Then I will be able to mark a line from the driver's side, across the bulkhead to the passenger side.

This line will decide the fate of the passenger side of the body shell, which will then be cut to match if required.

But all that had to wait as the car was wrapped up and I switched to other chores.

Until next time, take care, Paul.
Reply With Quote
  #1038  
Old 23rd June 2014, 17:52
Viatron Viatron is offline
Senior Member
 
Join Date: Apr 2012
Posts: 1,163
Viatron is on a distinguished road
Default

That filler is good stuff Paul, it's good and strong but shapes really quickly using 180 grit and powders nicely with 240 and above.
Quick tip for next time is to let it go off but rough shape it with 80 grit while it's still green, it makes getting the basic shape a much easier job, it does knacker the sand paper though.
Mac
Reply With Quote
  #1039  
Old 24th June 2014, 12:01
Paul L's Avatar
Paul L Paul L is offline
Senior Member
 
Join Date: Feb 2012
Location: Wembley, London
Posts: 5,056
Paul L is on a distinguished road
Default

Mac - I know you use air tools, but can you suggest any electric sanders for me to buy?
At the moment I have nothing to tackle the filler with other than my grinder & belt sander.

- - - - - - - - - - - - - - - - - - - - - - - - - - - - - - -

Driver's Side Corner:
Only had time to do one job today, so I stuck with the scuttle base and tackled this area of the driver's side.


As you can see in this photo, there is also a "lump" that needs to be removed.


Its removal will allow for a better line across the top of the door / body shell.

But I can't remove it all just yet as that is where the body shell brace is attached.

So first job was to tape up the bulkhead and a layer of cardboard I cut to fit on top of the corner I was working on.


The cardboard represents the fact that the bonding paste will "lift" the body shell off the bulkhead a fraction.

I also put more cardboard along the length of the bulkhead to get an even (ish) gap all the way across.


I had a thin off cut of metal from the lowered floor pans to play with.


So that was also covered in tape and then clamped into position.


Thus forming the bend required for the existing and new body shell bonnet lips to join up.

I used some of my "skip" wood to weight the rest of the scuttle based down.


Then I removed a section of the body shell and cleaned off the gel coat to reveal the fibreglass below.


After two sessions of fibre glassing, the corner now looked like this.


I must say I am really pleased with how this has actually worked out.

Just remember this is the base of the scuttle and all the real sculpting work has yet to come.

You can also see the work still required to get a decent line from the back of the cockpit to this area.


At least once the "lump" has been removed the line will look a look better and give me a base to work with.

I will leave all this to cure for as long as possible before I cover it up for the night.

- - - - - - - - - - - - - - - - - - - - - - - - - - - - - - -

I only other thing I did today was to pick some uPVC cable trunking.


I will use this to form the bonnet shut line as it should give me the right depth when covered in fibreglass.


With all the wood resting on the scuttle, I couldn't really position this properly.

But hopefully this photo gives you the general idea on the passenger side.


I will also be using this to measure across the bonnet lip to see if I need to 'cut & shut' this side of the body shell.

- - - - - - - - - - - - - - - - - - - - - - - - - - - - - - -

Whilst I have too many other things to do today, this was still a very good session.

Got to go, so take care, Paul.

Last edited by Paul L; 25th June 2014 at 07:12.. Reason: Typo
Reply With Quote
  #1040  
Old 24th June 2014, 14:18
oxford1360 oxford1360 is offline
Senior Member
 
Join Date: Mar 2012
Posts: 1,152
oxford1360 is on a distinguished road
Default

Paul, this could end-up looking really good, and it could do you a big favour........I had decided to fit Brooklands screens like you, and I spent lots of time looking at the contours of the scuttle which are complex, irritatingly asymmetric, and designed for the wrap-round screen.

If you carry on what you are doing, you will have a neat looking flat(ish) topped scuttle that will look great with two screens and a rear view mirror (and a neat shield) fitted.

Keep going! I'm just off to buy some shares in your local filler supplier.
Reply With Quote
Reply


Currently Active Users Viewing This Thread: 19 (0 members and 19 guests)
 

Posting Rules
You may not post new threads
You may not post replies
You may not post attachments
You may not edit your posts

BB code is On
Smilies are On
[IMG] code is On
HTML code is Off

Forum Jump


All times are GMT +0. The time now is 02:13.

copyright © madabout-kitcars.com 2000-2024
terms and conditions | privacy policy