|
|
| Sammio Builds and discussions Sammio bodied car builds and specials |

31st December 2014, 15:29
|
 |
Senior Member
|
|
Join Date: Feb 2012
Location: Wembley, London
Posts: 5,056
|
|

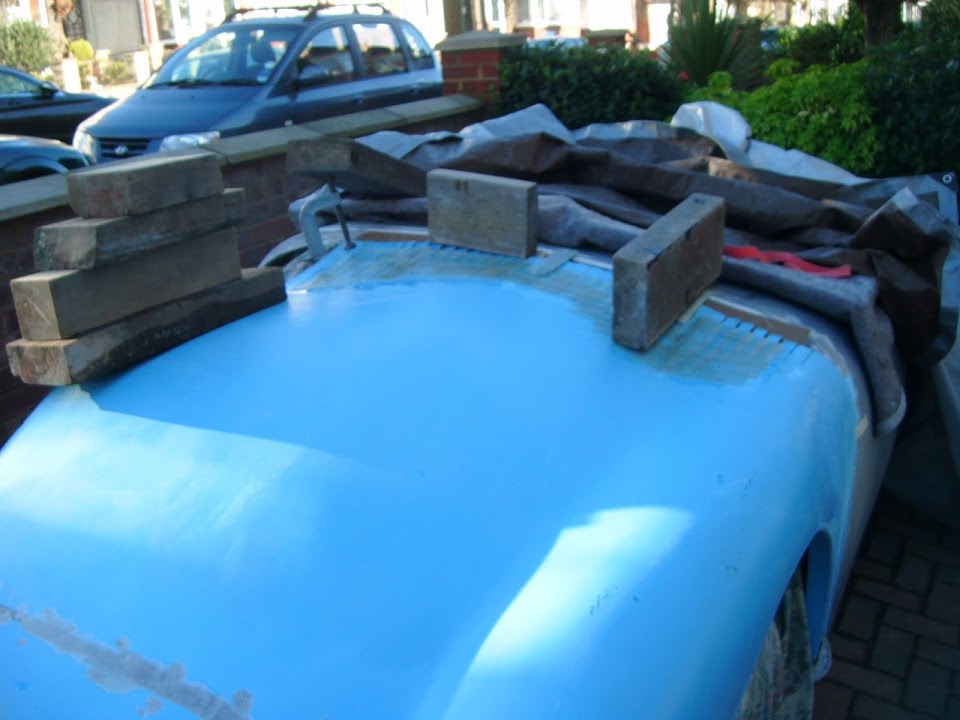
Bonnet Hinges - Part 2:
When both halves were completed, I bolted them back into position.
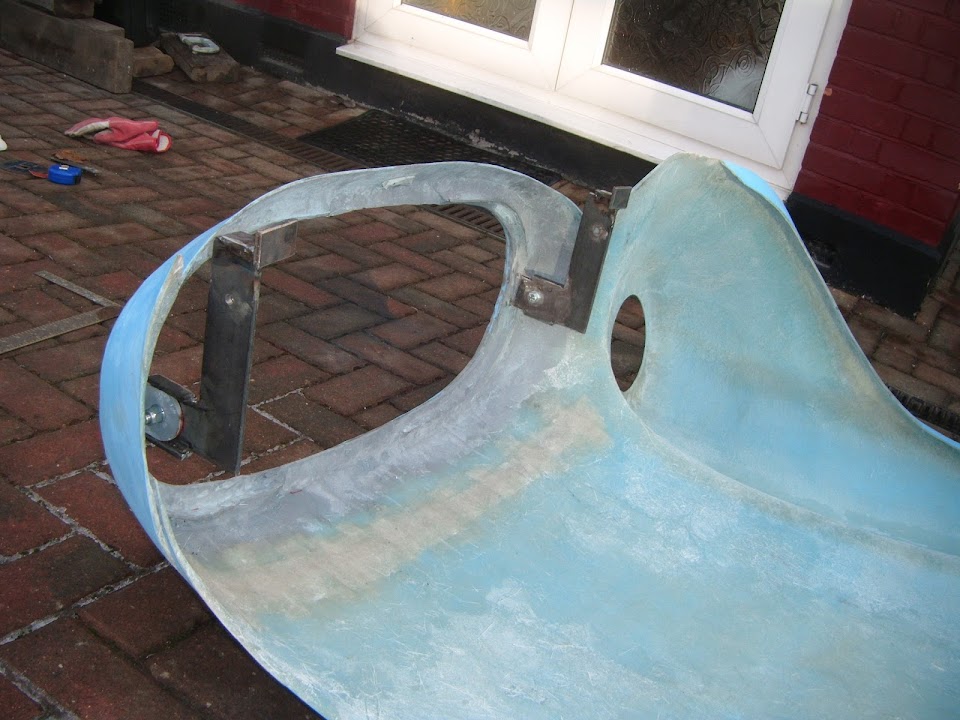
I then tidied up the chassis brackets, softening the corners and edges.

Then for the final time, well at least the final time today, I bolted the scissor hinges together.
By pulling the nose forward a bit, I hope it will be easier to shape the rear edge of the bonnet.

This also "dropped" the centre bulge in the bonnet, which I will be able to line up with the scuttle.
Note:
The centre bonnet edge was just pushed under the bonnet lip for the photo.
At this point, another penny had slowly dropped...
Because the other day Swifty had cut out the grille hole in his bonnet...

This allowed me to see that his front cross member is roughly in the middle of the hole.
So his bonnet nose sits lower that both Mac's & the original Ribble Cordite demonstrator.
Clearly Swifty has achieved this by cutting a hole in the bonnet so it drops down around the engine.
However, if you look at my bonnet, the hose opening is in a similar position without a big hole in the middle.
Despite mentioning clearing the radiator in my reply to Scottie above, the light bulb took a while to dimly glow. 
You see my bonnet will sit at a steeper angle than other Cordite\Navigators because my bulkhead is higher!
Which means that my nose is now at a slightly more aggressive "angle of attack".

Note:
You can also see that it shouldn't be too much of a problem to cover the bottom of the hinges when I rebuild the area below the grille opening.
But the real test was yet to come, would the bonnet actually open and close the way it was meant to...
You have no idea how happy I am to report that the answer was YES! 


And here is a close up of one of the "bonnet stops" in action.

I might add a rubber "cushion" to the chassis for a bit of extra protection at some point.
But this flat surface will do a lot less damage than if I'd just left the side edge of the flat bar to hit the chassis each time the bonnet opened.
By now I was cold, wet & hungry and decided to call it a day as the next job is to re-join the driver's side of the bonnet.
I already know that is going to be a major pain, so I want to be fresh when I start that process.
Still, it was great to end the day / year on such a high note, as I've been worrying about these hinges for a very long time.
Full credit and lots of thanks to Mister Towed for showing me how he built his hinges.
So until next time, take care, Paul. 

|
31st December 2014, 16:56
|
 |
Senior Member
|
|
Join Date: Dec 2011
Location: Devon
Posts: 550
|
|
Well done Paul. Look forward to your continued progress in 2015.
Happy New to you and all on the Sammio/Miglia and Tribute build areas.
|
31st December 2014, 18:39
|
 |
Senior Member
|
|
Join Date: Dec 2013
Posts: 839
|
|
Top job Paul  and an excellent result to finish the year on.
Look forward to reading your exploits in 2015, Happy new year Paul. |
1st January 2015, 15:38
|
|
Senior Member
|
|
Join Date: Feb 2012
Location: Wembley, London
Posts: 5,056
|
|
froggyman & Swifty - Thanks chaps and a "Happy New Year!" to you both as well.
Seeing the bonnet hinge for the first time really was a key point of the build for me.
- - - - - - - - - - - - - - - - - - - - - - - - - - - - - - - -
1st January 2015:
I really hope this is the year I finally get this car on the road. 
Although I am not going to start making any rash predictions about when in the year that might be.
And if I'm still working on it this time next year, so be it, I'll just keep chipping away.
Anyway, on to today's work...
I spotted something not quite right in one of yesterday's photos.
I guess the heat from the welding put a slight kink along the front face edge.
So I hammered it back flat and then put a small line of weld between the two edges.
( This was done on both sides. )

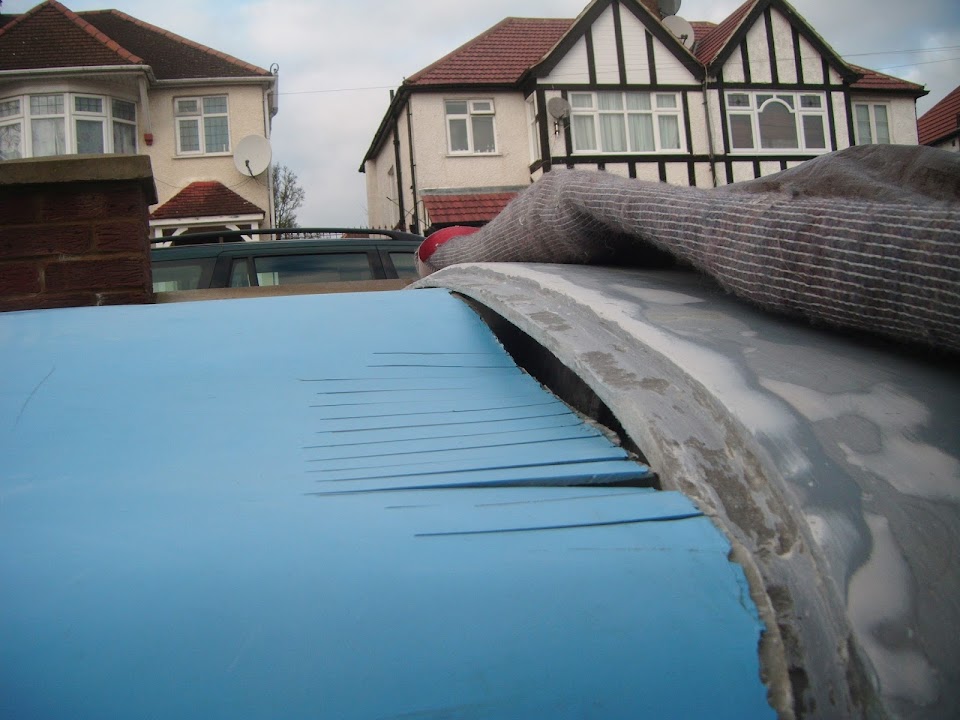
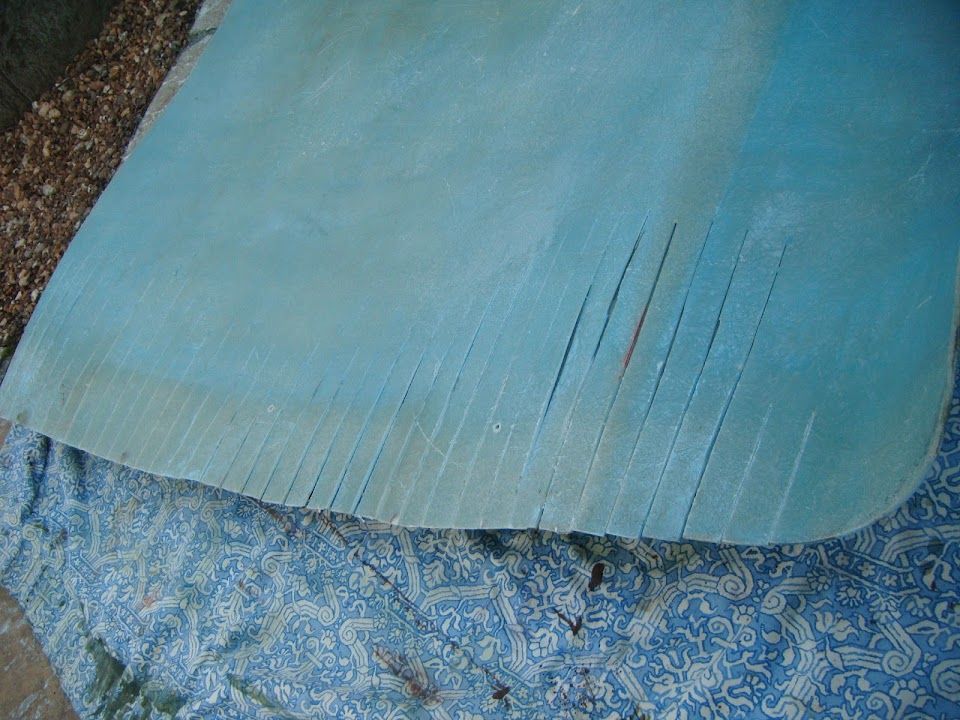
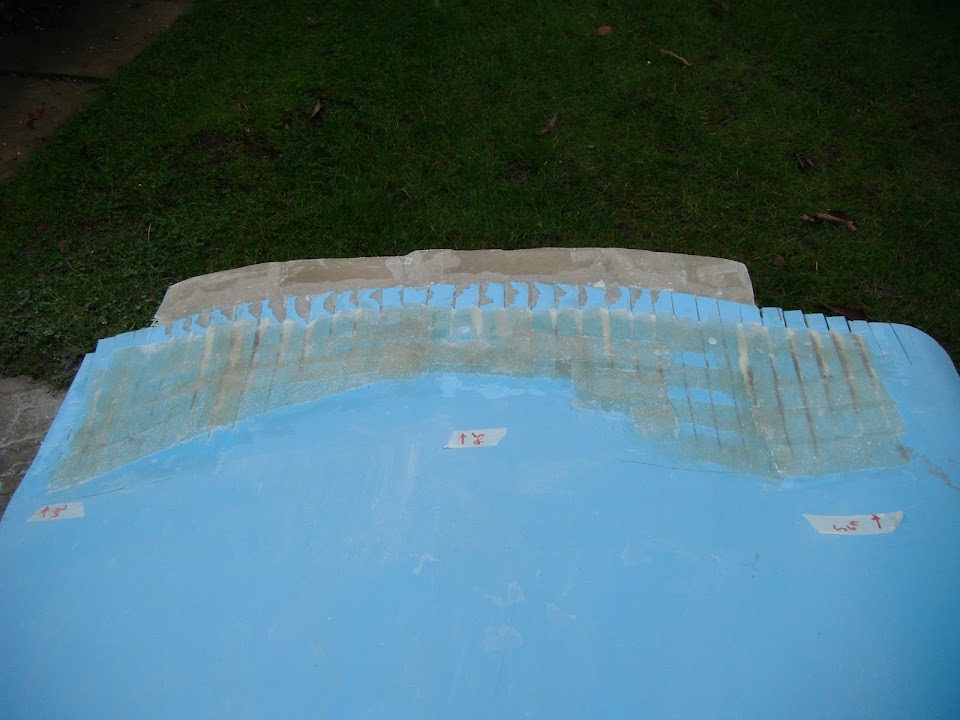
Then I turned my attention to sorting out the rear edge of the bonnet, which I will need to fix in small stages.
This is what it looks like now.

So I need to both extend the edge backwards and re-profile the curve.
The first step was to extend some of the existing cuts and add a few more.
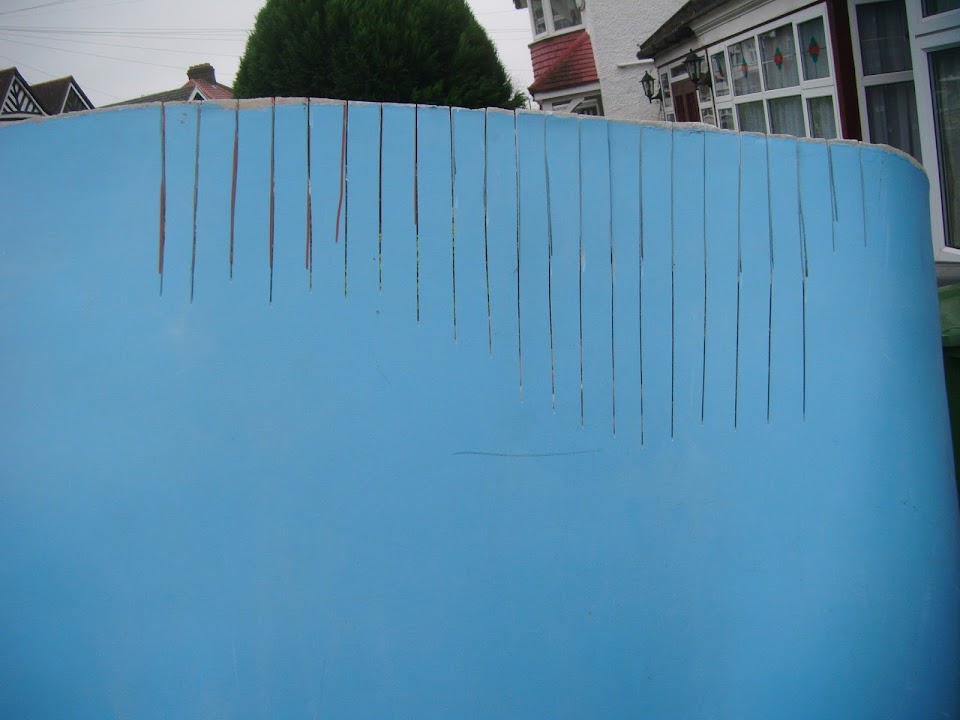
I think the standard Cordite bonnet would normally be trimmed back a bit along the rough edge.

So I tidied up the edge to give me a solid fibreglass to work from.

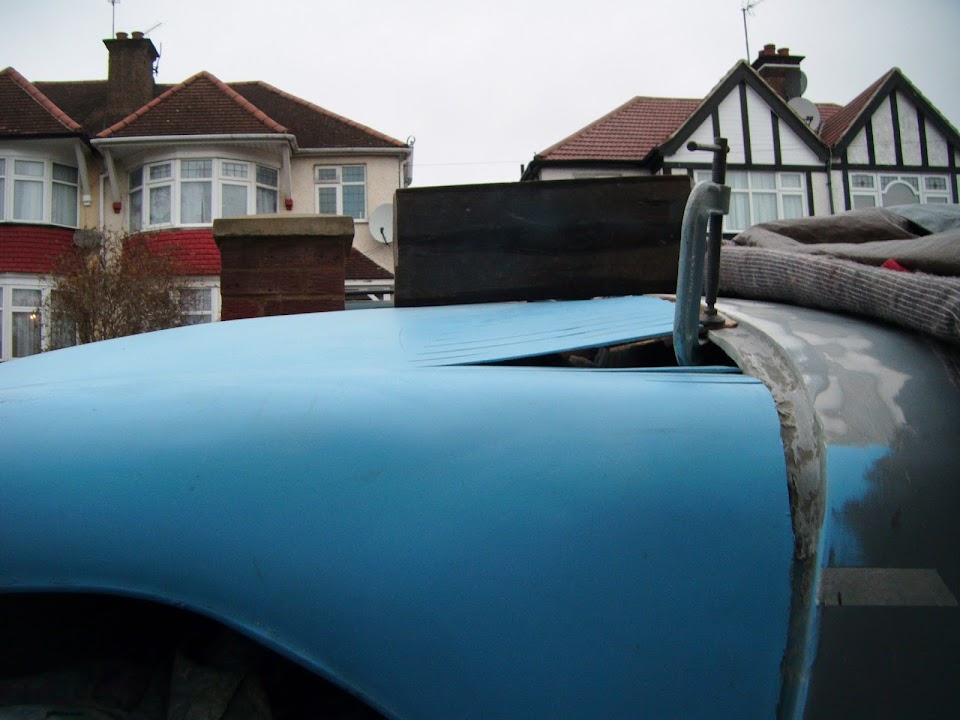
Then I clamped the bottom edge of the bonnet in place.

Note:
How moving the bonnet nose forward a bit means these two edges no longer have the same profile.
I put a strip of hardboard underneath one section and clamped that into position.

Note:
It was getting too complicated when I tried to do work on a longer section of the bonnet in one go.
At this point I only need to get a very rough curve, as I will be re-enforcing the bonnet from underneath before I do the final shaping on top.
Hopefully these photos give you an idea of the change in profile required.

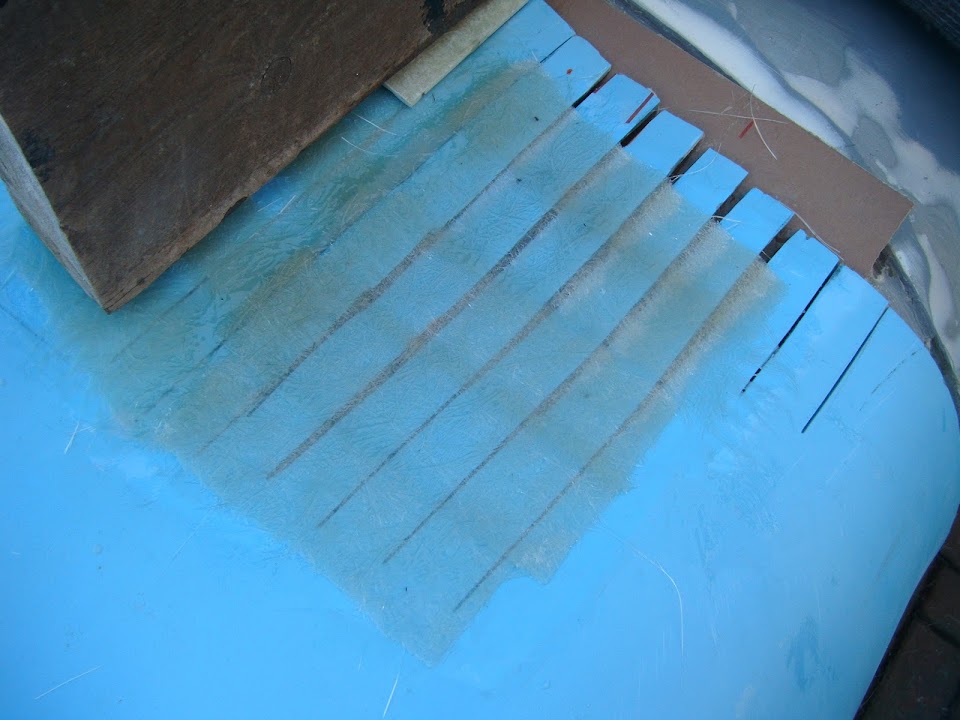
Then after grinding back the gel coat a bit, I applied a few strips of fibreglass matting over the top.

Again, the real work will be done underneath and these strips may simply be ground off later if required.
It felt like rain was due any minute, so I propped up the tarpaulin so it wouldn't rest on the fibreglass & then covered everything for the night.
It was good to make a start and I've decided to get the passenger side roughly sorted out before re-joining the missing driver's section.
Until next time, take care, Paul.
|
2nd January 2015, 13:27
|
|
Senior Member
|
|
Join Date: May 2013
Posts: 2,161
|
|
Good work Paul, you are really steam-rolling along with your build,
enough to make me ashamed of my efforts, and I don't mind the rain 'cos the tent is (reasonably) waterproof!
|
2nd January 2015, 15:55
|
|
Senior Member
|
|
Join Date: Feb 2012
Location: Wembley, London
Posts: 5,056
|
|
Scottie - Cheers mate.
- - - - - - - - - - - - - - - - - - - - - - - - - - - - - - - -
More Bonnet Work - Part 1:
At some point I will cut off the bottom section of the bonnet so I can attach it to the side of the body shell.
As previously mentioned, I am going to use the Spitfire bulkhead as my "level" for the cut.


Although at this point I don't know if that will line up with the top of the wheel arch like Swifty.

Or require a small "step" in it like Mac.
Either way, I will not know the answer to that question until I have re-worked the wheel arches themselves.
So for now, I don't want to re-profile the bonnet corners until I've extended the sides of the body shell.
Still, at least there is plenty of work left to do to sort out the middle of the bonnet.
In order to move a bit closer to the corner, I needed to fix the slight "overlap" that was going on in that area.

So I simply increased the gaps a bit.

Next I fixed a couple of brackets to the area I 'glassed over yesterday, so I could rest the bonnet against the scuttle.

Then I extended some of the existing cuts & added a few more on the driver's side.

The gel coat in these areas was also ground down a bit before the next round of fibreglassing.
I propped up the slits on both sides in the same way as before.


Thankfully, the bonnet is slowly starting to vaguely resemble the curve of the scuttle.

But I realised the absence of the driver's wing was letting the middle of the bonnet rise up a bit.
Thankfully this was nothing a few lengths of wood couldn't fix.

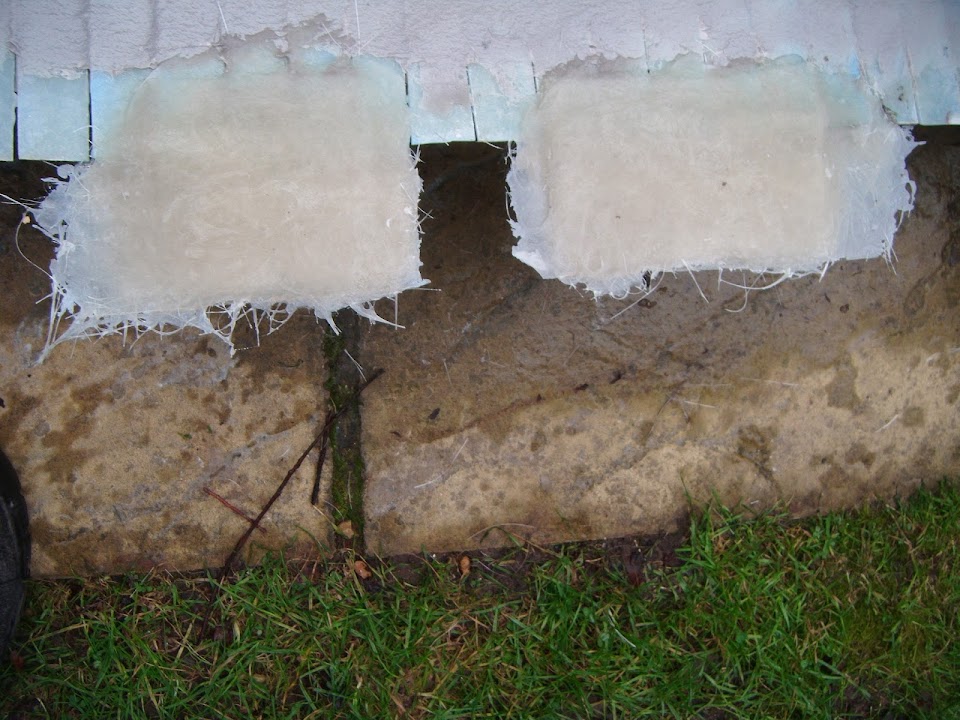
Then I put some fibreglass matting over the top.

You will notice I have now decided to cover the top of the slits completely.
As this will allow me to fill the gaps between the slits from below before I start adding matting to the underside.
Overall, this looks like a real HillBilly operation.
This certainly isn't how McLaren build cars!


At this point I had to leave everything to set and switch to some domestic chores.
End of Part 1...
|
2nd January 2015, 15:57
|
|
Senior Member
|
|
Join Date: Feb 2012
Location: Wembley, London
Posts: 5,056
|
|
More Bonnet Work - Part 2:
Obviously a cold, shady driveway isn't going to help the matting set quickly, but it got there in the end.
And with all the blocks of wood removed, you can get a slightly better idea of the shape it is taking.


Then I unbolted the bonnet from the hinges and moved it into the back garden.

The first job was to "soften" the edges of the strips to give me a marginally smoother surface to work with.
Then I pushed some fibreglass filler into all the gaps.

While that was setting, I looked for a suitable former to extend the rear bonnet edge backwards.
My master plan to build the majority of the extension in one go quickly crumbled as I remembered my clamps aren't deep enough. 
So I will have to build the rear edge in stages, starting in the centre.

I used some of my matting scraps to work around the uneven bonnet strips / gaps, before putting fresh matting on top.
This seemed to work quite well, so I used up the last bit of resin on some more scraps over the top.

By now, the sun had set and the moon was out, so it was time to call it a day.
The good news is that it does feel like I am making some real progress.
The bad news is that fine tuning the shape of the bonnet to blend it in with the scuttle is clearly going to take a while.
Until next time, take care, Paul.
|
3rd January 2015, 08:24
|
|
Senior Member
|
|
Join Date: Feb 2012
Location: Wembley, London
Posts: 5,056
|
|
Weather Flash:
I was woken up around 4am this morning by the wind & rain lashing our loft bedroom. 
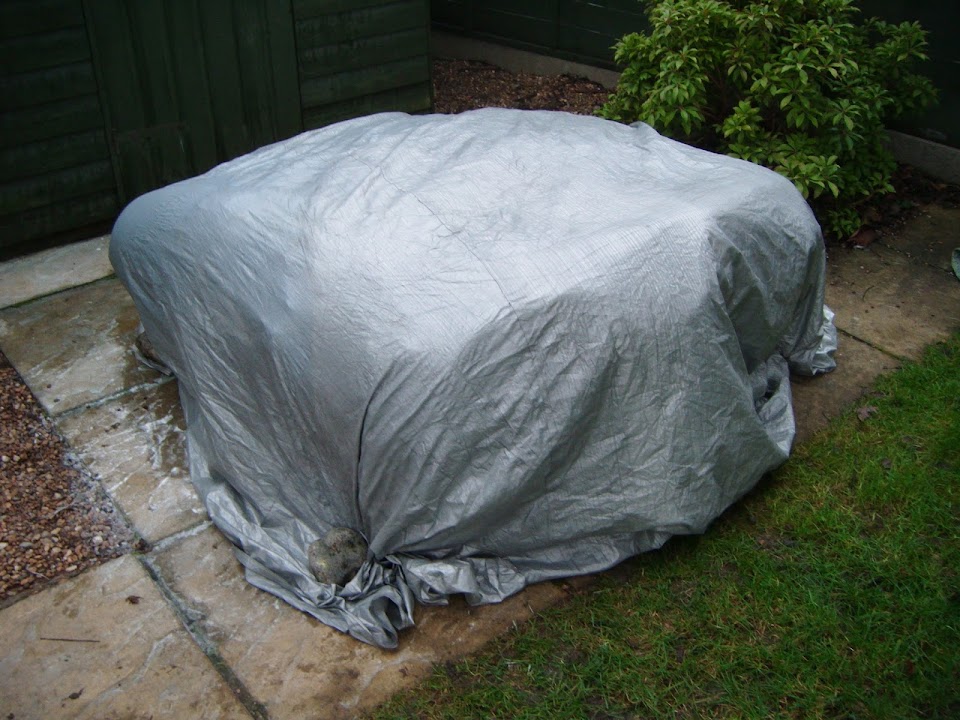
But that didn't really bother me until I remembered the fibreglass work I did yesterday was outside in this weather.
Whilst I had put covers over the top of the bonnet, it was "upside down" so likely to collect water.
I was able to go out and have a look during a break in the rain this morning.
There were two significant pools of water in both the nose & passenger wing.
But thankfully the way I had propped up the bonnet to do the work had stopped the water pooling on yesterday's repair work.
It also looked like it has set solid, so given the circumstances a great result.
I just had time to tip the water out, turn the bonnet over and re-covered it again before the rain returned.
It doesn't look like I will get anything done outside today, but I might be able to do some more tomorrow.
Cheers, Paul.
|
4th January 2015, 14:15
|
|
Senior Member
|
|
Join Date: Feb 2012
Location: Wembley, London
Posts: 5,056
|
|
New Year's Resolution:
In order to shed a few pounds, I plan to do return to swimming regularly this year after a long break away from it.
So I dragged myself out of bed this morning for a 7.30 am swim to be greeted by fog & iced up car windows.
No problem I thought, until I stepped on the pavement and my feet went flying on some black ice & I hit the ground HARD!
It was the text book perfect cartoon fall, all that was missing was a banana skin, but boy did it hurt.
Thankfully I still made it to the pool, although I was a bit late and quite sore.
So much for improving my health!
- - - - - - - - - - - - - - - - - - - - - - - - - - - - - - - -
Sunday:
After yesterday's complete wash out, I was keen to at least make a bit of progress today.
I removed the former from the first phase of the bonnet edge extension work.
I also sanded the filler & gave it a "blow dry" to remove any moisture from the area.
Before clamping on a couple of formers to "join up" the gap in the middle and extend the edges along both sides.

I then added the same mix of old scraps & fresh matting as before.

In the second round of fibre glassing, I put a bit more matting along the edge extensions, before starting to re-enforce the underside.

At this point, all I am trying to do is remove the flexibility from the bonnet that was created by cutting the slits in the first place.
Note: The bulk of the bonnet shaping will actually take place on the "sunny side".
Even though I left to set for a while, it was clear that I really needed to leave the formers clamped on over night.
I also spotted a couple of small "milky" patches that I will grind out and re-do.
So I figured the air was just too damp to do any more fibreglass work, so I simply turned the bonnet over & covered it up.
I just has a little bit of time left, so I unbolted the bonnet hinges and tidied them up a bit.

I got a coat of etch primer on one side of them.
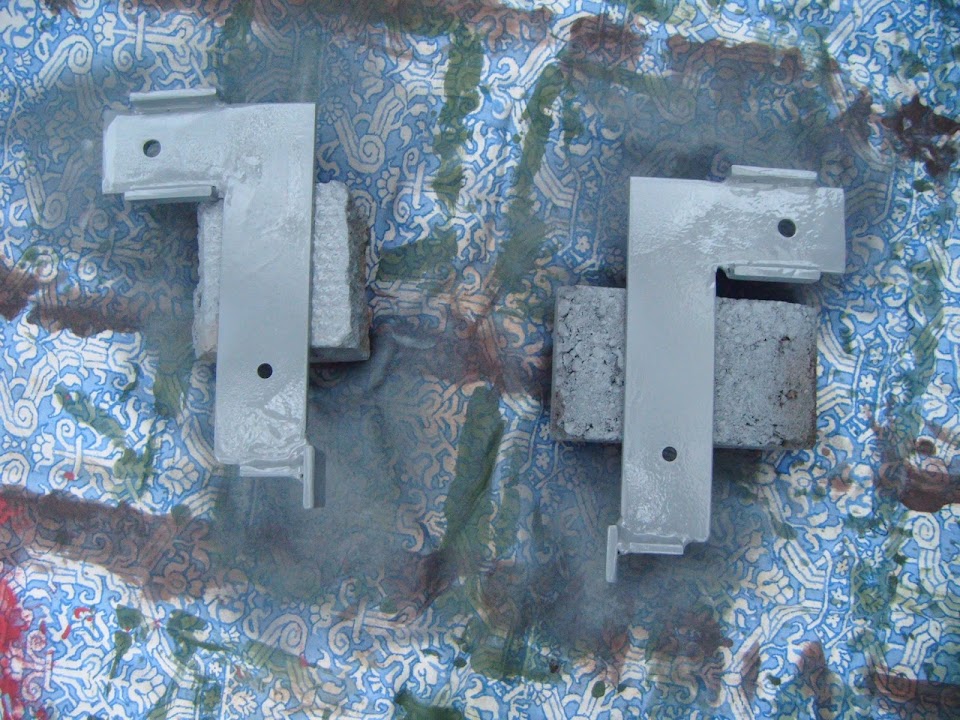
I've now left them inside the Summer House to dry properly & will try to do the other side tomorrow.
I will also tidy up the hinge plate attached to the chassis, as I don't want these to start rusting on me.
So until next time, take care, Paul.
|
5th January 2015, 13:00
|
|
Senior Member
|
|
Join Date: Feb 2012
Location: Wembley, London
Posts: 5,056
|
|
Watching Paint / Filler Dry...
Put a coat of etch primer on the other side of the hinges I started on yesterday.

Then cleaned up the hinge plates on the chassis.

Before painting them too.


I will leave the primer to dry overnight before I give the welds a light slim of filler.
I removed the formers from the rear edge extension work, before tidying up the "sunny side" with my grinder.

A gentle curve is starting to form along the rear edge, but there is still a long way to go.

Then I put some fibreglass filler into the gaps in the slits, the two bracket screw holes & along the join.

When that was sufficiently set, I roughly sanded it down.

With rain promised for the afternoon and taking down the Christmas decorations on my chore list, my time was up for today.
I know the bonnet looks a complete mess, but the scuttle actually looked worse when I was building that.
So I will keep the faith and hope it will turn out looking OK in the end.
Until next time, take care, Paul.
Last edited by Paul L; 6th January 2015 at 19:06..
Reason: Typo
|
7th January 2015, 13:13
|
|
Senior Member
|
|
Join Date: Feb 2012
Location: Wembley, London
Posts: 5,056
|
|
Tuesday:
Another damp, drizzly, wash out, so no real car work for me.
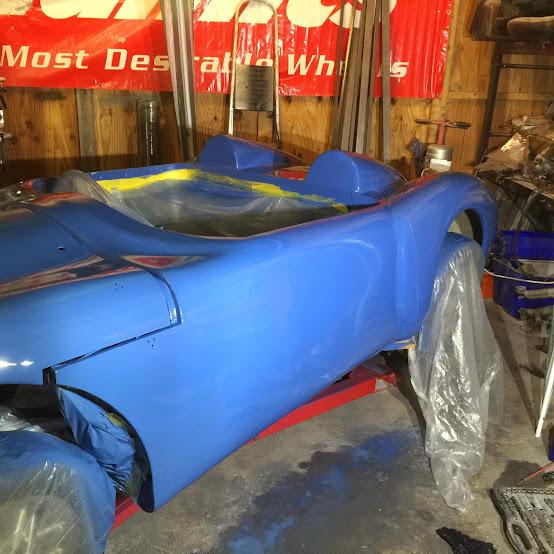
However, I did notice this on my way out to do other chores...
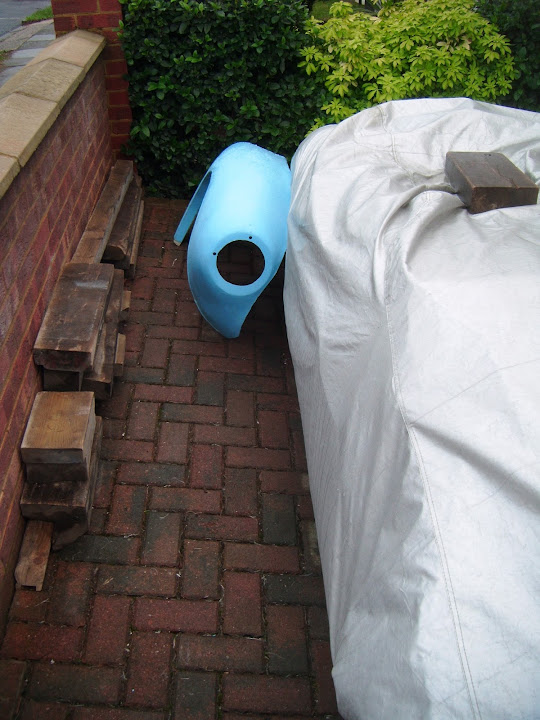
Yes, I had completely forgotten to tuck this back under the cover after spraying the chassis hinges.
So after wiping all the water off it, I carried it through the house into the back garden.
It can now live there until the time comes to re-join it to the rest of the bonnet.
- - - - - - - - - - - - - - - - - - - - - - - - - - - - - - - -
Wednesday:
Added some fibreglass filler to the outside edges of both sides of the front cross member.

Plus either side of the welding on both hinge brackets.


Note:
The red streaks you can see in some photos is actually ink from the cereal box I was mixing the filler on, not unmixed hardener.
Also got some black Hammerite on one side of the bonnet hinges.

Given how cold it is, even with extra hardener, the filler took a while to set hard enough for me to sand it down.


Similarly, it was ages before I could turn the hinges over and paint the other side.

By which time I could also return to the front drive and put some etch primer over the filler work.


I am feeling a little under the weather at the moment and working outside isn't helping, so that was it for today.
- - - - - - - - - - - - - - - - - - - - - - - - - - - - - - - -
Post:
The "chunky" M12 bolts I ordered for the bonnet hinge pivot point have arrived.

Unfortunately, there is still no sign of my revised V5C arriving from the DVLA.
Give the Christmas holidays I don't want to hassle them, so I'll wait until the end of this week before giving them a ring.
- - - - - - - - - - - - - - - - - - - - - - - - - - - - - - - -
Another Plan Bites The Dust...
Even though I have started the rear bonnet extension, I now realise I am not doing things in the right order. 
I deliberately added more fibreglass than I needed, so I can make a nice clean cut / shut line along the bonnet edge to match the scuttle.
However, as the body shell is still not bonded into place, there is a small risk that the scuttle might move slightly from it current position.
So I have decided not to trim the rear edge of the bonnet until the body shell is bonded into place and can not move at all.
There is still plenty of work I can be doing with the bonnet before then, but the bulk of re-profiling work will have to wait until later on in the build.
At least the hinges have been sorted out and this will allow me to look at the lower valance beneath the grille opening.
I did have a very brief look at this the other day and I should be able to build something that clears the chassis, one way, or the other.
- - - - - - - - - - - - - - - - - - - - - - - - - - - - - - - -
Until next time, take care, Paul.
|
7th January 2015, 16:29
|
|
Senior Member
|
|
Join Date: Dec 2011
Location: Devon
Posts: 550
|
|
Lucky you spotted the wing before some inebriated so and so decided to relieve you of it. By the way you now have five weeks to finish the build before Mac returns!!!!!!!!!! LOL.
|
7th January 2015, 21:17
|
|
Senior Member
|
|
Join Date: Jul 2011
Location: Belgium
Posts: 103
|
|
Paul, before finalising the curve on the scuttle side of the bonnet, wouldn't it be a better idea to fit the wing first? I'm thinking the work you are doing to that edge is bound to change the shape of the main part of bonnet - making it more difficult to match the wing to it...
|
7th January 2015, 23:07
|
|
Senior Member
|
|
Join Date: May 2013
Posts: 2,161
|
|
I think Alpha has the right idea Paul, every single thing you do makes slight changes in all the angles, and it may save re-doing something later if you do that now? Seems logical.
(Spock, Star Trek 1972) :-)
|
8th January 2015, 07:31
|
|
Senior Member
|
|
Join Date: Feb 2012
Location: Wembley, London
Posts: 5,056
|
|
Foggyman - I was also worried someone might have thought I'd left it out to be taken away!
Unfortunately, I don't think 5 months will be enough for me to finish the build, let alone 5 weeks!
- - - - - - - - - - - - - - - - - - - - - - - - - - - - - - - -
Alpha & Scottie - Thanks for the feedback gentlemen.
Believe it or not, sorting out the driver's wing and area below the grille opening are next on the bonnet "To Do" list.
The extension work I've done so far will at least allow the rear of the bonnet to rest on the front of the body shell.
The hinges will also give me another fixed point at the front, so this should make it easier for me to play with the wing position.
As previously there were simply too many variables for me to align anything up to anything else.
Whilst I did put my faith in this pile of wood to keep the bonnet roughly in shape...
I do accept that make the bonnet a single unit with lovely flowing lines will still be a challenge.
- - - - - - - - - - - - - - - - - - - - - - - - - - - - - - - -
Cheers, Paul.
|
8th January 2015, 13:24
|
 |
Senior Member
|
|
Join Date: May 2011
Location: Somerset
Posts: 1,671
|
|
It's the Jan, so i wouldn't expect anything from Swansea until at least the 3rd/4th week of Jan!
Although for the sake of your sanity i hope I'm wrong |
8th January 2015, 15:04
|
|
Senior Member
|
|
Join Date: Feb 2012
Location: Wembley, London
Posts: 5,056
|
|
Dave - I'd happily wait if I knew everything was in order and a revised V5C was going to be sent.
I guess the big advantage of trying to get all the paperwork sorted at this stage is that time is on my side.
- - - - - - - - - - - - - - - - - - - - - - - - - - - - - - - -
Thursday:
It was seriously bucketing down here this morning, but it finally dried out in the afternoon.
So I took my chance to get a coat of Hammerite on the front cross member.


Got to love the difference a coat of paint makes.
- - - - - - - - - - - - - - - - - - - - - - - - - - - - - - - -
I also refitted the other halves of the hinges to the bonnet.

They will get a second coat of paint before they are fitted for the final time.
As the main thing for now was to protect them from the rain so they didn't start to rust.
- - - - - - - - - - - - - - - - - - - - - - - - - - - - - - - -
There was then a bit of a wait before the fresh paint was dry enough for me to refit the bonnet.
( I'm still using the smaller bolts for now. )

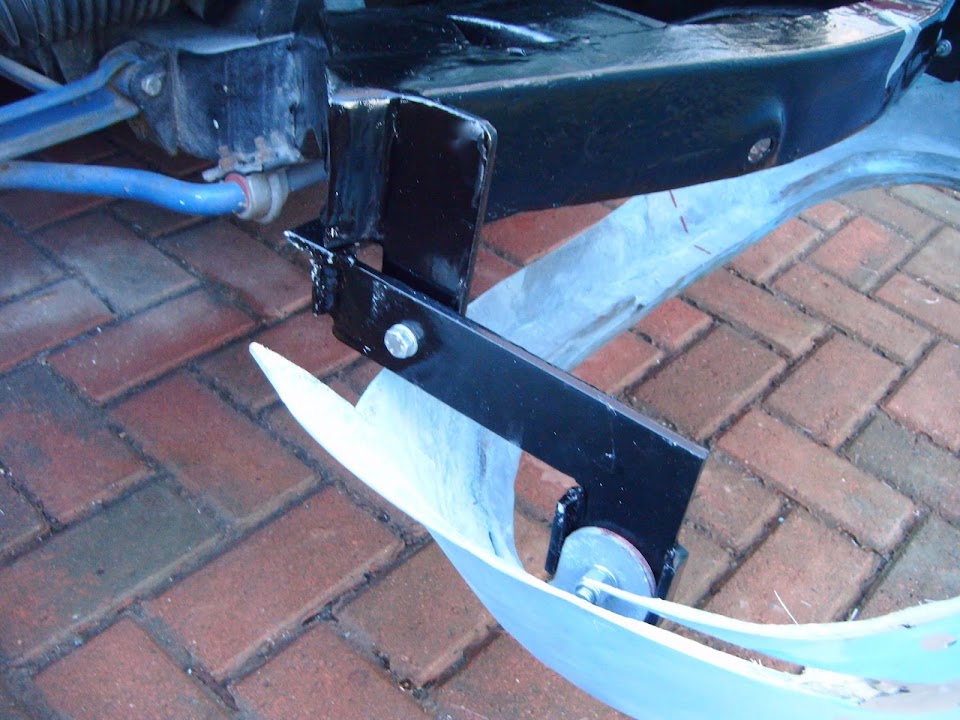
I know it is childish, but I still get a kick out of the fact I can now open the bonnet on hinges I made myself.
- - - - - - - - - - - - - - - - - - - - - - - - - - - - - - - -
I also marked up either side of the bonnet hose relative to the front cross member.


Given the fact my driveway slopes all over the place, I need something to help me line up the driver's wing.
I will probably use some variation of Swifty's cardboard template approach when the time comes.

As the wing doesn't quite fall into the correct position by itself at the moment.


- - - - - - - - - - - - - - - - - - - - - - - - - - - - - - - -
Research:
I find it funny how the direction of my build has swayed this way, and that, over time.
But today was a great example of how I can see something with fresh eyes depending on what I am currently working on.
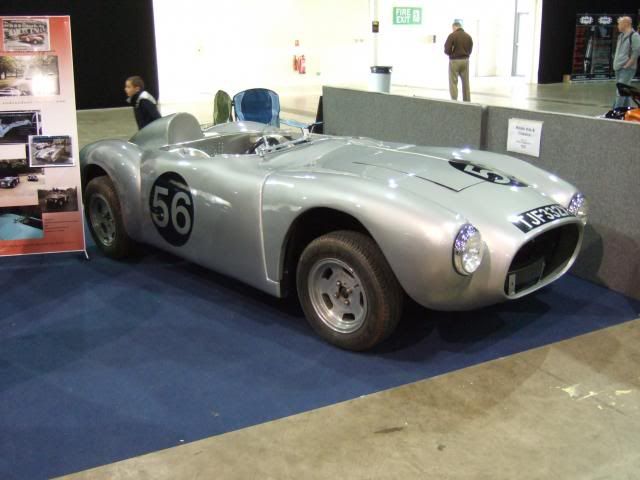
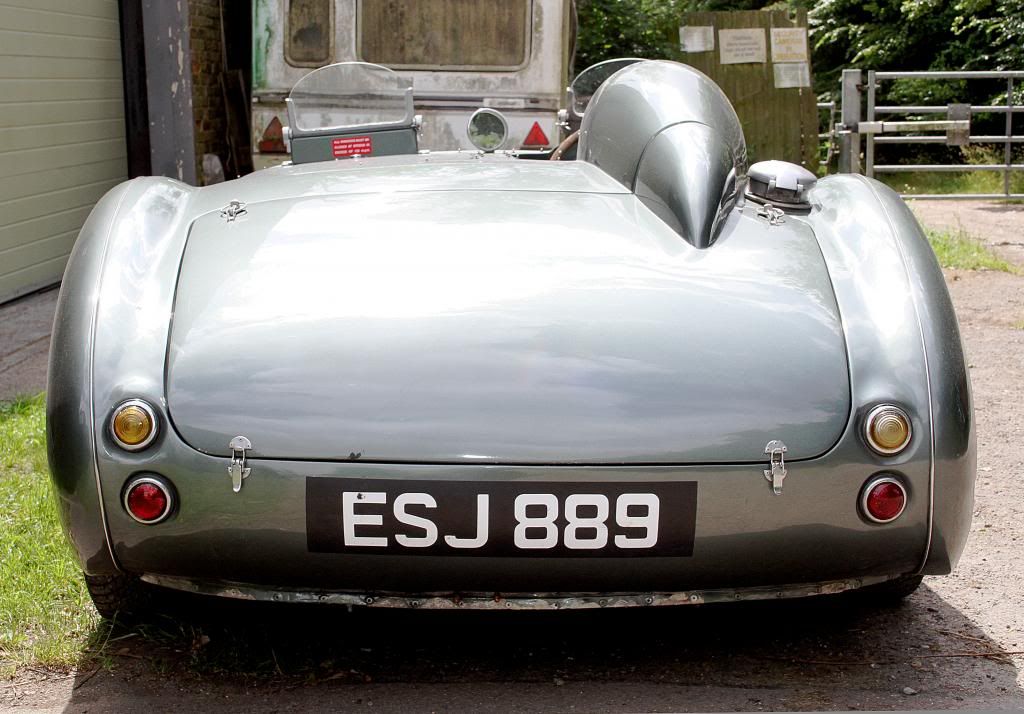
I was flicking through Nike55's G-46 thread earlier and he had posted photos of this Healey back in Jul.13.
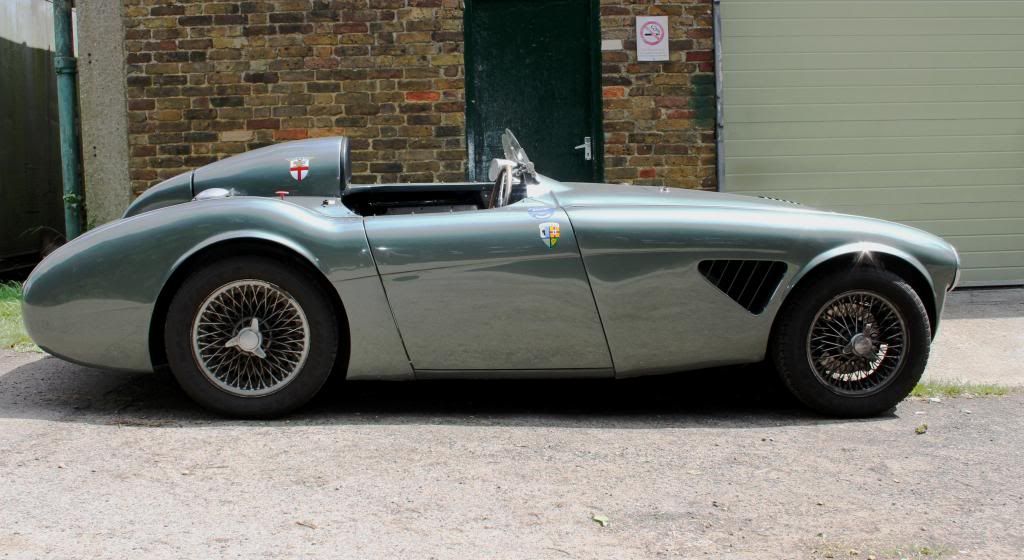
Now I do remember thinking this car was absolutely beautiful when I first saw it.
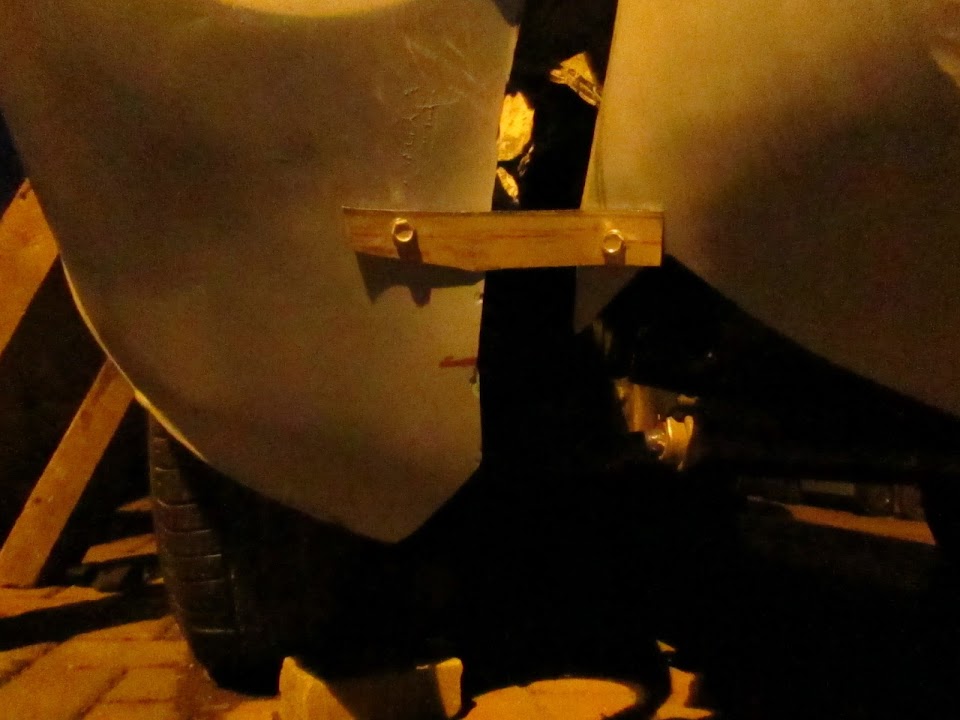
But it was only today that the way the bottom of the Healey's boot lid was secured really jumped out at me.

So whilst I haven't given up on the idea of finding a way to make my four locking pins work.
I did have a brief look around for something like the Healey's catches and found these.

Which means my "Plan B" will now be two locking pins at the top & two of these at the bottom.
Or in a worse case, "Plan C" scenario, use this type of external catch for the both the top & bottom.
- - - - - - - - - - - - - - - - - - - - - - - - - - - - - - - -
Until next time, take care, Paul.
|
8th January 2015, 22:06
|
|
Senior Member
|
|
Join Date: Dec 2013
Location: Sunny Cumbria
Posts: 470
|
|
A suggestion...
Hi Paul, I am reading this thread at both ends! Have got to page 8 from the front but I am also tying to keep up with your current posts.
I am Currently restoring a Marlin Berlinetta.
My suggestion relates to the attachment of the boot lid. If two hidden pegs or perhaps a flange at the back of the bottom of the lid engaged with the frame the attachment would be hidden, secure, cheap and easy. Neat? The pegs would also provide a way of standing the boot lid on the ground without risk of damaging the paintwork.

Last edited by 8 Valve Ed; 8th January 2015 at 22:10..
|
10th January 2015, 17:50
|
|
Senior Member
|
|
Join Date: Feb 2012
Location: Wembley, London
Posts: 5,056
|
|
8 Value Ed - Welcome to my build.
I saw some photos of your Marlin on Scottie's thread & look forward to seeing your own thread.
Thanks for the locating pegs suggestion, I will be having another detailed look at my options at some point.
As I previously walked away from any further work on the boot lid to avoid going completely mad.
Micky1Mo & Swifty - Thanks for your kind words about my hinges/engineering efforts on Swifty's build thread.
( I didn't want this reply to clog up his thread. )
- - - - - - - - - - - - - - - - - - - - - - - - - - - - - - - -
Cold, But Happy...
Didn't get a chance to do anything on Friday and it was the afternoon before I got going today.
I spent ages checking & changing the marks on the bonnet nose relative to the chassis.
Then eventually I reached the point where that would have to do and I committed to a line.

Then I made a template to match the nose profile and head light distance.

Initially I marked the line on inside of a headlight rim so I could transfer it over.

But then remembered that the headlight areas were not mirror images of each other to begin with.
So I made another template to link the "chassis" line with the headlight adjustment holes.

As I had already drilled these in a "best fit" position many moons ago.
This allowed me to match and mark up the horizontal line on the driver's headlight area.

However, getting the wing to line up with the template and markings was a serious pain.
In the absence of a flat floor to work with, this really was a job for two people & I was one short.
Despite all the hassles I was desperate to start re-joining the bonnet today, so I just kept going.
The sun went down & thankfully I was able to work by streetlight, although I was now very cold.
In the end I cut up the last "off cut" from the metal lowered floor pans to make three "bendy" brackets.

Even with one side fixed, getting the second screw in with one hand, while balancing the wing with the other was "interesting".
I had also temporarily clamped the two sides of the bonnet to some hardboard.

With the traditional wooden props at the side.

I must confess I found this to be a very tricky job and there were times when I really wasn't sure I could actually do it.
But Swifty's template idea was a really big help.

In addition, Mac mentioned that he had dropped the driver's side by 2 inches.
So I had also marked 2 inches on my wing to see if my drop would turn out to be similar.
Whilst it is not easy to see in this photo, the drop is certainly there, or thereabouts.
I still plan to have a very good look at this set up in the daylight for a final check before going any further.
Then I will fix brackets along the gap so that I can remove the bonnet and start the fibreglass repairs.
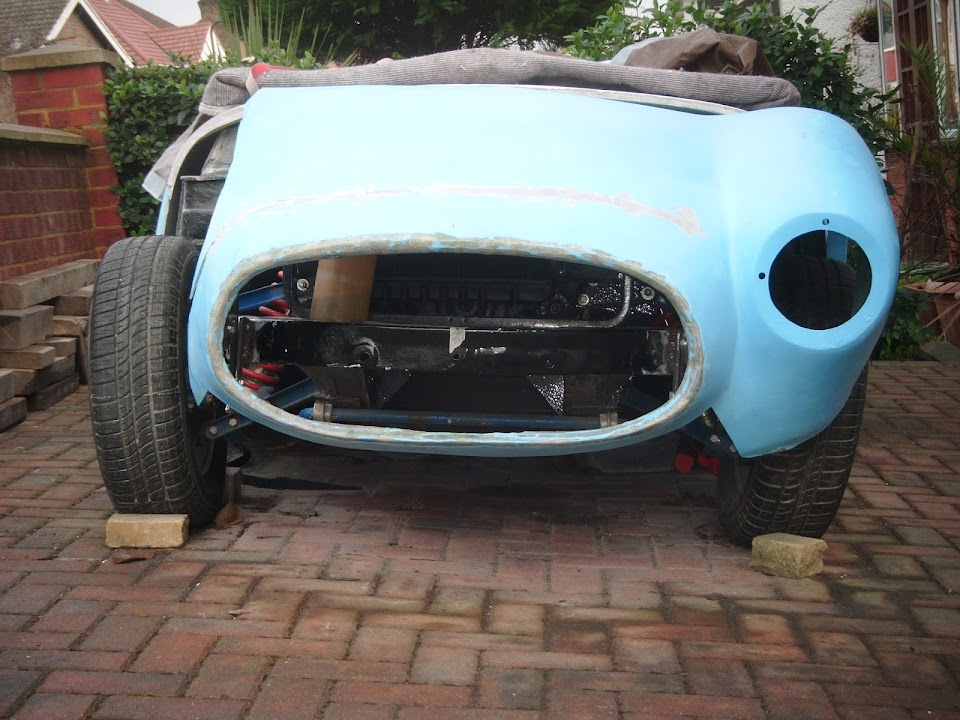
But for now, here is the view across the front of the bonnet.

The headlight faces certainly appear to be in a similar position either side of the nose.
Similarly, when viewed from the front, things seem to be roughly in the right place.

Although clearly the sloping drive and the fact the grille opening is a bit wobbly in places doesn't help.
I'm still very happy though, as even if this repair work isn't perfect, it will still be better than when I started.
Until next time, take care, Paul.
Last edited by Paul L; 12th January 2015 at 08:26..
Reason: Fixing photo link
|
10th January 2015, 18:00
|
|
Senior Member
|
|
Join Date: Dec 2013
Posts: 839
|
|
Paul you are taking this build to the next level working under street lighting in the middle of winter, hats off to you man.
The wing does look good but like you say it will be better to check in daylight when you have more time to double check. Pleased you found the template idea a great help, looking forward to your next installment.  |
|
Currently Active Users Viewing This Thread: 1 (0 members and 1 guests)
|
|
|
 Posting Rules
|
You may not post new threads
You may not post replies
You may not post attachments
You may not edit your posts
HTML code is Off
|
|
|
All times are GMT +0. The time now is 16:44.
|


 Linear Mode

