Are you madabout kit cars      
 "We've Got Kit Cars Covered" Information about Madabout-Kitcars.com Contact Madabout-Kitcars.com         Home of UK kit cars - madabout-kitcars.com Various kit car write ups All the latest kit car news Kit car related and general discussion

Search
Manufacturers
Kit Cars
Kit Car Data sheets
Picture Gallery
SVA Knowledgebase
Clubs & Communities
Build cost estimator
Kit cars for sale
Knowledge Base 
KitcarUSA.com
Classic-Kitcars.com
 

Go Back   Madabout Kitcars Forum > Mad Build Area > Sammio Builds and discussions

Sammio Builds and discussions Sammio bodied car builds and specials

Reply
 
Thread Tools Display Modes
  #1841  
Old 28th April 2015, 18:38
Paul L's Avatar
Paul L Paul L is offline
Senior Member
 
Join Date: Feb 2012
Location: Wembley, London
Posts: 5,056
Paul L is on a distinguished road
Default

Tiresome Tuesday - Part 2:

Gear Box Cover:
However, I wanted to add an extra screw on the horizontal face, so the cover came off again.

And a "catch" was added to both sides.


Before the cover went on again.


And the bulkhead was propped up.


So I could drill a pilot hole through the catch and the cover.


Then it the cover had to come off again, so I could remove the catch and drill out the holes to the right size.

Then I could refit the cover yet again to test fit the extra screws.


While the bulkhead had been propped up, I also marked the position of the top edges of the bulkhead onto the cover.


The cover comes with 3 pilot holes drilled in this top area and the two outside ones were going to be no problem.


But the centre one was too low compare to the metal available to screw into.


My donor car came with this small plate for this hole, so I used that to mark up the cover.


Then the three holes were drilled out to the right size in both the cover and the bulkhead.


Then I decided to add an extra bolt in the middle of this vertical face around here as well.
( As this ties in with the number of fixings my donor car had on the cover. )


With the holes drilled out, the bolts will look like this when fitted.


So after messing about for a very long time, all the holes required to fit the cover are finally done.

Now I just need to tidy up all these new holes and touch up the surrounding paint work, plus clean up some of the old catches.

Note:
I've trawled through this build thread to find these photos of the original bulkhead holes for the cover.
( Sorry the first photo is rubbish. )


Most of this mess was simply cut out and new metal was welded in.

Which is why I had to drill every hole required for the cover at this stage.

At least this job was a lot easier to do with the bulkhead off the chassis.

- - - - - - - - - - - - - - - - - - - - - - - - - - - - - - -

Overall this was definitely another slow progress day, but at least it was still some progress.

Until next time, take care, Paul.
Reply With Quote
  #1842  
Old 28th April 2015, 19:29
Thurcroft flyer Thurcroft flyer is offline
Senior Member
 
Join Date: Dec 2013
Location: thurcroft, Rotherham South Yorkshire
Posts: 196
Thurcroft flyer is on a distinguished road
Default

gearbox cover looks very neat keep up the good work
Reply With Quote
  #1843  
Old 28th April 2015, 20:59
garyh garyh is offline
Senior Member
 
Join Date: Jun 2011
Location: birchington, kent
Posts: 1,769
garyh is on a distinguished road
Default

Very tidy.
Reply With Quote
  #1844  
Old 28th April 2015, 21:35
Viatron Viatron is offline
Senior Member
 
Join Date: Apr 2012
Posts: 1,163
Viatron is on a distinguished road
Default

Paul
Any chance of a stand alone shot of your gearbox cover just so I can compare it to mine please?
Nice job BTW mine is going to be a bit easier though as I have decided to bond and rivet it in place. You have the "advantage" of having all the original mounting threads but with the frame etc I'm using none of them exist. I will probably put an access cover on for the gearbox filler but anything more serious will require removing the gearbox. That said you would have to remove the seats to get my tunnel off anyway so I don't think dropping the gearbox would really be that much more work.
Mac
Reply With Quote
  #1845  
Old 28th April 2015, 21:50
Paul L's Avatar
Paul L Paul L is offline
Senior Member
 
Join Date: Feb 2012
Location: Wembley, London
Posts: 5,056
Paul L is on a distinguished road
Default

Mac - I'm Just logging off, so I'd better be quick...

Here is my cover...


But this is Michiel's one from Spyder #47, which is Herald based and looks a bit like your one.


Hope that helps, Paul.
Reply With Quote
  #1846  
Old 29th April 2015, 07:21
Paul L's Avatar
Paul L Paul L is offline
Senior Member
 
Join Date: Feb 2012
Location: Wembley, London
Posts: 5,056
Paul L is on a distinguished road
Default

Thurcroft Flyer & Gary - Thanks gents.

The cover still needs a few finishing touches and another lick of paint, but that can be done away from the bulkhead.

I actually really like the look of the unpainted 10mm bolt heads on the self tapping screws (a bag of them came with my donor).

I've used them along the bottom edges of the cover and for this false access panel.


So it makes sense to replace these four screws with them as well, so it all matches.


I may also change the original Spitfire mounting plate for a circular one, similar to Michiel (see photo in previous post).

Which reminds me that at some point I need to make and fit a gaiter for the gear lever.

- - - - - - - - - - - - - - - - - - - - - - - - - - - - - - -

Mac - Cheers, hopefully adding a bit of sealant when I finally bolt the cover into place will keep it all water tight.

And whilst restoring the bulkhead was a LOT of work, when I look back at the original Cordite layout it was the right decision for me.


Note:
The passenger front foot well didn't sit flush as the frame rails were not the same height on all four sides.

- - - - - - - - - - - - - - - - - - - - - - - - - - - - - - -

Cheers, Paul.
Reply With Quote
  #1847  
Old 29th April 2015, 08:29
Scottie22 Scottie22 is offline
Senior Member
 
Join Date: May 2013
Posts: 2,161
Scottie22 is on a distinguished road
Default

Nice work on the box cover Paul.
Reply With Quote
  #1848  
Old 30th April 2015, 06:55
Paul L's Avatar
Paul L Paul L is offline
Senior Member
 
Join Date: Feb 2012
Location: Wembley, London
Posts: 5,056
Paul L is on a distinguished road
Default

Scottie - Cheers. As you well know, all these little jobs take ages, but they all need to be done at some point.

- - - - - - - - - - - - - - - - - - - - - - - - - - - - - - -

Holding Pattern:
I couldn't co-ordintate my free time with any dry weather to do any work on the car yesterday.

But I did spend a bit of time tidying up the Summer House (again ) and looking at the gearbox cover.

After a bit of playing around, I don't think it will be practical to change the shape of the gear lever bracket to a "simple" ring.

As this would also involve cutting the original rubber seal down to match and I am not sure that would be a good idea.


Note:
I still plan to replace the screws holding the bracket to the cover, with ones to match the false access panel.

- - - - - - - - - - - - - - - - - - - - - - - - - - - - - - -

Not sure how today is going to pan out as my daughters will be at home due to the school closing for their teacher's funeral.

I've also had a few other reminders recently that there is more to life than my car building project.

I'm off to a funeral myself next Tuesday for the mum of one of the people I was in Center Parcs with a few weeks ago.

Plus I'm visiting an old mate in hospital on Friday, as I've just discovered he had a major stoke last week!

Which means a trip to Stoneleigh on Bank Holiday Monday may not be possible, but we will see.

Take care, Paul.
Reply With Quote
  #1849  
Old 30th April 2015, 07:09
8 Valve Ed 8 Valve Ed is offline
Senior Member
 
Join Date: Dec 2013
Location: Sunny Cumbria
Posts: 470
8 Valve Ed is on a distinguished road
Default

Suggestion Paul, why don't you make a leather boot for the gear lever? very simple to do, I have some old leathers from my biking days which I have unstitched, I plan to sew a simple funnel shaped tube to slip over the gear lever then trap under a polished stainless ring (like a very large washer) secured by screws onto the gearbox cover.

Bit's of suitable leather are easy enough to obtain, if not from bike leathers, maybe from from old furniture, car boot sales?
Reply With Quote
  #1850  
Old 30th April 2015, 10:37
Viatron Viatron is offline
Senior Member
 
Join Date: Apr 2012
Posts: 1,163
Viatron is on a distinguished road
Default

if you want some leather i have lots of bits in navy blue :-) your welcome to some
Reply With Quote
  #1851  
Old 30th April 2015, 14:36
Paul L's Avatar
Paul L Paul L is offline
Senior Member
 
Join Date: Feb 2012
Location: Wembley, London
Posts: 5,056
Paul L is on a distinguished road
Default

8 Valve Ed & Mac - Funnily enough, one of the things I dug out during my summer house tidy up yesterday was this.


Which is a large section of black vinyl that came with my donor car.

So I will be attempting to make the gear lever cover out of that.

Cheers, Paul.

PS
My mum and my sister will be arriving soon for a family BBQ, so I'd better go.
Reply With Quote
  #1852  
Old 30th April 2015, 14:40
Viatron Viatron is offline
Senior Member
 
Join Date: Apr 2012
Posts: 1,163
Viatron is on a distinguished road
Default

"My mum and my sister will be arriving soon for a family BBQ, so I'd better go."

Lightweight! put a paintbrush in their hands!
:-)
Reply With Quote
  #1853  
Old 30th April 2015, 14:57
garyh garyh is offline
Senior Member
 
Join Date: Jun 2011
Location: birchington, kent
Posts: 1,769
garyh is on a distinguished road
Default

I thought you were going to ask them to make one...
Reply With Quote
  #1854  
Old 30th April 2015, 15:15
reneanglia reneanglia is offline
Senior Member
 
Join Date: Jan 2015
Posts: 168
reneanglia is on a distinguished road
Default

For the leather cover you better cut 4 piramide shaped pieces and sew these together,sew a channel at the top with a cord or a rubber band in it to close it around the gearstick.
Secure the bottom end as you like.
http://imagehosting.rodsnsods.co.uk/...bea6fe02bd.jpg
Reply With Quote
  #1855  
Old 30th April 2015, 16:12
garyh garyh is offline
Senior Member
 
Join Date: Jun 2011
Location: birchington, kent
Posts: 1,769
garyh is on a distinguished road
Default

I prefer the conical shape myself... more classical.
Reply With Quote
  #1856  
Old 30th April 2015, 19:57
8 Valve Ed 8 Valve Ed is offline
Senior Member
 
Join Date: Dec 2013
Location: Sunny Cumbria
Posts: 470
8 Valve Ed is on a distinguished road
Default

And less stitching...
Reply With Quote
  #1857  
Old 1st May 2015, 12:45
Paul L's Avatar
Paul L Paul L is offline
Senior Member
 
Join Date: Feb 2012
Location: Wembley, London
Posts: 5,056
Paul L is on a distinguished road
Default

Mac - At one point I was hoping to line up the extra people visiting with lifting the frame/floors/arches combo back onto the chassis.
But unfortunately, the rolling chassis still needs a few jobs on it before I am ready to bolt the big pieces back on.

Gary - Well my mum does have a sewing machine, but I will give it a go with hand stitching first.

Rene, Gary & 8 Valve Ed - I think the conical version (with less stitching to do) will be used for my first attempt.

- - - - - - - - - - - - - - - - - - - - - - - - - - - - - - -

Don't Panic!
So far it has been a lovely day to be tidying up the house & garden.

But everything is now ready for the small "horde" of teenage girls descending on our house straight from school.


If I survive the evening I really hope I will get a chance to do some car work over the weekend.

Cheers, Paul.
Reply With Quote
  #1858  
Old 1st May 2015, 14:27
Viatron Viatron is offline
Senior Member
 
Join Date: Apr 2012
Posts: 1,163
Viatron is on a distinguished road
Default

"Horde of teenage girls...."
Time to set up your sleeping bag in the summer house and retire!
Mac
Reply With Quote
  #1859  
Old 1st May 2015, 23:25
a big scary monster a big scary monster is offline
Senior Member
 
Join Date: Apr 2014
Posts: 198
a big scary monster is on a distinguished road
Default

Paul, post me some paper templates, give me a hint want colour leather you want and I'll make it for you and post it, call it quits for the hours of entertainment your thread brings.Ed.
Reply With Quote
  #1860  
Old 2nd May 2015, 18:49
Paul L's Avatar
Paul L Paul L is offline
Senior Member
 
Join Date: Feb 2012
Location: Wembley, London
Posts: 5,056
Paul L is on a distinguished road
Default

Mac - It was a long evening, but when everyone was finally gone I could at last sit down for a beer with my wife.

Ed - I really appreciate the offer, but I will at least give it a go using the vinyl first.

- - - - - - - - - - - - - - - - - - - - - - - - - - - - - - -

Friday:
As well as preparing for the teenage girl invasion, I also went to visit my mate who had a stroke last week in hospital.
He can't really speak and struggles to write, but by all accounts this is still a big improvement from where he was.
I'm glad I went, but it was hard to see his frustration at the fact his body wouldn't do what he wanted to do.

Although one bit of light relief was that I couldn't find his ward and the directions I was given were useless.
This resulted in me walking into the wing where Kate just had her baby and asking for more directions there.
I did think it looked very smart & noticed two big security guards keeping an eye on me as I spoke to the nurses.

- - - - - - - - - - - - - - - - - - - - - - - - - - - - - - -

Saturday:
It was the afternoon before I finally got a chance to do some work on the car...

Rolling Chassis:
Although the first job was to sweep the driveway so I had a clean area to work in & lie on the floor.


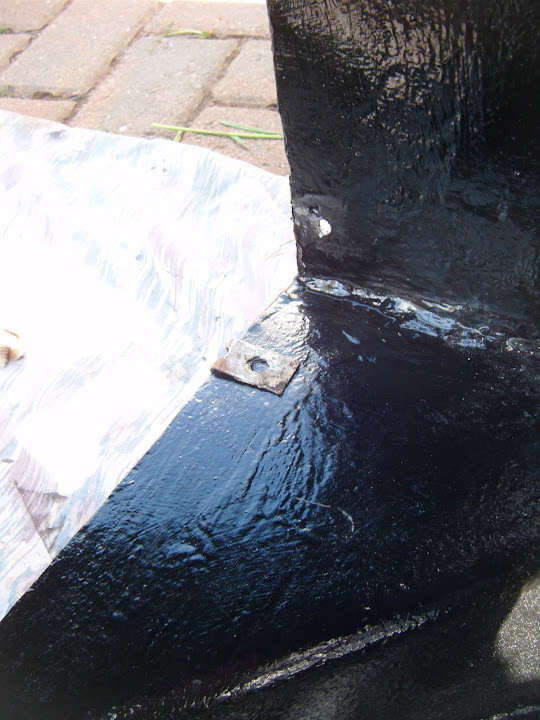
Next I spent some time looking at the bolt holes / crush tubes in the chassis that the framework bolts to.

Because I had previously noticed one bolt was slightly off centre before I removed the framework.


So I used a full length bolt as a guide and then did my best to fix this properly.
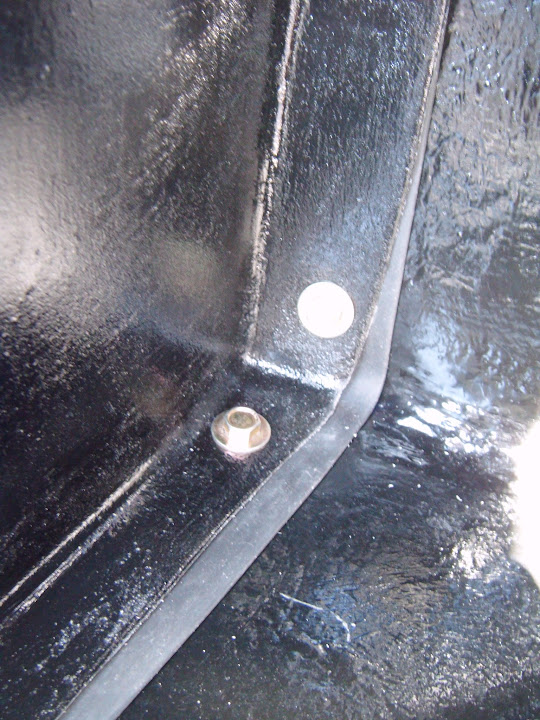
Before:


I re-drilled the hole in the bottom of the chassis to give me this "After" position.


Unfortunately, the angles of the photos don't help, but this is definitely an improvement.

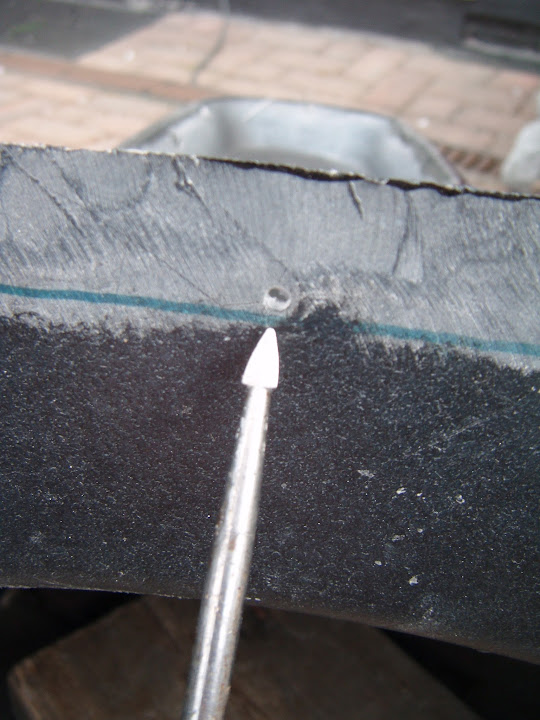
But then the old/surplus hole had to be welded shut.


Note:
This was tidied up a bit more after the photo was taken.

I then re-welded the crush tube to chassis joins along the top edge.


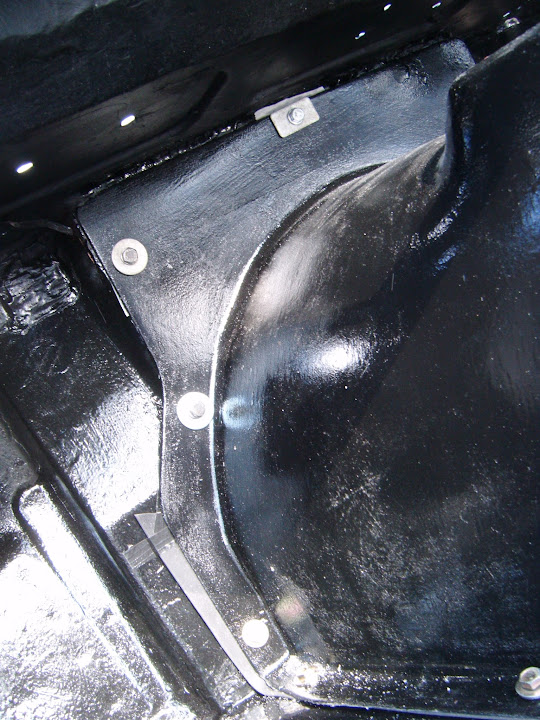
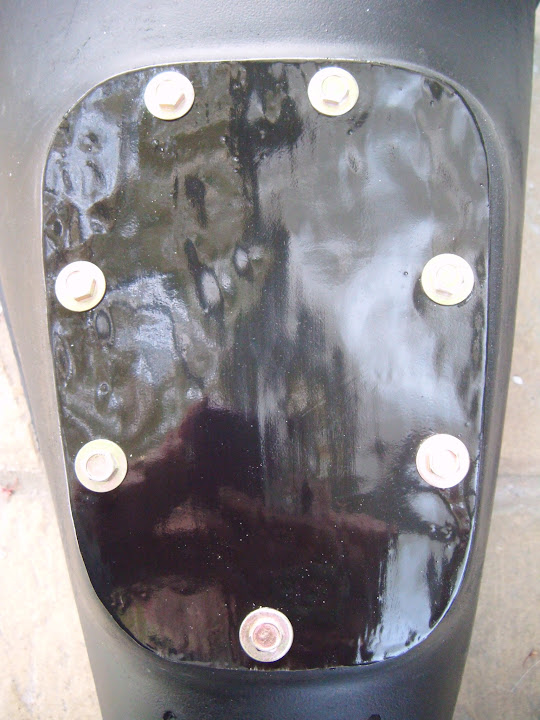
Whilst I had not planned to drill extra holes, I had planned to used "spreader" washers.

So I made cardboard templates for the four metal squares I'd cut out & painted ages ago.


Then putting a hole in the cardboard let me mark up & drill holes in the "washers".


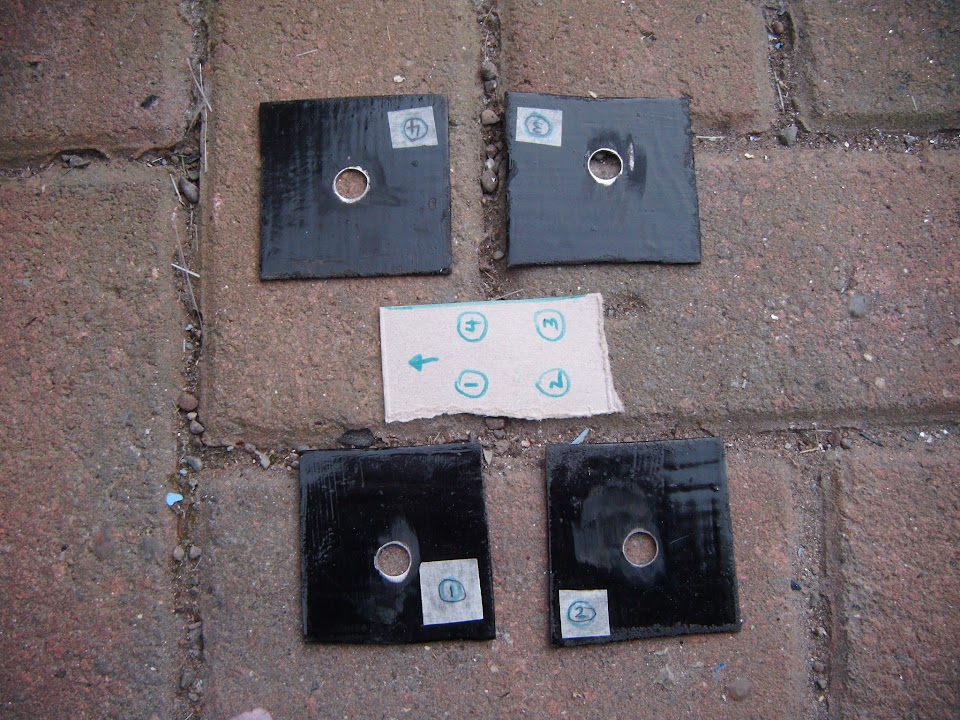
There is a curve on the inside edge of the chassis, so these washers stop short of that.


But continues just beyond the outside edge of the chassis.


So a good few hours working this afternoon has made little visual difference.

But this should improve the way that the frame bolts to the chassis, so well worth the effort.

Until next time, take care, Paul.
Reply With Quote
Reply


Currently Active Users Viewing This Thread: 10 (0 members and 10 guests)
 

Posting Rules
You may not post new threads
You may not post replies
You may not post attachments
You may not edit your posts

BB code is On
Smilies are On
[IMG] code is On
HTML code is Off

Forum Jump


All times are GMT +0. The time now is 01:08.

copyright © madabout-kitcars.com 2000-2024
terms and conditions | privacy policy