|
|
| Tribute Automotive Builds Discuss your Tribute kit build |

16th December 2017, 09:25
|
|
Senior Member
|
|
Join Date: Nov 2012
Posts: 845
|
|
 PM
PM
Steve
You have a PM.
Regards, Mick
|
11th February 2018, 11:52
|
 |
Member
|
|
Join Date: Jul 2017
Posts: 39
|
|
 Progress
Afternoon gents,
A couple of photo’s showing progress on my build. Just about to modify the first motion shaft on the ford gearbox and the GT6 bellhousing to accept each other. Rebuilt straight six is about a week away, brake and fuel lines about to be plumbed in.
Looking forward to getting the Spit body back on to create space in the garage!!
Cheers
Steve
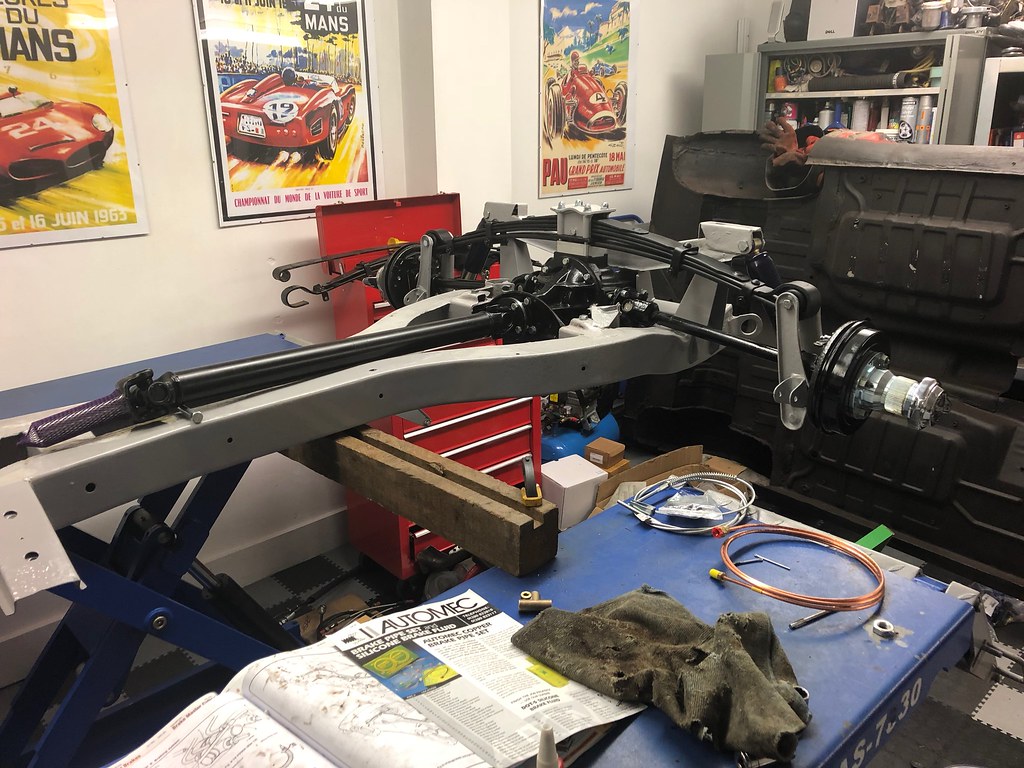 Chassis rear Chassis rear by Steve Ward, on Flickr
 Chassis side Chassis side by Steve Ward, on Flickr
 Chassis front Chassis front by Steve Ward, on Flickr
Last edited by Wardy50; 14th February 2018 at 09:40..
|
11th February 2018, 14:20
|
 |
Senior Member
|
|
Join Date: Feb 2012
Location: Wembley, London
Posts: 5,056
|
|
Wardy50 - Your chassis looks amazing. 
|
11th February 2018, 15:46
|
 |
Senior Member
|
|
Join Date: May 2009
Location: POOLE , DORSET
Posts: 2,200
|
|
Looking very nice ...
|
12th February 2018, 08:02
|
|
Member
|
|
Join Date: Jul 2017
Posts: 39
|
|
Wheel sizes
Gents,
Thanks for the comments - it's taken way longer than I thought to get to this stage, and the car seemed to be really fighting me at some points.
With regard to wheel sizes, has anybody fitted 15" and what tyre size did you fit. Subsequently were there any issues with clearance in the arches?? I'm planning on losing most of the rear inner arches anyway as they are pretty nasty.
Cheers
Steve.
|
12th February 2018, 09:25
|
|
Senior Member
|
|
Join Date: Mar 2015
Posts: 395
|
|
Steve
I fitted 15" wires to my herald based 352 the tires are Firestone 165 R15 86T and yes they will foul the front chassis on full lock If you look at page 8 of my build you will see how to sort it out I eventually used 40mm long sliding stops. you may also need wheel spacers to bring the wheels closer to the edge of the arches I used cheapo 32mm ones of ebay but will change them for some quality ones before it goes on the road.
Cheers
Deggsy
|
13th February 2018, 06:42
|
|
Senior Member
|
|
Join Date: Nov 2012
Posts: 845
|
|
15" Wheels
Quote:
|
Originally Posted by Wardy50
With regard to wheel sizes, has anybody fitted 15" and what tyre size did you fit. Subsequently were there any issues with clearance in the arches??
|
Hi Steve
I fitted 15" TR6 wheels to my A352. I used hub adaptors after swapping the wheel studs for Range Rover ones, these increased the track about 15mm each side. I put hose clips on the outer ends of the rack to limit the lock but the tyres still fouled on the footwell part of the bulkhead, which I had to cut away and recess a good inch.
I first made the panel to fill this hole from thin ally, flattened it and used it as a template for the galvanised steel item which was seam welded. It still needed a little cold dressing with a lump hammer before I was happy with the clearance.
At the back I lined the arches with aluminium sheet using pop rivets and GRP. The 155 80 15 tyres (VW Beetle, for that 50s look) foul a little on bump but the nice MOT man has turned a blind eye 
I'm fitting 15" MGF wheels to my Spitfire chassied Moss Monaco, as the PCD is also 3.75". I'm using Range Rover studs and nuts again, but, with the open wheeler design, fouling won't be a problem other than on full lock. I'll use the hose clip trick again to combat this.
Regards, Mick

|
14th February 2018, 08:36
|
|
Member
|
|
Join Date: Jul 2017
Posts: 39
|
|
Deggsy and Mick,
Thanks for the responses on the wheel sizes and clearances.
Did you both fit the offset hub adapters that are available, or the standard?? I opted for the offset ones which I'm thinking does away with the need for the spacers?? I'll try and post a pic later.
I'm also thinking of playing with tyre sizes to reduce fouling.
By my calc's the standard 13" wheels, fitted with say 165 wide and 80 aspect tyres, would have a rolling diameter of 595mm.
The 15" wheels, again fitted with 165 wide but 65 aspect tyres, would again have a rolling diameter of 595mm.
I appreciate your input on this gents based on your previous experience - to save me re-inventing the wheel as it were!!
Cheers
Steve.
|
15th February 2018, 08:04
|
|
Senior Member
|
|
Join Date: Nov 2012
Posts: 845
|
|
Hub Adaptors Saga
Quote:
|
Originally Posted by Wardy50
Deggsy and Mick,
Did you both fit the offset hub adapters that are available, or the standard??
|
This post details which adaptors I bought, and the problems that I encountered fitting them.
Regards, Mick
|
15th February 2018, 09:28
|
|
Senior Member
|
|
Join Date: Mar 2015
Posts: 395
|
|
no offset on mine as far as I know I bought them as a complete set off a friend. Which were fitted to a Burlington arrow (abandoned project) and the tires are quite narrow so wheel spacers definitely needed, I will also be fitting the longer spitfire 1500 drive shafts which I have recently rebuilt.
Cheers
Derek
|
20th February 2018, 08:24
|
|
Member
|
|
Join Date: Jul 2017
Posts: 39
|
|
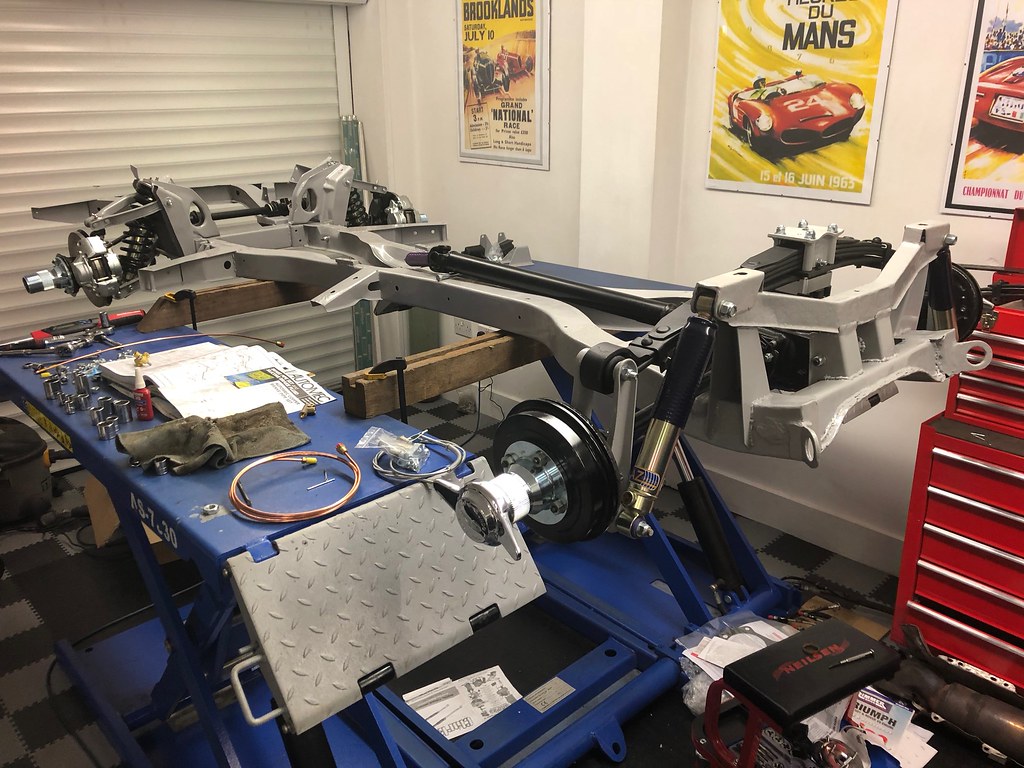
Morning gents,
Think I've finally decided on which way to go with the wheels after a bit of research!!
Going with 4.5J x 15" with 165/60/15 tyres. I reckon this is a 579mm rolling diameter, with the original GT6 with 13" wires having a rolling diameter of 575mm.
Mick I reckon your set up with the larger profiles bought you in at around 630mm, hence the contact issues. I do fully understand the logic in the selection though, and the period look of that profile. I just don't know if after all the body and bulkhead repairs I carried out if I'm prepared to hack into them again!!
These are the offset spline adapters I fitted for information to accommodate the 14 or 15" wire wheels, the standard ones for Triumph 13" are simply not long enough for the splined 42mm MG fitment.
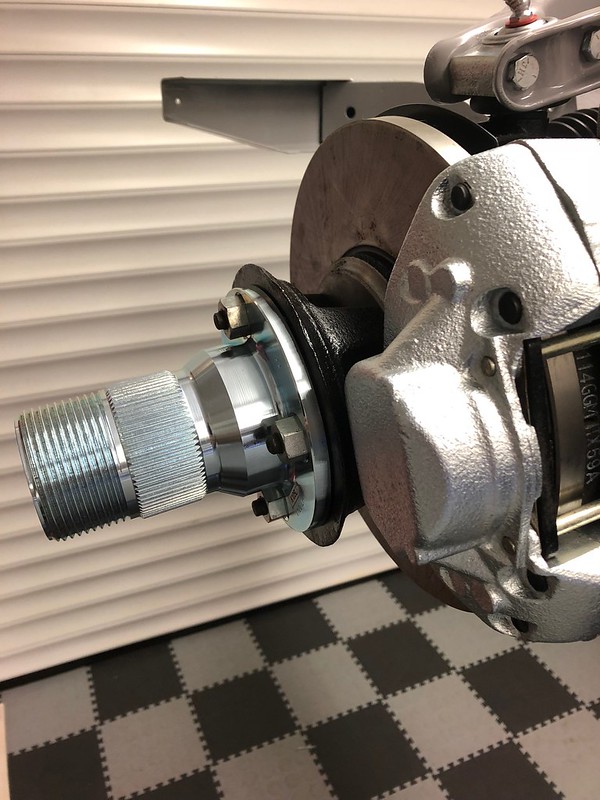 Front hub Front hub by Steve Ward, on Flickr
Once again thanks for all the info on your builds gents. |
11th March 2018, 17:20
|
|
Member
|
|
Join Date: Jul 2017
Posts: 39
|
|
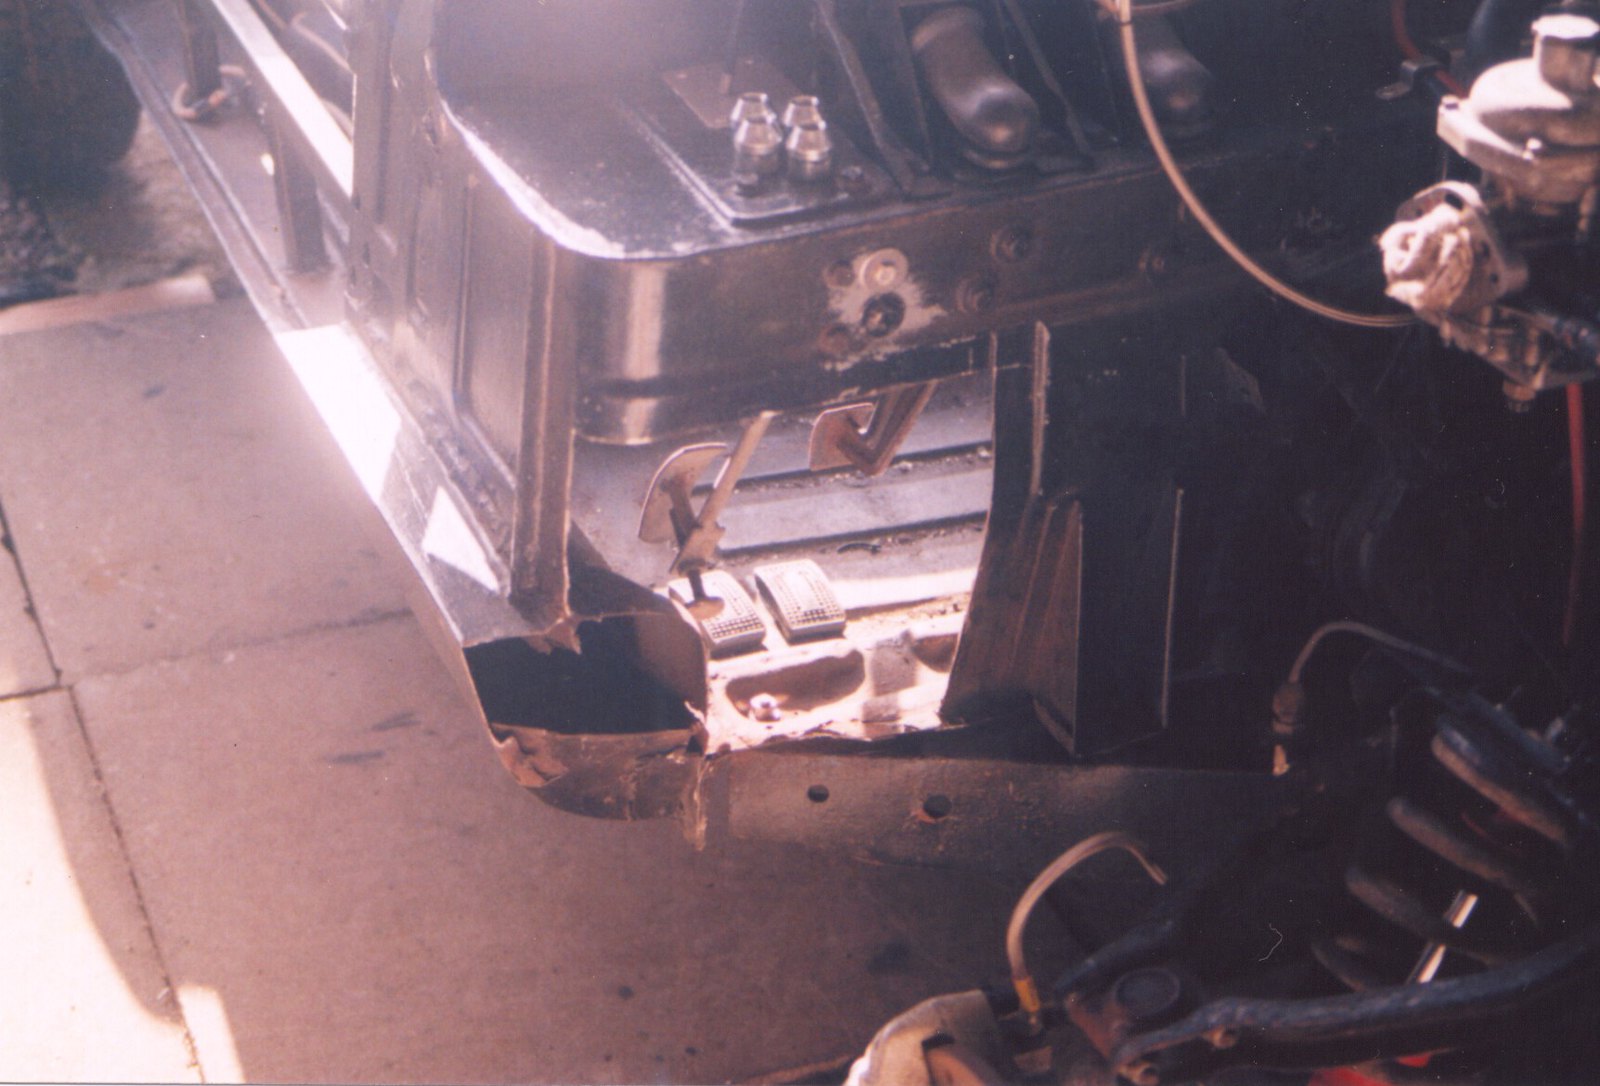
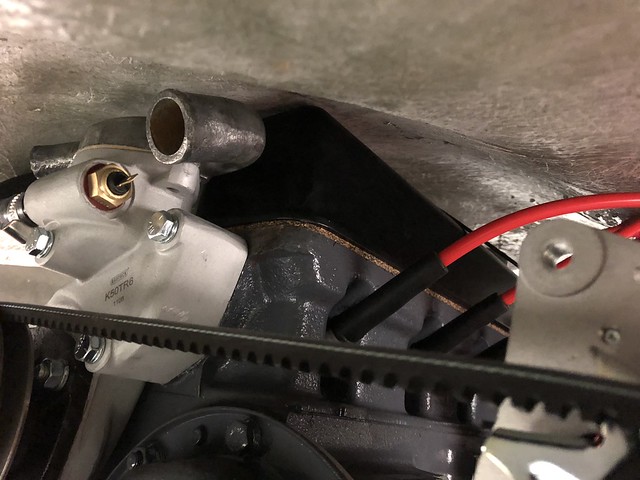
Good evening all, just a quick update on the build. feels like a momentous day as the engine's now in with most of the ancillaries. A few hiccups where the engine guys had fitted the 2000TC sump instead of the GT6, which led to a few clashes until I realised. Also had to play about with the engine mounts and move a few of the front brake lines to accommodate.
Exhaust will have to come off as one of the manifolds clashes with the front chassis upright, but still overall pleased with such a milestone moment.
Thoughts now turn to getting the Spitfire tub back on and arranging to get the A352 body from Dan.
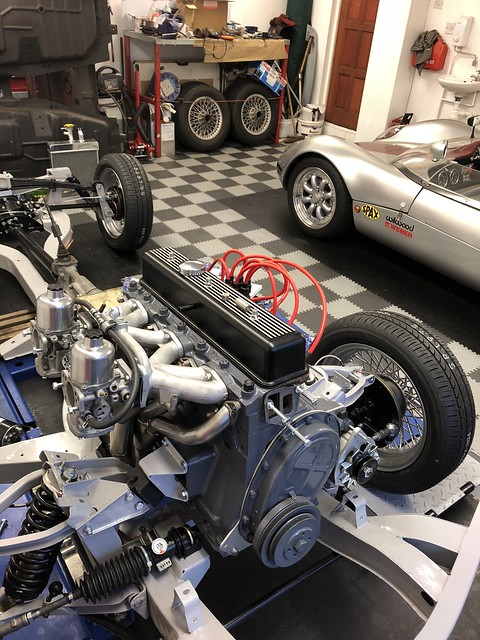 IMG_1683 IMG_1683 by Steve Ward, on Flickr
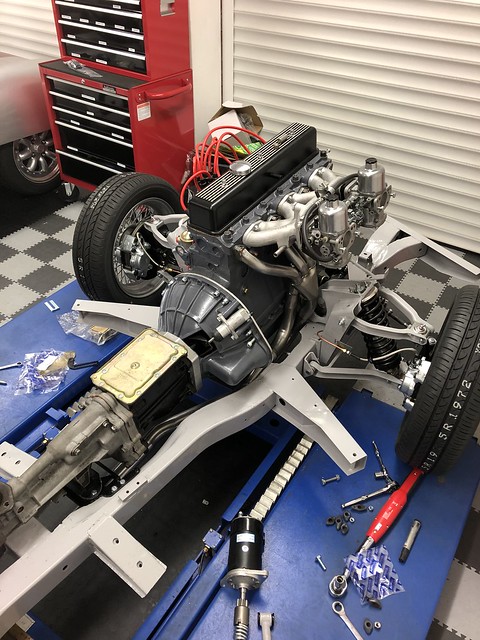 IMG_1681 IMG_1681 by Steve Ward, on Flickr |
14th March 2018, 05:26
|
|
Senior Member
|
|
Join Date: Feb 2012
Location: Wembley, London
Posts: 5,056
|
|
Steve – You have certainly created a high standard base for your A352.
I’m also a little jealous of your garage, tools, skills, other car, etc. 
Good luck, Paul.
|
15th March 2018, 08:32
|
|
Member
|
|
Join Date: Jul 2017
Posts: 39
|
|
Hi Paul,
Many thanks for the reply, and your comments re the car. Build quality maybe OK from a distance - but don't look too close!
I know I'm lucky having the space that I have to work in, I know a lot of these builds are carried out in rather more exposed positions!
The other car is an ERA30H from Tiger, and is pretty much a road going race car. My wife refuses to set foot in it again, hence the A352 build to produce something a little more passenger friendly (doors, heater, windscreen etc).
Anyway, need to pull my finger out now to avoid another missed summer!
Cheers
Steve.
|
4th April 2018, 18:37
|
|
Member
|
|
Join Date: Jul 2017
Posts: 39
|
|
Tubs on !
Gents,
So the tubs back on, and after all the work on the chassis I can't say I'm overly pleased to see it there! Not the most pleasing look!
Next jobs steering column and wheel back on, radiator and cooling hoses coupled up, fuel tank and lines plumbed in to carbs and then get the body on. Apparently there are a large number of 'domestic' items that require attention, so progress maybe delayed whilst brownie points are accrued!
Cheers
Steve
 Tub 1 Tub 1 by Steve Ward, on Flickr
 Tub 2 Tub 2 by Steve Ward, on Flickr |
5th April 2018, 05:14
|
|
Senior Member
|
|
Join Date: Nov 2012
Posts: 845
|
|
 Looking Good!
That puts my underpinnings to shame! Simply superb
Regards, Mick
|
8th April 2018, 09:06
|
|
Member
|
|
Join Date: Jul 2017
Posts: 39
|
|
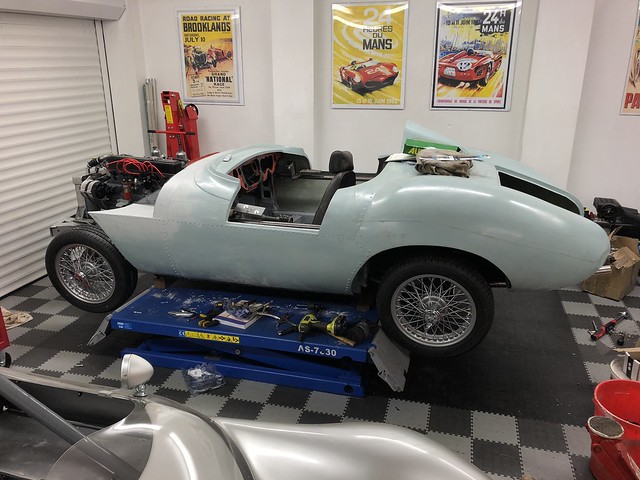
Bit more progress, and the body is on!!
 Body on Body on by Steve Ward, on Flickr
Fitting to the tub was relatively easy with no cutting or rework necessary. When it's on the deck though, its sitting high at the back (even though I fitted a 1" lowering block to the spring!) and needs lowering by about another 40mm, probably by modifying the vertical links and dropping the spring mounting points.
Came to fit the bonnet though and things are not so good!
Both of the SU's clash:
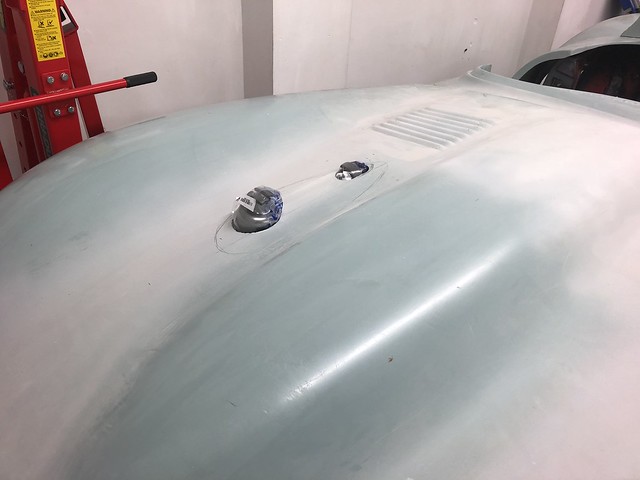 IMG_1720 IMG_1720 by Steve Ward, on Flickr
And the rocker cover:
 IMG_1721 IMG_1721 by Steve Ward, on Flickr
The SU's will be fairly easy with a bonnet blister to suit, and I'll take the opportunity to use it as an air intake for the carbs too.
The rocker cover not as simple. I'm thinking of cutting around the perimeter of the existing bulge, lifting and then glassing back in about an inch higher.
Did anyone else get this, and if so what approach did you take??
Cheers
Steve. |
8th April 2018, 13:53
|
|
Senior Member
|
|
Join Date: May 2009
Location: POOLE , DORSET
Posts: 2,200
|
|
I'd give Dan a call or email first as I am sure I have heard about a couple of these that were fitted too low and had clearance issues but when fitted as the kit supplier intended everything works out fine ...
|
8th April 2018, 19:56
|
|
Senior Member
|
|
Join Date: Mar 2013
Location: Coventry and the Limousin
Posts: 549
|
|
I just can't get over the garage.
|
9th April 2018, 08:06
|
|
Member
|
|
Join Date: Jul 2017
Posts: 39
|
|
Thanks for the response and advice, and yes I'm going to send some pics to Dan before I start cutting for his take on it.
I can't see that it's wrong though (with respect to height) as it site nicely on the Spit tub front and rear, and the 'tabs' were right height on the bulkhead.
The only thing I thought last night was maybe the body wasn't far enough forward, resulting in the bonnet also being pulled back hence the clashes?? This also doesn't ring true however as the main position indicator for the body is the fuel filler 'dimple' to the original Spit filler hole.
It's an odd one, as I know a few people have fitted the 6 cylinder with no issues.
When I get an answer from Dan I'll post it for information.
Thanks
Steve.
|
|
Currently Active Users Viewing This Thread: 1 (0 members and 1 guests)
|
|
|
| Thread Tools |
|
|
| Display Modes |
 Linear Mode Linear Mode
|
 Posting Rules
|
You may not post new threads
You may not post replies
You may not post attachments
You may not edit your posts
HTML code is Off
|
|
|
All times are GMT +0. The time now is 17:15.
|


