|
|
| Sammio Builds and discussions Sammio bodied car builds and specials |

18th May 2013, 07:07
|
 |
Member
|
|
Join Date: Jul 2012
Location: Northampton
Posts: 33
|
|
Viatron - yup, it's a 3 rail with a d-type overdrive. If you have a half decent casing spare that would be a marvellous help. I'll PM you!
Paul L - I think it's bonding paste impregnated into the laminate of the glass fibre. It's in the corners to reinforce them, or at least that is what Gary told me when I collected it.
|
18th May 2013, 09:07
|
|
Senior Member
|
|
Join Date: Apr 2012
Posts: 1,163
|
|
Adam, i have PM'd you back
|
28th May 2013, 11:49
|
|
Member
|
|
Join Date: Jul 2012
Location: Northampton
Posts: 33
|
|
So, I'm afraid my progress will be mostly mechanical for the foreseeable, but I know everyone likes to see pictures of progress and its a useful record for future builders.
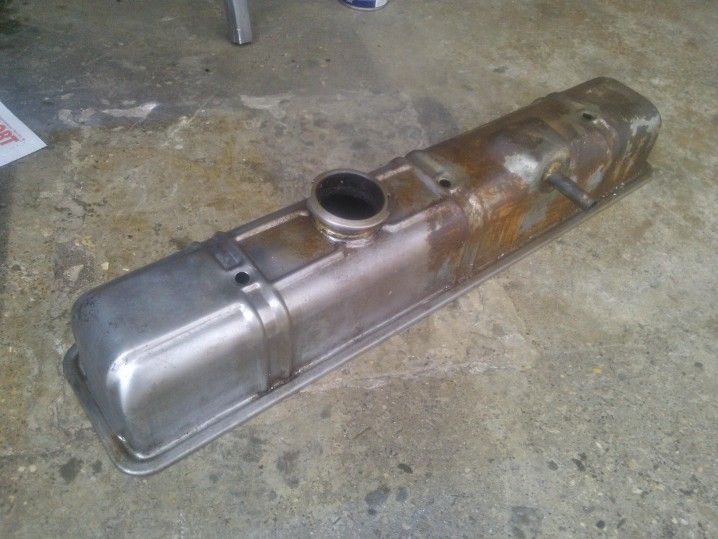
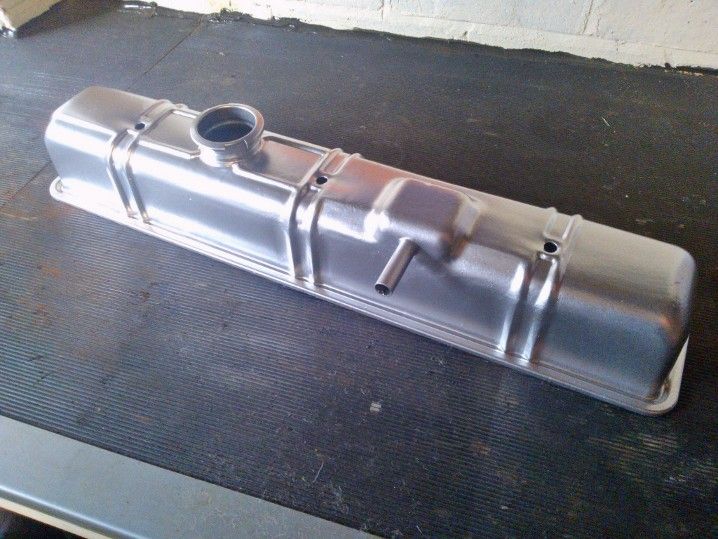
Rocker cover before and after. At one point I had delusions of polishing bare metal but I soon realised that would be the work of a lifetime so resorted to paint instead!
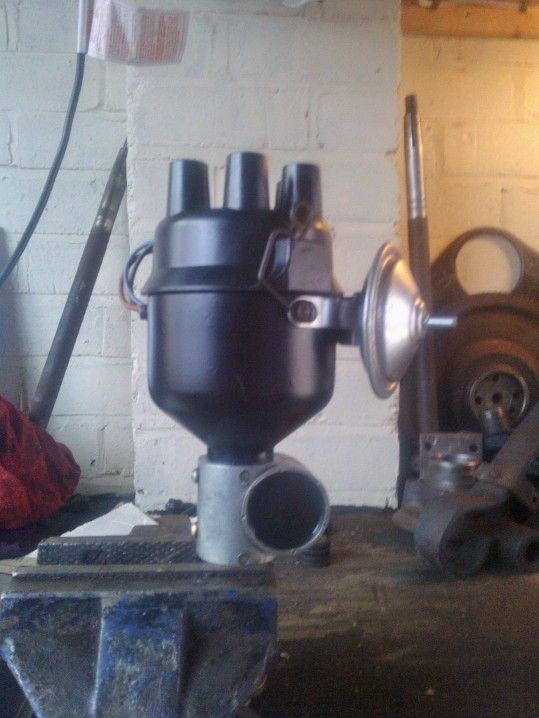
Distributor stripped and cleaned. Short panic when I realised its fitted with luminition electronic ignition and couldn't find the power box but that's now safe and sound.
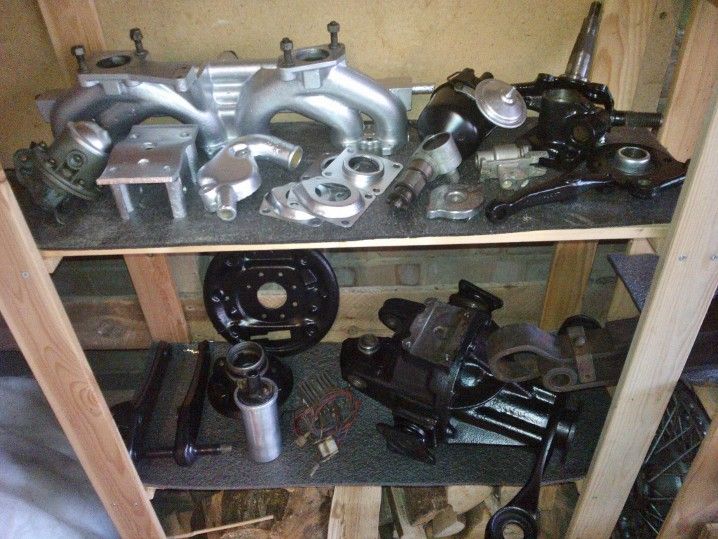
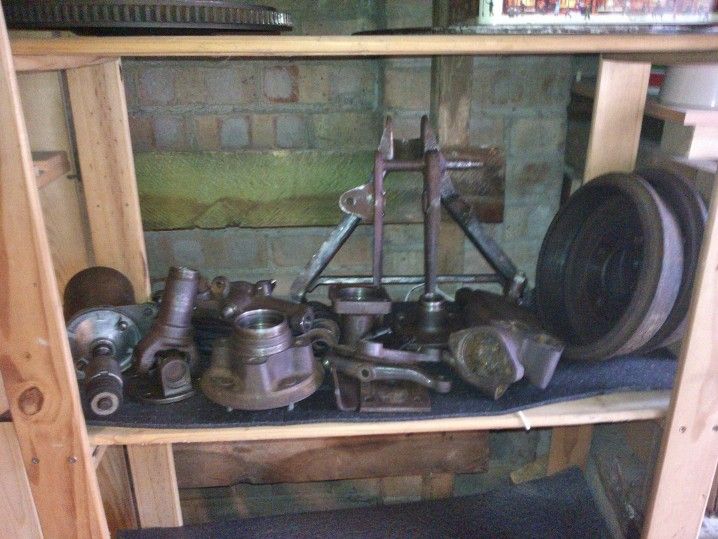
Big tidy up in the man cave resulting in the complete shelf and the clean and ready to paint shelf.
 |
31st May 2013, 06:07
|
 |
Senior Member
|
|
Join Date: Feb 2012
Location: Wembley, London
Posts: 5,056
|
|
Your collection of shiny things continues to grow nicely.  |
2nd June 2013, 22:01
|
|
Member
|
|
Join Date: Jul 2012
Location: Northampton
Posts: 33
|
|
Thanks Paul!
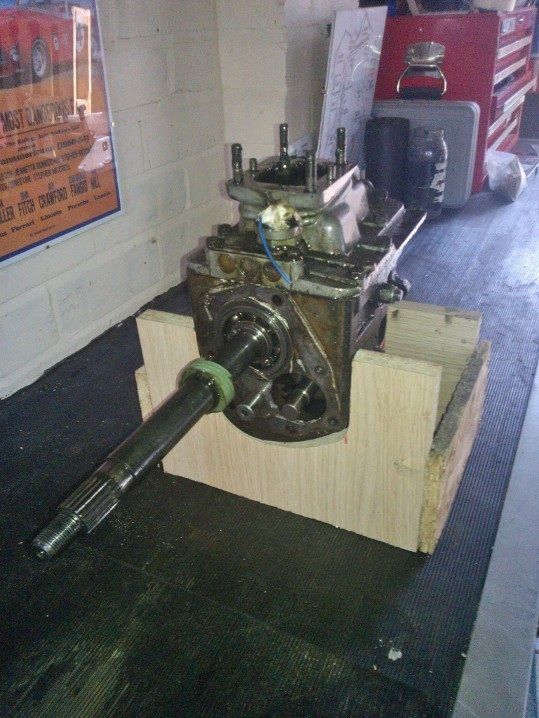
Made a trip up to see Viatron on Saturday to collect a gearbox that he kindly offered me. Top chap and had a good chin wag about all things Ribble. I now know all about the 'cut' that my cordite might need too.
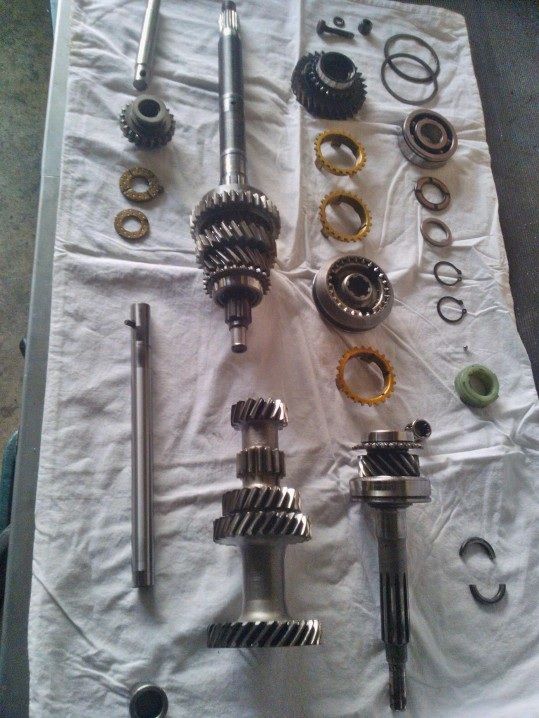
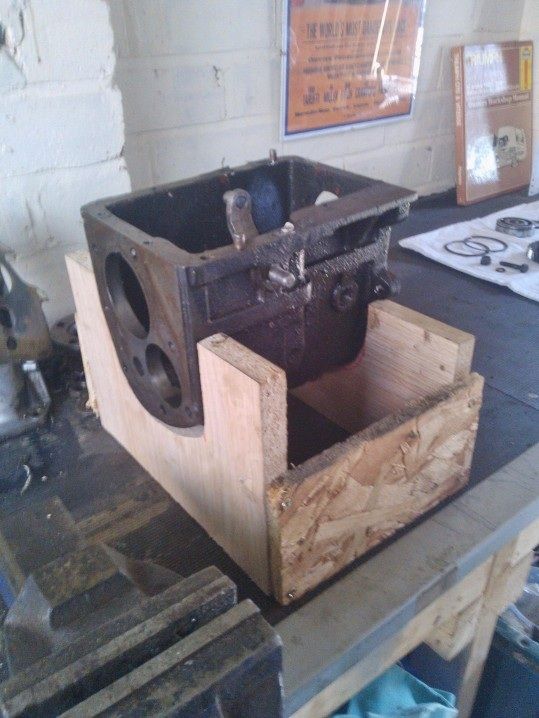
The gearbox was only really needed for the casing as mine was cracked. I was daunted by the prospect of rebuilding the box but after I'd built a quick casing jig and an hour or so of disassembly, it's in pieces and ready to swap!
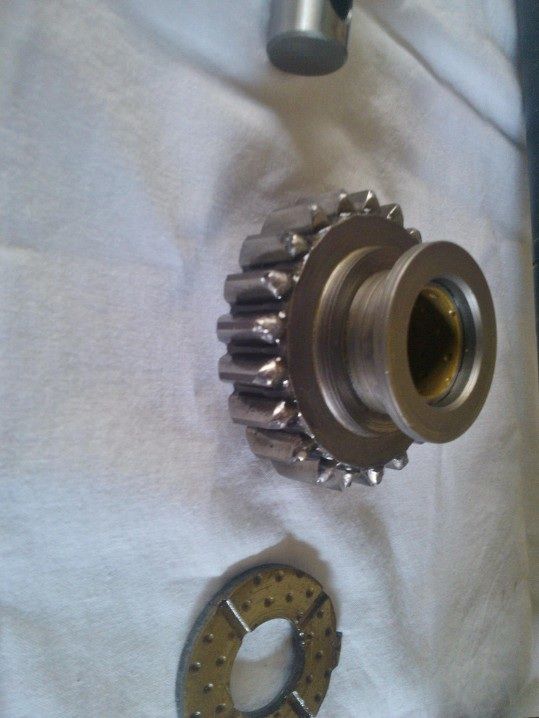
I found the reverse idler was chipped and the main shaft has a bit of play but that doesn't matter as I'm going to use the GT6 internals which I think are in good shape.
So I guess it's as simple as assembly is the reverse of disassembly....!?

One replacement case to be cleaned up and ready to be reborn with an overdrive bolted to the back...
 |
3rd June 2013, 05:26
|
 |
Senior Member
|
|
Join Date: Jul 2011
Posts: 5,328
|
|
Good luck getting your hybrid gearbox back together again. I guess you'll only really know if you've got it right when you put it in first and dump the clutch...
|
3rd June 2013, 06:54
|
|
Senior Member
|
|
Join Date: Mar 2012
Posts: 1,152
|
|
Time consuming but very rewarding once it's all back together. And, with so many pieces, what could possibly go wrong?
Good luck.
|
3rd June 2013, 07:43
|
|
Senior Member
|
|
Join Date: Jun 2011
Location: birchington, kent
Posts: 1,769
|
|
You make it look easy, all laid out...
|
3rd June 2013, 08:34
|
 |
Senior Member
|
|
Join Date: Jan 2012
Location: Poole, Dorset
Posts: 615
|
|
looking good..
Another suggestion might have been to look at the ford type 9 5 speed gearbox conversion from jigsaw racing.. 
gearboxes are one of those things that always seem mega-complex, but latying it all out and taking loads of pictures as you go should mean it simplifies the assembly! |
7th June 2013, 21:08
|
|
Senior Member
|
|
Join Date: Feb 2012
Location: Wembley, London
Posts: 5,056
|
|
Quote:
Originally Posted by adam1979

... I now know all about the 'cut' that my cordite might need too...
|
Part of me wants to know more about this.
The other part wants to stick my fingers in my ears & go "La La La, I'm not listening".

Good luck with the gearbox, I wouldn't have a clue where to begin.
I can barely get the gears on my bicycle to work properly. 
Cheers, Paul.  |
28th June 2013, 11:17
|
|
Member
|
|
Join Date: Jul 2012
Location: Northampton
Posts: 33
|
|

So, potentially a lot of progress this weekend but I fear its all going to be 2 steps forward, one step back (as Paula Abdul would say)...
Both gearboxes are now stripped and I think I have the parts I need to rebuild one mega box over the weekend. With a bit of luck i'll have 4 forward gears and one reverse at the end.
Engine stand has been purchased and an adapter plate been made similar to this one so that I can mount onto the side engine mount. I wasn't too keen to hang 200kg+ on a few 5/16 bolts at the back of the engine!

Whipped the head off my engine in excited anticipation of getting to work on it (forgetting that I had a gearbox in pieces to put back together first). Hmmm, milky oil in a couple of the cam followers and water where it shouldn't be. Not a major issue at the moment as I'm planning to strip most of the engine and replace where necessary. I would like to avoid re-machining and so far it looks slightly feasible as the bores are in very good condition. We'll see what the sump pan reveals tomorrow!
Paul - I don't think the 'cut' is that bad or even necessary. Time will tell when the body finally meets the chassis. Much admiration by the way - building a car outdoors is not something I could imagine entertaining!!!
Anyone got any advice on clearing out the water jacket in the head/block. They are jammed full of crud (perhaps the reason for water where it shouldn't be!!!)

|
28th June 2013, 16:08
|
|
Senior Member
|
|
Join Date: Jun 2011
Location: birchington, kent
Posts: 1,769
|
|
Jetwash?
|
12th July 2013, 08:12
|
|
Member
|
|
Join Date: Jul 2012
Location: Northampton
Posts: 33
|
|
Making sh!t and preparing sh!t for our wedding is taking over nearly all of my time but just before it got busy, I managed a day in the garage. Engine on stand, head off, sump off, fluids drained and all seems to look serviceable. Sat looking sorry for itself but it will soon look good after a good scrub and a few new parts. Photos soon.
The gearbox rebuild was a little less straight forward. I replaced a few parts with new, especially the main shaft tip bearing as that was packed with swarf and had started to collapse. Looked like a poor quality replacement. The cranleys replacement that I fitted was much better. Rebuilding was painful and involved a few hours of assembly and dis-assembly. The Haynes manual just isn't right for the gear clusters that are fitted in my gearbox.
Regardless, it went back together in the end and all seems fine! 4 forward, 1 reverse. 4th a bit clunky but I think that's just to do with the synchro hub springs being a bit stiff. Has more of a race feel getting into 4th. All bolted back together ready for some oil and probably a rebuild as soon as it sees and load!
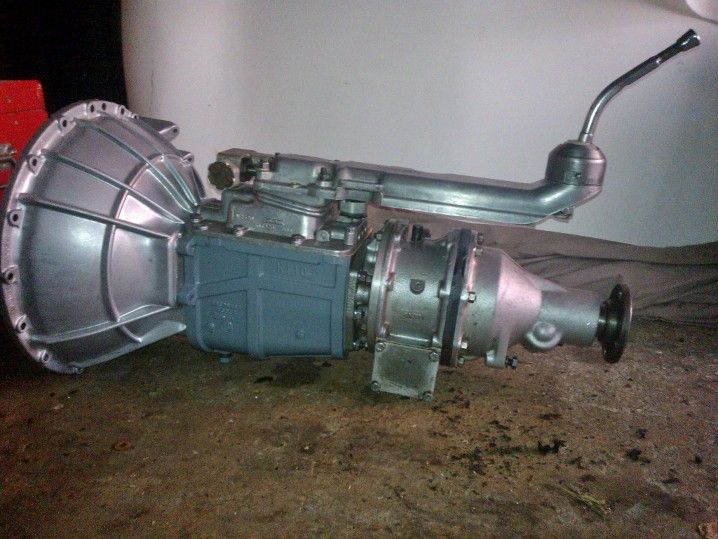 [/URL]
Plenty more photos to follow soon. Hope you are all having fun building or for a lucky few driving in this glorious weather!!!!
|
9th September 2013, 11:50
|
|
Member
|
|
Join Date: Jul 2012
Location: Northampton
Posts: 33
|
|
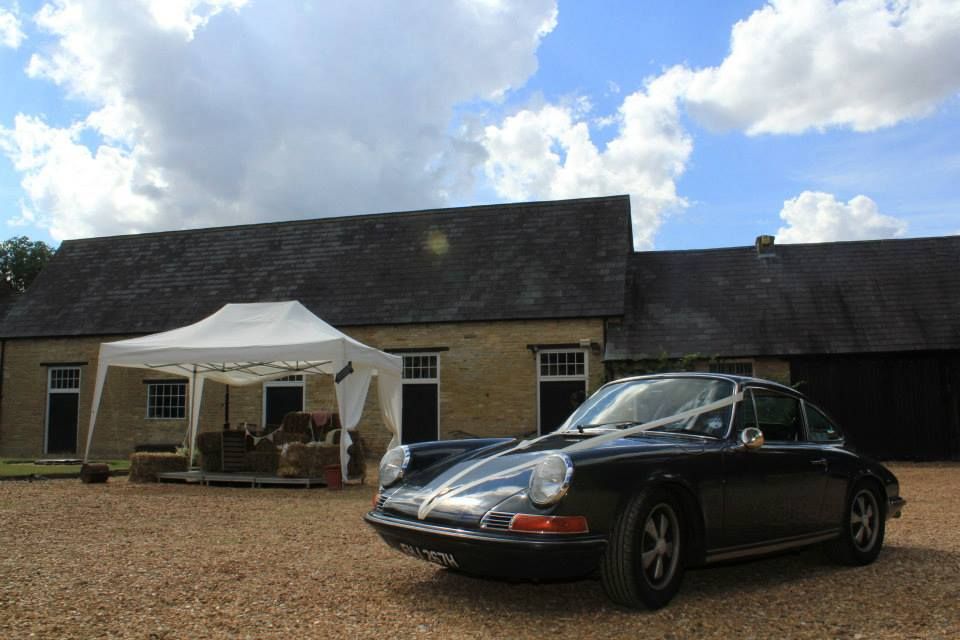
So i've not made a huge amount of progress over the summer as I've been busy getting married and honeymooning. Even so, managed to squeeze a few petrol head related things into both - the wedding car, a 1969 Porsche 911 and the honeymoon car, a 4L Mustang...

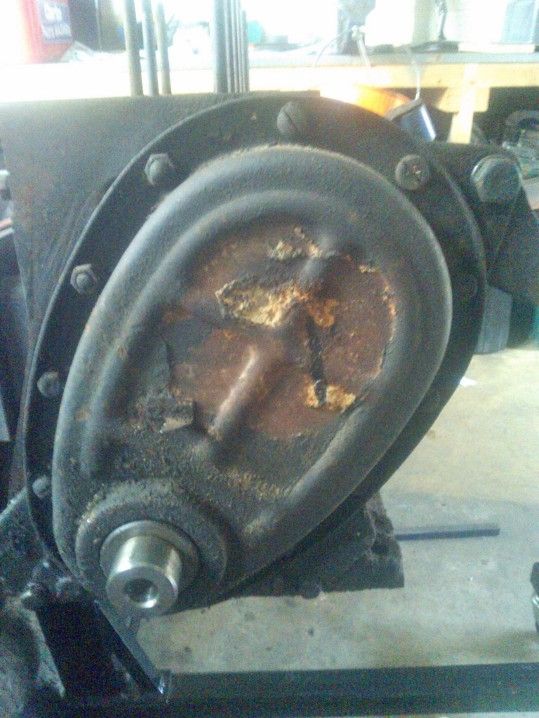
The past few weekends I've been stripping down the engine and I'm glad that I did in the end as I found some problems that would have bitten me in the @rse after a few hundred miles.
The rear crankshaft thrust washer was installed back to front so was running metal on metal. the result of this is the crank thrust face is damaged. I don't think its beyond repair so I've sent it off to a local machine shop today to be refaced. I might need some custom thrust washer made up but at least I'll know it will be spot on tolerance when its finished!
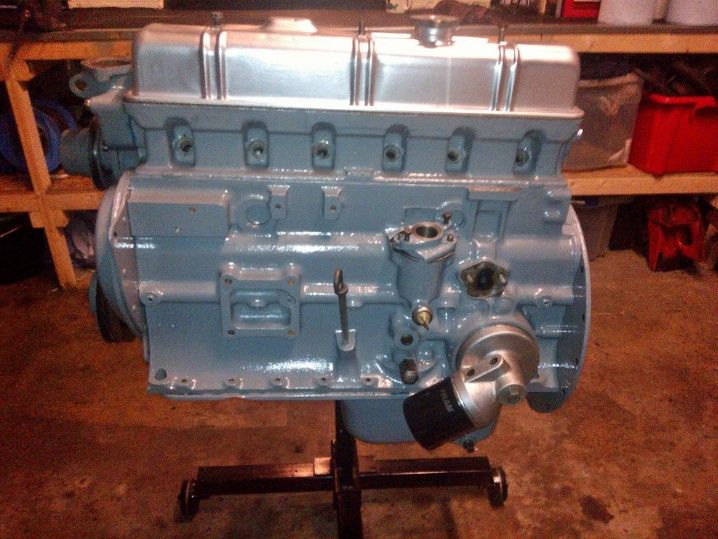
With everything stripped, I went to work on the block with some gunk and a pressure washer. The water jacket was really clogged up but not anymore. All painted up and ready to rebuild once the machine work is completed.
Before...
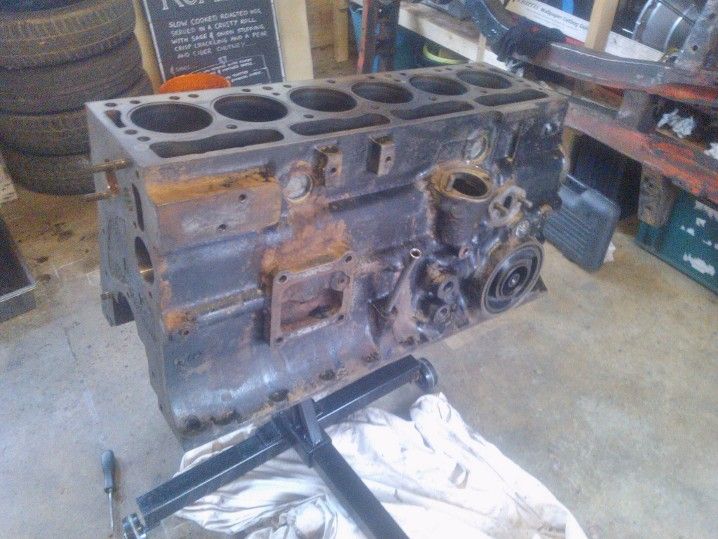
And after...
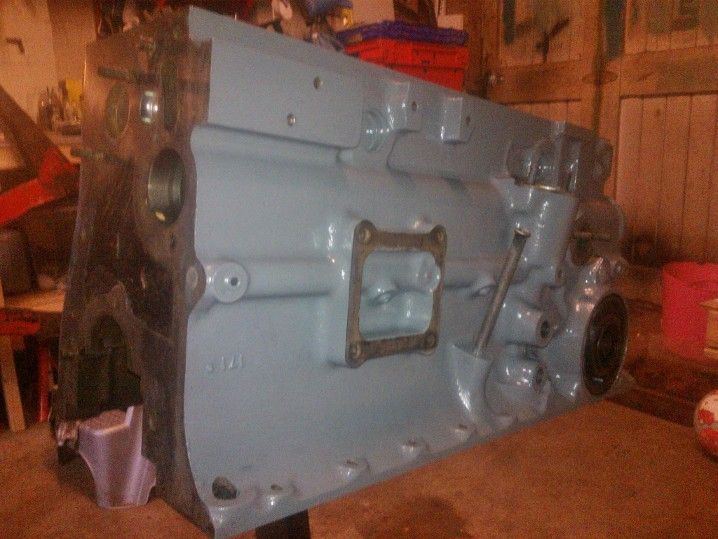
Before...
And after...
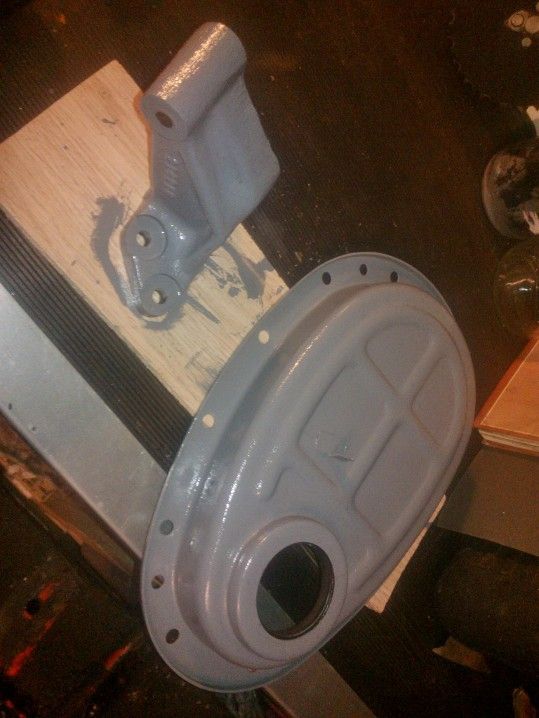
And some engine components...
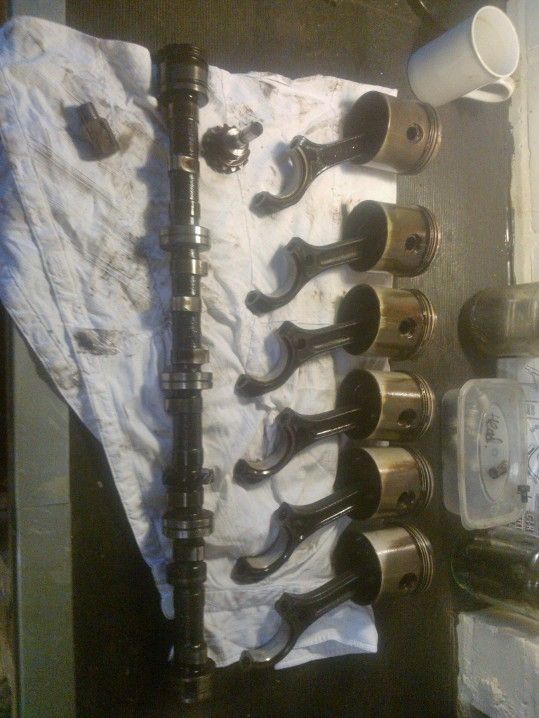
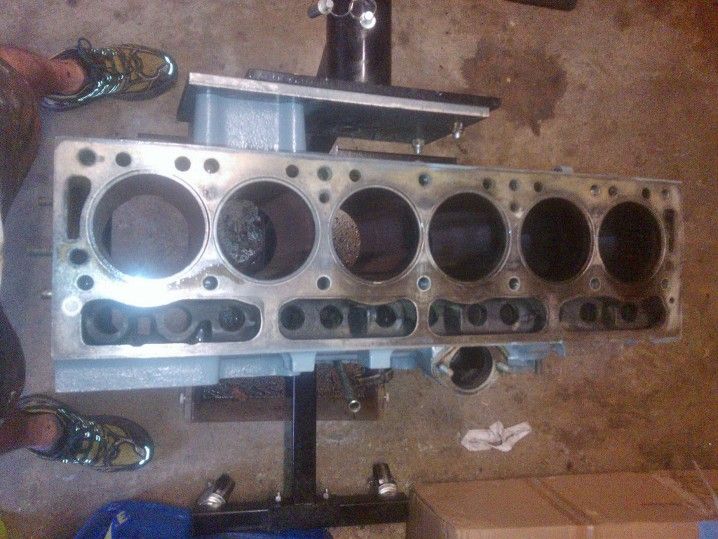
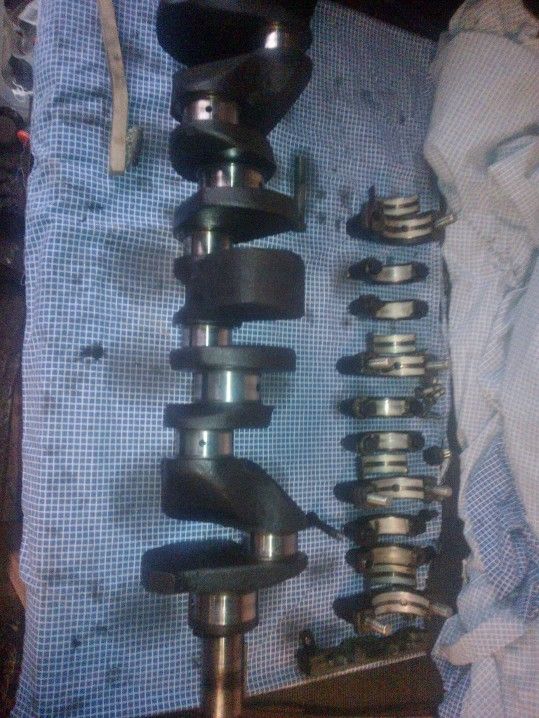
There is one thing that is still confusing me. The main bearings on the crank are 2.3" diameter, not the normal 2". I did some research and though that I could have a TR6 crank in my engine but the stroke is standard for the GT6. I have heard that the bearings were increased in size towards the end of GT6 production (to bring them in-line with the TR6). Any ideas anyone?
Adam
|
10th September 2013, 17:03
|
|
Senior Member
|
|
Join Date: Feb 2012
Location: Wembley, London
Posts: 5,056
|
|
Adam - Don't know how I missed this update yesterday??
First of all congratulations for your wedding.
Looks like you are making steady progress and will have a great engine when complete.
Good luck, Paul.
|
10th September 2013, 18:31
|
|
Senior Member
|
|
Join Date: Apr 2012
Posts: 1,163
|
|
you really didi like the colour of my engine then :-)
|
11th September 2013, 10:50
|
|
Member
|
|
Join Date: Jul 2012
Location: Northampton
Posts: 33
|
|
Ha, yes Viatron, all the inspiration for the engine colour came after seeing your's! Its looks great and really period too. The plan is to have all the running gear black so its only the engine and gearbox casing in that colour.
|
11th September 2013, 13:17
|
 |
Senior Member
|
|
Join Date: Aug 2012
Location: Surrey/Sussex border
Posts: 169
|
|
Congratulations on your recent wedding Adam.
Engine seems to be coming along ... that's something I will be tackling later this year, but mine's only a 4 pot 1147cc.
Keep up the postings ....
Slarti
|
10th November 2013, 20:03
|
|
Member
|
|
Join Date: Jul 2012
Location: Northampton
Posts: 33
|
|
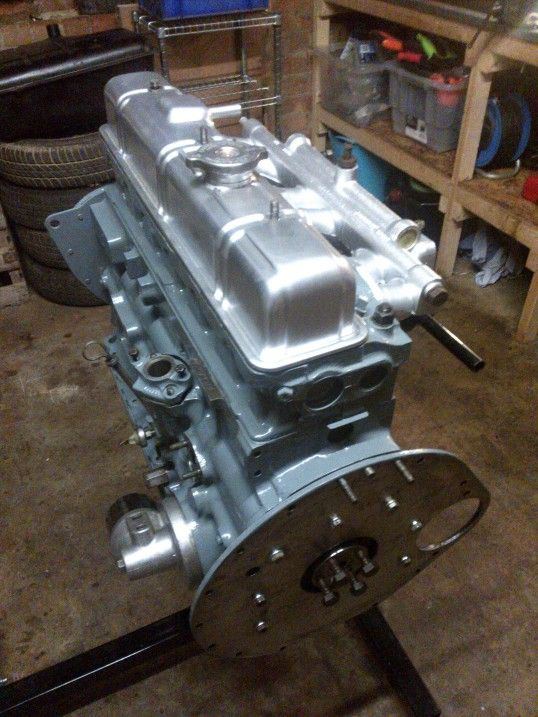
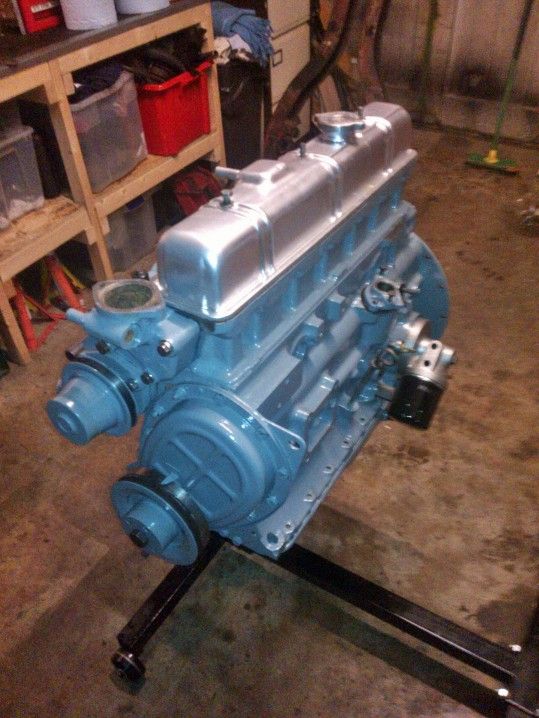
In the past few weeks everything has come together for the engine rebuild and although I'll have no idea if I did a good job for a few months yet, so far so good :-)
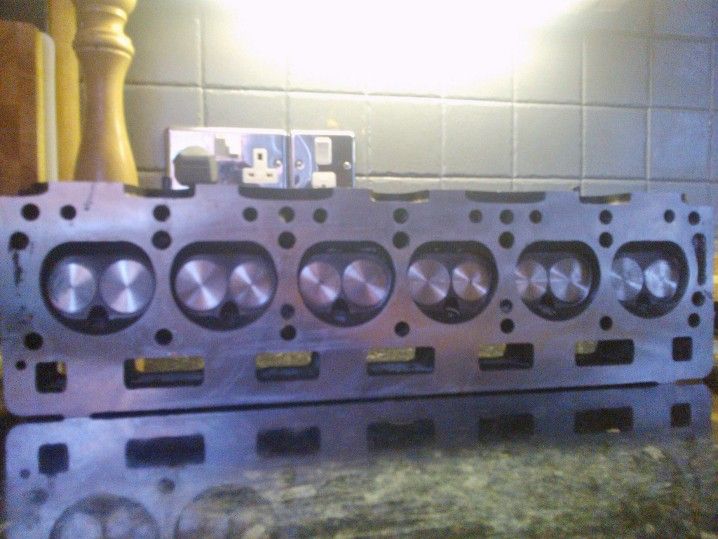
Cylinder head went away for a refurb which included a skim, unleaded exhaust valve seats and recut and seated valves. The crank was also had the thrust bearing faces cut to remove damage from the incorrectly fitted bearings. They supplied the replacement main, big end and thrust bearings too.
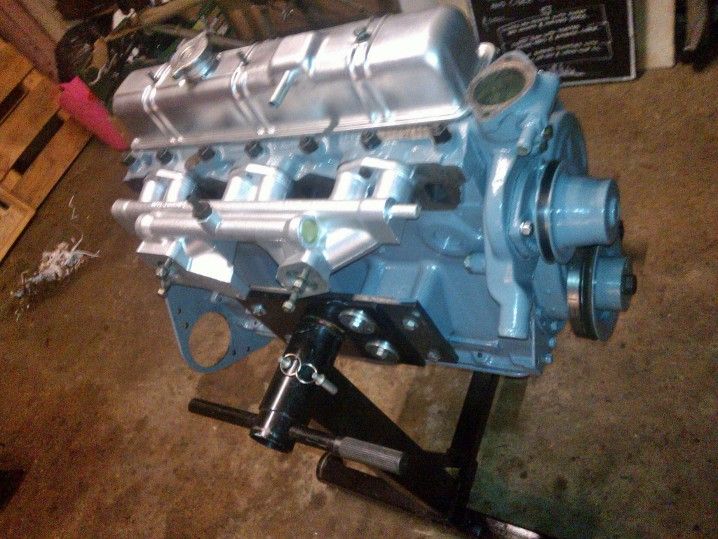
Over the past 2 days I've rebuilt and finished the main painting jobs on the engine. It was actually a lot easier than I'd expected with the main problems being stripped threads in the aluminium sealing block (which I'll repair later) and finding and knowing what bolt goes where.
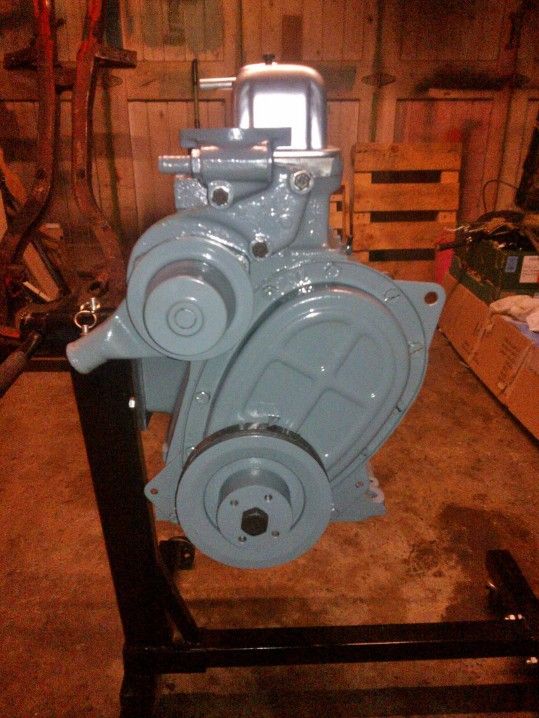
At the end of today (in order) fit the main and thrust bearings and set the crank (its runs nice a freely). Re-fit the pistons with new big ends and set the caps onto the crank (still running freely). Fit the cam, timing chain, sealing blocks, front and rear engine plates, cam cover and chain tensioner kit. Then the oil pump, the sump, head studs and cam followers. Then the head, the rocker shaft (setting the tappet clearances) and then touched up the remaining unpainted surfaces. phew!
Really happy with the end result. I just hope it runs when all the ancillaries are fitted.
Next job is this beasty! I'll get her blasted before some hopefully minor repairs (the outriggers need replacing) and then I can start the rolling chassis and have somewhere to bolt the engine and gearbox!

Adam
|
11th November 2013, 07:29
|
|
Senior Member
|
|
Join Date: Jul 2011
Posts: 5,328
|
|
Wow! What a lovely looking engine, well done. Hope it fires first time for you Adam.  |
|
Currently Active Users Viewing This Thread: 1 (0 members and 1 guests)
|
|
|
 Posting Rules
|
You may not post new threads
You may not post replies
You may not post attachments
You may not edit your posts
HTML code is Off
|
|
|
All times are GMT +0. The time now is 18:52.
|


 Linear Mode

