Are you madabout kit cars      
 "We've Got Kit Cars Covered" Information about Madabout-Kitcars.com Contact Madabout-Kitcars.com         Home of UK kit cars - madabout-kitcars.com Various kit car write ups All the latest kit car news Kit car related and general discussion

Search
Manufacturers
Kit Cars
Kit Car Data sheets
Picture Gallery
SVA Knowledgebase
Clubs & Communities
Build cost estimator
Kit cars for sale
Knowledge Base 
KitcarUSA.com
Classic-Kitcars.com
 

Go Back   Madabout Kitcars Forum > Mad Build Area > Marlin Sportster, Cabrio, Berlinetta and Roadster builds

Marlin Sportster, Cabrio, Berlinetta and Roadster builds Enthused or Confused about your vintage Marlin build? Ask away here or show off your build.

Reply
 
Thread Tools Display Modes
  #1  
Old 18th May 2014, 15:33
mcramsay mcramsay is offline
Senior Member
 
Join Date: Aug 2013
Posts: 130
mcramsay is on a distinguished road
Default bonnet fitting

this weekend i have managed to get the A pillar covers trimmed and fitted, along with the bonnet side panels. and now i am looking to commit to my least favorite part of the build and attempt to do the bonnet. fitting the centre hingle looks simple enough, along with trimming the straight edge of the bonnet that bolts on to the centre hinge. however the part i need some tips on is the actual trimming of the bonnet at the scuttle and nose cone ends. as you need to pick up the moulded body line that the bonnet sits into, but i cannot see how to actually trace that line onto the bonnet to allow it to be cut out.

do people trim both ends of the bonnet ends? i was going to trim the nose cone end of the bonnet side so that it fits perfectly in the nose cone moulding, and then trim the rest of the metal off the scuttle end....if i can work out a way of picking up the mould line.

any tips?
Reply With Quote
Available from eBay
  #2  
Old 19th May 2014, 10:12
MartinClan's Avatar
MartinClan MartinClan is offline
Senior Member
Enthusiast
 
Join Date: Sep 2004
Posts: 1,892
MartinClan is on a distinguished road
Default

As I recall I trimmed both ends. Width wise you need to try and arrange the bonnet so that there is some clearance between it and the bonnet sides. I left about 3mm. Otherwise it rubs all the paint off!

Most of us who built at the same time about 5 years ago discarded the brass hinge supplied by Marlin in favor of a stainless one. You can rivet the hinge, or if you have the patience, it looks very cool fixed with stainless button head screws.

It's worth spending plenty of time getting it right as it's the first thing that people look at....

Cheers, Robin
Reply With Quote
  #3  
Old 19th May 2014, 20:51
Mike Mike is offline
Senior Member
Enthusiast
 
Join Date: Jan 2007
Posts: 932
Mike is on a distinguished road
Default

Any of these help? :


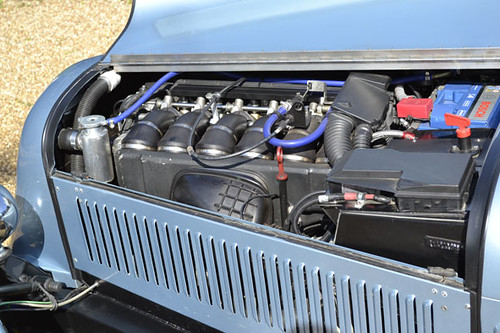
John Clements Sportster is fitted with a J type trim: it is a little more forgiving of non perfect panel fit.


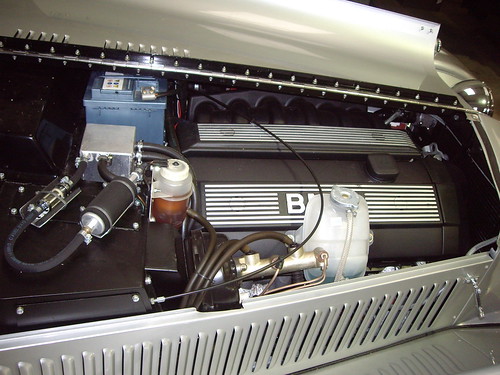
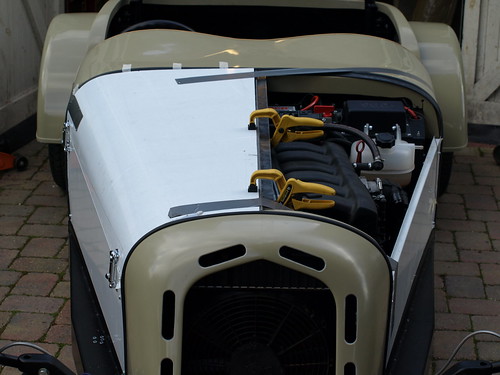
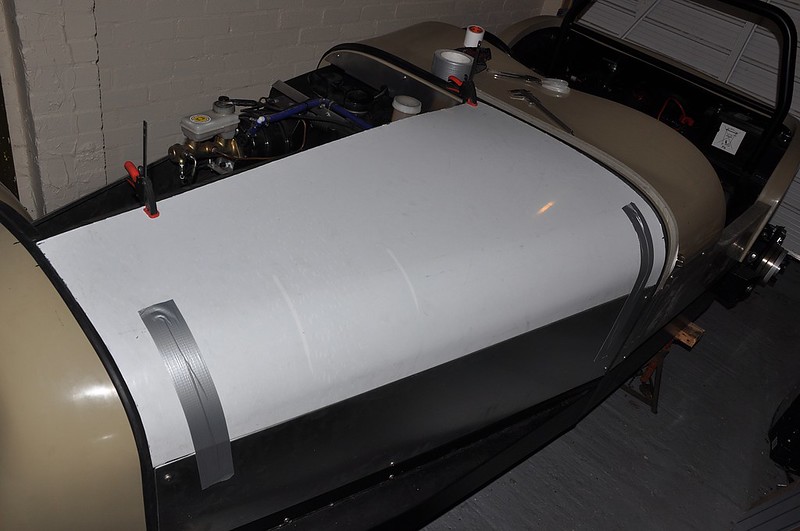
Although the last one is my Cabrio, I chose to fit my bonnet flush with the nose cone surface, by fitting a thin flat strip of neoprene o0n the landing edge of the nose cone, rather than a J profile rubber strip. It requires more attention to detail, but looks neater when finished. The centre hinge will require a rounded end added to it to cover the "sharp leading edge" for IVA.

Do not try to measure the centre - you are best using your eyesight and judgement, as nothing on a Marlin is symmetrical.

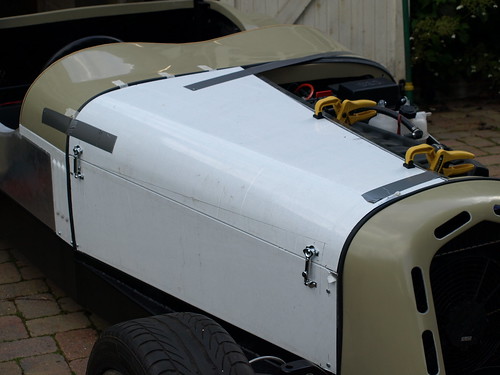
I found the best way to resolve the bonnet pieces was to set the gaps between the top of the side panels and the bonnet with spacers of your chosen depth, then spend time gently forming the bonnet shape to fit the nose cone, such that without any weight applied it follows the nose cone perfectly. Then trim the front edge to follow a parallel line with the nose cone. Finally you have to be brave and trim the hinge edge of the bonnet panels to the hinge. As Robin says, leave 2-3mm gap between edge and hinge, to allow paint to fill some of this, and make sure it does not rub when finished. This is still more difficult than it sounds as there is nothing to support the bonnet until it is attached to the hinge - Catch 22!
I used stainless screws that had plain heads, and despite what one might expect, they tighten up easily.
Simon Gregory used counter sunk pop rivets in order to make them flush with the bonnet material, which worked nicely, and were covered over by primer/filler paint: the only draw back being that after a while the filler paint cracks. Moral being, don't try to hide your bonnet fixings!
Reply With Quote
  #4  
Old 19th May 2014, 22:52
NigelB NigelB is offline
Senior Member
 
Join Date: Jun 2010
Location: Reading
Posts: 229
NigelB is on a distinguished road
Default

It's easy.............................................. ...........

Or so I thought. It turned out to be the most frustrating part of the whole build.

My thought process went like this. The centre line is a nice straight edge. Mark the centre points of the nose cone and scuttle and align the long straight edge of the bonnet panel with the marks. Then there's clearly a right angle between the centre line and the scuttle so scribe and cut the scuttle edge to suit making sure you compensate for the roll off at the bonnet outer edge. Once complete. tape the bonnet top in position with the centre line and scuttle edge aligned, push down on the front of the panel so it rests on the nose cone and mark the cut line. No problem.

But once you've put pressure on the front of the panel to sit it on the nose cone you find the rear edge is no longer aligned with the scuttle.

I ended up cutting the front and rear edges a number of times with a heavy dose of trial and error. It was a real pain. Not my greatest moment but got a reasonable result (certainly not perfect) in the end.

And of course with the experience gained from the first half bonnet the second one should be much easier.

Fat chance.........................

Here's some pics

Bonnet Fitting by MarlinBuild, on Flickr

Bonnet Fitting by MarlinBuild, on Flickr
Reply With Quote
  #5  
Old 20th May 2014, 19:39
morris's Avatar
morris morris is offline
Senior Member
 
Join Date: Jan 2011
Location: South Wales
Posts: 378
morris is on a distinguished road
Default

Like most things relating to bodywork on this car I've found that once you've plucked up the courage to start making cuts it's not all that bad after all. I followed a principle that Patrick used on his web site to cut roughly the right lines.

http://www.msportster.co.uk/bodywork...allery/page-9/

I basically stuck some masking tape down the scuttle line, measured a suitable distance back from the scuttle (about 50mm) and then drew a line on the tape that replicated the line the bonnet needs to follow. Drop the bonnet on the car, tape it into position then copy that line back onto the bonnet 50mm back in the other way. It's not perfect but gets you close enough that you can start filing and trimming to get it right.


https://www.flickr.com/photos/58068042@N07/12273374224/

The order I went in was
1. scuttle
2. nose cone
3. hinge line rough trim to within an inch
4. hinge line final trim to a few mm inside the hinge itself

The reason for doing two cuts on the hinge is so that you can get some clamps over like in Nigel's photos.

After that it was a case of fettling and filing until I was happy (which I'm not). The curves in the bonnets don't really match the lines of the body so I had to slowly work them into shape using the edge of a kitchen style work top as former running it back and fore a bit like an English wheel applying gentle pressure to get it into shape.

The other thing to remember is to do all this with the seals on as they make a big difference and also to account for any edging trim you'll be adding front and back for the IVA both in terms of the length of the bonnet and how much it will lift the sheet away from the seal. I didn't do the latter so my shut lines horizontally to the side panels are a bit wider than I'd like.
Reply With Quote
  #6  
Old 20th May 2014, 20:18
mcramsay mcramsay is offline
Senior Member
 
Join Date: Aug 2013
Posts: 130
mcramsay is on a distinguished road
Default

Thanks for the replies! Managed to get the passenger side bonnet half trimmed to fit between the mouldings, will need to put the rubbers on now and do the final fettling! Wasn't so bad in the end! Hopefully I will get the bonnet finished this week and move on to the fibreglass wings at the weekend!
Reply With Quote
  #7  
Old 23rd May 2014, 19:10
Patrick's Avatar
Patrick Patrick is offline
Senior Member
Enthusiast
 
Join Date: Feb 2005
Location: Hampshire
Posts: 2,497
Patrick is on a distinguished road
Default

I cut front and back too, some untrimmed pics here

http://www.msportster.co.uk/bodywork...gallery/page-4

And trimming starts here

http://www.msportster.co.uk/bodywork...gallery/page-9

I did a hell of a lot of looking and measure before cutting

I also changed to stainless before painting, much nicer than the brass.
Reply With Quote
  #8  
Old 24th May 2014, 13:11
mcramsay mcramsay is offline
Senior Member
 
Join Date: Aug 2013
Posts: 130
mcramsay is on a distinguished road
Default

The kit now comes with a stainless hinge as standard. The bonnet is a lot of work. I now have both halfs trimmed, but will still need a little final fitting. I have drilled the holes in the hinge and I'm ready to line the hinge up and start to to the hinge cuts on the bonnet! Can't wait to get the bonnet finished, it's the only bit of the build that has really worried me. And I only have one chance! But it's really easy to mess up if you are not paying attention!
Reply With Quote
Reply


Currently Active Users Viewing This Thread: 1 (0 members and 1 guests)
 

Posting Rules
You may not post new threads
You may not post replies
You may not post attachments
You may not edit your posts

BB code is On
Smilies are On
[IMG] code is On
HTML code is Off

Forum Jump


All times are GMT +0. The time now is 21:21.

copyright © madabout-kitcars.com 2000-2024
terms and conditions | privacy policy