|
|
| Marlin Sportster, Cabrio, Berlinetta and Roadster builds Enthused or Confused about your vintage Marlin build? Ask away here or show off your build. |

18th March 2014, 19:20
|
|
Senior Member
|
|
Join Date: Aug 2013
Posts: 130
|
|
 Build update
Hey guys. Been a few months since I last posted on here, just thought I would give an update on how I'm getting on and post up a few pics. So now minus the handbrake cable the rear end of the car is mechanically complete
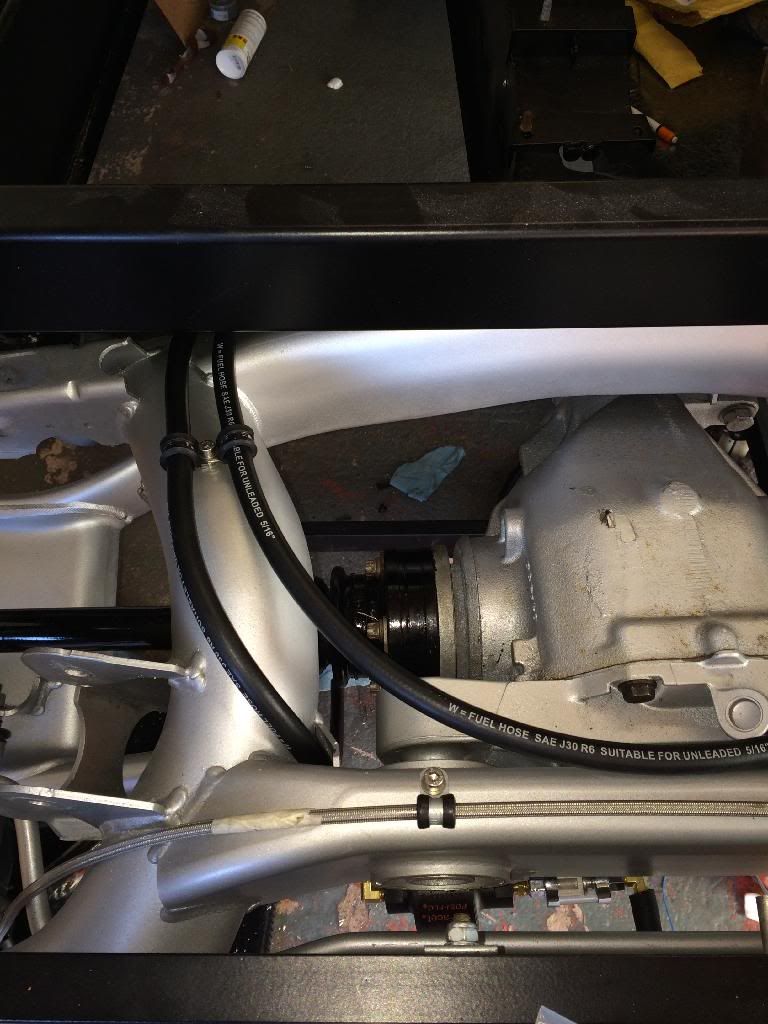
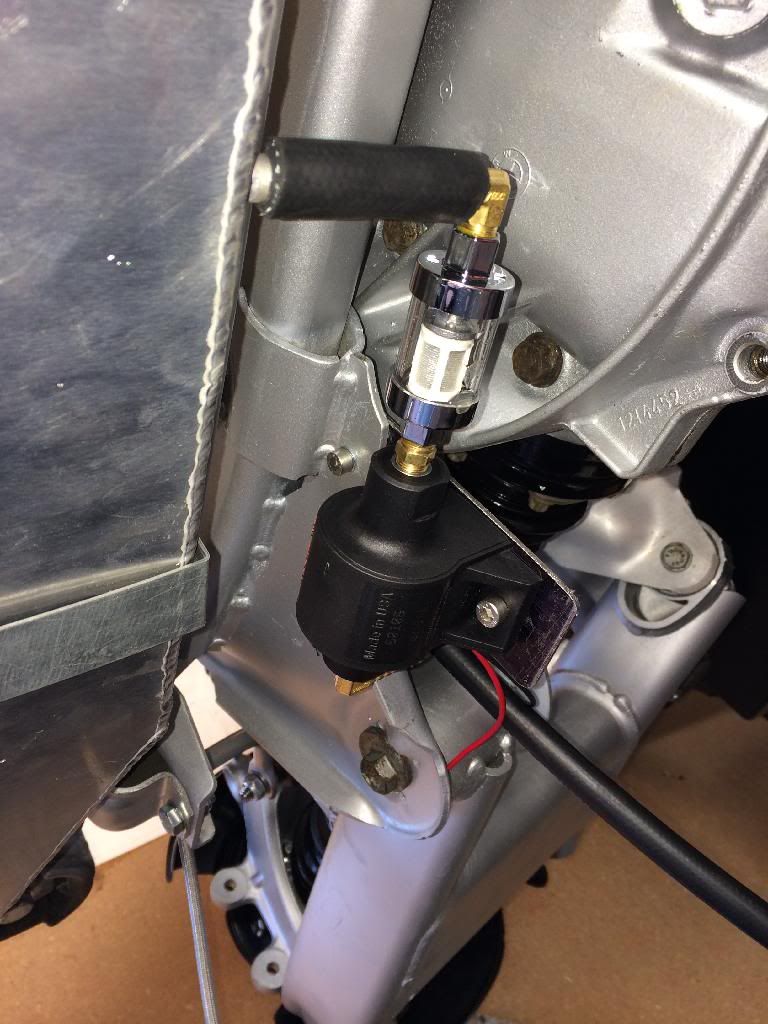
I mounted the LP pump just to the rear of the diff
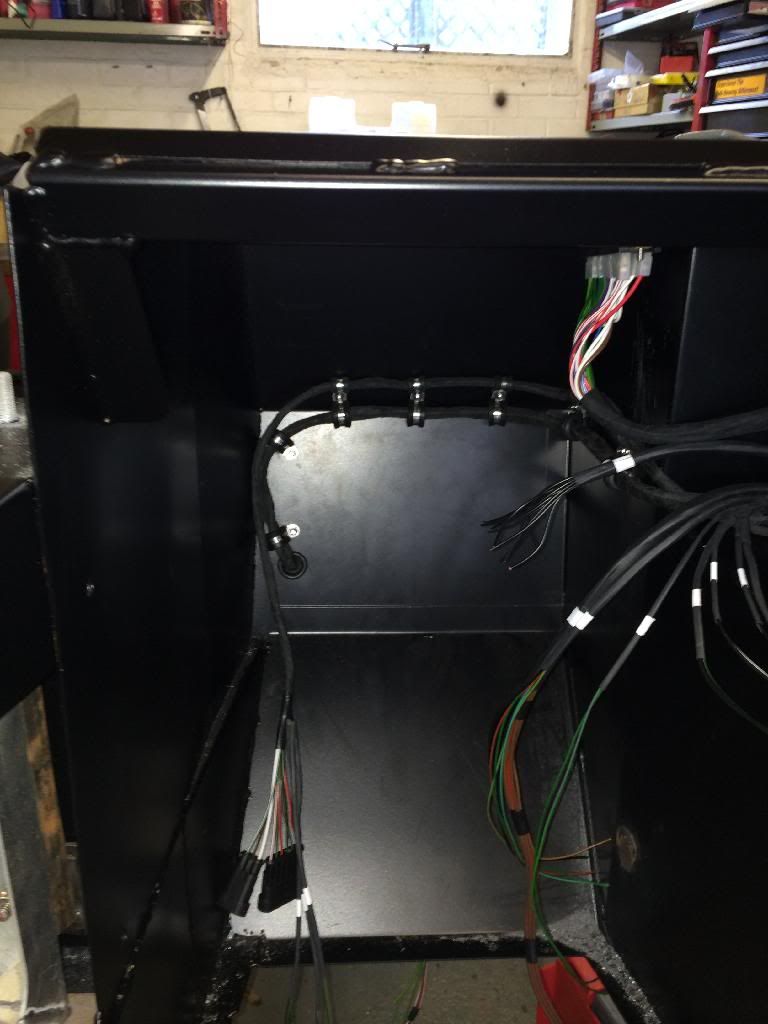
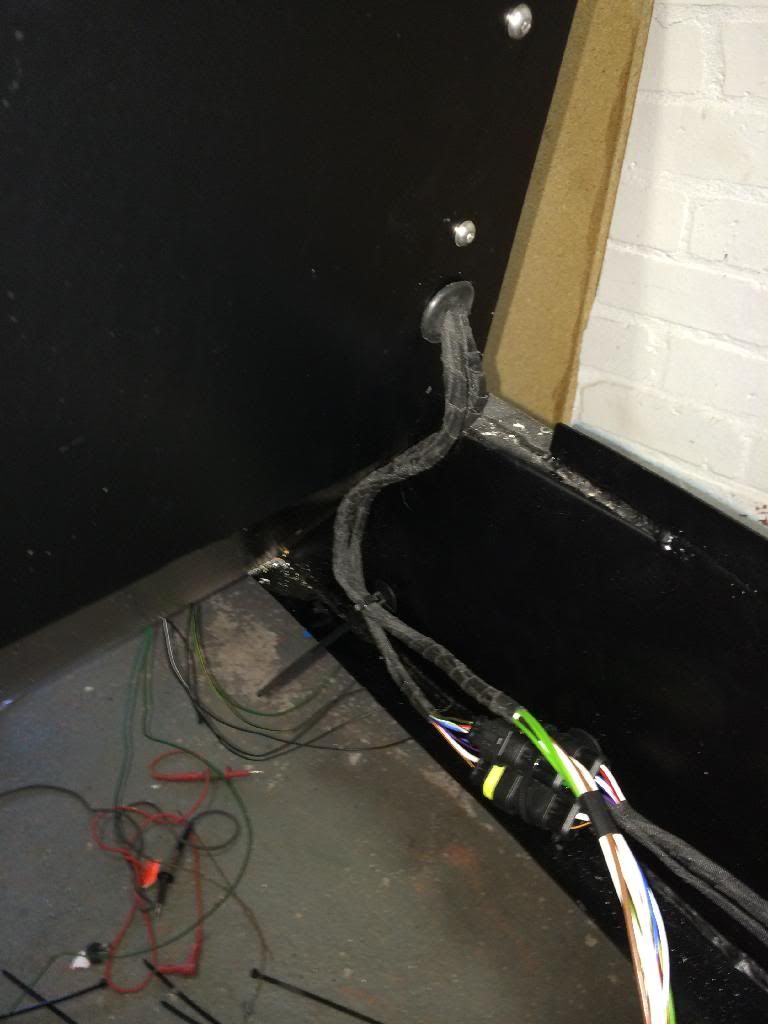
Have now also run the majority of the wiring loom through the car as below
And also at the weekend I managed to get my 3.2 s50b32 m3 engine fitted into the car:
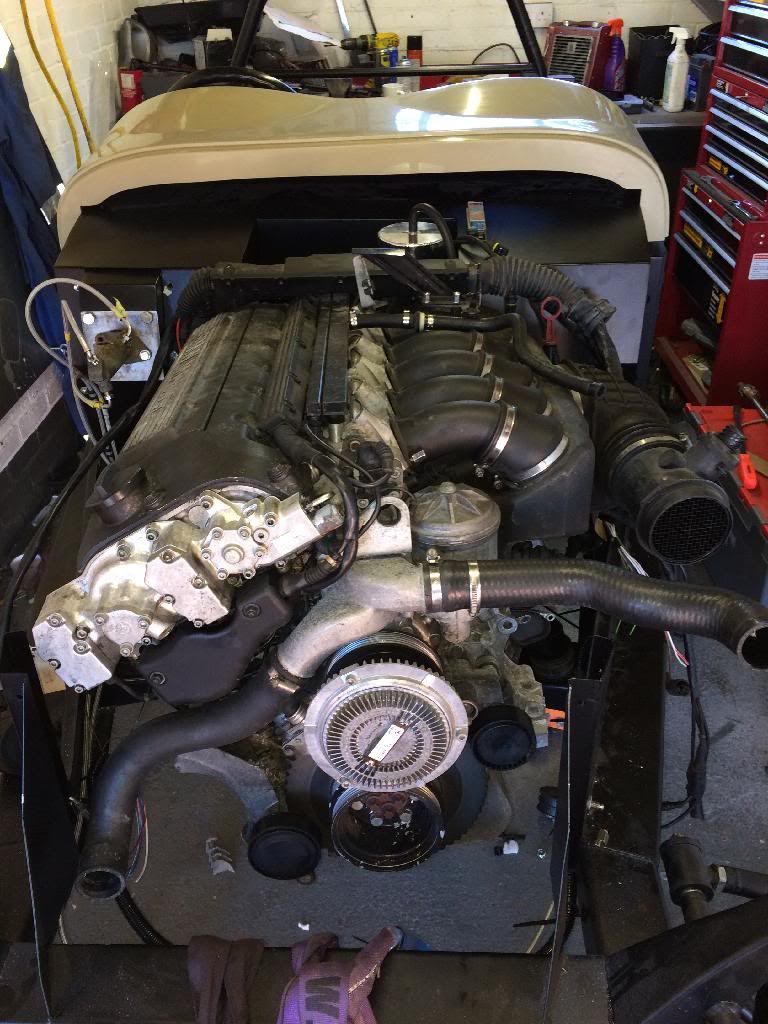
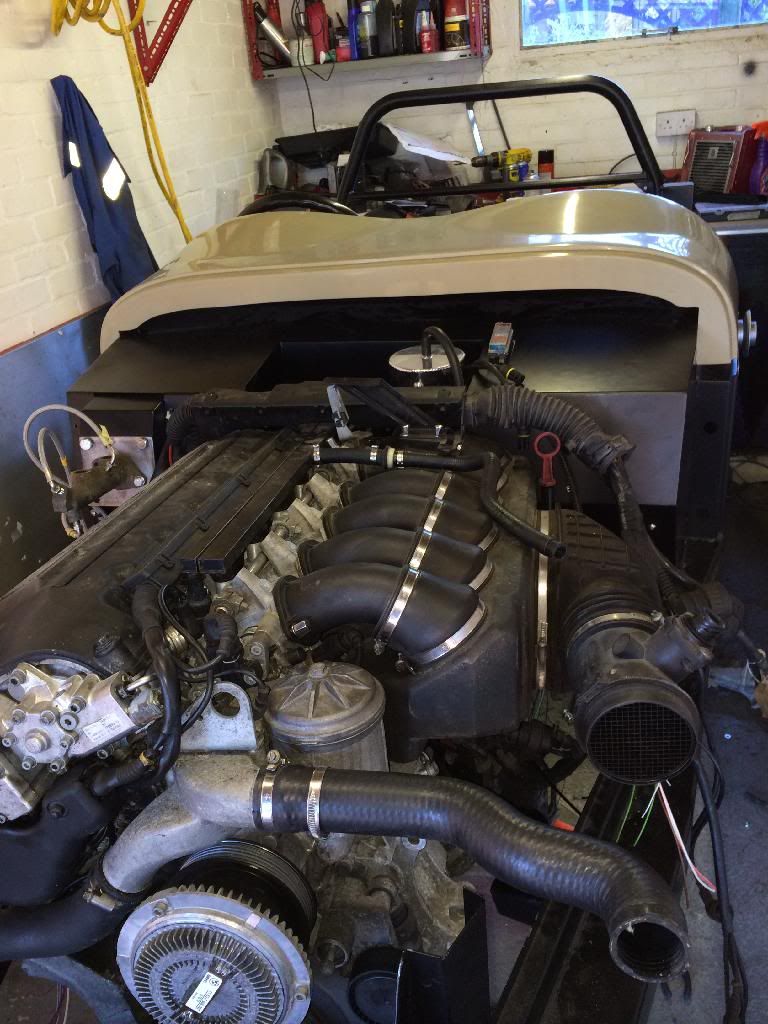
It's in the car but I wouldn't say it fits just yet, I have a few issues I pretty much expected... I need to relocate the alternator, and some how manage to get the inlet pipe work routed through the engine bay. And not 6" out where the side panel should go. |
19th March 2014, 09:23
|
 |
Senior Member
Enthusiast
|
|
Join Date: Feb 2005
Location: Hampshire
Posts: 2,497
|
|
Nice, interesting seeing the new chassis layout at the back
Last edited by Patrick; 19th March 2014 at 13:33..
Reason: typo
|
19th March 2014, 12:31
|
 |
Senior Member
Enthusiast
|
|
Join Date: Sep 2004
Posts: 1,891
|
|
Ooo - looking good. Good luck with getting the engine fitting sorted. There are all sorts of really compact alternators about now, should that help. I would probably have gone that route had they been available when I did my build.
It looks like the biggest challenge could be getting the inlet pipework sorted. I guess that M3 will need a lot of (cold) air!
I noticed you seem to have used quite a small low pressure pump. Did you check its capacity (throughput)? Most of us that completed their build over 5 years ago used a "Red Top" competition pump - but I suppose things may have moved on since then.
Cheers, Robin
|
19th March 2014, 21:21
|
|
Senior Member
|
|
Join Date: Aug 2013
Posts: 130
|
|
The pump is rated for 145 liters per hour. I figured that would keep the swirl pot topped up, plus the hp pump will be returning a lot of unused petrol back to the swirl pot aswell. It might not keep up. I'm fairly confident it will though.
I will prob use a Nippon aka density alternator, they are the smallest I can find at a reasonable price, around 100 quid, I will have to either machine a new Pulley up to suit the bmw belt drive, if I can't reuse the old pulley from the bmw alternator.
I am pretty confident I can sort the gearbox mount out at the weekend, then I can start sorting the engine wiring and get the hp fuel pump installed. Lots and lots to do. Started building in October and I am hoping to be finished and ready for Iva in May
|
19th March 2014, 21:22
|
|
Senior Member
|
|
Join Date: Aug 2013
Posts: 130
|
|
Aka denso alternator
|
20th March 2014, 16:54
|
|
Senior Member
Enthusiast
|
|
Join Date: Jan 2007
Posts: 932
|
|
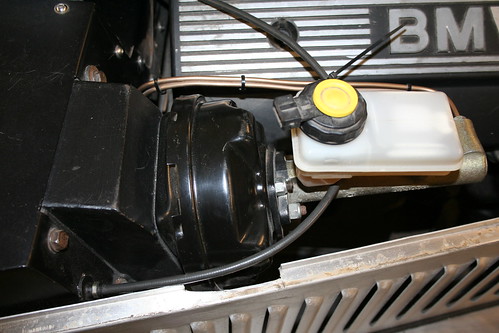
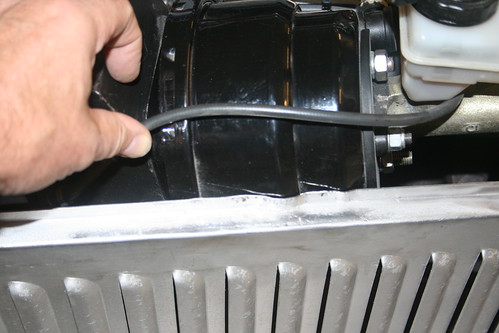
It does fit!
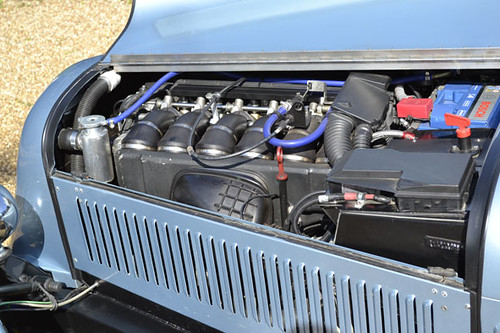
...and looks reasonably standard too.
This is an M3 EVO Sportster by John Clements.
After this photo was taken John fitted a dual 7" servo to his car after experiencing the 320 ponies and the lack of brakes a normal 7" servo provides.
Take it steady when you start driving yours with no servo at all !!
Mike
Quote:
Originally Posted by mcramsay

Hey guys. Been a few months since I last posted on here, just thought I would give an update on how I'm getting on and post up a few pics. So now minus the handbrake cable the rear end of the car is mechanically complete
I mounted the LP pump just to the rear of the diff
Have now also run the majority of the wiring loom through the car as below
And also at the weekend I managed to get my 3.2 s50b32 m3 engine fitted into the car:
It's in the car but I wouldn't say it fits just yet, I have a few issues I pretty much expected... I need to relocate the alternator, and some how manage to get the inlet pipe work routed through the engine bay. And not 6" out where the side panel should go. |

|
20th March 2014, 19:32
|
 |
Senior Member
|
|
Join Date: Jan 2011
Location: South Wales
Posts: 378
|
|
"Started building in October and I am hoping to be finished and ready for Iva in May"
Whoa, sporty schedule!
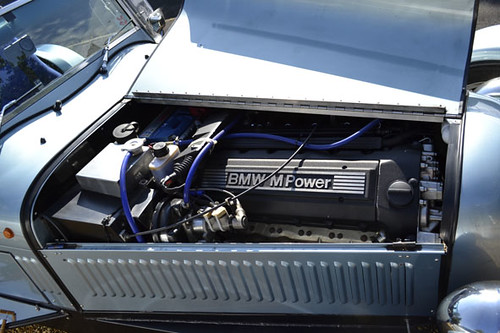
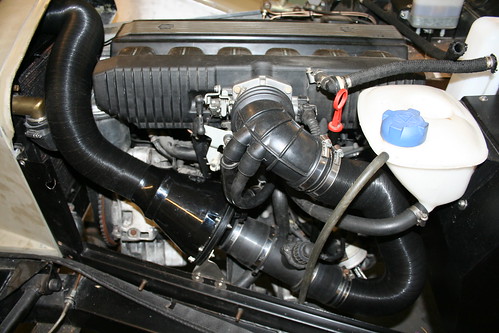
Looks like the big intake boot thing on the main intake plenum on those pics mike posted has been turned through 180 to help it fit in the body line.
I would advise if at all possible to avoid nibbling any material out of the bonnet side panel to make the intake fit as I and others have done. It weakens the panel and makes it too flexible so I'm going to have to get a bit of angle welded onto the back at some point to re-stiffen it
|
21st March 2014, 11:12
|
|
Senior Member
Enthusiast
|
|
Join Date: Jan 2007
Posts: 932
|
|
Quote:
Originally Posted by morris
"Started building in October and I am hoping to be finished and ready for Iva in May"
Whoa, sporty schedule!
Looks like the big intake boot thing on the main intake plenum on those pics mike posted has been turned through 180 to help it fit in the body line.
I would advise if at all possible to avoid nibbling any material out of the bonnet side panel to make the intake fit as I and others have done. It weakens the panel and makes it too flexible so I'm going to have to get a bit of angle welded onto the back at some point to re-stiffen it
|
I totally agree with Ian on the side panel (and sporty programme - very amitious but you seem to have made a lot of progress!)
I cut a section out of my side panel to fit around my metro servo:
But this does weaken the panel considerably, allowing it to deform. So when I fitted the bigger dual 7" servo I welded the angle back in and panel beat it gently to form around the minor contact areas:
Just this small piece of additional angle makes a significant difference to its lateral strength.
I know my Inlet manifold is different, but the priciple is there for you to do this:
Mike
|
21st March 2014, 19:41
|
|
Senior Member
|
|
Join Date: Aug 2013
Posts: 130
|
|
Thanks for the replies. Interesting to see how everyone has got round certain issues. I turned air box afm intake pipe 180 degrees and it will fit no bother without hitting the panel.
I would say hoping to be finished in May/June is ambitious but this is not my first kit car so I know where not to make mistakes.!
|
24th March 2014, 21:00
|
|
Senior Member
|
|
Join Date: Jan 2011
Posts: 150
|
|
Quote:
Originally Posted by mcramsay
Thanks for the replies. Interesting to see how everyone has got round certain issues. I turned air box afm intake pipe 180 degrees and it will fit no bother without hitting the panel.
I would say hoping to be finished in May/June is ambitious but this is not my first kit car so I know where not to make mistakes.!
|
Hi. We have a 1994 M3 Sportster on the road. We turned our intake boot round 180 degrees, and then extended the pipe, and have it hidden inside the passenger scuttle, behind the dash, with a grill on the side of the scuttle for air intake. Seems to work fine, but means no glove box, sadly.
Also, on the alternator, we were very wary of moving it to the other side, as it seemed to sit very low, and we were worried it may get 'speed bumped'. So, after cutting out a hole in the side panel to allow the alternator to 'poke through' the body line, I got a local mate who's a body repair guy to weld on an ali oval over the protruding alternator. He did a great job, and it adds a little difference to the look of the side passenger view. Not to everyone's taste, but we thought it was the safer option, plus you don't have to worry about not aligning the belt perfectly if you keep it where it is. We were worried a few degrees off perfectly straight may cause the belt to fail quite quickly. Hope that helps.
Great to see your progress. Ours took 2.5 years, but a good chunk of that was head scratching and delays in parts arriving.
Keep up the good work!
Rob
|
|
Currently Active Users Viewing This Thread: 1 (0 members and 1 guests)
|
|
|
 Posting Rules
|
You may not post new threads
You may not post replies
You may not post attachments
You may not edit your posts
HTML code is Off
|
|
|
All times are GMT +0. The time now is 15:12.
|


 Linear Mode

