|
|
| Miglia Builds and discussion Miglia bodied builds |

6th November 2013, 10:02
|
 |
Senior Member
|
|
Join Date: Feb 2012
Location: Wembley, London
Posts: 5,056
|
|
Tim - Although my kit is based on a Spitfire, I did read one tip on here for cutting the Herald bulkhead.
It has been suggested that you cut the bulkhead to match the contours of the bodyshell.
( Rather than the early build approaches of a straight horizontal cut. )
I also see that you are planning to re-use the Herald handbrake.
My suggestion would be to cut out and re-use the whole Herald transmission tunnel as well.
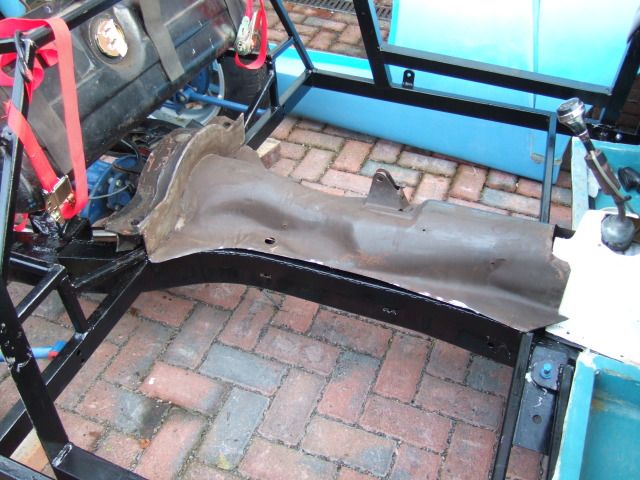
This was an early mock up from my own build with the Spitfire panel in place.
Just a thought.
Good luck, Paul. 
|
7th November 2013, 00:06
|
 |
Senior Member
|
|
Join Date: Aug 2013
Location: Brisbane, Australia
Posts: 276
|
|
Thanks, i was thinking of the whole tunnel, but it is a bit wide. As i plan on using the miglia not the ribble, the bulkhead is replaced, so the orig tunnel would have to be chopped somewhere. I'll definitely think about it.
thanks heaps,
Tim
|
21st November 2013, 08:32
|
|
Senior Member
|
|
Join Date: Aug 2013
Location: Brisbane, Australia
Posts: 276
|
|
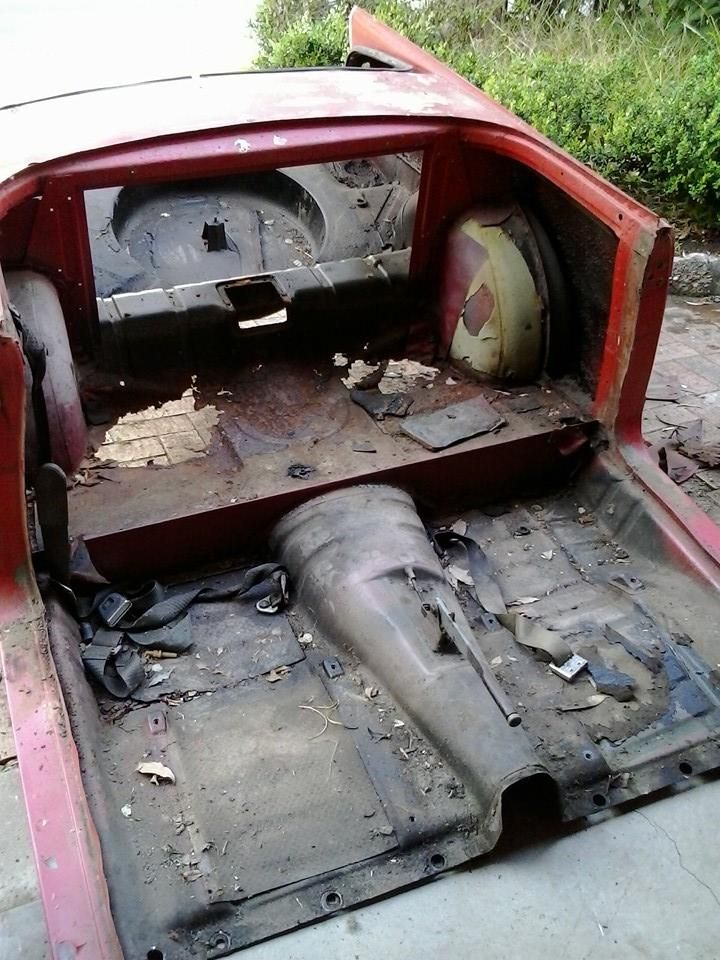
haven't posted for a while - can't get photo bucket at work and home my wife usually has the computer. (i know easy solution.) however, heres the work so far. pity its on the way down not on the way back together, but here it is. gave it a pressure clean. next step is to get the engine n gearbox out, and keep dismantling. the chassis will be sandblasted and powder coated. (thats the plan, wallet permitting) 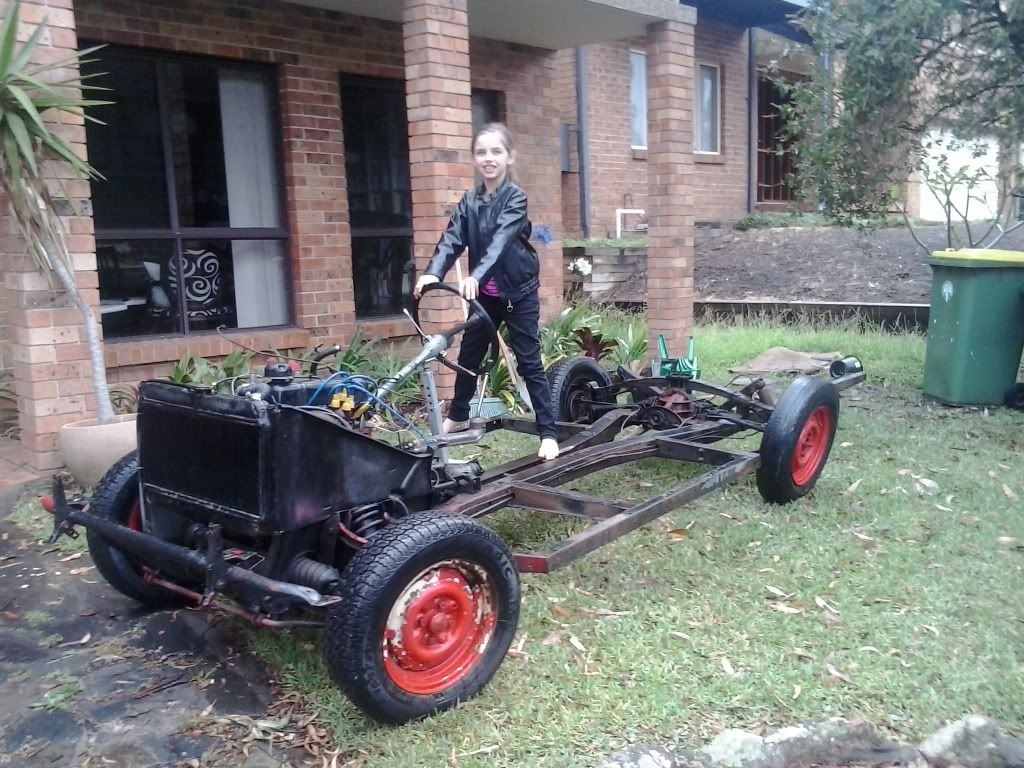 |
21st November 2013, 09:29
|
|
Senior Member
|
|
Join Date: Jun 2011
Location: birchington, kent
Posts: 1,769
|
|
Morning Tim, keep taking the photos if only to help you re-assemble. What ideas do you have for build? Are you aiming for D24 look-a-like style or something different?
|
21st November 2013, 09:32
|
 |
Senior Member
|
|
Join Date: Dec 2011
Location: Devon
Posts: 550
|
|
Slow progress is better than none!
Chassis looks very clean and an excellent base for your Miglia.
|
21st November 2013, 10:38
|
|
Senior Member
|
|
Join Date: Aug 2013
Location: Brisbane, Australia
Posts: 276
|
|
Thanks guys. Its night here, don't mention the cricket. Yes I'm very pleased with the quality of the bones. I will be going for an old school look, kind of d24 but also without constraint. It'll be reg as a 1961 year based on the chassis, so carries the dna, but will also be a miglia. I'll try using the herald seats too, and initially those wheels u see. I'll use ally sheet for the cocpit, perhaps a "quilted" roll finish but that may constrict bends. We'll see.
|
21st November 2013, 16:00
|
 |
Senior Member
|
|
Join Date: Oct 2011
Location: Surrey
Posts: 363
|
|
Quote:
Originally Posted by 1iTim

Thanks guys. Its night here, don't mention the cricket. Yes I'm very pleased with the quality of the bones. I will be going for an old school look, kind of d24 but also without constraint. It'll be reg as a 1961 year based on the chassis, so carries the dna, but will also be a miglia. I'll try using the herald seats too, and initially those wheels u see. I'll use ally sheet for the cocpit, perhaps a "quilted" roll finish but that may constrict bends. We'll see.
|
Now us cricket fans are up half the night we will be able to talk to you in real time!
I can't believe that herald has such a clean chassis |
22nd November 2013, 20:21
|
|
Senior Member
|
|
Join Date: Aug 2013
Location: Brisbane, Australia
Posts: 276
|
|
Thanks charman (ha how's that for a recovery in the ashes last night!) I think that would be because in Australia we don't grit the roads with salt. Just to make you all cry, there is only vague traces of surface rust on the chassis, otherwise looks brand new. That said, I've tried to sell the other body bits but the market for them is so low I've so far only sold the back bit, and that was to a guy who was going to use it for decoration!
Looks like I have a spit mk3 block and a mk2 6port head. With a cast exhaust manifold that looks like a mk3... Any benefit in hunting down a tubular header set? As far as tuning goes il be looking for drivability.
Last edited by 1iTim; 22nd November 2013 at 20:22..
Reason: Auto correct fail
|
7th December 2013, 09:43
|
|
Senior Member
|
|
Join Date: Aug 2013
Location: Brisbane, Australia
Posts: 276
|
|
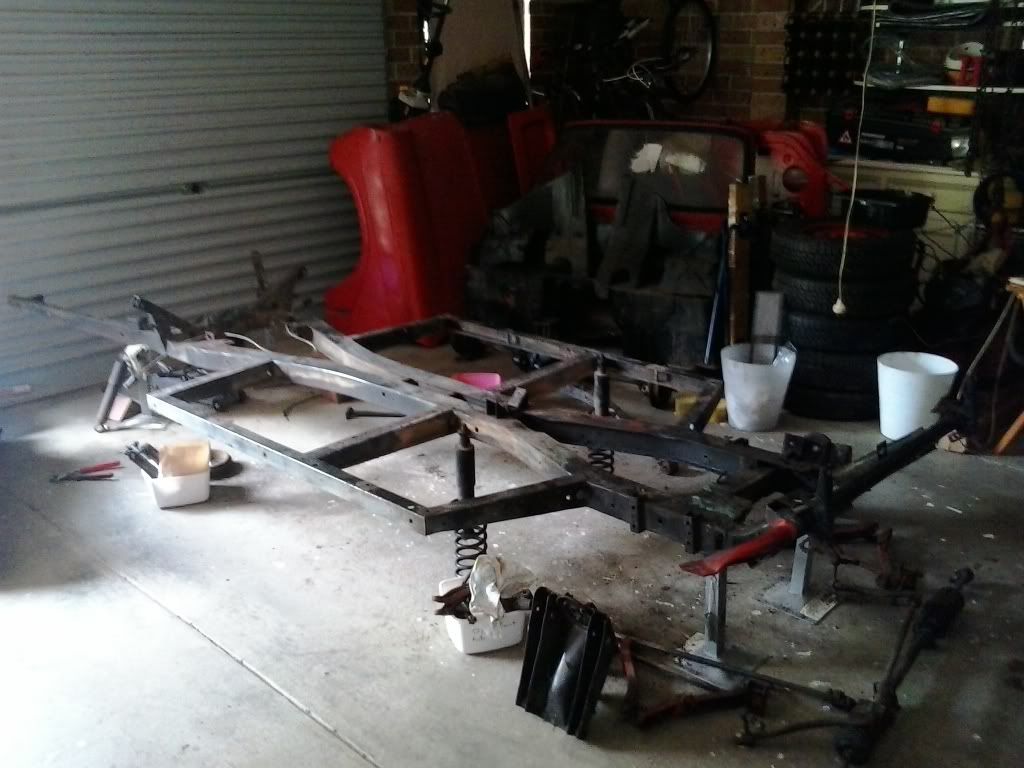
Heres every thing off the chassis, now to wash it up ready for blast and powdercoat.
<a href=http://s1332.photobucket.com/albums/w612/1iTim/?action=view¤t=2013-12-07134317_zps01eff4f0.jpg target=_blank><img src=http://i1332.photobucket.com/albums/w612/1iTim/2013-12-07134317_zps01eff4f0.jpg border=0 alt=Mobile upload></a>
|
7th December 2013, 09:44
|
|
Senior Member
|
|
Join Date: Aug 2013
Location: Brisbane, Australia
Posts: 276
|
|
|
7th December 2013, 10:11
|
|
Senior Member
|
|
Join Date: Apr 2012
Posts: 1,163
|
|
look nice and clean, have you had to do much too it?
Mac
|
7th December 2013, 14:25
|
|
Senior Member
|
|
Join Date: Sep 2012
Posts: 424
|
|
Quote:
Originally Posted by 1iTim
|
Chassis is in great condition. Your climate has looked after this
Last edited by mikmiglia; 8th December 2013 at 14:10..
|
7th December 2013, 19:12
|
 |
Senior Member
|
|
Join Date: Jul 2011
Posts: 5,328
|
|
Wow, that really does look like a new chassis. I'm very jealous.
|
9th December 2013, 07:21
|
|
Senior Member
|
|
Join Date: Aug 2013
Location: Brisbane, Australia
Posts: 276
|
|
I have to weld back in one of those spacer tubes for the body bolt but adide from that its fine. You wait till u see it after blast and mazda true red a4a powdercoat. Mike what did u do to the front ride height of #1?
One of my frt shocks is blown so considering what to do, replace standard shock with shorter softer spring or big bucks for adjustable shocks with orig springs?
|
9th December 2013, 07:29
|
|
Senior Member
|
|
Join Date: Jul 2011
Posts: 5,328
|
|
Quote:
Originally Posted by 1iTim
I have to weld back in one of those spacer tubes for the body bolt but adide from that its fine. You wait till u see it after blast and mazda true red a4a powdercoat. Mike what did u do to the front ride height of #1?
One of my frt shocks is blown so considering what to do, replace standard shock with shorter softer spring or big bucks for adjustable shocks with orig springs?
|
Standard shocks with Spitfire 150lb or 170lb springs cut down to your taste will work just fine. No need to spend megabucks on expensive short/adjustable shocks, mine never bottomed out even when I had the car far too low. |
9th December 2013, 08:36
|
|
Senior Member
|
|
Join Date: Aug 2013
Location: Brisbane, Australia
Posts: 276
|
|
Hi mr t thanks for that, but here in aus i can't cut the springs, not allowed. So I'll have to get shorter springs made. That might b cheaper than 170 gbp for adjustable shockers. I cant beleive the low price of the standqrd shocks!
|
7th January 2014, 00:13
|
|
Senior Member
|
|
Join Date: Aug 2013
Location: Brisbane, Australia
Posts: 276
|
|
i have a problem. (ok not just one but lets start with that!)
My left rear upright wont come off. The lower bolt that joins the hub or rear trunion is stuck inside somehow to the bush or something.
I've tried wd40, I've tried a hammer, I've tried both together, I've then tried blowtorch until its all smoking then the hammer.
All I have succeeded in doing is deforming the bottom of the bolt with all this banging. After hitting the bolt (lots) the bolt head is a mm proud, but the top of the upright spreads to about 90mm from its restful 80. I dont want to damage the upright.
Any advice or hints on removing this bolt?
(as an aside, which front stub axle assembly goes on which side? the normal trunion thread on the right hand side, and the left hand trunion thread on the left? or the other way? I had not labelled them before i realised they are "handed")
|
8th January 2014, 10:57
|
|
Senior Member
|
|
Join Date: Sep 2011
Location: Stanley, Durham
Posts: 104
|
|
Hi Tim
There is a small space either side, between the trunnion and the vertical link containing the flanges of the plastic bush and the thin tinplate dustshields. Hacksaw through the bolt either side of the trunnion through these. This allows you to separate the trunnion from the link and gives access to the rest of the bush inside the trunnion. Then you can remove the bush by a combination of melting, drilling and/or pressing. New bolts and bushes will obviously be required for reassembly!
The new bush kit looks like this
http://www.classicpartstrader.com/tr...-kit-758-p.asp
regards
Andrew |
8th January 2014, 11:05
|
|
Senior Member
|
|
Join Date: Sep 2011
Location: Stanley, Durham
Posts: 104
|
|
Quote:
Originally Posted by 1iTim
i have a problem. (ok not just one but lets start with that!)
My left rear upright wont come off. The lower bolt that joins the hub or rear trunion is stuck inside somehow to the bush or something.
I've tried wd40, I've tried a hammer, I've tried both together, I've then tried blowtorch until its all smoking then the hammer.
All I have succeeded in doing is deforming the bottom of the bolt with all this banging. After hitting the bolt (lots) the bolt head is a mm proud, but the top of the upright spreads to about 90mm from its restful 80. I dont want to damage the upright.
Any advice or hints on removing this bolt?
(as an aside, which front stub axle assembly goes on which side? the normal trunion thread on the right hand side, and the left hand trunion thread on the left? or the other way? I had not labelled them before i realised they are "handed")
|
The right hand threaded one goes on the right hand side and vice versa. |
9th January 2014, 09:55
|
|
Senior Member
|
|
Join Date: Aug 2013
Location: Brisbane, Australia
Posts: 276
|
|
Thanks andrew that worked a treat. Thats just about the only bush that I've not ordered yet! I'll get onto that too.
|
|
Currently Active Users Viewing This Thread: 3 (0 members and 3 guests)
|
|
|
 Posting Rules
|
You may not post new threads
You may not post replies
You may not post attachments
You may not edit your posts
HTML code is Off
|
|
|
All times are GMT +0. The time now is 16:58.
|


 Linear Mode

