|
|
| Tribute Automotive Builds Discuss your Tribute kit build |

22nd September 2016, 16:11
|
 |
Senior Member
|
|
Join Date: Jan 2014
Location: Egham, Surrey
Posts: 1,780
|
|

Petrol pipe fitted and glued in place and it looks fine, just dropping down slightly at the top of the wheel arch but the inner splash liner fits under it so it has enough clearance.
Had a play with the bonnet, made up a couple of plates with a M8 stud. Fitted them to the two plates ate the rear of the bonnet. When I offered up the bonnet it was a little low in the centre at the rear so I cut a slice, bent the bonnet slightly with the ratchet strap and used builders band again to check the curvature before bonding.
Just put some isopod on top of the plates and then fitted the bonnet on top giving a firm push. When it had dried I went over the top with some matting. 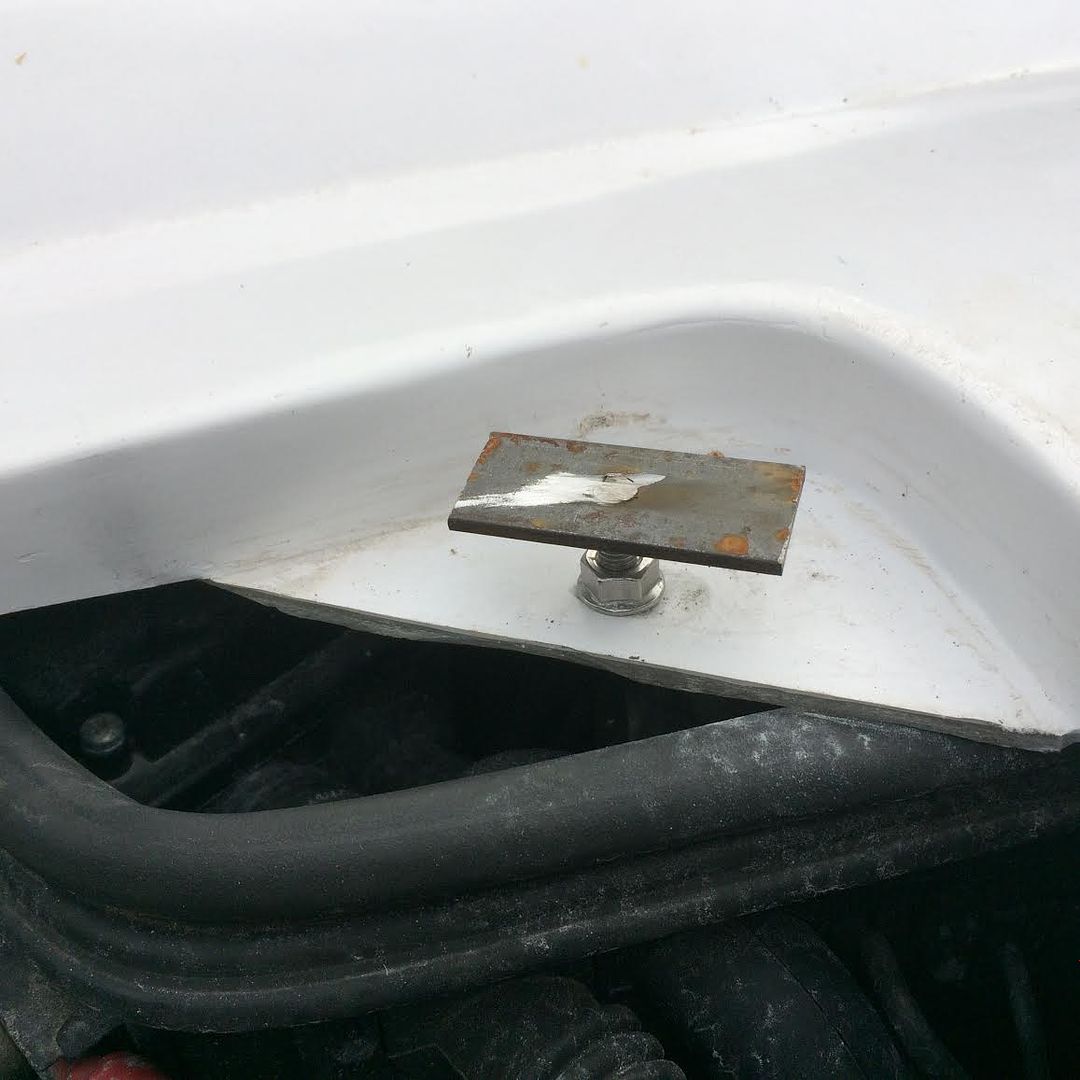 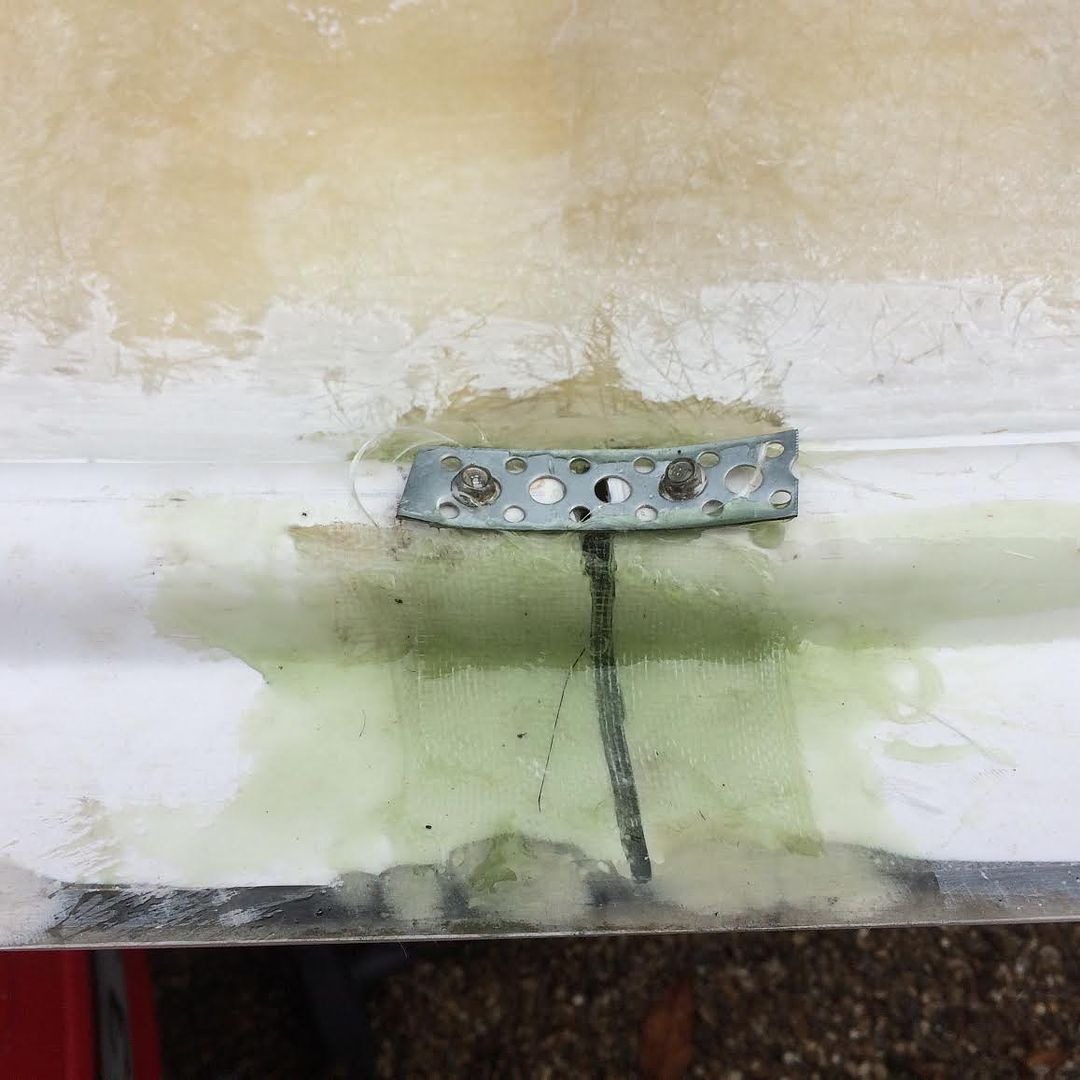
While I was playing with the bonnet I glassed some matting under the bonnet vent, this gives the vent a bit of depth and doesn't look quite so GRPish. I intend to cut a thin slot in it about 30mm back from the aperture and slide some mesh into it. Hopefully it should look quite neat.  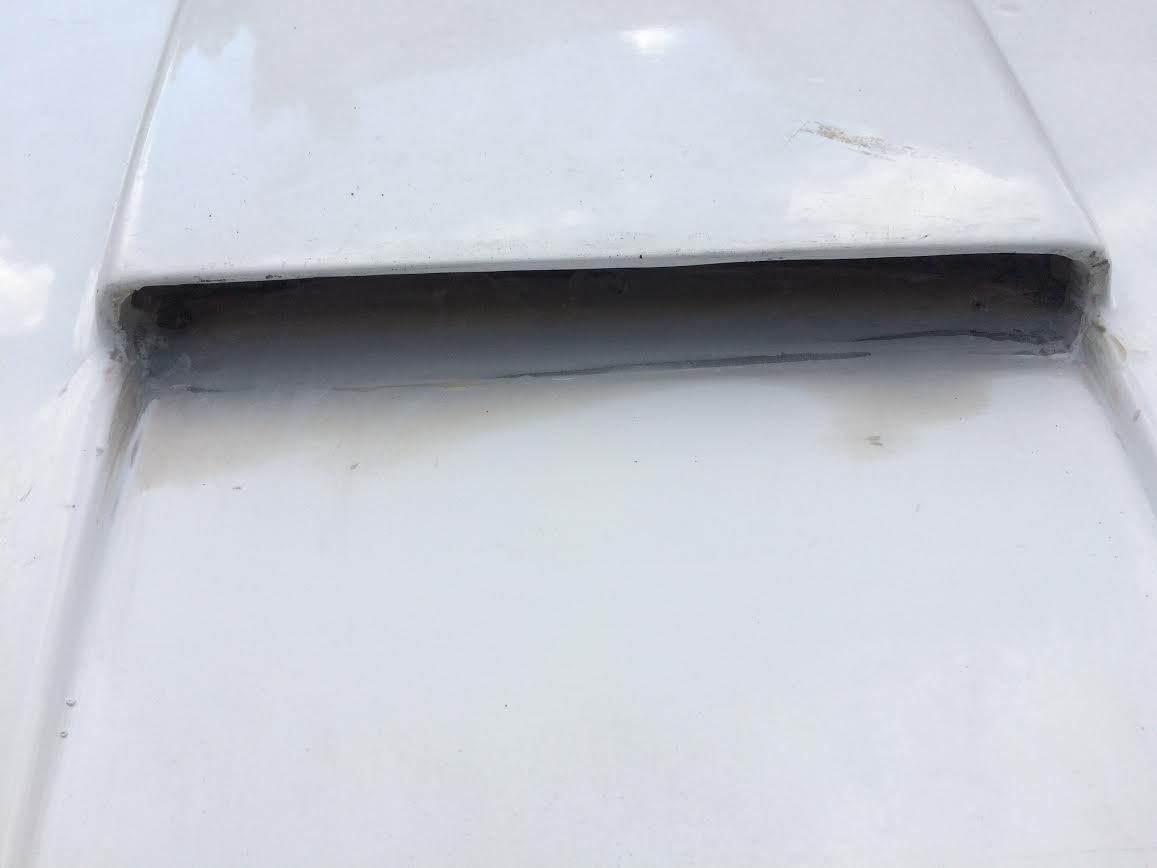
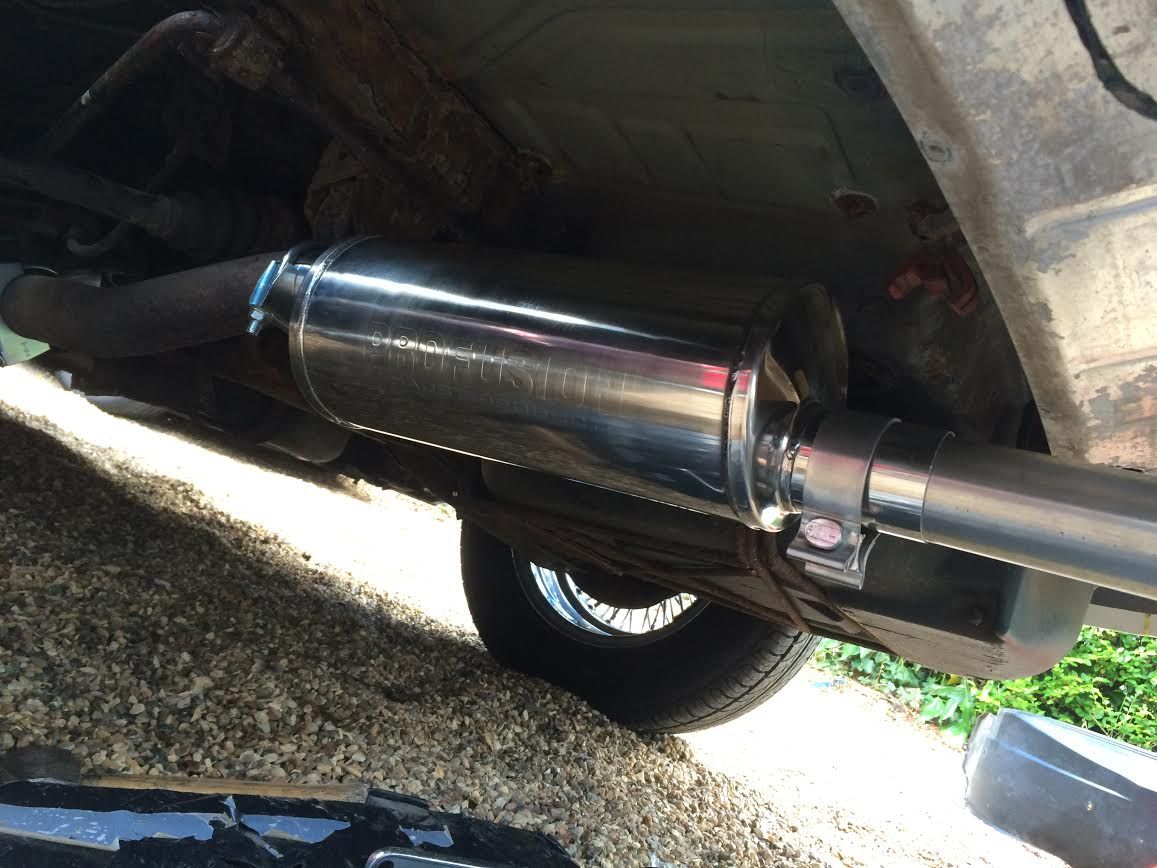
To finish the day off I had a play with the exhaust. I only want a single rear pipe so that I can still keep the spare wheel. I simply cut the rear pipe as close to the rear of the rear box. Just need to fit a rear hanger.
I hunted around on Ebay and found a suitable rear box, £76 inc delivery but they were local so I thought I would pick it up and try and save a little with some crispy pound notes. They didn't have it in stock but he gave me their trade website, came down to £42!
So the total bill for the exhaust including a bit of pipe, claps and delivery was less than £80.
If you look closely you will see that the existing pipe enters at the top of the new box and exits at the bottom. This give just enough drop to clear the rear bodywork. It's a bit quieter than I had hoped so I may drill a hole at the end and see If I can remove some packing. I can then fit a rivnut and fit a bolt to re seal it again, or leave the bolt out and just replace it at MOT's.
The website for anyone who is interested is
www.profusionexhasts.com
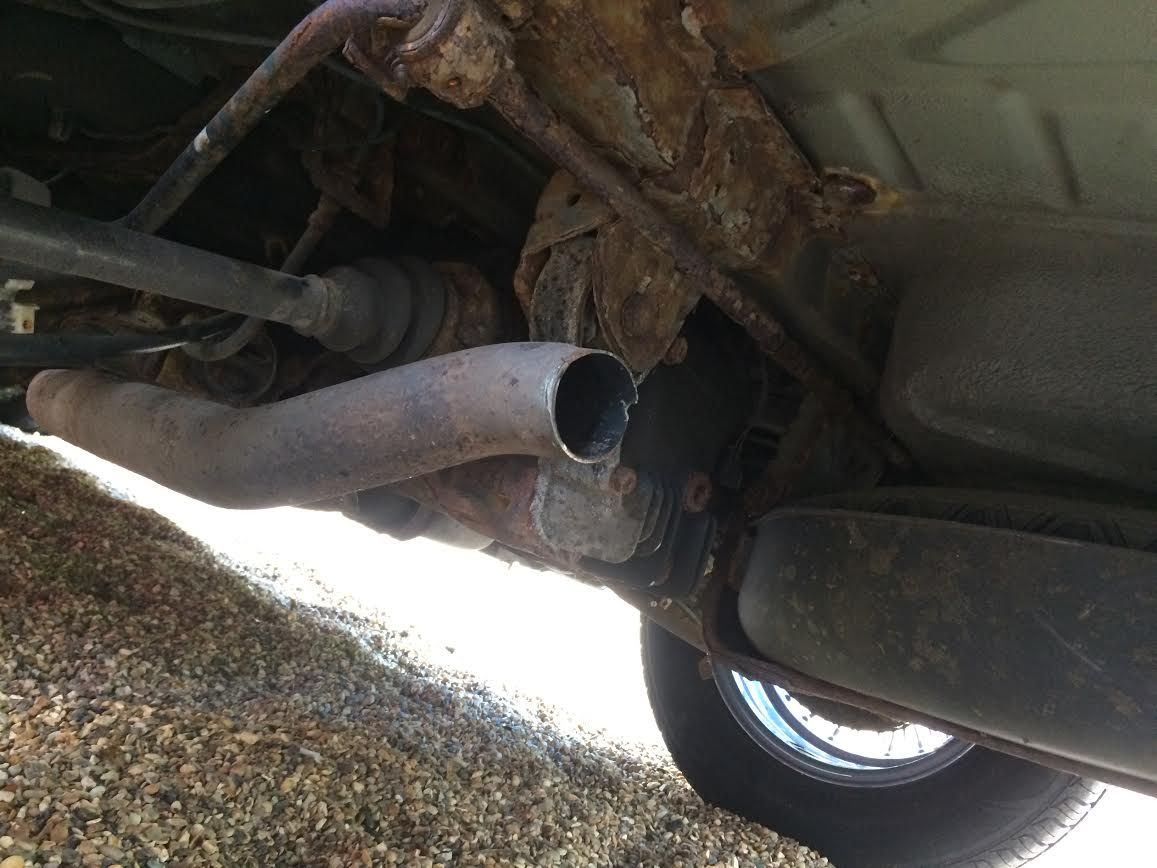 
Need to scurf off all the lose rust underneath, use a rust converter and a coat of hammerite
Last edited by Jaguartvr; 25th September 2016 at 11:30..
|
22nd September 2016, 16:28
|
|
Senior Member
|
|
Join Date: Oct 2013
Location: norfolk
Posts: 691
|
|
Please don't use hammerite! Absolute rubbish - I wouldn't paint anything (unless it never goes outside) with it.  |
22nd September 2016, 16:40
|
|
Senior Member
|
|
Join Date: Jan 2014
Location: Egham, Surrey
Posts: 1,780
|
|
Its the only paint that i have found that stops the rust coming back (so long as it's treated first). It is also pretty good at resisting chipping. I normally put some red oxide on before the hammerite.
I also use it on the boat and again it does a good ob protecting metal in a salt water environment.
|
22nd September 2016, 17:51
|
 |
Senior Member
|
|
Join Date: May 2014
Location: Oxon
Posts: 1,118
|
|
Quote:
Originally Posted by Mitchelkitman

Please don't use hammerite! Absolute rubbish - I wouldn't paint anything (unless it never goes outside) with it. |
Such a shame that they changed the formulation a few years ago. It was brittle in chip-prone situations but at least it lasted elsewhere.
Chassis Black after some Bilthamber Hydrate is probably best now.
POR-15 anyone? |
25th September 2016, 11:19
|
|
Senior Member
|
|
Join Date: Jan 2014
Location: Egham, Surrey
Posts: 1,780
|
|
I've got a big 5 litre tin that is at least 15 years old, maybe why I find it so good. Rust treated and painted.
Fitted the O/S rear splash panel into the wheel arch and it covers the new petrol pipe completely and it doesn't hang down so I'm pretty pleased with it. I'll leave it another week before I fill it with petrol to let the adhesive go completely off.
Bubble, shock ,horror, I have found my first bubble! On the front wing about 5mm round. If it carries on like this I think there is a good chance of me coming across another one by the time the build is complete!
|
27th September 2016, 08:36
|
 |
Senior Member
|
|
Join Date: Apr 2016
Location: Camberley
Posts: 972
|
|
Hair dryers at dawn!
|
27th September 2016, 09:52
|
|
Senior Member
|
|
Join Date: Jan 2014
Location: Egham, Surrey
Posts: 1,780
|
|
I think it's appalling, I was thinking of asking for one of the 275's as compensation!
|
27th September 2016, 15:45
|
|
Senior Member
|
|
Join Date: Jan 2014
Location: Egham, Surrey
Posts: 1,780
|
|
Prepare for some boot envy! 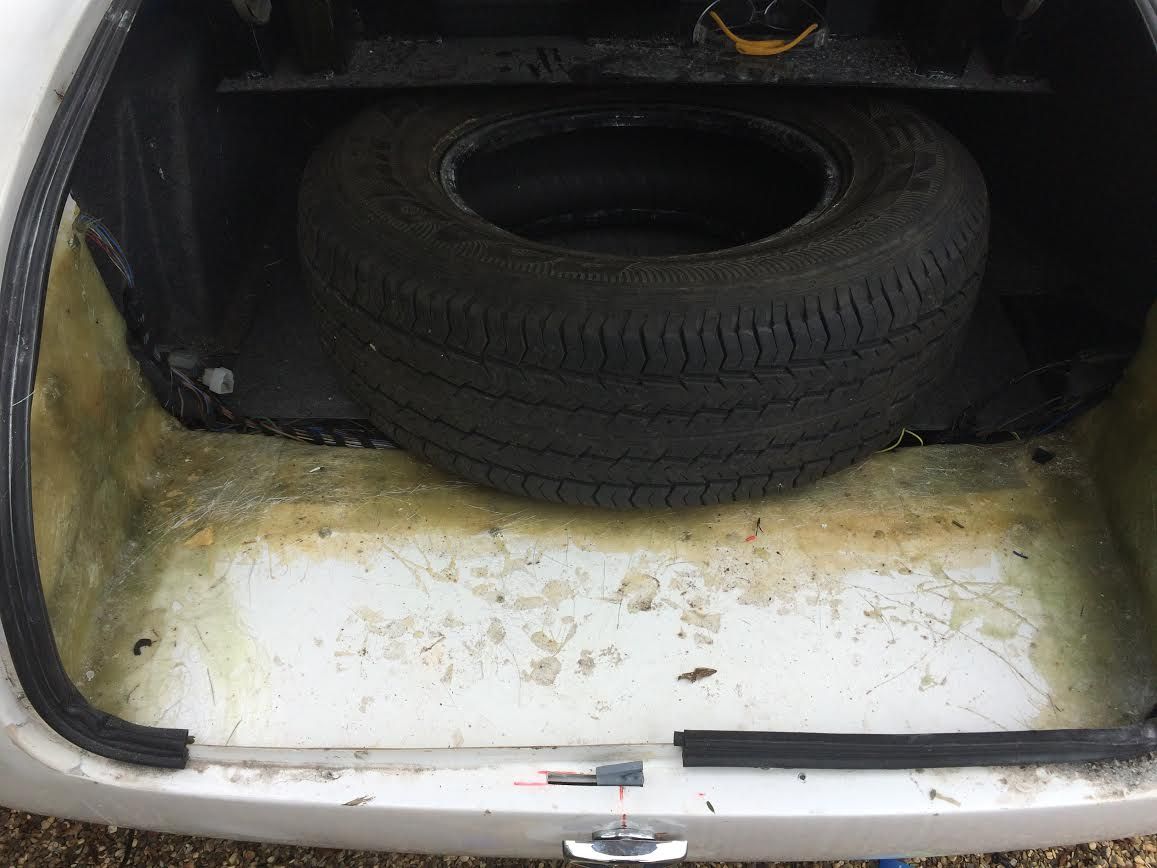
225/75x15 tyre in the boot with room to spare, it would not have fitted in the standard boot. So now if I get a puncture at least I can carry the full size wheel home. 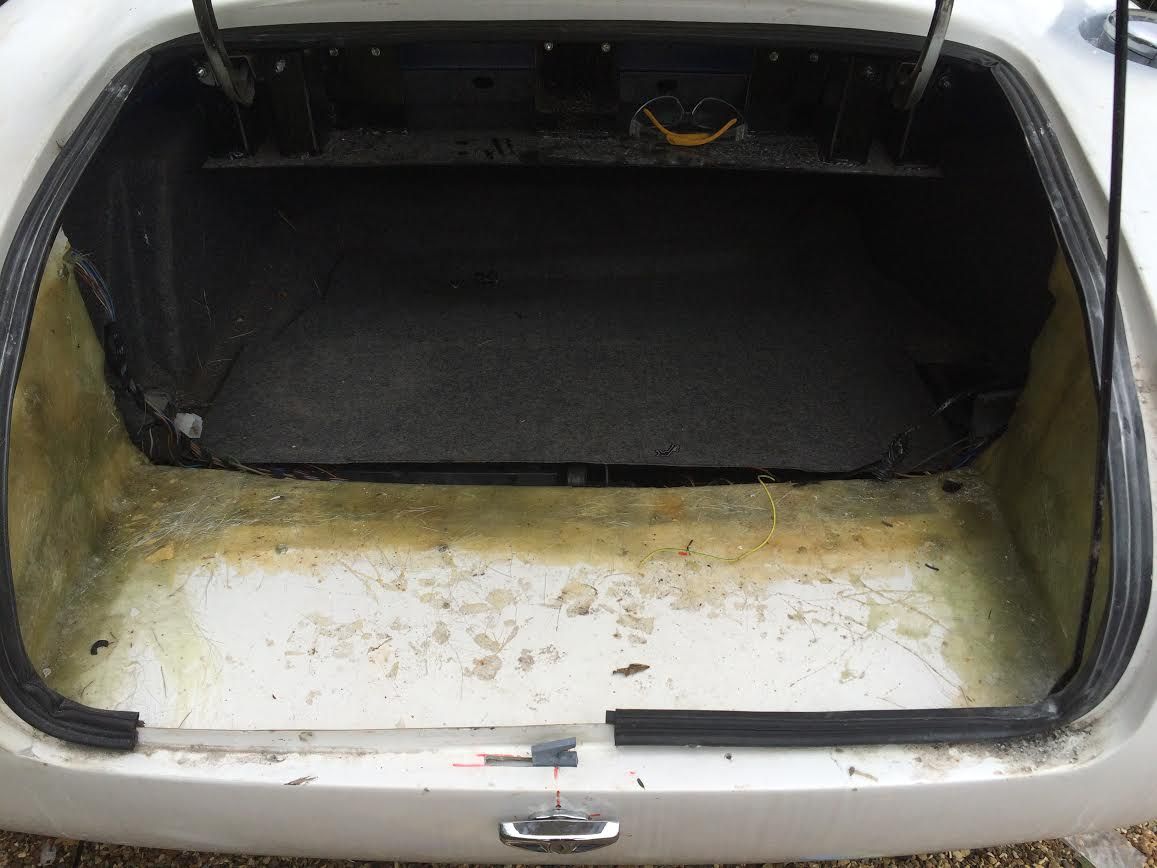
I also fitted an emergency release cable for the drivers door, sorry but didn't take the first couple of pictures. Basically I have fitted a long 6 foot bicycle inner and outer brake cable. On the inner wire I crimped a round electrical connector. This was threaded through the door and down oner the door locking button. As you go down the door locking button there is a bend and this is where I positioned it so when the wire is pulled it pulls the locking pin upwards. To stop the wire ring from simply moving I fitted a star clip on the wire behind it (the type of clip used to hold badges to the inside of metal panels). 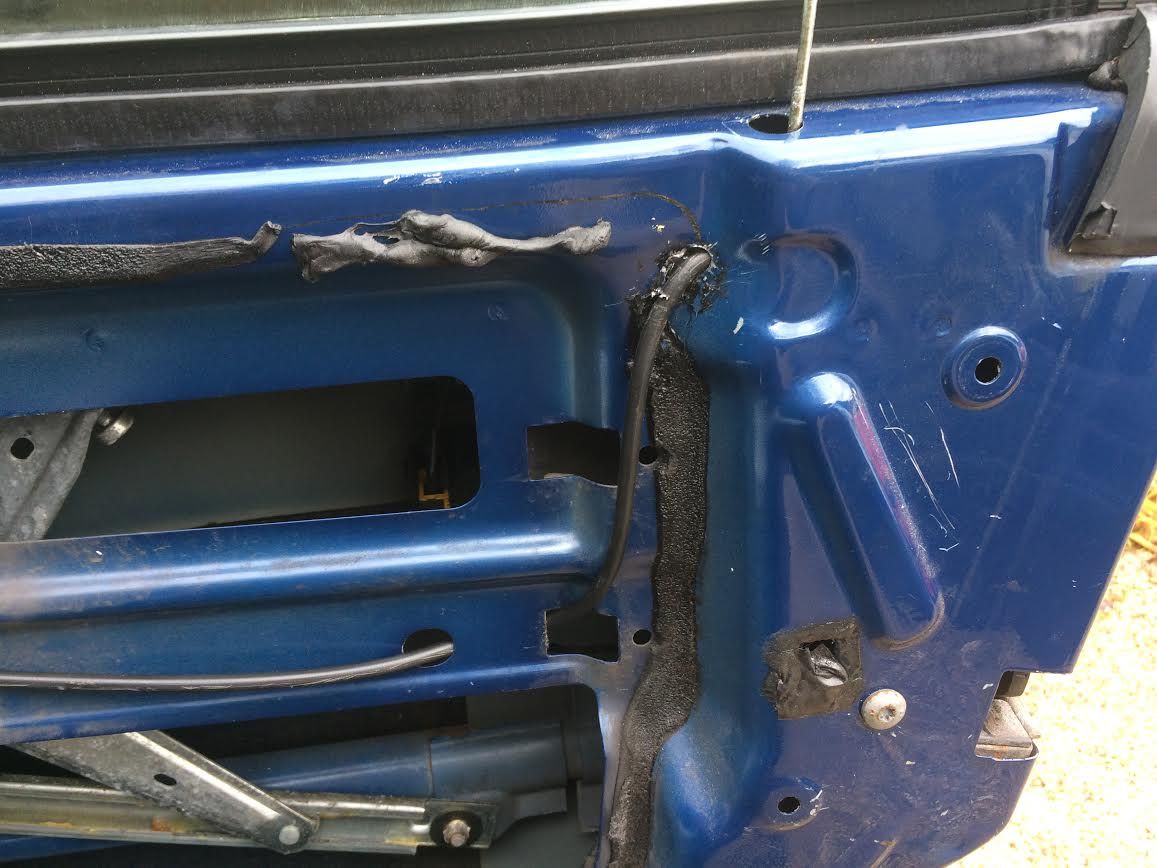
The outer cable has been zip tied to the inner door and through a new hole and run just under the old ridge that used to hold the old lower wing. 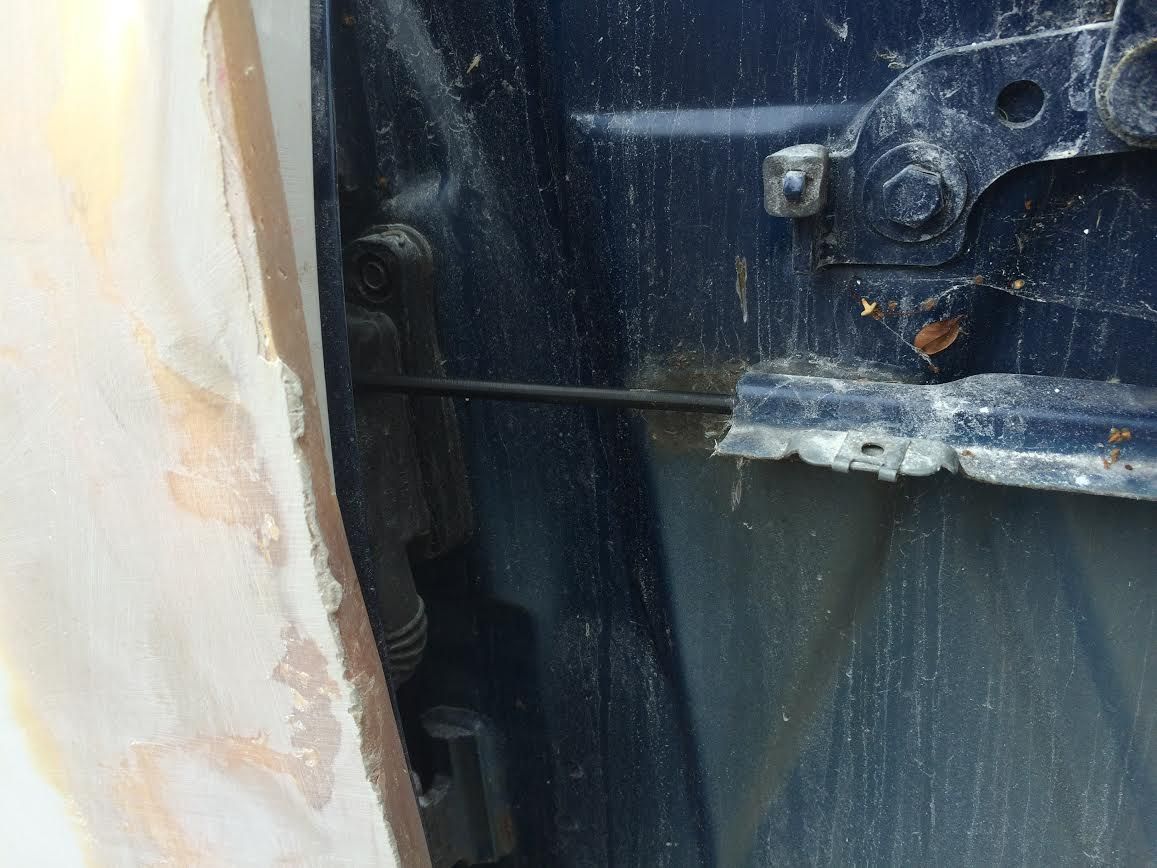
This is then run to a top secret location, I would tell you where it ends, but then I would have to kill you!
It all sits well hidden and a strong pull of the loop at the end and you can release the door lock. Even if someone were to find it, as soon as you pull the cable and open the door the alarm goes off.
Final job today was to fit the front cooling fan. It has three wire going to it, earth and I suspect one for cooling if the engine gets too hot and one for the aircon. I have fitted it but it won't turn on. The zircon compressor clutch doesn't kick in, I have checked the fuses and relay so I suspect it has no gas. I ran the car up to temperature with the viscous fan jammed to see if I could get the other fan to cut in. Even after 30 minutes the temperature gauge wouldn't rise above half way of the second fan didn't cut in.
To mount the fan I had to cut away the cowling and use the arms to bolt to a couple of metal bars, these were then zip tied to the front panel. 
I still had to cut a small section of the bonnet away to get it to fit but the cut will be covered by the front number plate.
Finally cut a metal plate to fit the boot lock. I took other peoples advice and fitted it lower so the catch wouldn't foul the boot when opening. Because of this the catch has to be longer. I drilled a hole and then used a very small file to make it square so that it would fit the spindle of the boot catch. I drilled into the boot spindle so that I could screw in s hex head self tapper, this along with a couple of washers holds the catch in place. 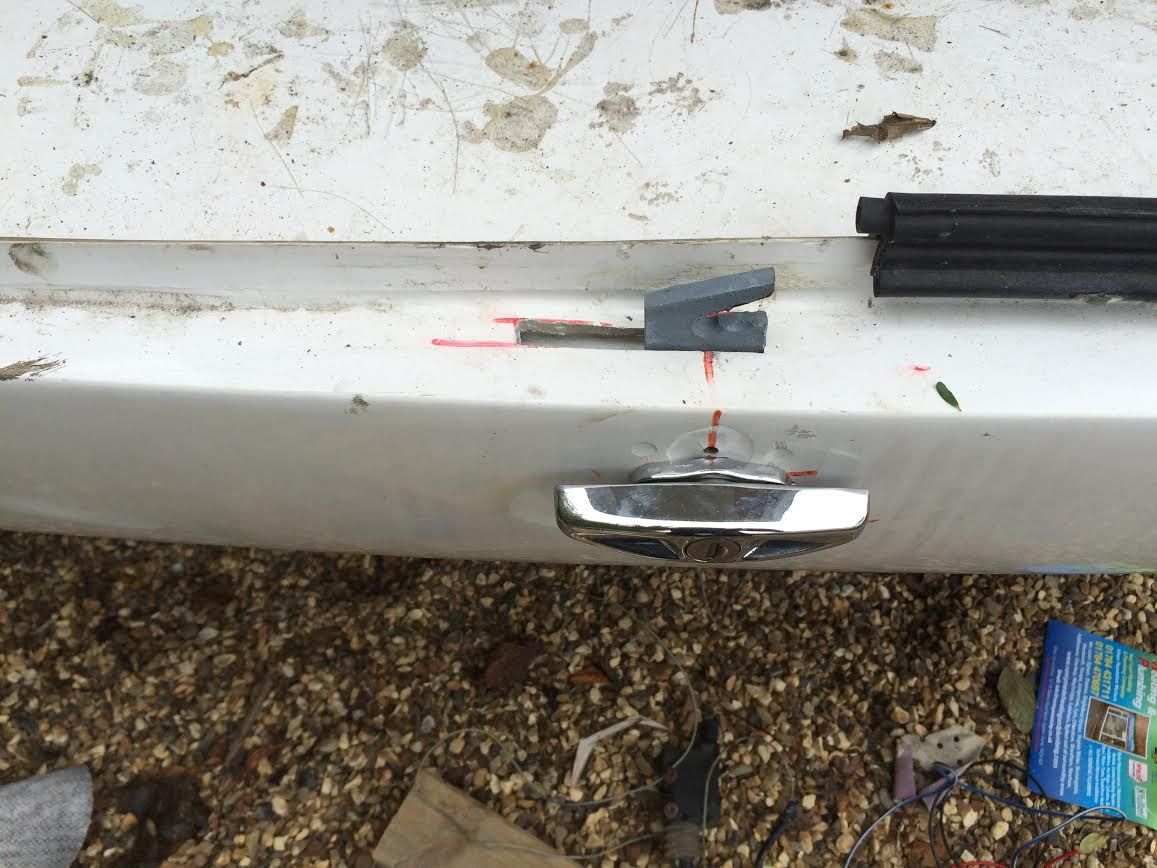

|
27th September 2016, 20:07
|
|
Member
|
|
Join Date: May 2015
Location: Lincolnshire
Posts: 85
|
|
Mmm nice boot, and great idea for the boot lock. By the way, what rubber edge seal have you used for the boot?
|
27th September 2016, 21:36
|
|
Senior Member
|
|
Join Date: Jan 2014
Location: Egham, Surrey
Posts: 1,780
|
|
It's the original boot seal, shame its just not long enough.
|
28th September 2016, 07:40
|
|
Senior Member
|
|
Join Date: Jan 2014
Location: Egham, Surrey
Posts: 1,780
|
|
I've just realised that I'm just about finished, the rest of the work is really prep for painting.
Got the kit middle of May and finished middle of September, I have however been away on holiday for 8 weeks in total so the total build time is 2 months. I haven't been rushing and it has all gone together very well.
If anyone is lurking and considering buying one I would suggest you go ahead and buy one. Chris has gone very quiet on the forum, I suspect because he is very busy. If you wait too long you could find that he has gone over the VAT threshold and future kits could attract 20% vat.
You don't need many tools to fit it, the only tool I would advise is a Rivnut tool, good wiring crimps and an angle grinder for fitting and a couple of cheap sanders and a hand held long bed sander. Nuts and bolts can be bought from Ebay very cheaply and normally next day delivery. Being a hoarder I have nuts and bolts everywhere and can quite easily loose most of a day looking for that elusive size. On this build I ordered what I thought I would need beforehand and anything else as I needed it. Everything is stainless, the right size and length, make the build much more enjoyable.
The only part on the whole build that I didn't enjoy was the doors, there does need to be a modification to the moulds to get them to fit better. Everything else is very straight forward and simple. I must say that I was very surprised how well it all fitted together. I kept waiting for something to bite me in the bum but it hasn't happened.
I have been sanding back some of the bodywork over the last couple of weeks when I have been waiting for parts to arrive and again have been surprised how straight the body panels seem to be. I will be driving it over to my painter on the 1st to get him to run his eye over it and to point out areas that I need to address. I am going to try and leave it in his oven for a couple of hours in case there are any air bubbles. I was on the DNA owners club (DNAOC.com) forum and was looking at a post on painting and even the 2fifty had small pinprick air bubbles come to the surface in the oven prior to painting and that is with GRP bodywork that looks perfect and paint ready.
I do know that I have a quite a bit of work on the front and rear door gaps to get them level. When I fitted the bonnet I found the gap a bit too large all the way around so I have cheated and fitted it as well as possible to the left and front, this leaves me the rear and right hand side to work on. I thought it easier to just work on two sides rather than four. It has only meant that the bonnet is off centre by about 3mm so it doesn't show. I have cheated by looking at other builds, when you look carefully you can see where the gaps need a little work. Unfortunately just a couple on mm show but not until after the paint has been put on.
Winter is coming, Z3 prices will be dropping so get your cheque books out, there will never be a better time to buy one, if SWMBO objects just point out the prices that Nubodi and DNA got for their recently finished cars.
|
28th September 2016, 12:41
|
|
Senior Member
|
|
Join Date: Mar 2013
Location: Coventry and the Limousin
Posts: 549
|
|
If you notice Chris has passed quite a lot of his production to other parties, probably how he keeps below the £83k threshold for vat.
|
28th September 2016, 13:18
|
|
Senior Member
|
|
Join Date: Nov 2011
Posts: 3,558
|
|
below the £83k threshold for vat
I think he manages that by selling the kits so cheap
|
28th September 2016, 17:57
|
|
Senior Member
|
|
Join Date: Apr 2016
Location: Camberley
Posts: 972
|
|
You have to register for Vat once vatable revenues reach the threshold. Doesn't make any difference if he builds or buys in. I have always anticipated that by the time I get my sh*t in a sock, I would have to pay the higher price anyway.
He is probably buying in simply to cope with the volume, and still be able to develop new models and custom builds.
|
28th September 2016, 19:04
|
 |
Senior Member
|
|
Join Date: Feb 2012
Location: Wembley, London
Posts: 5,056
|
|
JaguarTVR - Nice review of your experience of building a 250 SWB. 
You have made consistently steady progress and I look forward to seeing it painted.
Good luck, Paul. 
|
28th September 2016, 19:26
|
|
Senior Member
|
|
Join Date: Jan 2014
Location: Egham, Surrey
Posts: 1,780
|
|
Thanks Paul, I just wanted to tell prospective builders to have a go. It's a very easy straight forward build and I feel that I have got to the point where a lot of people would now hand it over to a paint shop for final finishing.
Being a skinflint I will be preparing mine myself but will have the final paint put on by a pro. I will be posting details on the body prep, being sorting out the rear door gap today and am pleased with the result. Pics to follow.
|
30th September 2016, 01:37
|
|
Senior Member
|
|
Join Date: Jan 2014
Location: Egham, Surrey
Posts: 1,780
|
|
There was a post the other day on my thread by "Minehart" about my petrol filler and it has now disappeared and so has the user.
Any idea what has happened?
|
30th September 2016, 07:13
|
|
Junior Member
|
|
Join Date: Apr 2016
Posts: 16
|
|
Im still here
Unfortunately I know very little about building a car. I got Nubodi to build mine so cant contribute a great deal of info sorry.
|
30th September 2016, 08:54
|
|
Senior Member
|
|
Join Date: Jan 2014
Location: Egham, Surrey
Posts: 1,780
|
|
Just surprised that the post disappeared, didn't think it could happen. You had mentioned that I had cut the chassis to relieve the route for the fuel filler.
I came across this post
http://www.madabout-kitcars.com/foru...anging+details
post 6
It seems to say that you cannot modify the chassis between the axles but anything fore or aft can be cut. I don't know if this is right or does it only apply to cars with a proper chassis?
Even if not I haven't removed anything, I have just folded it out of the way slightly and made good so nothing has been removed.
Does anyone know the exact rules? |
30th September 2016, 09:09
|
|
Senior Member
|
|
Join Date: Oct 2013
Location: norfolk
Posts: 691
|
|
The rules are always as the authority decides at the time!  |
|
Currently Active Users Viewing This Thread: 1 (0 members and 1 guests)
|
|
|
| Thread Tools |
|
|
| Display Modes |
 Linear Mode Linear Mode
|
 Posting Rules
|
You may not post new threads
You may not post replies
You may not post attachments
You may not edit your posts
HTML code is Off
|
|
|
All times are GMT +0. The time now is 01:01.
|


