|
|
| Tribute Automotive Builds Discuss your Tribute kit build |

4th June 2014, 14:04
|
|
Senior Member
|
|
Join Date: Apr 2014
Location: Midlands
Posts: 405
|
|
Thanks for the update, looking really good its interesting to see everyones different approach on the how the body meets the windscreen.
I am have purchased the donor car and driving around in that for the summer and hoping to do mine over the cold winter months.
Does anyone know if there is an issue here in the UK in removing the rear panel to make one large boot Like Andreas has? it looks much better!
|
4th June 2014, 17:34
|
|
Senior Member
|
|
Join Date: Mar 2013
Location: Coventry and the Limousin
Posts: 549
|
|
Technically you will be altering the monocoque so would be subject to an IVA test.
I would leave the section in place should you be asked to submit the car to inspection after submitting the V627.
|
4th June 2014, 22:29
|
|
Senior Member
|
|
Join Date: Feb 2014
Location: Sweden
Posts: 140
|
|
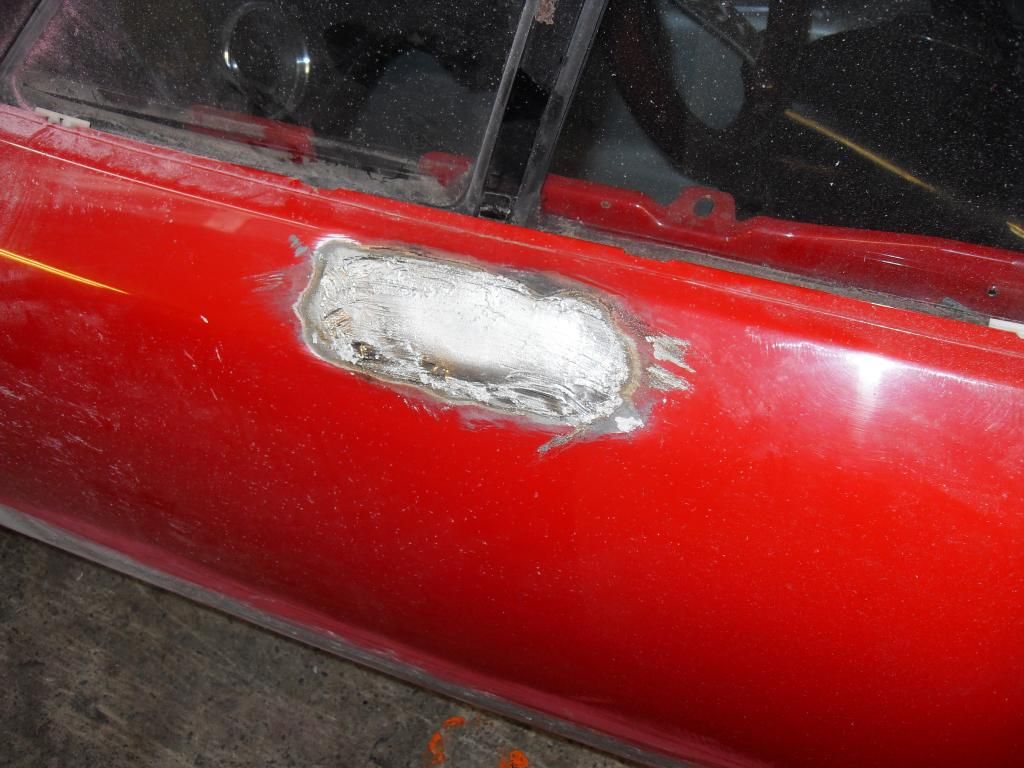
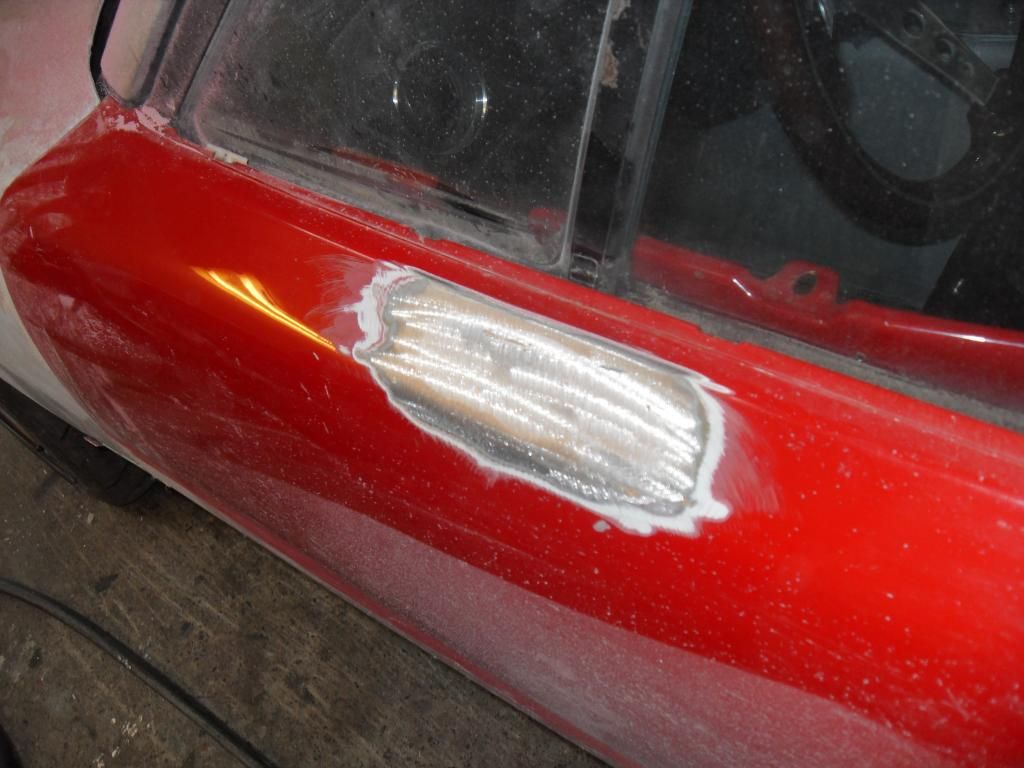
Myself i visited the car inspection and talked to the guy thats actually going to inpect the car and explained that it was just a flimsy 0.7 or so panel. He also agreed that there was no way in hell it could affect the cars safety. It is a grey area here to, but he also has seen the Pictures of the front end and he thinks its okay also, when i have replaced it with equivalent poarts as the rear of the new body and the trunk extension, and also the tubes in the front end... So i couldnt be happier with that!  |
6th June 2014, 19:55
|
|
Senior Member
|
|
Join Date: Feb 2014
Location: Sweden
Posts: 140
|
|
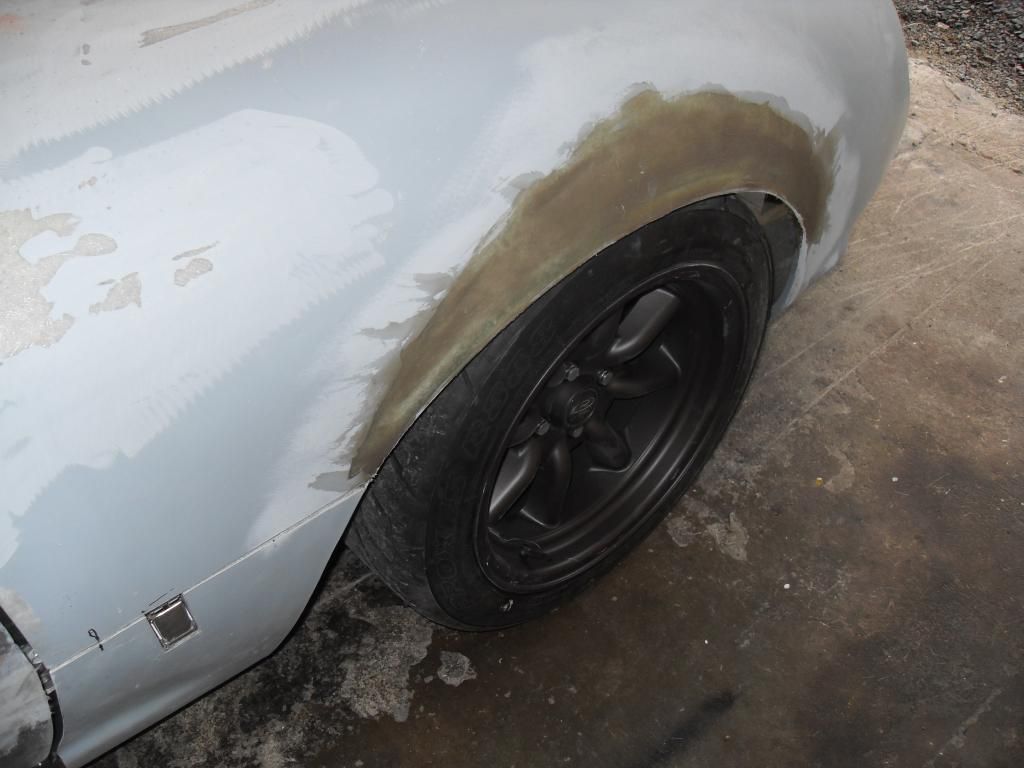
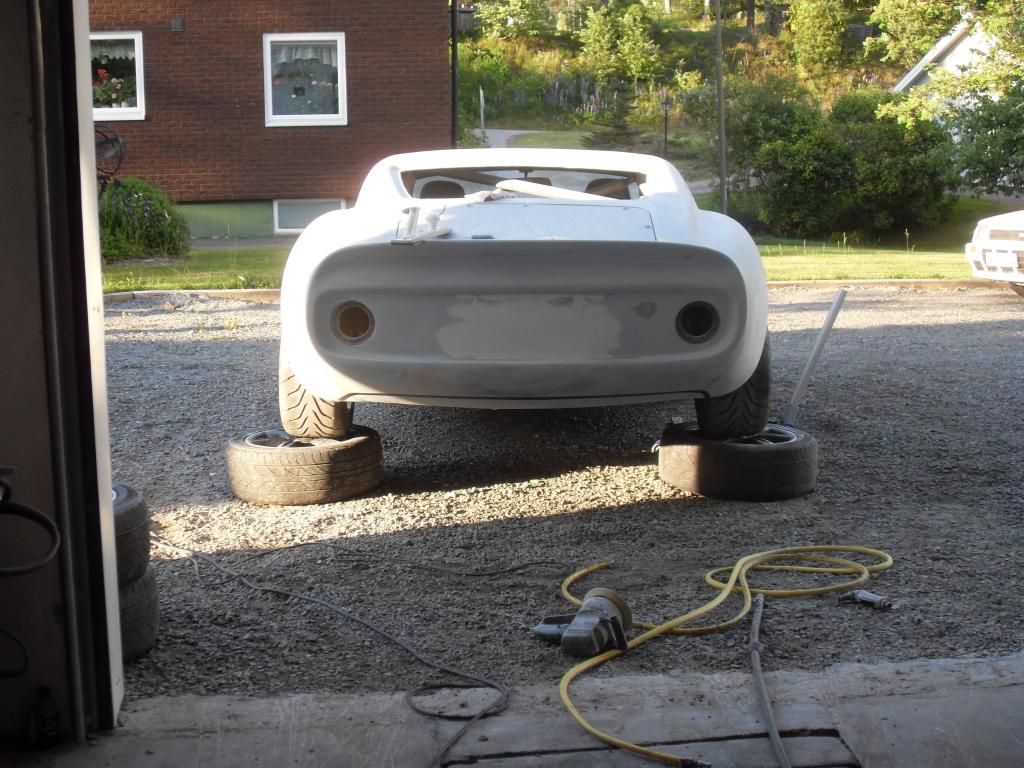
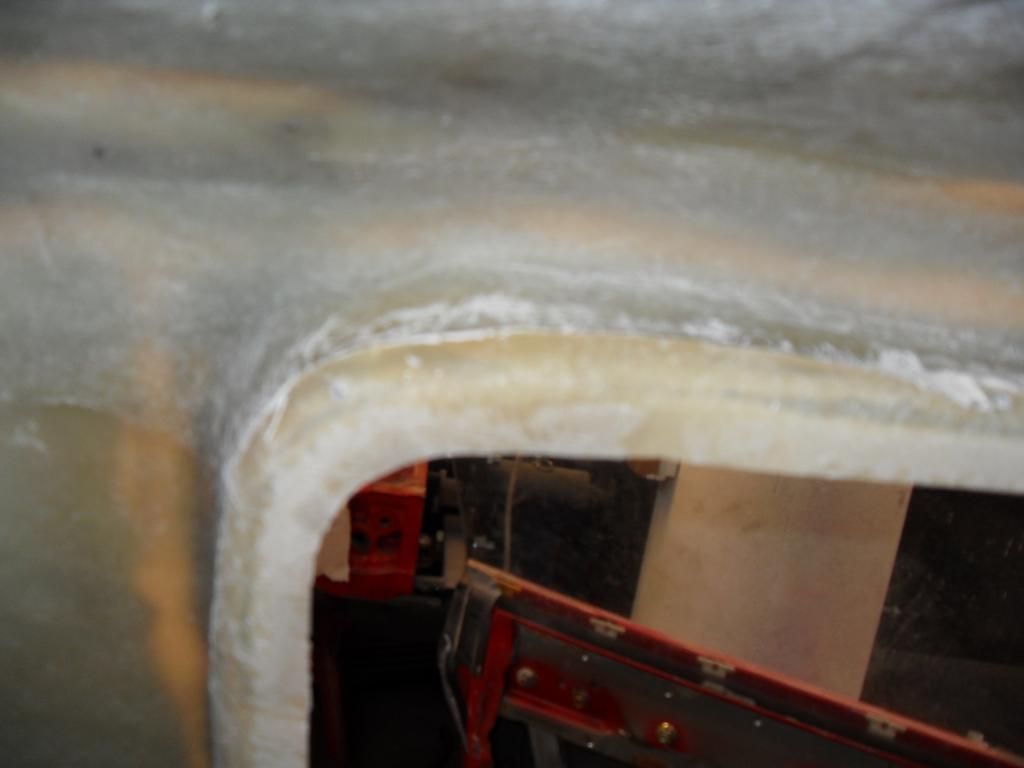
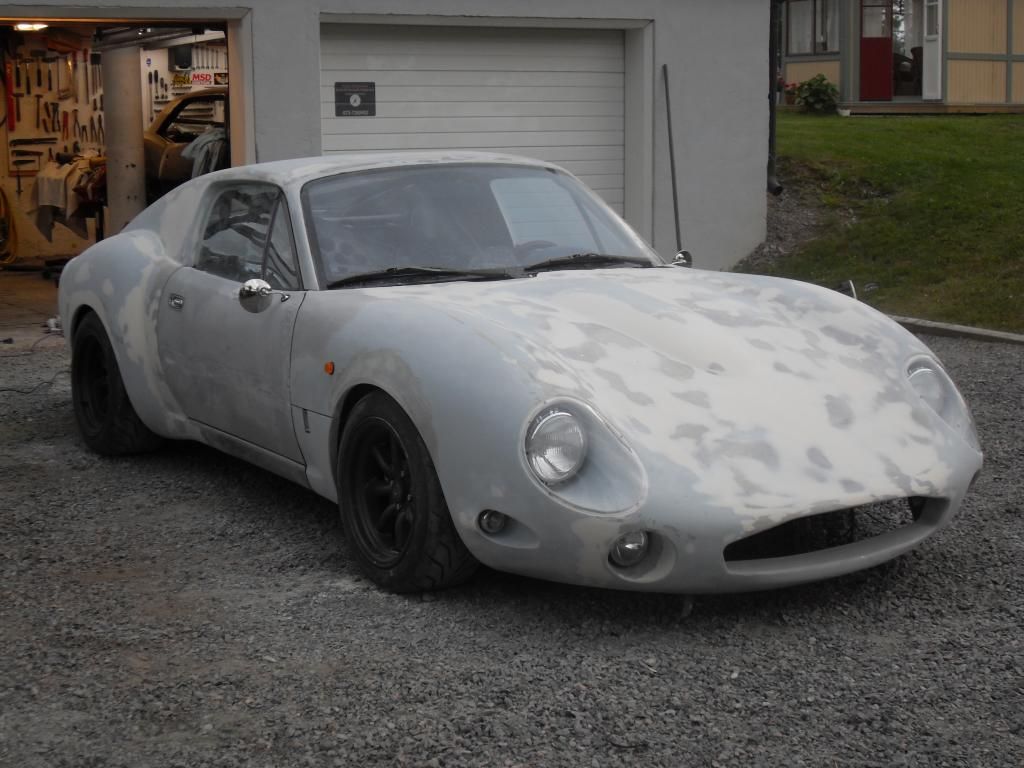
Yesterday i Went for a short drive just to feel the car a bit. The handling was just great, i bet these Little miatas can take a corner quite well! But all wasn´t just great, i had a bit of tyre rub in front. So i decided to widen the fenderlips on the upper part of the front wings, as they turn in a bit there. All to all this gave me a extra inch, plus i like the look of it now as it gives the car a bit more curves, to not say waist...
So i cut out a slice, but left just a tiny bit in each "corner" so i could bend them out
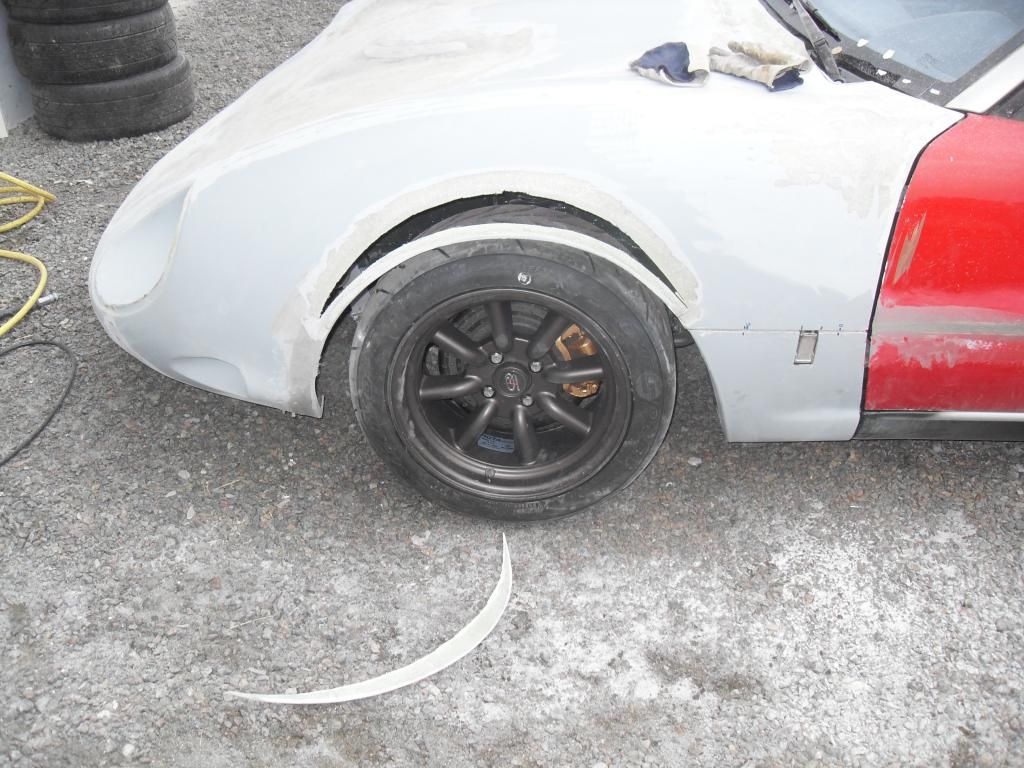
Bent out 1"...
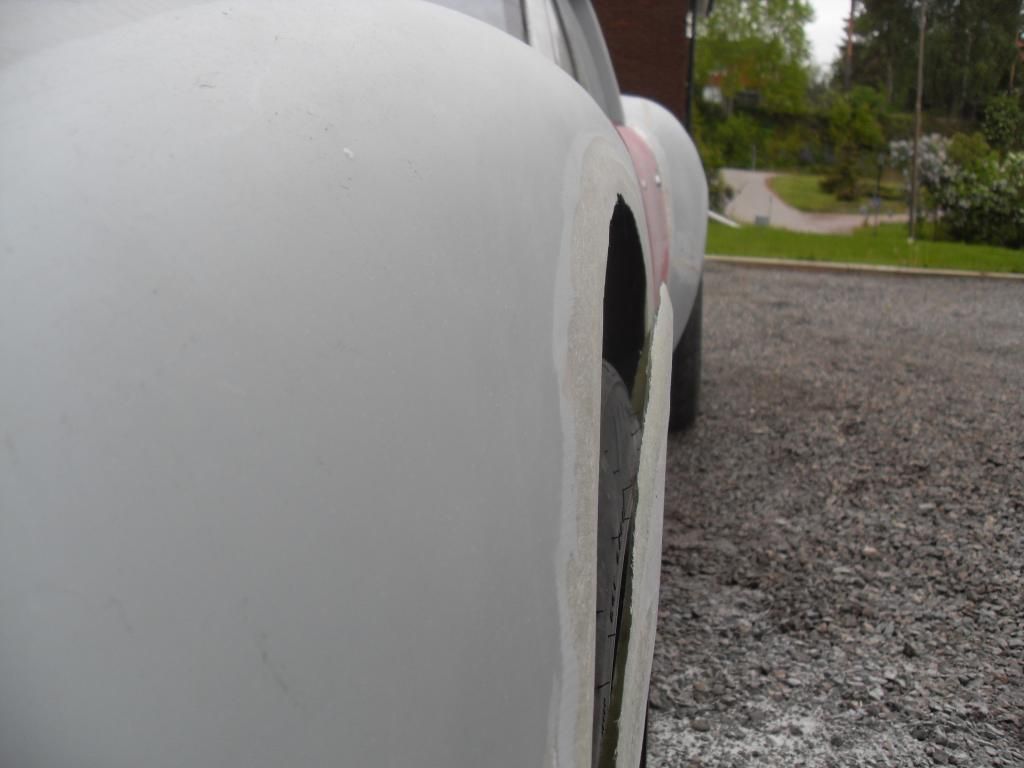
Hot glued a plastic piece on the inside...
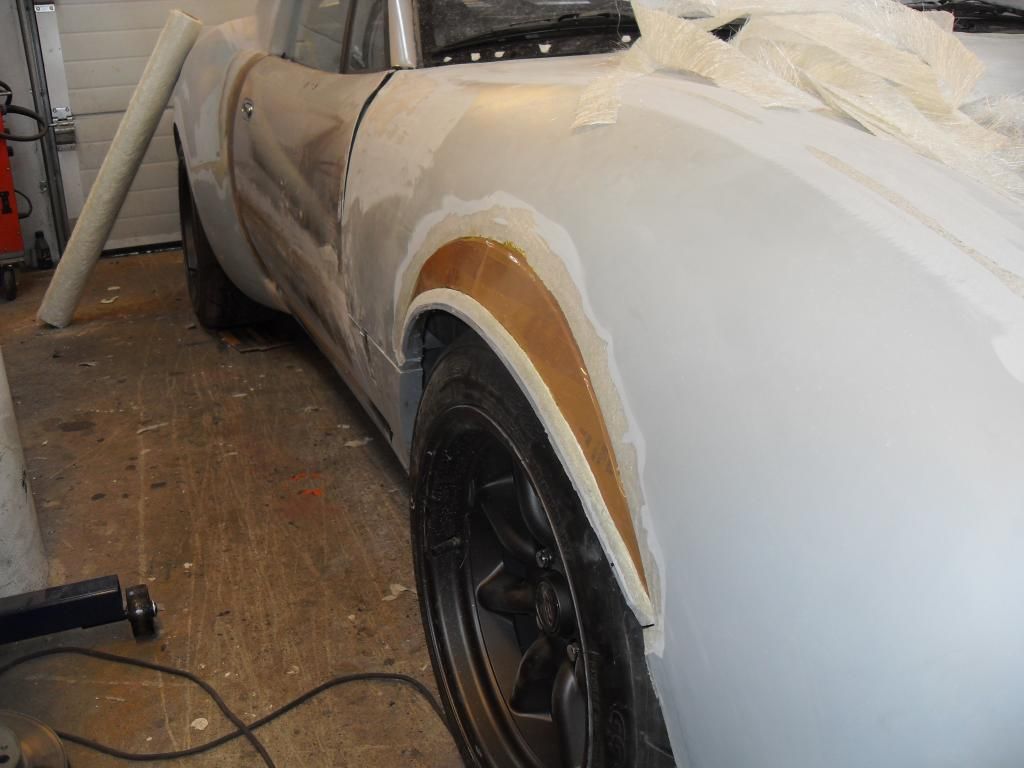
A couple of layers on to it...
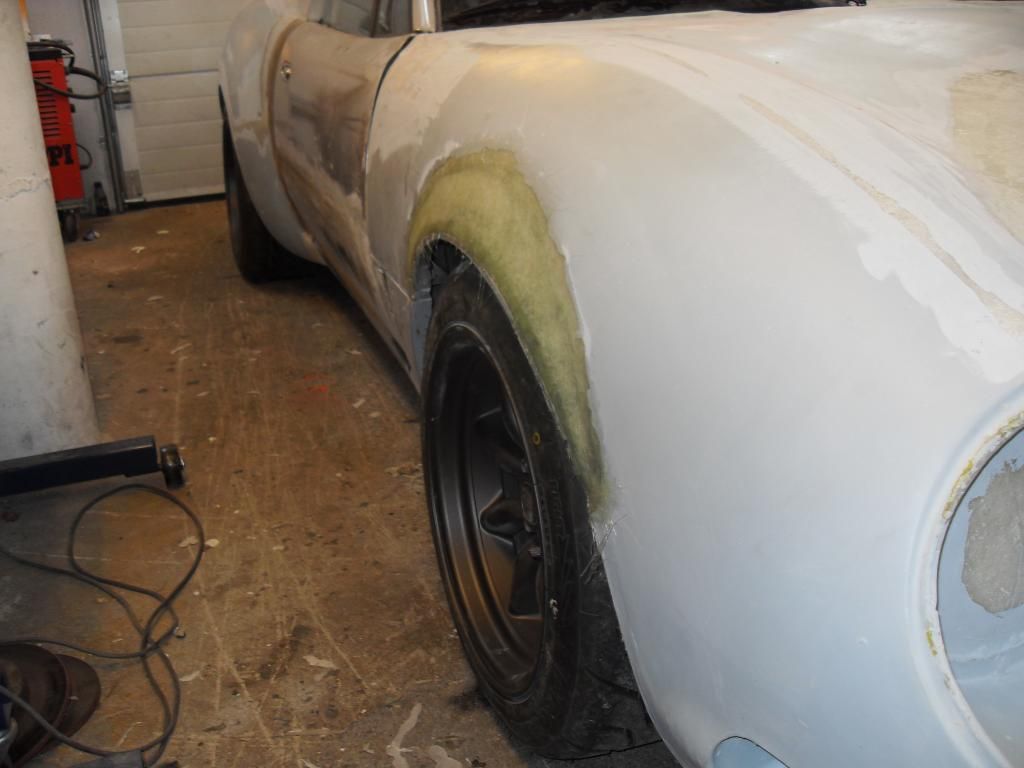
Sanded it on the inside and a couple of more layers...
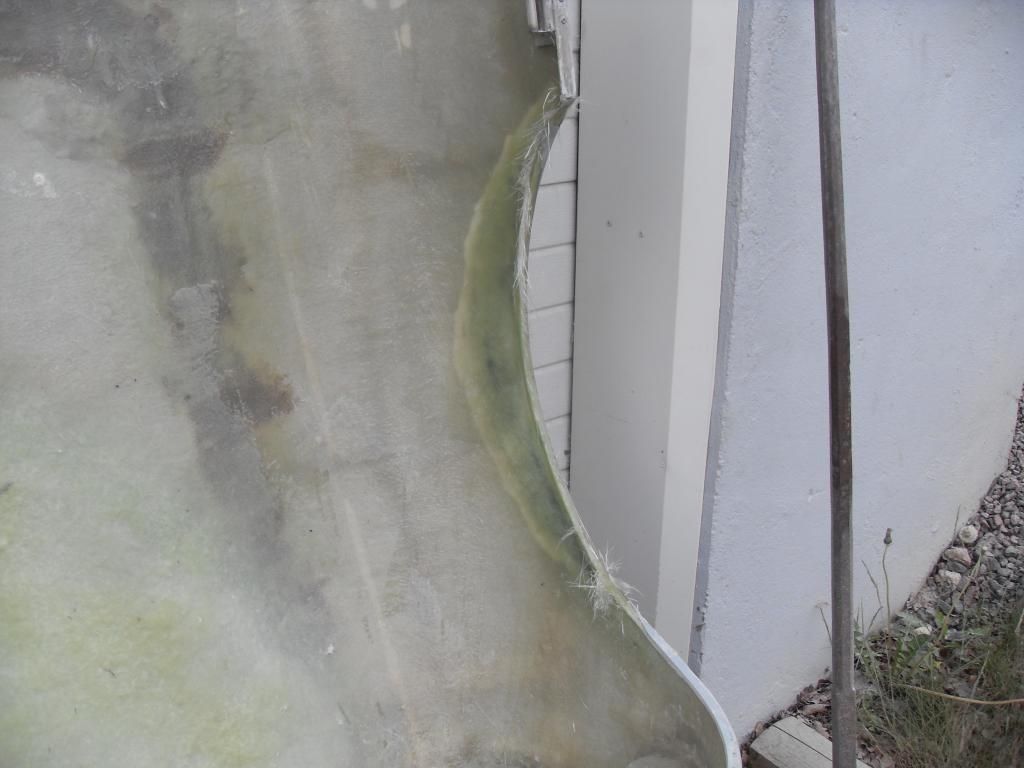
Some fibreglass filler on it to be sanded... But otherwise finished
Notice the 323 gtx turbo 4wd in the background! Theese Mazdas seems to breed! Found this one, totaly free from corosion, never repainted! My fiancee has it to work and back now...

Last edited by slangenracing; 6th June 2014 at 19:57..
|
6th June 2014, 20:25
|
|
Senior Member
|
|
Join Date: Feb 2014
Location: Sweden
Posts: 140
|
|
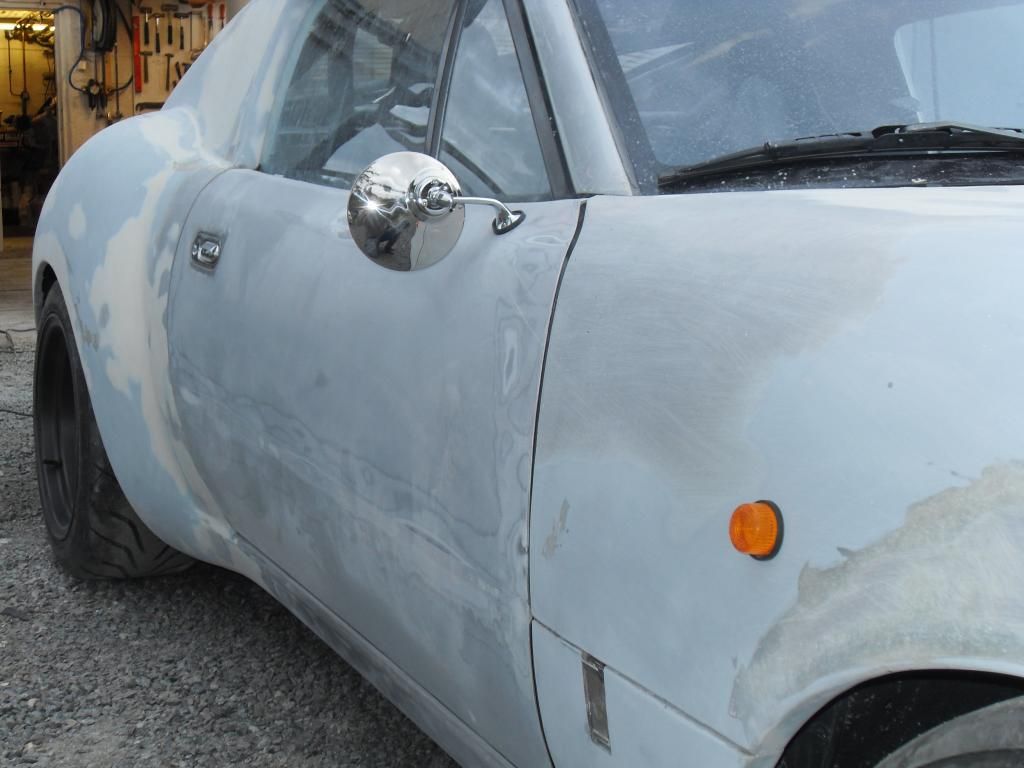
I am to replace the stock door mirrors to more Classic lucas style mirrors, so i needed to seal the old holes. Just filler is a no-no for me, and i don´t want to weld as the metal is so thin, it just ends up warped and the thing i don´t need now is more warped stuff. So i gently hammered the holes in a bit and used tin to seal the holes.
A bit hammered and cleaned up, ready for the flux
Tin on
No holes!
 |
7th June 2014, 07:49
|
|
Senior Member
|
|
Join Date: Jul 2012
Location: Near Penzance cnwll
Posts: 146
|
|
Like the front wings, more curves the better. Just one thing you are missing ! where is all the dust and mess. !  |
7th June 2014, 14:14
|
|
Senior Member
|
|
Join Date: Feb 2014
Location: Sweden
Posts: 140
|
|
Quote:
Originally Posted by Peepsy

Like the front wings, more curves the better. Just one thing you are missing ! where is all the dust and mess. ! |
Happy to hear you like it! Yes it really gets messy cutting and sanding this #%¤"&**! fibre glass! But i have done all sanding/cutting outside on the driveway just to get away from exessive cleaning of the garage! Plus i also get some sun too  |
10th June 2014, 15:03
|
|
Senior Member
|
|
Join Date: Apr 2014
Location: Midlands
Posts: 405
|
|
Thanks for the answers, I remembered seeing it on grayone's build thread so I will PM him and see how he got round that.
The build is coming on well, really interested in seeing how the new front arches turn out as they look like a good addition to the help with the flow of the curves.
|
12th June 2014, 22:17
|
|
Senior Member
|
|
Join Date: Feb 2014
Location: Sweden
Posts: 140
|
|
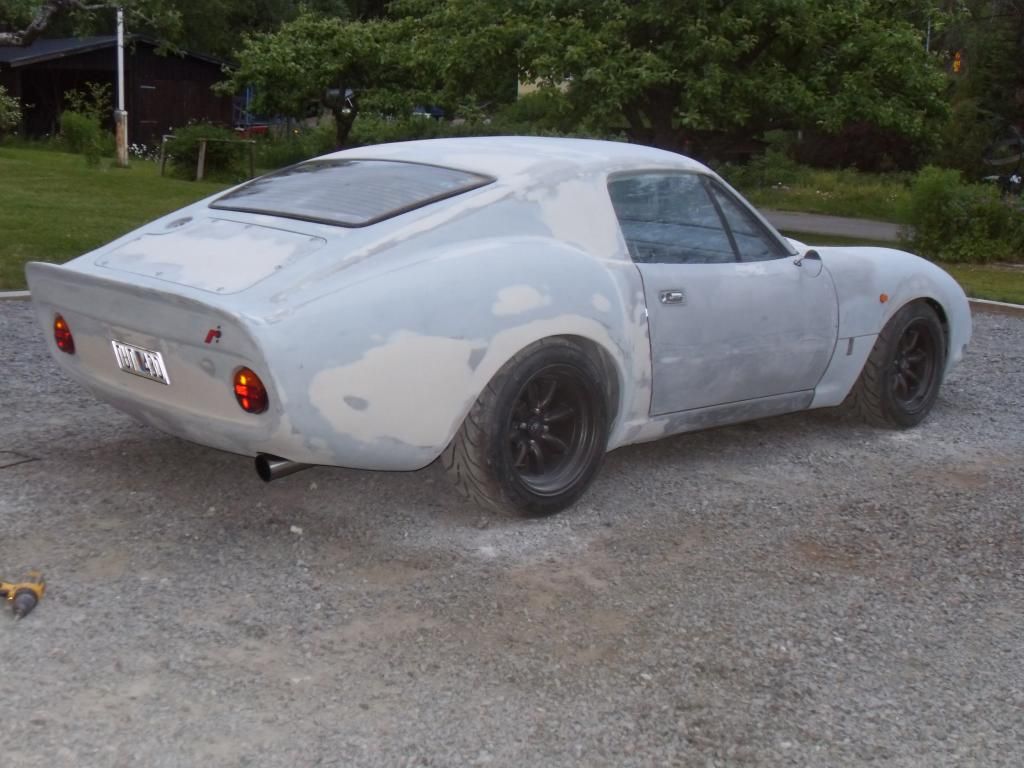
Looking at the rear of the car i figured it might be possible to slice of a piece to make it even flatter/fatter or "wider" to get that stance. Didn´t really like how the tail hanged like the belly on a cow. Well the angle grinder still works so... 
Put some tape on it to figure out where to cut. Got some help from my fiancee, one to look one to tape
Cut and back on the ground. I Think the kit car look vanished a bit. I guess a nice arse really wins every time for me too! 
 |
12th June 2014, 22:29
|
 |
Senior Member
|
|
Join Date: Sep 2011
Posts: 1,446
|
|
Very subtle...changes the rear
|
12th June 2014, 22:29
|
|
Senior Member
|
|
Join Date: May 2013
Posts: 2,161
|
|
I like that mod, it works well! Nice look!
|
16th June 2014, 21:15
|
|
Senior Member
|
|
Join Date: Feb 2014
Location: Sweden
Posts: 140
|
|
Last edited by slangenracing; 16th June 2014 at 21:18..
|
17th June 2014, 07:12
|
|
Senior Member
|
|
Join Date: Mar 2013
Location: Coventry and the Limousin
Posts: 549
|
|
Very quick work Andreas, it took me about 3 months to do what you did in a week.
|
17th June 2014, 07:35
|
|
Senior Member
|
|
Join Date: Feb 2014
Location: Sweden
Posts: 140
|
|
Quote:
Originally Posted by landmannnn
Very quick work Andreas, it took me about 3 months to do what you did in a week.
|
Yes, but think what it would cost you at the paintshop! After all the tribute kit is pretty ok! I have seen worse (the gt40, it was a disaster). Diy is the way if you wont pay....  But it is in the satisfaction to do it yourself the real reward is! |
17th June 2014, 08:09
|
|
Senior Member
|
|
Join Date: May 2013
Posts: 2,161
|
|
The car is looking great Andreas!
With me, I make all the things myself, because I cannot afford the stupid huge prices companies want for the bits I need.
They seem to think if you are building a Jaguar, you must be stupid and super rich!
I'm not even ordinary rich, but perhaps a bit stupid for taking on what I' m making.
But as you say, the reward comes in the form of satisfaction at the end!
What is the next task for you on your car?
|
17th June 2014, 08:57
|
|
Senior Member
|
|
Join Date: Feb 2014
Location: Sweden
Posts: 140
|
|
Well, i am a bit weather depending, as i cannot sand and cut inside, that would totaly contaminate my other project car and all the other stuff in the garage. If it will be nice outside (i hope), there will be some spray filler on the car. I also have to take up all the holes for lights etc. Bad weather, and i´ll be pulling the Cage out of it to be finishing all the welds. For brakes i have to fabricate the bracket for big brakes in the rear. I also have to make some new brackets for the radiator as i have to lowered it a bit. A new exhaust is also planned. A new tubular exhaust manifold i have calculated on, also to be fabricated.
Best regards Andreas!  |
17th June 2014, 09:03
|
|
Senior Member
|
|
Join Date: Feb 2014
Location: Sweden
Posts: 140
|
|
Oh Scottie!
Dont tell em youre building a Jag, tell em its a Skoda or maybe a Lada!  |
17th June 2014, 10:20
|
|
Senior Member
|
|
Join Date: Feb 2014
Location: Sweden
Posts: 140
|
|

I saw there was some questions how to solve the door window seal. I thought i post how i did it. It might not be the best way but this is how i did it.
The idea was to use a universal seal, camper type seal. To use one like that the attachment edge were way to far in, so the gap was to large by approximatly 15mm. So i marked out where to cut, cut it of and sanded the gelcoat of, sanded the inside edge on the roof, glued it back with epoxi.
Unfortunatly i didnt take a Picture of the cut piece, but the profile of it looked like an L.
So here it is glued back over the inner edge from the inside. 2K epoxi...
This is the outside. The corner is filled with common filler
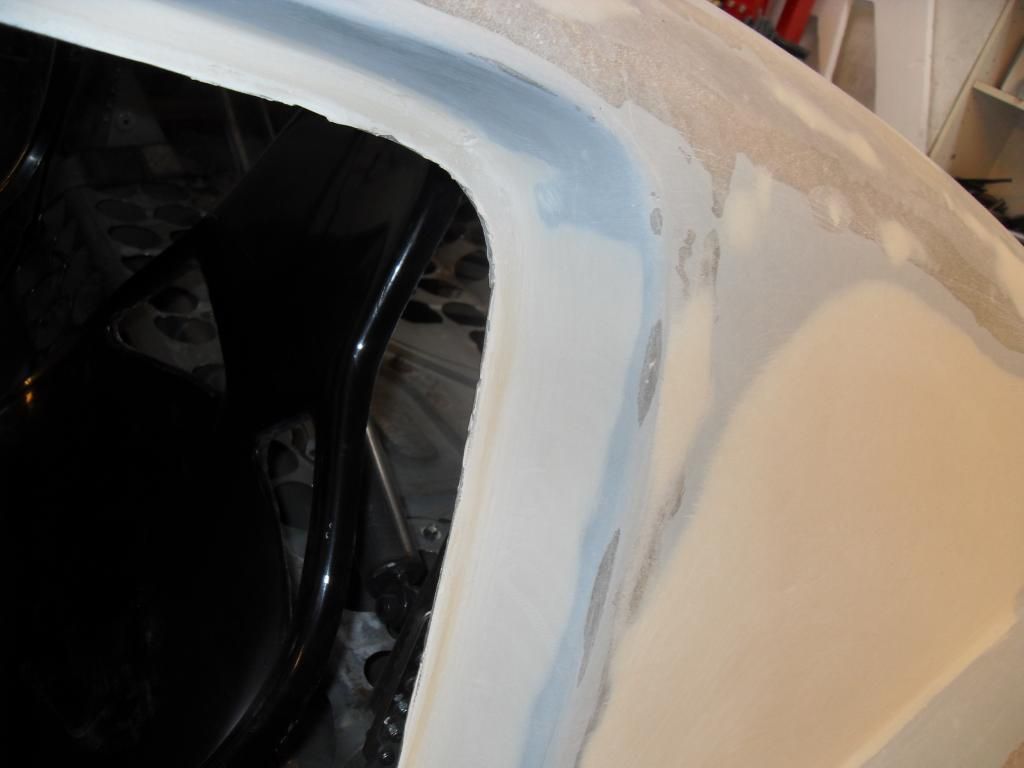
This is the profile of the seal. Just goes over the edge with molded in clamps
Bought on ebay UK http://www.ebay.co.uk/itm/CAR-VAN-CA...item27c88cef94
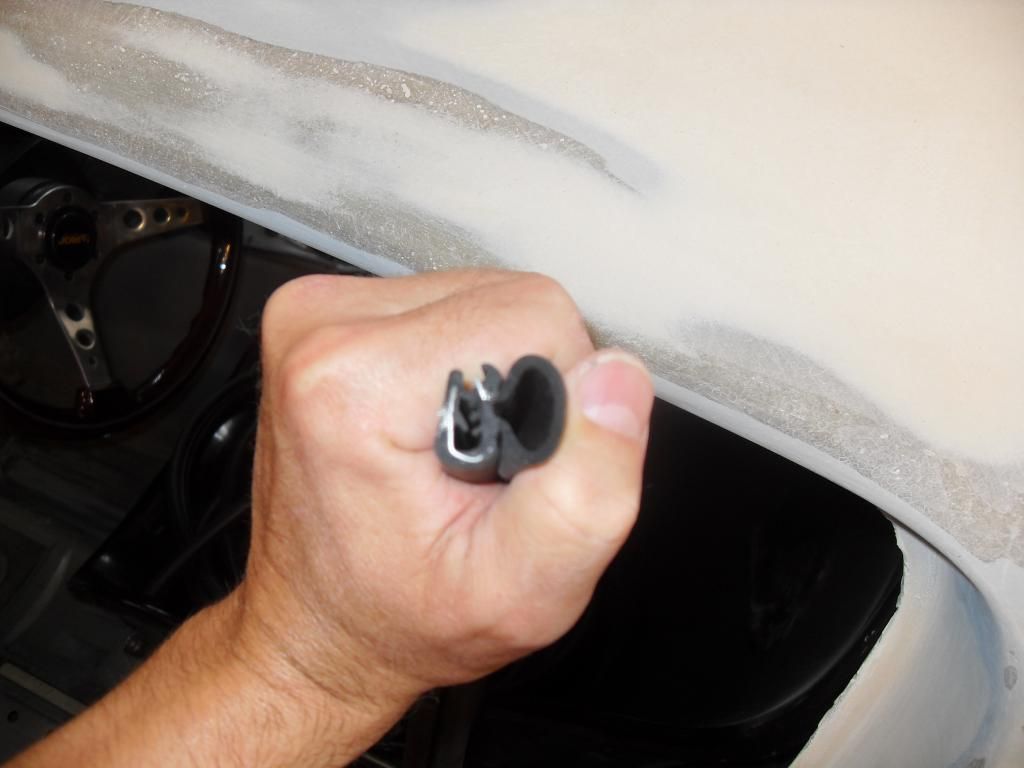
The front part where the roof meets screen frame.

I am using the oem seal, that has been cut to fit under the grp roof. The universal seal meets it, and will be glued with o-ring glue later and trimmed to fit nice and proper.
So this is how it looks with door closed. Looks really sealed up.
Best regards from Andreas

|
17th June 2014, 21:14
|
|
Senior Member
|
|
Join Date: Feb 2014
Location: Sweden
Posts: 140
|
|
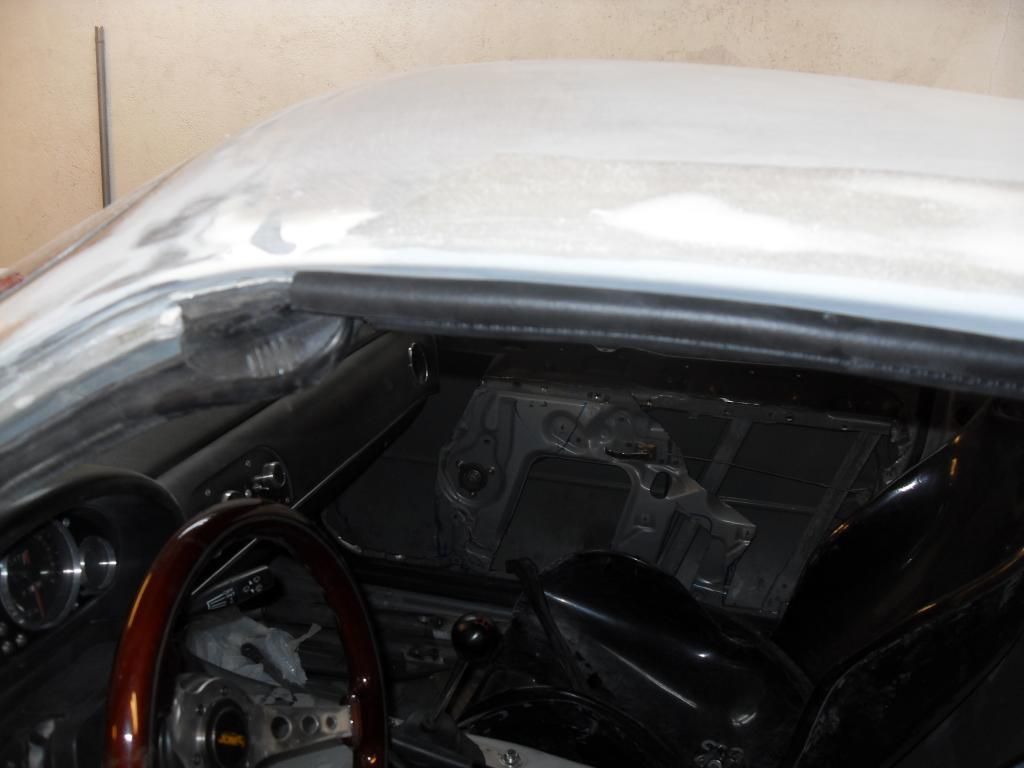
This evening, i put all the misc. parts on the car, drilled all the holes etc.
Lucas chinese copy mirrors, and som side markers. These are for inspection only, got very nice chrome drop like ones (has no E-marking), that i will use later on
Tail ligts are Lancia Stratos or gt40, some ferraris. But its also Fiat 500, four fast cars
Kill switch for battery.
Tail reg.plate. Notice it says TUT. That means toot (honk) in Swedish. I gues i´ll be hearing that a lot 
Also made a cutout for exhaust
Missing the reg. plate lights. Will get tomorrow
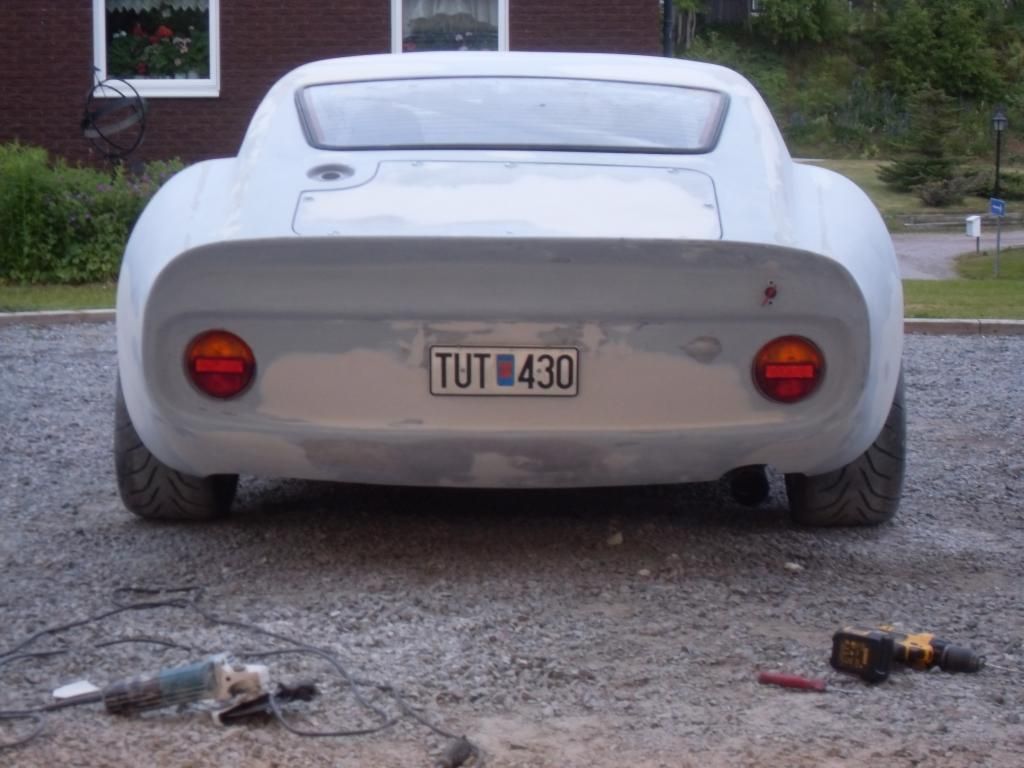
All the lights in, also the perspex covers

Happy greetings //Andreas
Last edited by slangenracing; 17th June 2014 at 21:21..
|
18th June 2014, 08:03
|
|
Senior Member
|
|
Join Date: May 2013
Posts: 2,161
|
|
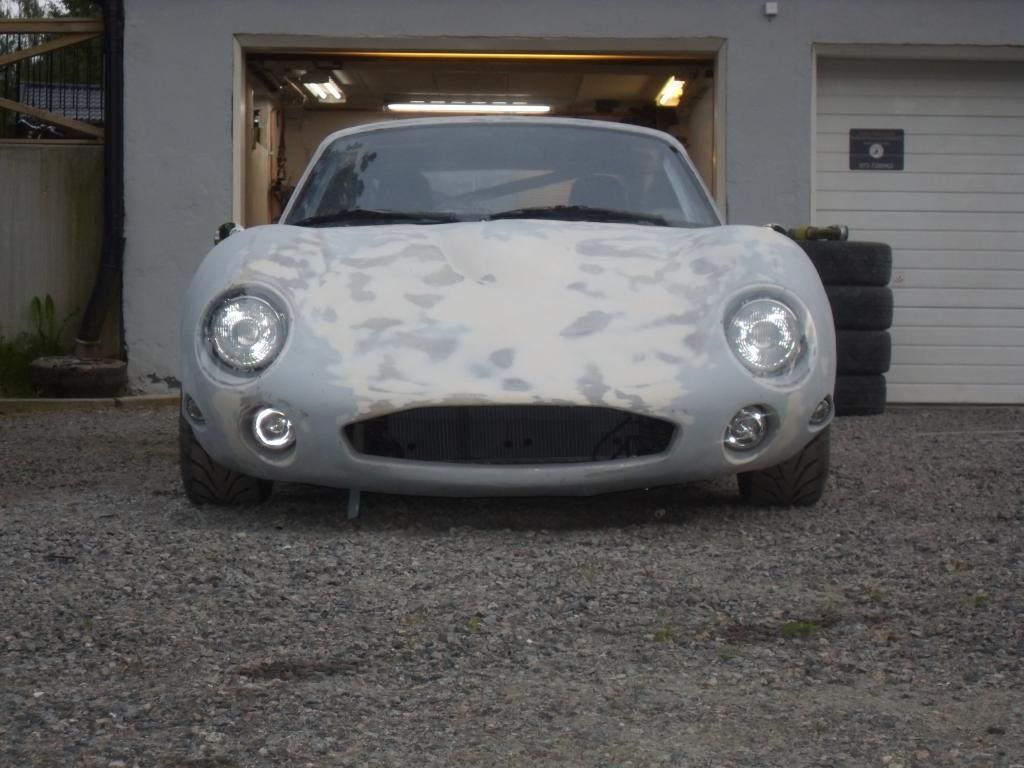
Its when you put theses bits on the car starts to "come alive" right?
Your car has a nice low aggressive stance, as Mr Towed once said:
" Praise be to the Lowered!
|
|
Currently Active Users Viewing This Thread: 1 (0 members and 1 guests)
|
|
|
 Posting Rules
|
You may not post new threads
You may not post replies
You may not post attachments
You may not edit your posts
HTML code is Off
|
|
|
All times are GMT +0. The time now is 01:15.
|


 Linear Mode

