Are you madabout kit cars      
 "We've Got Kit Cars Covered" Information about Madabout-Kitcars.com Contact Madabout-Kitcars.com         Home of UK kit cars - madabout-kitcars.com Various kit car write ups All the latest kit car news Kit car related and general discussion

Search
Manufacturers
Kit Cars
Kit Car Data sheets
Picture Gallery
SVA Knowledgebase
Clubs & Communities
Build cost estimator
Kit cars for sale
Knowledge Base 
KitcarUSA.com
Classic-Kitcars.com
 

Go Back   Madabout Kitcars Forum > Mad Build Area > Sammio Builds and discussions

Sammio Builds and discussions Sammio bodied car builds and specials

Reply
 
Thread Tools Display Modes
  #161  
Old 2nd December 2012, 17:35
Paul L's Avatar
Paul L Paul L is offline
Senior Member
 
Join Date: Feb 2012
Location: Wembley, London
Posts: 5,056
Paul L is on a distinguished road
Default

Engine Re-Start - Attempt #1:

Re-connecting the fuel supply was a little bit harder with the body shell sitting in place.
I didn't want to re-route the hard fuel line until I'd worked out what I was doing in the rear of the car.
So for now it was just a temporary hose pipe join between the tank & fuel line to get me going.
I also remembered to remove the protective cover I had stuck over the tank's fuel filler hole.


I've had this 2nd hand Spitfire expansion tank for a while now (it was missing from my donor).
Believe it, or not, this is what it looks like after I've spent some time cleaning it!


I'd also bought a grommet for the top of the cap, based on forum comments.


Even I could managed the simple job of cutting a hole in it for the pipe to go through.


This gives a nice seal between the pipe and the hole in the cap.


Then I connected it to the radiator and topped up the water and anti-freeze.
( I will use the bottle mounting bracket before I try to drive the car anywhere. )


I've still need to connect the Megane expansion tank to the heater hoses, but that can wait for now.
I would like to upgrade the radiator when I know more about how much space I've have under the bonnet.

I'd printed another copy of my modified wiring diagram to highlight (in pink) the minimum wiring required.
I wasn't 100% sure I needed the wires highlighted in blue just to start the engine (gearbox connections, etc.).


I thought it would be a good idea to protect the rest of the loom before taking it outside.
This "protection" was nothing more than some cling film & tape, but it did tidy things up a bit.
I just used the section of the steering column with the ignition switch attached so I could use the key.


Then it was simply a case of connecting the wires I thought I needed before connecting the battery.
( Which I had already given a bit of a charge, just in case.)


The good news was that when I turned the key to the first position the ignition light came on.


The bad news was that when I turned the key to start the engine I got a bit, fat, nothing.
There wasn't even the sound of the starter motor trying to burst into life.

Try as I might, I just couldn't trace the problem & eventually I needed a torch as the light faded.
So unfortunately I had to call it a night and decided to unplug the loom & bring it back inside the house.
As to be honest it was so cold staying out any longer was not really an option.

My drive faces North and the house keeps it in shade when the winter sun in low in the sky.
The ice from the top of the car cover was still solid at 2.50pm today when I started the wiring.


I'm sure the problem is "earth" related and I hope it is something simple.

Question: Does anything need new earth leads when fitted to a fibreglass bulk head?
As things like the coil & starter motor solenoid were previously mounted to a metal body.

Well I can just about feel my feet now, so until next time, take care, Paul.

Last edited by Paul L; 10th September 2019 at 11:01..
Reply With Quote
  #162  
Old 2nd December 2012, 18:16
Psycho pops's Avatar
Psycho pops Psycho pops is offline
Senior Member
 
Join Date: Jul 2011
Location: Marmande 47200
Posts: 501
Psycho pops is on a distinguished road
Default

Paul like you i will be fitting a header tank, one question will the feed from the radiator need blanking off and the expansion bottle run from the header tank?
Seeing as the radiator is now so low in the system i wonder if the water will flow out from this point or does the radiator cap prevent this from happening.
Cheers Stewart
Reply With Quote
  #163  
Old 2nd December 2012, 18:16
Mister Towed's Avatar
Mister Towed Mister Towed is offline
Senior Member
 
Join Date: Jul 2011
Posts: 5,328
Mister Towed is on a distinguished road
Default

From memory I think the starter solenoid has an earth cable attached to one of its mounting screws. You might want to run a cable from the chassis to one of the starter solenoid mounting screws to complete the circuit. Hopefully, it's that simple...

Good luck getting your engine started, it's one of the build milestones.
Reply With Quote
  #164  
Old 5th December 2012, 08:25
Paul L's Avatar
Paul L Paul L is offline
Senior Member
 
Join Date: Feb 2012
Location: Wembley, London
Posts: 5,056
Paul L is on a distinguished road
Default

Got the day off work today as the Gas Board are digging up pipes outside our house & require access.
If the weather improves I might even get the chance to sneak out and do some work on the car.

But first, this...

Megane Expansion Tank:
Psycho Pops - Thanks for the reply Stewart, as this is an area I've read conflicting stories about.
Clearly my first solution of simply connecting the two heater points together wasn't a brilliant idea.
As the forced bend in the hose pipe might allow an air pocket to form, blocking the whole system.


So I thought the Megan expansion tank was a simple way of forming an air free "in" & "out" connection.
In effect the bottle would simply be 'replacing' the heater & just allowing the coolant to circulate as normal.
This isn't a great photo, but you can see the two heater hoses connecting to the bulkhead in the middle.


And this is the Megane bottle...


So lower heater hose (going to left side of bulkhead as you look at photo) to the bottom pipe in the bottle.
And higher heater hose (ending up on right side) would be connected to the top pipe in the bottle.
I hoped that under normal operations, the bottle would remain full of coolant with no air inside it.
I believe this would be possible if I get the bottle fitted at the right height compared to everything else.

Clearly the bottle's cap would be handy when filling up the system with coolant (if radiator is upgraded).
If the Megane cap doesn't let air in (TBC), any water heat expansion would end up at the radiator as normal.

I know you have just lowered your radiator and if I have to do the same I think all bets will be off.
DonnySoutherner lowered his Cordite radiator & I'm waiting to see what AndyP57 has done on his.
Unfortunately, I can't test fit the bonnet until after the re-body inspection, so don't know what I need to do.
( Chassis brackets need to "fall off" after the inspection before there is room to fit the bonnet. )

So hopefully the current system will allow me to re-start the engine & I'll worry about the rest later.

Note: I'm happy to be corrected if I have got the wrong end of the stick about any of the above.

Cheers, Paul.

Mister Towed - Thanks for the suggestion as I hope to have another go at starting the engine soon.
At this stage I think it would be nice bit of build motivation to end the year knowing that it still fires up.
Reply With Quote
  #165  
Old 6th December 2012, 07:30
donnysoutherner donnysoutherner is offline
Senior Member
 
Join Date: Mar 2012
Location: Doncaster
Posts: 116
donnysoutherner is on a distinguished road
Default

Starter solenoid definitely needs an earth, I earthed the coil as well for completeness sake, not sure it was required but I figured it was earthed when it was attached to metal so why not! Mine goes!
Reply With Quote
  #166  
Old 6th December 2012, 18:10
Paul L's Avatar
Paul L Paul L is offline
Senior Member
 
Join Date: Feb 2012
Location: Wembley, London
Posts: 5,056
Paul L is on a distinguished road
Default

Gas Pipe Repairs:
In the end, I didn't get a chance to work on my car while waiting for the gas men to do their thing.
There were two main reasons for this, the first was how close the gas works were to the car itself.
Trying to "spark" my starter motor into life with a battery & jump leads would be an explosion hazard!


You can just about see the man standing in the hole in this photo.


The second was the fact they needed to dig up our new permeable driveway to reach a gas pipe join.


I had to make sure the different sizes of stone & gravel making up the different layers were kept separate.
We will now have to wait until the Gas board's driveway specialist is available to "make good" the mess.

After spending a few hours in the cold, I then had to return to a house with no gas & therefore no heating.
Which in turn made me spare a thought for the hole diggers themselves who had to work outside all day.

Hopefully I'll get to play with my engine at the weekend.
( After I've put the Christmas tree up with my daughters. )

Cheers, Paul.

DonnySoutherner - Thanks for the tip Simon, I'll try that first and see what happens.

Last edited by Paul L; 10th September 2019 at 11:06..
Reply With Quote
  #167  
Old 7th December 2012, 09:59
Mister Towed's Avatar
Mister Towed Mister Towed is offline
Senior Member
 
Join Date: Jul 2011
Posts: 5,328
Mister Towed is on a distinguished road
Default

I don't know what you were worried about, the sign clearly says 'No Smoking'.

If you'd tried to start your engine and blown the street sky high you could've just sued the gas company for failing to put signs up saying 'No Trying to Start Classic Car Engines'. Where there's blame...
Reply With Quote
  #168  
Old 9th December 2012, 15:59
Paul L's Avatar
Paul L Paul L is offline
Senior Member
 
Join Date: Feb 2012
Location: Wembley, London
Posts: 5,056
Paul L is on a distinguished road
Default

Yesterday was a major Spring (Winter?) clean before we put the Christmas tree up.
I was also forced to spend time up on on Santa's sleigh landing stop (see below).
Then most of today I have felt rubbish, but eventually I got outside just before sundown...

Engine Re-Start - Attempt #2:
Before I had another go, I re-read WCA's "First fire of the build" thread here.
I also did a quick Google search & found another great thread with a helpful photo here (last post).
And these highlighted the simple schoolboy error I made during my first starting attempt.

I thought the "earth" lead bolted to the engine was providing the earthing point for the loom.


Where as, it actually needs to be connected to earth itself & this was previously where it joined the body.


So making sure the loom was fully connected to the engine was a complete waste of time.
I knew I needed new earth points on the frame for my lights, etc. but missed this completely, oops.

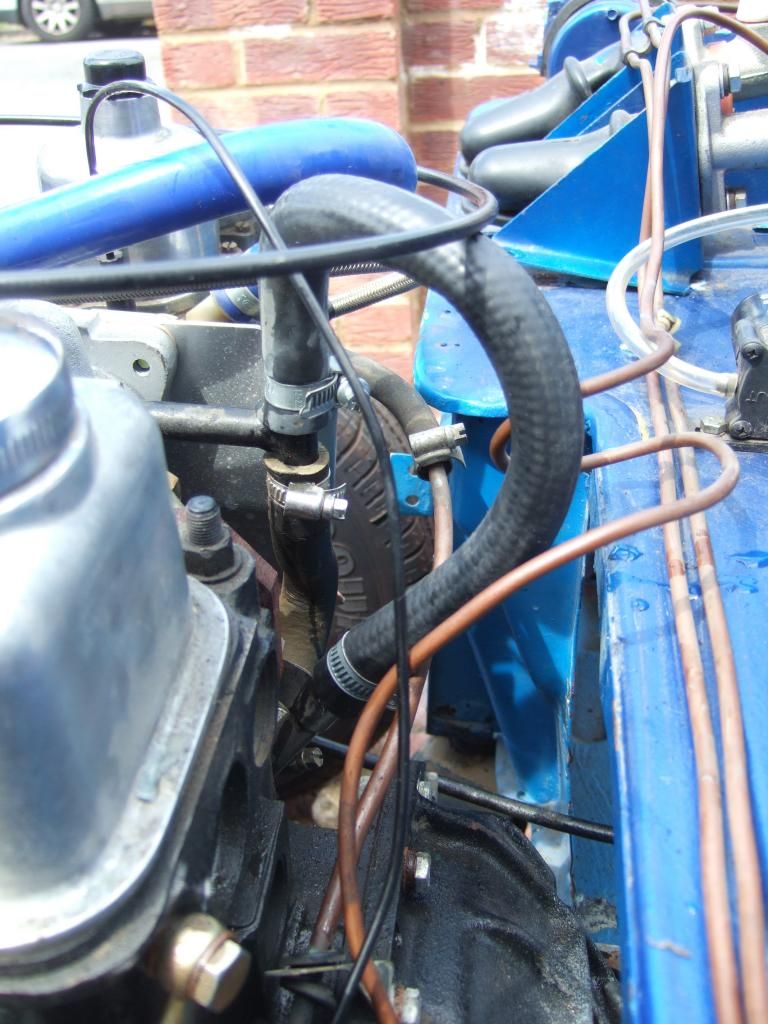
But before testing my earthing theory, I dug out some of the surplus wires I had removed from my loom.
I then wired both the starter solenoid & coil mounting points back to the main battery earth wires.
( This was just a temporary measure for the engine start & I will wire it all up properly later on. )

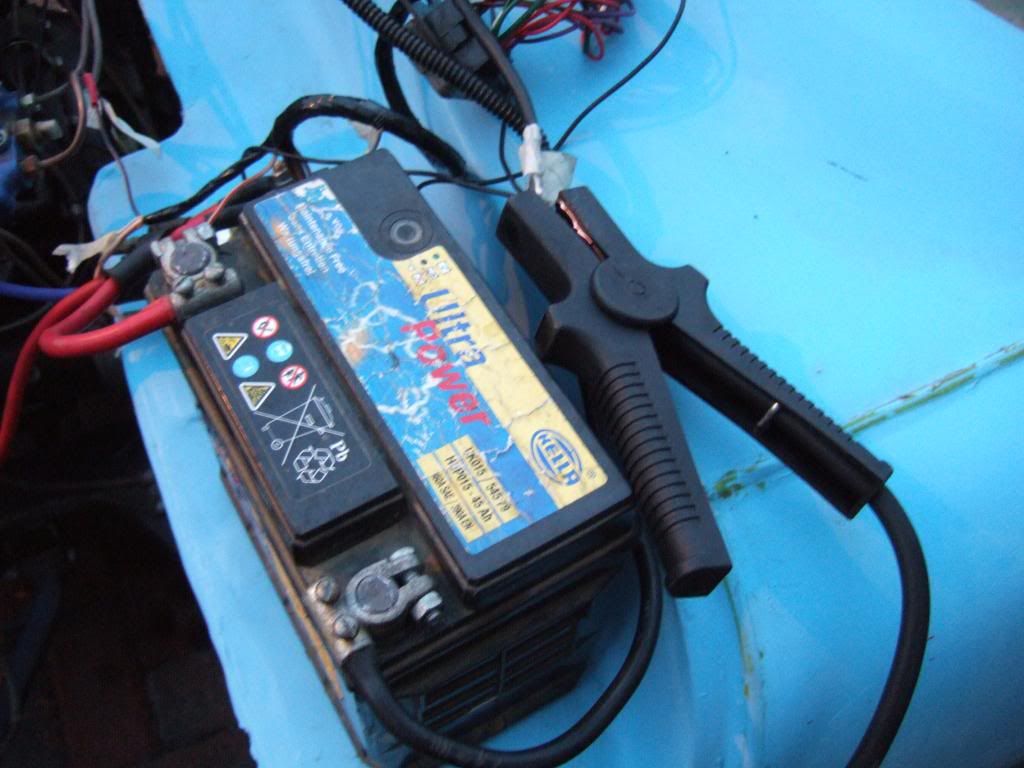
My final bit of simple trouble shooting before connecting everything back up was with the starter motor.
Using jump leads, I connected the "-ve" battery terminal to the frame & touched "+ve" lead to starter.
This got the starter motor turning over, so that was one possible problem removed from the equation.

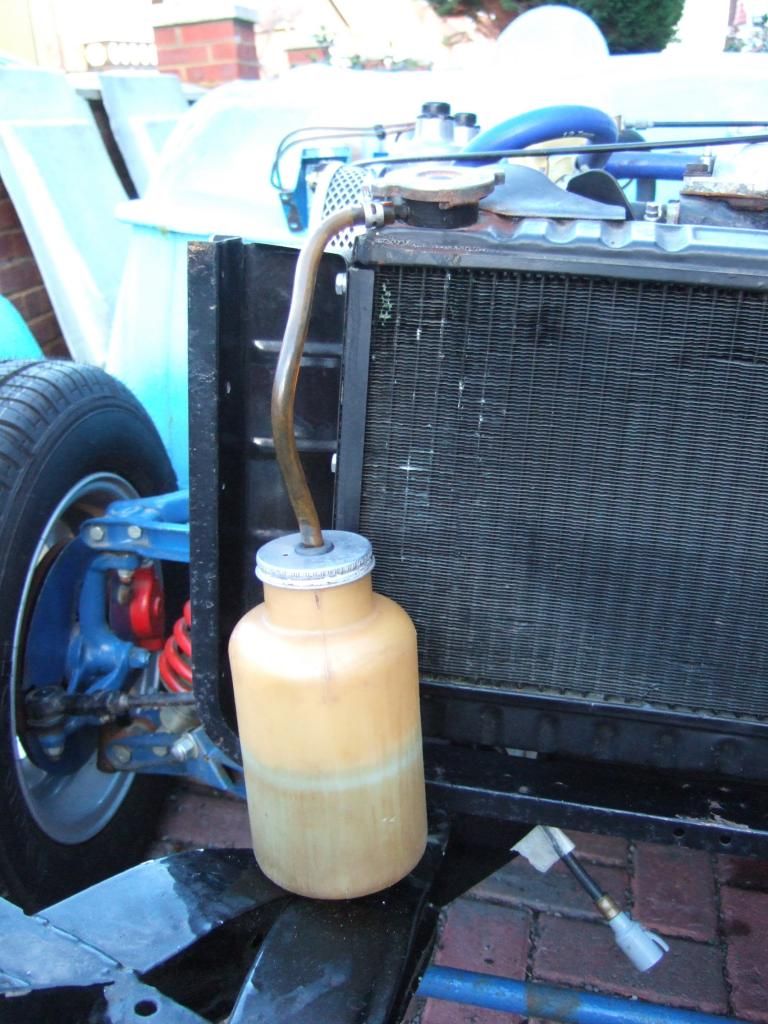
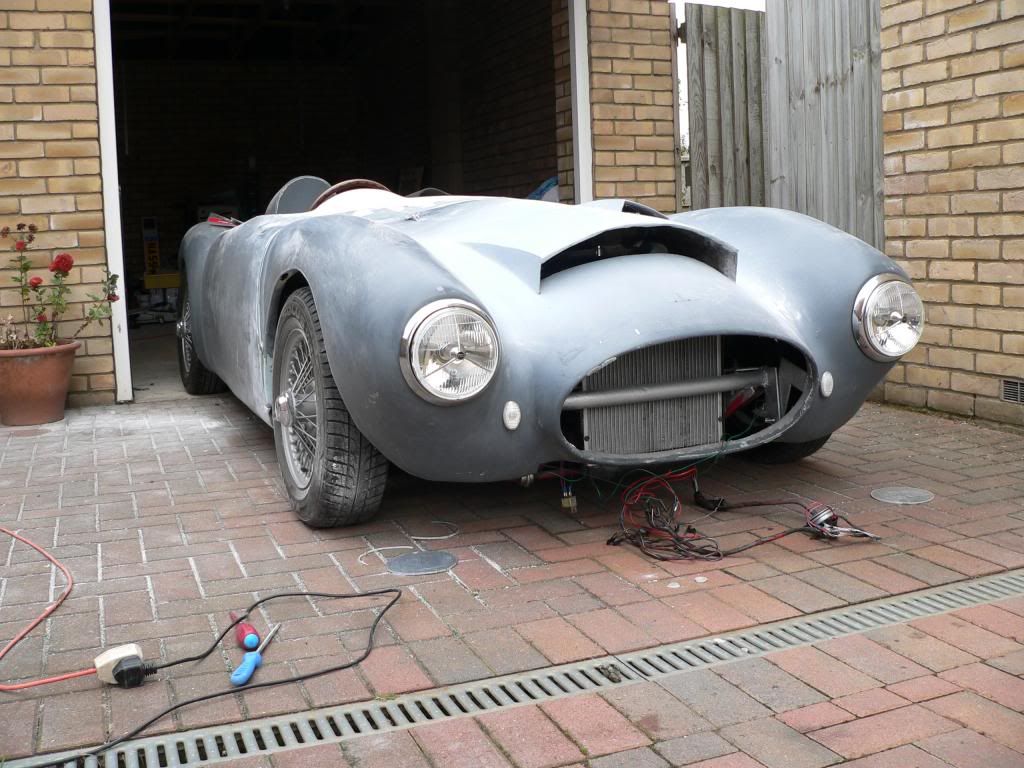
So I plugged my wiring loom back in again to just the main connections needed (gearbox wires not required).
Along with the wiring diagram I also printed off a copy of the original solenoid & coil wiring to double check.


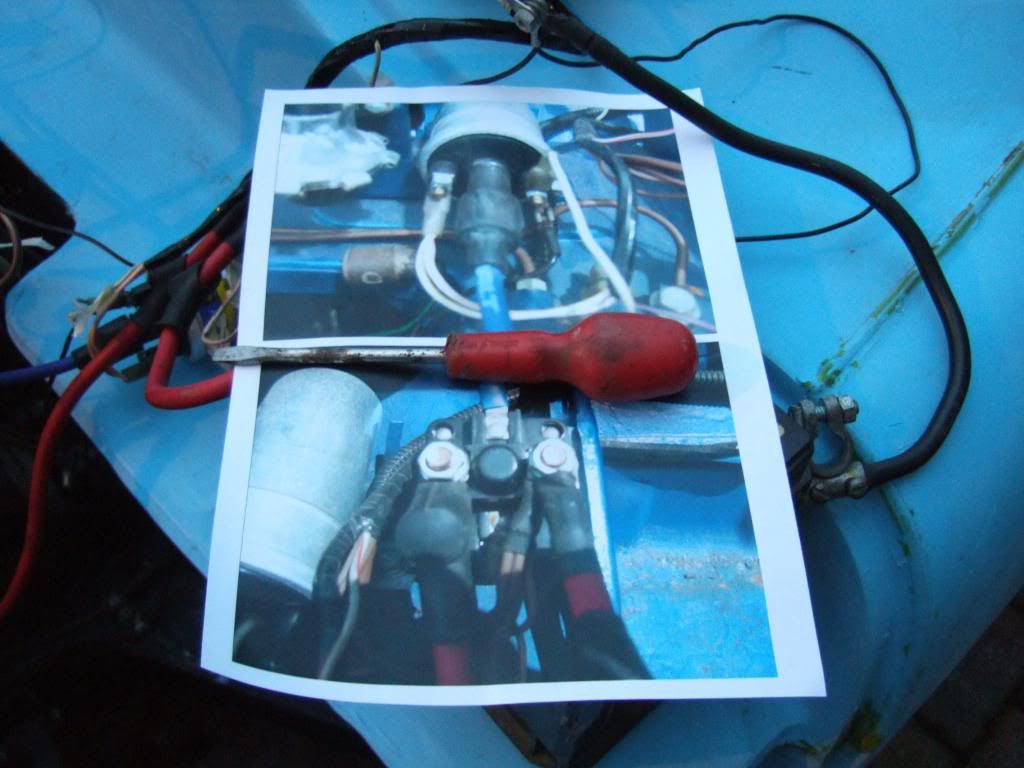
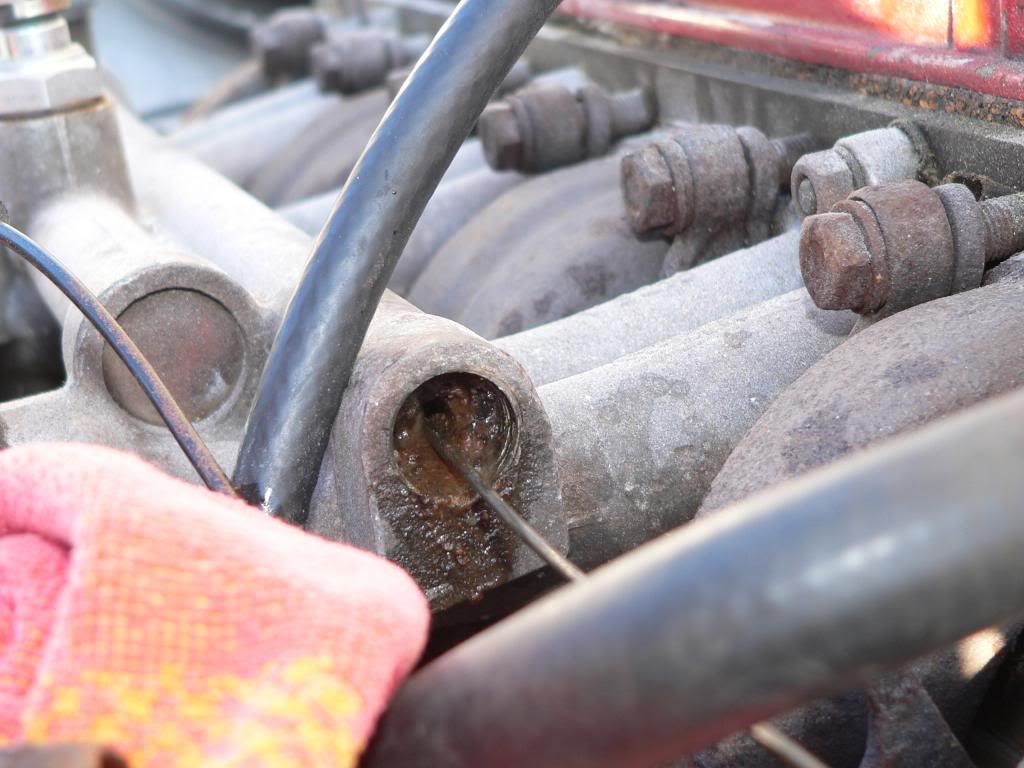
I then created a new earth point with a jump lead from the wiring loom at one end to the chassis at the other.
( Excuse the poor photos as it was starting to get dark. )


Turned the key the first turn, nothing happened at all and my heart sank.
Then I quickly spotted that I had forgotten to connect the loom plug back to the ignition switch.

So take #2 of the first turn of the key and this time the ignition light came on as before, so far, so good...

But unlike last time, there were definite signs of life coming from the engine at the next turn of the key.
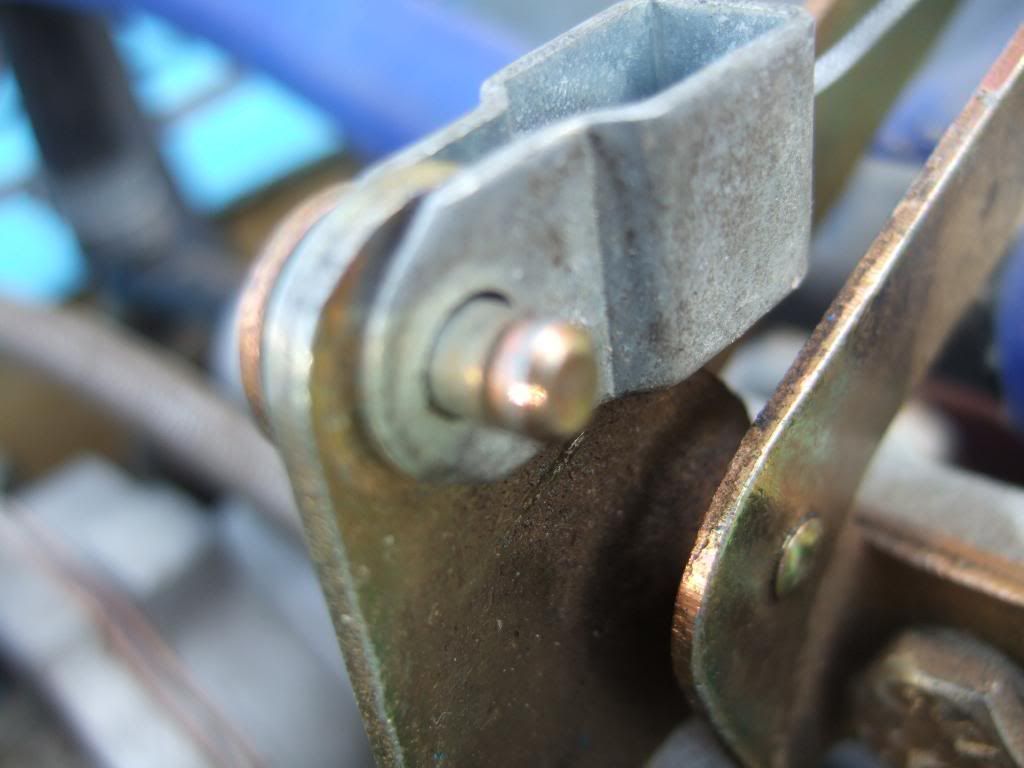
I hadn't re-fitted the throttle or choke cables, so needed to operated their levers on the carb. by hand.
( Sorry couldn't operate choke & throttle and take the photo. )


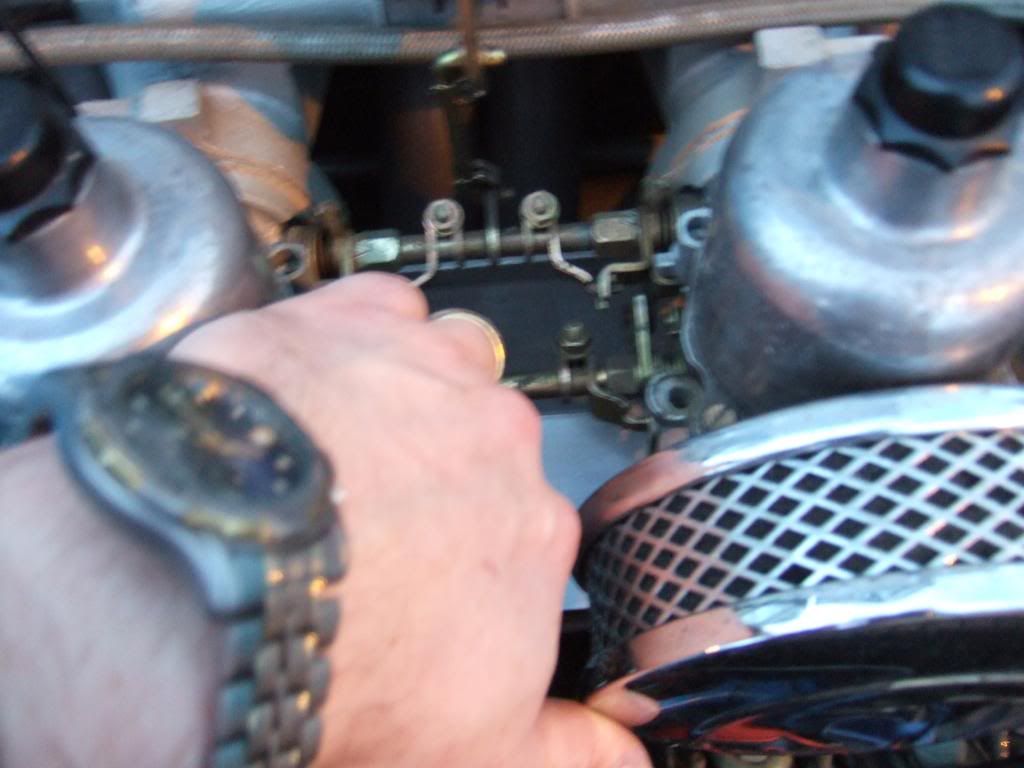
It took a few attempts to get the petrol in, but eventually...

[Dr Frankenstein] "IT IS ALIVE! . . . . ALIVE!" [/Dr Frankenstein]

You have no idea how happy I was to hear the engine running again.

Obviously it was working before I dis-connected everything, so I'm just glad I hadn't messed it up.
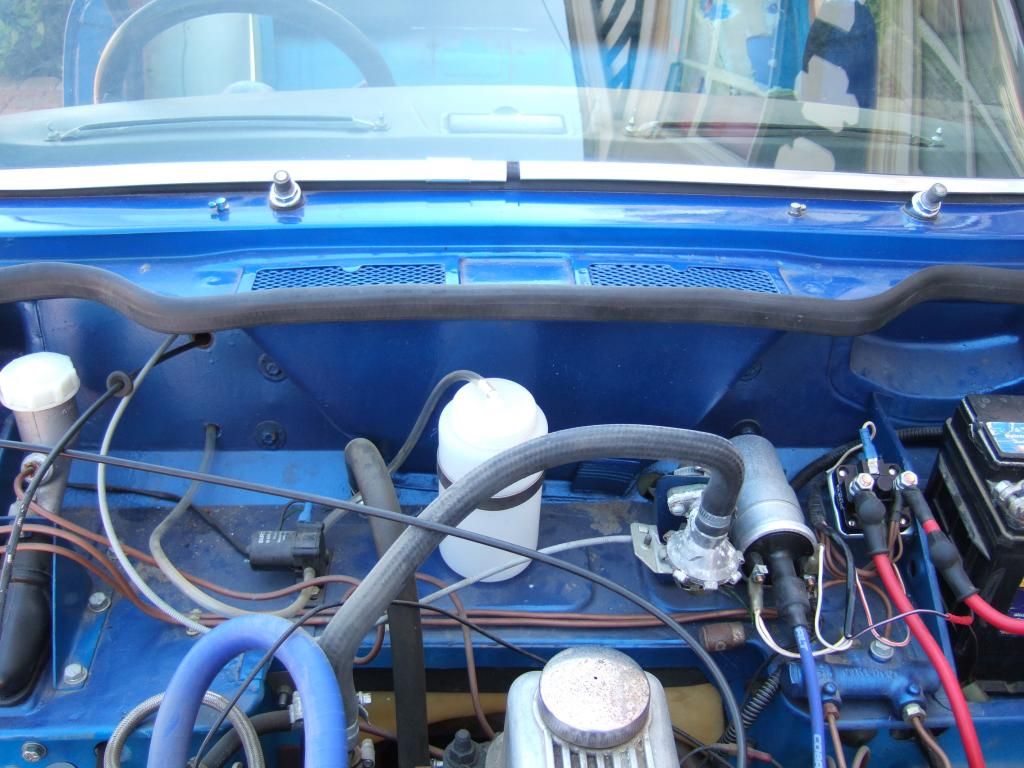
I left it running for a while before switching it off, but thankfully it kept starting each time I tried it again.

So whilst it may not look like much, this is a functioning wiring arrangement.


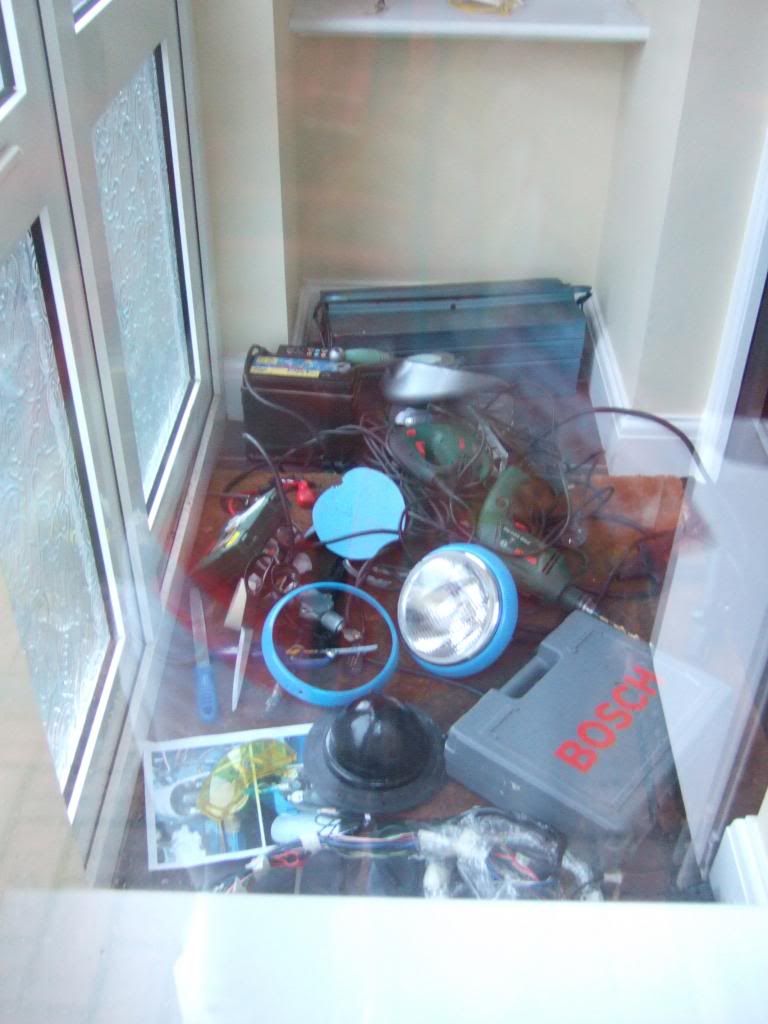
Santa's Sleigh Landing Area (or Domestic Appliances #3)
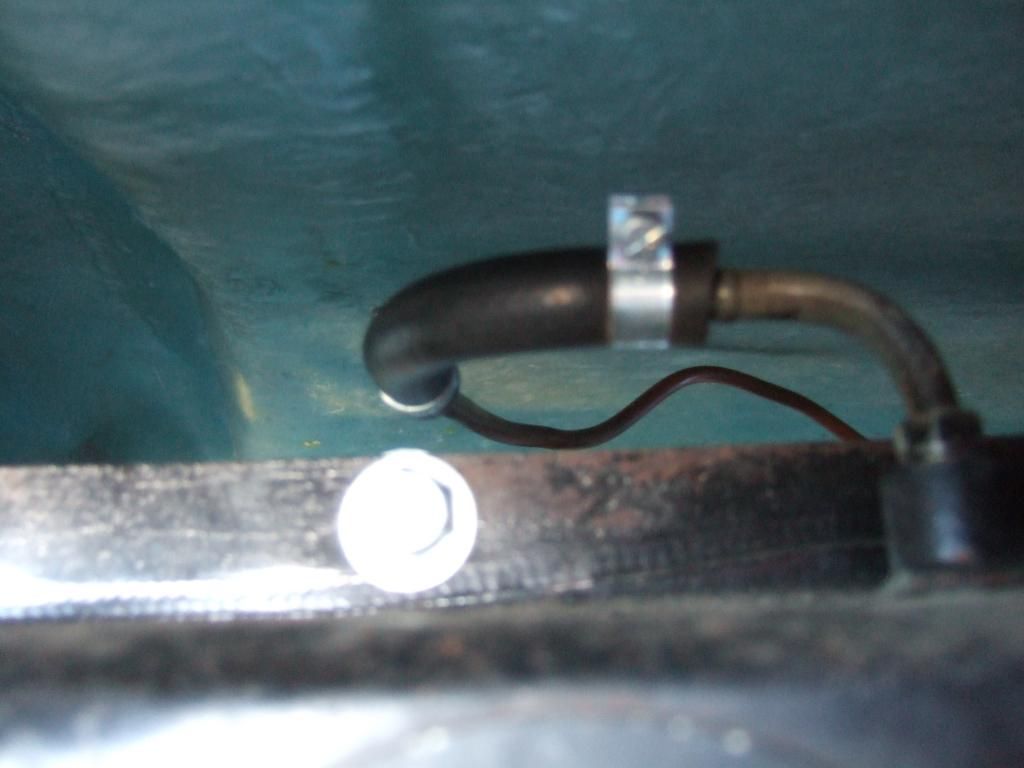
It rained so hard & was so windy on Friday night that water managed to get into our en-suite in the loft.
It had come through the extractor fan, after travelling through over 8 feet of hose!
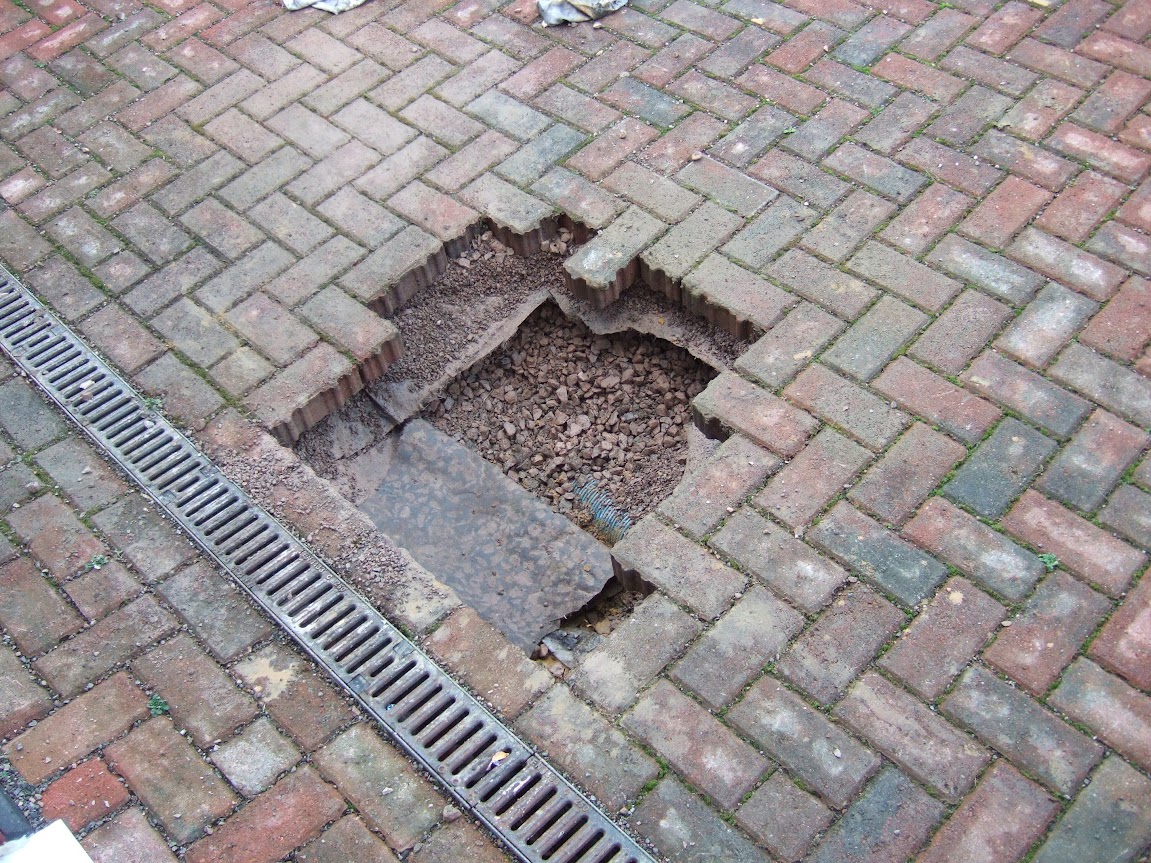
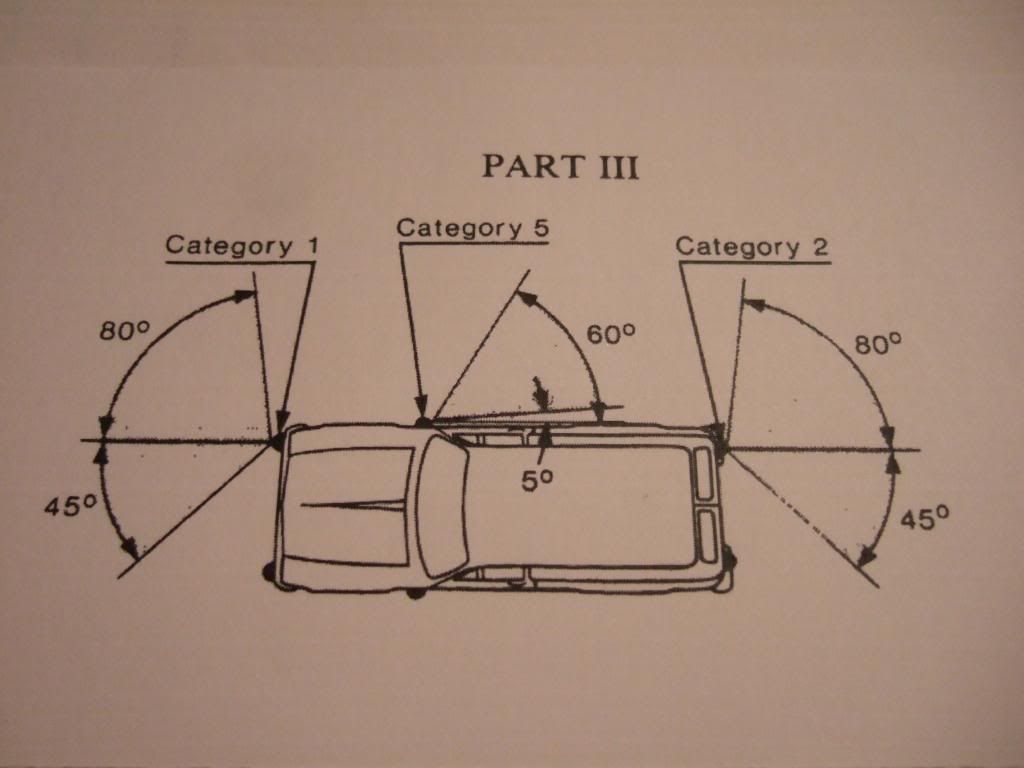
So I spent Saturday afternoon climbing out the skylight, up the front roof & onto the rear dormer.
Here is one of the views...


Turns out the builders decided to located the external vent next to the roof edge and gutter.
I had to remove the gutter, tape up the top half of the vent & refit everything.
Hopefully this will keep the rain out (fingers crossed).

The only good news is that was a few extra car building brownie points in the bag.

Until next time, take care, Paul.

Mister Towed - I'll need to sort out my insurance with 'A Plan' before I blow the car & street up!

Last edited by Paul L; 10th September 2019 at 11:08..
Reply With Quote
  #169  
Old 9th December 2012, 18:57
WorldClassAccident WorldClassAccident is offline
Senior Member
 
Join Date: Nov 2011
Posts: 3,558
WorldClassAccident is on a distinguished road
Default

Glad that my earthing/fire was of use. Now be careful on those ladders too!

Keep on posting.

Cheers

WCA
Reply With Quote
  #170  
Old 9th December 2012, 22:24
Mister Towed's Avatar
Mister Towed Mister Towed is offline
Senior Member
 
Join Date: Jul 2011
Posts: 5,328
Mister Towed is on a distinguished road
Default

Congratulations on firing that engine up. It's quite a milestone, well done.
Reply With Quote
  #171  
Old 10th December 2012, 17:44
Paul L's Avatar
Paul L Paul L is offline
Senior Member
 
Join Date: Feb 2012
Location: Wembley, London
Posts: 5,056
Paul L is on a distinguished road
Default

Mild Steel Box Section:
With a bit of luck, my mate will still be OK to give me some welding lessons during the Christmas holidays.
I'm not 100% sure of all the work I need to do (e.g. silencer mounts), but I need something to practise on.
So I've ordered 4 x 3 metre lengths of 20mm x 20mm x 2m mild steel box section (www.metals4u.co.uk).
This should be more than enough for any work on the frame, plus welding practise, plus some left over.
I have another day off work on Wednesday and they have arranged delivery for then, which is a big help.

Note:
As part of my record keeping, I will list how much steel I actually used on the car when I do the work.

Ebay Update:
I still haven't got around to listing my last few remaining Spitfire donor parts for sale on Ebay.
Rather than put myself under more pressure in the run up to Christmas, I'll simply leave this until 2013 now.

Cheers, Paul.

Replies:
WCA - I'm a firm believer in learning from other builds & hope putting lots of detail on here may help others.
Ladder? I used my "off road" trainers for grip, TV aerial mounting bracket & chimney to climb up the roof.
But I must confess the thought of your foot (& death itself) did keep me focused on doing this carefully.
Mister Towed - Cheers, getting the engine to run at this stage will set me up for the winter ahead.
It also has really improved my understanding of how the wiring loom is supposed to work (especially earthing).
Which I hope will help me trouble shoot as more sections of the loom get re-connected in the future,
Reply With Quote
  #172  
Old 11th December 2012, 09:25
donnysoutherner donnysoutherner is offline
Senior Member
 
Join Date: Mar 2012
Location: Doncaster
Posts: 116
donnysoutherner is on a distinguished road
Default

well done with the engine mate! With my broken leg I expect you to overtake me so I can start learning from you!
Reply With Quote
  #173  
Old 11th December 2012, 10:45
davecymru's Avatar
davecymru davecymru is offline
Senior Member
 
Join Date: May 2011
Location: Somerset
Posts: 1,671
davecymru is on a distinguished road
Default

If you're doing some welding practice then there is a good supplier on e-bay (might even be metals 4 u?) who do variety bundles of box section and sheet.

I bought a few packs so that i could practice with the different settings on my welder and also so that i had odds-n-sods lying around in the garage in case little jobs cropped up!
Reply With Quote
  #174  
Old 11th December 2012, 11:24
oxford1360 oxford1360 is offline
Senior Member
 
Join Date: Mar 2012
Posts: 1,152
oxford1360 is on a distinguished road
Default

Quote:
Originally Posted by davecymru View Post
If you're doing some welding practice then there is a good supplier on e-bay (might even be metals 4 u?) who do variety bundles of box section and sheet.

I bought a few packs so that i could practice with the different settings on my welder and also so that i had odds-n-sods lying around in the garage in case little jobs cropped up!
I did the same and made some wonderfully bizarre sculptures........

However, a far cheaper way is to track down a local engineering firm that keeps box, tube and sheet. I am fortunate to have a very friendly one just a mile from The Glade and they will sell off-cuts or full lengths/sheets much much cheaper than eBay and without the postage. I have had to get out of the habit of questioning them when they say the price.

I had no contact with them before I started building e.g. I don't have a mate that works there. I just rang them.

Best of luck!

PS The oddments - big and small angle, tube, rod etc. - that I got from eBay are really useful. For example, my special-bush-removal-tool was made with them.

Last edited by oxford1360; 11th December 2012 at 11:27..
Reply With Quote
  #175  
Old 12th December 2012, 15:15
Paul L's Avatar
Paul L Paul L is offline
Senior Member
 
Join Date: Feb 2012
Location: Wembley, London
Posts: 5,056
Paul L is on a distinguished road
Default

Box Section Delivery:
Very happy to say my box section arrived as promised, all wrapped up neatly.
( Note that isn't "real" snow on the cover, but the effects of the freezing fog we had last night! )


Day off passes me by...
Domestic chores, the gas board & my neighbour's flat battery conspired against me today.
So the small little jobs I have lined up between now & Christmas will have to wait until the weekend.

Cheers, Paul.

Replies:
DonnySoutherner - I've still got quite a bit to do to catch you up, but I'll try my best.
DaveCyrmu - Thanks, my mate has promised me his metal "left overs" when I see him.
Oxford - Cheers, I'm hoping this & my mate's odds and ends will be more than enough.

Last edited by Paul L; 10th September 2019 at 11:25..
Reply With Quote
  #176  
Old 15th December 2012, 15:28
Paul L's Avatar
Paul L Paul L is offline
Senior Member
 
Join Date: Feb 2012
Location: Wembley, London
Posts: 5,056
Paul L is on a distinguished road
Default

Bonnet Holes:
Cutting the holes out of the bonnet for the headlights was hardly a top priority in my build plan.
But it was a job that didn't involve dragging lots of stuff around which made it ideal at this time.
Having said that, there was still a pile of stuff required...
( Although in fairness, some of this was required for job number two of the day, see below. )


So here is the before:


A headlight outer rim helped me establish a "best fit" position to tape my cardboard template on.
I then marked the two headlight adjustment holes (9 & 12 O'Clock), plus the main shell hole.
I'd left small sections of masking tape under the template so I could drill straight through.


I drilled a couple of holes inside the main shell area to provide access for a hacksaw blade.
However, it was proving difficult to change the direction of the blade to cut a circle.


So whilst I initially thought it would be tricky to use my jigsaw, I had no choice.
In the end I don't know what I was worried about as it was very straight forward.
I just needed to run a rasp file around the hole edges and it was job done.


And here is a headlight I restored earlier...


Note:
There is enough space in the hole to move the headlight up a bit to match the body.
This was just pushed into place to give a rough idea of what it would look like.

Then it was a case of repeating the process on the other side to give this...


I will leave cutting the big hole out for my beer crate grill until it arrives.

Engine Cooling:
This photo Mister Towed posted of his blocked cooling pipe left me wondering a bit.


As I posted on his thread, I'd found some "crud" blocking my heater value when I removed it.


So I reconnected my wiring loom to the car & re-started the engine.
The plan was to leave the engine running & check the cooling pipes were warming up.
But I seemed to be having a lot of trouble trying to balance the choke / throttle levers.
In the end i just couldn't get it to tick over by itself (probably as I was in a rush ).

What I did notice was that the end of my throttle cable retaining clip is missing.


I'll have to go back & check old photos to see if it was there before & has simply fallen off.
Or I might just order a replacement if it is not likely to re-surface quickly.

The main reason I was in a rush is I could sense the rain was coming.
And sure enough I was forced to abandon all work and cover the car for the day.

This means a temporary dump of everything inside the porch.
( Can you tell my wife has taken the children to visit her sister? )


I can then put everything away properly without it getting any wetter.

Next Steps:
Sunday will be a "get everything to do with the car" out of the house before Christmas activity.
I will just leave enough bits for one small job next weekend that I can do indoors (touch wood).

So until next time, take care, Paul.

Last edited by Paul L; 10th September 2019 at 11:31..
Reply With Quote
  #177  
Old 15th December 2012, 16:11
tlrtone's Avatar
tlrtone tlrtone is offline
Senior Member
 
Join Date: Jan 2012
Location: Poole, Dorset
Posts: 615
tlrtone is on a distinguished road
Default

these are good for cleaning up edges for lights and any other holes you have to cut in fibreglass

Put them in a drill and away you go..


flapwheel.jpg
Reply With Quote
  #178  
Old 23rd December 2012, 16:35
Paul L's Avatar
Paul L Paul L is offline
Senior Member
 
Join Date: Feb 2012
Location: Wembley, London
Posts: 5,056
Paul L is on a distinguished road
Default

Christmas Tidy Up:
The good news is I cleared the house of car parts & tools ready for our final Christmas day preparations.
( Although I did tuck a few things away in a utility room cupboard for one small "indoor" job, see below. )

The bad news is while re-arranging the garden shed I discovered one of my resin containers is leaking.
Thankfully everything is still in the sealed bag it was delivered in, so I'll sort that out after Christmas.

Welding Lessons - Delayed:
Met my mate after work during the week for a quick Christmas drink & to exchange pressies for our children.
Unfortunately, he has a lot on his plate, so my first welding lesson needs to be put back until early January.
Don't get me wrong, I'm not complaining, as he is till doing me a HUGE favour & it will be worth the wait.
I just need to cut one of my 3 metre lengths of box section tube into more "bite size" lengths to practise on.

Missing Throttle Cable Parts:
I went back through my photos and it looks like there was some sort of a clip holding this in place originally.
However, when I cross checked this with the Rimmer Bros. diagram this was the wrong part anyway.
So I now need to order some new bits to bring this all back up to the correct spec. which I hope will stay in place!

Car Alarm:
I posted a question about car alarms here & got some great replies.
So another little bit of shopping required to sort that out too.

Last job planned, but I ran out of time...
I'd planned to make a template for my rear lights, reflectors & number plate before Christmas.
As this was a little job that I hoped to squeeze in which wouldn't make a mess of the house.
But I've spent hours today washing mud off the road, pavement, & driveway following the gas works.
( We didn't want our guests on Christmas day getting mud over their nice clothes. )
That, together with all the traditional Christmas chores means I have to call time on the car for now.
I'm working half day tomorrow, then it is family time until at least the 27th of December.

But as I'd already prepared the following links in advance, here is what I want to do...

It all started out with my computer mock up based on possible dimensions (top row).


This had then became a full scale mock up with everything taped to the body work.


But it was clear I would need a way of evenly spacing everything out, both vertically & horizontally.
So I will lay everything out again on a template & then fine tune this initial rough spacing with a ruler.
I can then mark up all the centre holes for drilling on a single piece of paper / card.

So much for the best laid plans, and all that. But with a bit of luck, that will be my next job.

Until then, I hope you all have a very Merry Christmas & here's to more cars on the road in the New Year.

Ho! Ho! Ho! Paul.

Replies:
TriTone - Thanks for the tip Tony, I've already learnt a lot from your build thread.

Last edited by Paul L; 10th September 2019 at 11:34..
Reply With Quote
  #179  
Old 27th December 2012, 18:20
Paul L's Avatar
Paul L Paul L is offline
Senior Member
 
Join Date: Feb 2012
Location: Wembley, London
Posts: 5,056
Paul L is on a distinguished road
Default

I've been a little bit slow getting back into things after Christmas.
So this is more of a "thinking" update, rather than a "doing" one.

Front Indicators:
After cutting out the holes for my headlights, I started to think about my front indicators.
I'd bought some side repeaters for the job ages ago as there are no size limits.


This was based on Trevor Bennett's build, one of the first finished cars I saw.


I've since found this diagram which is a guide to the rules about visibility angles.


So I need to extend a 45 degree line back from the front edge of the bonnet's "nose".
This will then give me the furthest inside position on the body work that the indicator can go.

Unfortunately, the original Cordite demonstrator didn't have indicators fitted.


So when it finally stops raining long enough for me to work outside I will mock that up & see.
While I am at it, I will also try my rear indicator for size to see what that looks like too.

Here are a few Spyder examples & I love the fact there is such a variety of indicators used.


So as always, lots to think about.

Hopefully, I might actually get a few small jobs done in the next few days.

Cheers, Paul.
Reply With Quote
  #180  
Old 28th December 2012, 08:52
CarNoob's Avatar
CarNoob CarNoob is offline
Senior Member
 
Join Date: Sep 2012
Posts: 192
CarNoob is on a distinguished road
Default

thats one big scoop
Reply With Quote
Reply


Currently Active Users Viewing This Thread: 3 (0 members and 3 guests)
 

Posting Rules
You may not post new threads
You may not post replies
You may not post attachments
You may not edit your posts

BB code is On
Smilies are On
[IMG] code is On
HTML code is Off

Forum Jump


All times are GMT +0. The time now is 14:33.

copyright © madabout-kitcars.com 2000-2024
terms and conditions | privacy policy