|
|
| Sammio Builds and discussions Sammio bodied car builds and specials |

3rd October 2013, 12:58
|
 |
Senior Member
|
|
Join Date: Feb 2012
Location: Wembley, London
Posts: 5,056
|
|
Replies:
Viatron & Charman.Tech - Thanks for the tip chaps, please see below.
- - - - - - - - - - - - - - - - - - - - - - - - - - - - - - -
Holding Pattern:
Not had the chance to do much on the car recently.
But I did manage a little bit of shopping...
I got a tub of the P40 filler recommended above.
Plus a tin of seam sealer (something else recommended on here).

I also bought 6 x 150mm M10 bolts to join the frame to the chassis.
These are too long, but I will cut them to size when the time comes.

Also I am nut sure if I will be using all 6, or just 4.
I am also still not sure about welding in crush tubes vs. using spreader plates.
( I certainly know which is easier for me to do! )
I hope to test fit the frame & wheel arches at the weekend.
At that point I will make the final decisions about bolting everything into place.
Until then, take care, Paul. 
|
7th October 2013, 17:34
|
|
Senior Member
|
|
Join Date: Feb 2012
Location: Wembley, London
Posts: 5,056
|
|

Still Holding...
Didn't get a chance to test fit the frame & wheel arches at the weekend. 
But with a bit of luck I will get the chance in the next few days.
I had planned to touch up the paint on the rolling chassis first.
Which meant I had to bite the bullet & find the blue Hammerite paint.
This in turn meant tackling the pile of boxes in the Summerhouse...

They had been pretty well labelled until I put the new shelves in.
Then it was such a rush to get it all put away that I just shoved things in. 
So I took the chance to re-pack & re-label each box I opened while I was there.
Obviously this meant it took me ages to work through the boxes.
Plus I was making an even bigger mess while I was organising things.
Eventually "Sod's Law" meant that it was in the very last box I had. 
( Bottom left row, unseen, behind the car seat in bubble wrap in the photo above. )

The other thing that I found while opening boxes was my broken tie down strap.
( The one I had used to pull the front framework into position ages ago. )
It was only the stitching that had given way...

So a few minutes with a needle and thread later, that was fixed...

These may come in handy when test fitting the framework.
Until then, take care, Paul.
PS
I also picked up a short length of steel tube that I might use when drilling the chassis.
However, it is only 1mm thick, so would that be up to the task of being a crush tube?
( Obviously, there is this the question of whether I'm up to the task of welding them!  )

|
8th October 2013, 16:51
|
|
Senior Member
|
|
Join Date: Feb 2012
Location: Wembley, London
Posts: 5,056
|
|
Rear Cordite framework & Spitfire wheel arches - Part 1
Before i could test fit anything, I needed to move everything to the front drive.
This would have been much easier with two people, but there was just me.
I started here...
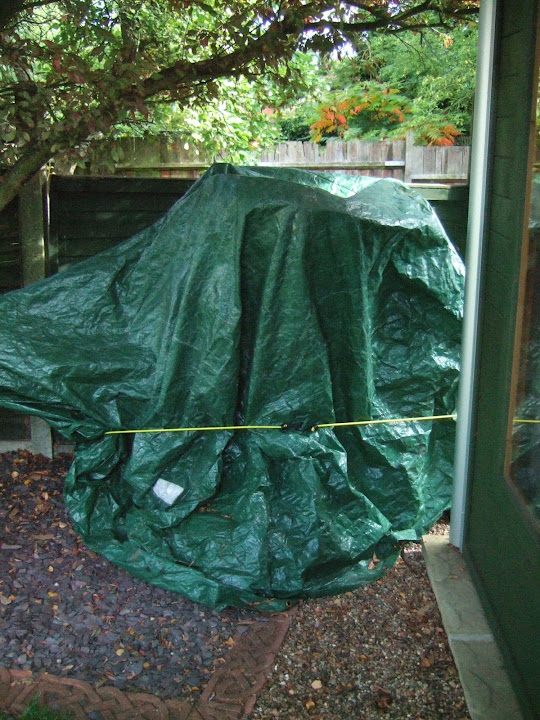
Removing the cover didn't take too much effort...

Carrying these the length of the garden was a bit harder (even one at a time)...

Then from the patio, it was into the kitchen...


Through the hallway...

Then out the front door and porch...

Before finishing here until I could get the body shell off...

Avoiding scraping the walls / doors inside was hard work!
( I was actually quite glad of the rest when I stopped to take the photos. )
Note:
I had a complete disaster removing the car cover. 
But I'll come back to that later on.
Next step was to fit just the arches to check against the lowering block.
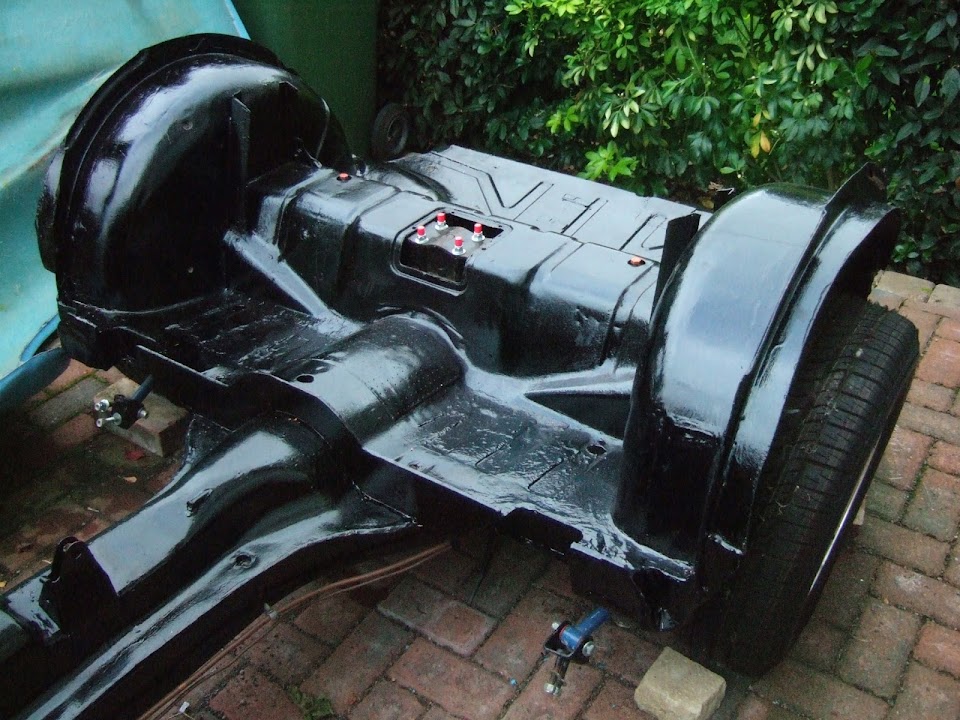
As expected, the studs extend beyond the line of the bodywork.

Which means I will need to modify the original cover plate to fit.

But I'll worry about that another day.
Next job was to slot these two sections together before fitting.
( I'd need some sort lifting gear to do this in situ. )

The good news is that they go together quite well.
The bad news is that they are now both heavy & awkward to fit.
But after yet more huffing & puffing there were in place.

Also as expected, the front of the hand brake panel was sticking up.

This is because the rear frame is deigned to sit on the chassis, not the arches.
Which means that the "feet" for the frame work need to be shortened.
( Which, in turn, would allow the arches to tilt forward to the right level. )


There is another small technical hitch with the frame "feet".
The chassis mounting points have some lateral play in them.
This allowed the Cordite framework to be bolted in place without adjustment.
However, the mounting points for the wheel arches are fixed.
There is only about one cm difference between the two...
( Not really visible in this photo, which was mainly a reminder for myself. )
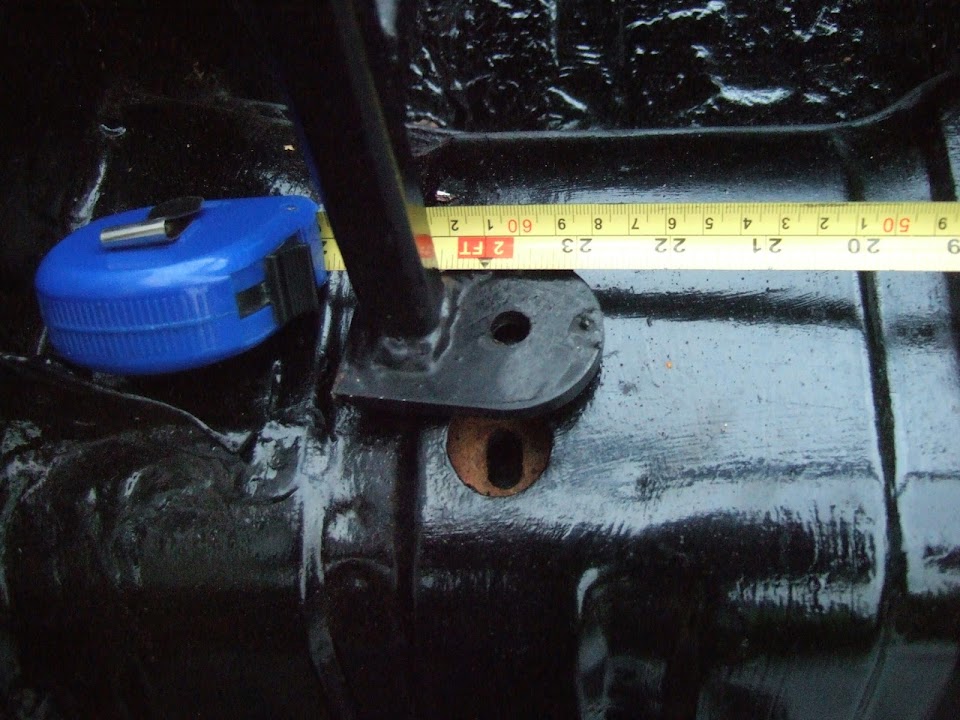
But that is still one cm too many.
My plan was to cut off the feet to allow the arches to tilt.
When it comes time to weld them back on, they will be in the right position.
So out came the angle grinder & off came a section of frame/feet.
( I wanted to make sure I had plenty of box section left to work with. )

Back in a minute with "Part 2"...
|
8th October 2013, 16:52
|
|
Senior Member
|
|
Join Date: Feb 2012
Location: Wembley, London
Posts: 5,056
|
|
Rear Cordite framework & Spitfire wheel arches - Part 2
This highlighted the next area to foul, which was one of the "ribs" on the arches.

No room to get a grinder / hack saw in there without removing every thing again.
Then I remembered my mate's metal "snips" & cut two slots above & below.
This allowed me to bend the metal out of the way for now.
( Sorry about the poor photo. )

In order to tilt the rear arches, I am fitting original Spitfire chassis mounts underneath.
( The metal wedges were originally used towards the front of the car, not the back. )

Raising the back effectively lifts the hand brake panel higher than the Cordite framework.
( Which needs to be under the panel to be bolted to the chassis. )
As you can see, a much better fit already, with a bit more work to do.

Note: I still need to fit the metal floor pans between the frame & the hand brake panel.
This gives to an idea of how the feet could be welded back into position.

I will add extra bracing in my traditional over-engineered problem solving way.
This was the overall look after this first test fit.
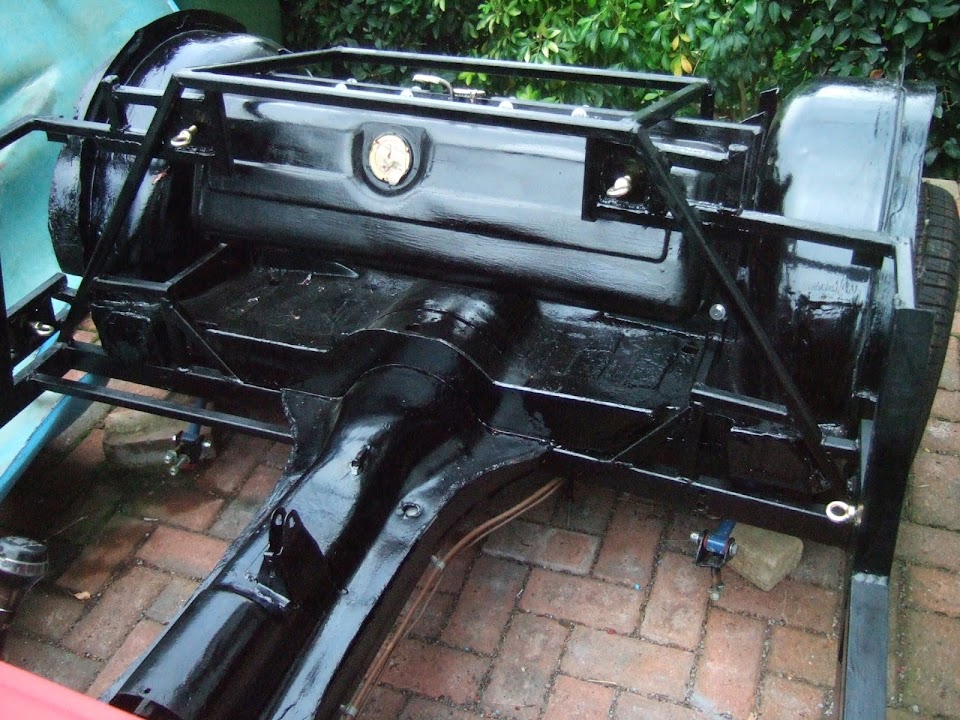
The boxed in "cut outs" in the arches work well with the frame.


In order to tidy up for the day, I had to put the body back on.
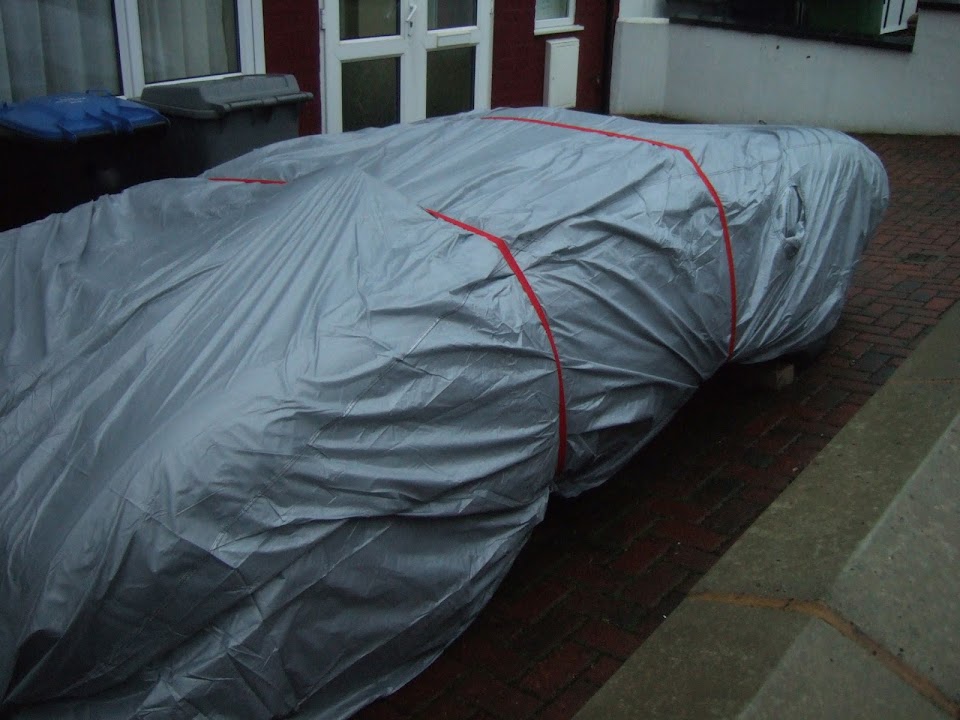
 Car Cover - RIP
It was a little harder to tidy up with the car cover as it had fallen apart.
When I tried to remove it, it simply came away in strips and is now completely brittle.

Whilst it is only the bonnet area that is effected, it is completely beyond repair.

So I had to use the cover that way on the framework & arches instead.

This is only temporary until I can get a new cover delivered.
Especially as the green cover is meant to be protecting the garden furniture!
Next Steps:
Unfortunately, I need to remove everything from the chassis again.
I need to check the alignment of the frame work and drill holes to mount it.
Obviously I need to put the corresponding holes in the chassis too.
I also need to work out whether I am bolting the floors to the chassis.
( The alternative is to have a holes in the floor that sit over the mounting bolts. )
Only when the frame & floors are in their final positions will I weld the feet back on.
It is also clear, that this is all going to take a lot of time & multiple test fittings.
Until then, take care, Paul.
|
8th October 2013, 21:11
|
|
Senior Member
|
|
Join Date: Mar 2012
Posts: 159
|
|
Hi Paul,
This is quite an endeavour. Whatch your steps, otherwise you end up with a uge crane lifting your car over the roof of your house just like a Dutch fellow builder!
It looks like great progess. Keep it up.
Michiel
|
9th October 2013, 05:51
|
|
Senior Member
|
|
Join Date: Apr 2012
Posts: 1,163
|
|
A good step forward Paul, apart from the rear mounts whats stopping you getting it permanently fixed?
|
10th October 2013, 15:52
|
|
Senior Member
|
|
Join Date: Feb 2012
Location: Wembley, London
Posts: 5,056
|
|
Replies:
Michiel - Thankfully the car is being assembled on the "road side" of the house.
I would have needed a huge crane if I wanted to get the donor car into the back garden.
But given the choice, I'd still recommend building in a conventional garage!  Mac
Mac - Cheers, the plan is to get this rear section permanently mounted ASAP.
However, that does involve a number of other related tasks which I will tick off first.
E.g. I need to lower the fuel & brake hard lines along the chassis as the frame hits them.
I also need to finalise the flexible fuel line route from the tank to the existing hard line, etc.
So lots to do, but eventually I will be left with a the final version of the back half of the car.
Then I will be able to focus on the front bulkhead, which is another can of worms all together.
- - - - - - - - - - - - - - - - - - - - - - - - - - - - - - -
Shopping News:
I've ordered a cheap and cheerful car cover which should be here tomorrow. 
This is because the fitted "Spitifire" cover can not be delivered for a couple of weeks.
Given the weather is a bit hit and miss, I need to be able to cover things quickly.
I will use both covers over the winter, which will hopefully protect the fitted one.
I also got a small retaining screw from Rimmer Bros. for the rear drum brake cover.
As I noticed that one was missing the other day when I was fitting the lowering block.
But I will wait until I have touched up the paint on the drum covers before using it.
My final bit of shopping was for a cheap Dremmel type multi-tool "thingy"...
This should allow me to at least tidy up my welding on the bulkhead a bit.
Up until now, I've just left the welds that I couldn't reach with my grinder as they were.
Has anyone used one of these to dress welds?
If so, which one of the many accessories works best?
That's all for now, hopefully some work on the car to report next time.
First job is to double check the two sections line up with the seat belt mounting holes in the chassis.
Cheers, Paul.
|
10th October 2013, 17:02
|
|
Senior Member
|
|
Join Date: Mar 2012
Posts: 159
|
|
Hi Paul,
I use the dremel all the time for various task. And I have learned that the Bosch Multi tool is the tool if you're into glass fibre. You can make terrific straight and precise cuts for example.
But I doubt that the dremel would dress welds. It lacks the power to do that. The little accessoires won't handle it. The angle grinder is the tool to accomplish that task.
Michiel
|
10th October 2013, 17:32
|
 |
Senior Member
|
|
Join Date: Jul 2011
Posts: 5,328
|
|
Quote:
Originally Posted by christinedmc

...I doubt that the dremel would dress welds. It lacks the power to do that. The little accessoires won't handle it. The angle grinder is the tool to accomplish that task.
Michiel
|
Agreed. I tried to clean up some inaccessible welds on my chassis with a dremel and the abrasive compound on the heads just disintegrated after a few seconds.
I ended up just cleaning up what I could get to with a hand file and painting over them with Hammerite. Out of sight, out of mind... |
10th October 2013, 18:12
|
|
Senior Member
|
|
Join Date: Sep 2012
Posts: 424
|
|
Quote:
Originally Posted by Paul L
Rear Cordite framework & Spitfire wheel arches - Part 2
This highlighted the next area to foul, which was one of the "ribs" on the arches.
No room to get a grinder / hack saw in there without removing every thing again.
Then I remembered my mate's metal "snips" & cut two slots above & below.
This allowed me to bend the metal out of the way for now.
( Sorry about the poor photo. )
In order to tilt the rear arches, I am fitting original Spitfire chassis mounts underneath.
( The metal wedges were originally used towards the front of the car, not the back. )
Raising the back effectively lifts the hand brake panel higher than the Cordite framework.
( Which needs to be under the panel to be bolted to the chassis. )
As you can see, a much better fit already, with a bit more work to do.
Note: I still need to fit the metal floor pans between the frame & the hand brake panel.
This gives to an idea of how the feet could be welded back into position.
I will add extra bracing in my traditional over-engineered problem solving way.
This was the overall look after this first test fit.
The boxed in "cut outs" in the arches work well with the frame.
In order to tidy up for the day, I had to put the body back on.
Car Cover - RIP
It was a little harder to tidy up with the car cover as it had fallen apart.
When I tried to remove it, it simply came away in strips and is now completely brittle.
Whilst it is only the bonnet area that is effected, it is completely beyond repair.
So I had to use the cover that way on the framework & arches instead.
This is only temporary until I can get a new cover delivered.
Especially as the green cover is meant to be protecting the garden furniture!
Next Steps:
Unfortunately, I need to remove everything from the chassis again.
I need to check the alignment of the frame work and drill holes to mount it.
Obviously I need to put the corresponding holes in the chassis too.
I also need to work out whether I am bolting the floors to the chassis.
( The alternative is to have a holes in the floor that sit over the mounting bolts. )
Only when the frame & floors are in their final positions will I weld the feet back on.
It is also clear, that this is all going to take a lot of time & multiple test fittings.
Until then, take care, Paul.
|

|
11th October 2013, 14:33
|
|
Senior Member
|
|
Join Date: Feb 2012
Location: Wembley, London
Posts: 5,056
|
|
Replies:
Michiel & Mr T - Thanks for the feedback chaps, please see below.
Mike - Welcome back, hope wedding & honeymoon went well.
- - - - - - - - - - - - - - - - - - - - - - - - - - - - - - -
One of those days...
The day didn't start well when I discovered my new tool wouldn't tidy up welds.
D'Oh!
Hopefully I will find a good use for it somewhere along the line.
And I guess I will just have to get better at welding instead.
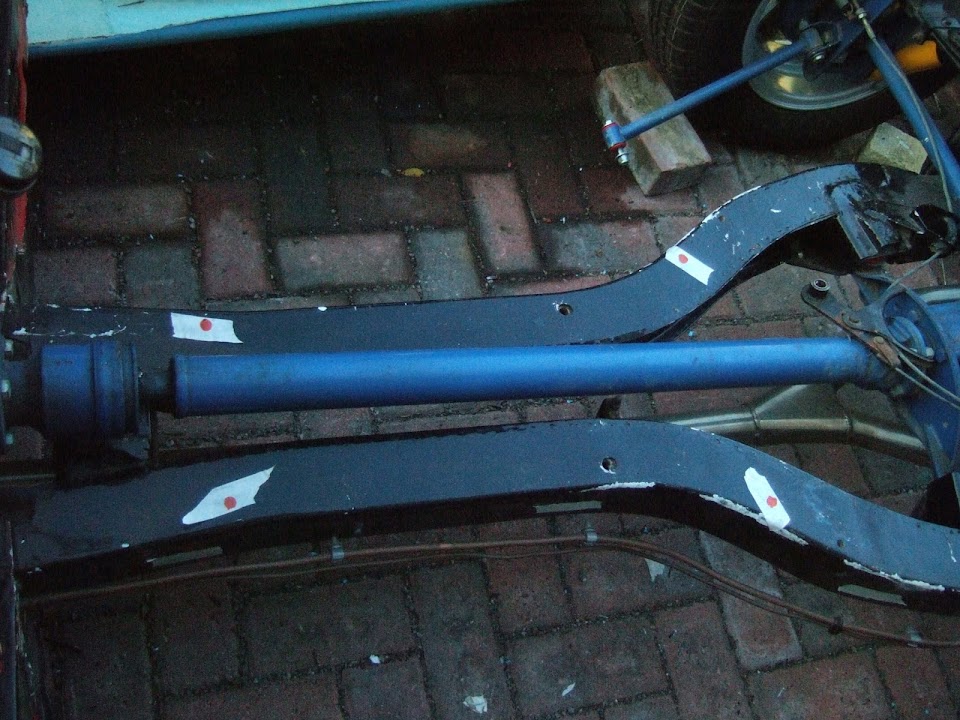
The first job of the day was to check the seat belt chassis holes.
These are easy to see in the hand brake panel.

But I haven't drilled the corresponding holes in the frame yet.
Instead I had marked them with green dots on some masking tape.
As things currently stand, the holes do not quite line up.

I don't think it will be must of an issue & hopefully it will all line up properly.
However, I need to take the body off before I can see just what is going on.
But the rain was due any minute and thankfully the cheap cover had arrived.
So the old cover was consigned to the bin, although I kept the retaining straps.
I blame the fact I had a few other things to do today and so my mind was elsewhere.
I did think that for a cheap cover it came in a nice bag...

It even occurred to me that it didn't have the "ears" for the mirrors in the Ebay picture.
It also seemed to be a very snug fit, given that it was supposed to be oversize.

But I didn't have time to dwell on it as the rain arrived shortly afterwards.
It was only when this arrived in the post in the late afternoon that the penny finally dropped.

Yes, the cover that was supposed to take weeks to get here arrived overnight.
I know there is something to be said for "under promising & over delivering", but really.
If it ever stops raining, I will try to get the cheap cover on over the top of the fitted one.
Until next time, take care, Paul.
|
14th October 2013, 16:14
|
|
Senior Member
|
|
Join Date: Feb 2012
Location: Wembley, London
Posts: 5,056
|
|
Fitting Rear Framework Debate:
Rather than hijack Mac's ( Viatron) build thread I'm switching the debate back here.
Mac posted this picture of what his frame currently looks like.

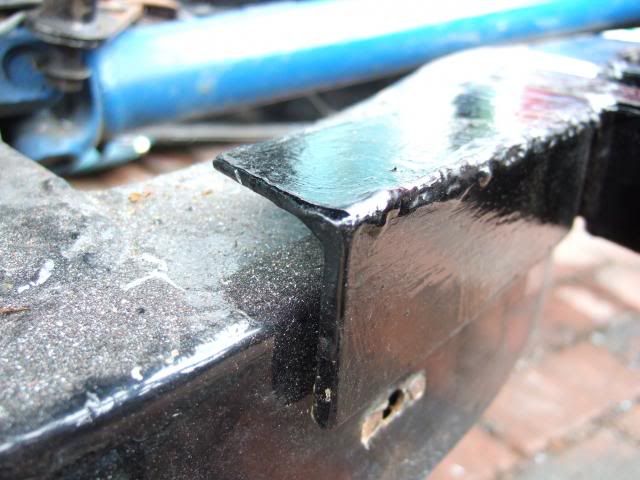
The biggest difference between this & my Cordite frame is around the central chassis mounting area.
My frame has a large section of shaped "angle iron" designed to fit on top of the Spitfire chassis.
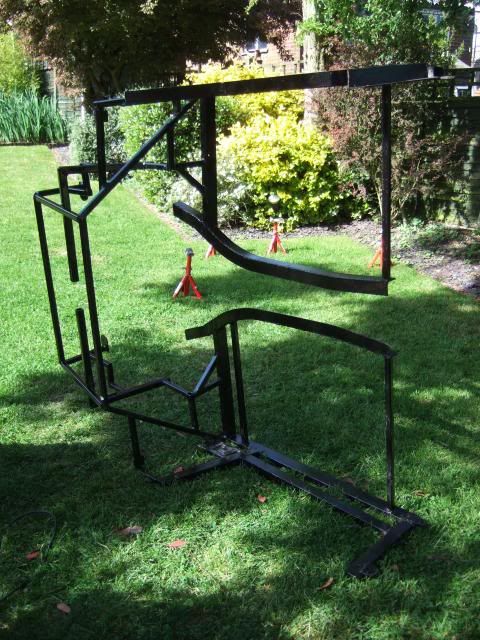
Well, when I say "fit", obviously I mean in the Sammio sense of the word.
Because the rear ends of this angle iron section do not sit flush with the chassis at all.

My initial thoughts were to stick a big bonding blob into the gap.
Another alternative would be to hit it with a big hammer until it was a better fit.
But after seeing Mac's frame, I could simply cut off these small sections at the back.
However, Mac asked if the angle iron could be held tight to the chassis and then bolted down.
I actually bought an extra pair of bolts to look at the possibility of doing just that.
As this is where DonnySoutherner bolted the rear of his frame to the chassis.
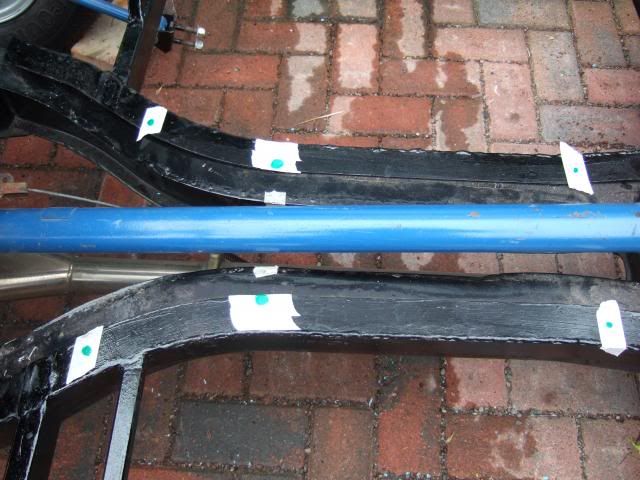
Whereas my first plan was to use two bolts at the front of the frame (green dots on right of the photo below).
Plus two bolts at the rear of the frame, but just inside the rear cockpit wall (dots on left of photo).
With two extra holes cut in the frame to allow the seat belt bolts to be fitted (middle of photo.)
So rather than starting cutting off bits of the frame, I will try to bolt it into position first.
Once I know the frame is in the right place I will then make sure that the rear arches section fits the frame.
If that means opening up the holes in the hand brake section, so be it.
Wooden Tonneau Cover:
It has been raining pretty consistently since I fitted the new car covers.
This was a regular sight with the old cover...

And I've already had to bail out the new covers too.
I've got the feeling that the weight of water isn't good for them, so I needed a quick fix.
I made a trip to B&Q for some hardboard panels and a couple of lengths of wood.
I was then able to knock up this rough & ready cover for the middle of the car.

If I get the chance I will get some more wood to run extra lengths "side to side".
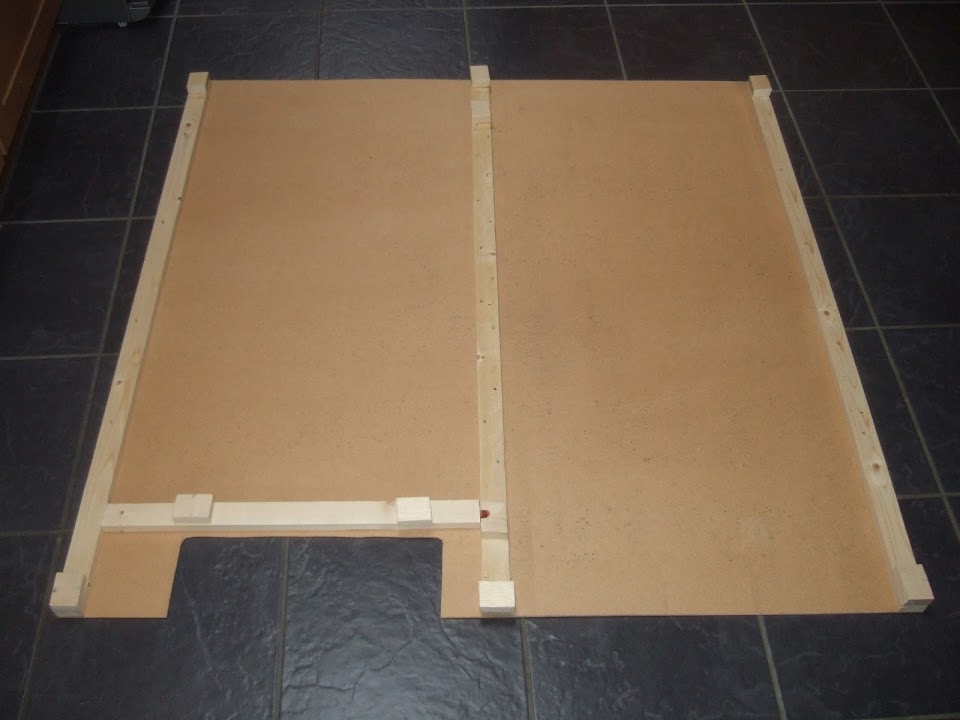
This then sits on the car, located around the hump.

I then threw an old dust sheet over the top to avoid any edges scraping the cover.

The "fitted" cover then just sits over the top with no issues.

Until I get the chance to sew the old cover's straps onto the "cheap" cover, I've have to hold it in place.
( Without these straps it would simply blow away given the weather we have been having lately. )
 Re-Body Inspections:
I know I have posted on the specific thread about this, but Micky1mo had some great news.
The opportunity to simply supply some photos and words to the DVLA would be a big help to me.
So I plan to contact my local office shortly to see if they are also following this approach.
Even if it is only for a six month trial period, it is a good excuse for me to get a move on!
Trading Standards:
I got an email the other day saying the company that supplied my rear number plate is under investigation.
Apparently they have not been following the rules and the plate they supplied may be illegal to use.
( E.g. It doesn't have a post code for the supplier listed on the bottom of the plate. )
I have filled in the questionnaire I was sent and asked what that means for me.
Not sure at this point whether I need to get a refund, or a new plate issued.
That's all for now, cheers, Paul.
|
14th October 2013, 18:19
|
|
Senior Member
|
|
Join Date: Apr 2012
Posts: 1,163
|
|
Most online plate suppliers aren't strictly speaking legal, however, i don't think the plate rules will apply to you anyway due to the age of the car? I have the original silver on black plates that came with my donor so plan to use those.
|
14th October 2013, 19:26
|
 |
Senior Member
|
|
Join Date: Mar 2013
Location: Gloucester
Posts: 247
|
|
really impressed with your build Paul - but I don't recommend forcing that angle down to meet the chassis - it'll just put stresses into the frame and eventually crack at the weakest point IMHO.
you can't get in trouble for buying illegal plates (even if they're advertised as "show" plates) - you can only get in trouble for using them on the road.
|
15th October 2013, 07:22
|
|
Senior Member
|
|
Join Date: Mar 2012
Posts: 159
|
|
Hi Paul,
Nice tonnau cover design. I'm not sure it beats Towed's. But still. 
Michiel |
15th October 2013, 08:04
|
|
Senior Member
|
|
Join Date: Jul 2011
Posts: 5,328
|
|
Everything you ever wanted to know about number plates but were too afraid to ask...
Here's a little light reading about number plate regulations -
http://www.legislation.gov.uk/uksi/2...0010561_en.pdf
The upshot is that the maker's id marks are only a legal requirement on cars registered after 1st September 2001.
Anything registered pre 1973 can use black plates with either silver or white letters, and you can even use black plates with white backlit translucent letters on the back if you like.
For Cordite builders using post '72 Spitfire donors, legally you're stuck with reflective plates. You could always transfer a dateless three number three letter plate onto it and go with black plates, but just be aware that there may be a dedicated, thorough and ruthless law enforcement official out there somewhere who knows you're breaking the law -
http://www.thisisgloucestershire.co....#axzz2hm4msbov
Just to play Devil's advocate though, this guy's guilty as hell of the offence he's been accused of and only fought the case because rich to$$ers generally believe themselves to be above the law. As for his accusation that the criminal justice system should be focussing on 'real' criminals, 'real' criminals use vehicles to commit crime and alter their number plates to make it harder for the Police to catch them, confusing the ANPR (automatic number plate recognition) cameras fitted to all Traffic cars, for example, which is why those offences exist. Oh, and the fine's now £100 btw.
Anyway, keep up the good work Paul, looking forward to finally seeing a Cordite on the road next spring
|
15th October 2013, 08:16
|
|
Senior Member
|
|
Join Date: Apr 2012
Posts: 1,163
|
|
Bentley driving accountant, why am I not surprised! I'm guessing his vehicle is registered to his business and he is probably claiming his legal fees through his business against tax, so were probably all paying for both the prosecution and the defence costs.T0553r!
|
15th October 2013, 08:27
|
|
Senior Member
|
|
Join Date: Apr 2012
Posts: 1,163
|
|
Paul, if you can find a local garage with oxy acetylene they could heat it up enough for you to bend it a bit? Might mean some repainting though :-0
|
15th October 2013, 09:02
|
|
Senior Member
|
|
Join Date: Jul 2011
Posts: 5,328
|
|
Quote:
Originally Posted by Viatron
Bentley driving accountant, why am I not surprised! I'm guessing his vehicle is registered to his business and he is probably claiming his legal fees through his business against tax, so were probably all paying for both the prosecution and the defence costs.T0553r!
|
Honestly officer, W4NKR is my middle name... |
16th October 2013, 07:59
|
|
Senior Member
|
|
Join Date: Feb 2012
Location: Wembley, London
Posts: 5,056
|
|
Viatron, ScimJim, Christinedmc & Mister Towed - Thanks for the replies gentlemen. 
Numberplate - I'm still waiting for Trading Standards to confirm if my rear plate is legal to use.
I did order a yellow & black one and the numbers/letters are all the right size & spacing.
If the post code requirement doesn't apply to 1980 cars, then that is good enough for me.
Although, if I did buy an ageless plate I'd be very tempted to "chance" black & white/silver plates.
Finally, I hope the Bentley driver loses his case as he is giving accountants a bad name!
Rear Framework - During the work I did yesterday (see below) the "gap" at the ends was significantly reduced.
I will give it a bit more thought as another option is to put a section of steel plate in the gap before bolting it down.
But for now, I have worked on the basis of four bolts holding the frame in place.
Temporary Tonneau - I actually did think of Mr T's beautiful cover when I saw mine fitted.
But more in the sense of his being Premier League and mine being the local pub team.
If I get a decent break in the weather I will give the wood a coat of furniture oil for some basic waterproofing.
- - - - - - - - - - - - - - - - - - - - - - - - - - - - - - -
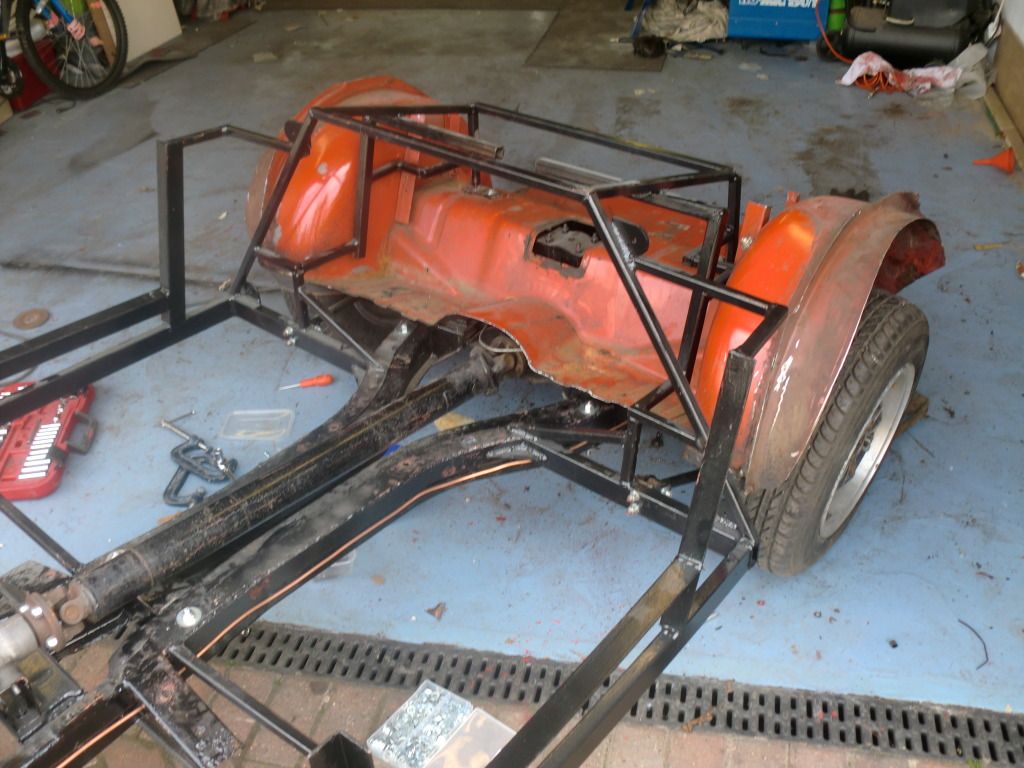
Inching Forward - Part 1:
I had another look at the way the rear frame & Spitfire arches were coming together.
I then ended up convincing myself that one section on the driver's side was still fouling.

So off everything came, so I could mark up and remove a small section.
Rather than go all the way to the bottom of the garden for my grinder I used a hack saw.
But I seem to have forgotten just how long it takes to cut something by hand.


Obviously I will need to weld a "cap" over this hole at some point.
Note: By the end of the day, this "problem" had gone away, so a complete waste of time all round.
Then I put just the frame work back on the frame as I wanted that in the right position.
But before I started marking things up and drilling I put the floors in place.

One issue I have at the moment is the front edge of the floors sits over the Spitfire bulkhead.

I don't really want to trim this off until I know what I am doing with the front end.
( More thoughts on that later on. )
I then roughly connected the radius arms to the frame to keep that distance correct.

Then I gently clamped the frame to the chassis.

This allowed me to re-mark the holes required for the seat belt mounts in red.
There was a small shift in position of the hole which will help alignment.

I then marked up where I needed to drill holes in the chassis to bolt the frame on.
As I said earlier, at this point I am definitely using 4 bolts & I'll decide on the extreme rear ends of the frame later on.


Then the frame came off, the drill came out & the frame holes were done.


With the frame back on the chassis, the seat belt holes lined up nicely.

Although on the driver's side, I ended up notching out the hole as it was very thin at the edge.

Then I put some tape on the chassis and marked the holes that need to be drilled in it.
I'll be back in a minute with Part 2....
|
|
Currently Active Users Viewing This Thread: 7 (0 members and 7 guests)
|
|
|
 Posting Rules
|
You may not post new threads
You may not post replies
You may not post attachments
You may not edit your posts
HTML code is Off
|
|
|
All times are GMT +0. The time now is 11:27.
|


 Linear Mode

