Are you madabout kit cars      
 "We've Got Kit Cars Covered" Information about Madabout-Kitcars.com Contact Madabout-Kitcars.com         Home of UK kit cars - madabout-kitcars.com Various kit car write ups All the latest kit car news Kit car related and general discussion

Search
Manufacturers
Kit Cars
Kit Car Data sheets
Picture Gallery
SVA Knowledgebase
Clubs & Communities
Build cost estimator
Kit cars for sale
Knowledge Base 
KitcarUSA.com
Classic-Kitcars.com
 

Go Back   Madabout Kitcars Forum > Mad Build Area > Sammio Builds and discussions

Sammio Builds and discussions Sammio bodied car builds and specials

Reply
 
Thread Tools Display Modes
  #2561  
Old 6th July 2016, 19:01
Paul L's Avatar
Paul L Paul L is offline
Senior Member
 
Join Date: Feb 2012
Location: Wembley, London
Posts: 5,056
Paul L is on a distinguished road
Default

Time Out - Part 2:
Once that was set enough, I mixed up some fibreglass filler:

For the fixing bracket holes on the bonnet.


The outside surface of the locating pin panel.


Having already re-drilled the hole through the matting applied earlier.
( Sorry, not a great photo. )


The join between the return lip & closing panel on the body shell extension.


I then used up the last of the filler on the underside of the rear cockpit wall.


At this point of the day, the sun was blazing down and I realised that there was more to life than building a kit car.

So I switched my attention to providing a family BBQ in the evening.

This involved a huge tidy up of all the stuff left in the front porch.

Although it only got as far as the dining room.


I the mowed the lawn, which is looking very green for July, which shows how much rain we've had lately.


By the time the family was home, the BBQ was under way.


I've typed this up as fast as I can, so now I'm off to watch Wales in the Euros.

Take care, Paul.
Reply With Quote
  #2562  
Old 7th July 2016, 18:00
Paul L's Avatar
Paul L Paul L is offline
Senior Member
 
Join Date: Feb 2012
Location: Wembley, London
Posts: 5,056
Paul L is on a distinguished road
Default

Thursday - Part 1
The morning was lost waiting for the plumber to arrive to sort out our boiler.

Then it was time to start tidying up both the fibreglass and the filler that I applied yesterday:

Bonnet screw fixing holes.


Locating pin panel (with the hole re-drilled).


Body shell extension closing panel.


Then it was time to test the locating pin again.


I just needed to adjust the locating "hole" a little bit to get a decent fit.


Next up was another round of fibreglass filler:

This covered the join between the body shell extension closing panel and the Spitfire bulkhead.


Also the joins between the horizontal panel and the bulkhead.


A light skim over the low spots on the locating pin panel.


Plus the small end piece next to the locating pin panel.


End of Part 1…
Reply With Quote
  #2563  
Old 7th July 2016, 18:01
Paul L's Avatar
Paul L Paul L is offline
Senior Member
 
Join Date: Feb 2012
Location: Wembley, London
Posts: 5,056
Paul L is on a distinguished road
Default

Thursday - Part 2:
I also added some filler to the underside of the horizontal panel and the bottom of the return lip "blob".

Unfortunately, I couldn't get any decent photos of these areas.

But I did get a good photo showing why you need to be careful working upside down!


When that was all set, there was an epic sanding session.


Still not easy to see, but this is the back of the "blob" at the bottom of the body shell extension.


The underside of the horizontal panel.


I also spend ages tidying up any excess bonding paste around the underside of the cockpit's plywood panels.
( This photo is taken with me flat on the ground looking up. )


With the locating pin back in, this new section of the bonnet looks pretty good to me.


With the driver's side in position, the passenger side of the bonnet sits slightly pound of the body shell.


Unfortunately, with all the internal "rope" bracing on the curves, this is where the bonnet now "naturally" sits.

So I intend to simply work with this position, rather than force it back into shape, and it should be OK in the end.
( After all, what is a bit more filler between friends? )

Therefore, I trimmed the locating pin panel to match the bonnet edge and fixed it into position.


End of Part 2…
Reply With Quote
  #2564  
Old 7th July 2016, 18:02
Paul L's Avatar
Paul L Paul L is offline
Senior Member
 
Join Date: Feb 2012
Location: Wembley, London
Posts: 5,056
Paul L is on a distinguished road
Default

Thursday - Part 3:
Then I mixed up some bonding paste and slapped it on.


Note:
I've also fixed the extra small piece of fibreglass into place at the same time.


The last of the bonding paste was used on the rear edges of the panels in the boot.
( Although there is no way of getting a decent photo of that side. )


Thankfully, I can pop the boot lid back into place and cover the rear of the car up while that sets.


There was a bit of a gap before I got the chance to sand down the rear cockpit edge.


I quite like the way the body shell "overhangs" the rear cockpit wall, although this isn't a great photo.


Finally, I fixed the access panel into position.


Whilst all these little jobs feel like slow progress, it is definitely progress.

Until next time, take care, Paul.
Reply With Quote
  #2565  
Old 7th July 2016, 20:15
Roadster's Avatar
Roadster Roadster is offline
Senior Member
 
Join Date: Jun 2011
Posts: 935
Roadster is on a distinguished road
Default

Well done Paul

I love the confidence you are now showing.
Its coming together really well now - you can see the end is in sight
Reply With Quote
  #2566  
Old 7th July 2016, 21:07
DaveP DaveP is offline
Senior Member
Enthusiast
 
Join Date: Jun 2015
Location: Reading, Berkshire
Posts: 688
DaveP is on a distinguished road
Default

Agreed with the positive comments. Great work as ever Paul
Reply With Quote
  #2567  
Old 8th July 2016, 05:55
Roadster's Avatar
Roadster Roadster is offline
Senior Member
 
Join Date: Jun 2011
Posts: 935
Roadster is on a distinguished road
Default

Demon Tweeks sent me this and I thought you would be interested.
http://www.demon-tweeks.co.uk/motors...ric-motorsport

Unless you win the lottery, I don't think you will buy any of these but it may give you some ideas to finish your replica race suit
Reply With Quote
  #2568  
Old 8th July 2016, 06:26
Paul L's Avatar
Paul L Paul L is offline
Senior Member
 
Join Date: Feb 2012
Location: Wembley, London
Posts: 5,056
Paul L is on a distinguished road
Default

Roadster & DaveP - Thanks chaps.

Part of me is a bit frustrated by the amount of time that all of these small tasks seem to be taking.

But, thankfully, the rest of me is very happy to see more and more of the car slowly reaching MOT ready status.

Take the rear end…

Apart from testing the rear lights, the outside is now finished as far as the MOT is concerned.


And I just need to add some zip ties to tidy up the wiring loom inside the boot for that to be completed too.


Obviously, at some point I need to come back and tidy up* the inside of the boot, but not for the MOT.
( * By tidy up I mean painting and adding some internal alloy panels to protect the wires. )

Similarly, I spend a lot of time yesterday working on the underside of the plywood cockpit panels.
( Which are a real pain in the to reach and get anything done on. )


Because the other day, I went back through Mister Towed's 'On the road' thread to find this photo.


Whilst it is predominately of his 'Cherry Bomb' exhaust you can also see his use of plywood.
- The red sections are the outside of his rear "boot" area.
- The "wood" sections are the back of his rear cockpit panels.

Mr T said that the "wood" sections were treated with "… a generous coat of cuprinol clear…".

As I have already treated my plywood panels, they now just need some etch primer & Teroseal and they will be finished too.

I just hope the person doing the MOT appreciates all the effort I have made to improve their view of the underside of my car.

Cheers, Paul.

PS
Roadster - Just seen your link as I was about to post this, so I'll look at that later.

Last edited by Paul L; 8th July 2016 at 06:49.. Reason: Adding * update
Reply With Quote
  #2569  
Old 8th July 2016, 16:30
Paul L's Avatar
Paul L Paul L is offline
Senior Member
 
Join Date: Feb 2012
Location: Wembley, London
Posts: 5,056
Paul L is on a distinguished road
Default

Roadster - Thanks for the link.

Mind you, if there was a lottery win to play with, how about a brand new "old" Everoak helmet, only £795!

http://www.everoakhelmets.com/shop/4...veroak/8520372

- - - - - - - - - - - - - - - - - - - - - - - - - - - - - - -

Fiddly Friday - Part 1
Removed the brackets from the locating pin panel on the passenger side.


Marked up the back edge of the bonnet for an initial trim.


Also marked up the bottom edge of the driver's side to get it level.


There is a good reason why I usually take my time to counter sink the fixing screw holes with my drill.

And it is because this is what happens when I decide to quickly use my Dremmel thingy instead.


At least after a bit more grinding and trimming I was slowly getting there.


Not easy to see, but I added some fibreglass matting to the back edge of the bonnet between the two "rope" sections.


Leaving a small overhang.


I also added matting on the inside of the locating pin plate & beefed up the other side of the section I ground down on the sunny side earlier.


End of Part 1…
Reply With Quote
  #2570  
Old 8th July 2016, 16:31
Paul L's Avatar
Paul L Paul L is offline
Senior Member
 
Join Date: Feb 2012
Location: Wembley, London
Posts: 5,056
Paul L is on a distinguished road
Default

Fiddly Friday - Part 2
Covered the top side of the locating pin "hole" with masking tape.


And roughed up the underside.


Note:
In the photo above, you can see my mini filler applicator made from an alloy off cut.

It is significantly smaller than the standard plastic ones I normally use.


Then I mixed up a small quantity of bonding paste, which also acted as a "self leveller".
( Sorry about the blurred photo. )


This is the side on view of the body shell extension and the "hole" is completely flush.


Mixed up some normal body filler, for a skim over the screw holes on the outside of the driver's side.


Then made a dog's dinner of applying the filler on the inside.


Note: The leather bonnet straps will be fixed into position "somewhere" around here.

By now the bonding paste had set hard enough for me to remove the masking tape without disturbing anything.


Next up was some fibreglass filler for the passenger side.


End of Part 2…
Reply With Quote
  #2571  
Old 8th July 2016, 16:32
Paul L's Avatar
Paul L Paul L is offline
Senior Member
 
Join Date: Feb 2012
Location: Wembley, London
Posts: 5,056
Paul L is on a distinguished road
Default

Fiddly Friday - Part 3
Sanded down the filler on the driver's side.


I spend so long on that inside surface that the filler on the other side was ready for sanding by the time I had finished.


Then, in a change from how I did the other side, I fitted the locating cone first.


Then marked up and drilled the hole second.


Then marked up and hollowed out the shape needed.


By this point I'd got a text from a mate who wanted to meet up for a beer tonight, so I called it a day.

There is still a bit of fine tuning to do on the gap, but I am definitely getting there.


Right, I've got a train to catch and a beer to drink.

Until next time, take care, Paul.
Reply With Quote
  #2572  
Old 9th July 2016, 17:58
Paul L's Avatar
Paul L Paul L is offline
Senior Member
 
Join Date: Feb 2012
Location: Wembley, London
Posts: 5,056
Paul L is on a distinguished road
Default

Saturday - Part 1
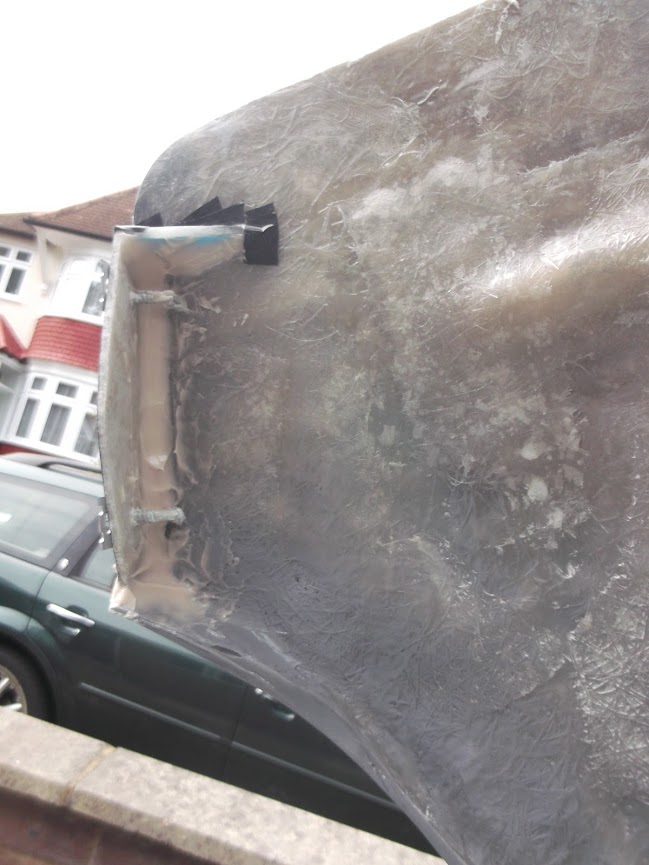
It was late morning before I was able to get some etch primer on the bottom corner of the bonnet on the driver's side.


Plus the inside edges of the body shell extension.


Then my day took an unexpected turn, which was quite sad really.

So if want to stick to more up beat car building, ignore the following and page down to the next photo…

- - - - - - - - - - - - - - - - - - - - - - - - - - - - - - -

Perspective:
As I was starting to apply some normal body filler I could hear someone loudly banging on a front door down the street.
I looked up and saw it was an old lady who lives on the street at her next door neighbours' house.
So I thought nothing of it and carried on with the filler, but the banging continued and I figured her neighbours must be out.
However, for whatever reason, at this point I had stopped what I was doing to see if everything was OK.
Just as I did, I could faintly hear the old lady said "Can somebody help me please?".
F***!
So I dropped everything and ran down the road to help, fearing her husband might have fallen (or worse).
She then lead me into the house where I could smell smoke and now thought there might be a fire.
Turns out the poor lady has dementia and instead of turning on the grill, she had switched on a cooking ring by mistake.
Thankfully she had managed to turn everything off but she was clearly both confused and distressed.
Her husband was out and she was very worried that he was going to find out what had happened.
As I got the impression that she wasn't supposed to use the cooker unsupervised.
She also said she was not allow to leave the house by herself, which she had clearly done looking for help.
So I tried to reassure her that she did the right thing getting help and that we all make mistakes.
I then quickly nipped back to my own own house to tell my wife what was going on before returning.
It was hard work trying to talk her into just sitting down to recover and she didn't want a cup of tea or even a glass of water.
I even offered her the chance to come and stay at my house until her husband returned, or I'd wait with her in her house.
But either of the these options would mean that the husband would know something had happened and she didn't want that.
Eventually I was able to convince her that I wouldn't tell him and the cooker ring was now cold, so there was also no "evidence".
This seemed to bring her some comfort and she was now calmer and happy for me to leave her to it.

Clearly this couple are only just getting by with the problems they have and need proper help.
So I will keep an eye out for the husband and tell him what happened, as there is clearly a real fire risk.
Depending on his reaction, I might see if there is anything else I can do to help them out a bit.
As, coincidently, I used to look after their neighbour's garden, on the other side of their "semi" over 10 years ago.
As my wife was friendly with the lady who lived there when our children were very small.
Back then, this couple's garden was immaculate and they were happy to see me mowing their neighbour's lawn.
But today, I could see that their garden is now completely over grown, so things have declined over time.
Their neighbour passed away last year, but she did get proper home help in the end to help her around the house & garden.

Anyway, this lady is only a few years older than my own mum, who is also in her 80s, but is, thankfully, as fit as a fiddle. <Touch Wood>
It really brought home the fact that you should always count your blessings, as things can always be worse.
It certainly puts all my whinging and moaning about the less than perfect shape of my wheel arches into perspective.
Apologies for sharing this in the middle of my build thread, but this whole episode has troubled me for most of the day.
At least writing it all down helps me a little bit, so I'll now return to a normal build update.

- - - - - - - - - - - - - - - - - - - - - - - - - - - - - - -

Normal body filler was added to:

The bottom corner of the bonnet on the passenger side.


Although I didn't get to finish off the horizontal panel on the driver's side.


End of Part 1…
Reply With Quote
  #2573  
Old 9th July 2016, 17:59
Paul L's Avatar
Paul L Paul L is offline
Senior Member
 
Join Date: Feb 2012
Location: Wembley, London
Posts: 5,056
Paul L is on a distinguished road
Default

Saturday - Part 2:
Still, at least it looked a lot better after sanding down.


As did the bonnet.


Note:
I have no idea how Swifty had the patience to smooth out the inside of his entire bonnet!

Then it was etch primer time and I've painted over the shiny "hole" on purpose.


Then the "hole" for the passenger side was bonded into position.


Next, I found a fibreglass off cut that I could use to test the bonnet straps.


As it occurred to be that I needed to set the distance between the straps correctly…


Because if they were too far apart, then the buckle couldn't be opened.


So they need to be close enough so that they can actually work.


End of Part 2…
Reply With Quote
  #2574  
Old 9th July 2016, 18:00
Paul L's Avatar
Paul L Paul L is offline
Senior Member
 
Join Date: Feb 2012
Location: Wembley, London
Posts: 5,056
Paul L is on a distinguished road
Default

Saturday - Part 3:
Note: There is only a few mm in the difference.


I then spent a bit of time beard scratching trying to settle on the best location, before finally committing to this.


I then went into full self doubt mode before committing to the holes for the bottom bracket.


And given that this is a "warts and all" build, I'd be lying if I said I got this right first time.


Oh ! ! !

Still, nothing some filler can't fix and there will be a backing plate on the other side.

I just need to order some longer bolts given how thick the fibreglass is in these areas.

However, at this point I called it a day, as my heart just wasn't in it.

The good news is that once I fix the sides of the bonnet in place, I can shape the middle section of the bonnet/scuttle.

Which will take me one step closer to the car's first MOT.

Until next time, take care, Paul.
Reply With Quote
  #2575  
Old 10th July 2016, 06:17
Mick O'Malley Mick O'Malley is offline
Senior Member
 
Join Date: Nov 2012
Posts: 845
Mick O'Malley is on a distinguished road
Default Good Neighbour Stakes

10/10

Same score for your build

Regards, Mick
Reply With Quote
  #2576  
Old 10th July 2016, 09:03
Paul L's Avatar
Paul L Paul L is offline
Senior Member
 
Join Date: Feb 2012
Location: Wembley, London
Posts: 5,056
Paul L is on a distinguished road
Default

Thanks Mick.

I was hoping to sneak in some car time early this morning, but it is still damp outside, so the covers have stayed on.

There is a slim chance I might be able to do something later on today, if not, hopefully tomorrow.

Cheers, Paul.
Reply With Quote
  #2577  
Old 11th July 2016, 10:26
Paul L's Avatar
Paul L Paul L is offline
Senior Member
 
Join Date: Feb 2012
Location: Wembley, London
Posts: 5,056
Paul L is on a distinguished road
Default

Mini Monday
With rain in the forecast (yet again), I had to be quick first thing this morning…

So I sanded down the bonding paste on the passenger side "hole" & keyed the metal.


Mixed up a tiny amount of fibreglass filler for the extra driver's side holes.


Added another layer of fibreglass matting along the centre of the rear bonnet edge.


I also dug out the front grill so I can start thinking about how this will be fitted.


As there really isn't much room to play with in some areas.


So whilst part of me would like to make the grille removable…

The other part of me knows this will be a lot harder to do than it might sound.

Although I have a big fear that bonding the grille in before paint will make the prep/painting harder to do.

Having said that, I'm sure Swifty bonded his grille in before paint and that seemed to work for him.

Sanded down the filler.


Then re-drilled the holes and got some etch primer on, making it all look much better.


I also etched the hole on the passenger side.


Then I fitted the locating cones on both sides.


Using an extra spreader washer while I was at it.


By now there was the odd spit of rain which told me my time was up.

Unfortunately, the fibreglass matting hadn't fully set enough for me to trim the excess off the back.

So I needed to lay a cloth between the bonnet and scuttle & then weigh the bonnet down.


This effectively "folds" any excess matting along the rear bonnet edge out of the way & keeps the bonnet in shape.

Thankfully, the covers were back on before the rain really started coming down.

That's all for today, as I will be working from home this afternoon and back in the office in the morning!

As always, it would have been great if I was able to get a bit more done during my unexpected time off.

But, overall, I am really pleased with how much work I've managed to do over the last few weeks.

The car has taken some seriously big steps towards its first MOT and my motivation is at a high point.

So until next time, take care, Paul.
Reply With Quote
  #2578  
Old 11th July 2016, 13:29
froggyman's Avatar
froggyman froggyman is offline
Senior Member
 
Join Date: Dec 2011
Location: Devon
Posts: 550
froggyman is on a distinguished road
Default

Great progress Paul. It really is looking good with all your mods coming together. I think the turning point for you now will be the MOT. Good luck and keep chipping away at it when you can.
Reply With Quote
  #2579  
Old 12th July 2016, 06:56
Paul L's Avatar
Paul L Paul L is offline
Senior Member
 
Join Date: Feb 2012
Location: Wembley, London
Posts: 5,056
Paul L is on a distinguished road
Default

Froggyman - Thanks, I love the fact that it all seems to be finally coming together.

By the time the grille, aero screens, mirrors, seats, etc. are all fitted, it should look even better.

I know there will still be a lot of work to do after the MOT, but that will still be a HUGE milestone to reach.

Cheers, Paul.
Reply With Quote
  #2580  
Old 12th July 2016, 09:48
Roadster's Avatar
Roadster Roadster is offline
Senior Member
 
Join Date: Jun 2011
Posts: 935
Roadster is on a distinguished road
Default

Your doing a great job Paul
The way your going it will be finished before summer arrives.

But them Summer might not arrive until 2017
Reply With Quote
Reply


Currently Active Users Viewing This Thread: 8 (0 members and 8 guests)
 

Posting Rules
You may not post new threads
You may not post replies
You may not post attachments
You may not edit your posts

BB code is On
Smilies are On
[IMG] code is On
HTML code is Off

Forum Jump


All times are GMT +0. The time now is 11:00.

copyright © madabout-kitcars.com 2000-2024
terms and conditions | privacy policy