|
|
| Sammio Builds and discussions Sammio bodied car builds and specials |

8th June 2015, 10:46
|
|
Senior Member
|
|
Join Date: Jul 2011
Location: Hampshire
Posts: 146
|
|
Paul - the wheel arch is now on a 35cm dimater circle from the centre of the wheel and looks about right.
Here are some pictures:
IMG_0373.jpg
IMG_0374.jpg
IMG_0375.jpg
IMG_0376.jpg
IMG_0377.jpg
Seems to me that the front of each of the rear wheels is quite a way inside the wheel arch whereas the rear is well outisde the wheel arch. I have not changed this aspect of the bodyshell and so assume this pose to be standard?
Thanks
Chris
|
8th June 2015, 16:23
|
 |
Senior Member
|
|
Join Date: Feb 2012
Location: Wembley, London
Posts: 5,056
|
|
Chris - Thanks for the measurement & your arches looks miles better. 
As the the rear arch profile, they did "sweep" back on the Spyder, as seen on this photo of Mister Towed.

Good luck, Paul. 
|
26th July 2017, 19:23
|
|
Senior Member
|
|
Join Date: Jul 2011
Location: Hampshire
Posts: 146
|
|
Cant believe how much time has passed since my last post! But I have been plugging away slowly but surely on the Sammio.
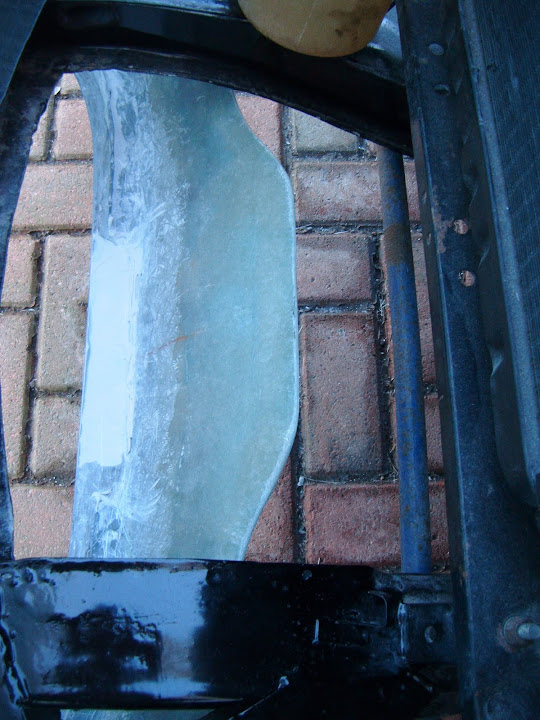
Tonight I have fitted the bonnet which is now bolted to the car for the very first time. Was feeling pretty pleased with myself UNTIL I tried to open it and found that the skirt (underneath the grill) meets the chassis before the bonnet fully opens. Photo below probably gives a clearer picture.

Cant remember seeing this on any of the other build threads that I have followed. Is it me or do I need to cut out some of the skirt to allow the bonnet to open fully?
Last edited by cbjroms; 26th July 2017 at 19:45..
|
26th July 2017, 20:08
|
 |
Senior Member
|
|
Join Date: May 2009
Location: POOLE , DORSET
Posts: 2,200
|
|
YOU WILL NEED TO RELIEVE IT ...I have done it several times so don't panic !
Either slot each one individually or , an easier solution , one large slot across the two horns ...
|
26th July 2017, 21:10
|
|
Senior Member
|
|
Join Date: Feb 2012
Location: Wembley, London
Posts: 5,056
|
|
Chris - Welcome back.
Sorry I'm in a bit of a rush, so these were the first two photos I could find.
Even though the Cordite/Spitfire combo is different to the Spyder/Herald one, I had the same issue.
So I cut a 'wavy' line along the bottom of the bonnet.

Which allow a full 90 degree opening without fouling the chassis.
Hope that helps and I can get better photos if you need them.
Good luck, Paul.
|
15th August 2018, 19:37
|
|
Senior Member
|
|
Join Date: Jul 2011
Location: Hampshire
Posts: 146
|
|
Still plodding away!
Looking back at my last post I am horrified to find that I have spent the majority of the last 12 months re-working the bonnet to get (only) a half-decent fit. Decided that it will do for now.
Now I am struggling to find enough height in front of the engine to fit a radiator. Current plan is to use a Honda radiator which I purchased some (years) ago on MrT's recommendation. But with the radiator filler cap below the height of the thermostat housing I need to find a way to fit a secondary filler neck in order that I can get the air out of the system. Wondering whether I can use flexible pipes to allow me to temporarily raise the height of the radiator (with the bonnet open) to bleed the air before dropping the radiator back down into its normal position.
Looking on Google images for inspiration (and in desperation) I see some Sammio/Cordites SEEM to have a radiator cap below the thermostat housing. How would this work?
|
15th August 2018, 19:59
|
|
Senior Member
|
|
Join Date: Jul 2011
Location: Hampshire
Posts: 146
|
|
Bingo!
Took a break and started to think about putting a header tank at the rear of the engine off one of the heater pipes.
Quick Google led me direct to the following advice from davecymru circa 2012 - 'Just beware of air locks. Myself, Pat and a few others simply cut that pipe and fitted a header tank there. As that will also assist if/when you drop the radiator.'
That seems to be a plan.
|
16th August 2018, 13:26
|
 |
Senior Member
|
|
Join Date: Apr 2016
Location: Camberley
Posts: 972
|
|
No excuses now then? ;-)
|
17th August 2018, 09:48
|
 |
Senior Member
Enthusiast
|
|
Join Date: Dec 2006
Posts: 1,130
|
|
Take a look at this header tank fitted to the bulkhead and feeding the heater line.

Works well.  |
8th September 2018, 05:23
|
|
Senior Member
|
|
Join Date: Feb 2012
Location: Wembley, London
Posts: 5,056
|
|
Chris – Good to see your build thread back again.
I might still have a plastic header tank from a Renault Megane in one of my boxes if you need it.

As my Frankenstein build approach meant I could keep the radiator in its original position.
If you can keep chipping away at it, eventually your ‘To Do’ list will be complete.
Good luck, Paul.
|
8th September 2018, 20:23
|
|
Senior Member
|
|
Join Date: Jul 2011
Location: Hampshire
Posts: 146
|
|
Thanks Paul,
Actaully had a trip to the local scrapyard this week and found a header tank complete with mounting rack. Also a top and bottom hose which ideally suits my
angled-forward radiator installation. Icing on the cake was finding an electric fan which fits the Honda Civic radiator I bought X years ago on Towed's recommendation.
|
8th September 2018, 21:09
|
|
Senior Member
|
|
Join Date: Oct 2013
Location: norfolk
Posts: 691
|
|
Quote:
Originally Posted by cbjroms

Thanks Paul,
Actaully had a trip to the local scrapyard this week and found a header tank complete with mounting rack. Also a top and bottom hose which ideally suits my
angled-forward radiator installation. Icing on the cake was finding an electric fan which fits the Honda Civic radiator I bought X years ago on Towed's recommendation.
|
I wish I could find anything at our local scrappies! I've asked them for various items, they've never rung me (as agreed) to say they have them. I even asked for wire from a loom, any loom, and still they can't provide. It is impossible to look around (not allowed into area with cars, even accompanied) and they don't have stock on shelves. Clearly just interested in crushing, nothing else. Where are we you ask, in the middle of a large town, too high-tec? No, in the depths of rural Norfolk, where everything (except the car breakers) is usually 10 years behind everyone else  |
9th September 2018, 06:31
|
 |
Senior Member
|
|
Join Date: Jul 2011
Posts: 5,328
|
|
Quote:
Originally Posted by Mitchelkitman
...in the depths of rural Norfolk, where everything (except the car breakers) is usually 10 years behind everyone else |
Hey, slew you down boy, I live in rural Norfolk and I object to that assertion that we be a bit backwards.
It's 2008 boy and we stopped wearing smocks and chomping on bits of straw next year. We even have tractors with wirelesses built in so we can listen to Radio Naarfolk while we hold up the holidaymakers for hours and hours on what passes for roads round these parts, and we'm thinkin that one day, we might even get thinternet, but maybe not this century Yarp? |
9th September 2018, 16:31
|
|
Senior Member
|
|
Join Date: Oct 2013
Location: norfolk
Posts: 691
|
|
When we were in Essex (before emigrating to Norfolk) the breakers were prolific - you could walk around the yard and (at least select but not remove like the old days) any part you wanted. You could get any part you wanted, which would be removed (sometimes without the owner's permission  ) |
9th September 2018, 17:11
|
 |
Senior Member
|
|
Join Date: May 2011
Location: Somerset
Posts: 1,671
|
|
Wow, that header tank discussion brings back some memories!
I just wemt and checked my old Sammio build thread to see what i did and I cant believe it was 2011 when i went through that phase of my first build.
Keep going matey, its looking really good!
|
10th September 2018, 06:14
|
|
Senior Member
|
|
Join Date: Jul 2011
Posts: 5,328
|
|
Quote:
Originally Posted by Mitchelkitman
When we were in Essex (before emigrating to Norfolk) the breakers were prolific - you could walk around the yard and (at least select but not remove like the old days) any part you wanted. You could get any part you wanted, which would be removed (sometimes without the owner's permission ) |
Funnily enough I was born in bred in Essex too before settling in Norfolk. I remember those breakers' yards but that was a very long time ago.
Sadly they've all been replaced with Spray Tan Booths, Teeth Whitening services and Botox While-U-Wait salons these days. Thanks The Only Way Is Orange, you've ruined my home county.  |
16th September 2018, 16:35
|
|
Senior Member
|
|
Join Date: Jul 2011
Location: Hampshire
Posts: 146
|
|
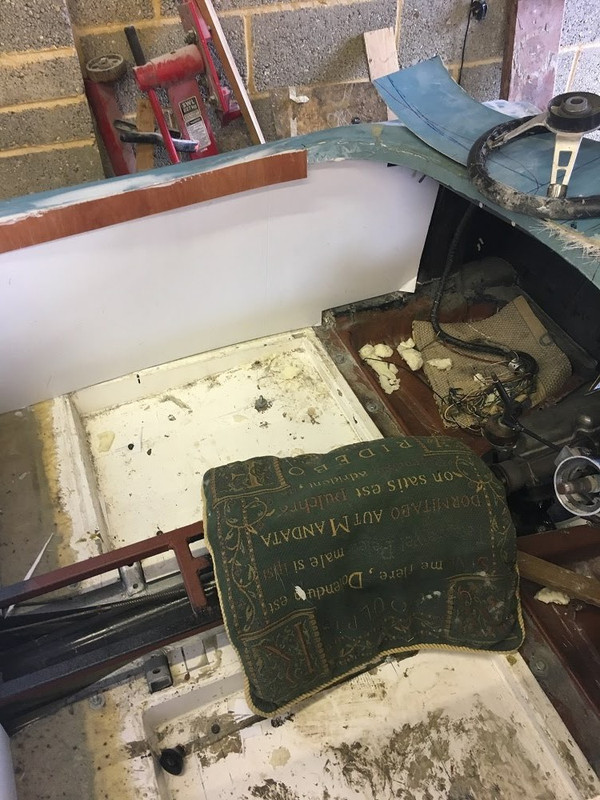
A few photos showing the way that I have plumbed-in the expansion tank.


Filling the system, however, showed that I have a major leak from the face of the thermostat housing. Probably due to me using a homemade gasket! Should be an easy fix.
Last edited by cbjroms; 28th September 2018 at 11:01..
|
20th September 2018, 16:33
|
|
Senior Member
|
|
Join Date: Feb 2012
Location: Wembley, London
Posts: 5,056
|
|
Sorry, I get error messages on the photo links.  |
20th September 2018, 17:55
|
|
Senior Member
|
|
Join Date: Jul 2011
Location: Hampshire
Posts: 146
|
|
Thanks Paul,
I have had major issues with getting photos to appear for some reason. Now fixed I think.
|
22nd September 2018, 12:42
|
|
Senior Member
|
|
Join Date: Jul 2011
Location: Hampshire
Posts: 146
|
|
Productive morning. Thermostat gasket replaced and is now watertight. Radiator overflow stub has been blanked-off as this radiator cap allows water to pass either way. Overflow/overpressure will be hanlded by the expansion tank.
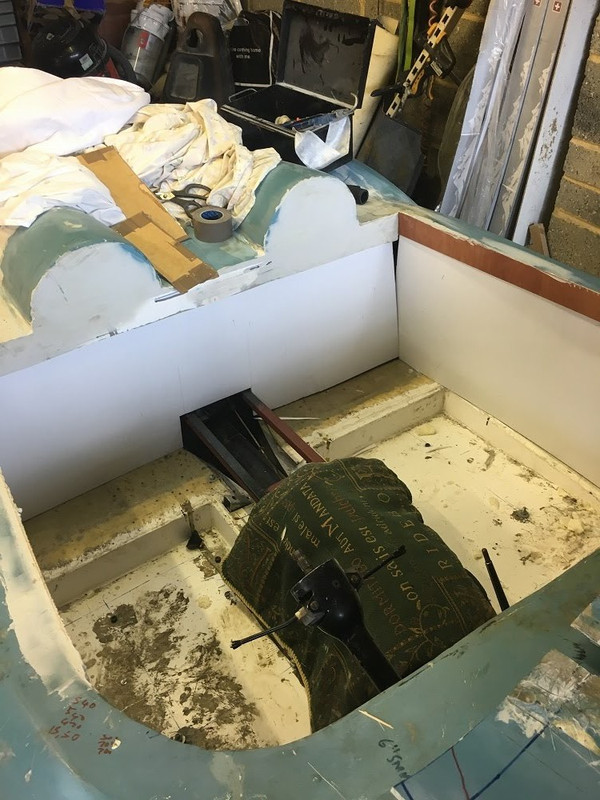
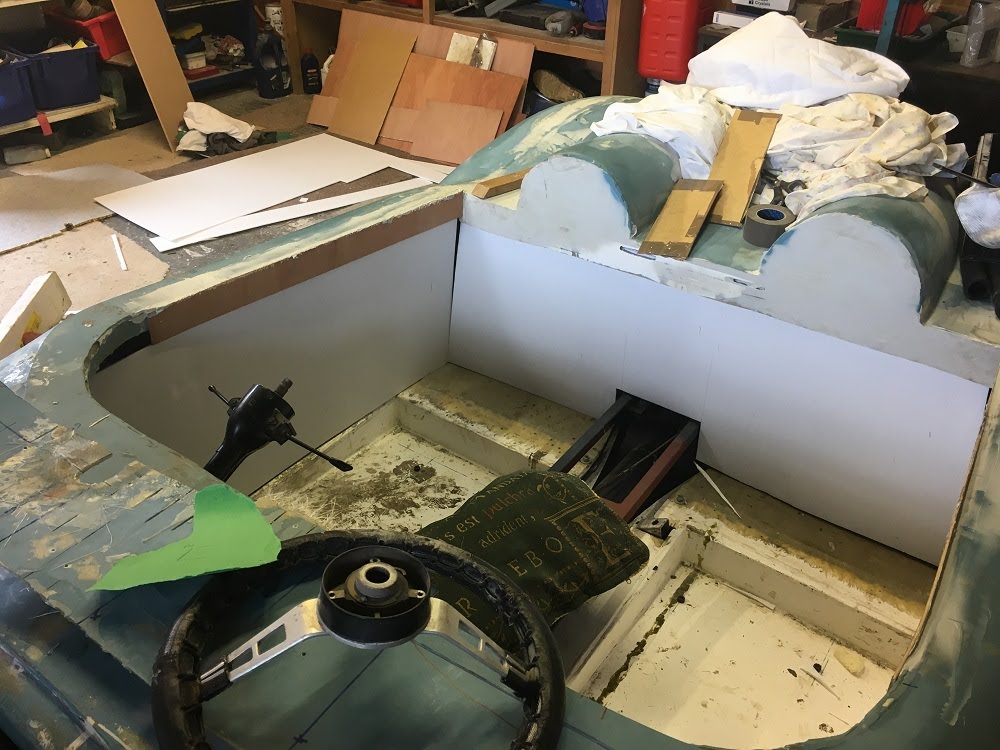
Made some templates out of correx for my cockpit side and rear panels. Was much easier than I feared and has given me a real buzz feeling that progress has been made.
Last edited by cbjroms; 28th September 2018 at 11:03..
|
|
Currently Active Users Viewing This Thread: 2 (0 members and 2 guests)
|
|
|
 Posting Rules
|
You may not post new threads
You may not post replies
You may not post attachments
You may not edit your posts
HTML code is Off
|
|
|
All times are GMT +0. The time now is 00:10.
|


 Linear Mode

