|
|
| Tribute Automotive Builds Discuss your Tribute kit build |

1st November 2013, 17:04
|
|
Senior Member
|
|
Join Date: May 2013
Posts: 2,161
|
|
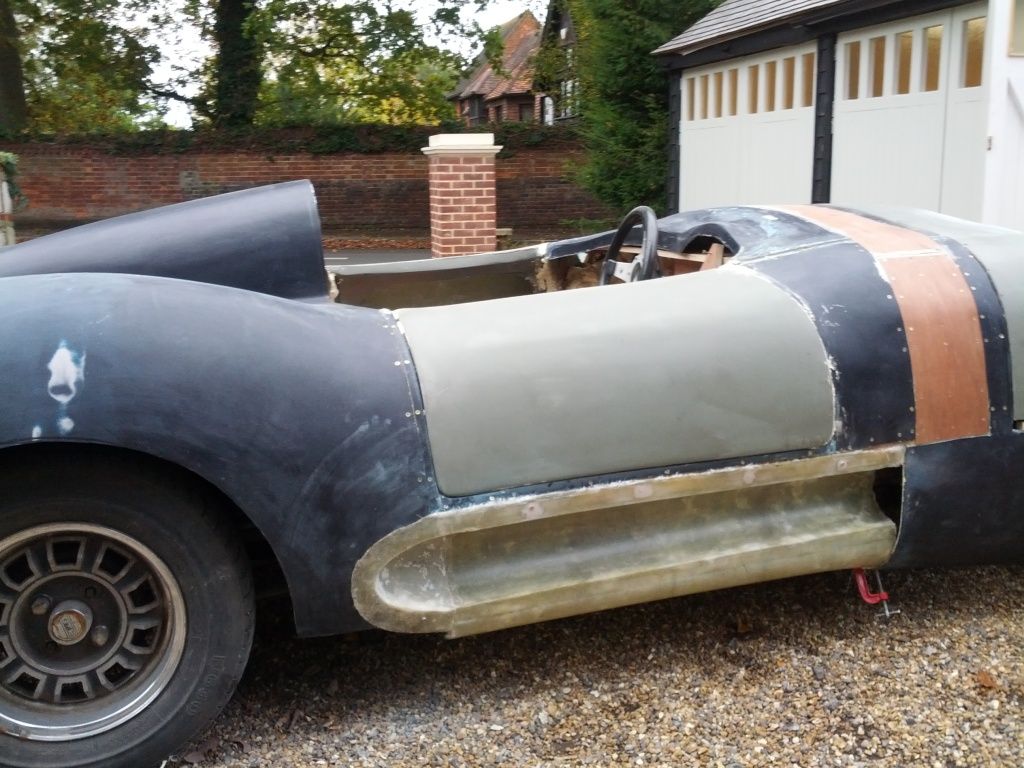
 Problems...
My initial euphoria on finally getting the body actually on the car was short-lived.
I realised that the body was resting not on the scuttle as it should, but at the 10 and 2 o’clock position each side on the door hinge bracket. A totally impossible situation.
Doom gloom death and destruction. The plan is to remove the body again, and cut at least half an inch off the offending brackets, and weld back for strength if necessary.
On the positive side, the body should then be around 1 inch LOWER than it was. Ride on, way to go!!!! Watch this space………..
|
3rd November 2013, 11:28
|
|
Senior Member
|
|
Join Date: May 2013
Posts: 2,161
|
|
Sunday, I have to do SOMETHING!
My friend who would usually help me remove the car body was not available,
So I decided to tackle the job with the body in place,
More difficult and awkward, but I didn’t have much choice.
[IMG]  [/IMG]
[IMG]  [/IMG]
[IMG] 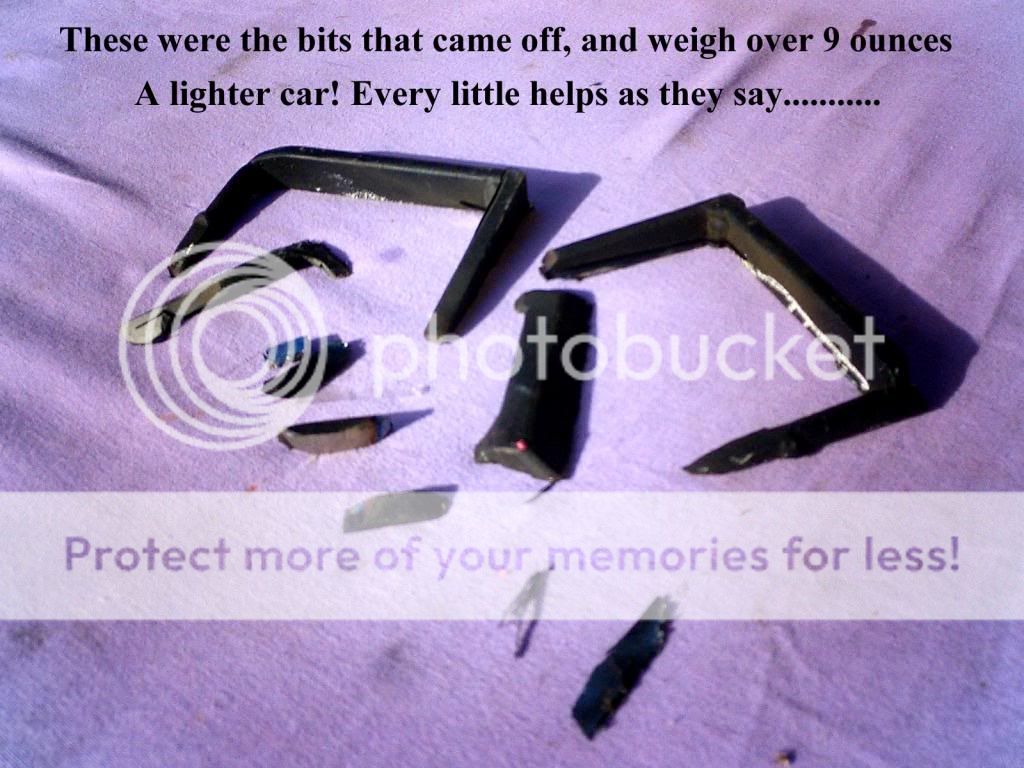 [/IMG] |
6th November 2013, 17:21
|
|
Senior Member
|
|
Join Date: May 2013
Posts: 2,161
|
|
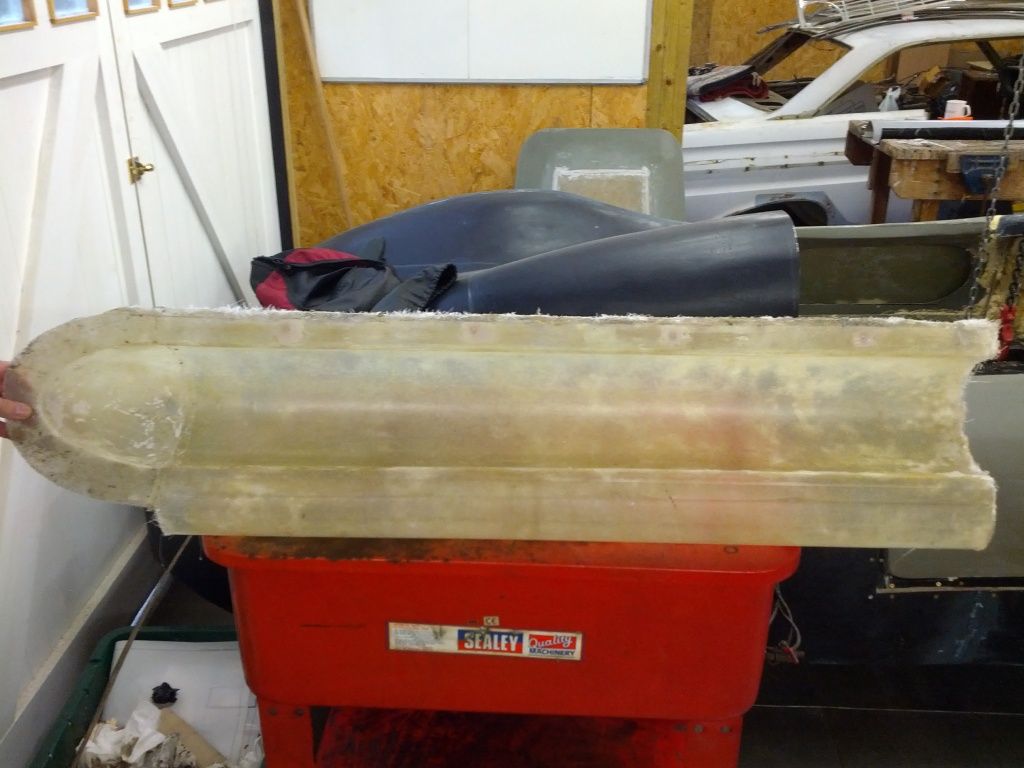
Pre bonding work
Today I started the preparation I need to do before bonding the body permanently to the chassis / tub.
The nose and tail were too low, with a 3 inch gap between the chassis at the nose and the boot floor at the rear.
When jacked up enough to make contact, it raised the whole body off the
Spit tub, and was far too high.
I found that about half way was a good compromise, the body rested on the tub top, fore and aft, but that position left a 1.5 inch gap between the chassis at the nose underneath, and the boot floor underneath at the rear.
Therefore I needed a 1.5 inch spacer. A trip to my local scrappy yielded Several feet of stainless steel box section the correct size for the princely sum of 2 quid.
I then realised I had not ordered the bonding / sealing goo. Poosticks!!
Should be with me in a day or two.
Here are some not so good pics:
[IMG] 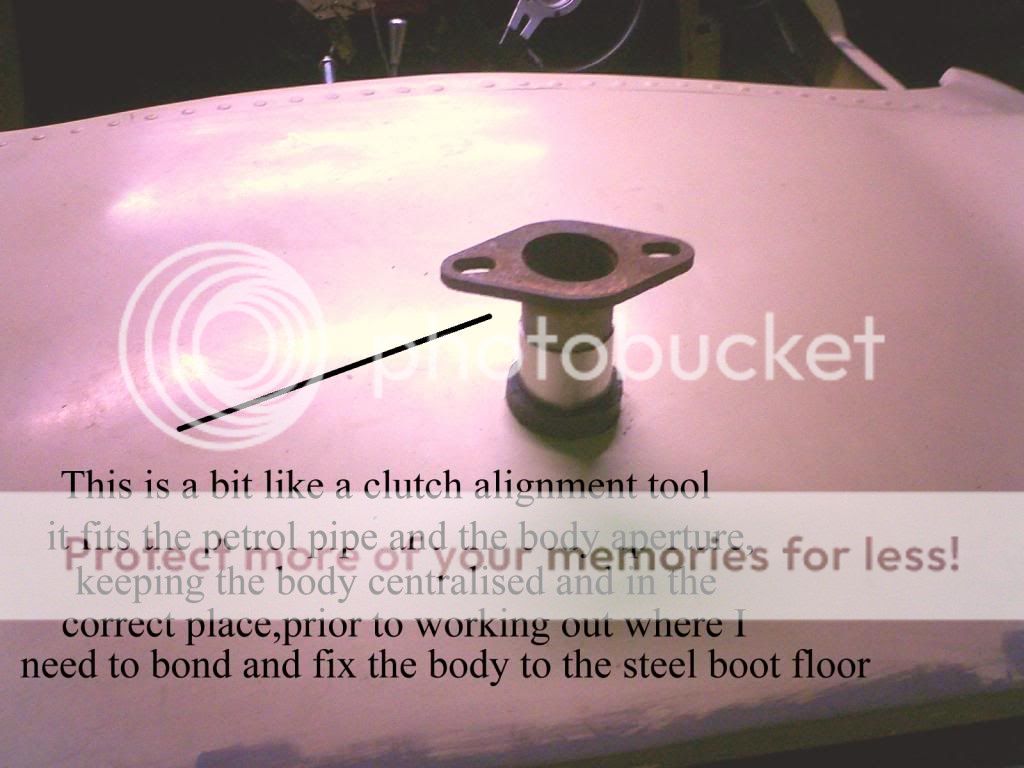 [/IMG]
[IMG] 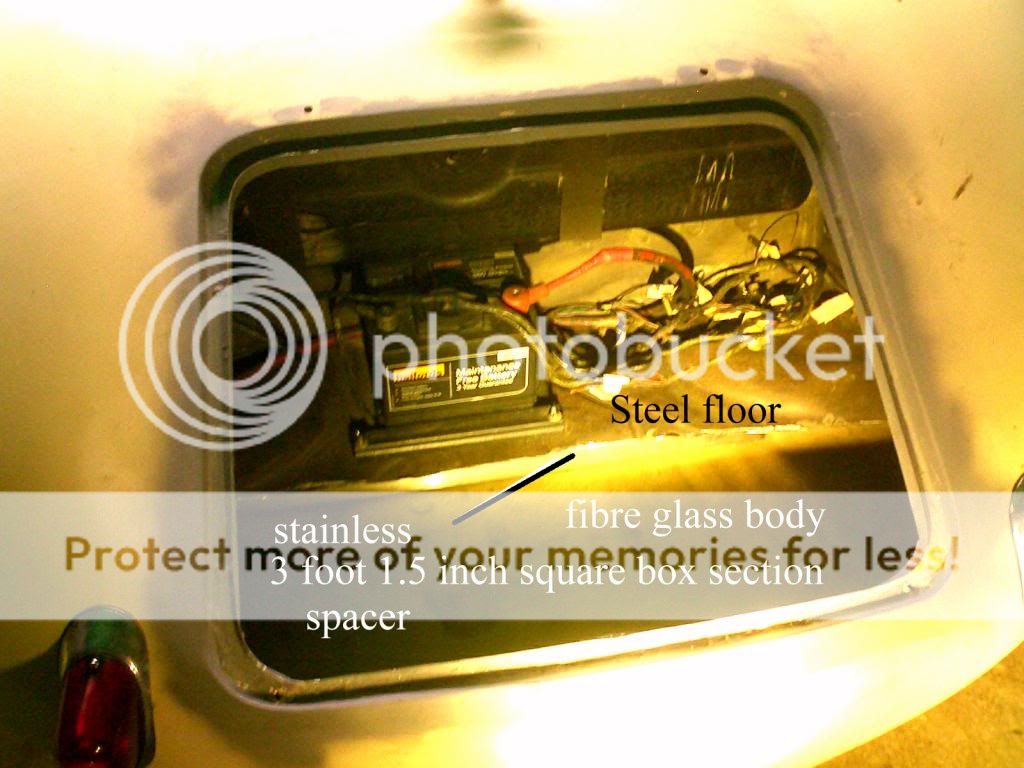 [/IMG]
[IMG] 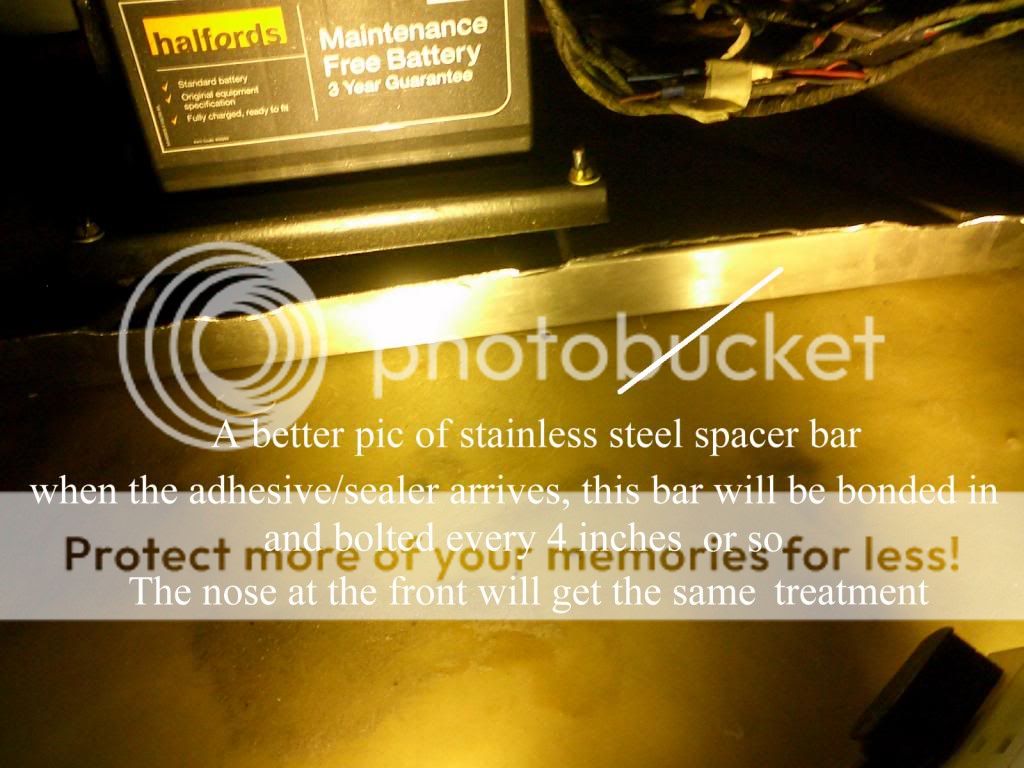 [/IMG]
[IMG] 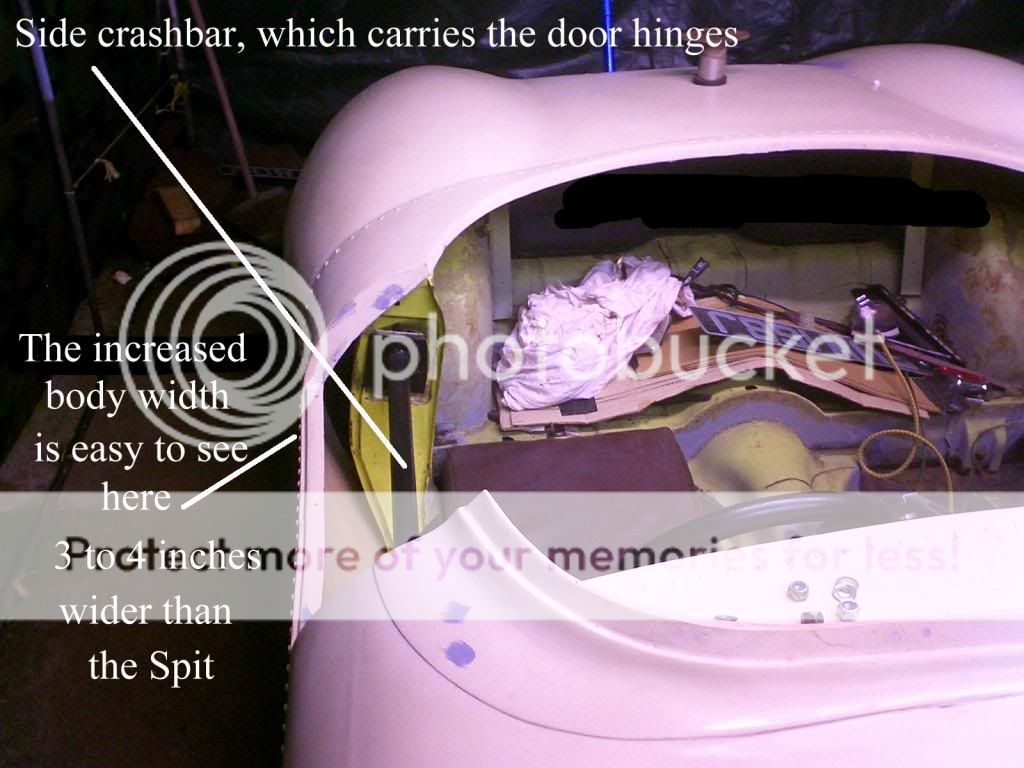 [/IMG] |
7th November 2013, 11:33
|
|
Senior Member
|
|
Join Date: May 2013
Posts: 2,161
|
|
Inspiration
[IMG] 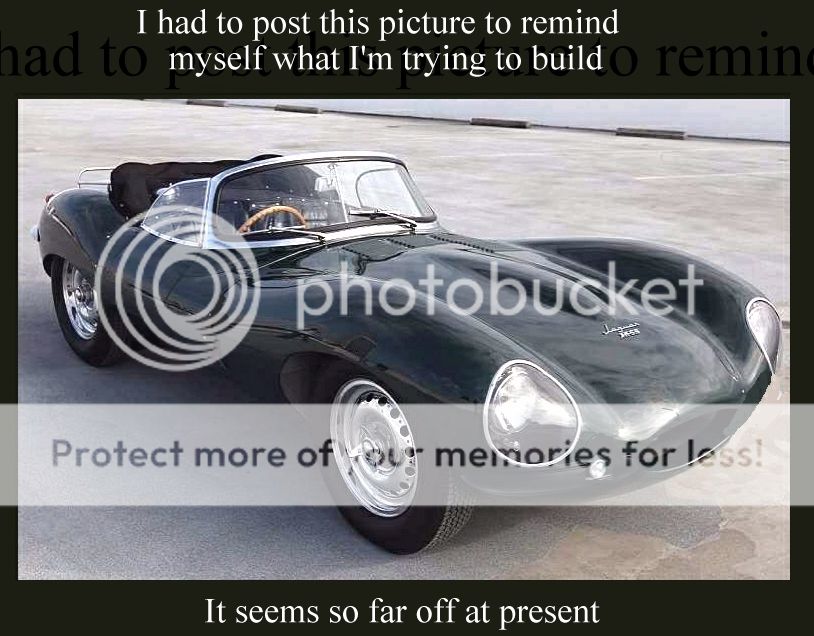 [/IMG] |
7th November 2013, 15:15
|
 |
Senior Member
|
|
Join Date: Jul 2011
Posts: 5,328
|
|
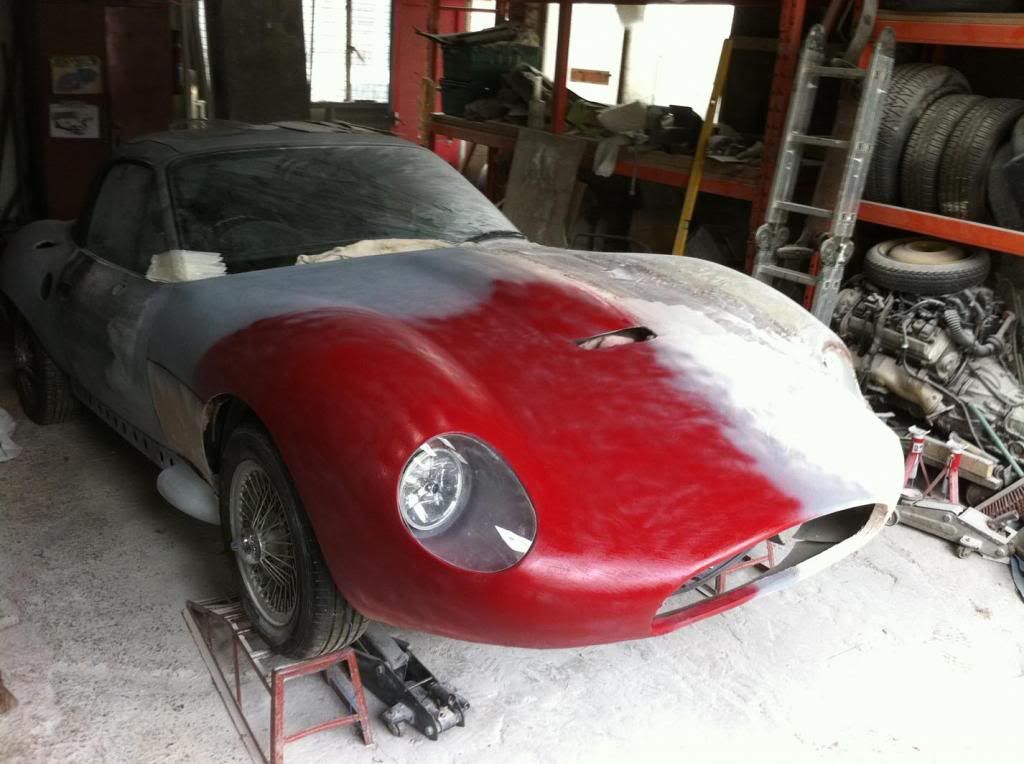
Don't worry, for two years I kept referring back to this picture -
While I turned this -
Into this -
Keep plugging away and you'll be on the road before you know it.  |
7th November 2013, 20:18
|
 |
Senior Member
|
|
Join Date: Oct 2010
Posts: 1,622
|
|
Quote:
Originally Posted by Scottie22

[IMG] [/IMG] |
It's not been that long Scottie! Most kit car builders would be over the moon with your progress  |
7th November 2013, 21:00
|
|
Senior Member
|
|
Join Date: May 2013
Posts: 2,161
|
|
Thanks for the encouragement fellas! I think I need it, as I feel I'm dragging my heels at times!
|
8th November 2013, 16:49
|
 |
Senior Member
|
|
Join Date: Feb 2012
Location: Wembley, London
Posts: 5,056
|
|
Quote:
Originally Posted by Scottie22
... I feel I'm dragging my heels at times! ...
|
< Cough! >
< Splutter! >
What???
You are making great progress Scottie, and with a nice record of your build to match. 
Remember you are not even building a standard kit, you are modifying one to recreate a classic Jag.
Keep up the good work, Paul. |
8th November 2013, 17:03
|
|
Senior Member
|
|
Join Date: May 2013
Posts: 2,161
|
|
You are too kind Paul! I KNOW when I've been shirking!
The guilt gets to me!!
|
9th November 2013, 17:09
|
|
Senior Member
|
|
Join Date: May 2013
Posts: 2,161
|
|
Spinner problems
Earlier, when I engineered the spinners to fit, I realised I had a problem with being unable to get a wheel brace past the spinner arms.
I needed to make a specially shaped one.
My first attempt was a failure, and it bent in half.
I did some research, and found that Spit wheel nuts should be torqued to 48 foot pounds.
I made a beefier spanner and gave it a good test, and it worked.
I then hit other problems which I have tried to show in the following pics.
[IMG] 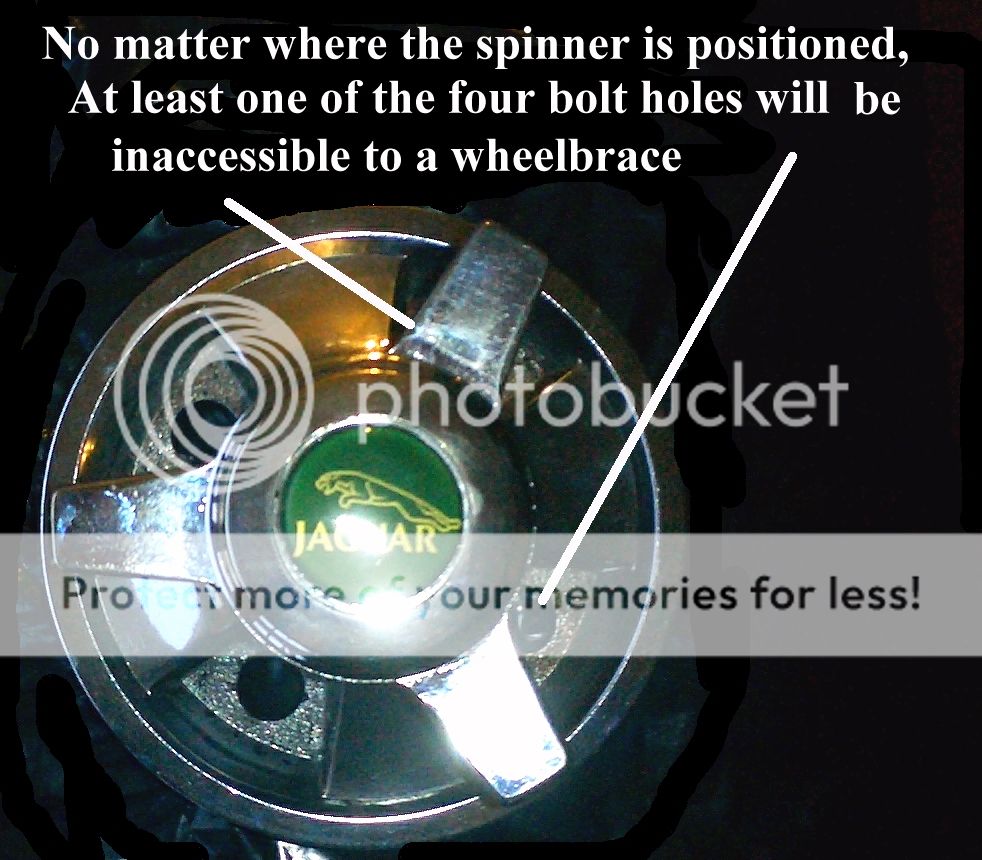 [/IMG]
[IMG] 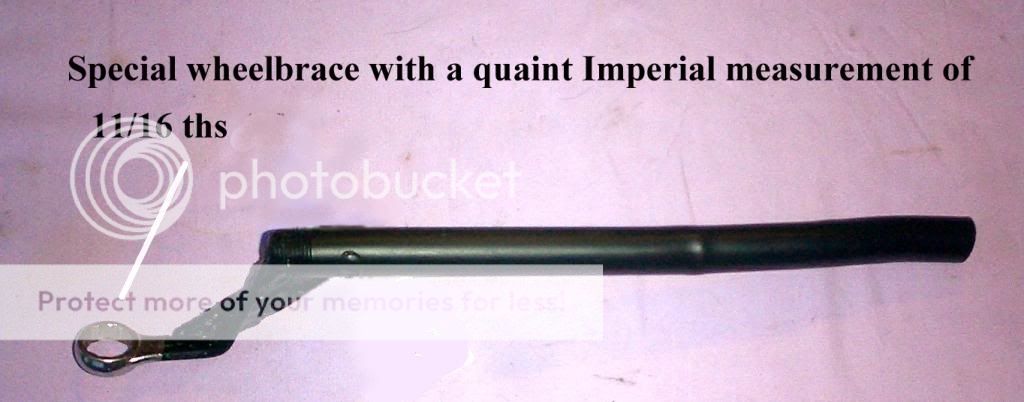 [/IMG]
[IMG]  [/IMG]
[IMG] 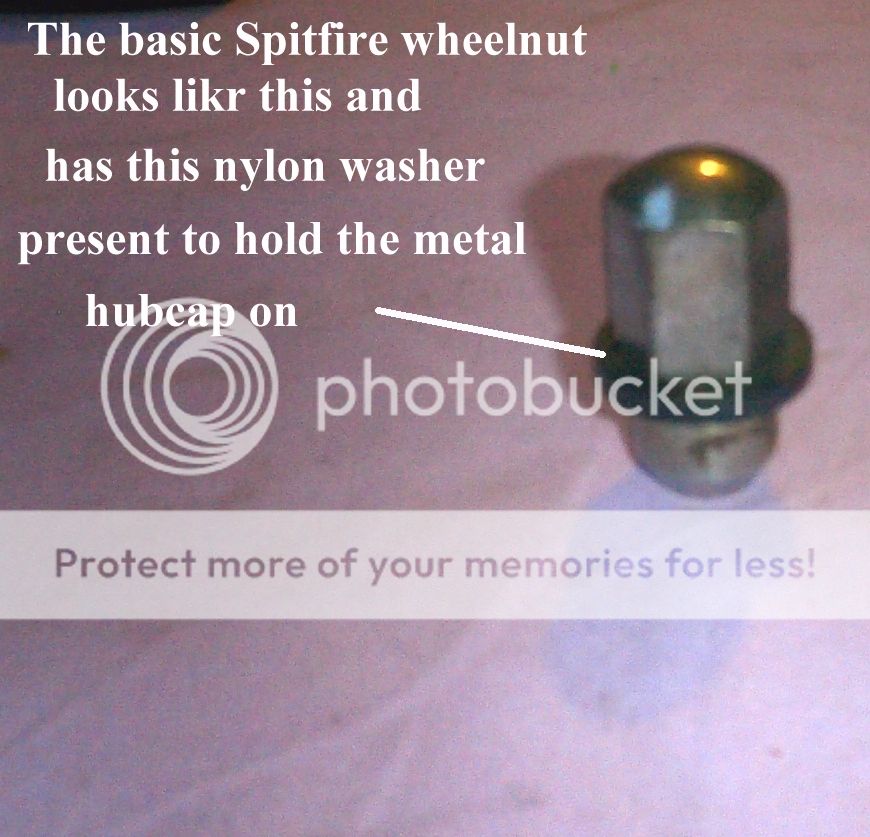 [/IMG]
[IMG] 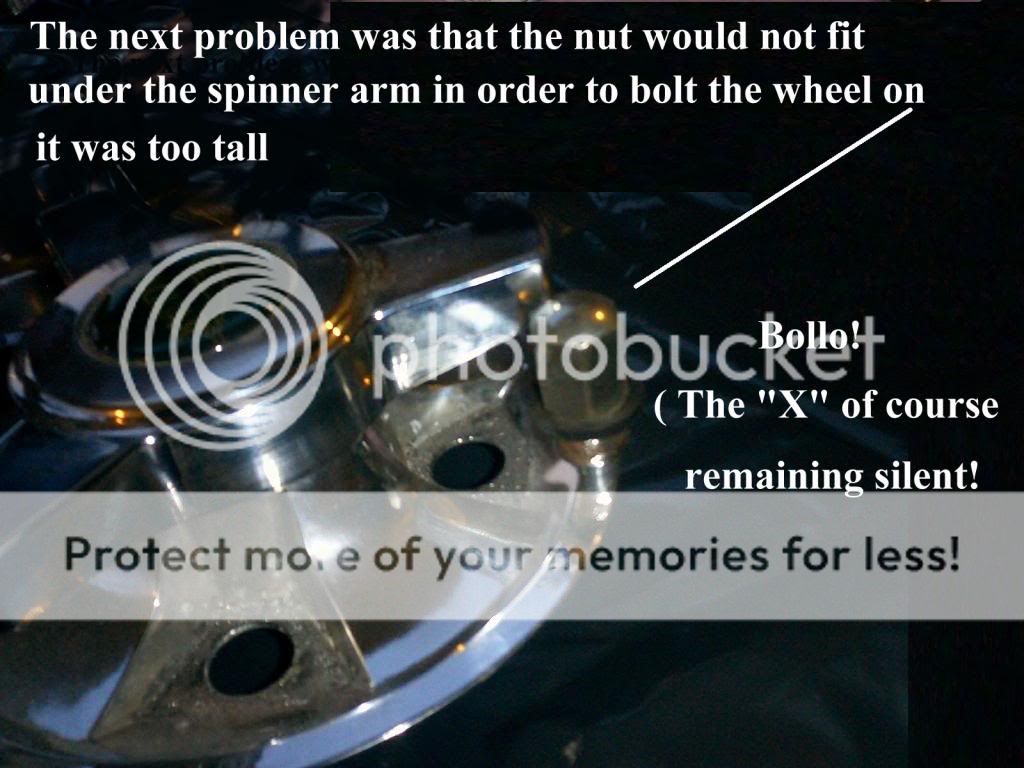 [/IMG]
[IMG] 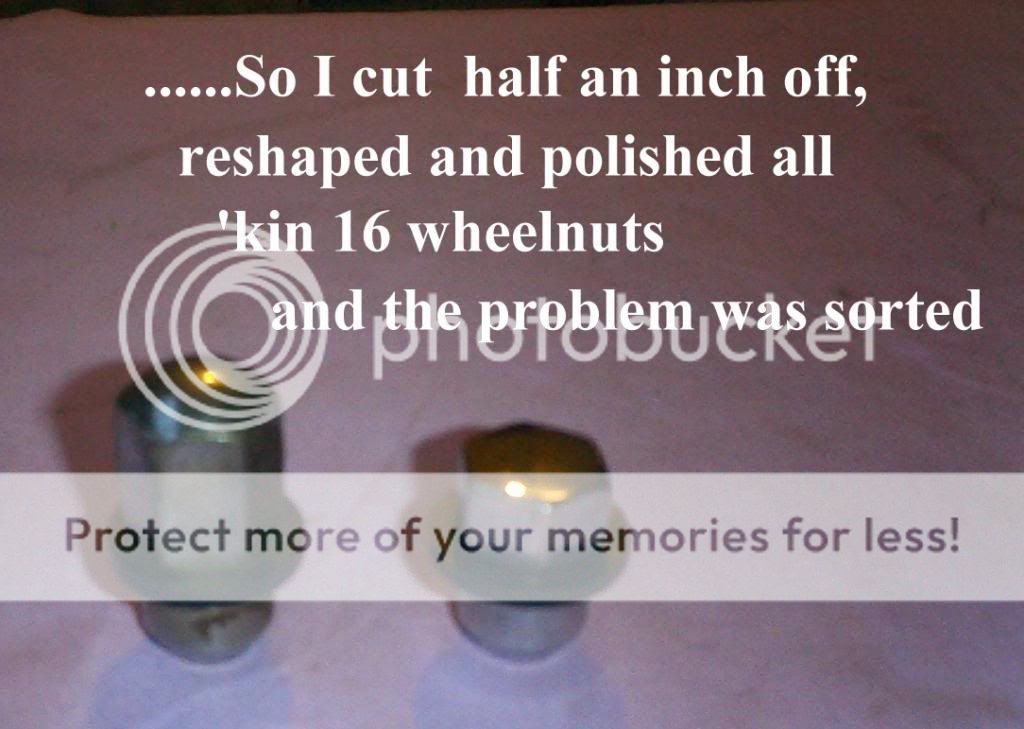 [/IMG]
[IMG]  [/IMG]
[IMG] 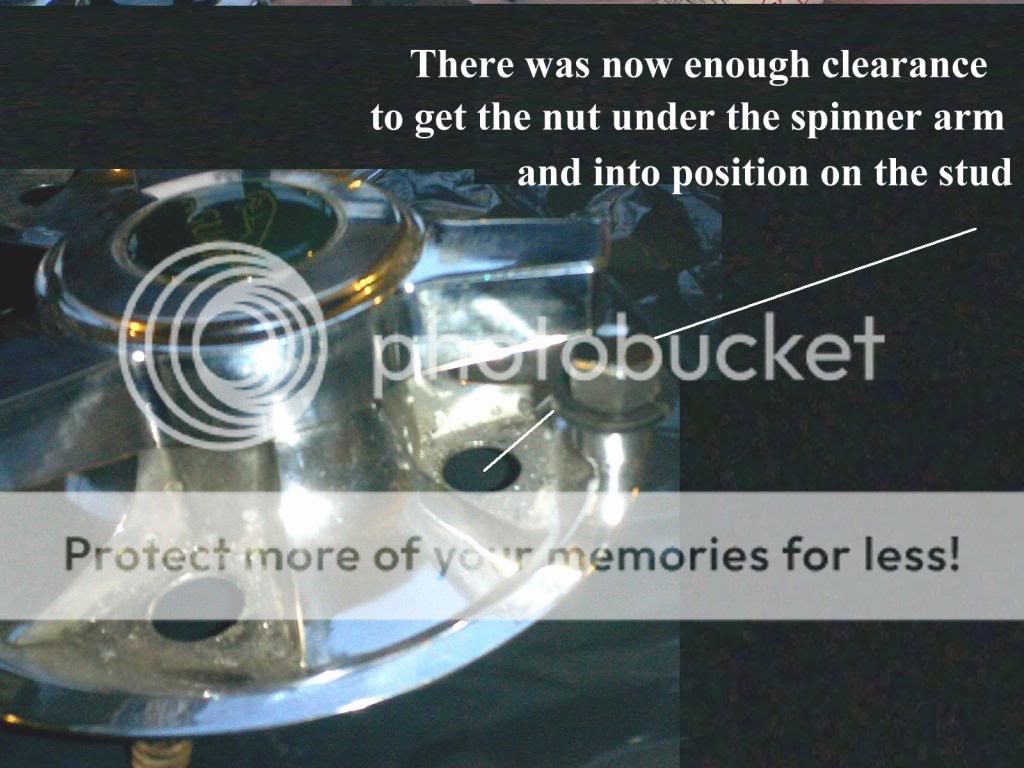 [/IMG]
[IMG]  [/IMG] |
11th November 2013, 21:06
|
|
Senior Member
|
|
Join Date: May 2013
Posts: 2,161
|
|
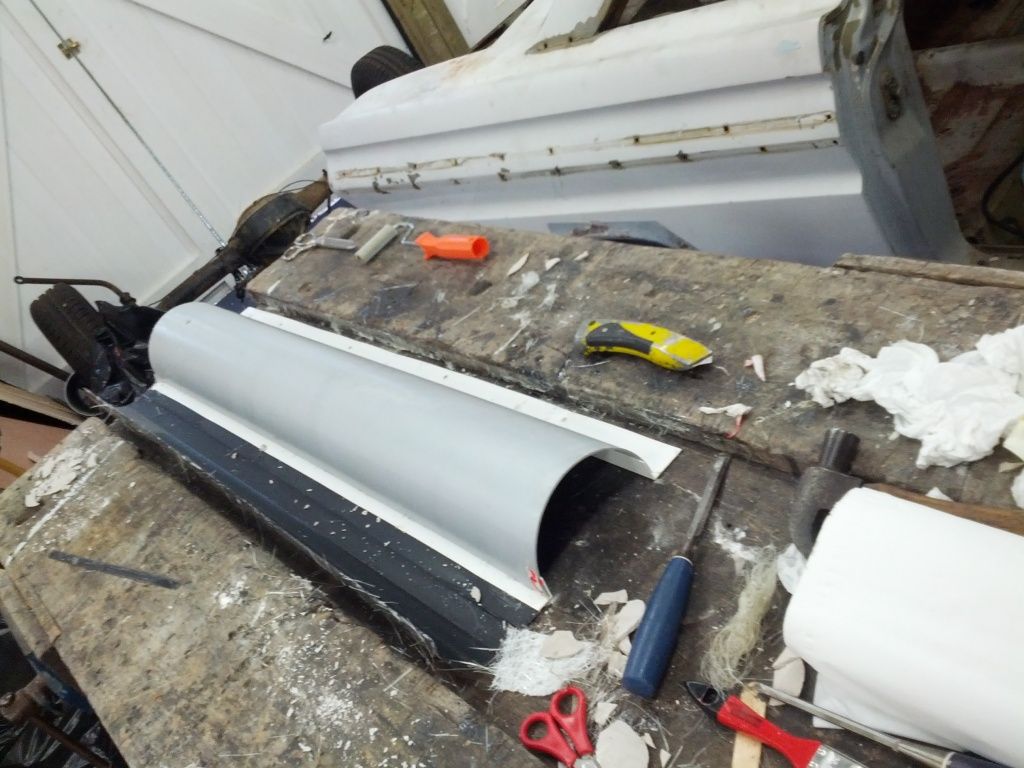
Exhaust dome
The bonding goo STILL has not arrived, but I have lots to do before I finally use that anyway.
I need to make a dome type thing to go over the front part of the side exhaust. Also to fabricate brackets to hold it all in place
This really has to be done before the bonding bit.
I always knew that making this dome thing was going to be difficult
But F.H. it taxed my patience I can tell you, and it’s not finished yet!
[IMG] 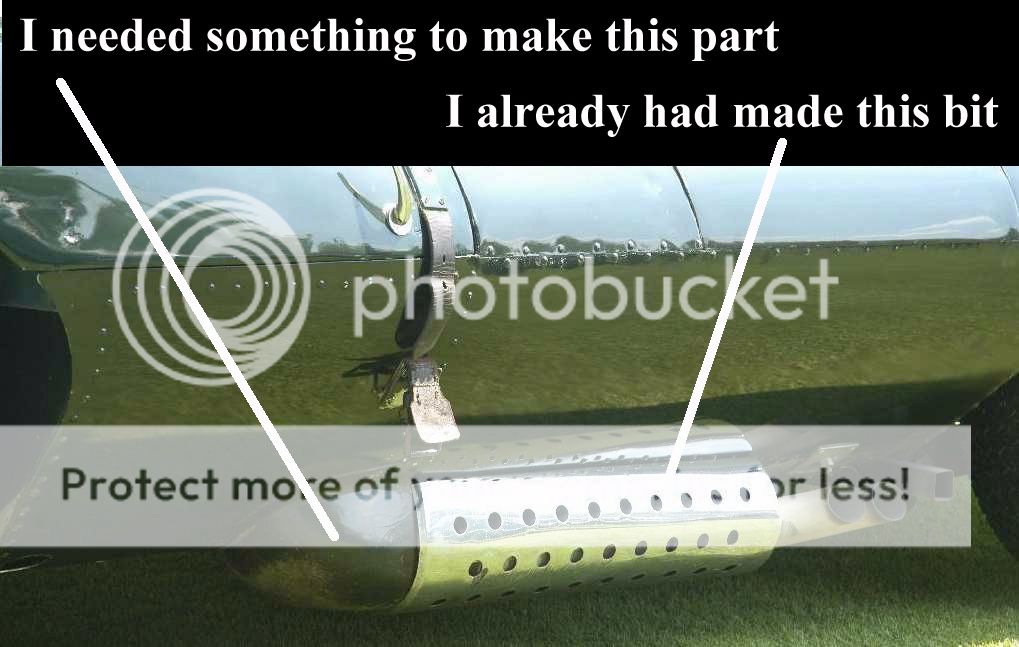 [/IMG]
[IMG]  [/IMG]
[IMG] 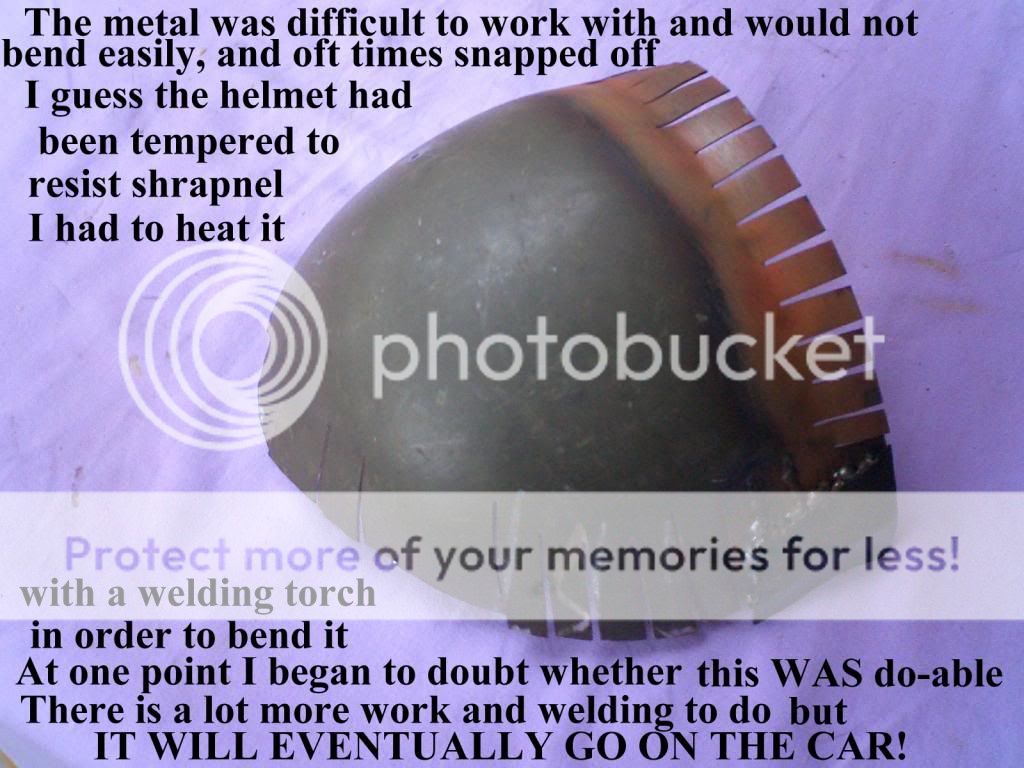 [/IMG]
[IMG][IMG] 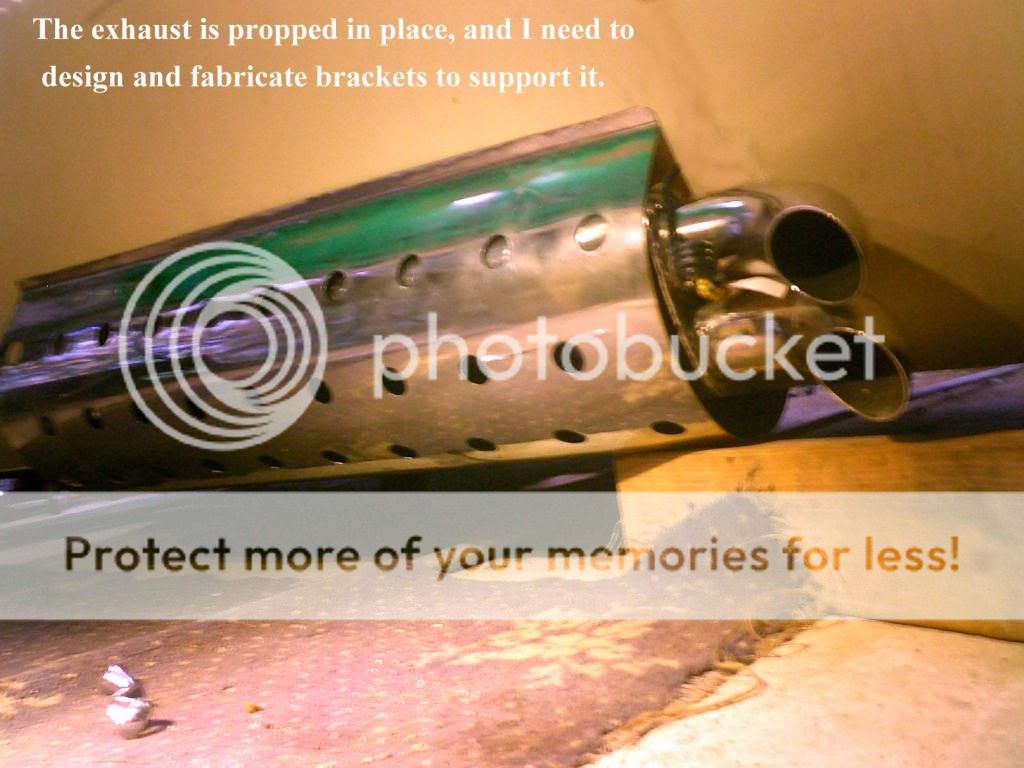 [/IMG][/IMG] |
11th November 2013, 21:08
|
|
Senior Member
|
|
Join Date: May 2013
Posts: 2,161
|
|
[IMG] 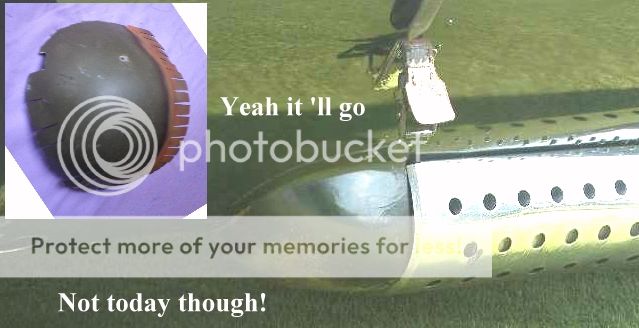 [/IMG] |
11th November 2013, 21:27
|
|
Senior Member
|
|
Join Date: Feb 2012
Location: Wembley, London
Posts: 5,056
|
|
Scottie - Love the idea of using a soldier's helmet, very outside of the box.
But I have to ask, does the dome need to be made of metal?
Would fibreglass with some heat reflective material on the inside work?
Not sure if you have read SeaNick's build thread?
http://www.madabout-kitcars.com/foru...ead.php?t=3924
But he would probably be doing something based on a drinks bottle for that shape.
Obviously not great timing with the suggestion given how much work you've already put in. 
Good luck, Paul.
Last edited by Paul L; 12th November 2013 at 06:17..
Reason: Typo
|
11th November 2013, 21:53
|
|
Senior Member
|
|
Join Date: May 2013
Posts: 2,161
|
|
I think you are right Paul, some of the D type replicas have fibre glass
domes. I think it was the challenge that made me pick the hat!
I wanted steel, but the amount of welding I will need to do, it will most likely look crap, and I'll end up filling it anyway!!
I intend to heavily wrap all the exhaust in the right stuff to prevent the
heat from affecting the fibre glass body, so I most likely could have made it from something else.
The work I still have left to do is daunting enough to make me consider
something else anyway! I will have a think about it.
|
12th November 2013, 06:26
|
|
Senior Member
|
|
Join Date: Feb 2012
Location: Wembley, London
Posts: 5,056
|
|
I knew this exhaust mod reminded me of something else I had seen.
These photos are taken from Charman.tech's G46 build thread.
Full details here:
http://www.madabout-kitcars.com/foru...ead.php?t=3211 |
12th November 2013, 08:15
|
|
Senior Member
|
|
Join Date: Nov 2011
Posts: 3,558
|
|
I am planning to have the same problem in mine

Photos of the end result on Saturday but this was the start of the first idea
Last edited by WorldClassAccident; 12th November 2013 at 08:17..
|
12th November 2013, 08:53
|
|
Senior Member
|
|
Join Date: May 2013
Posts: 2,161
|
|
Exhaust
Thanks for the input Paul and WCA, it is interesting.
At least I have no worries about using filler or fibre glass to finish off what I started.
I still find it hard to believe that the red hot exhaust does not damage the fibre glass which is so close to it.
|
12th November 2013, 16:01
|
 |
Senior Member
|
|
Join Date: Nov 2011
Location: Emsworth
Posts: 810
|
|
With your spinner/spanner conundrum, could you maker the spinners, er, spin?
|
12th November 2013, 20:27
|
|
Senior Member
|
|
Join Date: May 2013
Posts: 2,161
|
|
Seanick, when the car is finished and has the wheels attached, and when it is driven, I fully expect the spinners to spin!
In fact, I'd be mortified if they didn't.
|
13th November 2013, 21:45
|
|
Senior Member
|
|
Join Date: May 2013
Posts: 2,161
|
|
Screen
In working on the exhaust, I somehow managed to sprain my wrist,
and am out of action for a few days. So I should post some earlier
pictures to alleviate boredom!
.
When I got my body shell from Chris, there was no windscreen or real plans for one. Most people that have built a 352 have gone for the D type Perspex wrap screen look.
I wanted the XKSS proper screen look. For 2 or three grand I could buy a replica Screen and frame, but even if I had the cash, it would be far too wide. The D type shell was cut down to fit the Spit body, but this meant that almost all Car windscreens were too wide.
Chris suggested the Morris Minor screen, but even that was too wide.
In the end I cut a Morris Minor REAR screen out of a car complete with the original steel screen frame. I hacked it about a bit, and did some welding, until I reached the stage when I realised that I could not go any further until the body was on the chassis tub, and I could actually sit inside the car and work out screen rake, head room, bum position etc.
I have had a few soft top cars, and being a six footer, my head always was up above the windscreen, this as some of you will know, is not ideal, and I was determined that this time it was within my power to prevent this problem arising.
[IMG] 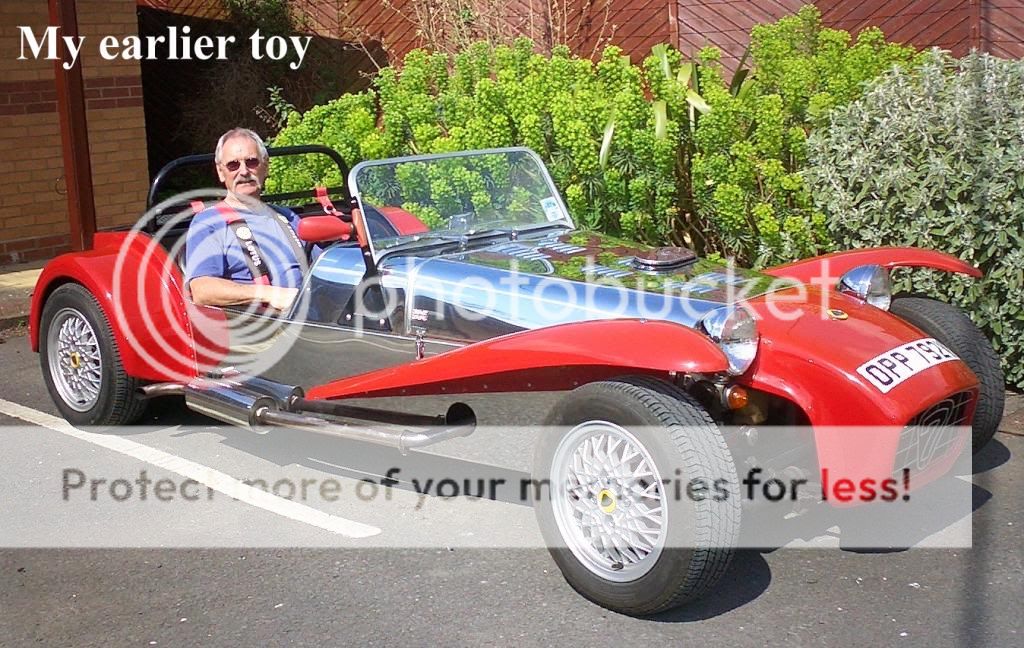

|
|
Currently Active Users Viewing This Thread: 2 (0 members and 2 guests)
|
|
|
 Posting Rules
|
You may not post new threads
You may not post replies
You may not post attachments
You may not edit your posts
HTML code is Off
|
|
|
All times are GMT +0. The time now is 22:16.
|


 Linear Mode

