|
|
| Sammio Builds and discussions Sammio bodied car builds and specials |

6th September 2014, 19:33
|
 |
Senior Member
|
|
Join Date: Dec 2013
Posts: 839
|
|
Sorry to hear about your pet dog, they do become one of the family and are a great miss but as scottie says time is the healer as we as myself and the family know.
|
21st September 2014, 11:42
|
 |
Senior Member
Enthusiast
|
|
Join Date: Dec 2006
Posts: 1,130
|
|
Know how you feel mate, lost my collie dog "Ben" after 16 years .
|
24th September 2014, 17:36
|
|
Senior Member
|
|
Join Date: Apr 2012
Posts: 1,163
|
|
Right,
Been AWOl for a while as I came down with Flu and being as I'm immunologically compromised it gave me a right kicking! Ebola paa!
So the news in no particular order.
The Alfa 156 developed a worrying bottom end rattle and much as I love it to drive there is no way I'm going to spend £1800 on an Autolusso Engine Rebuild on a 05 plate Alfa worth pennies so had a hunt around and am now driving a new mid life crisis car, A Fiest St150 in Colarado Red, an unloved example but basically all there and straight and got it for £2k less than book initial impressions are favourable it goes like a scalded rat!
Ill be splitting this post up to avoid losing it all when I press the wrong button so scroll down for the part II
|
24th September 2014, 17:40
|
|
Senior Member
|
|
Join Date: Apr 2012
Posts: 1,163
|
|
Seats.
Sean finally got round to pulling a mould of my buck.
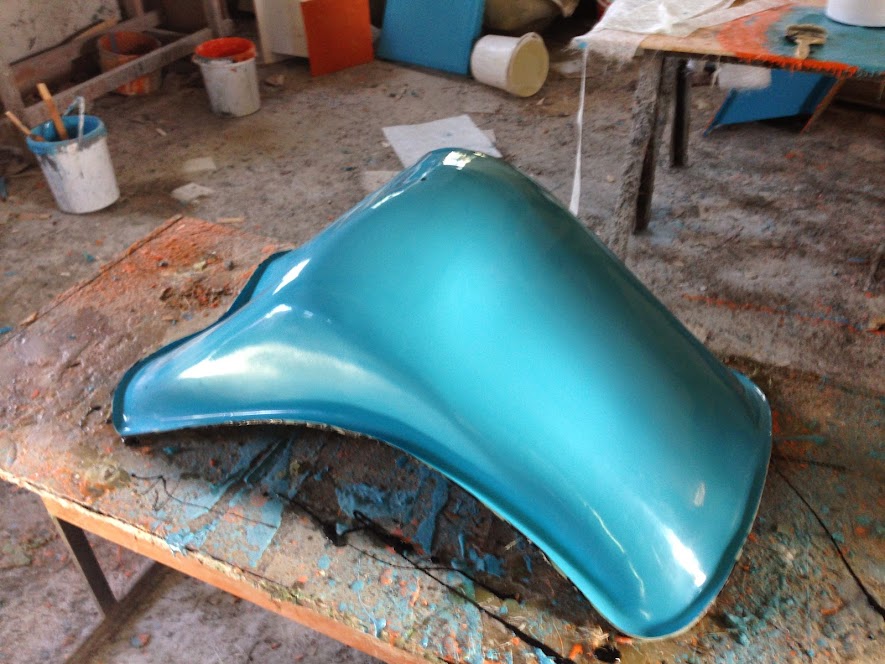
The first seat has been pulled and am very happy with the finish.

The first pair are earmarked for Swifty and he should have them by the middle of next week as I will be laying up the second one on Friday. |
24th September 2014, 17:46
|
|
Senior Member
|
|
Join Date: Apr 2012
Posts: 1,163
|
|
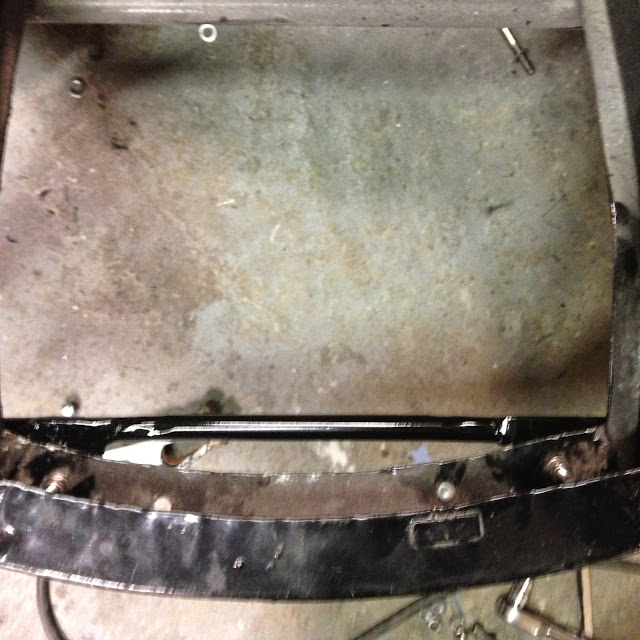
And the part you have all been waiting for.
Finally got back onto the bonnet tilt mechanism today and got the hinged part done.


by using 2 spherical joints I have about 2" of adjustment for and aft and about another 2" of adjustment left and right by removing washers from one side and adding to the other.
In the picture below you can see it tucks all the way back under the front chassis rail if required
And all the way up in the other direction

hopefully I will get some shop time tomorrow and will now make a start joining the hinge to the oval steel hoop in the nose.
TTFN
Mac |
24th September 2014, 20:27
|
|
Senior Member
|
|
Join Date: Dec 2013
Posts: 839
|
|
Cheers Mac looking forward to seeing the seats.
The bonnet hinge bracket is coming along great, will be interesting to see it attached to the bonnet and how much clearance there is.
|
25th September 2014, 05:56
|
 |
Senior Member
|
|
Join Date: Feb 2012
Location: Wembley, London
Posts: 5,056
|
|
Mac - Sorry to hear you were ill, but glad to see you back.
Despite seeing the hinge work, I still can't work out how the lower section of the bonnet will clear the chassis. 
So obviously I can't wait to see how this all works in practise.
( As I need to make some final bonnet design decisions in order to finish the body shell. )
Good luck, Paul. 
|
3rd October 2014, 13:58
|
|
Senior Member
|
|
Join Date: Apr 2012
Posts: 1,163
|
|

Time in the workshop has been limited by health and work but am back in today and should be up for the day tomorrow as well so the aim is to have the bonnet fitted and tilting by COP tomorrow.
I have already identified an issue with using 2 spherical joints that to be honest I should have realised straight off. as they both have a wide range of movement the whole hinging action is very sloppy. Easily fixed though by replacing one of them each side with a solid version.
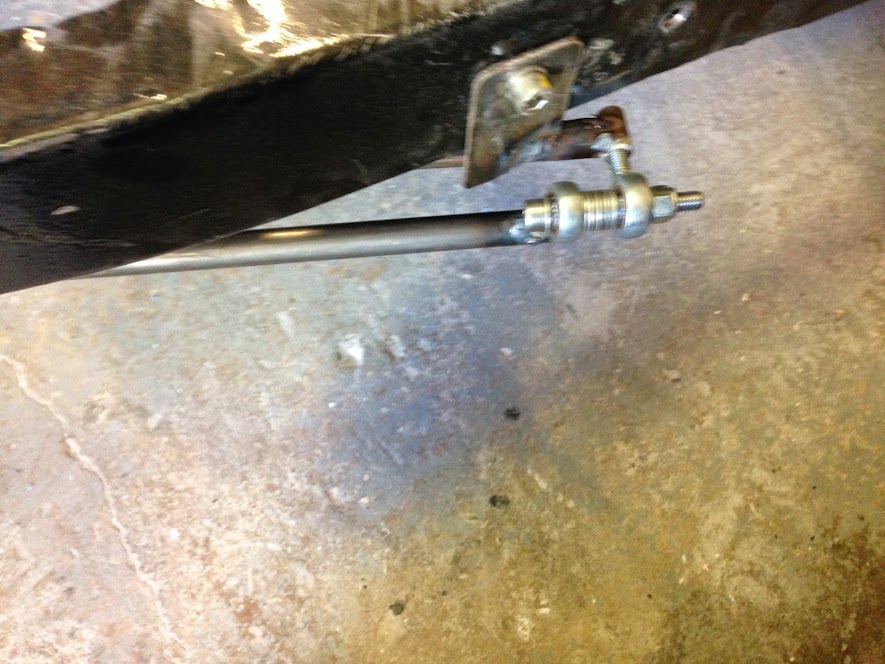
Some ali bar stock from a mates scrap bin and ten minutes of next doors lathe gave me the starting point.
Drill an 8mm hole through the middle and another 5mm hole from the side. Cut up a very long stainless M8 X 1.25 bolt and voila we have a kit of parts


And yes I realize that one of the centre holes is a little off, luckily due to the large range of adjustment this shouldn't matter at all. At this stage I realised I didn't have an M8 X 1.25 Tap only an M8 X 1.0 so have just ordered a set complete with a couple of 6.8mm drills which I will collect on the way in in the morning so a quick re drilling of the 5mm out to 6.8mm and a run through of the taps should see me able to thread the studs I cut up in with some thread lock which will give me the solid mounting point I need on the bumper side. Fingers crossed it all goes to plan!
TTFN
Mac

|
4th October 2014, 07:40
|
|
Senior Member
|
|
Join Date: May 2013
Posts: 2,161
|
|
Good to see you back in action Mac!
|
4th October 2014, 11:21
|
|
Senior Member
|
|
Join Date: Apr 2012
Posts: 1,163
|
|
Cheers Scottie.
So picked up my tap set and drills so now have these:

All fitted up and now moving as originally envisaged.


Now to join the bonnet to the hinge......
TTFN
Mac |
4th October 2014, 12:21
|
|
Senior Member
|
|
Join Date: Feb 2012
Location: Wembley, London
Posts: 5,056
|
|
Quote:
Originally Posted by Viatron

...Now to join the bonnet to the hinge...
|
Good luck Mac, I'm really looking forward to see how all of this works together.
Cheers, Paul. |
4th October 2014, 13:16
|
|
Senior Member
|
|
Join Date: Apr 2012
Posts: 1,163
|
|
Wait no longer! Its tilting!

Doesn't go quite as far as I had hoped as the ends of the front chassis cross member limit the travel, not totally unexpected and easily solved once I have all the paperwork completed and sent off on Monday..... :-)


Plenty of room under the front so that once the front chassis cross member is errrr trimmed I think I can probably get it to go almost vertical :-)

One issue is that the static Ali hinge I made this morning is proving to be an issue as I cant get the thread bar to stay firm with unwinding, locktiite, superglue, staking them with a centre punch all failed. Will have to grab some similar material on Monday in steel which will allow me to remake them but will allow me to put a tack or 2 to fix the thread bar in place permanently or I may break out the silver solder. All in all though Im happy. Just going to beef it up a bit now then I can glass in the front hoop, possible more pics in a bit
TTFN
Mac
Last edited by Viatron; 4th October 2014 at 13:19..
|
4th October 2014, 15:45
|
|
Senior Member
|
|
Join Date: Apr 2012
Posts: 1,163
|
|
Beefed up the frame and mounting points a fair bit


Some may not like the idea of the tubes of the frame being visible in the grill area but it doesn't bother me.
Made a start glassing the frame into the bonnet permanently

So all in all mission accomplished!
Well that went better than I feared it would :-)
TTFN
Mac |
4th October 2014, 16:40
|
|
Senior Member
|
|
Join Date: Feb 2012
Location: Wembley, London
Posts: 5,056
|
|
Mac - Great work and thanks again for the step by step guide. 
Quote:
Originally Posted by Viatron
... Doesn't go quite as far as I had hoped as the ends of the front chassis cross member limit the travel, not totally unexpected and easily solved once I have all the paperwork completed and sent off on Monday...
|
Good luck with your DVLA application, as part of my motivation for sorting out my own V5C at this stage seems to be very similar to yours. 
Cheers, Paul.
|
9th October 2014, 18:55
|
|
Senior Member
|
|
Join Date: Apr 2012
Posts: 1,163
|
|
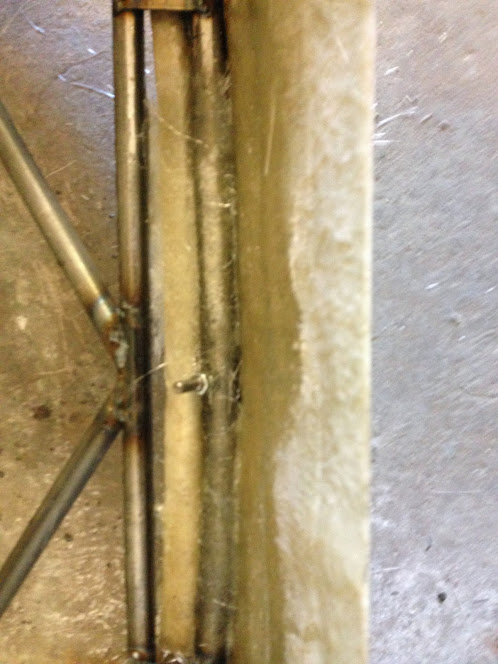
Nearly finished glassing in the rest of the frame tonight:


one more session will see it done, hopefully tomorrow on the way back from work. then it just need a quick trim. its already very strong and I can pick the whole bonnet up just using the frame so am happy its strong enough
Also have finished and painted the hinge frame, note it has an extra bracket at each end which I decided to add to ensure that it could not flex in any direction at all!

TTFN
Mac |
9th October 2014, 20:52
|
|
Senior Member
|
|
Join Date: Apr 2012
Posts: 1,163
|
|
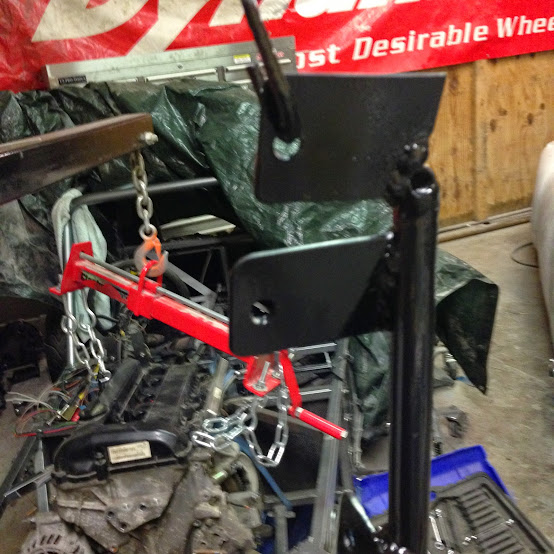
And a couple of shots with the finished support frame installed


TTFN
Mac |
9th October 2014, 21:32
|
|
Senior Member
|
|
Join Date: May 2013
Posts: 2,161
|
|
It looks like its meant to be there ! Good job.
|
16th October 2014, 20:12
|
|
Senior Member
|
|
Join Date: Dec 2013
Posts: 839
|
|
Mac i am trying to figure out the position of the steering column which i would like to be central to the seating position with the steering wheel parallel to the to the driver/dash board and not angled as is the original spitfire. I can see you have one UJ which looks to be outside of the body but i can't get the wheel central to the seat with one UJ.
Is your steering wheel angled in relation to the driver/dashboard?
|
16th October 2014, 20:32
|
|
Senior Member
|
|
Join Date: Mar 2012
Posts: 1,152
|
|
Swifty, I did what you are planning by butchering a couple of Herald columns and adding a few bits from carbuildersolutions plus a pillow bearing which made it easy and quite neat. See -
http://www.madabout-kitcars.com/foru...t=3569&page=20 |
16th October 2014, 20:42
|
|
Senior Member
|
|
Join Date: Dec 2013
Posts: 839
|
|
Oxford the way you have two UJ's is the only way i can see the steering been central on my spitfire build but i think Mac has used one UJ and the wheel looks to be square and central which mystifies me.
|
|
Currently Active Users Viewing This Thread: 1 (0 members and 1 guests)
|
|
|
 Posting Rules
|
You may not post new threads
You may not post replies
You may not post attachments
You may not edit your posts
HTML code is Off
|
|
|
All times are GMT +0. The time now is 14:38.
|


 Linear Mode

