|
|
| Sammio Builds and discussions Sammio bodied car builds and specials |

31st March 2013, 08:36
|
 |
Senior Member
|
|
Join Date: Feb 2012
Location: Wembley, London
Posts: 5,056
|
|
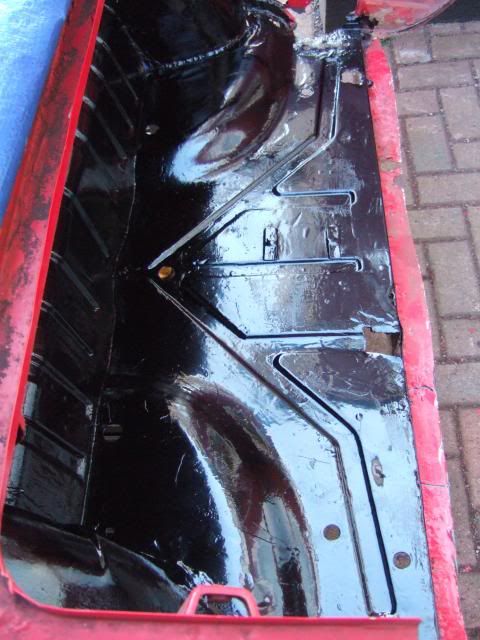
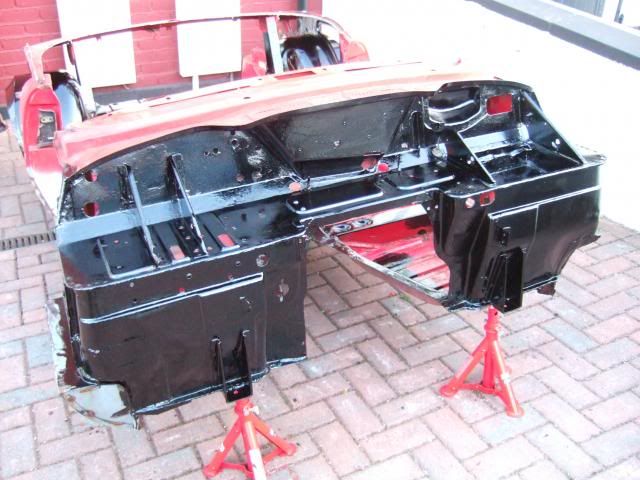
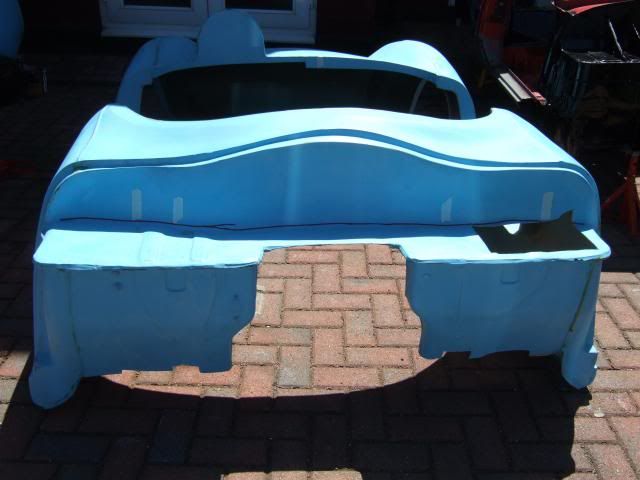
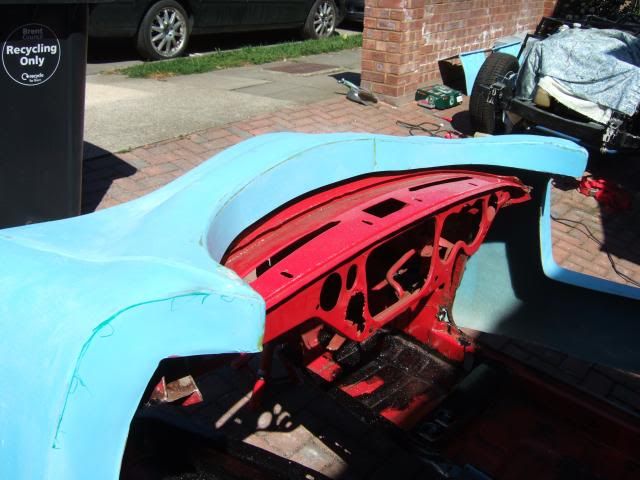
Belated "After" Photos:
Just enough time to peel back the tarpaulin this morning and take a few photos...
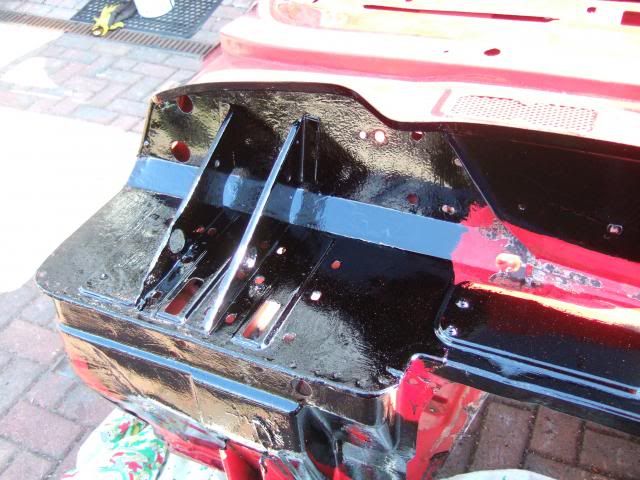
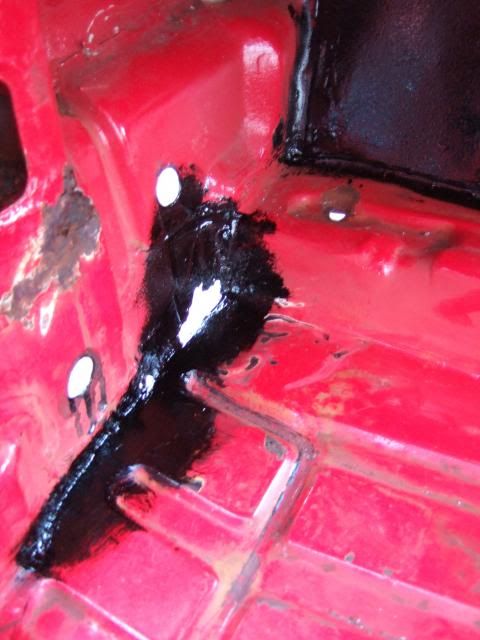
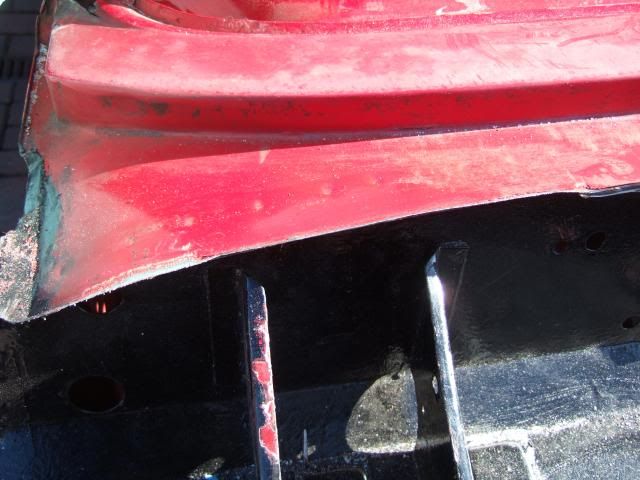
The Boot Area:
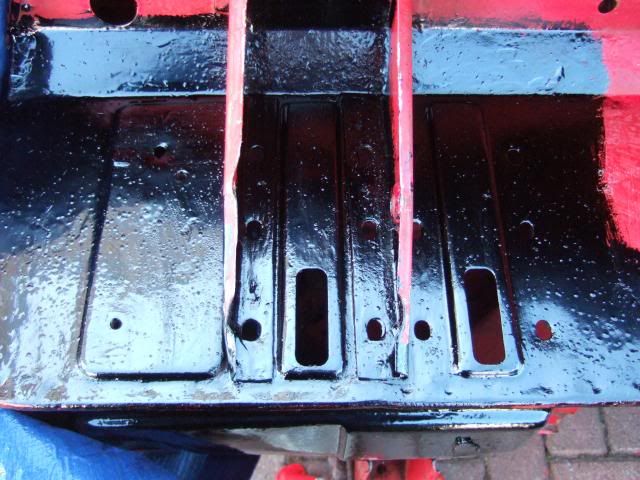
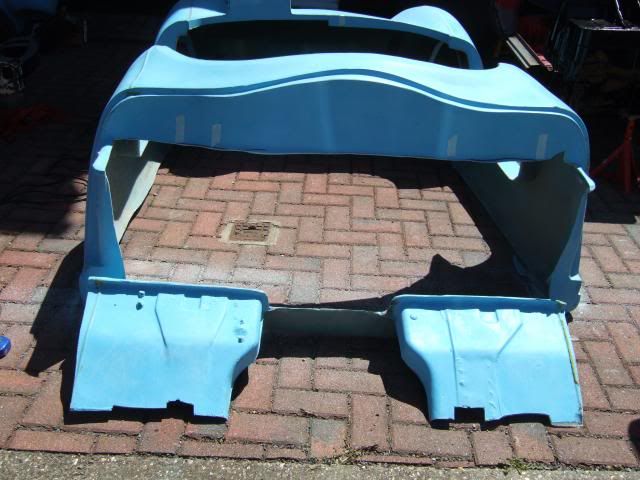
Passenger Side Bulk Head - Outer Corner:
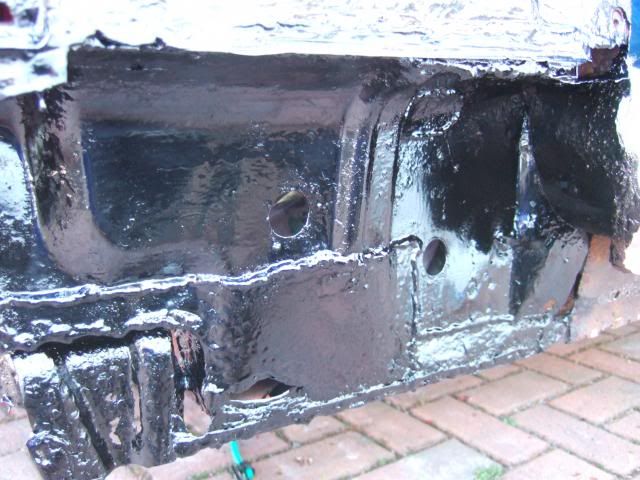
Driver Side Bulk Head - Top Corner:
If you look closely, you will see the impact of the sleet on the paint. 
I just wasn't fast enough covering up the wet paint, so I'll sand that down again.
Top Tip:
Even if you are just popping out to take some photos, wear your gloves.
For the second time in two days I've caught my hand on sharp edges of metal.
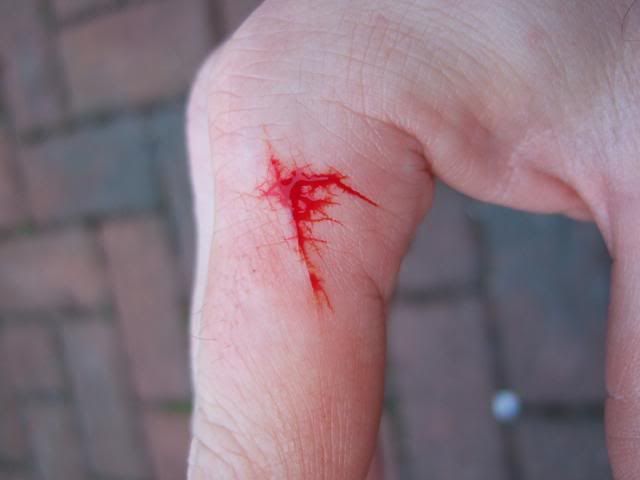
Obviously there have been photos of bigger injuries on here.
But I'm trying to keep blood off the camera. 
Happy Easter, Paul. 
|
31st March 2013, 16:11
|
|
Senior Member
|
|
Join Date: Jun 2011
Location: birchington, kent
Posts: 1,769
|
|
Great colour, i wonder what the beakdown would be?
|
1st April 2013, 17:01
|
|
Senior Member
|
|
Join Date: Feb 2012
Location: Wembley, London
Posts: 5,056
|
|

After a relaxing Easter Sunday with my family, it was back to "work" this morning.
Cordite Internal Framework:
I started the day by checking the current gap between the two sections of frame work.
As I wanted to be sure that my Frankenstein build option was actually possible.
In other words, could I replace the front frame section with the Spitfire bulk head?
My plan would be to cut the bulk head so I kept this chassis mounting point section...
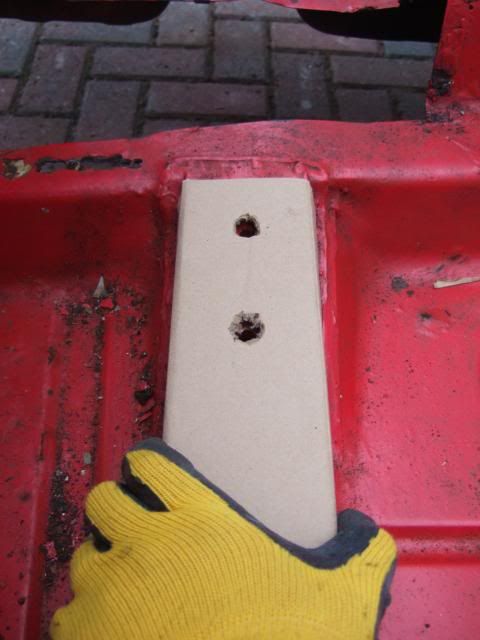
I used this slightly oversized cardboard template to check the gap...
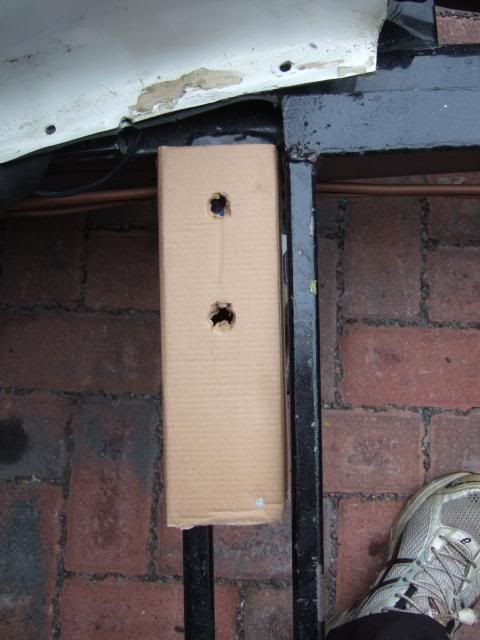
The lowered floor pan rests on the frame rail to the right of the carboard.
Obviously I could trim the edge of the floor to line up with the edge of the bulk head.
Which means that this is definitely possible and that is a HUGE relief.
As this allows the rear section of Cordite framework to be used as originally intended.
However, while I had the Cordite's cover off, I just couldn't resist...
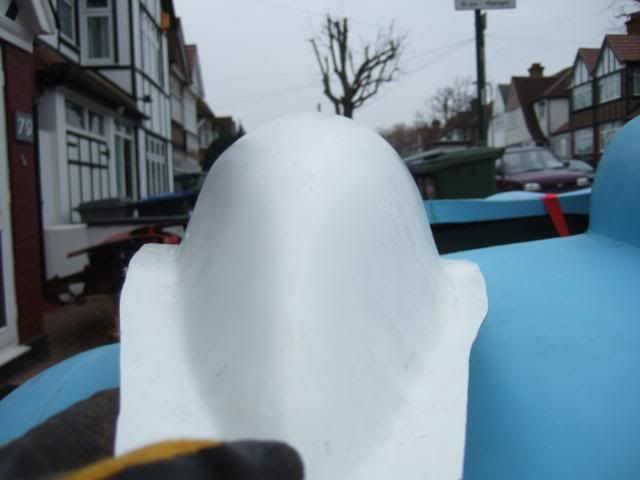
Double Hump:
I taped the Ribble independent hump very roughly into position to see how it looks...
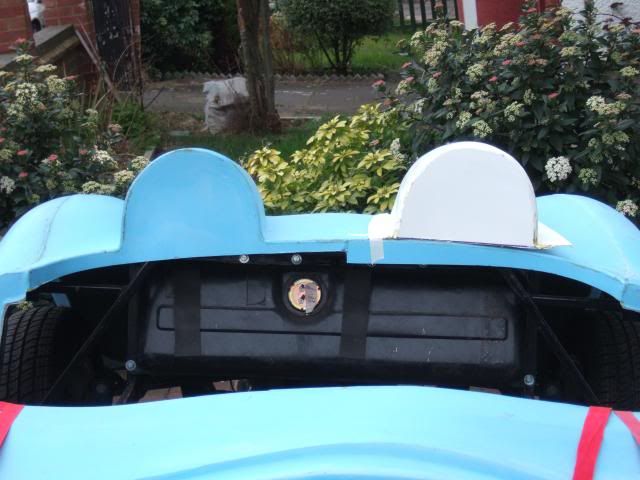
The good news is that two humps do look good. 
The bad news is I've actually been sent a second driver side hump by mistake.
( Don't worry about it Andy, I'll hopefully see you at Stoneleigh & we can swap. )
If you look closely, the hump is deeper on the right than the left.
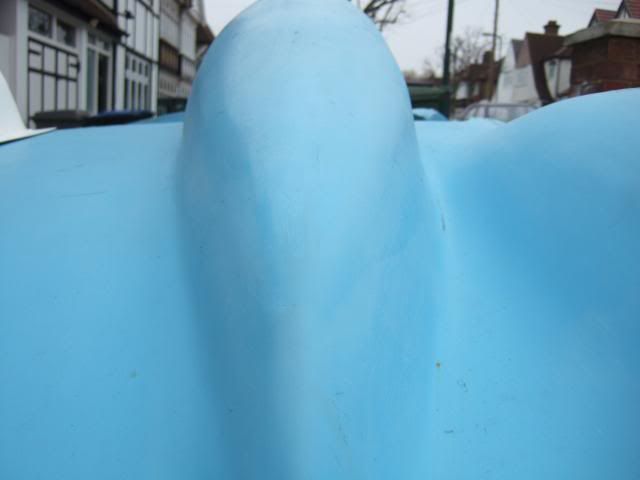
And that is the way the spare hump is set up, when I need the deep side to be on the left.
 Yet More Body Shell Prep.
I continued to work my way around the shell with my screwdriver checking for rust.
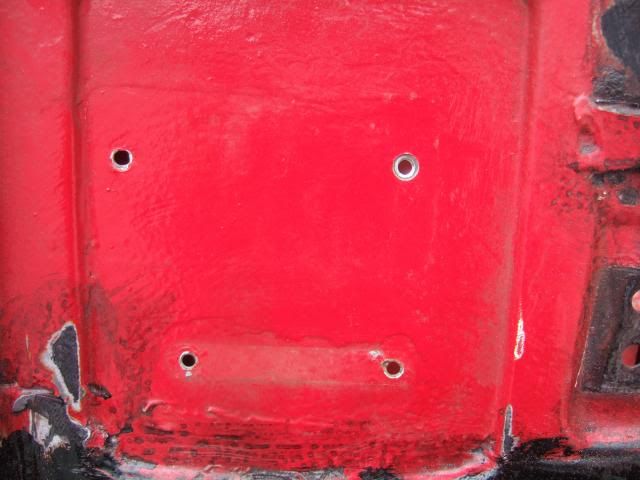
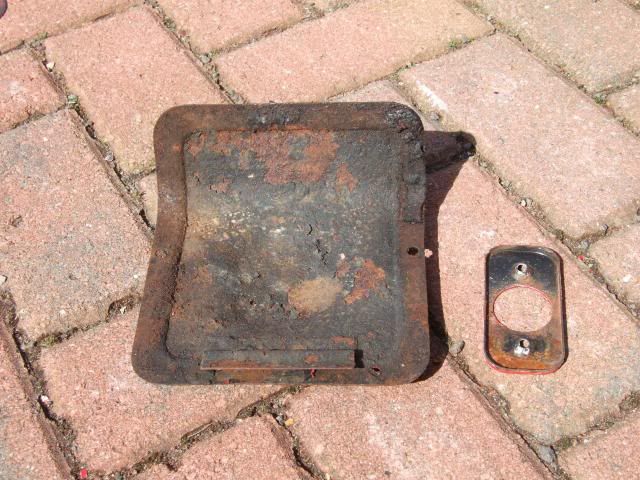
Unfortunately the passenger side "pad" was also hiding some rusty metal...
So I took the whole thing off, which is a real pain.
As it takes both time & effort and usually bits of skin off my knuckles too.

I am leaving the centre pad in position as hopefully water does settle on a slope.
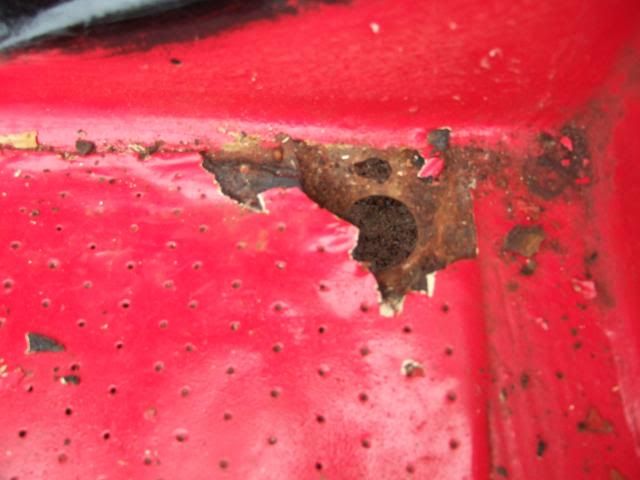
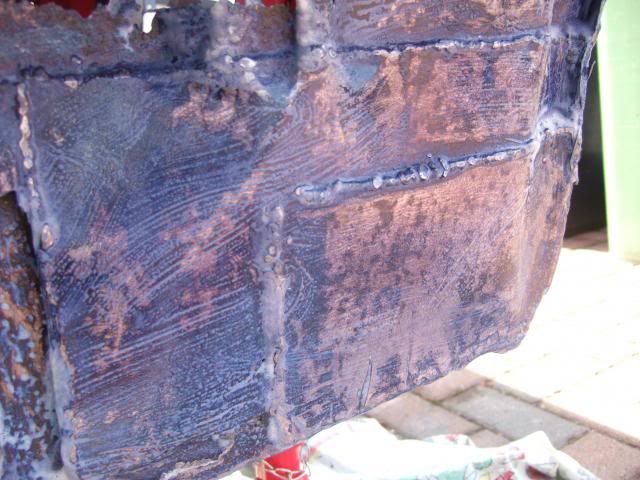
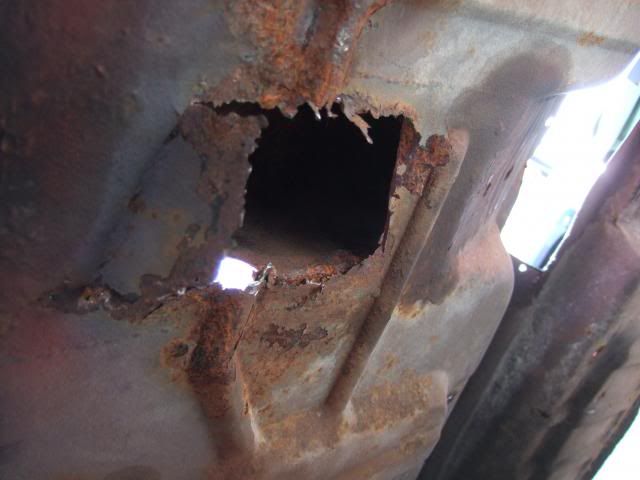
I noticed the battery box has been repaired in a slightly odd way.
It looks fine from above...
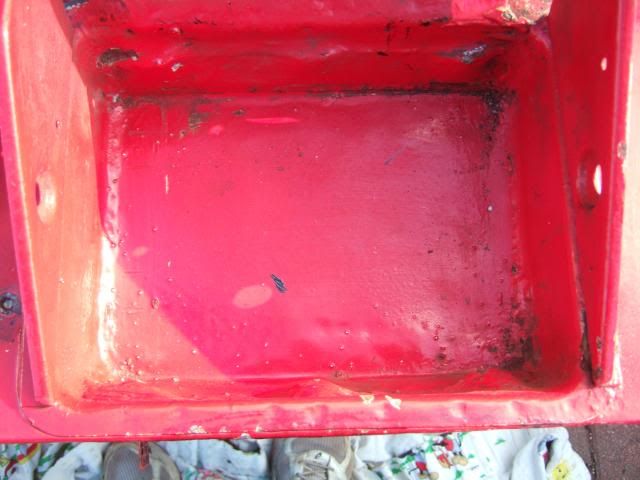
But the rusty section that needed repairing has been left in place below...
Eventually it was after noon, so my power tools could come out to play.
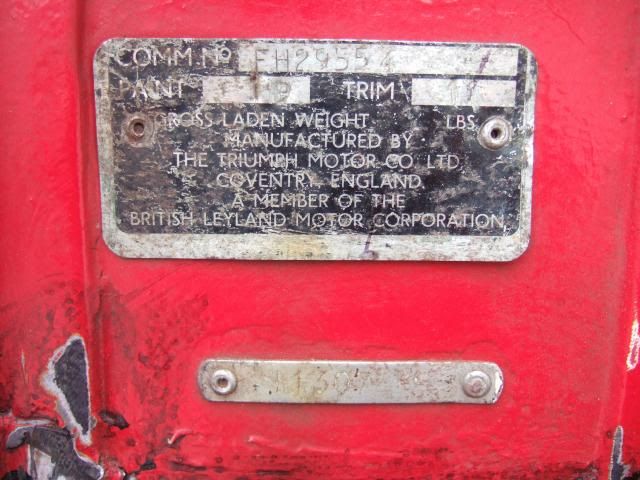
First simple job was drilling out the rivets holding on the VIN plate.
Then I set to work with the grinder to clean the next sections of rust.
I then wiped everything down with white spirits to clean off the grime.
I had a quick break for a late lunch around 2.30pm while that evaporated.
Then it was time to apply more of the rust treatment stuff.
After that I started to paint other sections that didn't need treatment.
And give a second coat to the sections that were painted on Saturday.
Here is a selection of photos from the work done today.
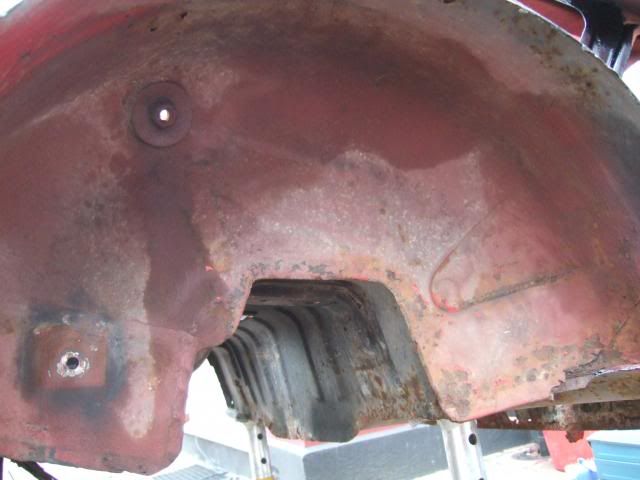
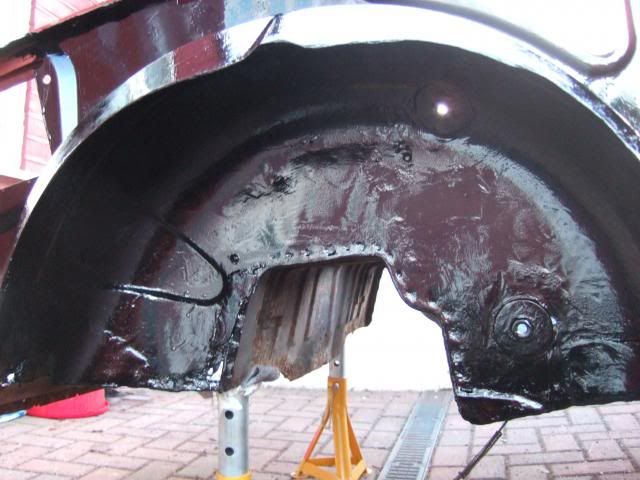
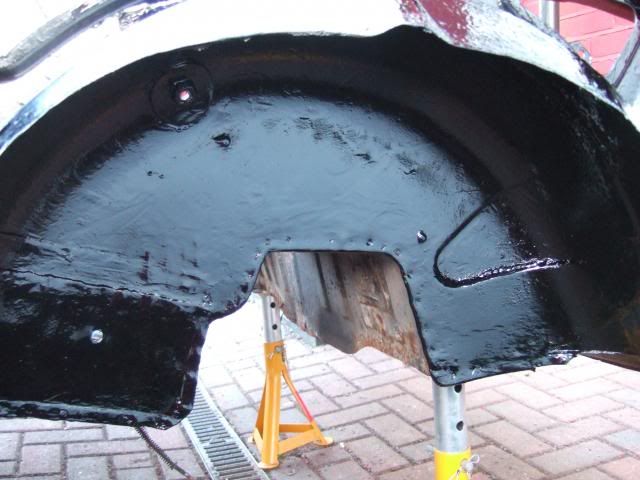
Inner Wheel Arch - Driver's Side
Before cleaning
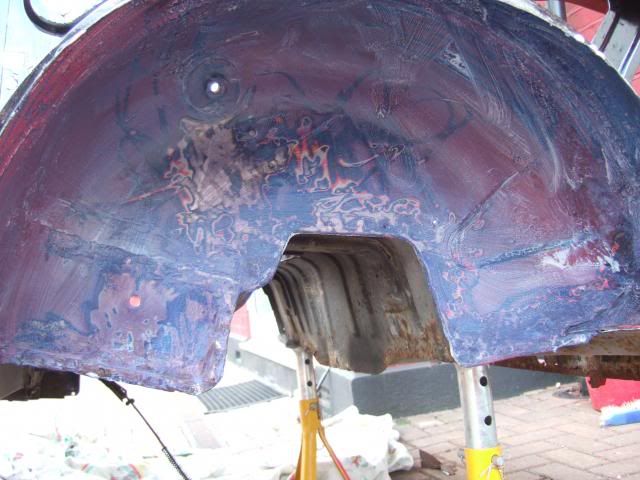
After cleaning & rust treatment
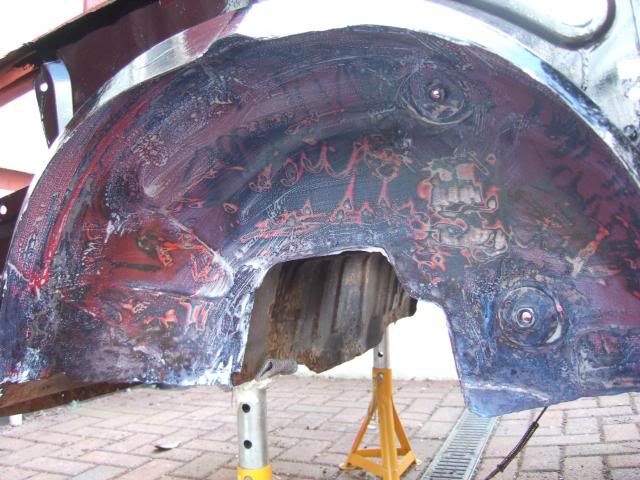
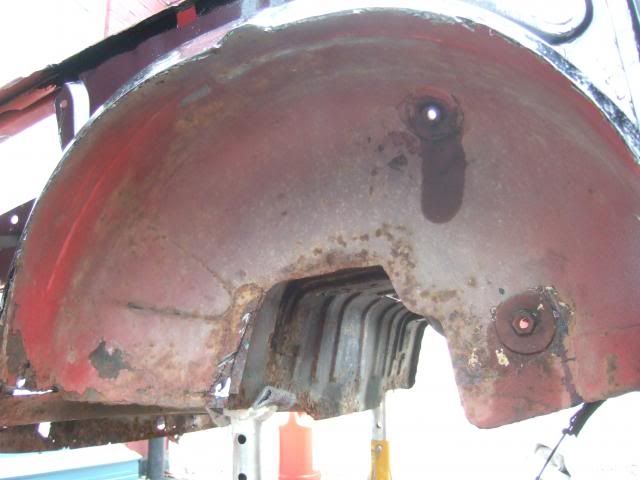
Inner Wheel Arch - Passenger's Side
Before cleaning
After cleaning & rust treatment
Rear Section & Bulk Head (with gaps around the areas treated for rust)
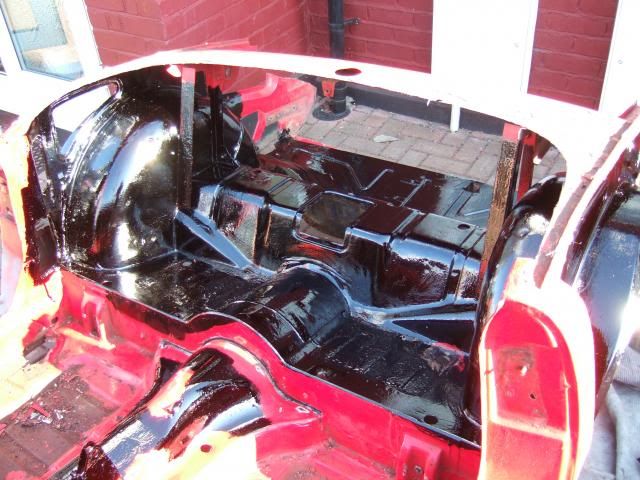
I'll be back outside in a few minutes to paint over the rust treatment.
So the clocks going forward the other night will be a big help.
Overall the weather has been good today, although it has threatened to rain a few times.
The only problems has been the wind blowing rubbish on the fresh paint. 
But what can you do? I'll take that over rain, sleet & snow any day.
I'll try to post some more photos tonight if I get the chance.
Cheers, Paul.
Replies
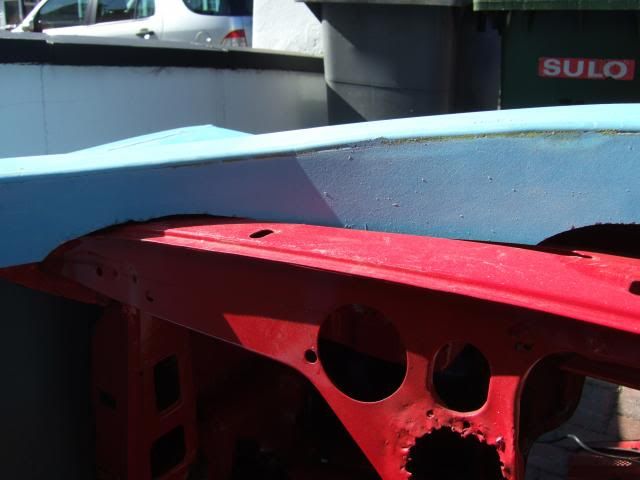
Gary - Not sure I understand the question, but the Spitfire shell will be matt black.
( Apparently, it goes on with a gloss finish, but dries to a matt one. )
The Cordite body shell will be light blue (initially gel coat & may be one day painted).

|
1st April 2013, 18:10
|
 |
Senior Member
|
|
Join Date: Dec 2011
Location: Devon
Posts: 550
|
|
I think Garyh was referring to the colour of your blood!!
Good progress for you today.
|
1st April 2013, 18:18
|
|
Senior Member
|
|
Join Date: Jun 2011
Location: birchington, kent
Posts: 1,769
|
|
Spot on Gman.
|
1st April 2013, 18:47
|
|
Senior Member
|
|
Join Date: Feb 2012
Location: Wembley, London
Posts: 5,056
|
|
Froggyman & GaryH - Sorry for being a bit slow on the colour reference.
Although I can't imagine the paint shop would be too impressed if customers started bleeding all over the counter and asking for a match! 
- - - - - - - - - - - - - - - - - - - - - -
Whilst it is sunny outside, when the sun goes down, the temperature really drops.
So just a final quick update from me, before I put the tarpaulin back on & call it a night.
Final "after" photos for the day...

I'd also started work on the worst areas of the front floor pans...
( Sorry photo quality also dropped with the light fading. )
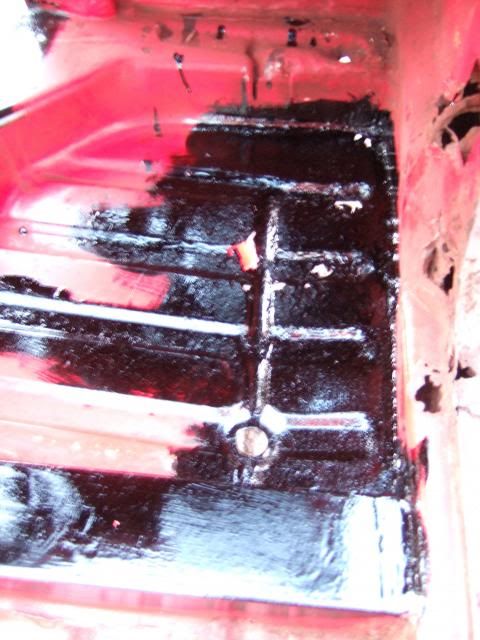
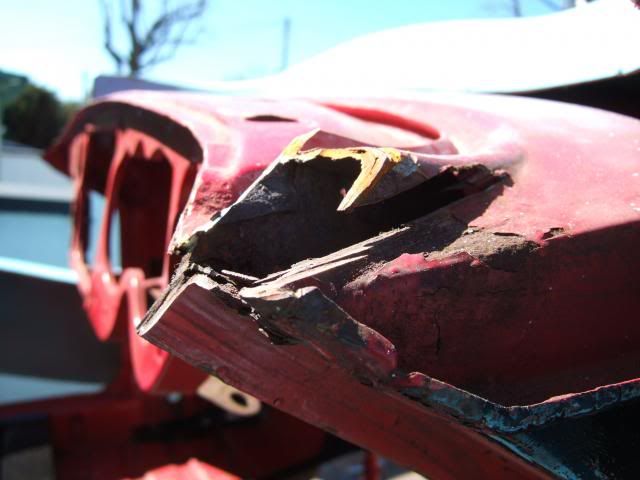
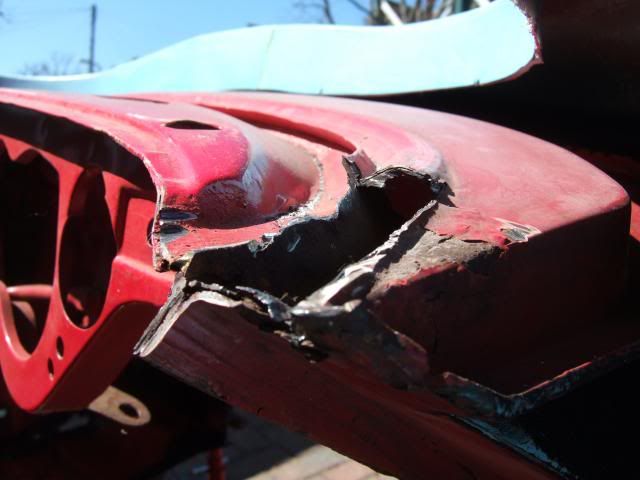
There is also quite a bit of rot on the driver's side of the bulk head here...
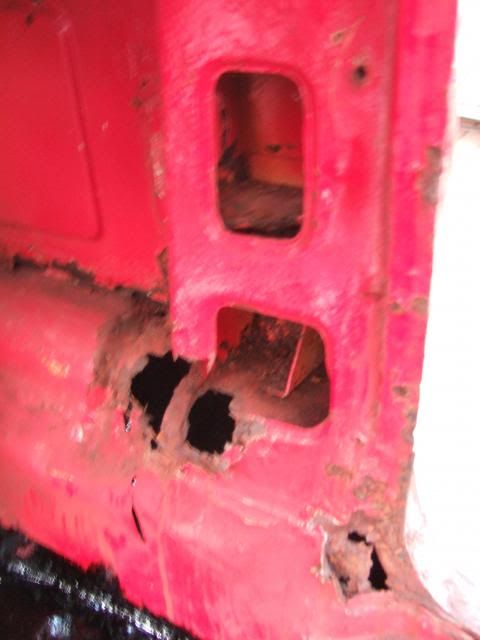
But I think the only way to treat it will be to remove the outside sill...
Which does look like it was welded on to untreated rusty metal behind.
But I'll worry about that another day, take care, Paul.
|
1st April 2013, 20:02
|
|
Senior Member
|
|
Join Date: Jun 2011
Location: birchington, kent
Posts: 1,769
|
|
Will you cover holes with mesh and fibreglass like T did? Or use your new welding skills?
|
4th April 2013, 17:45
|
|
Senior Member
|
|
Join Date: Feb 2012
Location: Wembley, London
Posts: 5,056
|
|
GaryH - I think I will be carrying out repairs using both fibre glass for some & welding for others.
More details in the post below…
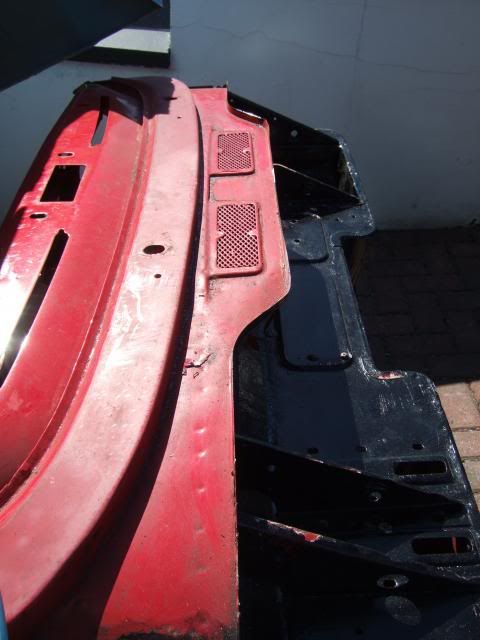
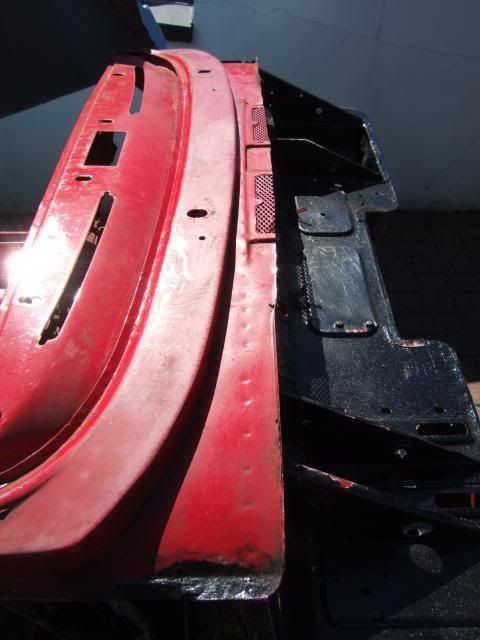
Possible Boot Option:
One big advantage of using the rear section of the Spitfire is the possibility of having useable boot space.
This is how Tribute "next door" approached this on their A352 project …

This boot area also allows the Spitfire floor & wheel arches to be joined to the new bodywork from within.
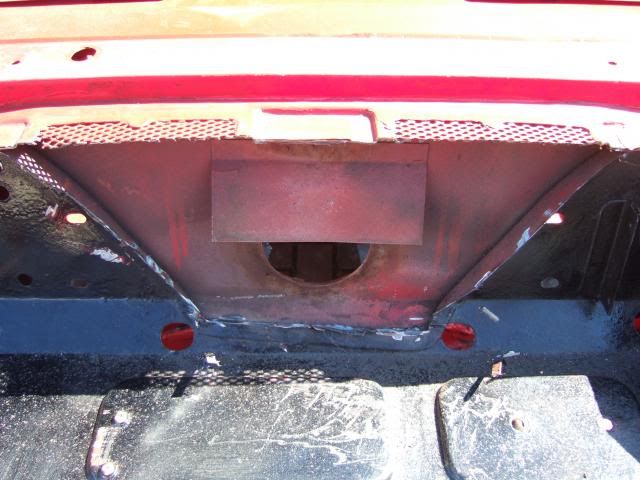
So I would cover / fill in all the holes / gaps in this area with extra fibreglass when doing that work.
It would also provide access to the silencer mounting points, otherwise, captive nuts would be needed.
However, this A352 had a huge boot lid, as the optional D type hump & tail fin were not fitted.
I would need to start the boot lid between the humps & expand out to full width at the bottom.
I'd copy their idea of taking the whole bottom section out & mount my number plate & reflectors on the lid.
The boot would also provide great access to the rear lights which would also be protected from the elements.
As usually, this is an impression, the edges would need to be gentle curves, not sharp angles.
 Build Options - Latest Thoughts:
The boot option above is one reason why I am happy with the decision to buy the 2nd hand Spitfire shell.
I got the whole tub for the price I'd have paid for just the rear section, so I have nothing to lose really.
I know I still have to tackle all the metal work underneath the rear section, another big job.
But so far, the cleaning up, rust treatment & painting of other sections of the shell has gone well.
In fact, the Easter weekend did show what could be achieved by spending a chunk of time on the car.
However, it also highlighted just how long some jobs can take, so I must remain realistic about my options.
In terms of my priorities, I think being able to use the bulk head must rank ahead of using the whole shell.
So I will remove the driver's side sill in order to repair the driver's side bulk head (see previous post / photos).
I'm sure that repairing this section may require some new metal to be welded in to strengthen the area.
But I can't really assess the work required until I can see the extent of the rust damage behind the sill.
At this point, I think I must face the facts that the "fast build" option is now effectively dead in the water.
I'd previously posted a picture of the extra bracing Pantoune used on his Spitfire shell for his A352.
But that bracing was in addition to the original Spitfire sills that look both solid & firmly attached to his donor.
It would take me far too long to come up with something that would work as well as the frame I already have.
Whereas, my Frankenstein option just needs me to join the Spitfire bulk head to the rear Cordite frame.
A Shell Of Two Halves...
Abandoning any thoughts about using the whole shell will actually make my life easier in other ways too.
If I cut the shell into two & remove further surplus sections, I should be able to carry it through the house.
Once in the back garden, I can put up the "Circus Tent" & have somewhere to continue the preparation work.
It would also give my wife her parking space back, once I've cleaned up the mess I seem to have made there.
It will also be a lot easier to turn the front & rear sections over to work on the underside if they are separated.
Based on a comment Mister Towed made, I will need to do some preparation work before I start cutting.
He mentioned the flex in his bulkhead when it wasn't attached, so I will bolt some box section to it first.
I'll put one section across the mounting points at the front & another across the back which should help.
The last thing I want to have a look at before cutting the shell in two is the Spitfire’s main floor sections.
I’ve got new metal lowered floor pans, but if I use them, then I will probably need to change my seats.
My seats are inclined at the back when the base is horizontal and a sloping floor does exaggerate this.
I have a few ideas about a possible solution that I need to check before going angle grinder crazy!
As always, lots to think about, so until next time, take care, Paul.
PS
With one thing, or another, I'm not going to get a chance to work on the car for over a week or so.
|
4th April 2013, 18:40
|
 |
Senior Member
|
|
Join Date: Jul 2011
Posts: 5,328
|
|
Don't dwell too long on the structural rigidity of the Spit body parts you're trying to incorporate. The strength comes from the chassis and frame bolted to it. So long as they're sound the internal and external body panels are purely decorative, so you can remove steel bits and add 'glass where needed. As for the MOT test, just make it all look smooth and rust free and you'll breeze it. |
6th April 2013, 07:03
|
|
Senior Member
|
|
Join Date: Feb 2012
Location: Wembley, London
Posts: 5,056
|
|
Cheers Mr T.
Hopefully I'll get a chance to remove the driver's side sill next weekend, then I'll really know what I'm up against.
Having looked at your build (again) the Spyder frame extends into the bulk head area.
Whereas the Cordite frame comes in two sections bolted together & I'm hoping to join the Spitfire bulkhead to the rear Cordite frame.
But I will have the top section of bulk head left in place, unlike the Spyder approach of cutting that section off.
( So I hope that I will have some extra strength from there. )
However, for things like the holes in the floor, I will use fibre glass repairs.
( As the kit uses fibre glass floors. )
Paul. |
6th April 2013, 10:28
|
 |
Senior Member
|
|
Join Date: May 2012
Location: Preston
Posts: 139
|
|
Quote:
Originally Posted by Paul L

GaryH - I think I will be carrying out repairs using both fibre glass for some & welding for others.
More details in the post below…
Possible Boot Option:
One big advantage of using the rear section of the Spitfire is the possibility of having useable boot space.
This is how Tribute "next door" approached this on their A352 project …
This boot area also allows the Spitfire floor & wheel arches to be joined to the new bodywork from within.
So I would cover / fill in all the holes / gaps in this area with extra fibreglass when doing that work.
It would also provide access to the silencer mounting points, otherwise, captive nuts would be needed.
However, this A352 had a huge boot lid, as the optional D type hump & tail fin were not fitted.
I would need to start the boot lid between the humps & expand out to full width at the bottom.
I'd copy their idea of taking the whole bottom section out & mount my number plate & reflectors on the lid.
The boot would also provide great access to the rear lights which would also be protected from the elements.
As usually, this is an impression, the edges would need to be gentle curves, not sharp angles.
Build Options - Latest Thoughts:
The boot option above is one reason why I am happy with the decision to buy the 2nd hand Spitfire shell.
I got the whole tub for the price I'd have paid for just the rear section, so I have nothing to lose really.
I know I still have to tackle all the metal work underneath the rear section, another big job.
But so far, the cleaning up, rust treatment & painting of other sections of the shell has gone well.
In fact, the Easter weekend did show what could be achieved by spending a chunk of time on the car.
However, it also highlighted just how long some jobs can take, so I must remain realistic about my options.
In terms of my priorities, I think being able to use the bulk head must rank ahead of using the whole shell.
So I will remove the driver's side sill in order to repair the driver's side bulk head (see previous post / photos).
I'm sure that repairing this section may require some new metal to be welded in to strengthen the area.
But I can't really assess the work required until I can see the extent of the rust damage behind the sill.
At this point, I think I must face the facts that the "fast build" option is now effectively dead in the water.
I'd previously posted a picture of the extra bracing Pantoune used on his Spitfire shell for his A352.
But that bracing was in addition to the original Spitfire sills that look both solid & firmly attached to his donor.
It would take me far too long to come up with something that would work as well as the frame I already have.
Whereas, my Frankenstein option just needs me to join the Spitfire bulk head to the rear Cordite frame.
A Shell Of Two Halves...
Abandoning any thoughts about using the whole shell will actually make my life easier in other ways too.
If I cut the shell into two & remove further surplus sections, I should be able to carry it through the house.
Once in the back garden, I can put up the "Circus Tent" & have somewhere to continue the preparation work.
It would also give my wife her parking space back, once I've cleaned up the mess I seem to have made there.
It will also be a lot easier to turn the front & rear sections over to work on the underside if they are separated.
Based on a comment Mister Towed made, I will need to do some preparation work before I start cutting.
He mentioned the flex in his bulkhead when it wasn't attached, so I will bolt some box section to it first.
I'll put one section across the mounting points at the front & another across the back which should help.
The last thing I want to have a look at before cutting the shell in two is the Spitfire’s main floor sections.
I’ve got new metal lowered floor pans, but if I use them, then I will probably need to change my seats.
My seats are inclined at the back when the base is horizontal and a sloping floor does exaggerate this.
I have a few ideas about a possible solution that I need to check before going angle grinder crazy!
As always, lots to think about, so until next time, take care, Paul.
PS
With one thing, or another, I'm not going to get a chance to work on the car for over a week or so.
|
We are currently playing around with the idea of having a boot option as part of the frame work but still 'tinkering'  Watch this space!
|
6th April 2013, 18:33
|
|
Senior Member
|
|
Join Date: Apr 2012
Posts: 1,163
|
|
Feel free to tinker with mine! a boot would be a big big plus!
|
13th April 2013, 11:53
|
|
Senior Member
|
|
Join Date: Feb 2012
Location: Wembley, London
Posts: 5,056
|
|
AndyP85 & Viatron - I think the more of these "mods" that become "standard" the better.
I am really looking forward to seeing the first new Navigator coming together.
- - - - - - - - - - - - - - - - - - - - - -
Just back from a nice week away with my family, hence no progress to report.
Although it looks like I didn't miss much in terms of weather while I was away.

Although I did spend a bit of time drawing up a "To Do" list & some sketches of my options.
So with a bit of luck, I'll get a bit more done on the car tomorrow (weather permitting).
I'll also try to catch up on all the forum updates I missed while being away.
Cheers, Paul.
PS
We took a trip to Warwick Castle & I found a kit car reference from the Middle Ages.
A special place for those who think it is a good idea to build a car without Ye Olde Garage...

|
14th April 2013, 21:42
|
|
Senior Member
|
|
Join Date: Feb 2012
Location: Wembley, London
Posts: 5,056
|
|
Sunday - Part 1
A bit of a slow start to the day as I had some domestic duties to perform first thing.
But I finally got out just before noon to continue preparing the Spitfire body shell.
A bit of "deja vu" with the tarpaulin, as over night it had filled up with water again.
Although the fact the sun was shining was a bit different to normal.

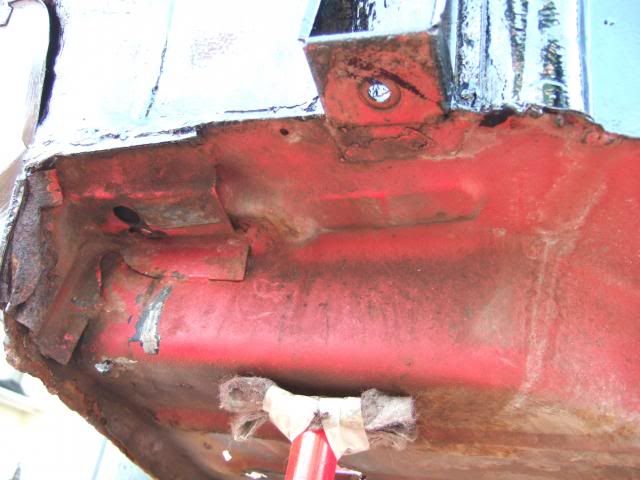
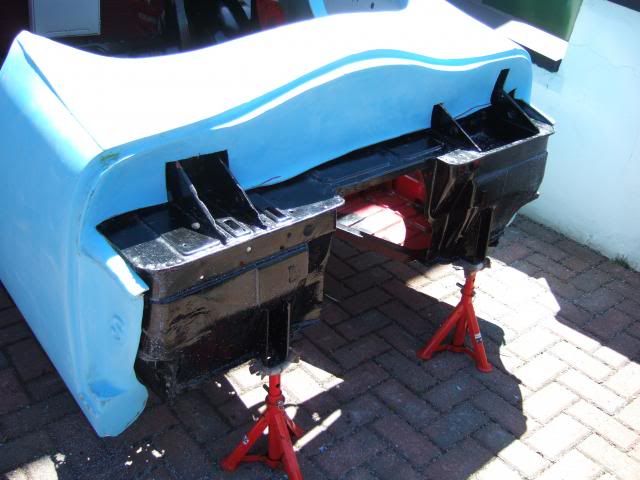
I rearranged the car jacks so I could get better access to the front bulk head mounting points.
I will be using these to brace the bulk head when I cut the shell in half & wanted to paint them first.
Then it was the same process as before, clean up the area before applying the anti-rust treatment.
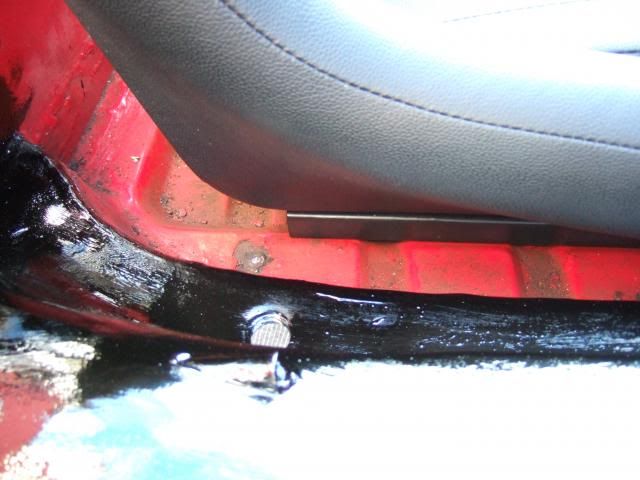
Driver's Side:
Passenger Side:
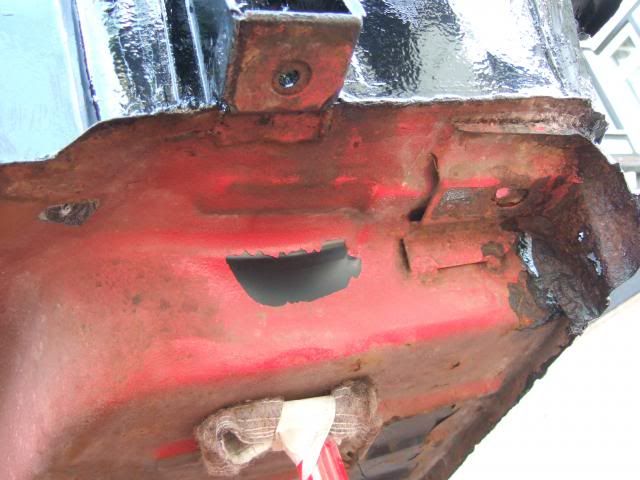
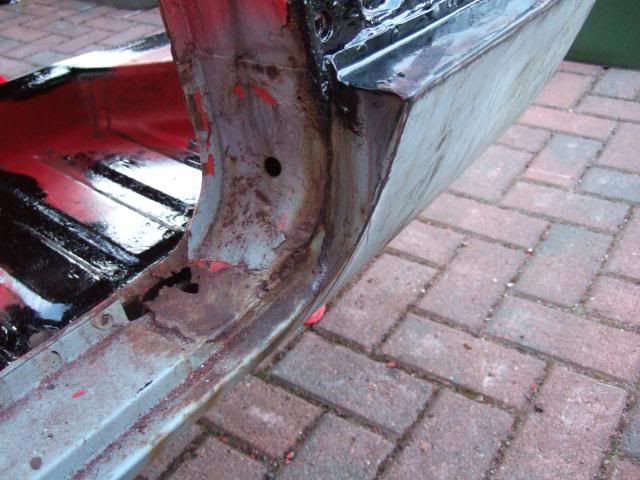
While I waited for that to dry, I attacked the sill on the driver's side.
Before:
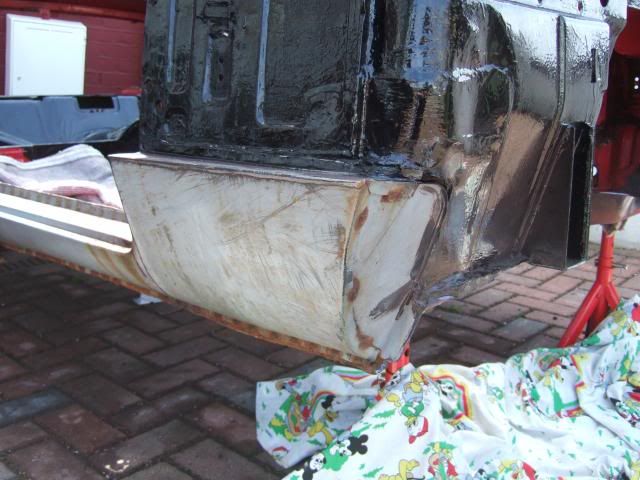
After:
I knew there was going to be rust behind the sill, so I know it was right to remove it.
Unfortunately, when I started prodding it with the "screwdriver of truth, it got worse.
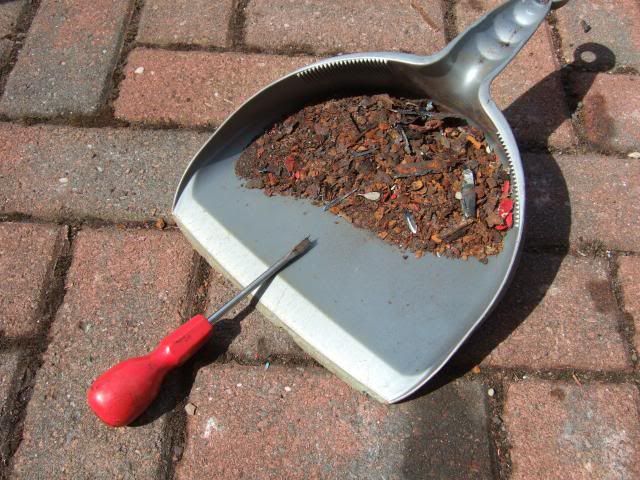
So I cut a bit more out before cleaning the area up & applying the anti-rust stuff.
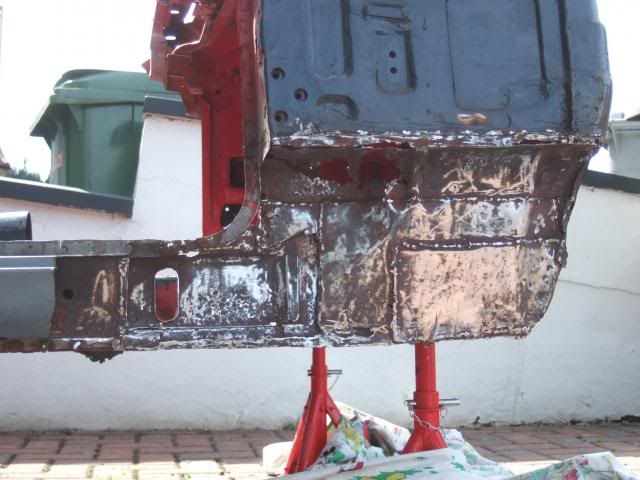
There were a few other areas I gave a quick clean up & treatment to...
The "after" photos will have to wait as it started to rain & I had to tidy & cover up.
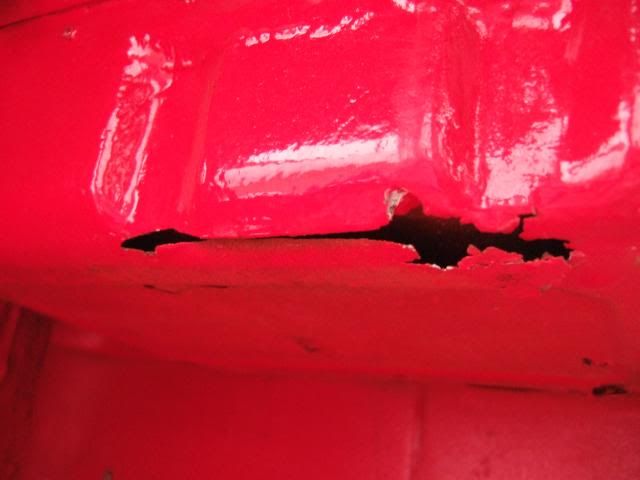
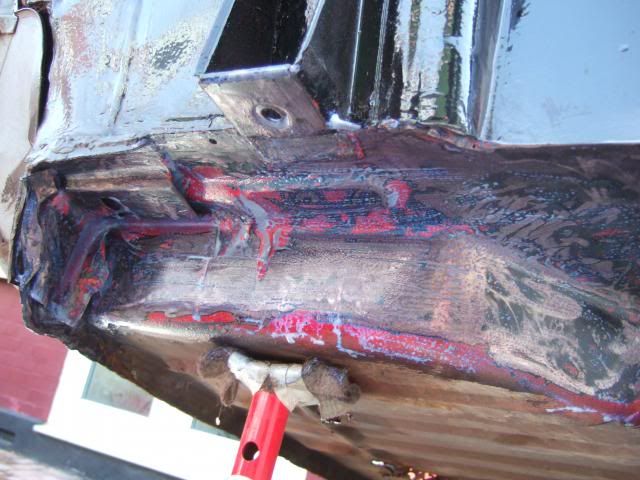
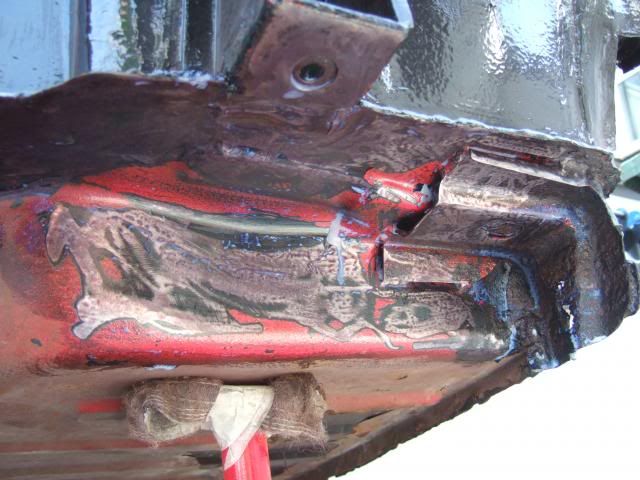
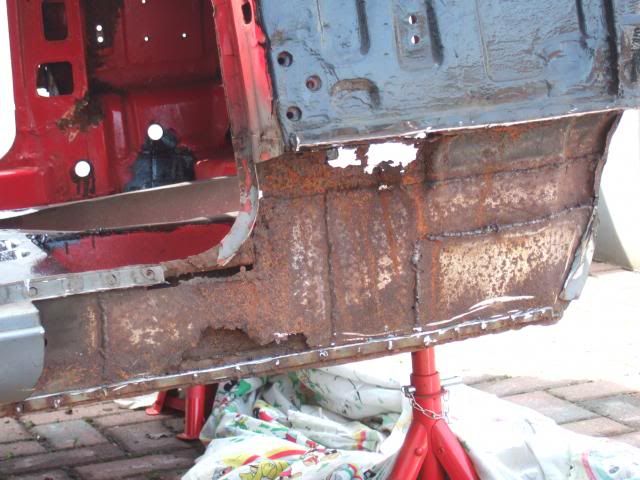
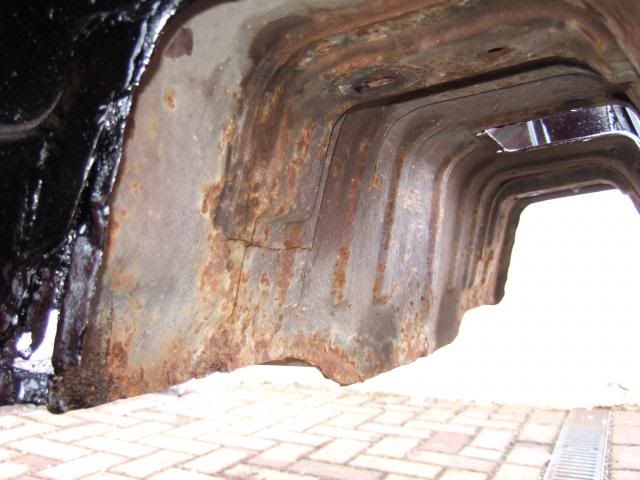
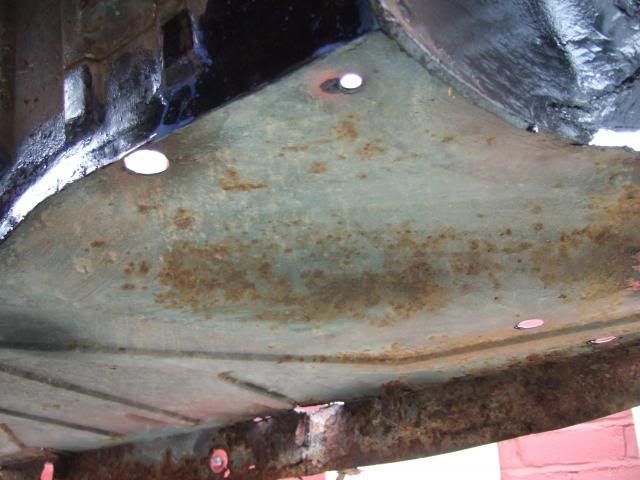
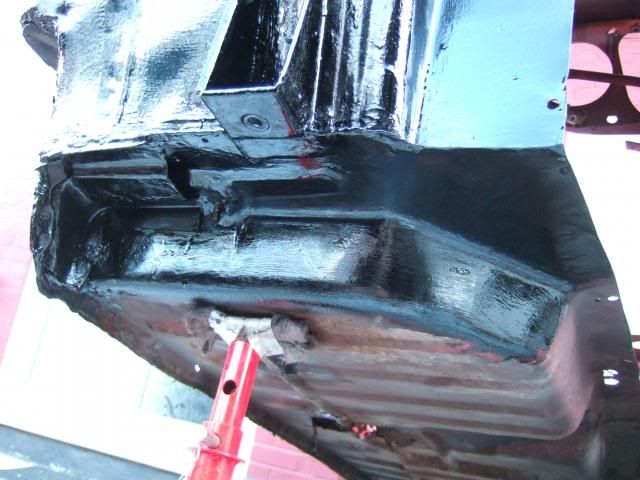
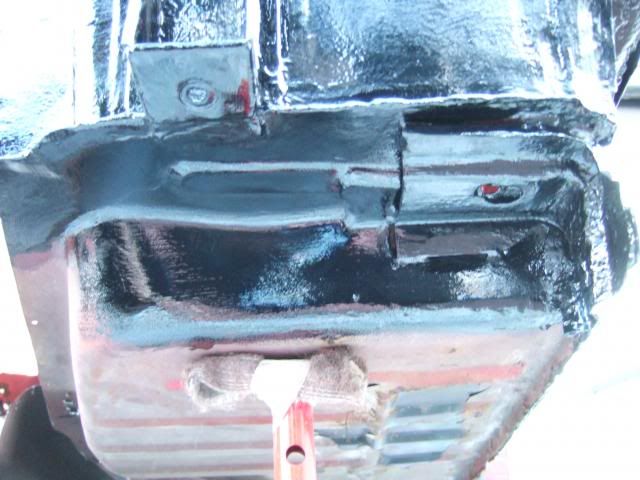
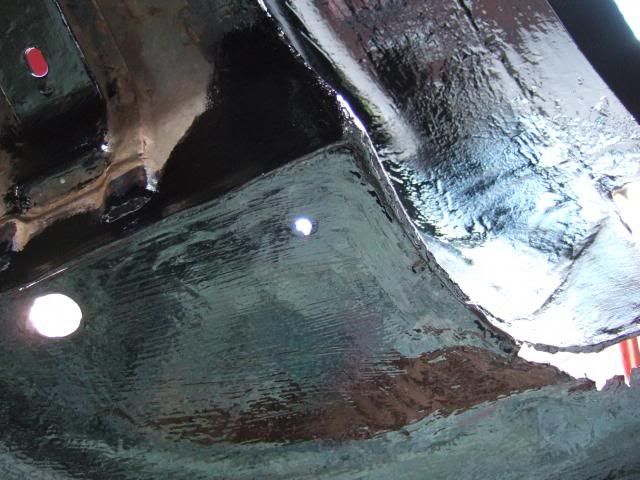
The other big problem area is underneath the front bulk head mounting frame.
Above:

Below:
I will not start sorting this mess out until after I cut the shell in two.
As it will be much easier to see what I am doing with the bulkhead turned over.
Well it looks like the rain has stopped so I'm heading back out to do some painting.
( The forum is currently off line, so I'll copy & paste this from 'Word' later on. )
Cheers, Paul.
Last edited by Paul L; 15th April 2013 at 17:22..
Reason: Typo
|
14th April 2013, 21:44
|
|
Senior Member
|
|
Join Date: Feb 2012
Location: Wembley, London
Posts: 5,056
|
|
Well the forum seems to be back again, so...
Sunday - Part 2
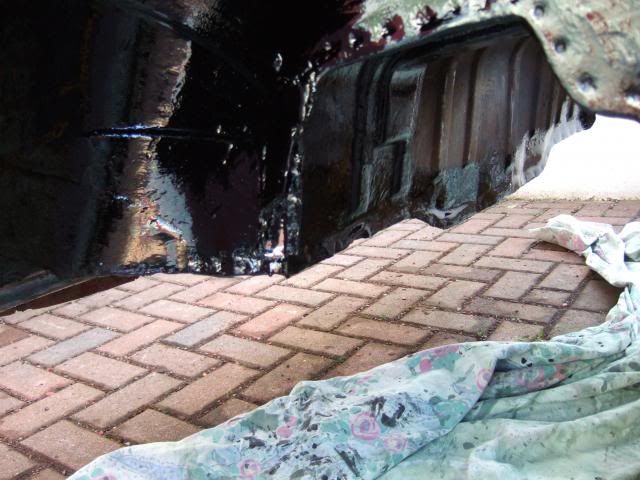
Thankfully the rain stayed away & I was able to do some bitumen painting.
I gave a second coat to the areas I had painted before going on holiday.
( Inner wheel arches, parts of the front bulk head & rear floor sections. )
I then did the lower sections of the bulk head around the mounting point.
Driver Side:
Passenger Side:
Followed by the bulk head area where I had removed part of the sill...

In the end I only prepared part of the area under the car.
It will be much easier to do the rest when the rear section is separated & turned over.
Still, it is a bit more done and every bit counts...
Finally I did one side of the parts I cleaned up.
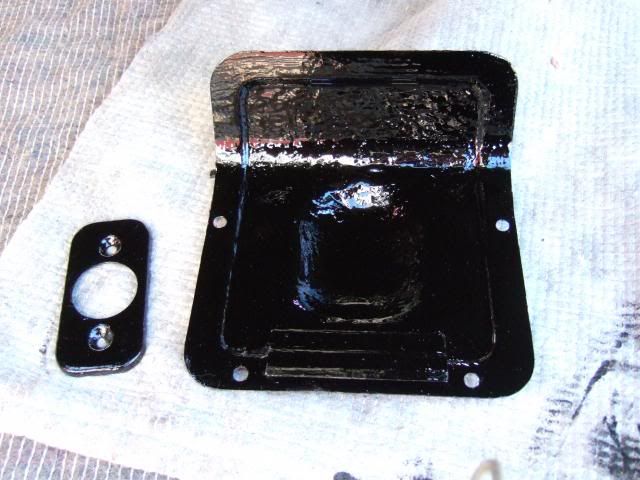 Seat Options:
Just before I called it a night, I put my new seat in the old shell to check space.
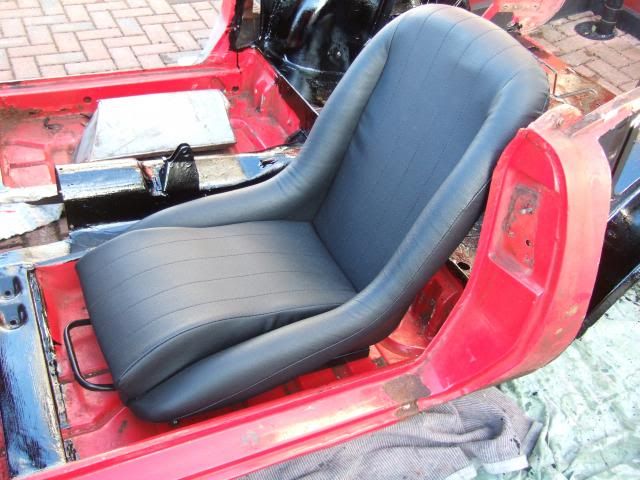
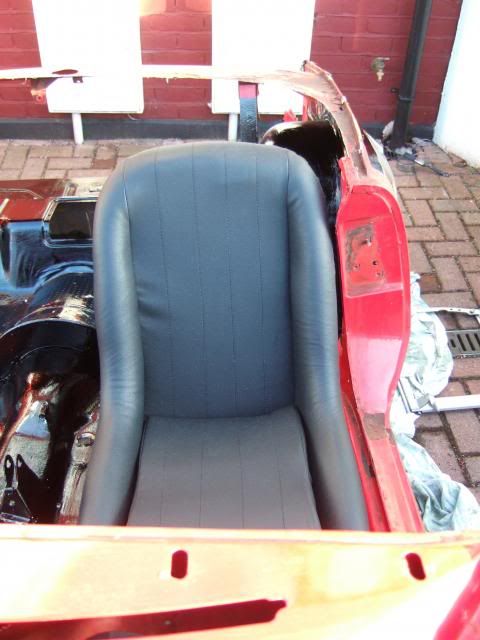
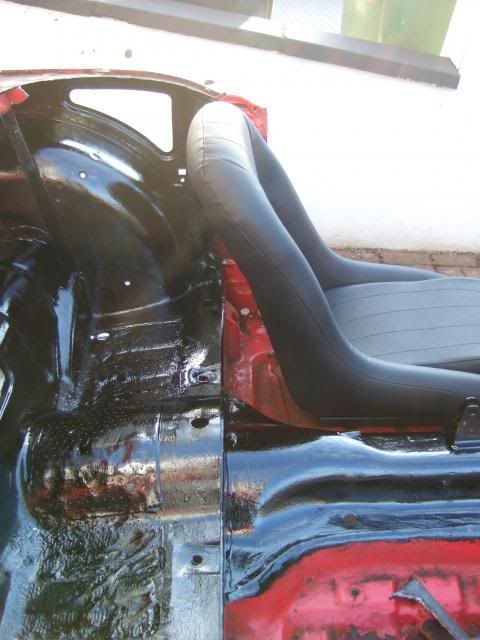
I am slowing coming to the conclusion that I actually need different seats.
Whilst I think it might be possible to make the changes required to fit them.
It would add a lot of extra work to an already very long "To Do" list.
So it might be worth trading an extra cost for an easier build.
I will make a final decision when I see how my Frankenstein build evolves.
Until next time, take care, Paul.
|
15th April 2013, 17:24
|
|
Senior Member
|
|
Join Date: Feb 2012
Location: Wembley, London
Posts: 5,056
|
|
13th April 2014:
I was so busy unpacking from our holiday that I forgot to mention I'd passed a key mile stone in my build.
Saturday marked one year since I went to visit the Sammio factory in Poole & paid my deposit for Cordite #7.
Even more scary is the fact that next week will mark the anniversary of my Spitfire donor purchase too.
On the one hand it is hard to believe it has been 12 months, yet on the other, time seems to have flown by.
I know there is still a long way to go, but I am looking forward to seeing what the next 12 months will bring.
Cheers, Paul.
|
15th April 2013, 22:31
|
|
Senior Member
|
|
Join Date: Jul 2011
Posts: 5,328
|
|
Keep up the good work Paul.
A year might seem like a long time, but It's now two years since I bought my donor and it's flown by.
I know some people can put one of these cars together in a matter of weeks, Patoune springs to mind, but for us mere mortals I think a year or two is a realistic timescale.
Just do what you can when you can and your car will come together before your very eyes.
And just think, how many people you know have built their own car?  |
17th April 2013, 18:40
|
|
Senior Member
|
|
Join Date: Feb 2012
Location: Wembley, London
Posts: 5,056
|
|
Mister Towed - Wise words as always, and I must resist comparing myself with other (faster) builds.
In addition to a general lack of time, I am also learning new skills as I go along which takes me longer too.
Plus I've spent a huge amount of time beard scratching trying to work out how it all goes together.
So let's see where I have got to with this build when two years are up.
- - - - - - - - - - - - - - - - - - - -
Heritage Motor Centre:
We made a trip here during our holiday & whilst I was a bit disappointed overall, I did pick up a few ideas:
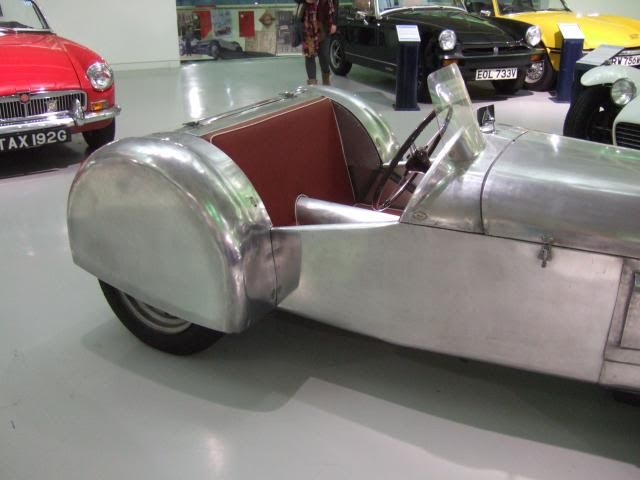
An alternative to doors - 1953 Lotus MkVI
If my attempts at getting the doors to work fail, I could always just leave a big hole in the side of the car...
 Boot lid
 - 1952 Aston Martin DB2
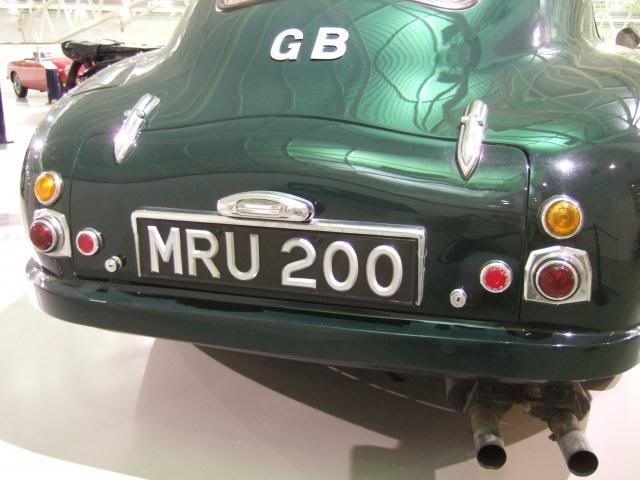
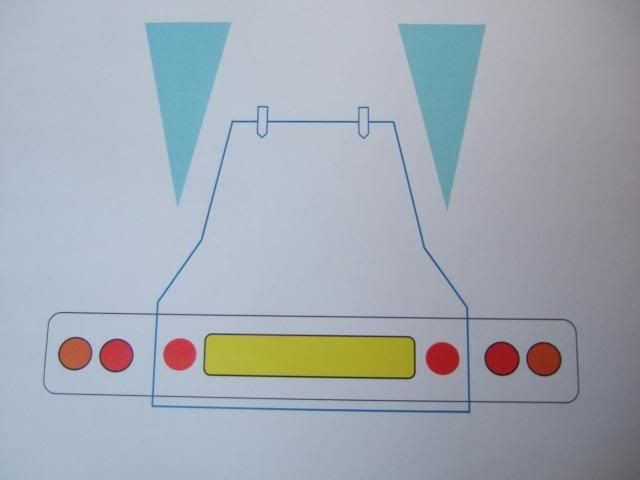
This lead me to have another think about what might work on my car if I just stick to a single hump.
( As always, please ignore scale & perspective, but I would push the indicators & stop/tail lights out wider.
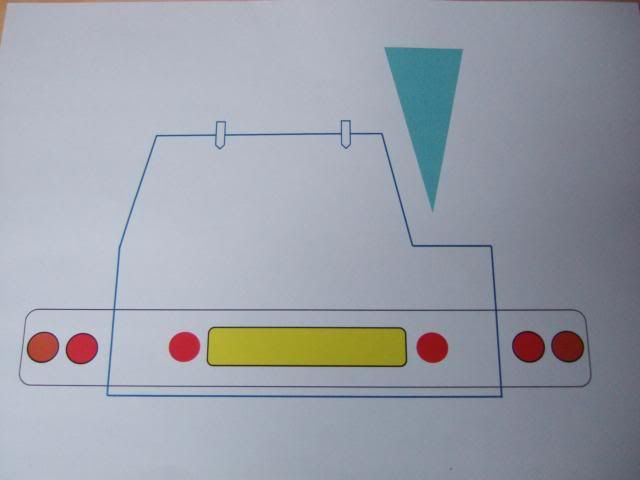
Whilst this would give me an asymmetrical boot lid, it would provide a bigger opening to the boot area.
And this would help me to "get into" the boot to fibreglass the Spitfire metalwork to the Cordite shell.
A simple boot lock - Racing Jaguar XK120
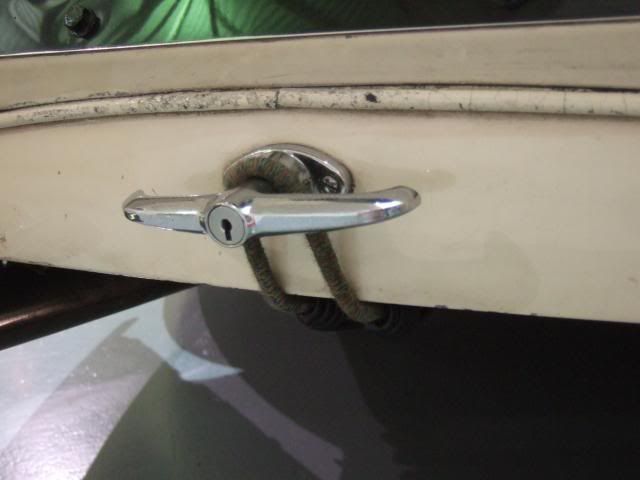
This might stop the boot lid opening while driving, but I wouldn't advise leaving anything inside when parked!
Anyway, that's all for now, I just hope the better weather hangs around for the weekend. 
Until then, take care, Paul.
|
18th April 2013, 12:21
|
 |
Senior Member
|
|
Join Date: May 2011
Location: Somerset
Posts: 1,671
|
|
That's a shame to hear about the heritage motor center, i was thinking of going there "some time".
To make up for that I don't know if you've ever been, but If you're ever up my neck of the wood you've got to make a trip to the Haynes motor museum, it's superb!
http://www.haynesmotormuseum.com/ |
20th April 2013, 22:45
|
|
Senior Member
|
|
Join Date: Feb 2012
Location: Wembley, London
Posts: 5,056
|
|
DaveCymru - I think it was the Haynes museum I was thinking of when I went.
- - - - - - - - - - - - - - - - - - - -
There is a limit to how many photos you can put in a single post, so today needs to be spread out...
Saturday - Part 1:
Before I continued with the prep. & painting of my Spitfire bodyshell I wanted to finalise my cutting plans.
As there is no point in painting sections that will end up being cut out so that other sections will fit into place.
Also, there is no turning back from my Frankenstein build option once I cut the body shell into two!
So before I went mad with the angle grinder I thought I should just check how the "fast build" might work.
( I've only seen two basic photos of the green Ribble Navigator to give me any sort of guide to this. )
Cordite Bulk Head:
What ever build route I take, part of the Cordite's fibreglass bulk head needs to go, so I started on that first.
I thought I'd try to follow the original Spyder body work & leave some vertical bulk head sections in place.
These photos are from the "Getting Started" section of the Ribble web site:

One thing I needed to bear in mind was that the heater "bulge" had been cut out of the Herald donor:
( Whereas this currently remains in place on my Spitfire shell. )

I started with a paper template (using old continuous computer paper thrown out from work ages ago)...
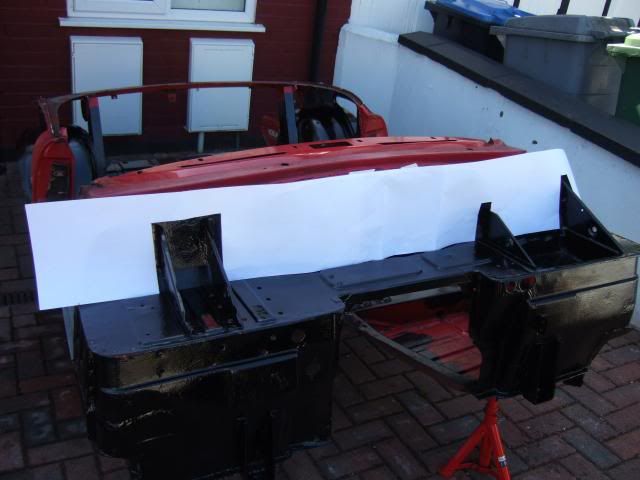
Which I then used to use out a more solid cardboard template...
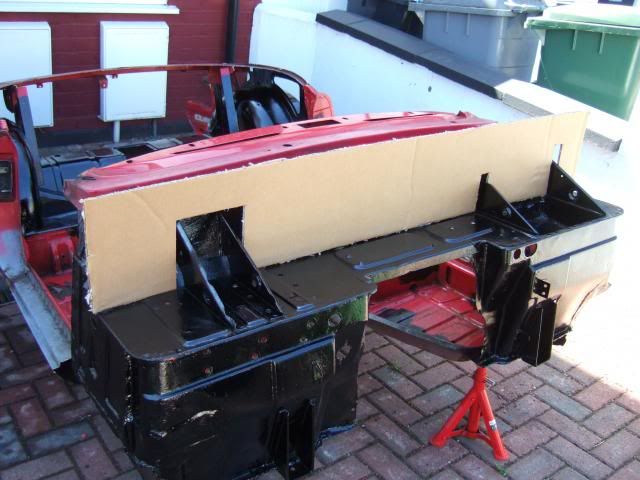
It was odd to be cutting the cardboard in the back garden (South facing) in blazing sun shine.
But then returning to the drive out the front in shadow & needing to put my coat on (North facing).
I roped my wife in to supply a spare pair of hands to help me remove the Cordite body from the frame.
After using my template to mark up the Cordite bulkhead It was time to set to work with my jig saw.
Before:
After:
Then I cut the slots required for the pedal mounting sections & the battery box...
Whilst this might have looked pretty good from the front, this is what the back looked like...
So it was time to put down the jig saw & bring out the angle grinder.
I cut off sections of metal behind the rear wheel arches a bit at a time.
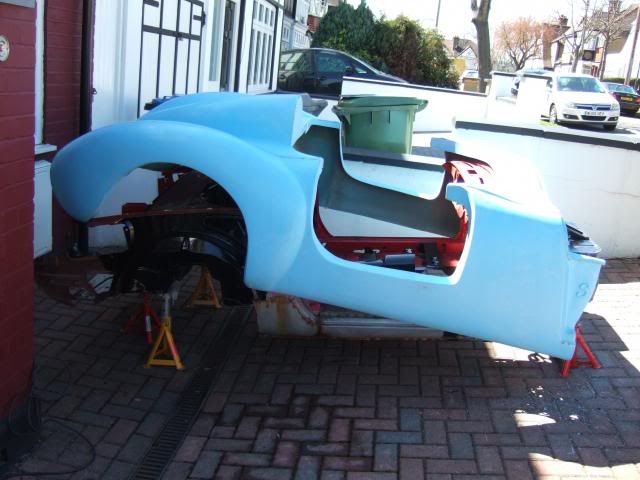
This became the theme for the day as I continued to test fit the body & see what fouled.
Ironically, as the fit became better, it was harder to remove the body shell by myself.
Eventually I reached the point where it was clear the dash needed to go both "back & down".
So the heater in take box had to go.
Before:
Gone:
After:
I also removed the front "lip" on the bulk head as this seemed to be causing problems too...
Other areas to receive the angle grinder treatment were the remains of the windscreen pillars.
These were sitting a little proud of the rest of the dash on both sides.
Before:
After:
I also trimmed off some of the vertical fibre glass dash panel which left me with a better fit...
Right that is Part 1 and I will be posting Part 2 in just a tick.
Cheers, Paul.
|
|
Currently Active Users Viewing This Thread: 1 (0 members and 1 guests)
|
|
|
| Thread Tools |
|
|
| Display Modes |
 Linear Mode Linear Mode
|
 Posting Rules
|
You may not post new threads
You may not post replies
You may not post attachments
You may not edit your posts
HTML code is Off
|
|
|
All times are GMT +0. The time now is 21:22.
|


