|
|
| Tribute Automotive Builds Discuss your Tribute kit build |

10th August 2017, 09:35
|
 |
Member
|
|
Join Date: Jul 2017
Posts: 39
|
|
 Wardy's A352
So, I'm under way with the build.
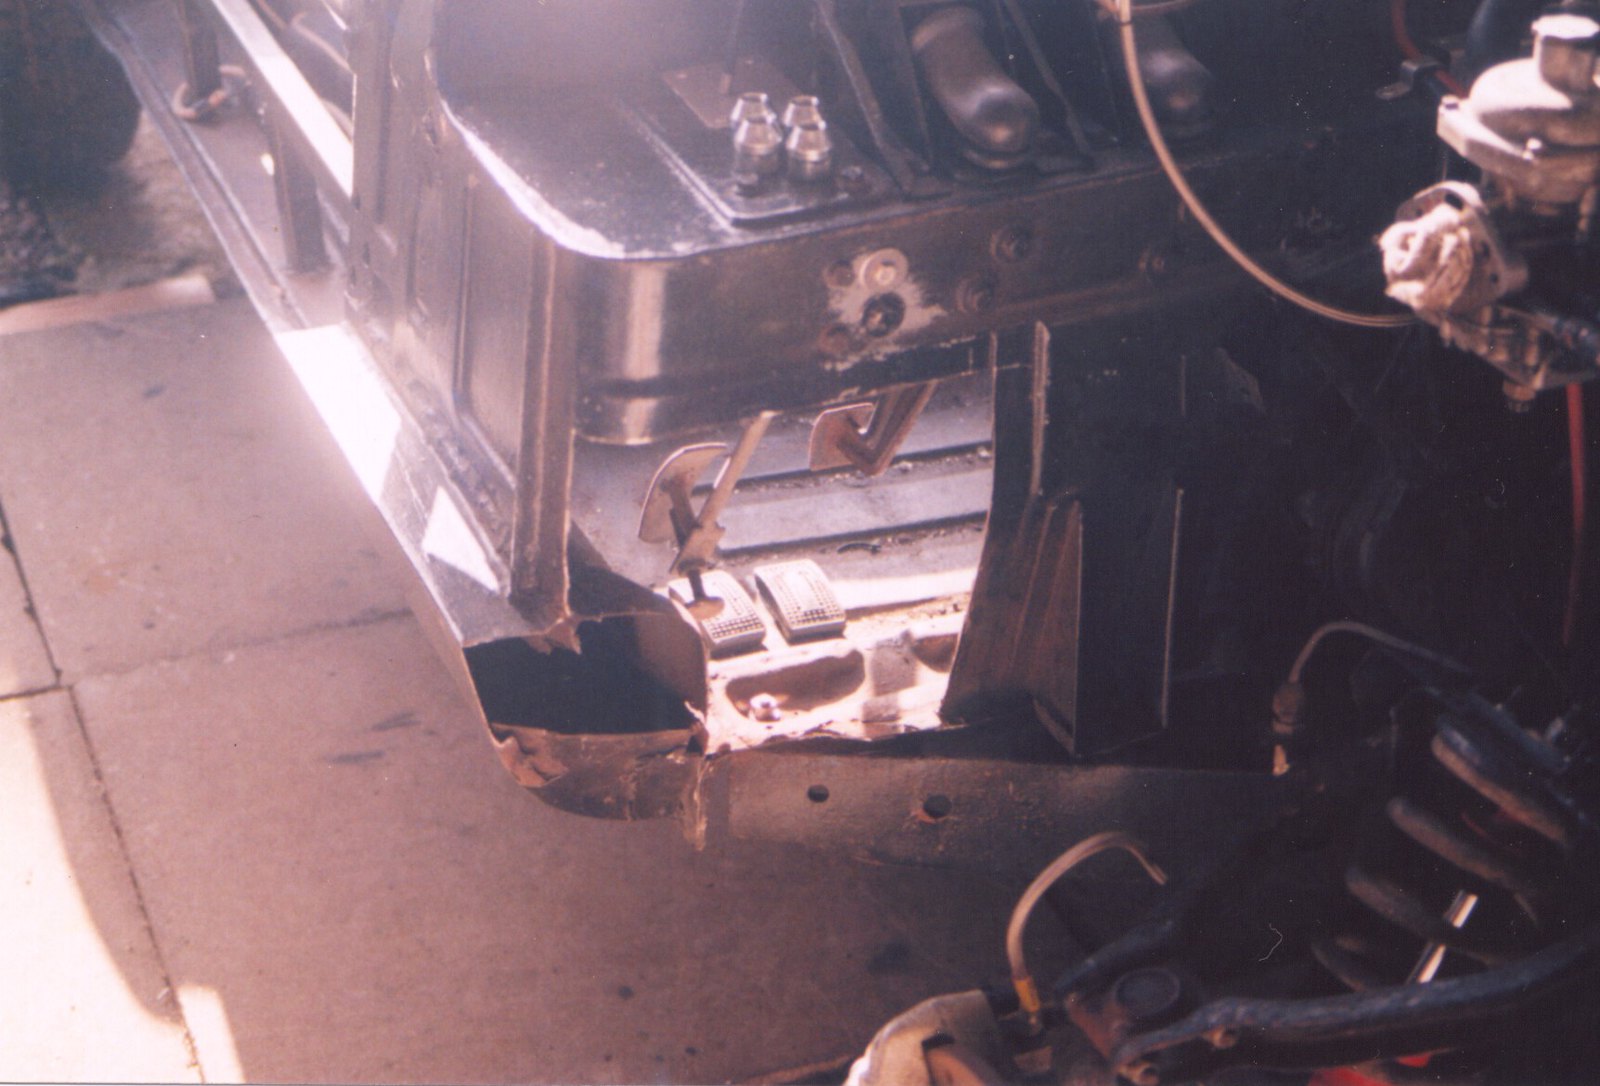
A pretty crusty Spitfire which was probably right on the cusp of being a scrapper is in the garage and being stripped. Lots of holes where there shouldn't be, and all in the bits I need to keep!
Welder out this weekend, along with blowtorch to remove way, way too much underseal (queue more holes) and then the angle grinder to put the car on a diet.
Hopefully the great and the good on this forum will look kindly upon me when I need information or advice, if not there's always booze.
Cheers.
|
10th August 2017, 14:51
|
 |
Senior Member
|
|
Join Date: Feb 2012
Location: Wembley, London
Posts: 5,056
|
|
Wardy50 – A belated welcome to the forum Steve. 
Sorry, I meant to reply to your original post about an engine upgrade for your Spitfire.
I’ve got the 1500 engine in my kit car and that is quick enough for me.
Especially as the absence of any roll over protection discourages any real speed. 
Good luck with your build, Paul. 
PS
[Crocodile Dundee]
“That’s not a crusty bulkhead…
 THIS is a crusty bulkhead!”

[/Crocodile Dundee]

|
11th August 2017, 08:34
|
|
Member
|
|
Join Date: Jul 2017
Posts: 39
|
|
Hi Paul,
Thanks for the welcome.
I'll give you that one on the bulkhead rot, makes me feel slightly better about this weekends work schedule not being too bad !!
Probably going after a straight six Triumph motor to keep 'the feel' of the car, which will be badged as a Triumph when (if??) completed, but coupled to a five speed Ford type 9 to help with motorway and long distance cruising.
Long way top go though, and as always the biggest decision to make..............colour!!
Steve.
NB. How do you get the photo's into the main post and not as an attachment - am I missing something..........again...........
|
11th August 2017, 14:11
|
 |
Senior Member
|
|
Join Date: May 2009
Location: POOLE , DORSET
Posts: 2,200
|
|
LOOKING FORWARD TO SEEING PROGRESS ON THIS ...The A352 is a pretty little car and a 6 cylinder one will be great ...they are lively with a 4 banger as well , but totally get the 6 cyl. exhaust tone preference ...straight 6 engines have a great sound ..
|
11th August 2017, 16:05
|
 |
Senior Member
|
|
Join Date: Sep 2011
Posts: 1,446
|
|
Watching with interest
Good luck
Crazy idea I had ....clear the floor out and use it as a mould and lay reinforced fibreglass on the floor pan sections ....remove once cured ..cut the rusty floor pans out and bond in the fibreglass items .
Would this work???? Food for thought
Last edited by redratbike; 11th August 2017 at 16:09..
|
11th August 2017, 18:24
|
|
Senior Member
|
|
Join Date: Apr 2014
Location: Birmingham, UK
Posts: 545
|
|
Great to see you've started on it |
12th August 2017, 05:43
|
|
Senior Member
|
|
Join Date: Feb 2012
Location: Wembley, London
Posts: 5,056
|
|
Quote:
Originally Posted by Wardy50

… will be badged as a Triumph...
|
My donor Spitfire came with brand new wheels, tyres & Triumph wheel centres, so I used them on my build.

Although I’ve always like the idea of using a big Triumph motorcycle sticker too.

Quote:
Originally Posted by Wardy50
… How do you get the photo's into the main post and not as an attachment…
|
You need to add [img] and [/img] either side of the photo’s ‘code’.
I’ve just added some spaces to the following code of one of your photos so you can see what I’m doing.
When you click on the attachment, this is the code:
http: //www.madabout-kitcars.com /forum/ attachment.php?attachmentid=4529&d=1502356867
Add the img code, again with extra spaces added.
[ img ] http: //www.madabout-kitcars.com /forum/ attachment.php?attachmentid=4529&d=1502356867 [/ img ]
Then when you remove the spaces you get this.

Hope that makes sense.
Cheers, Paul.
PS
If you use the "Quote" button you can see the detail of the photo as it appears. |
5th October 2017, 13:14
|
|
Member
|
|
Join Date: Jul 2017
Posts: 39
|
|
Good afternoon all,
So an update since the last post, seems painfully slow but progress all the same.
Body repairs complete for now including new inner and outer sills and strengthening plates (strengthening plates all but gone).
New lower A & B posts on both sides (originals had vanished to the same place as the sills).
Complete new floor pans both sides.
Heelboard repairs particularly around the trailing arm support sections.
Boot floor repairs to retained section.
Both bulkheads repaired with new lower sections, battery box and master cylinder 'shelf'.
Body treated with rustcure, then primed and then waxoyled and undersealed.
Left the rear inner arch repairs at the moment as I'm not sure until the bodies on how much is retained.

Body now propped up at the back of the garage and the chassis is being stripped down as we speak.
Six cylinder sourced and over to engine builders (car SOS's guys) for start early in November (I hope).
Ford type 9 gearbox sourced and built with longer first gear.
Conversion kit for the gearbox sourced and ready with uprated clutch and reduced propshaft.
Necessary other bits for the engine conversion of GT6 front turrets and mounts, GT6 alloy bellhousing c/w clutch fork / bearing and GT6 cut away sump all sourced.
New Gaz front and rear adjustable dampers on the way - fronts height adjustable.
On the lookout for triple 40 webers and six cylinder inlet manifold if anyone has any leads on that.
Pictures of the chassis progress to follow if I haven't died from rust inhalation by then or bored everyone to death with this post!!
Cheers
Steve.

|
6th October 2017, 08:08
|
 |
Senior Member
|
|
Join Date: Apr 2016
Location: Camberley
Posts: 972
|
|
Quote:
Originally Posted by Wardy50
Good afternoon all,
So an update since the last post, seems painfully slow but progress all the same.
Body repairs complete for now including new inner and outer sills and strengthening plates (strengthening plates all but gone).
New lower A & B posts on both sides (originals had vanished to the same place as the sills).
Complete new floor pans both sides.
Heelboard repairs particularly around the trailing arm support sections.
Boot floor repairs to retained section.
Both bulkheads repaired with new lower sections, battery box and master cylinder 'shelf'.
Body treated with rustcure, then primed and then waxoyled and undersealed.
Left the rear inner arch repairs at the moment as I'm not sure until the bodies on how much is retained.
Body now propped up at the back of the garage and the chassis is being stripped down as we speak.
Six cylinder sourced and over to engine builders (car SOS's guys) for start early in November (I hope).
Ford type 9 gearbox sourced and built with longer first gear.
Conversion kit for the gearbox sourced and ready with uprated clutch and reduced propshaft.
Necessary other bits for the engine conversion of GT6 front turrets and mounts, GT6 alloy bellhousing c/w clutch fork / bearing and GT6 cut away sump all sourced.
New Gaz front and rear adjustable dampers on the way - fronts height adjustable.
On the lookout for triple 40 webers and six cylinder inlet manifold if anyone has any leads on that.
Pictures of the chassis progress to follow if I haven't died from rust inhalation by then or bored everyone to death with this post!!
Cheers
Steve. |
Not Tim, I hope.
|
17th October 2017, 05:15
|
|
Senior Member
|
|
Join Date: Feb 2012
Location: Wembley, London
Posts: 5,056
|
|
Wardy50 – Hi Steve,
Sounds like you have done a lot of work.
Unfortunately, I just see an “X” instead of a photo in your last post.
Good luck, Paul.
|
9th December 2017, 12:14
|
|
Senior Member
|
|
Join Date: Apr 2014
Location: Birmingham, UK
Posts: 545
|
|
chassis is looking much better |
16th December 2017, 09:25
|
|
Senior Member
|
|
Join Date: Nov 2012
Posts: 845
|
|
 PM
PM
Steve
You have a PM.
Regards, Mick
|
11th February 2018, 11:52
|
|
Member
|
|
Join Date: Jul 2017
Posts: 39
|
|
Progress
Afternoon gents,
A couple of photo’s showing progress on my build. Just about to modify the first motion shaft on the ford gearbox and the GT6 bellhousing to accept each other. Rebuilt straight six is about a week away, brake and fuel lines about to be plumbed in.
Looking forward to getting the Spit body back on to create space in the garage!!
Cheers
Steve
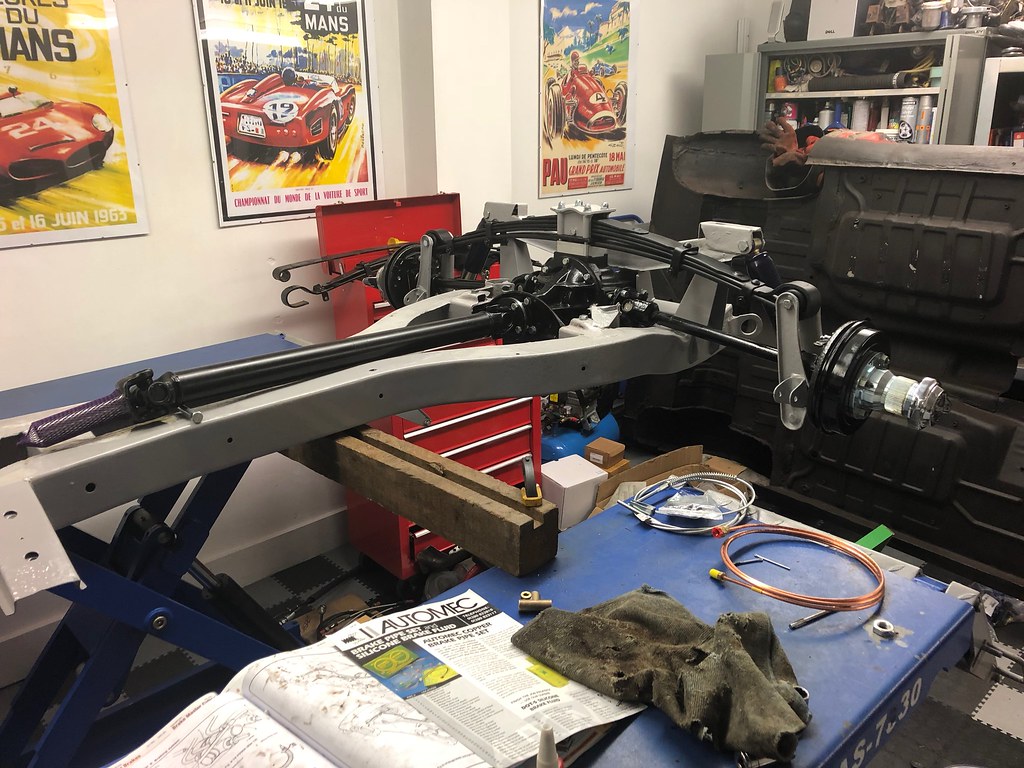 Chassis rear Chassis rear by Steve Ward, on Flickr
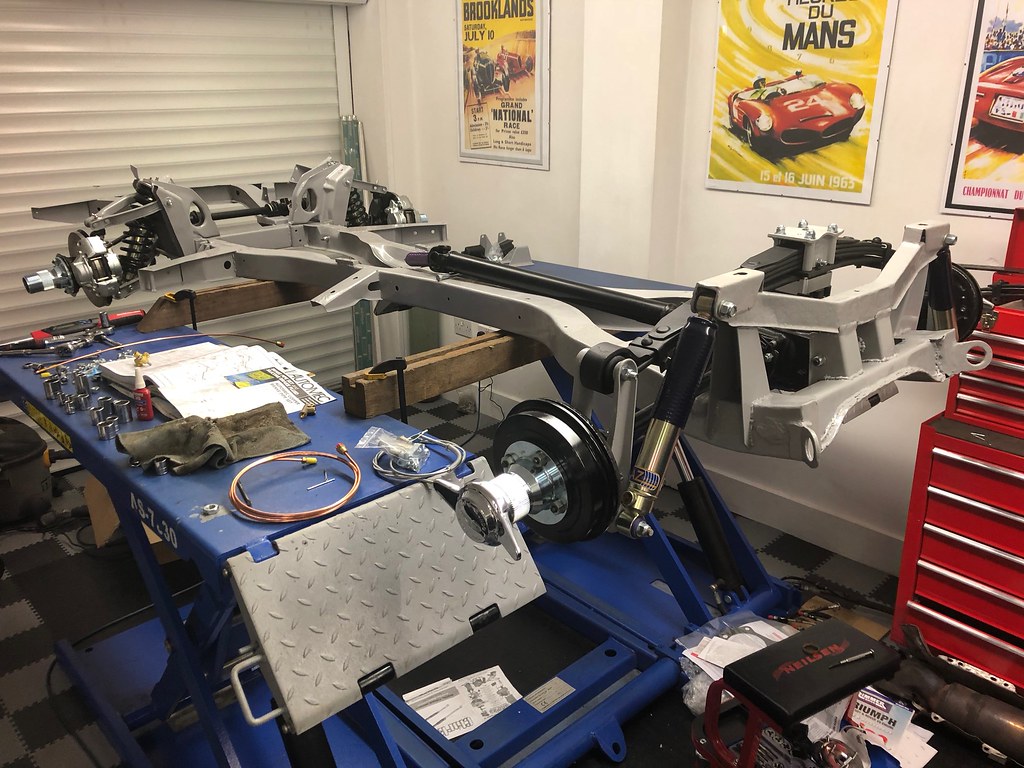 Chassis side Chassis side by Steve Ward, on Flickr
 Chassis front Chassis front by Steve Ward, on Flickr
Last edited by Wardy50; 14th February 2018 at 09:40..
|
11th February 2018, 14:20
|
|
Senior Member
|
|
Join Date: Feb 2012
Location: Wembley, London
Posts: 5,056
|
|
Wardy50 - Your chassis looks amazing.
|
28th July 2018, 18:55
|
|
Member
|
|
Join Date: Jul 2017
Posts: 39
|
|
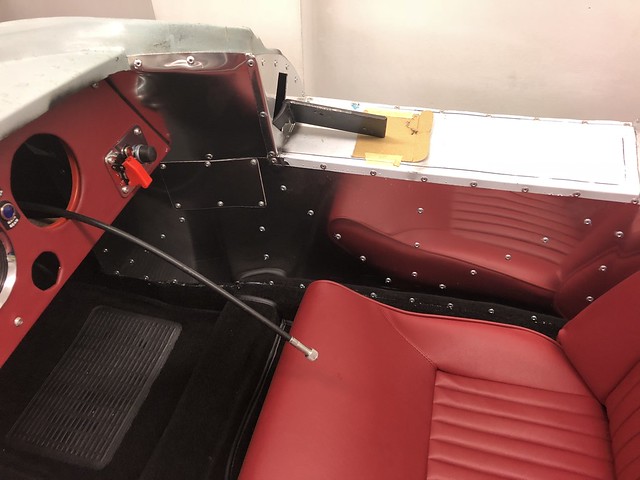
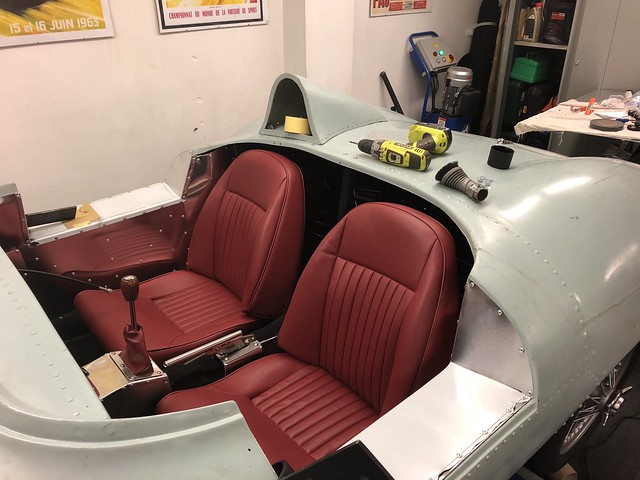
Evening gents,
Recently fell out of love with the build process and left it alone for a few weeks after an intensive few months. Having viewed others build and on the road threads on the forum, it reignited my energy for the project.
So decided to attack the interior. The rank spitfire seats were stripped down and recovered with new foam, and a new dash installed with a mixture of old and new smiths gauges. Not sure if i'm happy with it, maybe its a bit fussy and not race car but I can always change it later.
Anyway, update photo's,
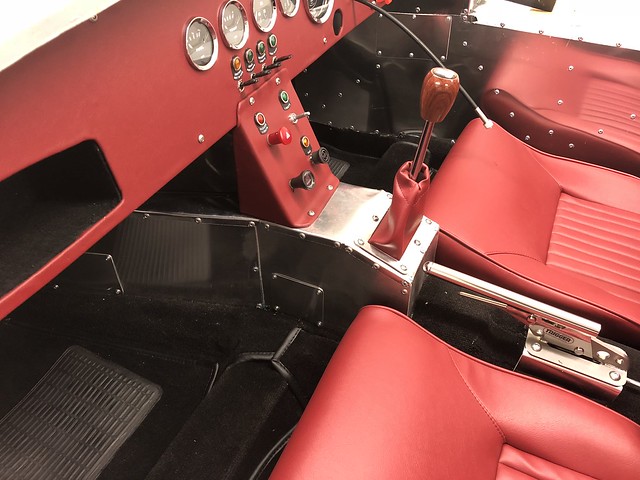 IMG_1841 IMG_1841 by Steve Ward, on Flickr
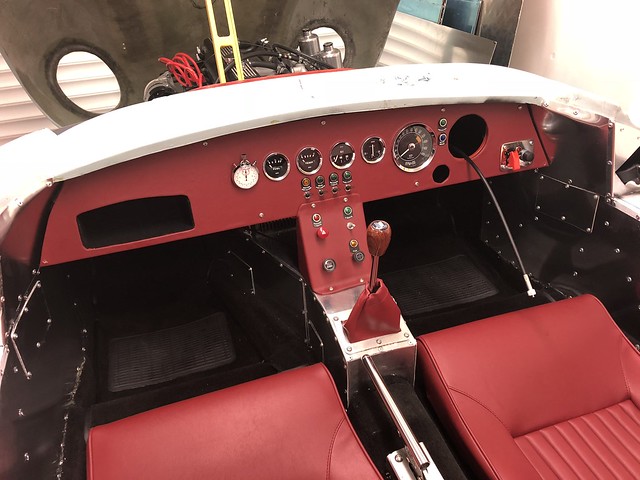 IMG_1840 IMG_1840 by Steve Ward, on Flickr
 IMG_1839 IMG_1839 by Steve Ward, on Flickr
 IMG_1837 IMG_1837 by Steve Ward, on Flickr |
11th February 2018, 15:46
|
|
Senior Member
|
|
Join Date: May 2009
Location: POOLE , DORSET
Posts: 2,200
|
|
Looking very nice ...
|
12th February 2018, 08:02
|
|
Member
|
|
Join Date: Jul 2017
Posts: 39
|
|
Wheel sizes
Gents,
Thanks for the comments - it's taken way longer than I thought to get to this stage, and the car seemed to be really fighting me at some points.
With regard to wheel sizes, has anybody fitted 15" and what tyre size did you fit. Subsequently were there any issues with clearance in the arches?? I'm planning on losing most of the rear inner arches anyway as they are pretty nasty.
Cheers
Steve.
|
13th February 2018, 06:42
|
|
Senior Member
|
|
Join Date: Nov 2012
Posts: 845
|
|
15" Wheels
Quote:
|
Originally Posted by Wardy50
With regard to wheel sizes, has anybody fitted 15" and what tyre size did you fit. Subsequently were there any issues with clearance in the arches??
|
Hi Steve
I fitted 15" TR6 wheels to my A352. I used hub adaptors after swapping the wheel studs for Range Rover ones, these increased the track about 15mm each side. I put hose clips on the outer ends of the rack to limit the lock but the tyres still fouled on the footwell part of the bulkhead, which I had to cut away and recess a good inch.
I first made the panel to fill this hole from thin ally, flattened it and used it as a template for the galvanised steel item which was seam welded. It still needed a little cold dressing with a lump hammer before I was happy with the clearance.
At the back I lined the arches with aluminium sheet using pop rivets and GRP. The 155 80 15 tyres (VW Beetle, for that 50s look) foul a little on bump but the nice MOT man has turned a blind eye
I'm fitting 15" MGF wheels to my Spitfire chassied Moss Monaco, as the PCD is also 3.75". I'm using Range Rover studs and nuts again, but, with the open wheeler design, fouling won't be a problem other than on full lock. I'll use the hose clip trick again to combat this.
Regards, Mick
|
14th February 2018, 08:36
|
|
Member
|
|
Join Date: Jul 2017
Posts: 39
|
|
Deggsy and Mick,
Thanks for the responses on the wheel sizes and clearances.
Did you both fit the offset hub adapters that are available, or the standard?? I opted for the offset ones which I'm thinking does away with the need for the spacers?? I'll try and post a pic later.
I'm also thinking of playing with tyre sizes to reduce fouling.
By my calc's the standard 13" wheels, fitted with say 165 wide and 80 aspect tyres, would have a rolling diameter of 595mm.
The 15" wheels, again fitted with 165 wide but 65 aspect tyres, would again have a rolling diameter of 595mm.
I appreciate your input on this gents based on your previous experience - to save me re-inventing the wheel as it were!!
Cheers
Steve.
|
15th February 2018, 08:04
|
|
Senior Member
|
|
Join Date: Nov 2012
Posts: 845
|
|
Hub Adaptors Saga
Quote:
|
Originally Posted by Wardy50
Deggsy and Mick,
Did you both fit the offset hub adapters that are available, or the standard??
|
This post details which adaptors I bought, and the problems that I encountered fitting them.
Regards, Mick
|
|
Currently Active Users Viewing This Thread: 1 (0 members and 1 guests)
|
|
|
 Posting Rules
|
You may not post new threads
You may not post replies
You may not post attachments
You may not edit your posts
HTML code is Off
|
|
|
All times are GMT +0. The time now is 14:59.
|


 Hybrid Mode
