|
|
| Tribute Automotive Builds Discuss your Tribute kit build |

3rd January 2016, 19:43
|
 |
Senior Member
|
|
Join Date: Apr 2013
Location: Swansea
Posts: 803
|
|
Thanks for the helpful advice. As you're using the OEM instrument assembly, I wonder how the bezel surround would look painted in body colour to reinforce the period look?
And vinyl or letraset lettering to add the veglia brand name?
Last edited by y cymro; 3rd January 2016 at 19:45..
|
3rd January 2016, 19:46
|
|
Senior Member
|
|
Join Date: Apr 2013
Location: Alicante Spain
Posts: 880
|
|
Good idea, but im not sure i would of doubled up the 'ferrari' logo, it doesnt look right underneath the MPH for me as there is a bit of a white '-' still showing. Good work non the less but doesnt look right to me.
The door cards look spot on though.
|
3rd January 2016, 19:50
|
|
Senior Member
|
|
Join Date: Apr 2013
Location: Swansea
Posts: 803
|
|
Quote:
Originally Posted by Danny_HUFC

Good idea, but im not sure i would of doubled up the 'ferrari' logo, it doesnt look right underneath the MPH for me as there is a bit of a white '-' still showing
|
From looking at cars and photos it seems that Ferrari added their logo to both speedo and tacho. |
3rd January 2016, 19:52
|
|
Senior Member
|
|
Join Date: Apr 2013
Location: Swansea
Posts: 803
|
|
Adding Acqua and Benzina lettering using vinyl or Letraset would look authentic too. A bugger to line up though.
|
3rd January 2016, 20:19
|
 |
Senior Member
|
|
Join Date: Oct 2010
Posts: 1,622
|
|
|
4th January 2016, 08:18
|
 |
Senior Member
Enthusiast
|
|
Join Date: May 2014
Posts: 607
|
|
O'Rourke have always been the industry standard but ridiculously expensive. One chap from the Daytona replica club ( www.daytonareplica.co.uk) had a quote of just under £10000 for an interior. That just carpets, seats and panels! I got a local contact to do it for £4000 to the same standard.
However that's not the point of this thread. Most people on this forum do not have £4000+ to spend on an interior. I'm showing an alternative at a 10th of the cost including steering wheel, gauges, gaiters, gear knob, seats, etc, etc. That's a challenge! I personally love finding solutions that are cheap but effective.
It was the same in my twenties when I was Drag racing against teams with massive budgets. My times were as good and sometimes better with a 10th of the budget. |
4th January 2016, 08:45
|
|
Senior Member
|
|
Join Date: Nov 2011
Posts: 3,558
|
|
O'rourke for reference, Nubodi for method
|
4th January 2016, 08:47
|
|
Senior Member
|
|
Join Date: Feb 2015
Posts: 678
|
|
Another cheap and cheerful trick just one stage further is to take out the entire dial background plate, scan it, then photo shop original style F gauges and fonts on.
I did this for the Italian replica Facebook group when I had a 355 rep. made a whole set of dials for the MR2 that aped the 355 originals. Some of the guys just literally printed them out, laminated them and used them like that!
Here's an example that someone else did for F430 although this guy had them professionally produced (I think by Lockwood).
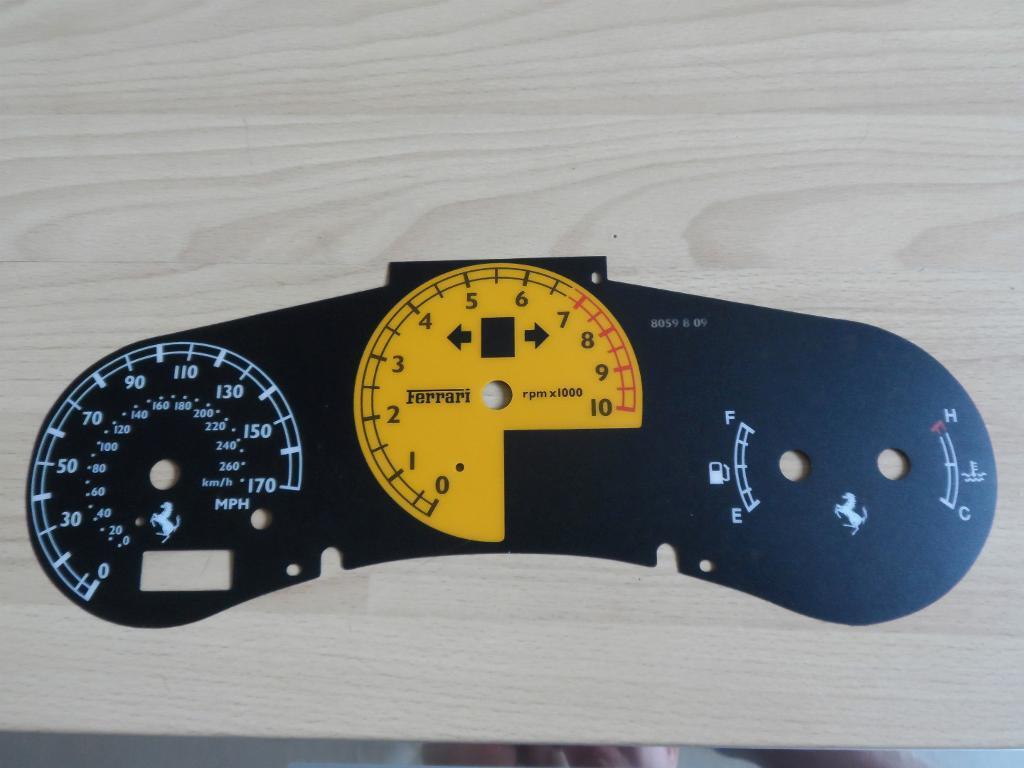
If anyone can send me a scan of the Z3 gauage backplate I'll have a go at producing one in 250 swb gauge style. I've still got the F355 psd files somewhere with all the Veglia logos etc. |
4th January 2016, 08:59
|
|
Senior Member
|
|
Join Date: Apr 2013
Location: Alicante Spain
Posts: 880
|
|
I had them for my 360 replica. The owner of the dna automotive ownersclub ordered a fair few of them and they worked out at around £25 a set if i remember rightly.
If you have a look at my MX250 build thread, I was going to make them myself for my mx5 but never got round to it. There is a helpful link on how to do it very easily.
|
9th January 2016, 17:32
|
|
Senior Member
Enthusiast
|
|
Join Date: May 2014
Posts: 607
|
|
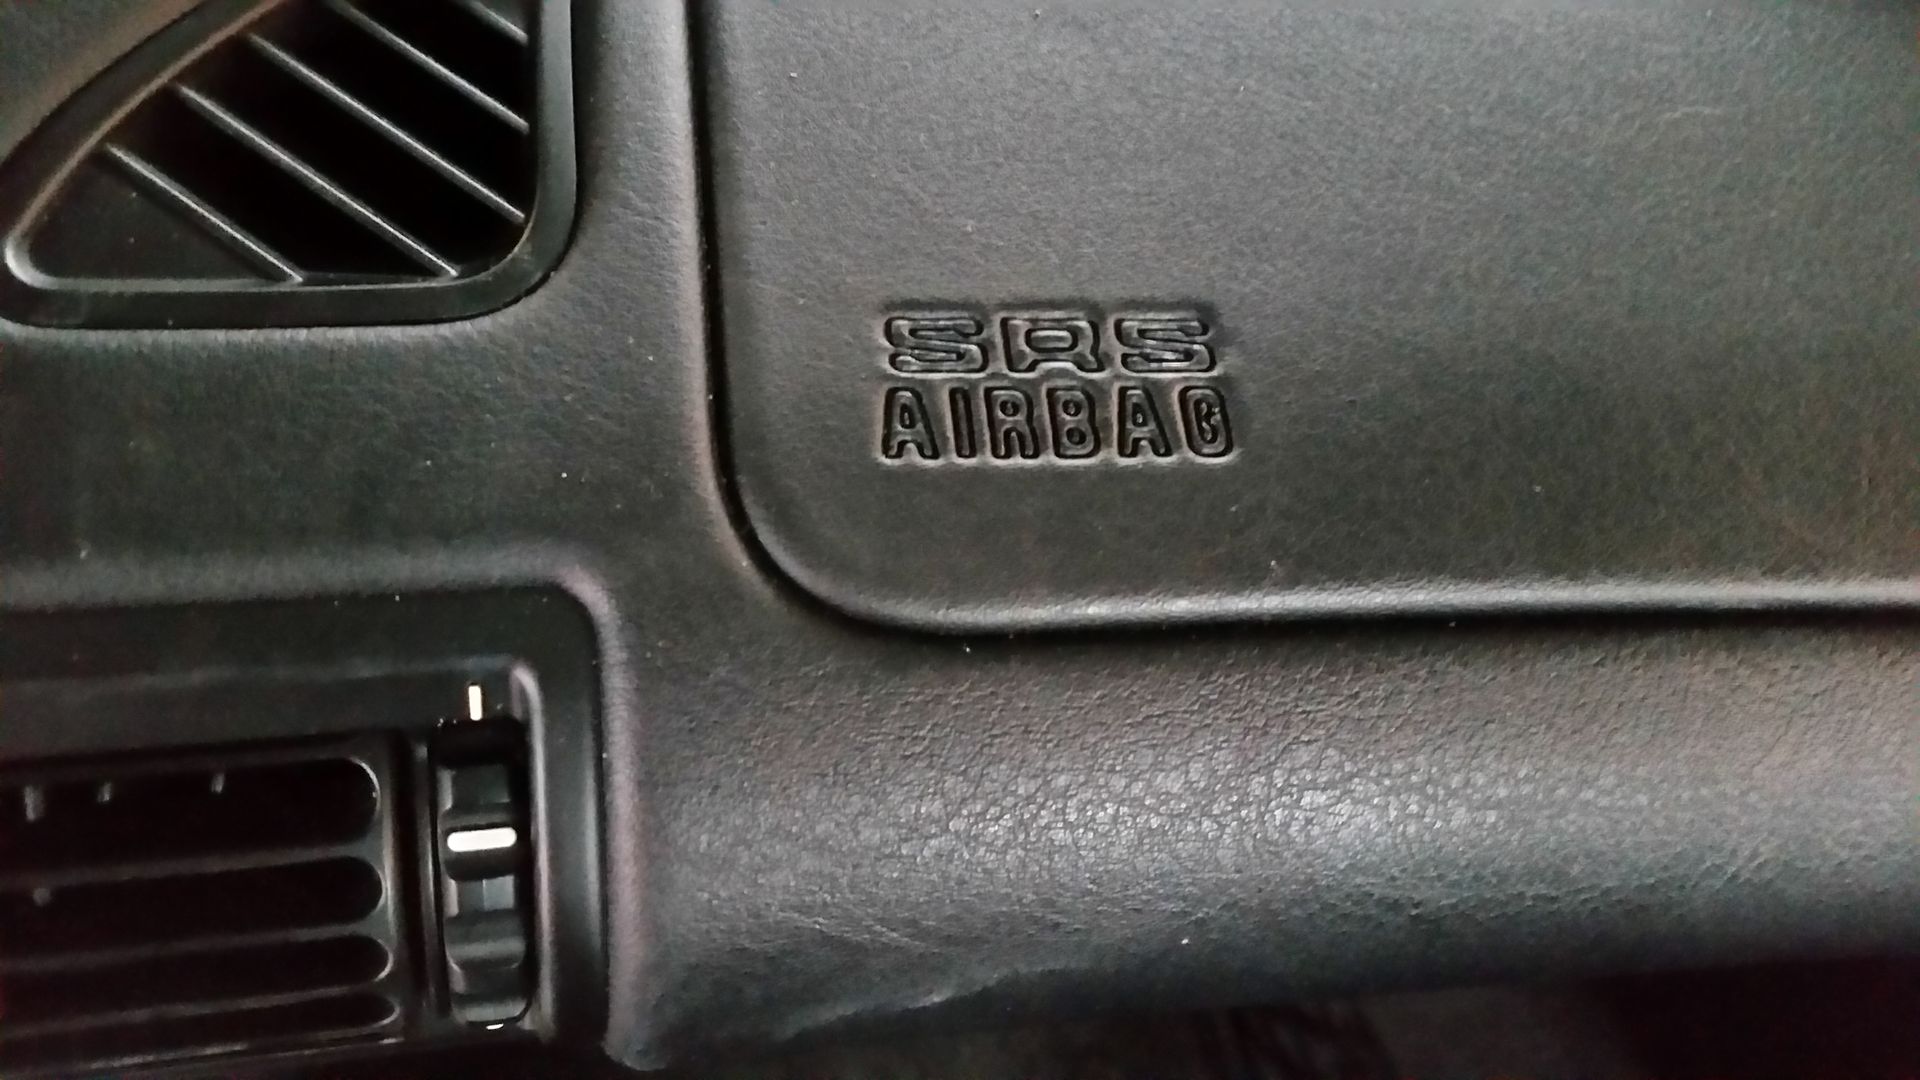
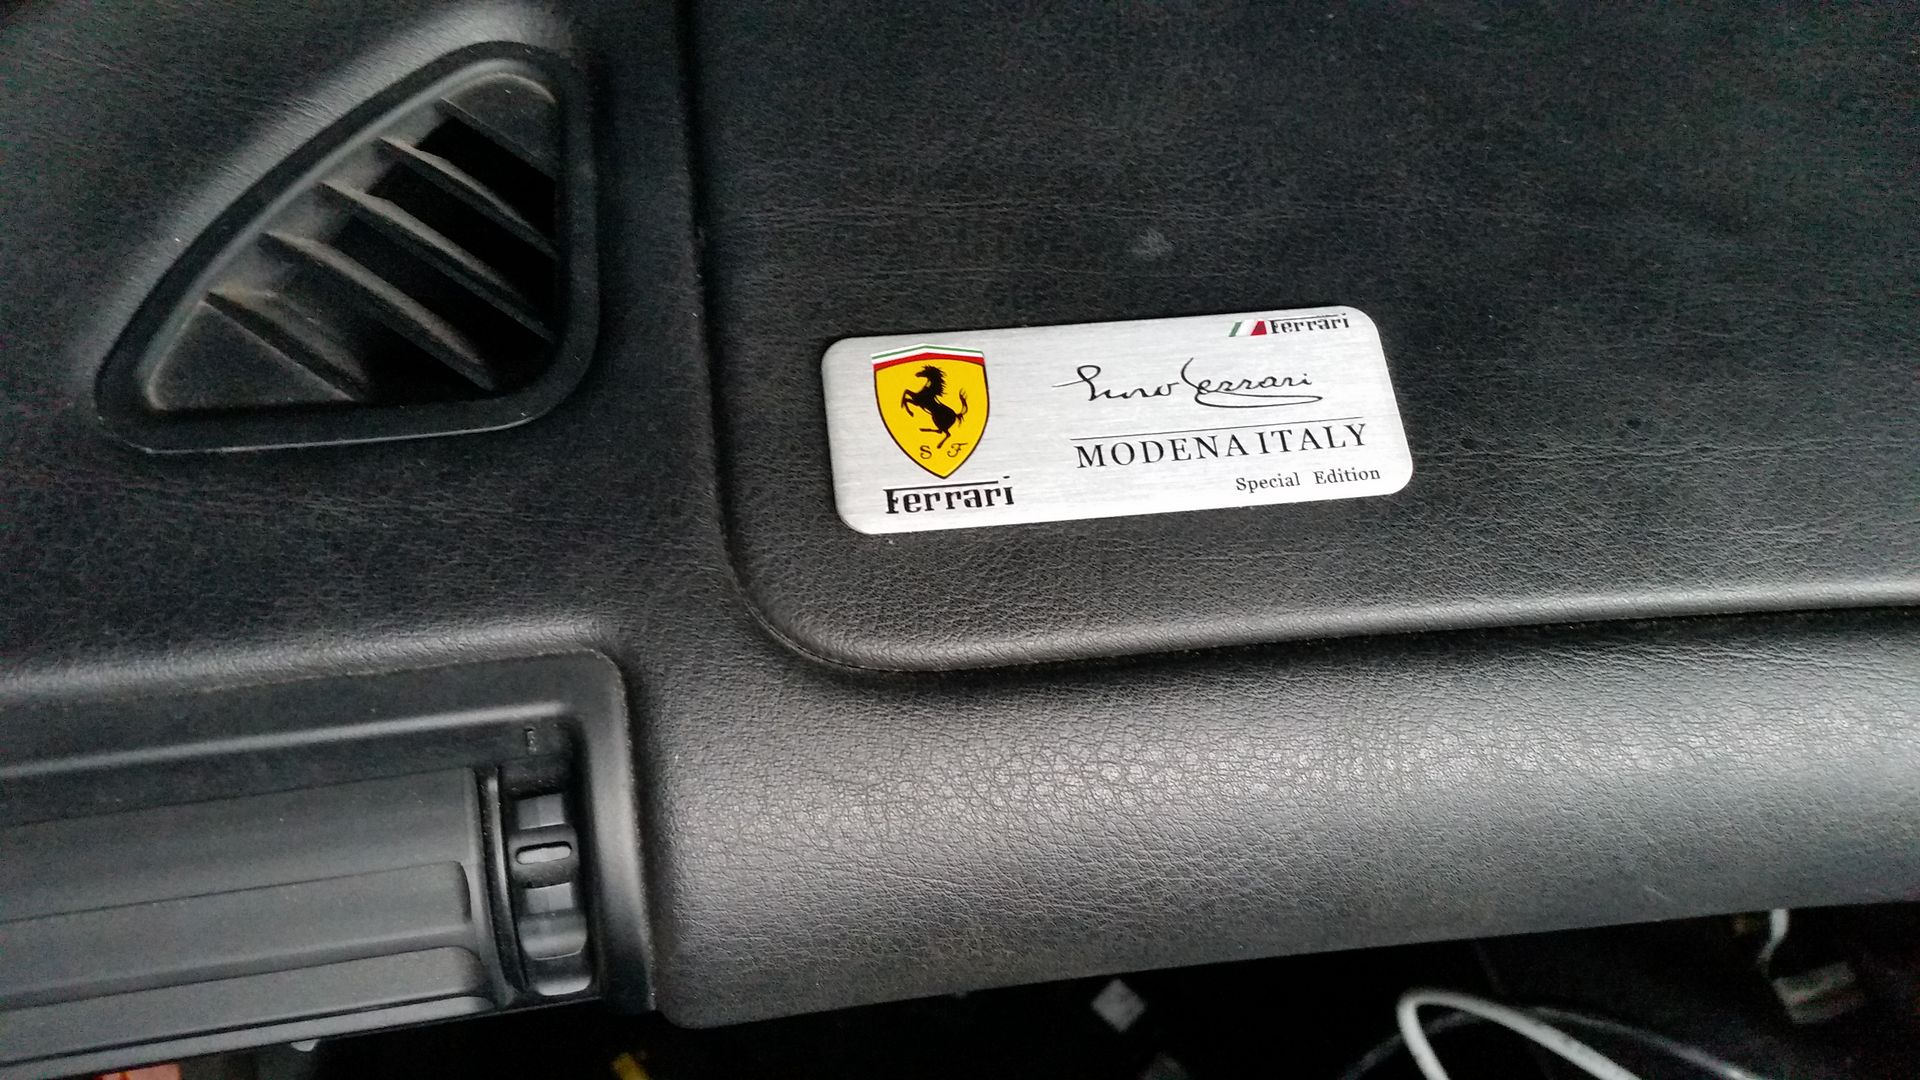
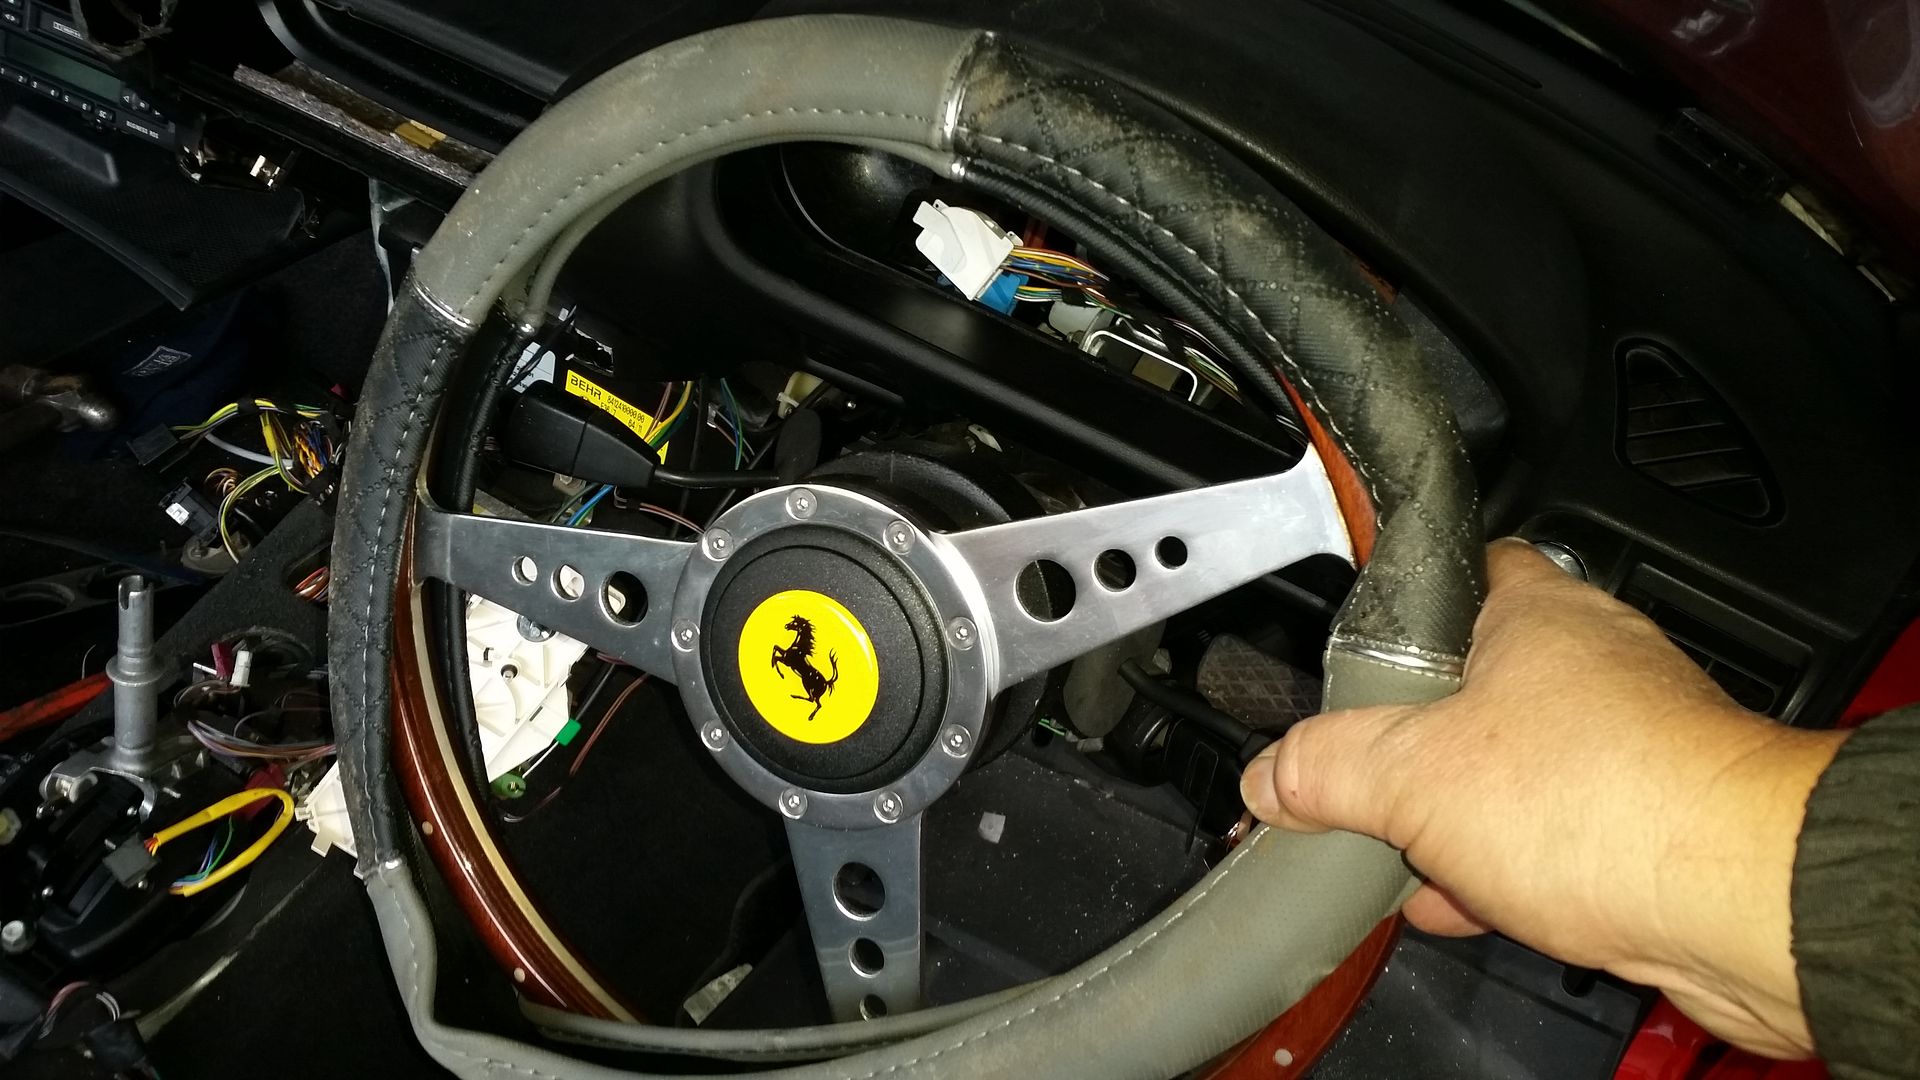
The passenger airbag has an embossed logo on it which is a dead giveaway. I have been searching for the right badge to cover it up. It has to be appropriate and the correct size. I think I have the perfect one now.
 |
9th January 2016, 17:36
|
|
Senior Member
Enthusiast
|
|
Join Date: May 2014
Posts: 607
|
|
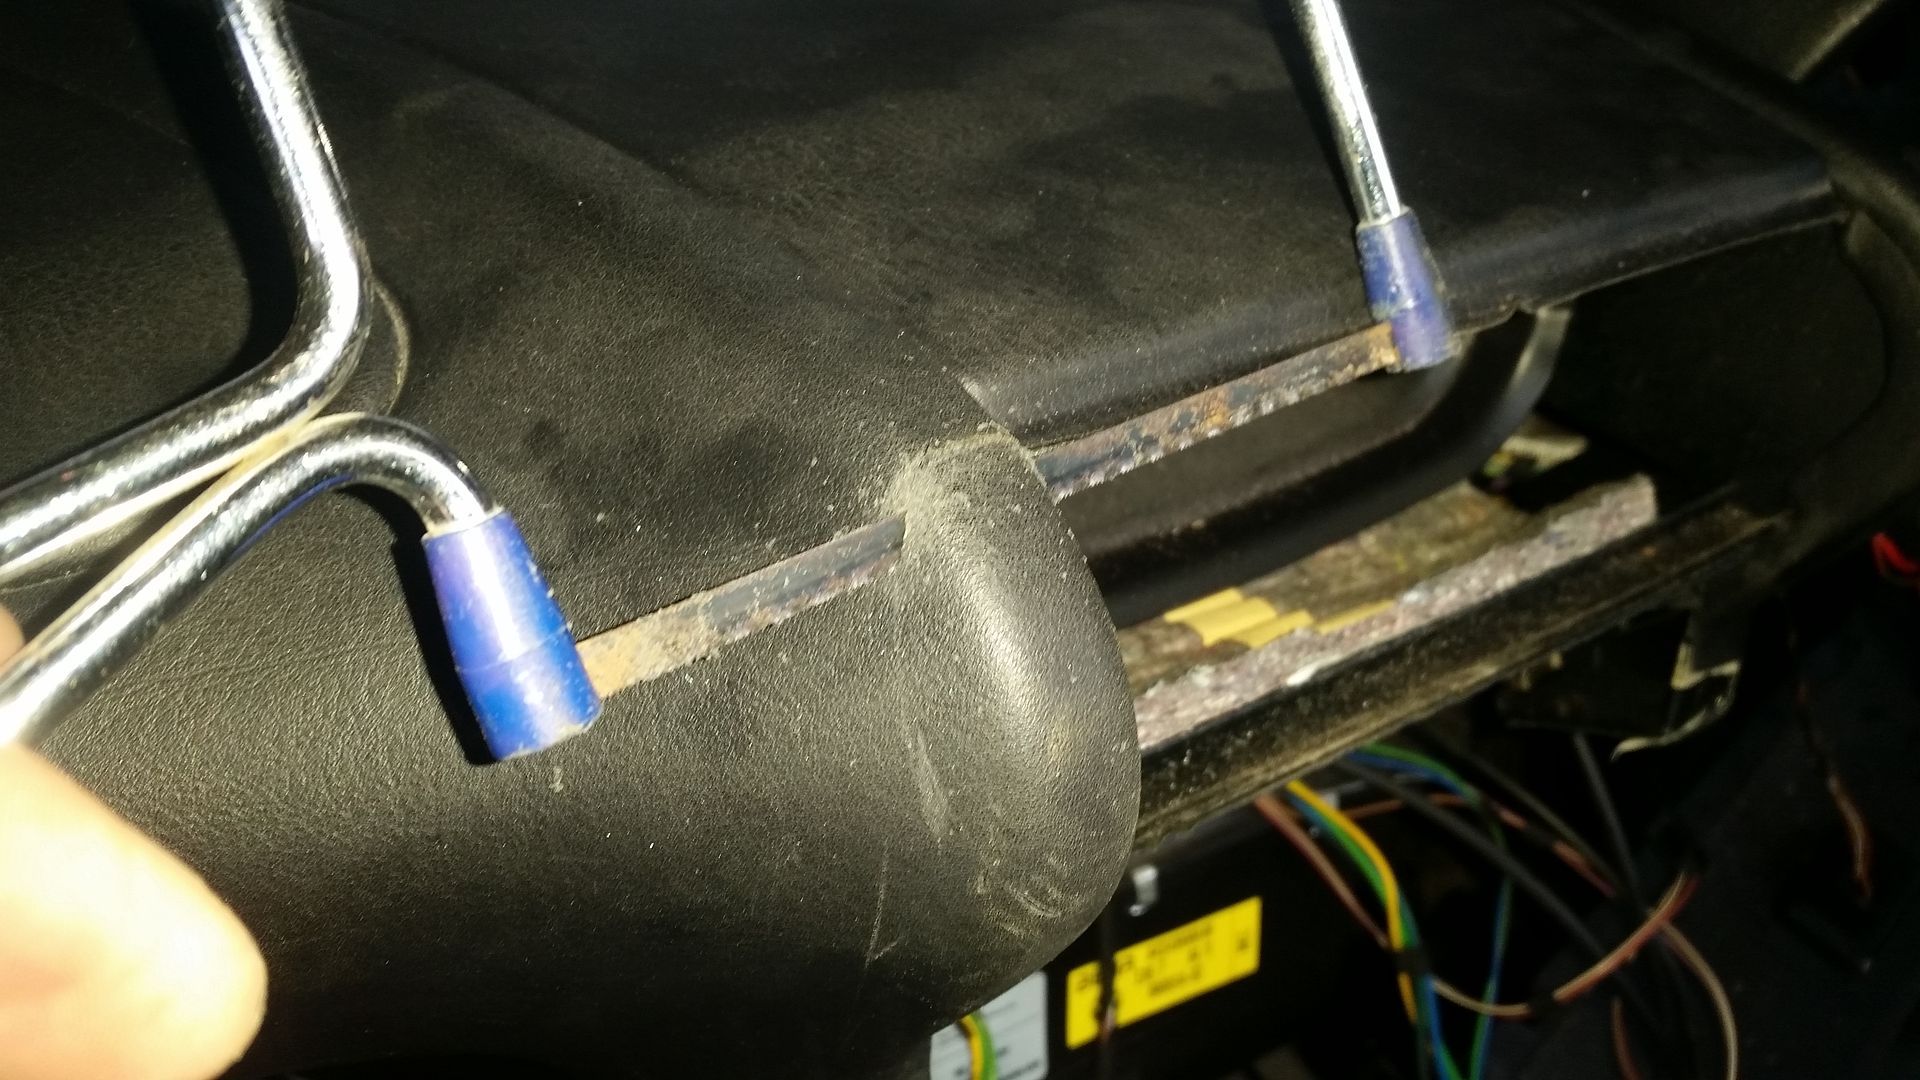
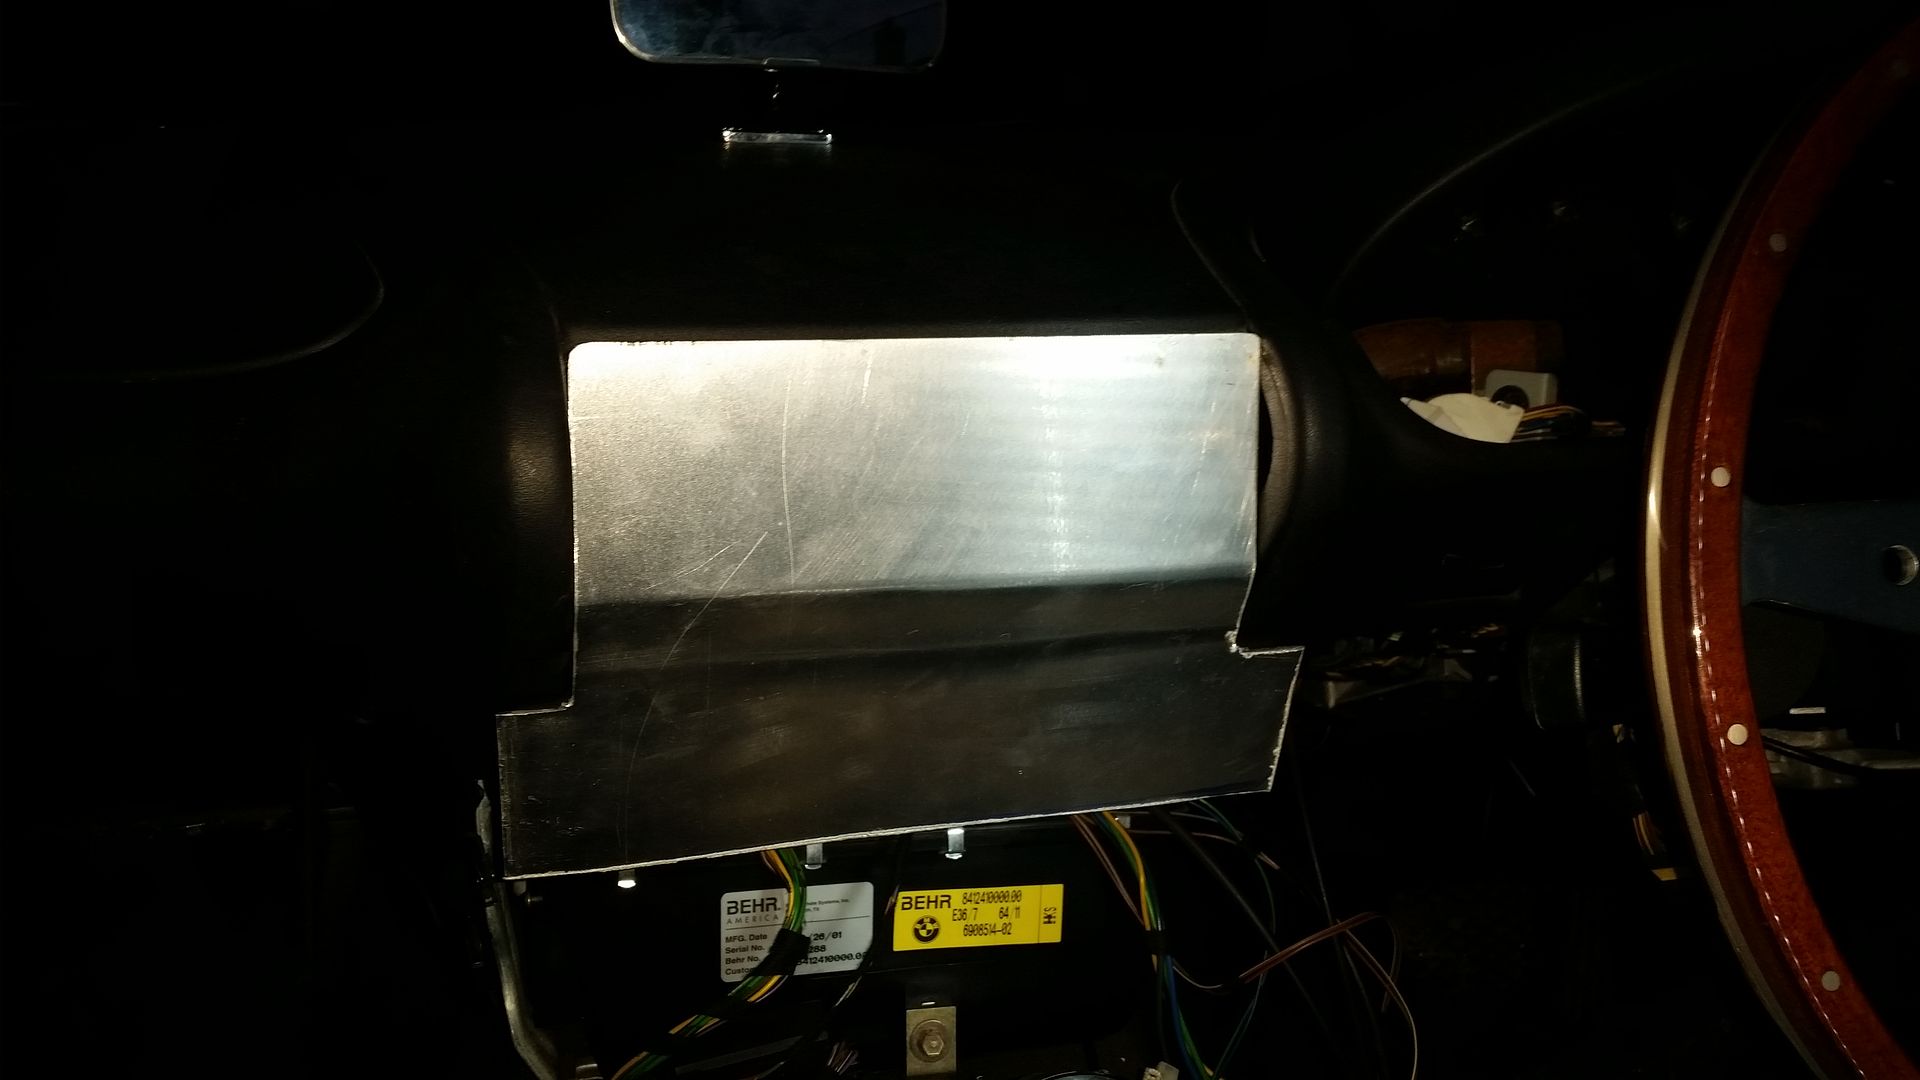
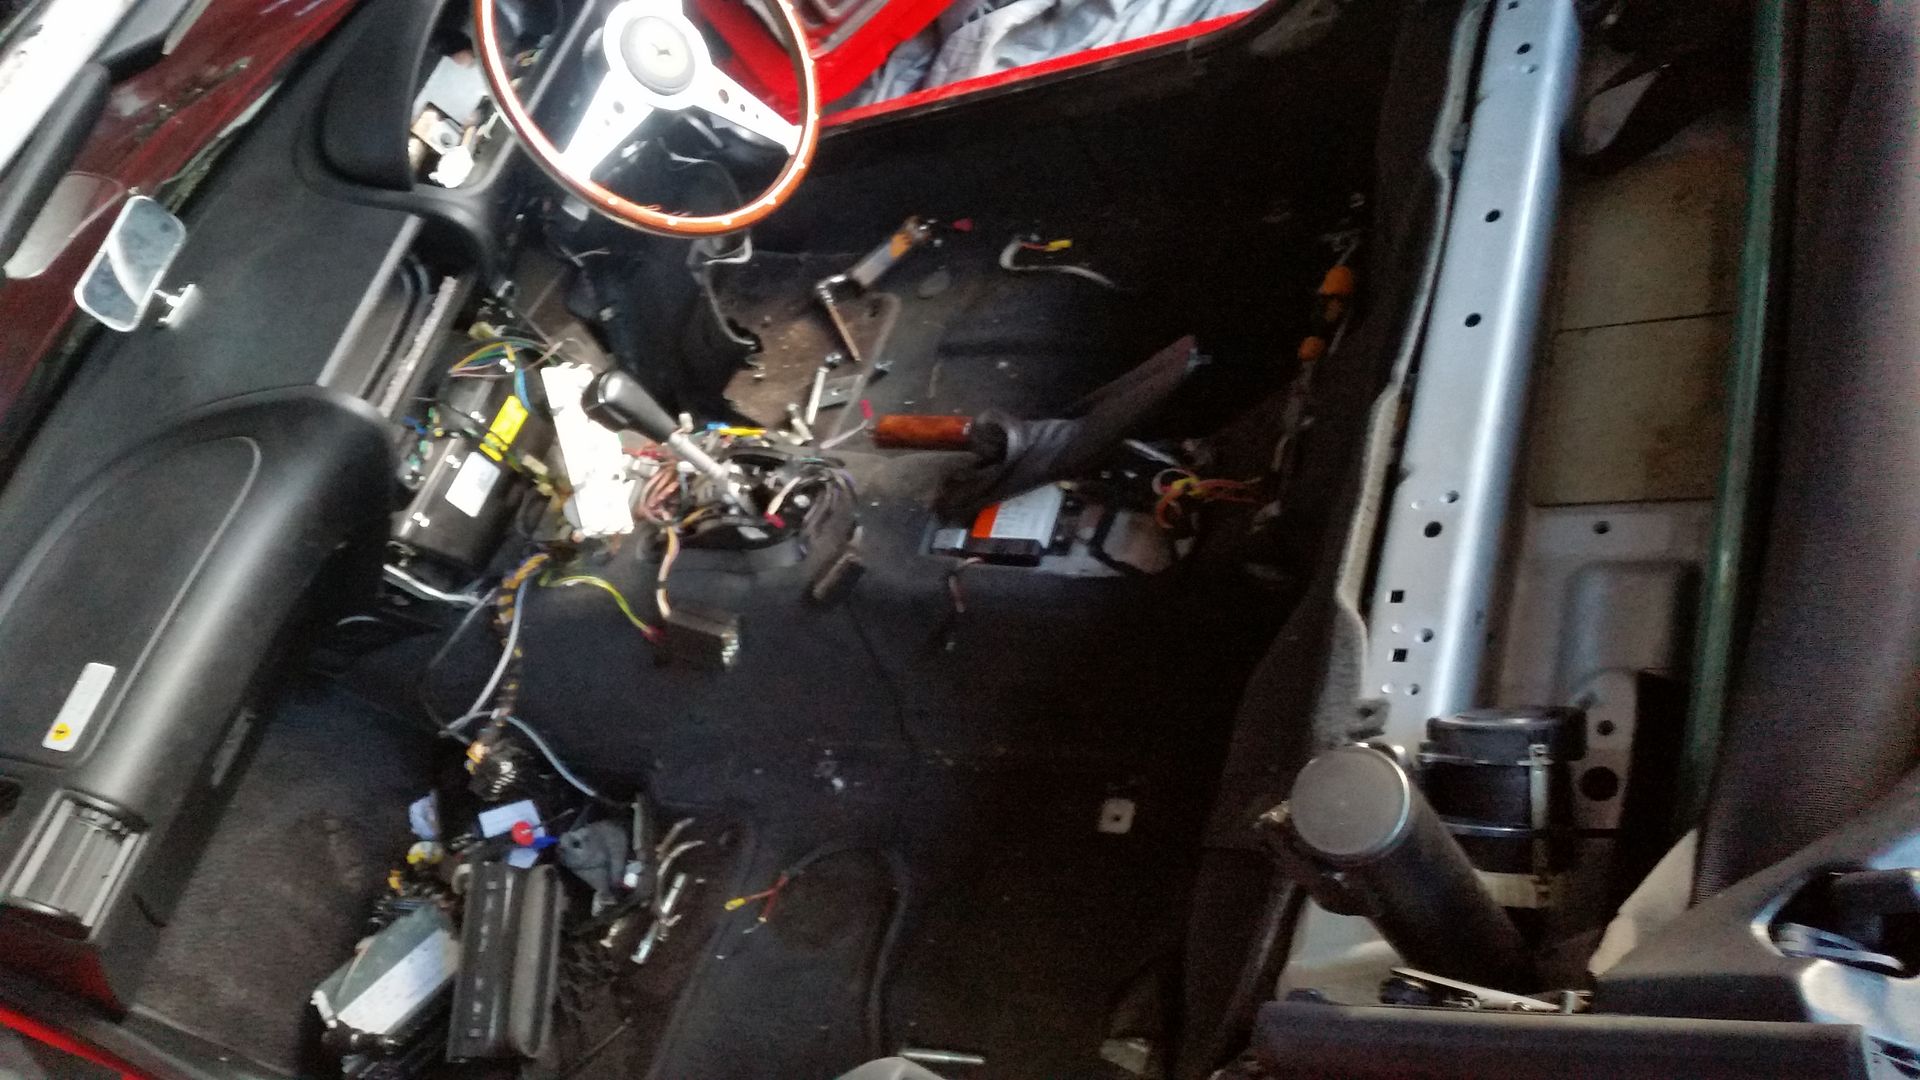
I wanted to start disguising the dashboard. The ‘ears’ that stick out from the dashboard that house the centre vents are a characteristic of the breed so I cut them off. If thy ears affend thee....
 |
9th January 2016, 17:37
|
|
Senior Member
Enthusiast
|
|
Join Date: May 2014
Posts: 607
|
|
I made up a cardboard template of the bracket I wanted to make. Can you see what it is yet Rolf???
 |
9th January 2016, 17:39
|
|
Senior Member
Enthusiast
|
|
Join Date: May 2014
Posts: 607
|
|
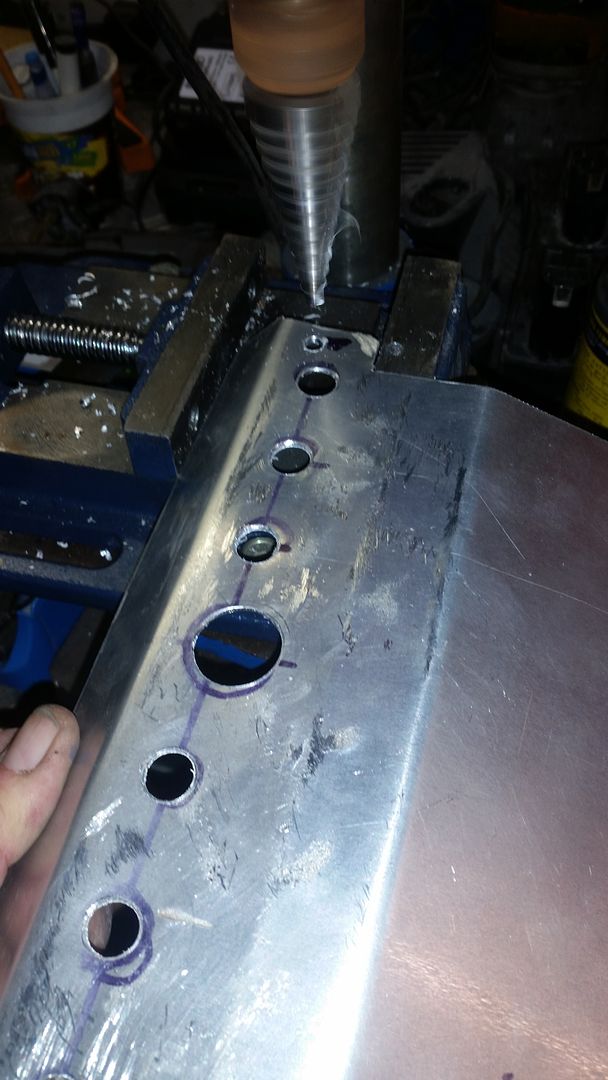
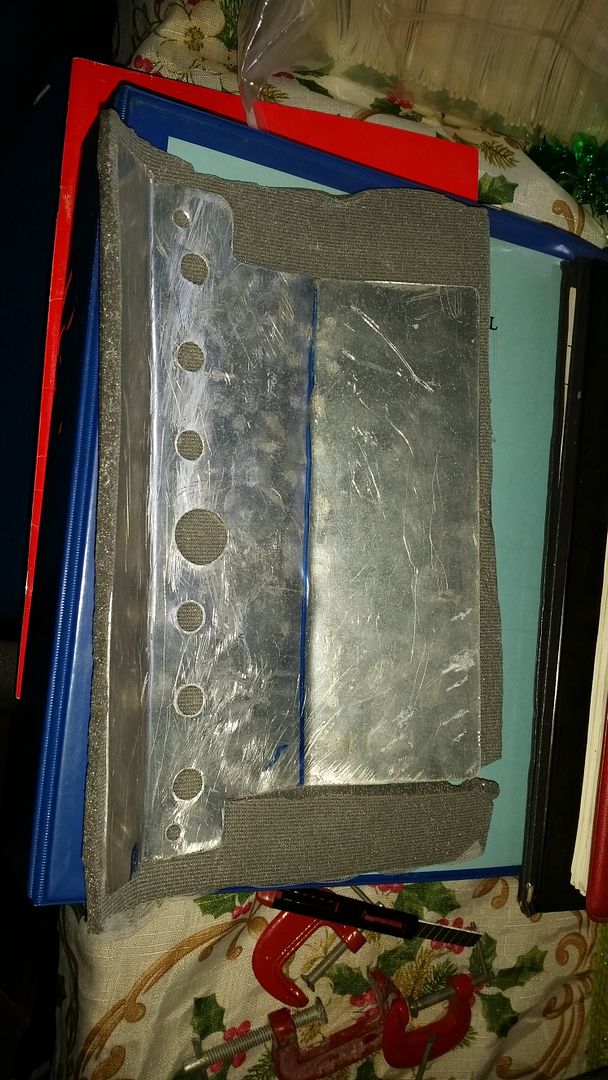
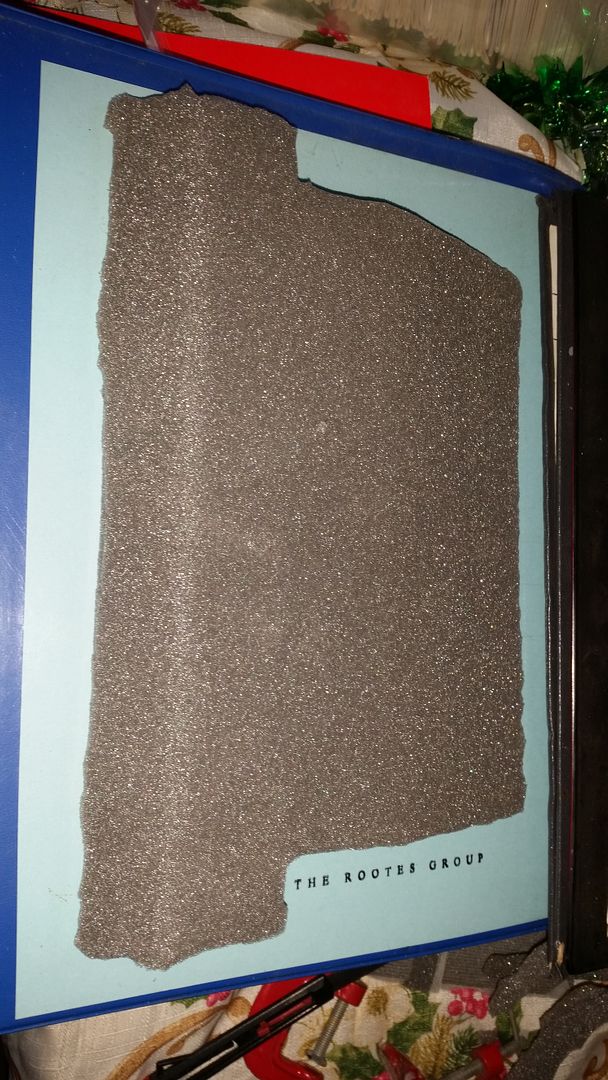
Then drew around it and cut it out of 0.8mm aluminium (same stuff I did the door panels in, offcut).
 |
9th January 2016, 17:41
|
|
Senior Member
Enthusiast
|
|
Join Date: May 2014
Posts: 607
|
|
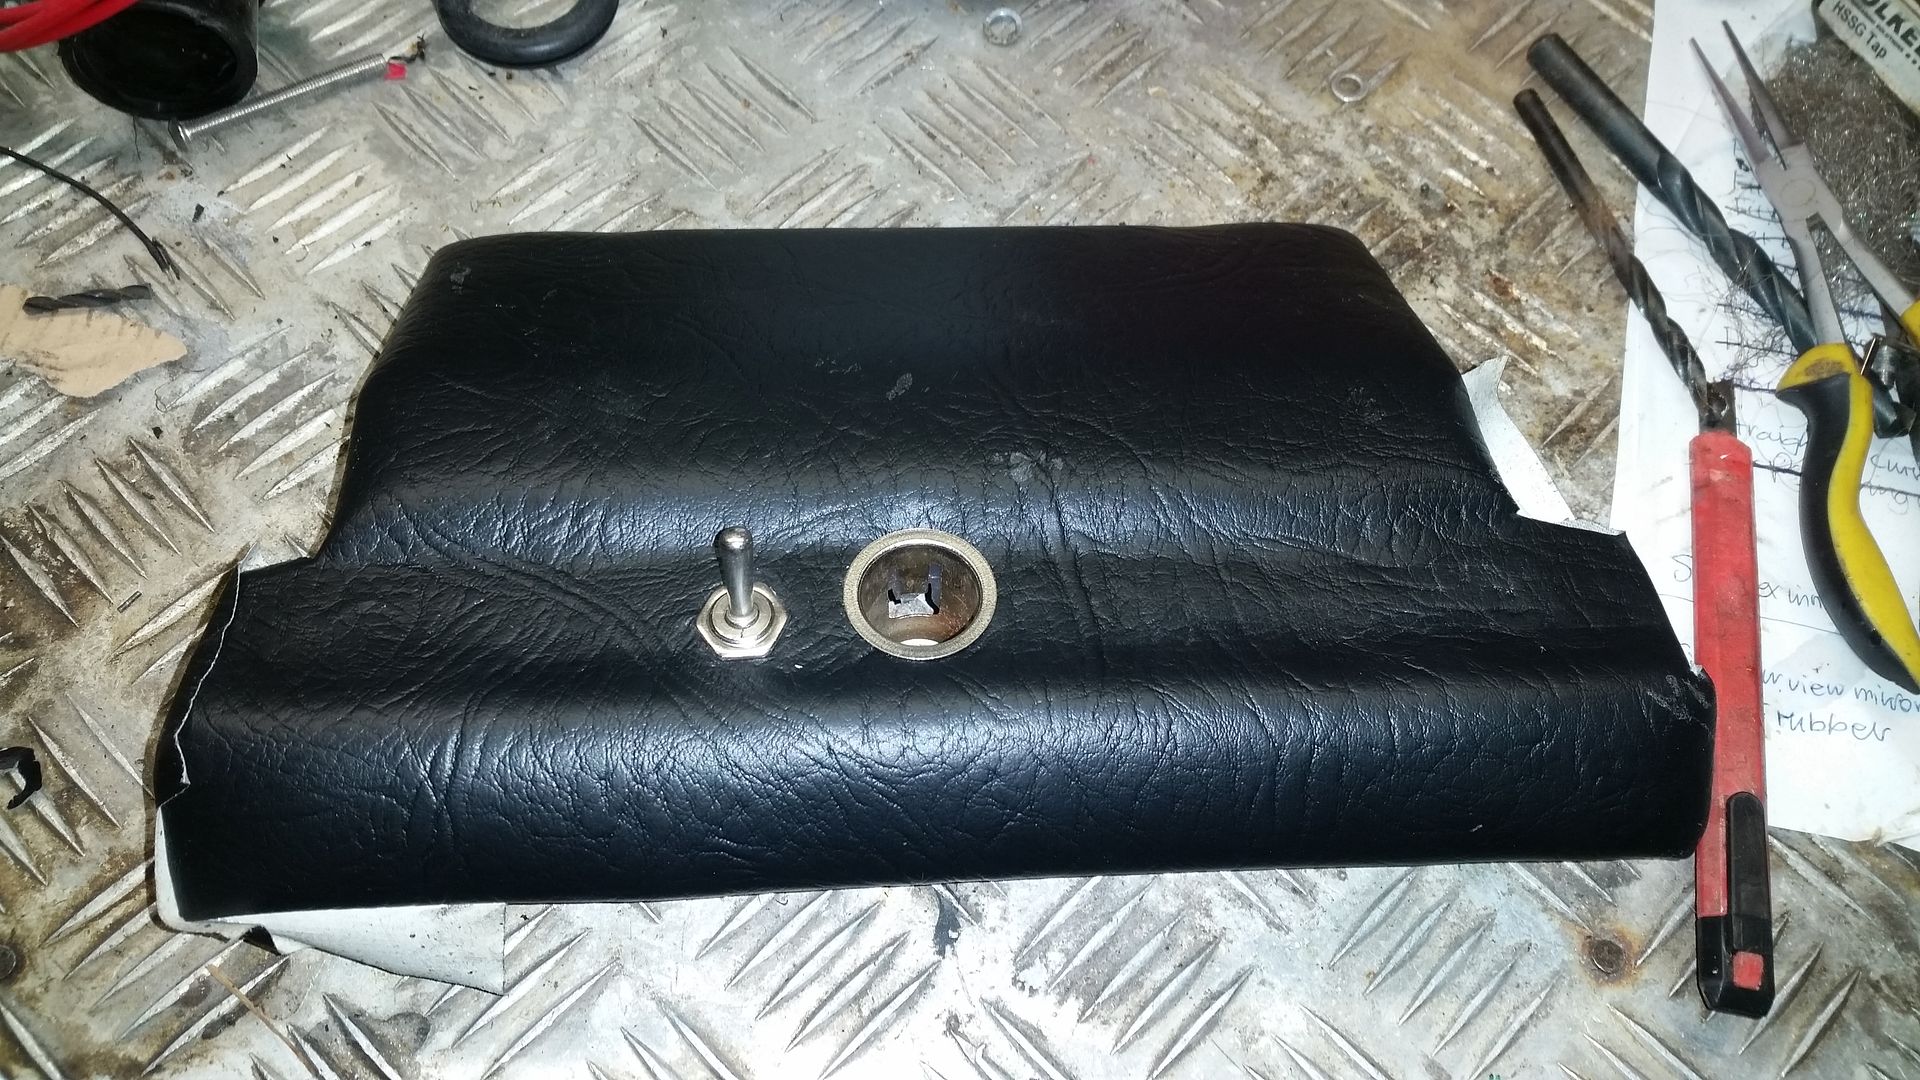
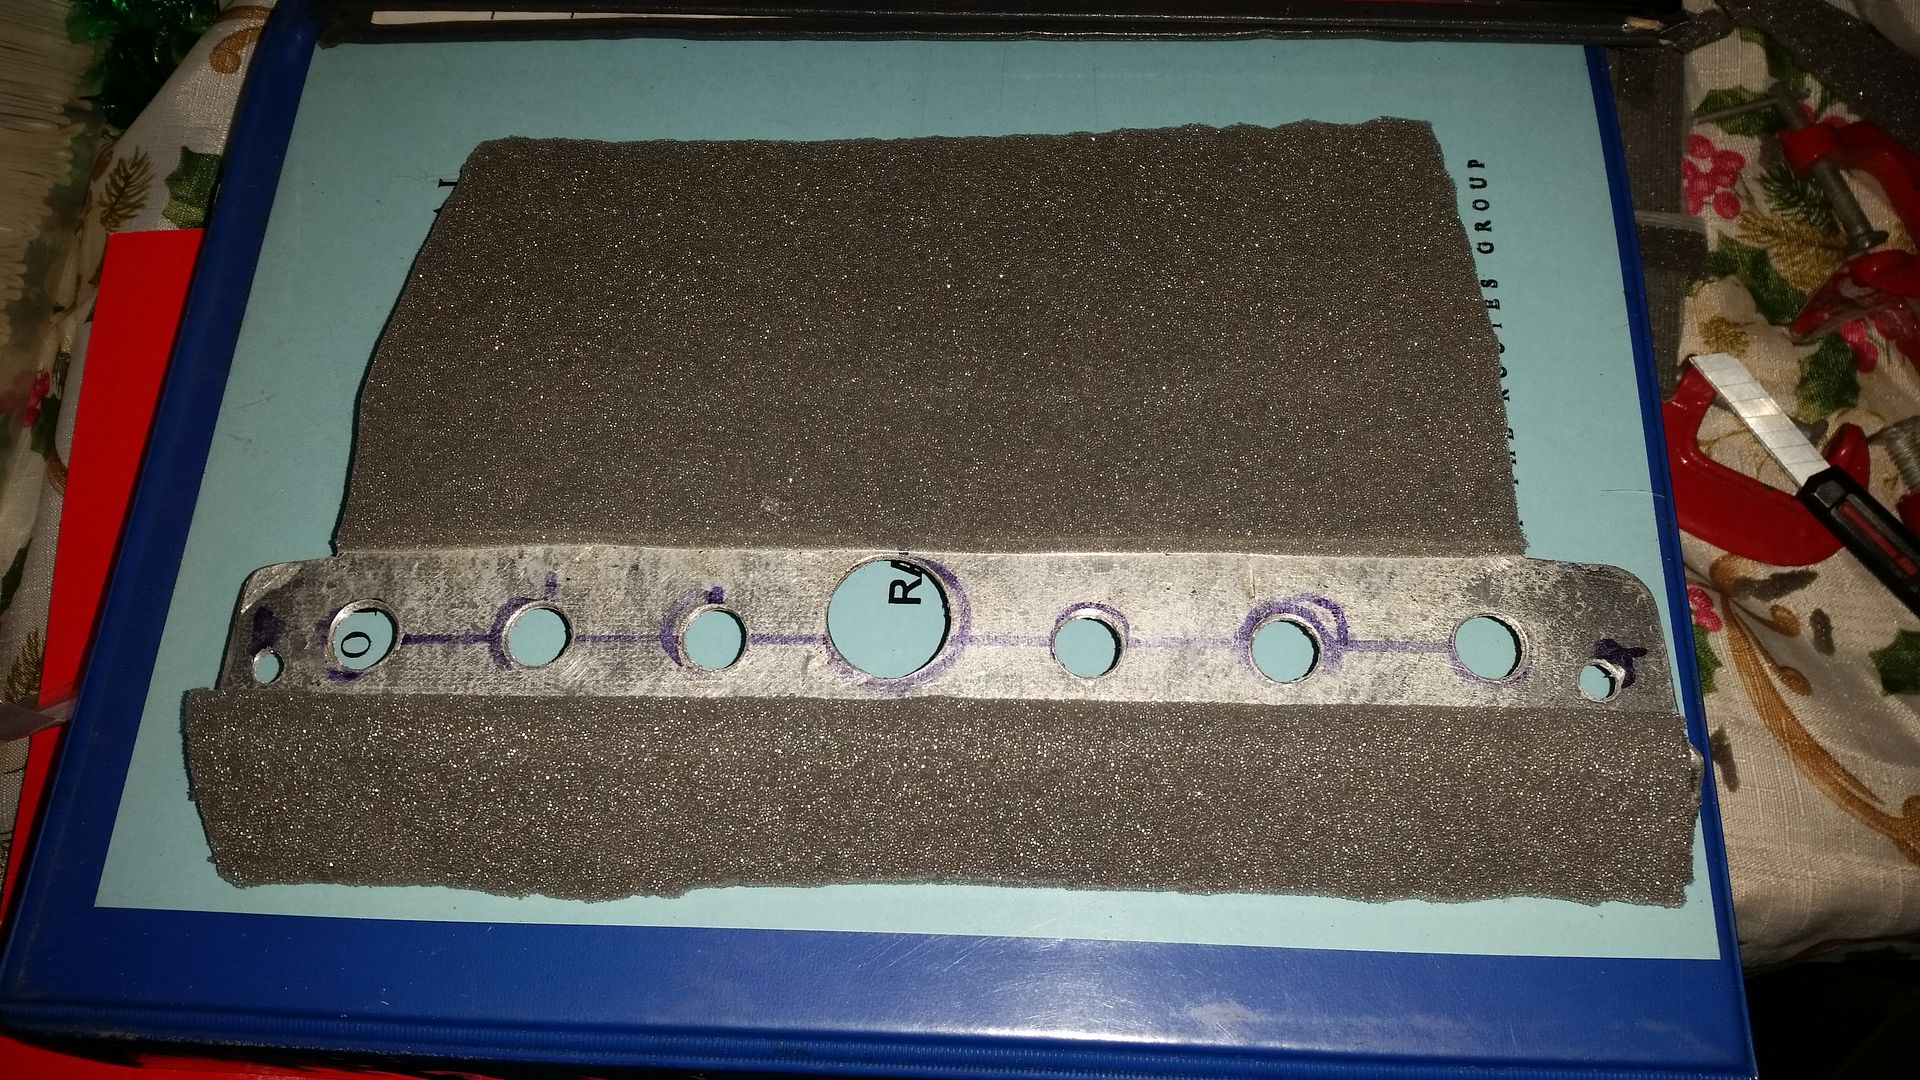
I planned where I wanted the cigarette lighter (could have been a dummy ignition switch or a choke cable, etc but I use the sat nav a lot so this was the first choice) and the eight dummy switches. You could make use of them but I prefer the Z3 ones hidden from view.
 |
9th January 2016, 17:44
|
|
Senior Member
Enthusiast
|
|
Join Date: May 2014
Posts: 607
|
|
|
9th January 2016, 17:47
|
|
Senior Member
Enthusiast
|
|
Join Date: May 2014
Posts: 607
|
|
Here's a top tip, If you are not removing your polished wood steering wheel and do not want it getting damaged, just slip on a steering wheel cover to protect it till you are finished.
 |
9th January 2016, 17:49
|
|
Senior Member
Enthusiast
|
|
Join Date: May 2014
Posts: 607
|
|
I then covered the panel in leatherette same as the door panels. I fitted the cigarette lighter socket and the dip switches.
 |
9th January 2016, 17:52
|
|
Senior Member
Enthusiast
|
|
Join Date: May 2014
Posts: 607
|
|
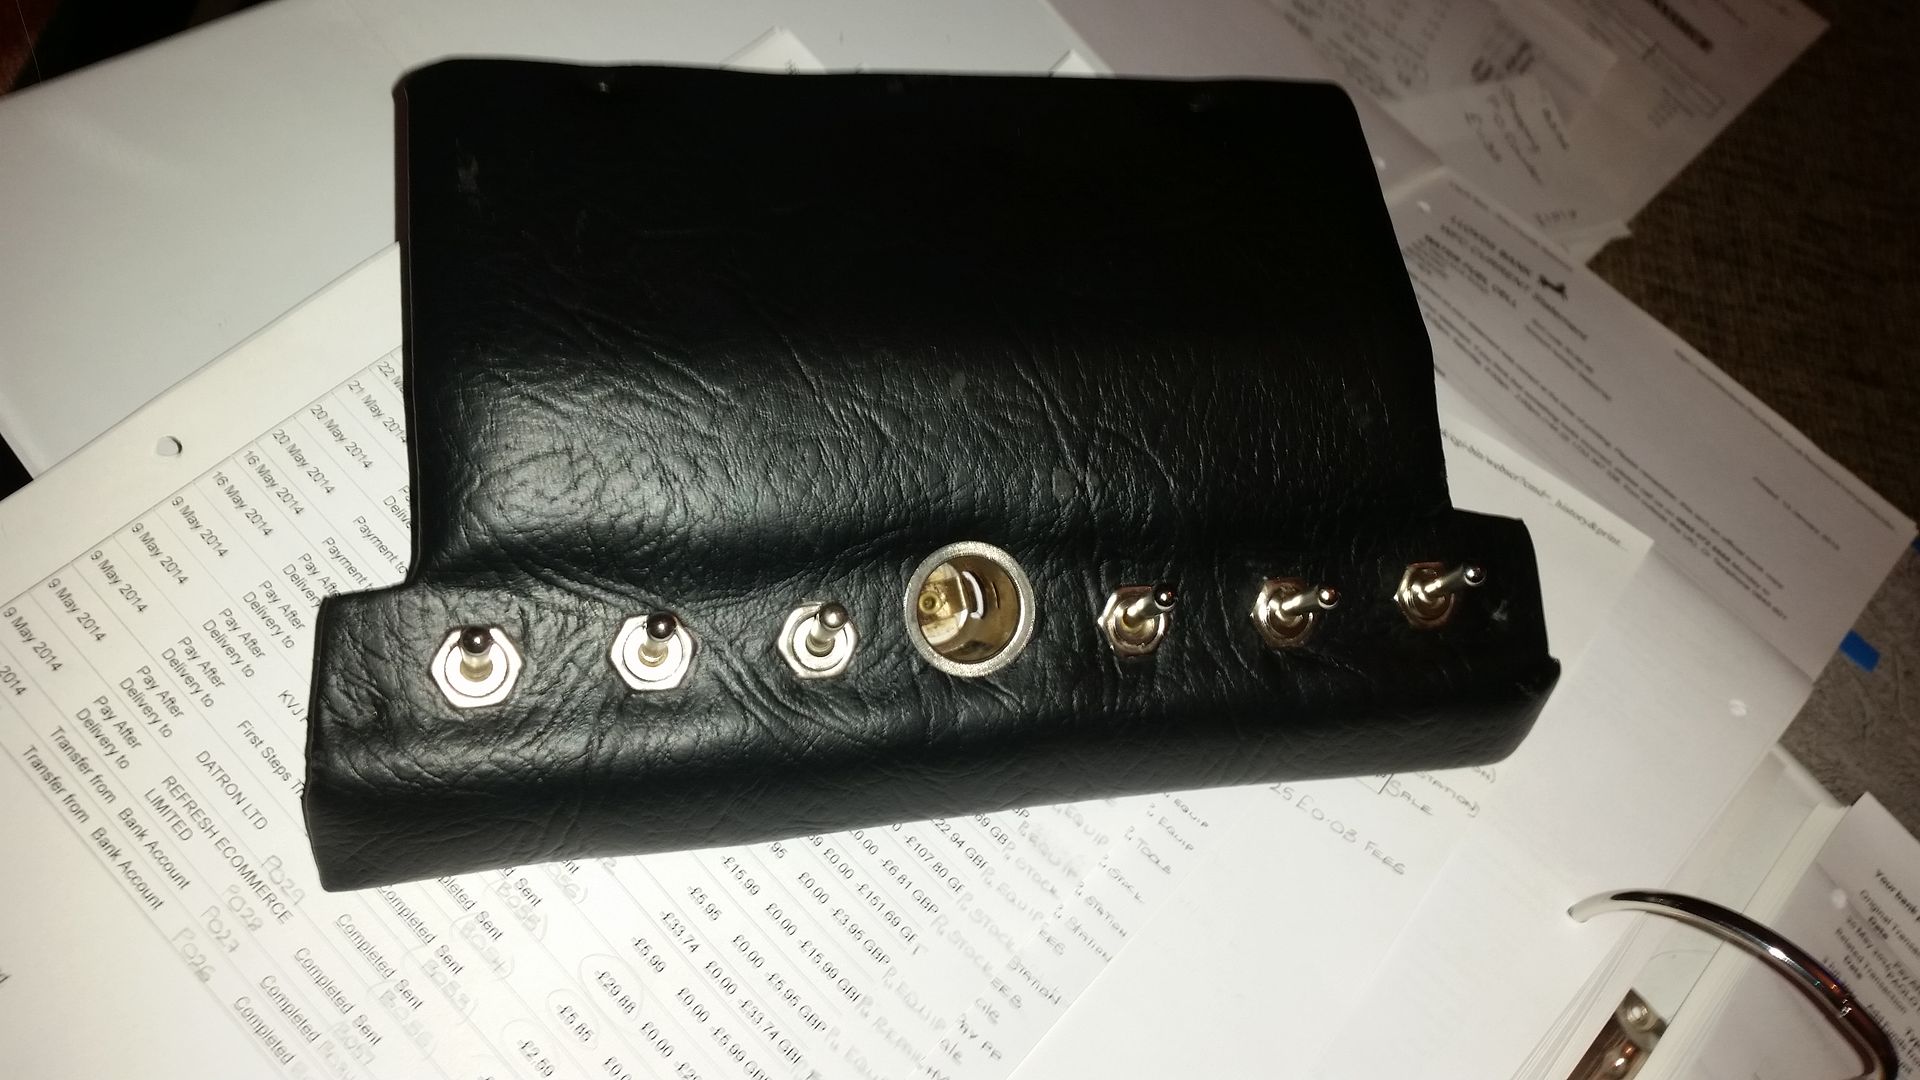
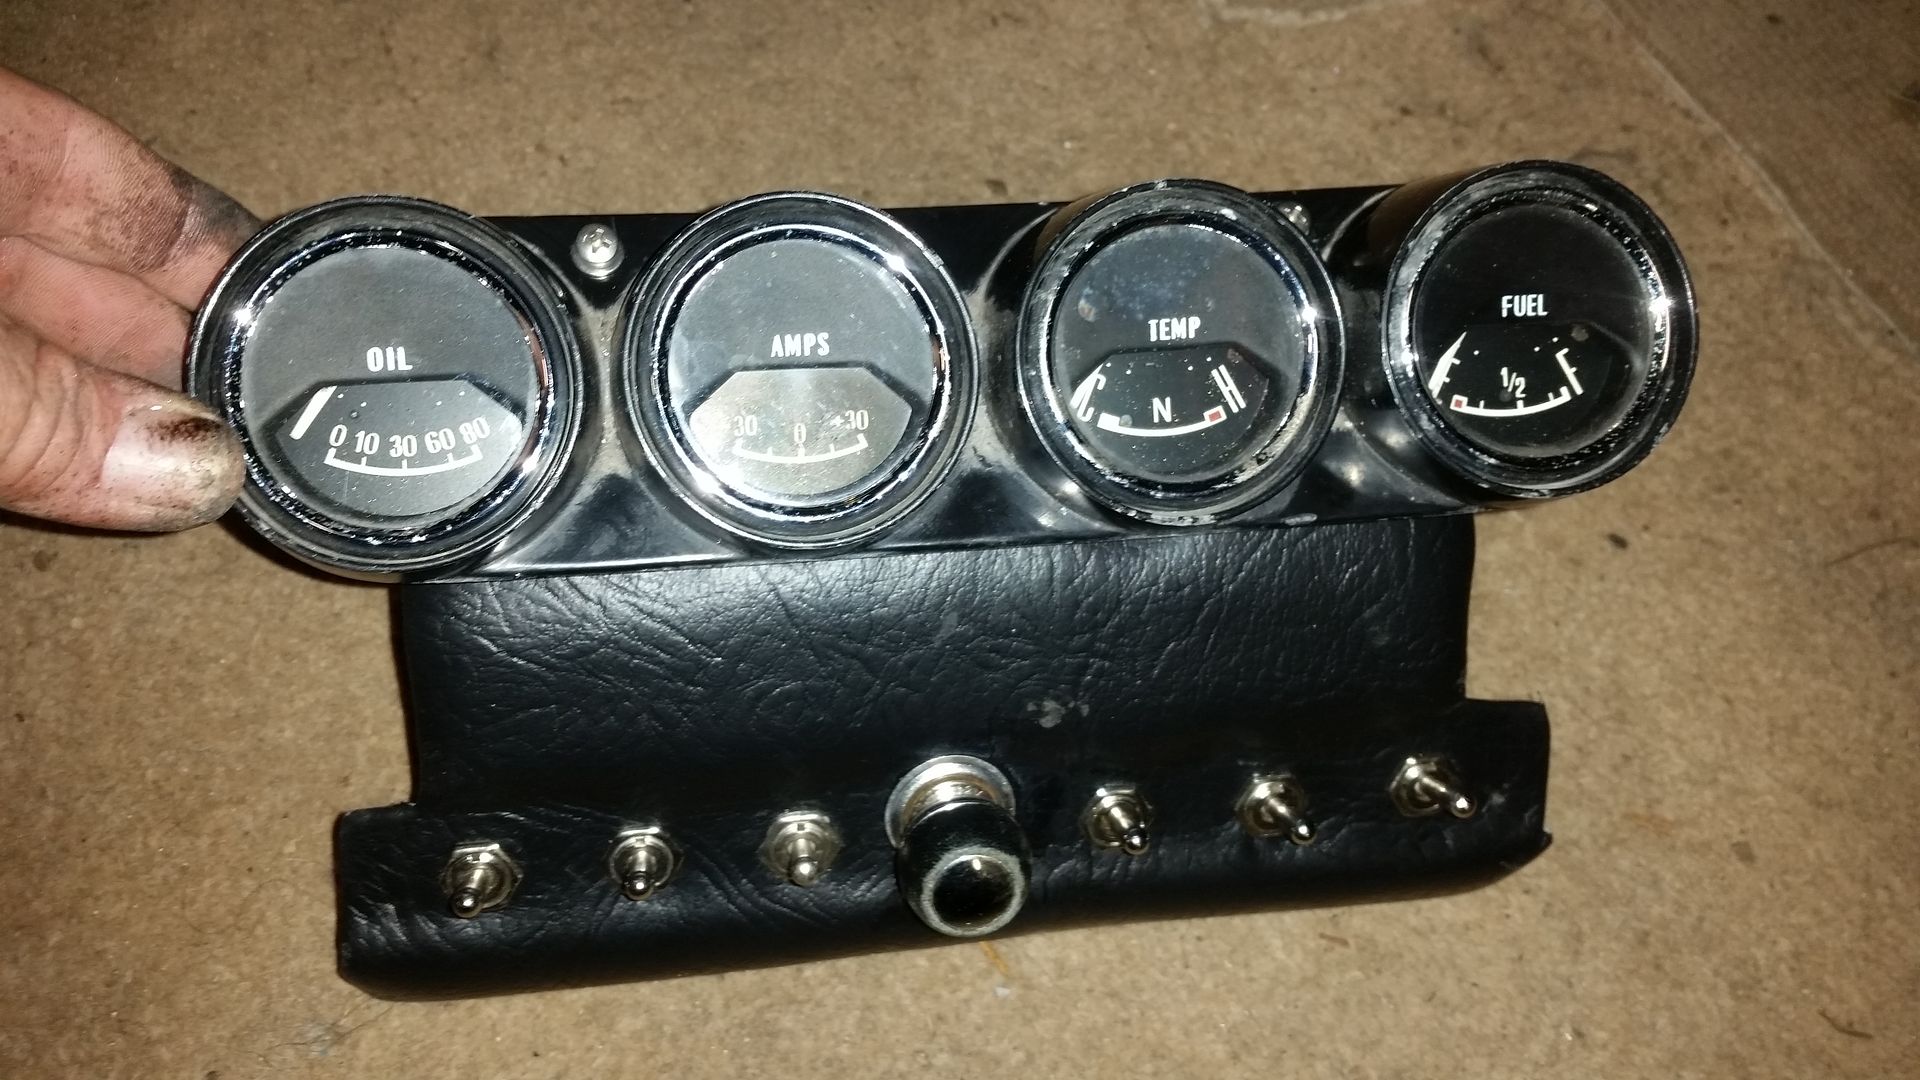
As you can see here I bolted the gauges pod I had (from a ford I think, came from a car boot £8 with gauges as the seller said a couple did not work) to the plate. It’s starting to take shape.
 |
9th January 2016, 17:54
|
|
Senior Member
Enthusiast
|
|
Join Date: May 2014
Posts: 607
|
|
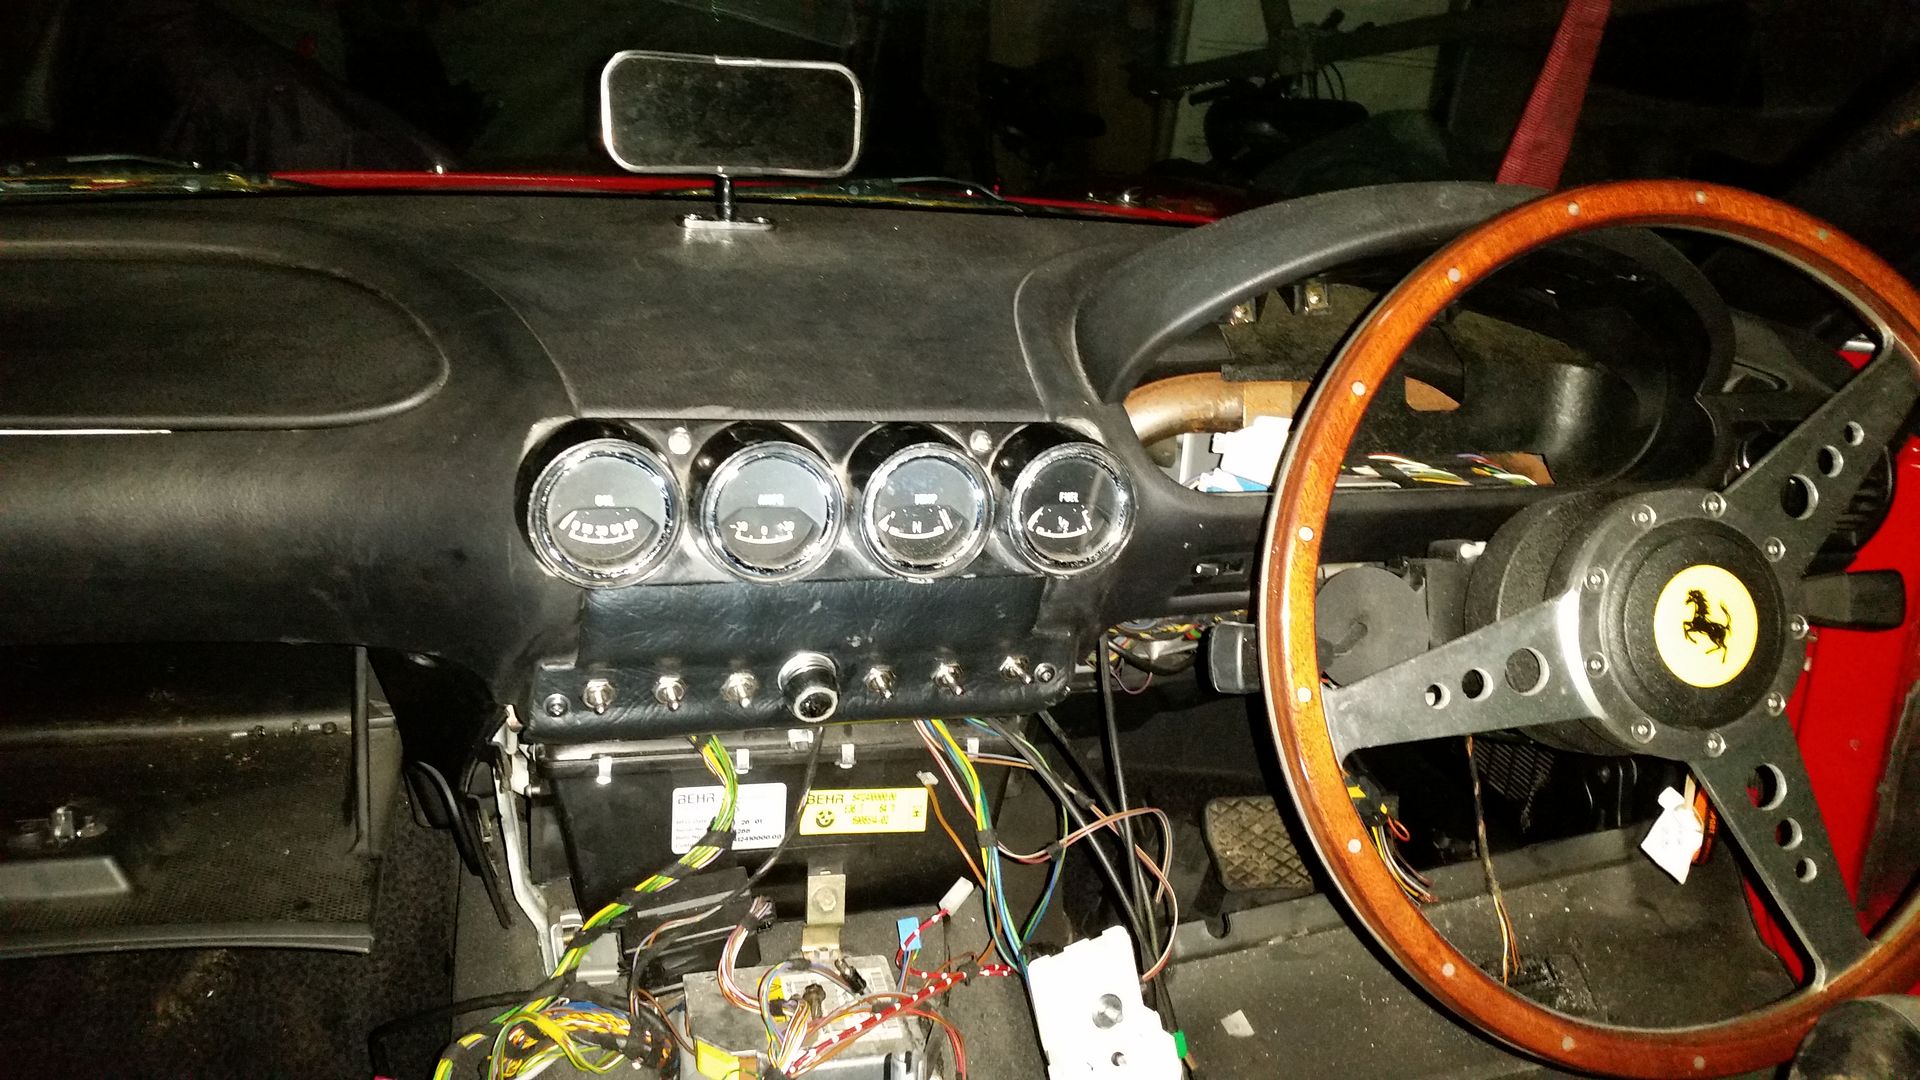
This is with the plate bolted to the dashboard. I will post a photo of them in the day light, they look much better than in the flash light. I have to tidy the edges and clean but you get the idea.
 |
|
Currently Active Users Viewing This Thread: 1 (0 members and 1 guests)
|
|
|
 Posting Rules
|
You may not post new threads
You may not post replies
You may not post attachments
You may not edit your posts
HTML code is Off
|
|
|
All times are GMT +0. The time now is 19:55.
|


 Linear Mode

