|
|
| Miglia Builds and discussion Miglia bodied builds |

31st March 2013, 10:10
|
|
Senior Member
|
|
Join Date: Sep 2012
Posts: 424
|
|
Nice work tony, ill get you your floor pans so you can fit prior frame and body.
|
2nd April 2013, 08:08
|
 |
Senior Member
|
|
Join Date: Jan 2012
Location: Poole, Dorset
Posts: 615
|
|
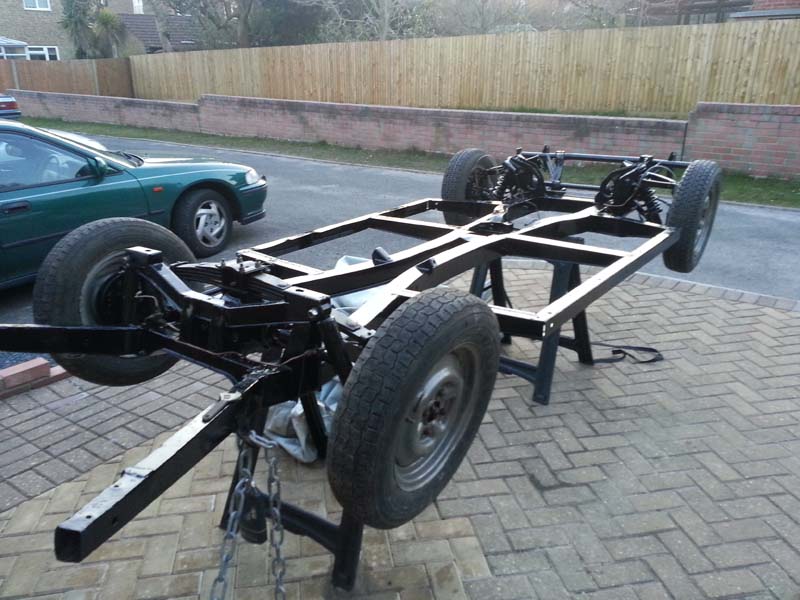
Post-Easter update......
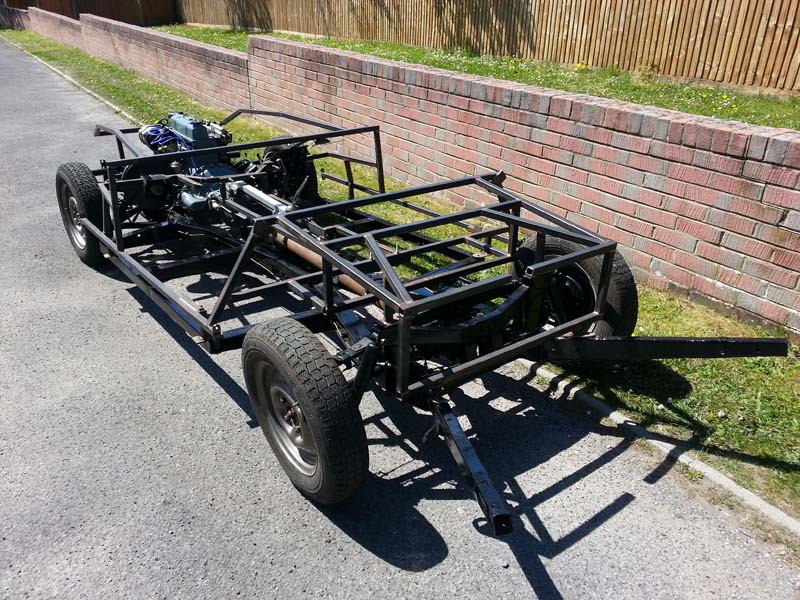
I managed to get to where I wanted to be - with a rolling chassis..... 
If things had gone to plan I may have had the engine and gearbox in, but I was scuppered when I found the clutch wouldn't fit! 
The issue was that I am using an MG Midget 1500 engine which has a larger diameter clutch - 7.25" as opposed to the 6.5" on the Herald 1300.
I ordered up the 3-piece clutch kit for the engine only to find out that the centre plate won't fit as it has 20 splines instead of 10. 

So some internet searching came up with Rimmers who do a 7.25" centre plate with the 10 spline Herald gearbox centre, so that has now been ordered. Hopefully I will be able to get the engine and box in next weekend, along with the propshaft that I ordered from Spitz Bitz.
Next up with Floorpans, frame, wiring and then I can get onto the body and interior! 
Last edited by tlrtone; 13th July 2013 at 09:03..
|
3rd April 2013, 18:52
|
 |
Senior Member
|
|
Join Date: Feb 2012
Location: Wembley, London
Posts: 5,056
|
|
It does seem to be coming together nicely (& quickly). 
Despite you giving me the link to your bulkhead photos, I forgot about your Herald restoration. 
I hope you are getting some bulk buying discount from your Triumph spares supplier!
Good luck, Paul.  |
6th April 2013, 19:47
|
|
Senior Member
|
|
Join Date: Jan 2012
Location: Poole, Dorset
Posts: 615
|
|

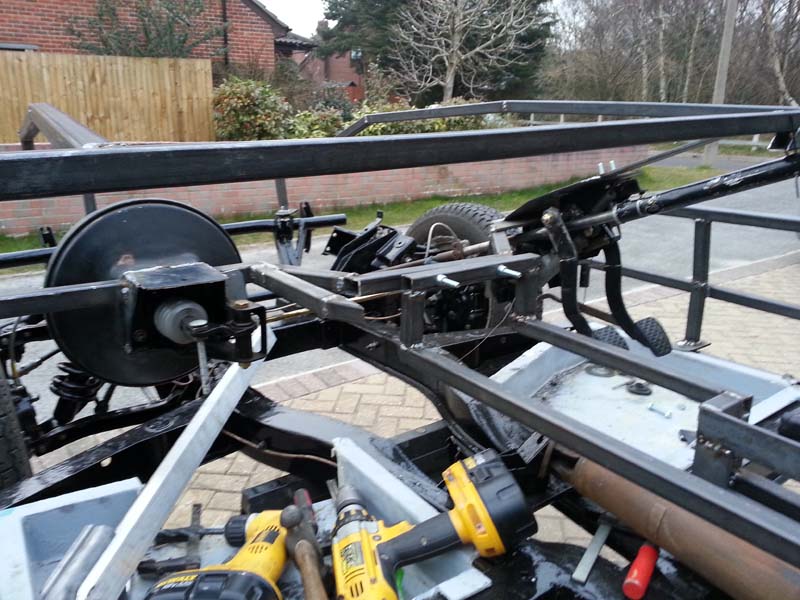
Mike turned up with my frame tonight, so I had a chance to quickly try it on for size....
This is a new frame as the one I modified became the standard and was sold as part of another kit! I was happy with that as i wasn't ready at the time anyway.
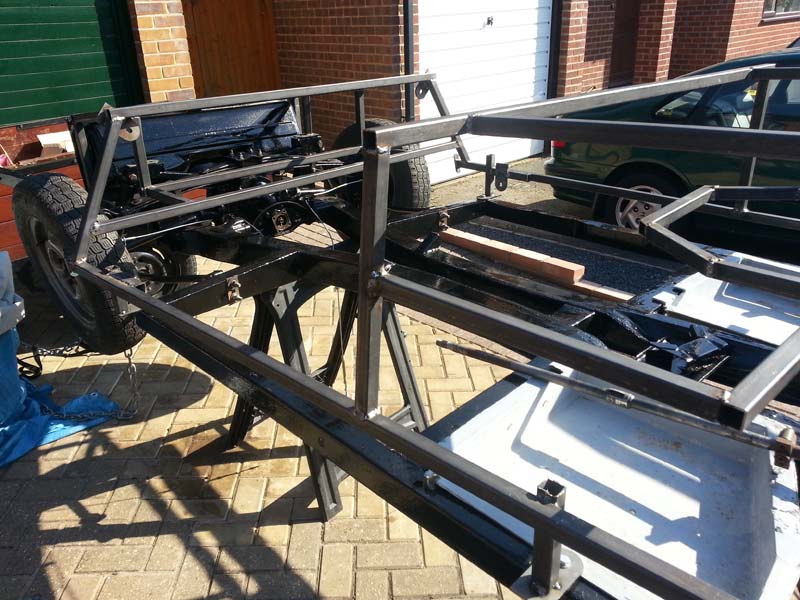
Luckily (?) all the bolt holes lined up apart from the front two, which need a little bit of persuasion from a hammer...
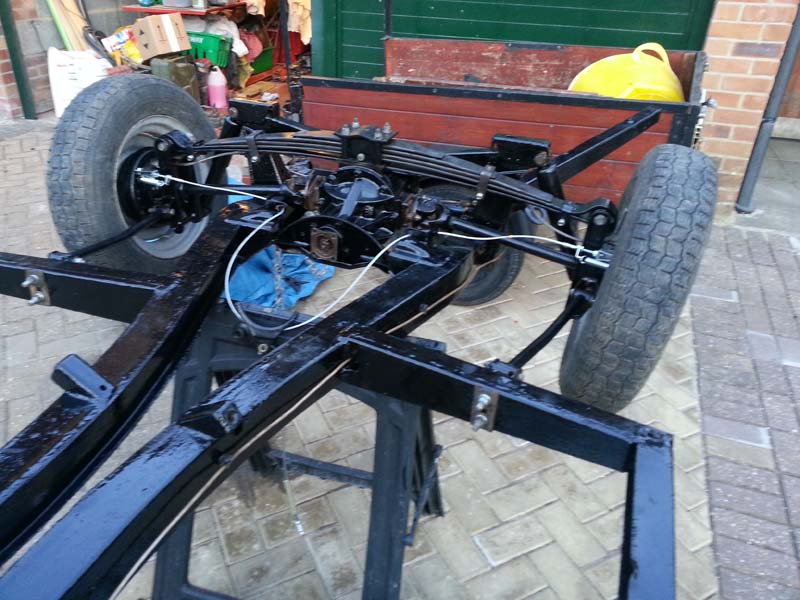
The rear now comes with the petrol tank mount behind the spring, and for transport, it doesn't have the cut out for the petrol filler, so this was the first job to be done...

I purposely asked Mike not to paint the frame as I needed to modify the front end to fit the BMW e30 pedal assembly and servo unit.
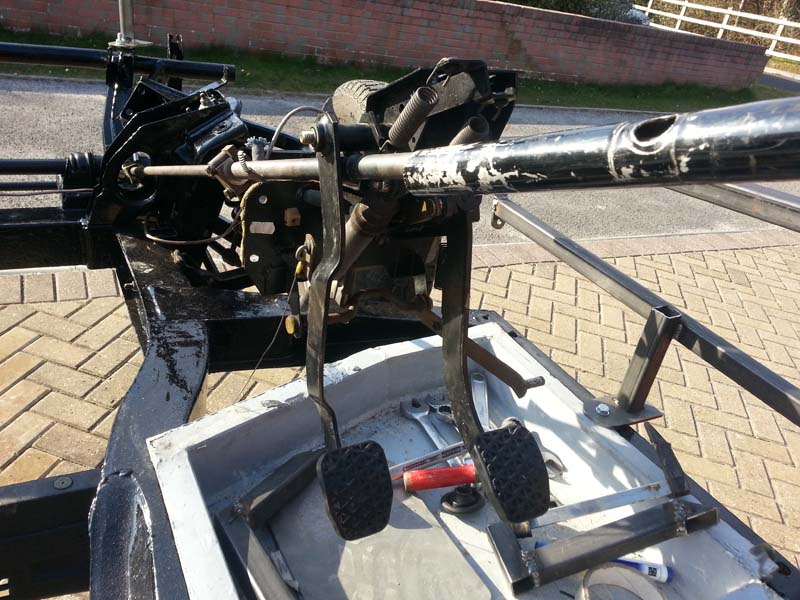
After some major scratching of the head and so trial fitmets and cutting of the frame, I eventually ended up with a position that was suitable. However, it needed the steering column to go through the middle of the pedals. At the moment it is all a bt tight, although I think with some welding and modification, the pedal assembly will fit nicely around the column position.
I will make the necessary modifications tomorrow and post up some new pictures 

|
6th April 2013, 19:55
|
|
Senior Member
|
|
Join Date: Jan 2012
Location: Poole, Dorset
Posts: 615
|
|
Oh, and the engine is all ready to go in now I have the right clutch centre!
 |
7th April 2013, 08:32
|
|
Senior Member
|
|
Join Date: Sep 2012
Posts: 424
|
|
So is it engine in today Tony ? The weathers perfect go for it.  |
7th April 2013, 20:20
|
|
Senior Member
|
|
Join Date: Jan 2012
Location: Poole, Dorset
Posts: 615
|
|
Didn't get the engine in 
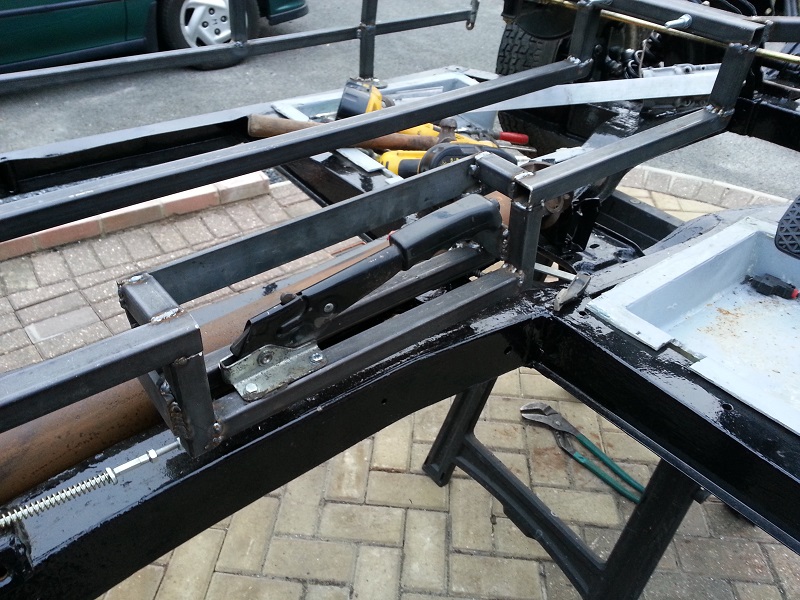
However, I was pleased with progress as I got the pedals and servo mounted and moving freely. Also made up the mounting for the handbrake.
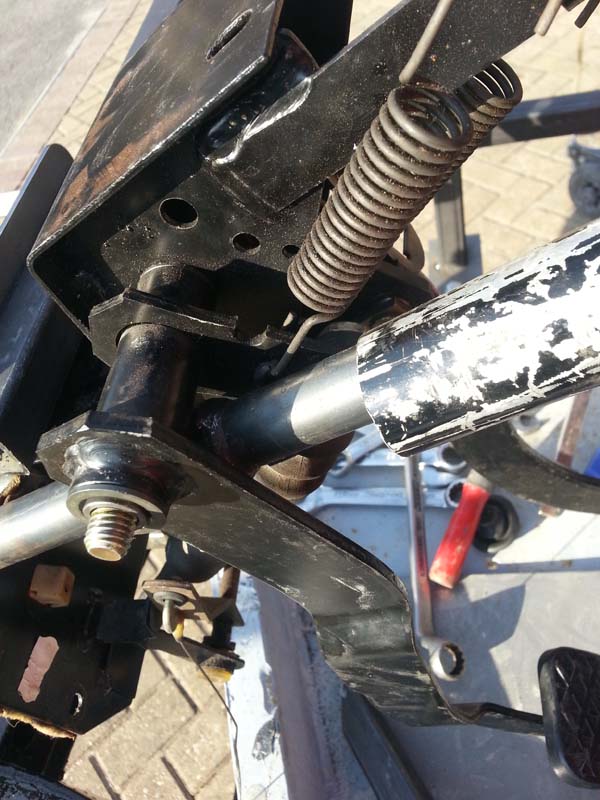
I needed a bit more clearance around the steering column, so I ground out the welds on the clutch pedal and mater cylinder lever, and moved them apart by about 15mm.
The steering column I had was out of a Spitfire so had the bracket for a steering lock.. that had to go too....
so that gave me plenty of clearance for the steering column...
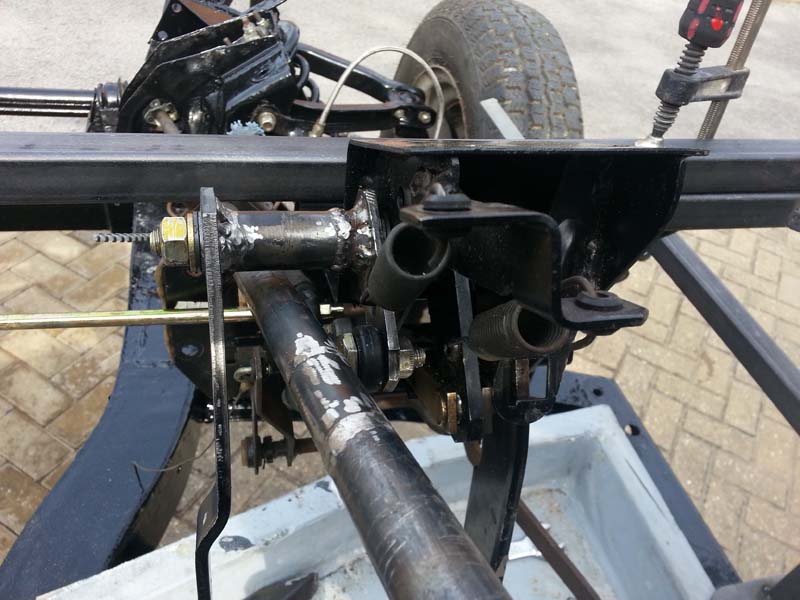
The BMW e30 has a remote servo that is mounted in the passenger side and connects with a push rod. so with a bit of playing around with the positioning so it operates freely and clears the wheels, I welded the bracket in as part of the frame.
The frame still needs a bit of tidying up with a bit more to cut out and modify to get it looking nice, but it all works and with some adjustment (cutting and welding) of the pedal positions, it should all be fine. 
It is worth noting that Mike's Miglia Speedster kit has a heavy duty bracket normally welded into the frame for the standard triumph brake and clutch master cylinders etc, and all this work I am doing it extra as I wanted to try something different!
I also made up a recess in the centre tunnel for the handbrake. I am making the tunnel higher in this car, so it feels more sporty  but I didn't want the handbrake to be too high.
So a good weekend's fetling and engineering,with just the tidying up left to do on the frame now. You get a fibreglass bulkhead with this kit, so I am going to have to modify that to fit around my new pedal mounts, but fibreglass it a little easier to adjust so I am hoping that part goes smoothly (or stickily!)
Anyway, next weekend is engine in and floors in, get the wiring sorted and brakes pipes and fuel pipes all connected....in my dreams at least! 
|
8th April 2013, 08:16
|
 |
Senior Member
|
|
Join Date: Jul 2011
Posts: 5,328
|
|
Your build's coming along nicely 'Tone.
What's the reason for going with the BMW pedals in place of the Spit ones, is it just because you can?
Your taller prop tunnel with recessed handbrake is interesting. It really shows the versatility of the concept - you want a snug fitting cockpit so you're making a tall tunnel, I wanted more elbow room and wider seats so I made a very low one.
Vive la difference! |
8th April 2013, 08:46
|
|
Senior Member
|
|
Join Date: Jun 2011
Location: birchington, kent
Posts: 1,769
|
|
Loving the build, interesting to see people making stuff to suit. The engine looks great.
|
8th April 2013, 19:20
|
|
Senior Member
|
|
Join Date: Jan 2012
Location: Poole, Dorset
Posts: 615
|
|
Mr T, I wanted a servo on this one and the complete pedal assembly with servo, clutch master cylinder etc, was only £65. I am also thinking the modern pedals may improve the drive-ability! 
Also, as you say - because I can. 
Like a lot of us on here, I enjoy an engineering challenge, and at least we can now say it can be done! Mind you I am going to reserve judgement until I get the engine in and it all running - moon-rover stylee - so I can test it all. I will do it all before the body goes on in case I need to change it all back to standard! 
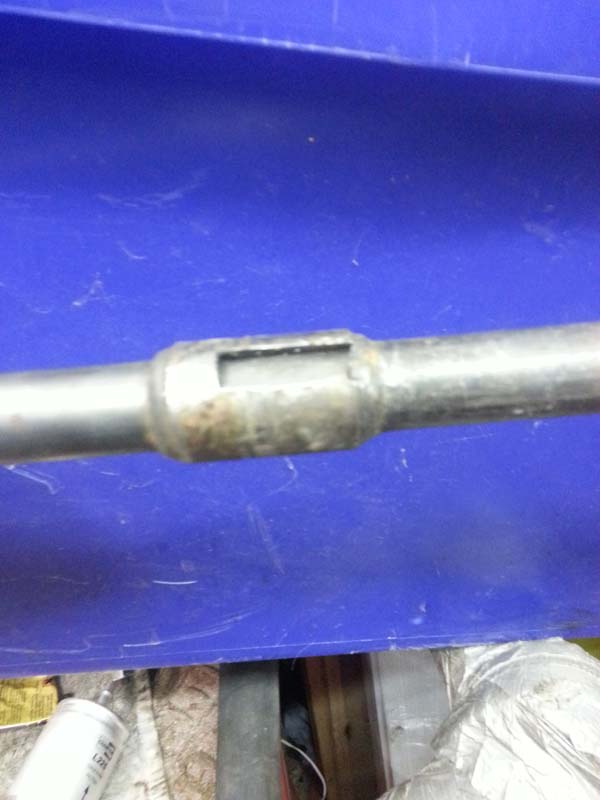
I got back my modified gear extension. It is mammoth! 
The seating position is further back and so Mike does a simple extension kit on an exchange basis. It is a machined billet of aluminium and a dowelled and welded rod. I wasn't expecting this though.....
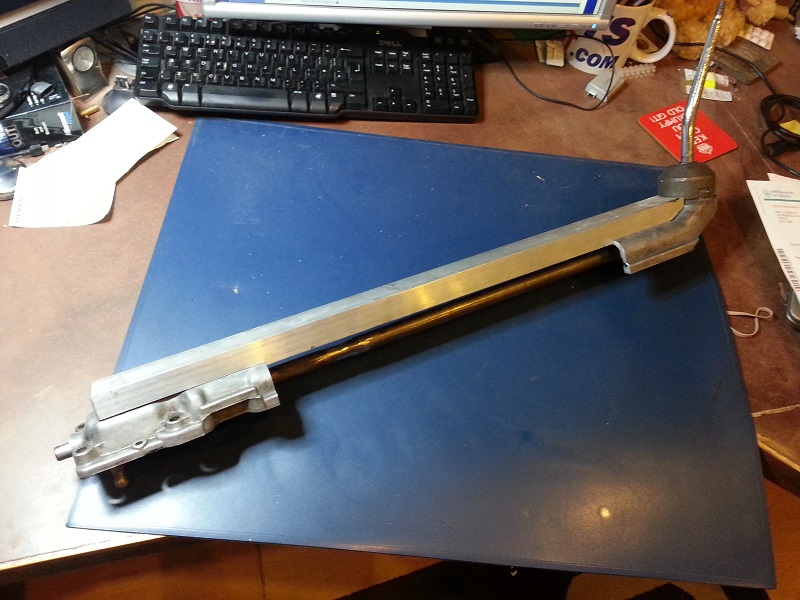
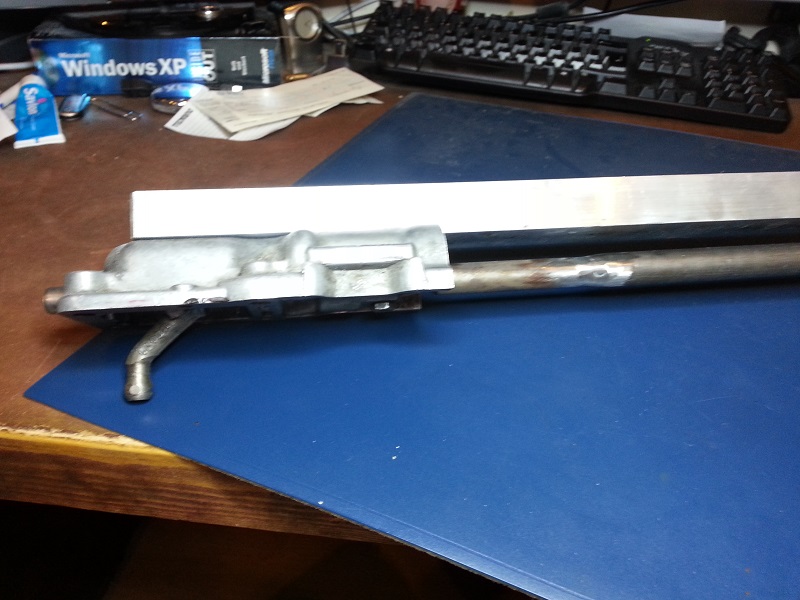
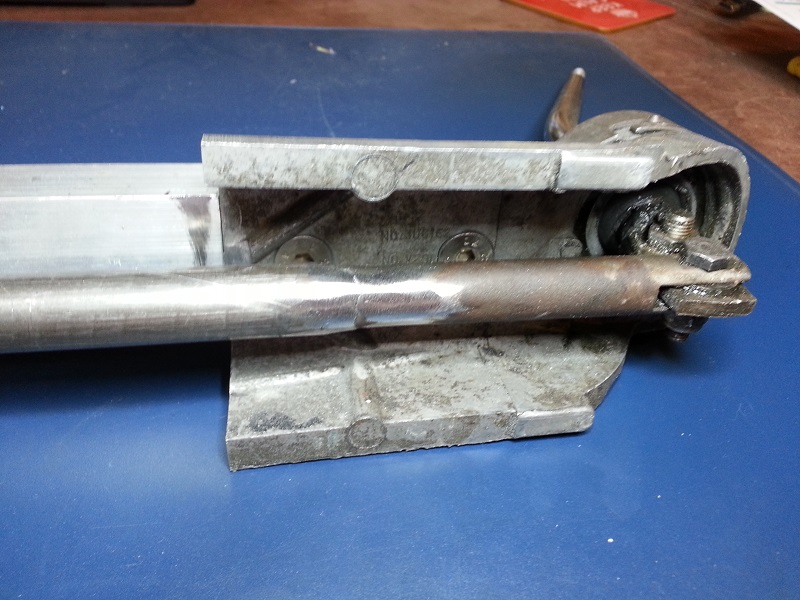
It extends the gear linkage by 400mm.
I think I may have to add a couple of rubber mounts for it when it is fitted up!
Last edited by tlrtone; 13th July 2013 at 09:20..
|
8th April 2013, 19:28
|
|
Senior Member
|
|
Join Date: Apr 2012
Posts: 1,163
|
|
bloomin heck! thats loooooonnnnggggg will be interesting to see how good the gearshift is
|
8th April 2013, 20:06
|
 |
Senior Member
|
|
Join Date: Dec 2011
Location: Devon
Posts: 550
|
|
Ideal for back seat drivers!!!!! LOL.
Build coming along great guns. Brake setup looks good.
|
8th April 2013, 20:08
|
|
Senior Member
|
|
Join Date: Jan 2012
Location: Poole, Dorset
Posts: 615
|
|
Quote:
Originally Posted by Viatron

bloomin heck! thats loooooonnnnggggg will be interesting to see how good the gearshift is
|
Theoretically, it should be no different. The standard gearbox is remote, so this is just a longer remote!
The spartan kits have a similar tried and tested extension so I am hoping it will all be okay! fingers crossed. |
8th April 2013, 21:25
|
 |
Senior Member
|
|
Join Date: Nov 2011
Location: Emsworth
Posts: 810
|
|
Same sort if extension on me Burlington Arrow, but longer. Works fine. The stick end is chassis supported though. I recommend a new set of bushes in the gearstick too. Its a lovely shift when its all good.
|
6th May 2013, 18:32
|
|
Senior Member
|
|
Join Date: Jan 2012
Location: Poole, Dorset
Posts: 615
|
|
Things have been pretty slow for the last month, as I have been busy elsewhere, so the Miglia took a bit of a rest.
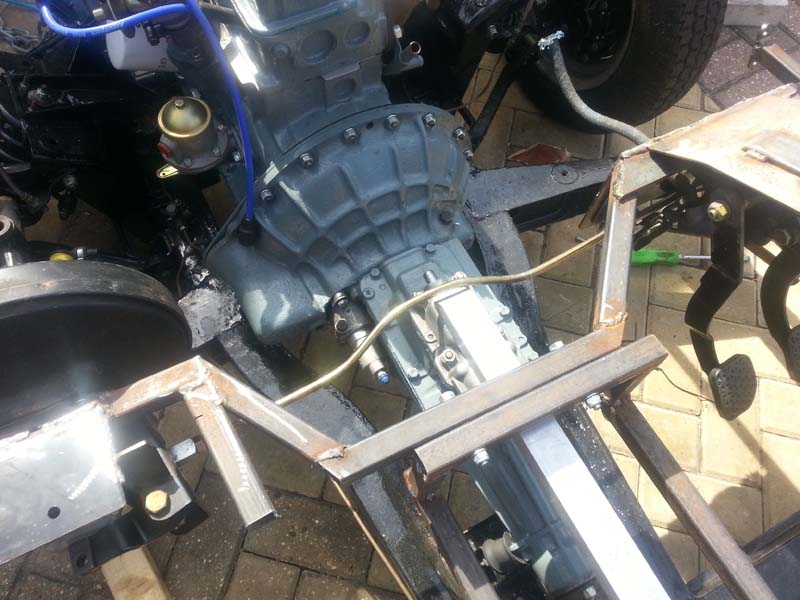
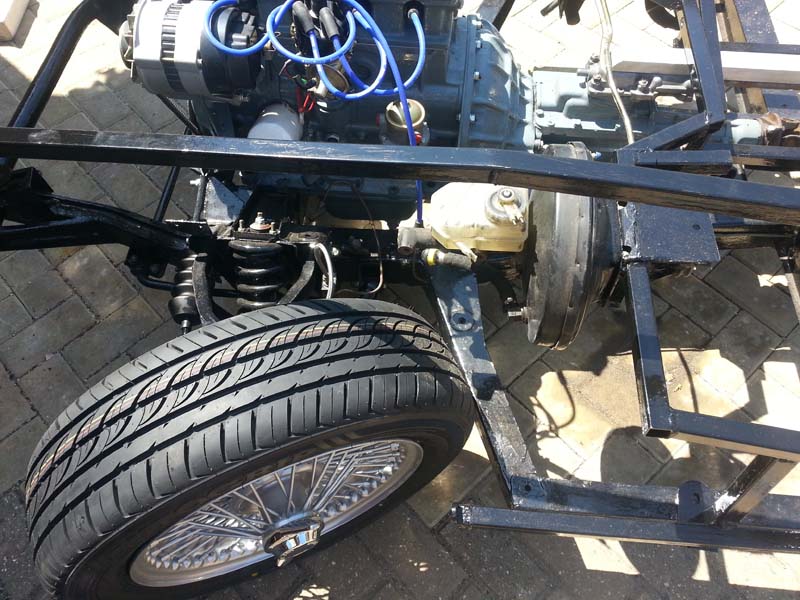
However, today I did manage to get the engine in!
Did it the old fashioned way, with a bit of rope and a long bit of 4x2 
So now that is in I can crack on with getting the wiring sorted and get the engine running.
Even the secondhand propshaft was the right one and fitted - just got to paint it up now.
I have got a sports exhaust header and a reconditioned set of carbs to go on as well - the last month has been a month of collectign all the bits left to get so I can hopefully just get on an finish it!  |
6th May 2013, 21:15
|
|
Senior Member
|
|
Join Date: Sep 2012
Posts: 424
|
|
Good on ya mate, i take it you been busy then  |
7th May 2013, 08:45
|
|
Senior Member
|
|
Join Date: Jul 2011
Posts: 5,328
|
|
Coming together nicely now, keep up the good work.  |
8th May 2013, 05:42
|
 |
Senior Member
|
|
Join Date: Sep 2012
Posts: 192
|
|
Another great build. Seeing your Sammior on ebay and then reading your build diary inspired me to build my own. So thanks for the inspiratiion  |
13th July 2013, 09:19
|
|
Senior Member
|
|
Join Date: Jan 2012
Location: Poole, Dorset
Posts: 615
|
|
no update for a while as I have been out enjoying a new motorbike and I started a new job so been busy!
but here are a few pics of some progress - more on www.mymigliaspeedster.co.uk if you are interested...
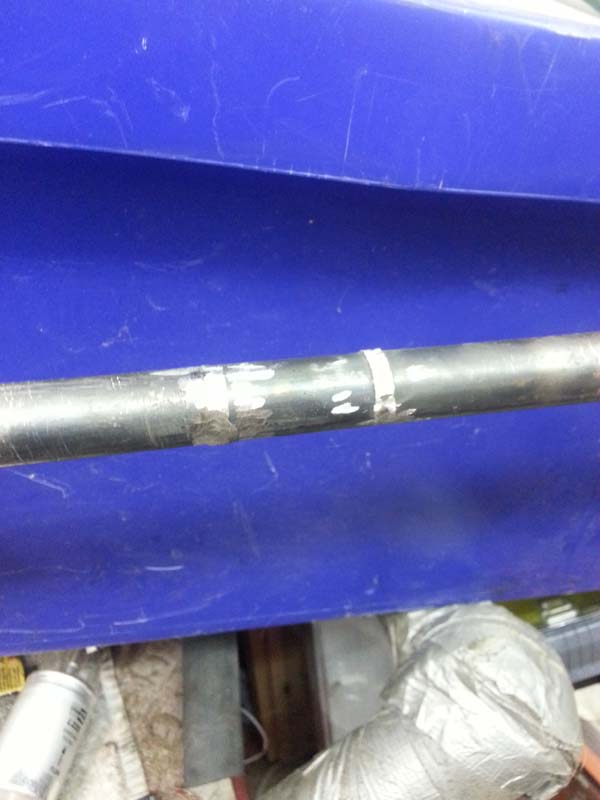
I had to 'adjust' the linkage to the servo - so a chamfer on the gear extension and a bend in the rod with my knee managed to sort that!
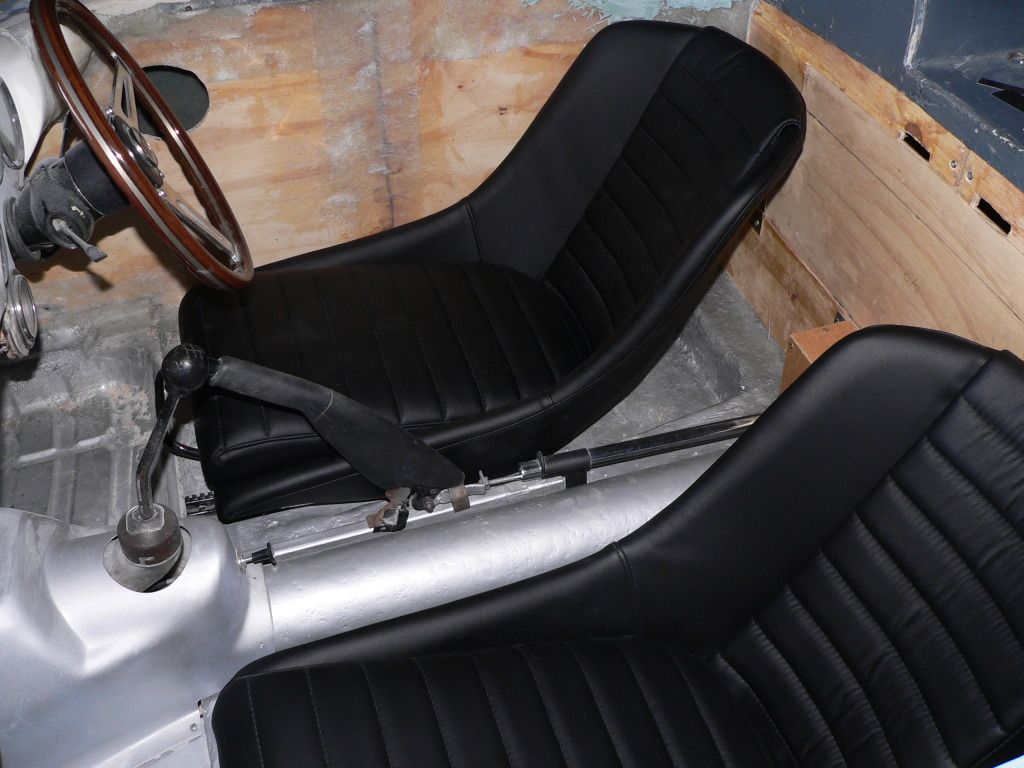
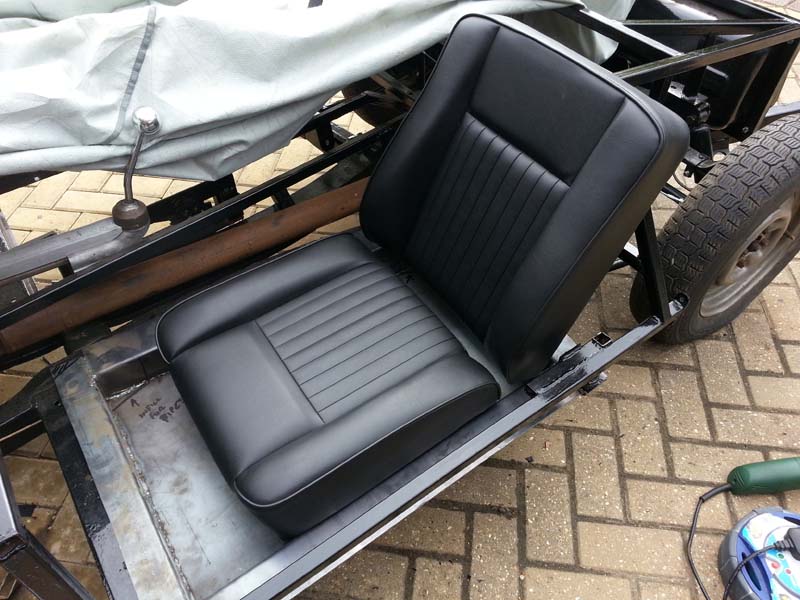
Played around with a lowered floorpan and found my seats were slightly too wide. I have now narrowed them by 20mm and they will fit fine. I am going for the Landrover seats again as they were very comfy in the Sammio Spyder. The backs will hinge forward to access the luggage area and with any luck I won't need to make them any shorter like I had to with the Sammio Spyder.
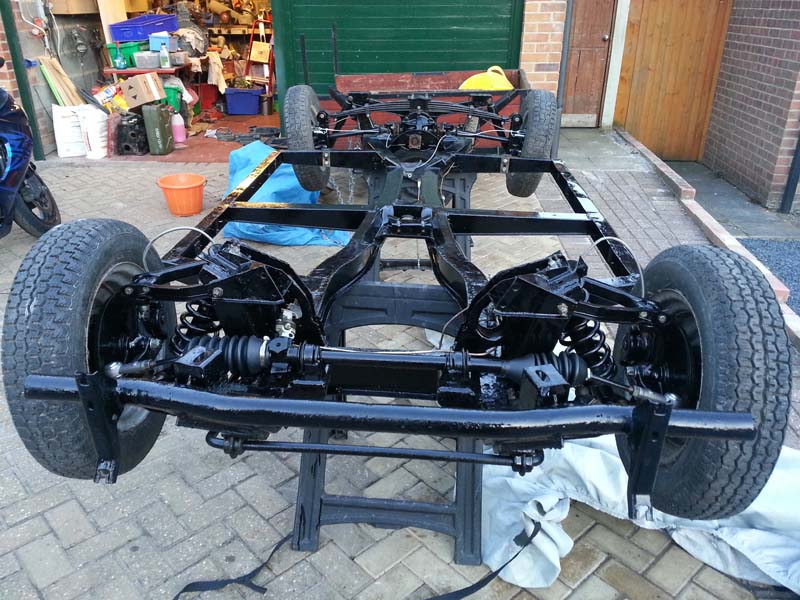
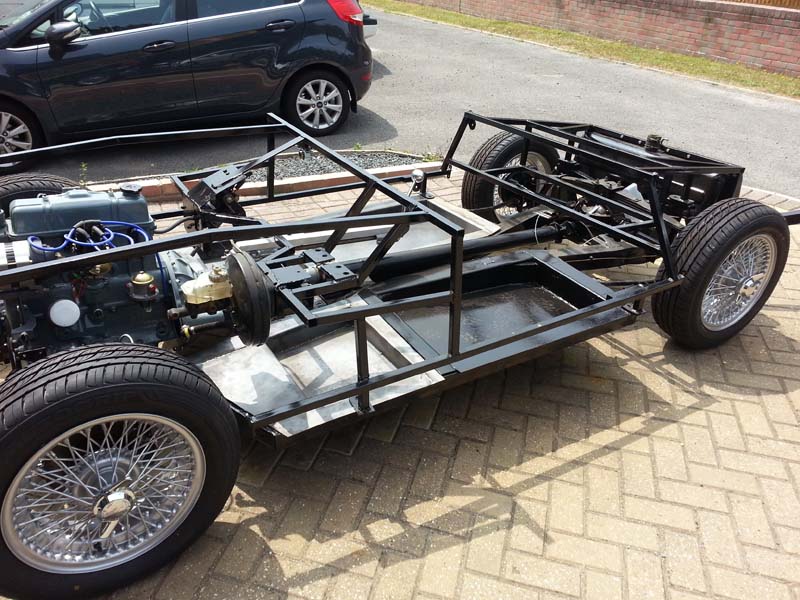
Got my wire wheels (ebay purchase) shot blasted and powder coated silver so they went from this:
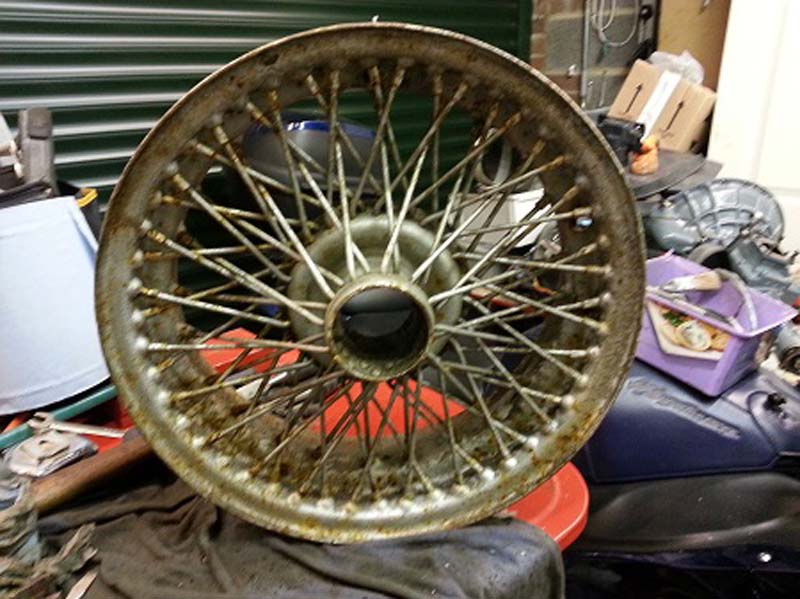
to this....
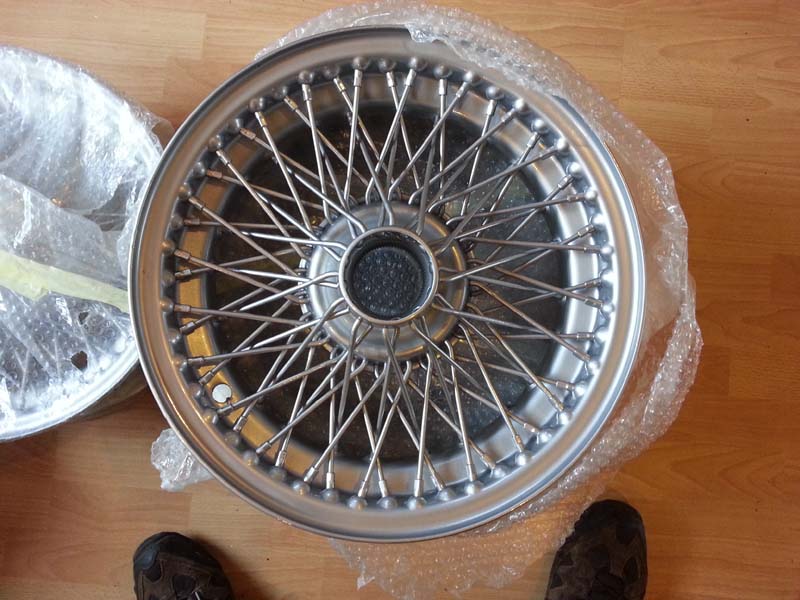
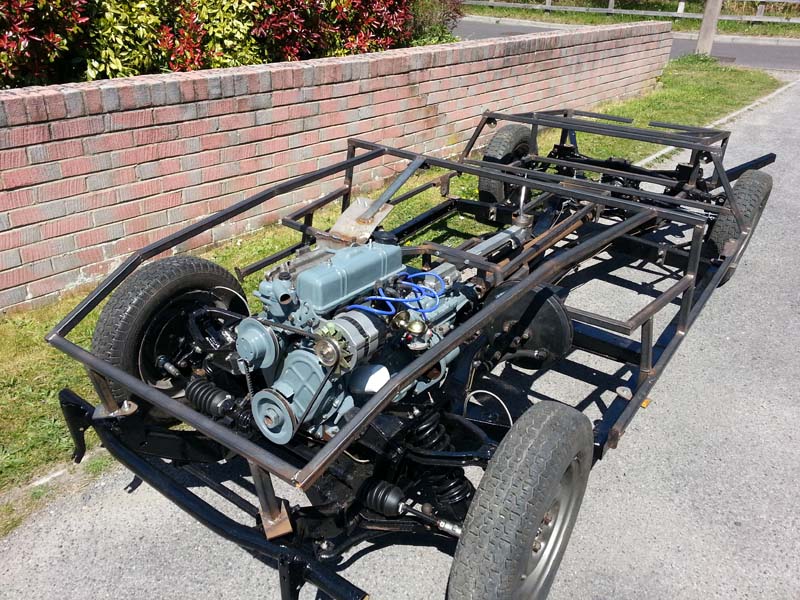
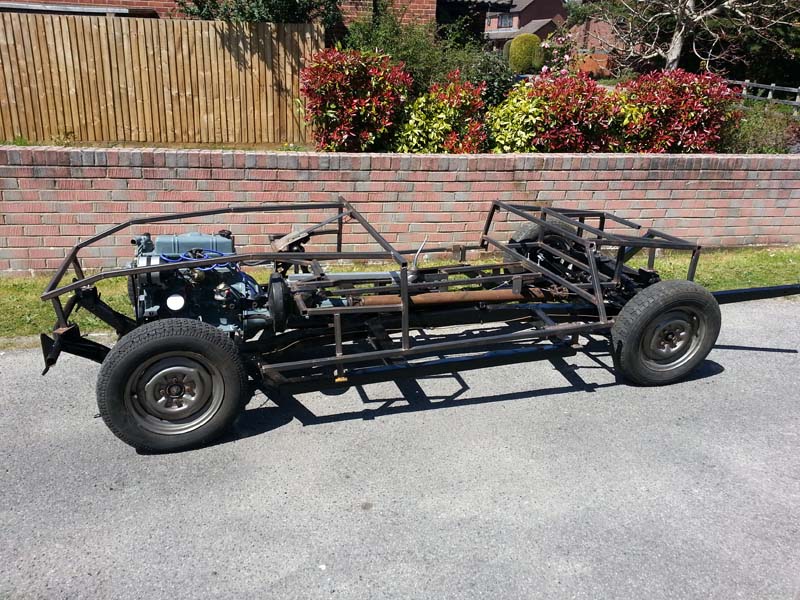
and they look very nice on the chassis....
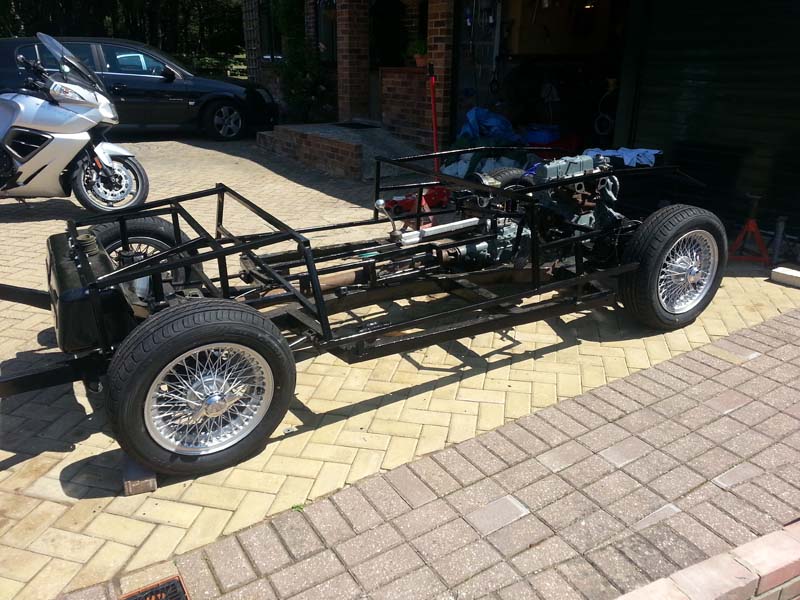
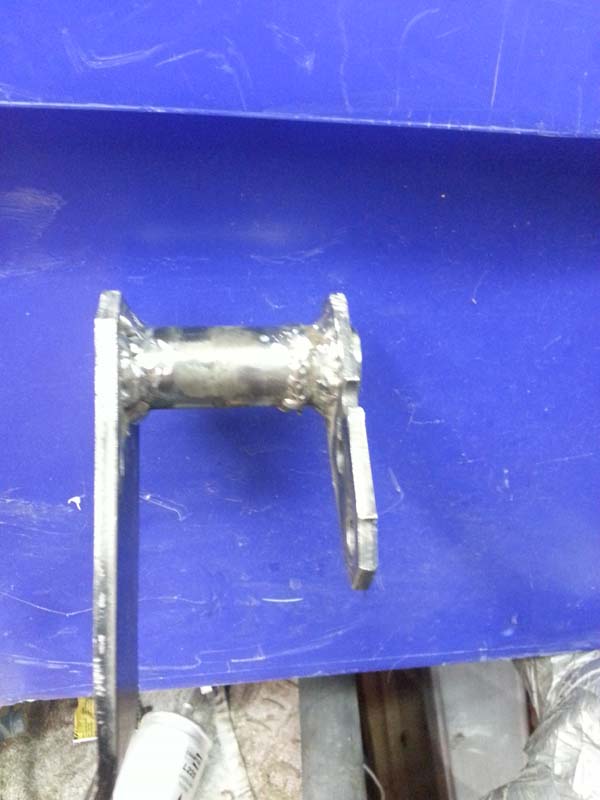
It did mean that I had to modify the steering rack so I could limit the lock to avoid the bigger wheels and tyres hitting on the front outrigger. A 25mm sleeve was fashioned and welded to either end of the rack..

This still gives plenty of steering lock but does not touch now...
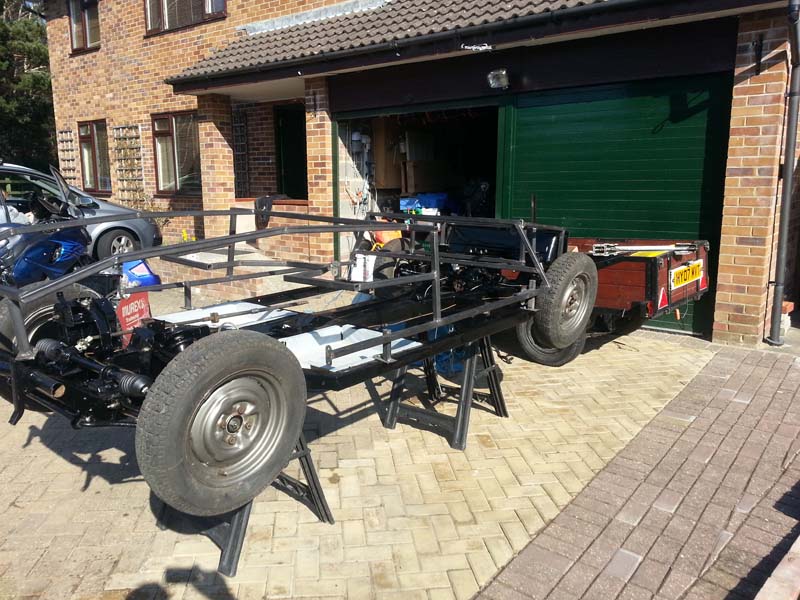
Then I made up the floorpans for the front as well, and they all fitted quite well...
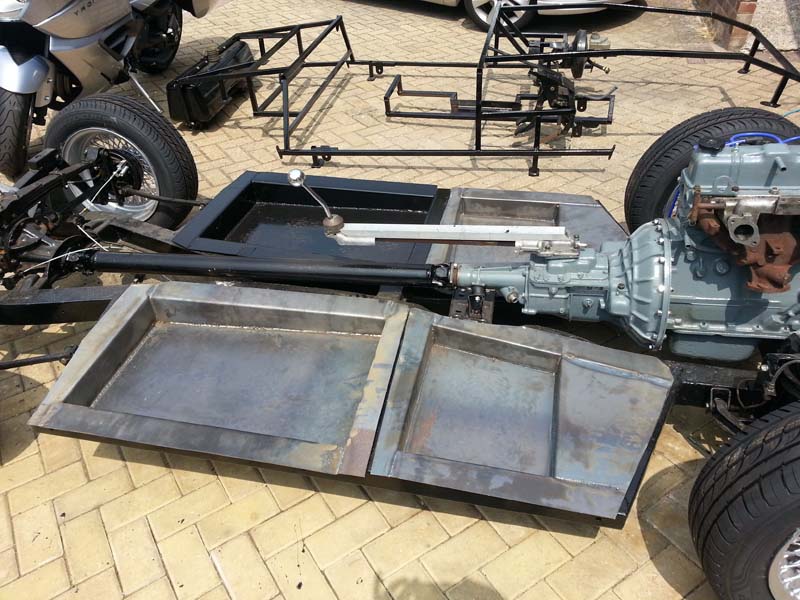
And with the frame placed on it, it is starting to look like a car...
So not a huge amount of progress, but I am going to try and get things moving now, so I can try and enjoy what is left of the summer! 
Next up is a modified exhaust for which I will make up my own and use an 'end-can' from a motorbike. I have several lying around from bike projects so wondered what it would sound like!
|
14th July 2013, 09:22
|
|
Senior Member
|
|
Join Date: Sep 2012
Posts: 424
|
|
Hi Tony, looking good mate, the pans work real well. I will pop in next week .
Keep up the good work.
|
|
Currently Active Users Viewing This Thread: 1 (0 members and 1 guests)
|
|
|
 Posting Rules
|
You may not post new threads
You may not post replies
You may not post attachments
You may not edit your posts
HTML code is Off
|
|
|
All times are GMT +0. The time now is 19:34.
|


 Linear Mode

