This is a read-only archive of the old Madabout Kitcars forum. New posts and replies are no longer possible, but every thread is still here to browse and read.
I had same problem when trial fitting screen early in build, having spoke to mark at one of the shows he said alter dash panel to get best fit of screen. I raised front edge of dash (10-15mm) and although not perfect a lot closer to where I was expecting it to be. I am hoping to bond mine in this weekend and will be using a cover strip round the front edge which should take the eye off any inaccuracies. i don't think it will be possible to get a perfect fit without major alterations to the dash. Brian.
Looks like I too will need to raise the front of the dash about 10mm.
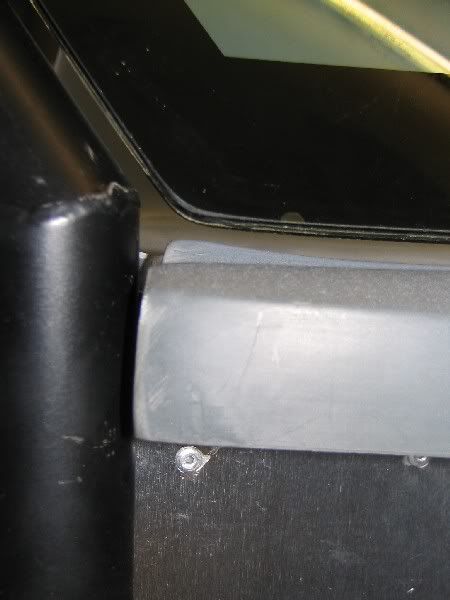
There will still be a gap at the lower edges of the windscreen to roll bar.
Brian, what did you use to bond and seal your windscreen.
Module III contained the GRP surround panel only.
Looking at the Marlin finished cars, there are rubber strips around the windscreen...but they were not supplied...
You should have a rubber strip to go round the sides and top edge of the screen.
The screen is then bonded at the bottom and rests under its own weight at the top.
The screen capping is then fitted over and screwed to the roll bar.
As for rising the dash, I think I might have a good (and adjustable) method of doing it.
I took the rubber stops from the doors, boot and bonnet from the donor. The door ones are small and 'screw in', therefore enabling the shut line to be adjusted.
Putting these on the bracket the dash rests on give you some adjustment.
I have bonded mine around the dash with windscreen sealer, I think it is also called sikkaflex, very much like silicon but much stronger. I have used a C channel rubber seal around the sides and top of the screen and also bonded the seal and screen with normal silicon to avoid any water penetration. I have also finished the lower edge with a windscreen sealing strip from a Vauxhall Omega (actually 2), it shows how large the screen is with its curve, the seal was about 6" short. I have put a joint in the centre. The only problem I had was holding the seal on whilst the silicon set, I used masking tape. The only mistake I made was not to clean off the silicon on the screen before it set, I mistakingly thought it would come off the glass easily, I was so wrong, I spent about 2 hours with a sharp blade. Brian.
You should know buy now that you do not get anything without asking for it!
I am not sure if this is the right way for Marlin to progress. It looks like in the old days the kit suppliers left bits for the builders to source for themselves and from those I have spoken to there was a certain thrill in manufacturing a fit.
I think Marlin have taken the kit car industry a step forward with the EXI but are a little guilty at believing that builders still want to 'shop around'.
My suggestion to Mark and Terry would be to come up with a full parts list, not just the bits that they currently sell, I mean full every nut bolt and screw.
Including gearbox and engine possibly even offering 'uprating' at an extra cost.
This would then give us the buiders a simple choice and a clear guide for cost I would have preferred to have bought everything from Marlin rather than waste time and money searching for items that are not up to spec.
I phoned Terry yesterday and she is putting a 'rubber' in the post to me, if they were following my recommendations above I think I should have been offered any other sealants / fixings needed. Now I know I need to go hunting again..........oh well.
As I am waiting for my rubber before I attempt this I did a quick email to young Terry and Mark asking for advice.
An extensive reply, but it seems to cover everything:-
With reference to the queries re fitting the windscreen glass. It is clear that the bottom edge of the windscreen glass should be close to resting in the channel in the front edge of the dashboard moulding. in order to obtain best fit here there are several adjustments open to you:
1. By raising and lowering the front two roll bar posts
2. Moving same posts forward & backwards a little
3. raising & lowering the dashboard panel and thereafter placing spacers underneath it.
When best position for windscreen, roll cage & dashtop have been selected all I would do to fit the windscreen glass is bond the bottom edge of it directly to the dashboard. As for the other three sides a simple rubber seal strip will act as 'softening buffer' between the glass & roll cage frame whilst also stopping the majority of any water passing through.
To finish the job the glass fibre windscreen capping panel needs only to be fitted to the roll cage using a few (8) small self tapping screws, it is important at this point to make sure that this capping is clear of the glass by approx 3mm.
This windscreen capping will now act as both a fitting channel for the front edge of the roof and also a rain gutter (if you find it necessary you can always complete the seal around the top edge of the windscreen capping by applying a small bead of silicone before finally positioning said capping).
Quite obvious really, but I know as a beginner I was very concerned at doing most of this.
By the way I have just sent my SVA application to VOSA!!!!


 Brian
Brian