MadaboutKitcars

This is a read-only archive of the old Madabout Kitcars forum. New posts and replies are no longer possible, but every thread is still here to browse and read.

Royale Sabre - Take two!

8 Sep 2012, 7:30am
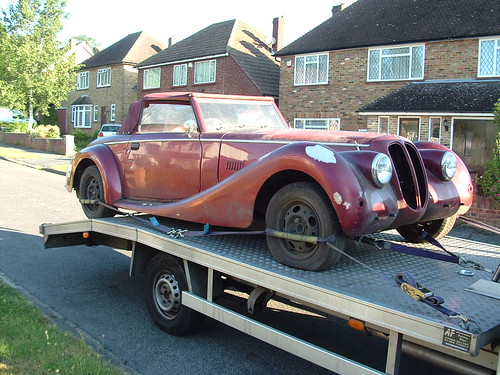
OK, so this is the build log of my plan to rebuild this forlorn Royale Sabre to the glory it deserves.

OK, so here it is.... by marlinpeter, on Flickr

The history is a little sketchy but the chassis was made in September 1994 by the Royale Motor Company. It is a John Barlow design and according to the A-Z of Kit Cars by Steve Hole, the Sabre was launched in March 1994 and I appear to have chassis number 14, so quite an early example.
(Note: I later discovered it came with the wrong VIN plate and my chassis is in fact Sabre No.7)

The donor car was a 1992 Ford Sierra Sapphire GLSi but the original engine was frost damaged and has been removed before I got the car. It seems to have been built to a high standard but has not been stored in the dry, so has badly deteriorated in places, but nothing that can't be addressed.

The first job was to give the exterior a through clean up to get rid of the last 10 years of muck and dirt.
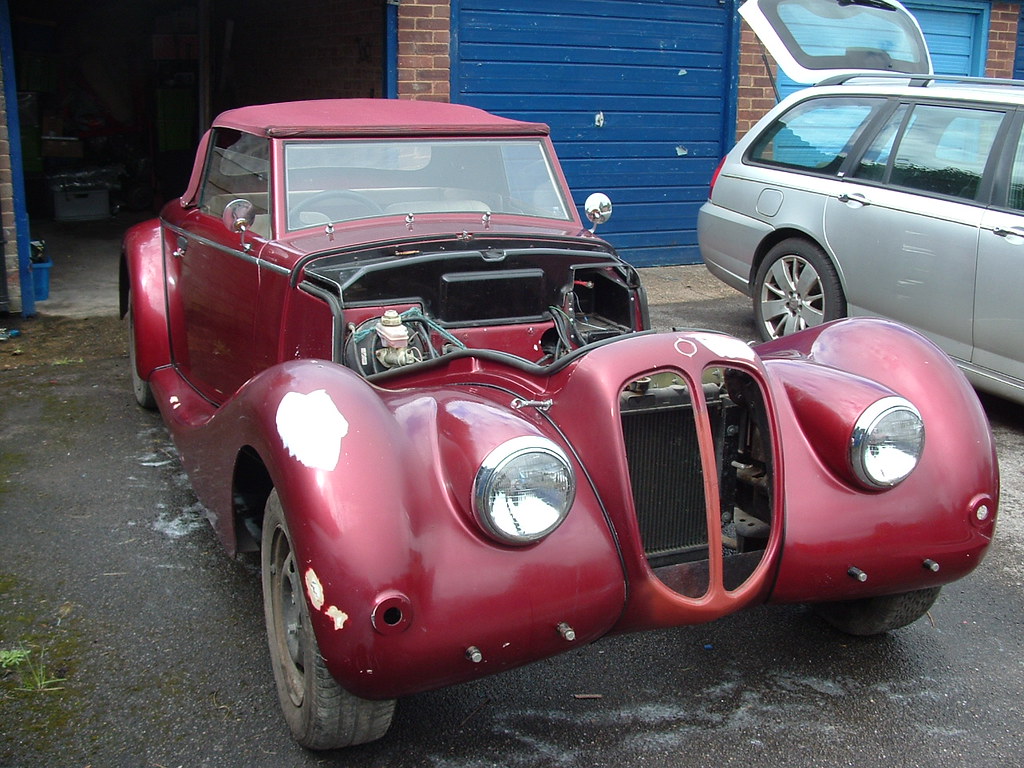

Washed by marlinpeter, on Flickr
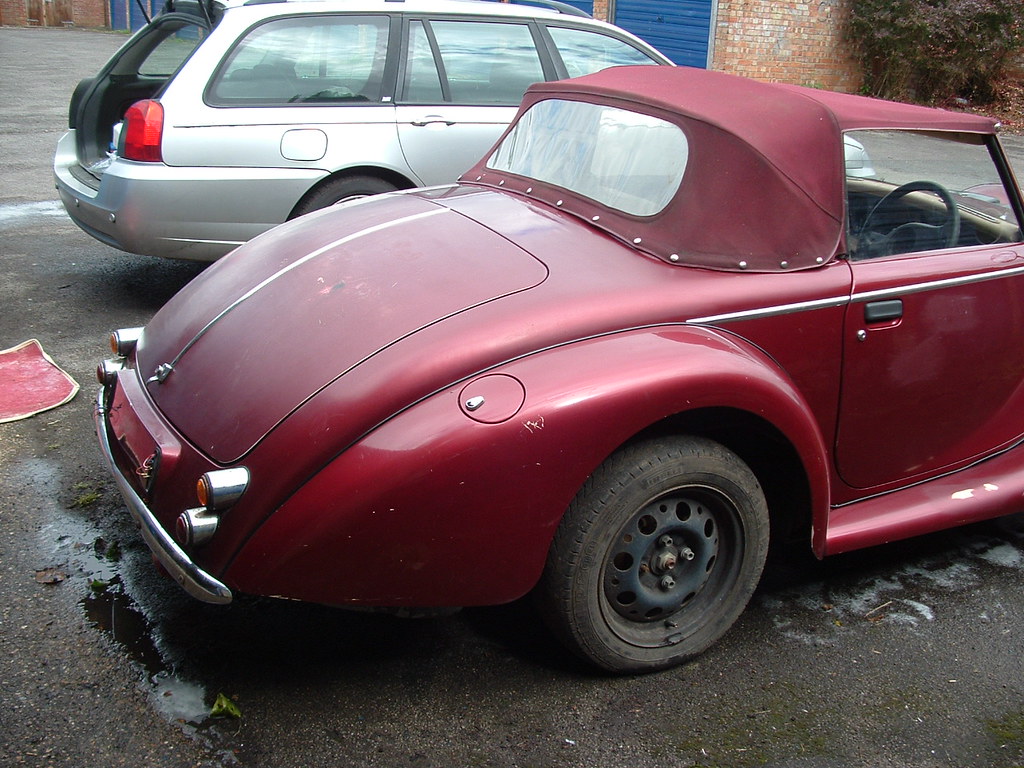

Rear View by marlinpeter, on Flickr

The next job was to empty and sort out stuff in the boot.
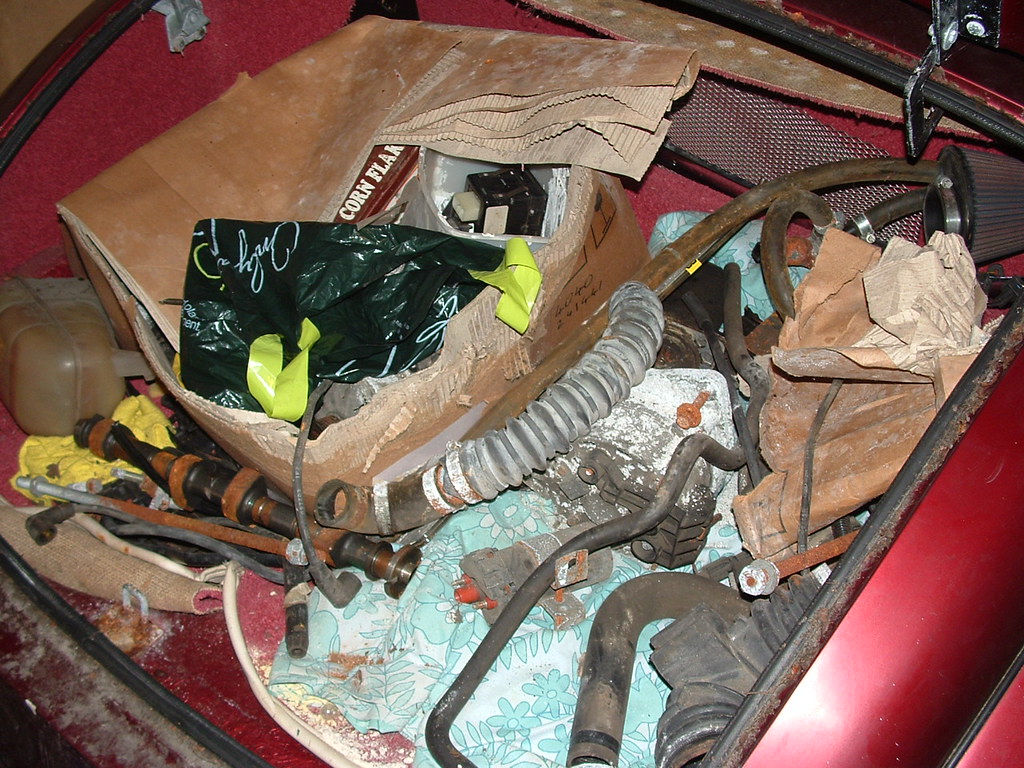

Boot full of rubbish by marlinpeter, on Flickr

This left me with a sack full of mouldy rubbish, a box of scrap metal and some very useful bits including the original grill, front bumpers and a 'Royale' emblem.


Good stuff by marlinpeter, on Flickr

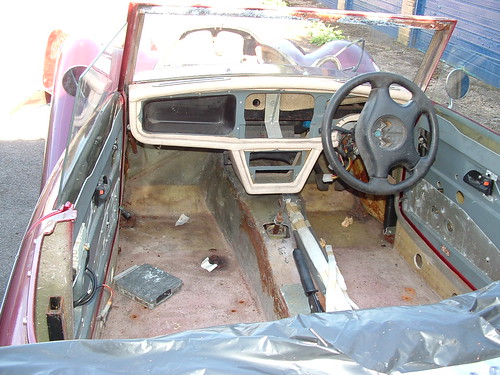
The next job was to strip out the seats and all the mouldy carpets which have been stored as templates for later reference.
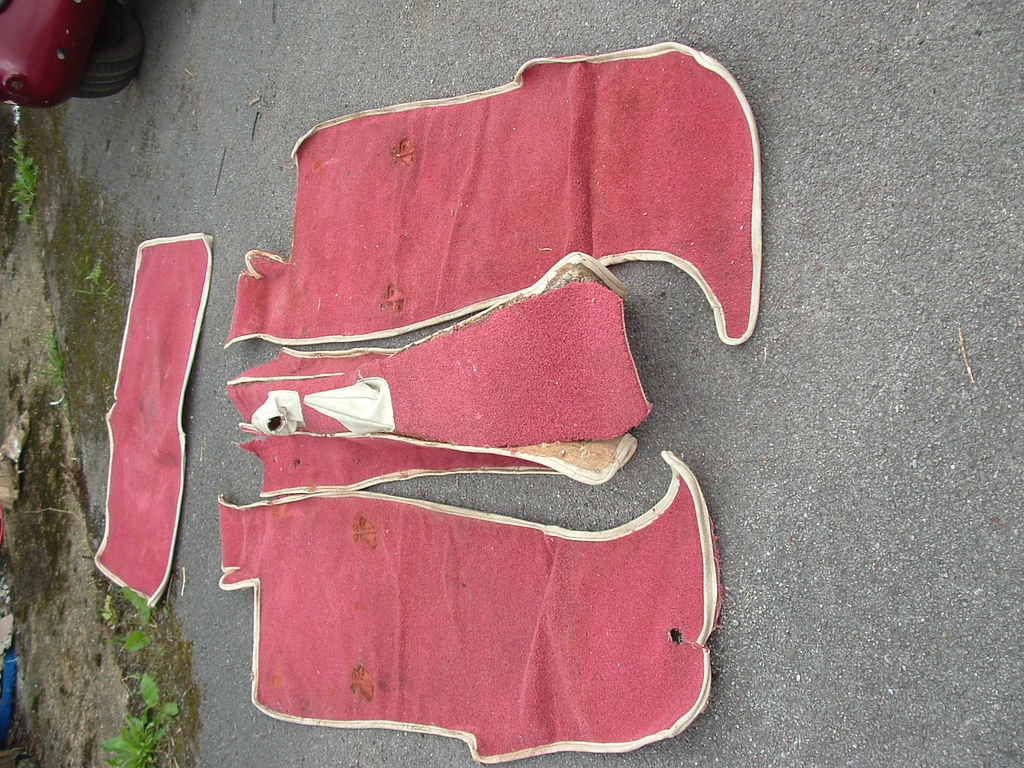

Carpets by marlinpeter, on Flickr
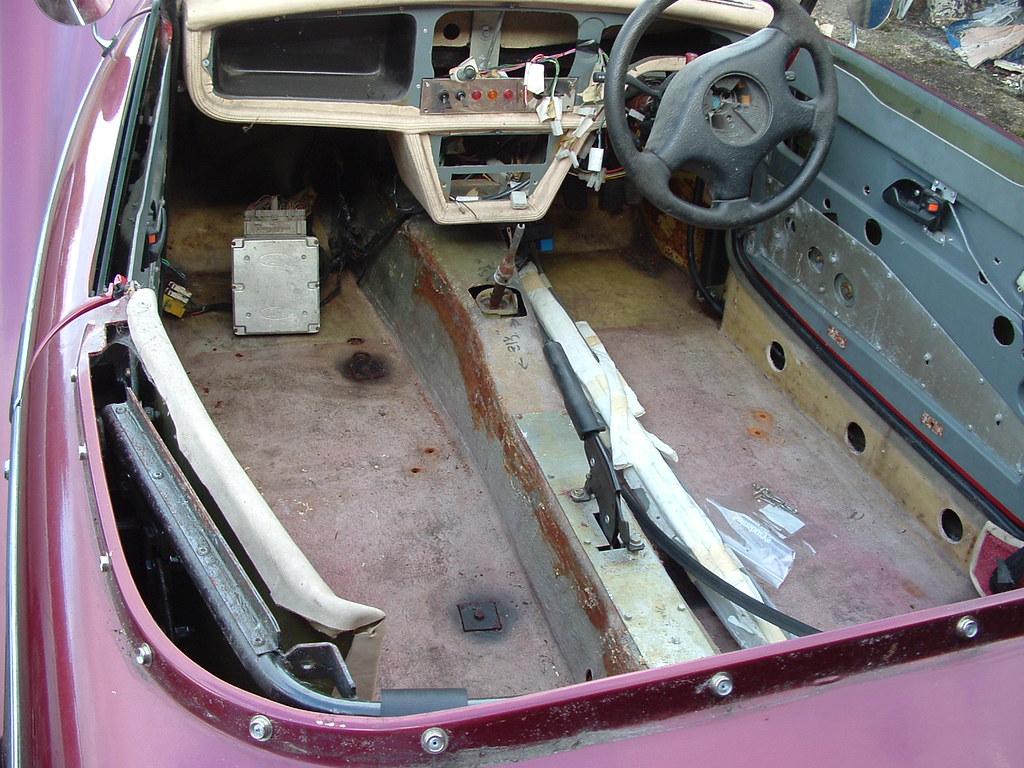

Carpets and seats stripped out by marlinpeter, on Flickr

I have also removed and stored the hood cover (which incidental stores neatly behind the seats when not in use.)
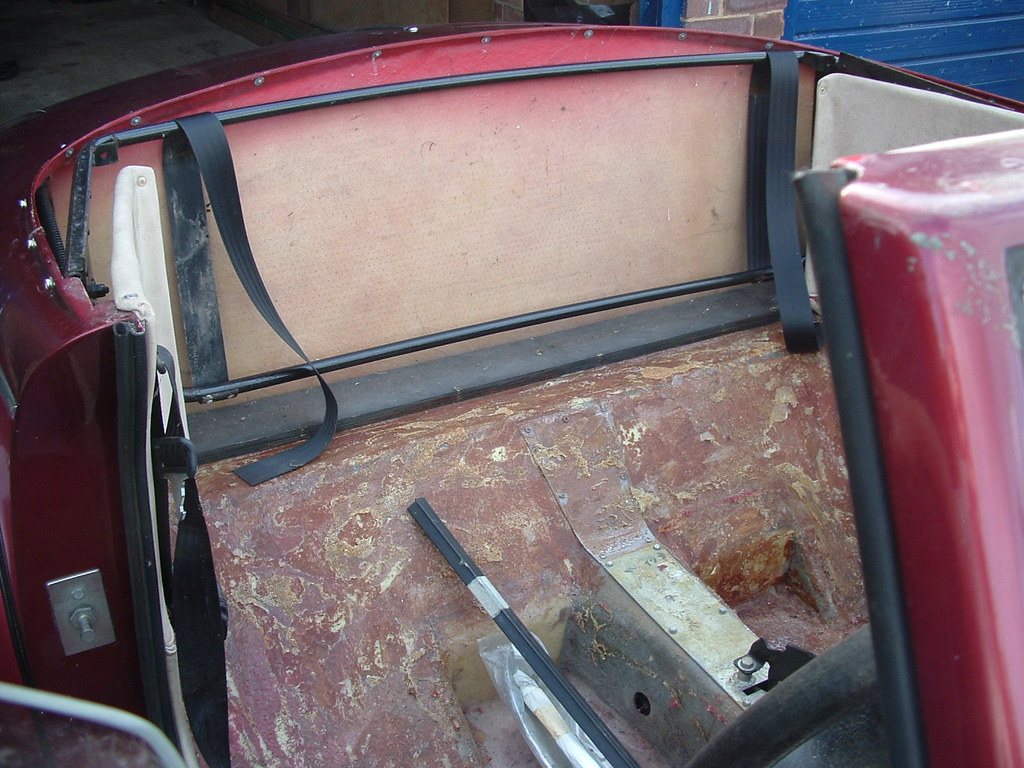

Hood cover and front rail removed by marlinpeter, on Flickr

The next job is to remove the seat belts, hood frame, lights and then start on removing the loom. (Unless I find something more interesting to do!)

...peter
8 Sep 2012, 8:49am
I say it once and I'll say it again....ahem, great kit, almost production quality moldings. Don't suppose you know of other unfinished kits available at reasonable cost do you?
10 Sep 2012, 8:41am
peterux wrote:


The next job is to remove the seat belts, hood frame, lights and then start on removing the loom. (Unless I find something more interesting to do!)

...peter

Update on the above plan....

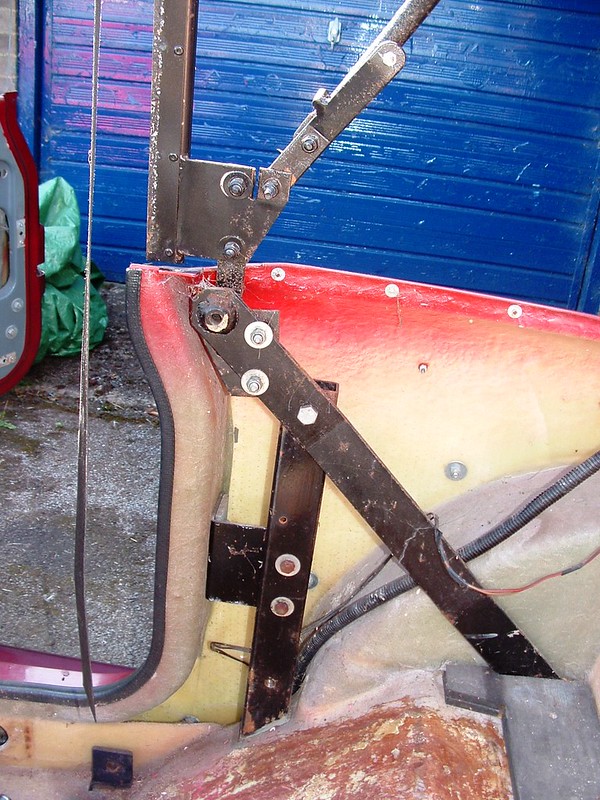
Seat belts removed......


Hood frame and rear brace by marlinpeter, on Flickr

The upright in this shot is welded to the chassis. The diagonal brace takes the seat belt upper mounting and the hood frame. All these parts have some surface rust that will need to be removed and the parts repainted.

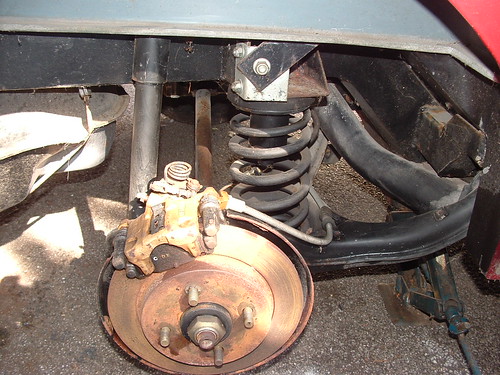
That rear diagonal brace is mounted beneath the rear wing so I had to remove the rear wheels which gave me the chance to have a look around underneath :smile:


Rear brakes and suspension by marlinpeter, on Flickr

The brake calipers were clearly refurbished back in 1995 but now need attention.

While I had the car jacked up I took off the rear bumper and fog/reverse lights. The lights were just for show as there was no wires?


Rear bumper and lights by marlinpeter, on Flickr

I then moved on to removing the loom.....


Wiring gone! by marlinpeter, on Flickr

I've removed all the wiring up to the engine bay.

Taking a kitcar apart is a lot quicker than building one!! :lol:
11 Sep 2012, 9:23pm
You guys are getting me looking at kits again :D looks like your having fun :)
12 Sep 2012, 7:30am
Patrick wrote:
You guys are getting me looking at kits again :D looks like your having fun :)


Be careful, it can be addictive!! :heh:
13 Sep 2012, 8:41pm
OK, this weeks progress report......(not all weeks will show this much action)

I have now removed all the loom and old Ford engine management wiring.


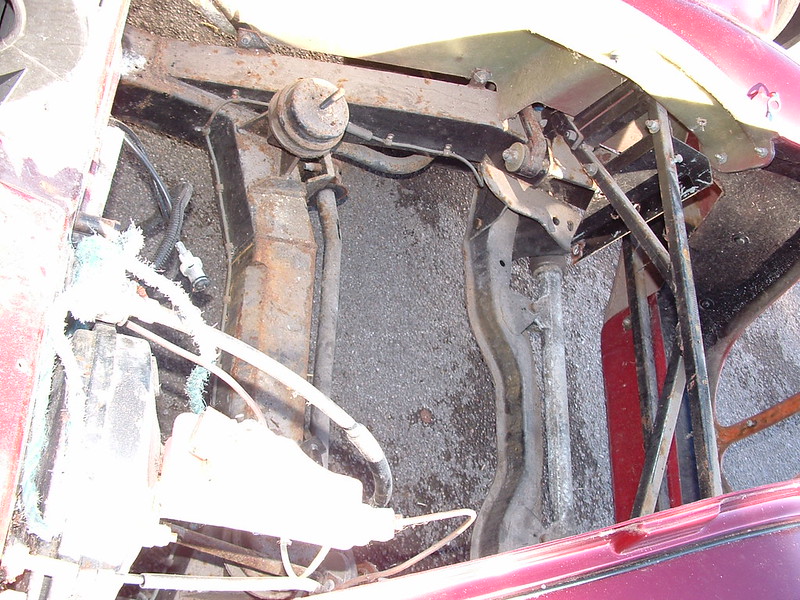
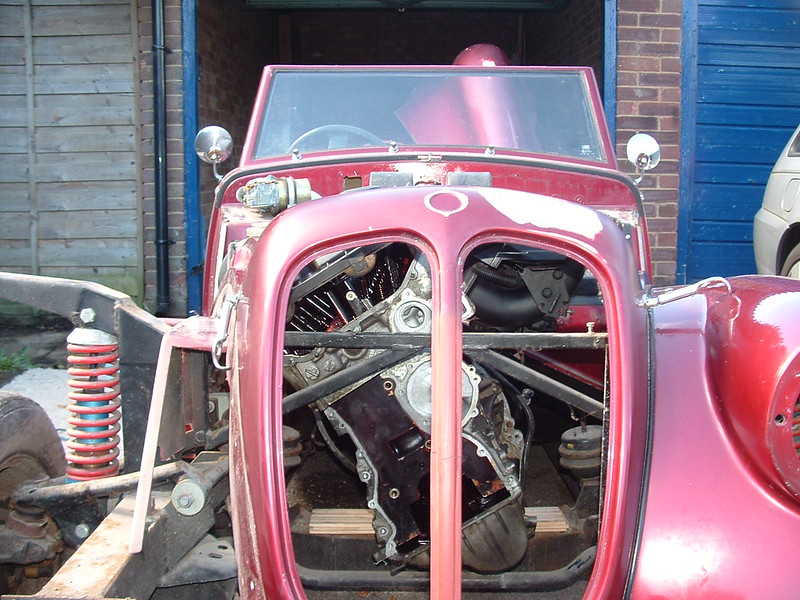
Empty engine bay by marlinpeter, on Flickr

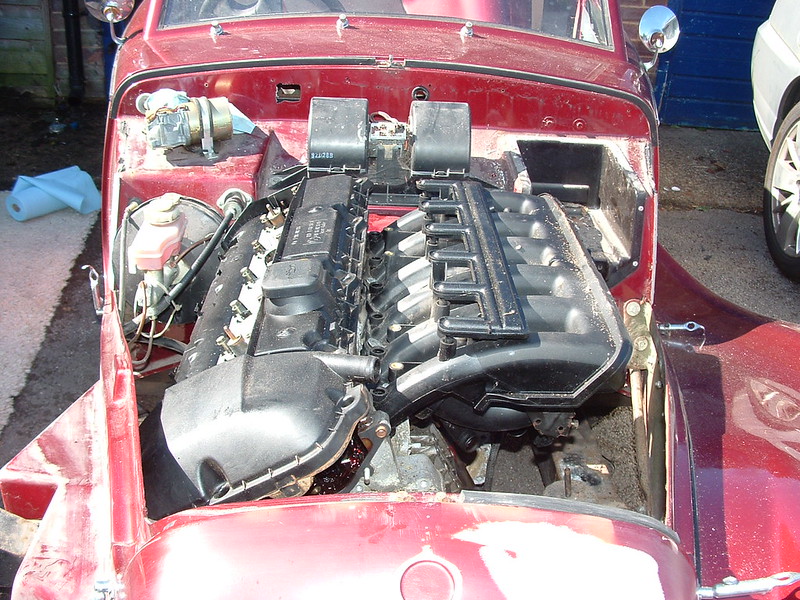
I now have a completely empty engine bay but before further dismantling of the body, I wanted to do some 'Proof of Concept' tests to see if a BMW M52 engine will fit :madgrin:

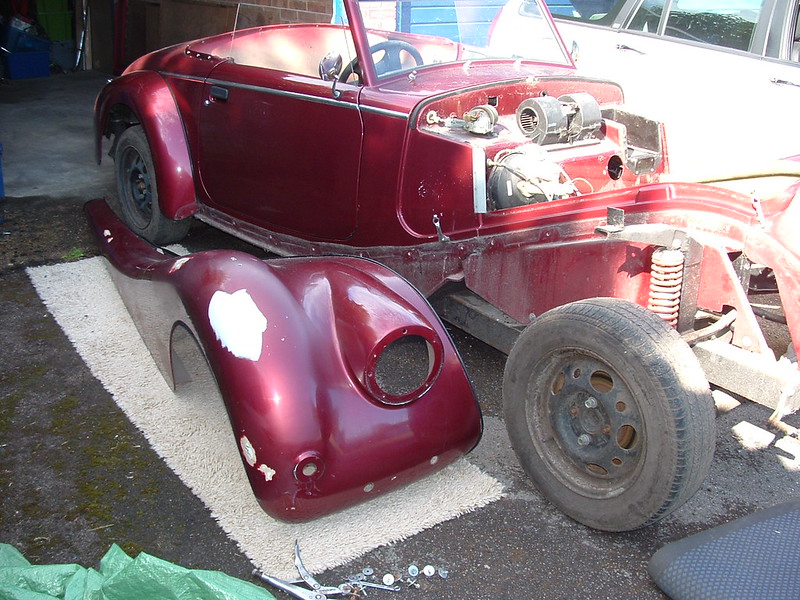
First job was to remove a wing as lifting heavy engine parts over the wing hurts my back and I'm too short to reach into the engine bay.

Each wing is held on with no less than 18 M6 bolts! The wing is huge.


Wing removal by marlinpeter, on Flickr

I have a BMW M52 engine all in pieces (from a previous abandoned project) so fitting it was done in stages.

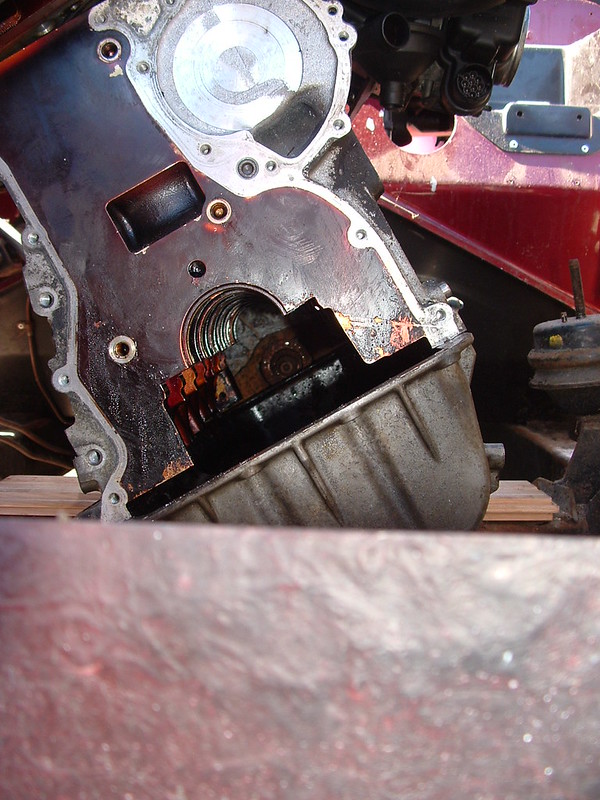
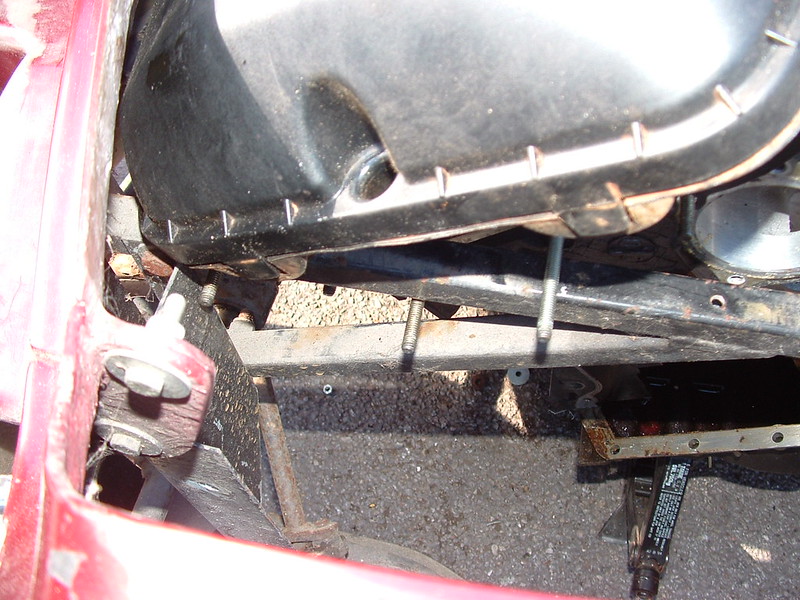
First, I placed the sump on a 20mm thick piece of wood on the chassi cross member and butted up to the old Ford gearbox.


BMW 328i POC by marlinpeter, on Flickr

So far so good, the sump cleared the cross member without any issue.

Next, I placed the block (without crankshaft and pistons, conrods, etc) on top of the sump. After a while shifting it around I was able to get a couple of sump bolts in to hold in place.
First issue is that the crankshaft doesn't align with the gearbox input shaft. I need a BMW gearbox to see if this is a real issue. If it is, I will need to raise and possibly angle the gearbox and engine down at the back.
I think some major surgery to the body tub and tunnel will be required to fit the BMW gearbox but it is GRP and I don't think the gearbox tunnel is structural.


BMW 328i POC by marlinpeter, on Flickr

(Having an engine with no crank really helps you to see what is going on :smile:)

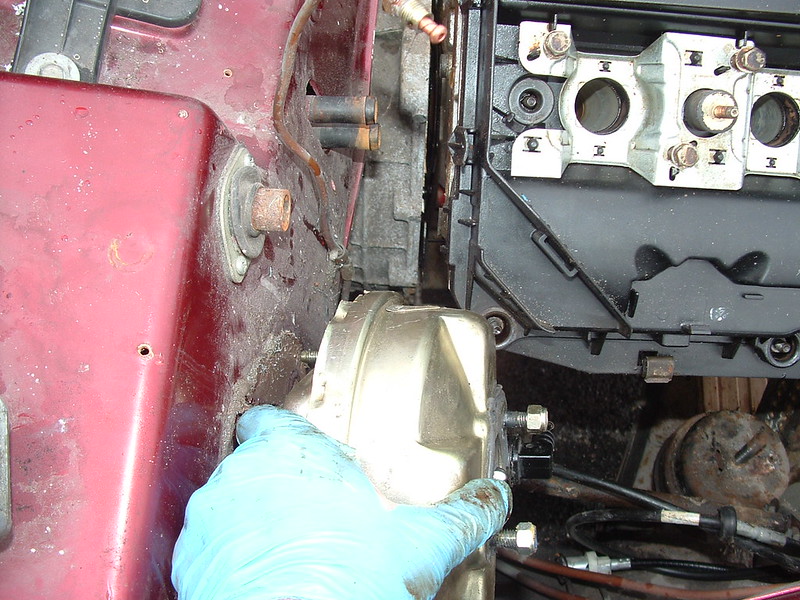
Next up was the cylinder head.......which doesn't fit as it hits the brake servo.


BMW 328i POC by marlinpeter, on Flickr

An MBM dual diaphragm servo might solve this problem. :lol:


Also, the front of the engine fouls the cross member between the front suspension struts.


BMW 328i POC by marlinpeter, on Flickr

I need to assemble a bit more engine and look at the options for moving or modifying this part of the chassis.


I then couldn't resist trying out the inlet manifold..........and I couldn't see any immediate problems.


BMW 328i POC by marlinpeter, on Flickr

Bearing in mind this is just proof of concept and all just balancing together and the head is not in the correct position, I think it looks pretty good!!


BMW 328i POC by marlinpeter, on Flickr

It also seems to clear the bonnets.


BMW 328i POC by marlinpeter, on Flickr

Lots to do and I do really need to get a BMW gearbox to see what other issues I may have.

If you can see any other issues let me know ....

...peter
16 Sep 2012, 12:00am
Very interested in your new project, Peter. I have always liked the look of the Sabre and wonder if you have seen this site

http://www.automotivecreation.com/royalesabre.htm

I assume ACL took over the kit but have no idea if they are still going. If they are they may have made some progress on the use of BMW parts.

Sorton
16 Sep 2012, 8:46am
Sorton wrote:
Very interested in your new project, Peter. I have always liked the look of the Sabre and wonder if you have seen this site

http://www.automotivecreation.com/royalesabre.htm

I assume ACL took over the kit but have no idea if they are still going. If they are they may have made some progress on the use of BMW parts.

Sorton


Hi Sorton,
thanks for your positive comments. Like you, my wife and I have often commented on how stylish these cars look.

Yes, I am aware of the new company who re-launched the Royale Sabre at Stoneliegh back in May of this year (2012). I had a quick look at their demonstrator at that show (with a Ford Zetec Engine), but to be honest was not seriously considering it as an option at that time.


Stonleigh National Kitcar Show - 2012 by marlinpeter, on Flickr


Stonleigh National Kitcar Show - 2012 by marlinpeter, on Flickr

The company is run by a guy called Malcolm Badger ( a member of the ROC, who obtained the rights to the Sabre in 2011 ) but I've not yet spoken to Malcolm about my project. I'm not aware if they have sold any new kits yet and their website has not been updated with any new info since just after the Stoneliegh show. I was hoping to take a closer look at Donnington but they didn't exhibit at that show.

.....peter

P.S. their car was looking a lot nicer than mine :lol:
20 Sep 2012, 1:42pm
OK, so here's a quick update on progress down at the lockup....

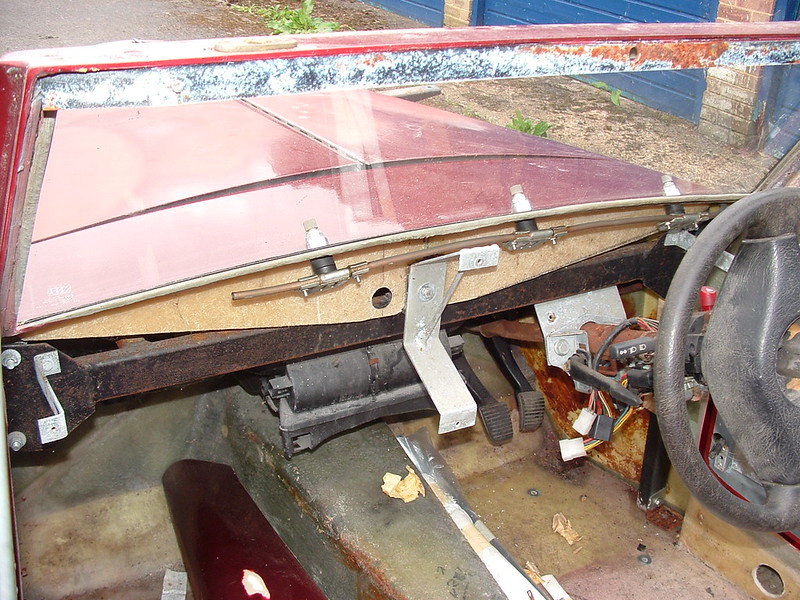
I started this week by removing the dashboard surround so I could see better around the inside of the gearbox tunnel, etc.


Dashboard surround removed by marlinpeter, on Flickr

It's a once piece moulding held on by two brackets at each side plus this rather nicely engineered central bracket.


Dashboard central bracket by marlinpeter, on Flickr

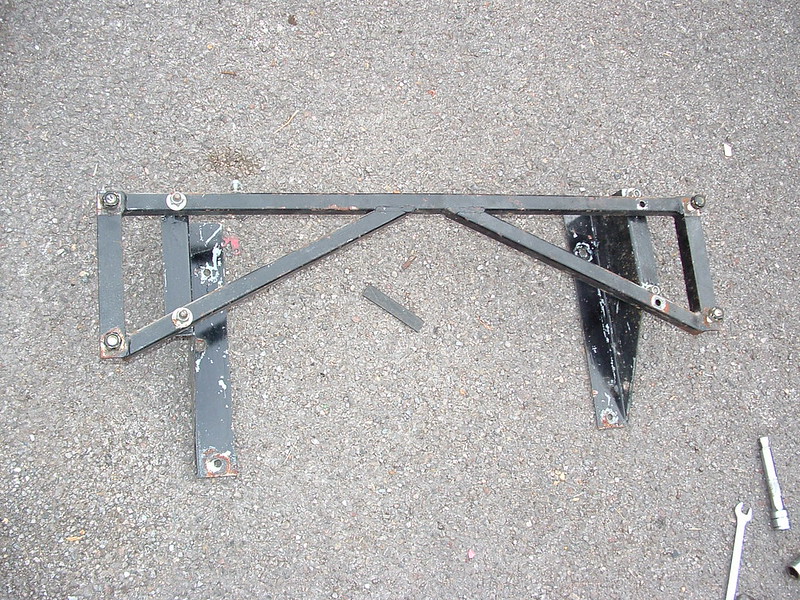
I then removed the front suspension/chassis brace which, to me, looks more like a somewhere to hang the radiator.


Front Brace - removed by marlinpeter, on Flickr

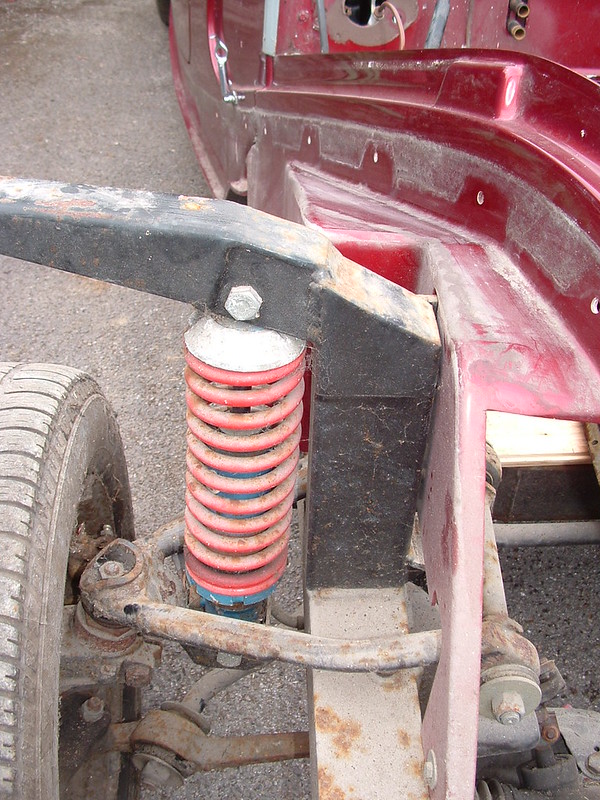
According to the build manual it is to support the front suspension uprights but since they are 1.5 x 2.5 inch steel uprights, I don't think the brace does a lot.


Front Upright by marlinpeter, on Flickr

I also removed the brake master cylinder and servo, but you've all seen one of those so i'll skip the picture.

This then allowed me to have another go at positioning the engine, now all bolted together again but it's still fouling on the old gearbox so not ideal.

There is not much space for the servo so i'll either have to position the servo on the other side of the engine (like BMW do on the e30) or mount the engine rotated a few degrees in the clockwise direction when looking from the front.


Engine POC-II by marlinpeter, on Flickr

Can anyone see a drawback of mounting the engine 'more vertical' than BMW intended? The oil in the sump runs from the front to the back sump so I can't see a problem. The gearbox will also be rotated slightly and the gear stick will stick up a few degrees to the left of central.
Any thoughts?

In other news, one of the ROC members came up trumps with the wiring loom description which matches perfectly my loom. The loom is in good condition and will be cleaned up and re-used saving me a few hundred quid or hours of time :smile:

I next need to check the position of the exhaust manifolds and pipe exit but then I think I've probably gone as far as I can with the engine fit POC so I think it'll be more dismantling next week.


...peter

(More pictures and comments on Flickr.... http://www.flickr.com/photos/peters-bmwmarlin/ )
20 Sep 2012, 7:09pm
peterux wrote:

Can anyone see a drawback of mounting the engine 'more vertical' than BMW intended? The oil in the sump runs from the front to the back sump so I can't see a problem. The gearbox will also be rotated slightly and the gear stick will stick up a few degrees to the left of central.
Any thoughts?


It will be a bit taller. And, if my geometry still works, there will be a bit less oil in the sump. But I guess a few degrees won't make a lot of difference.

Robin
21 Sep 2012, 7:35am
MartinClan wrote:
It will be a bit taller. And, if my geometry still works, there will be a bit less oil in the sump. But I guess a few degrees won't make a lot of difference.

Robin


Where will the oil have gone Robin..................?

It may affect the dip stick reading marginally?
21 Sep 2012, 7:59am
Mike wrote:


It may affect the dip stick reading marginally?


I assumed that is what Robin meant. I need to check which side the oil pick-up is in the sump and maybe 're-calibrate' the dip stick a bit. I think the rest of the oil circulating is generally pumped under pressure so can't see it making much difference. I guess the offset gearstick might look or feel a bit strange?
25 Sep 2012, 9:18pm
peterux wrote:

I next need to check the position of the exhaust manifolds and pipe exit but then I think I've probably gone as far as I can with the engine fit POC so I think it'll be more dismantling next week.


Week 5 progress report......

Well, I've checked the exhaust manifold and there is no issue, except that my trusty Fuji camera, that I've used since 2003, finally died so I didn't get a picture.

I have also dismantled, cleaned and painted the hood frame. This is now all wrapped up and stored away for the future.


Hood Frame by marlinpeter, on Flickr

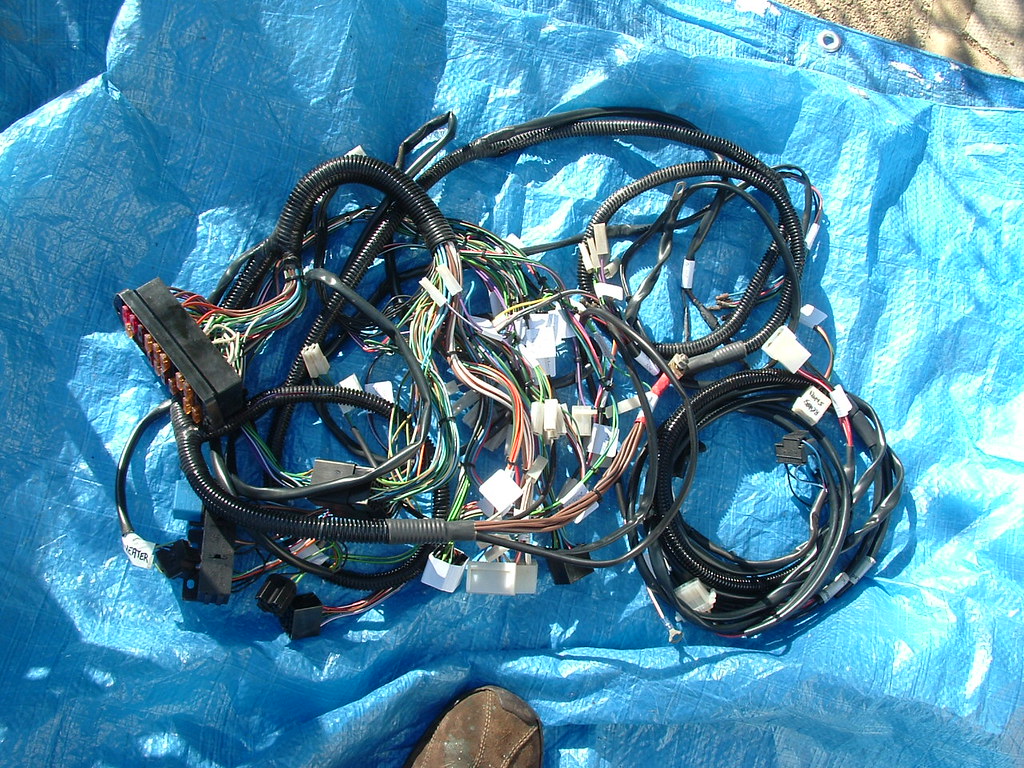
I've also cleaned up and labelled the loom.


Wiring loom by marlinpeter, on Flickr

So back to the great dismantling.....

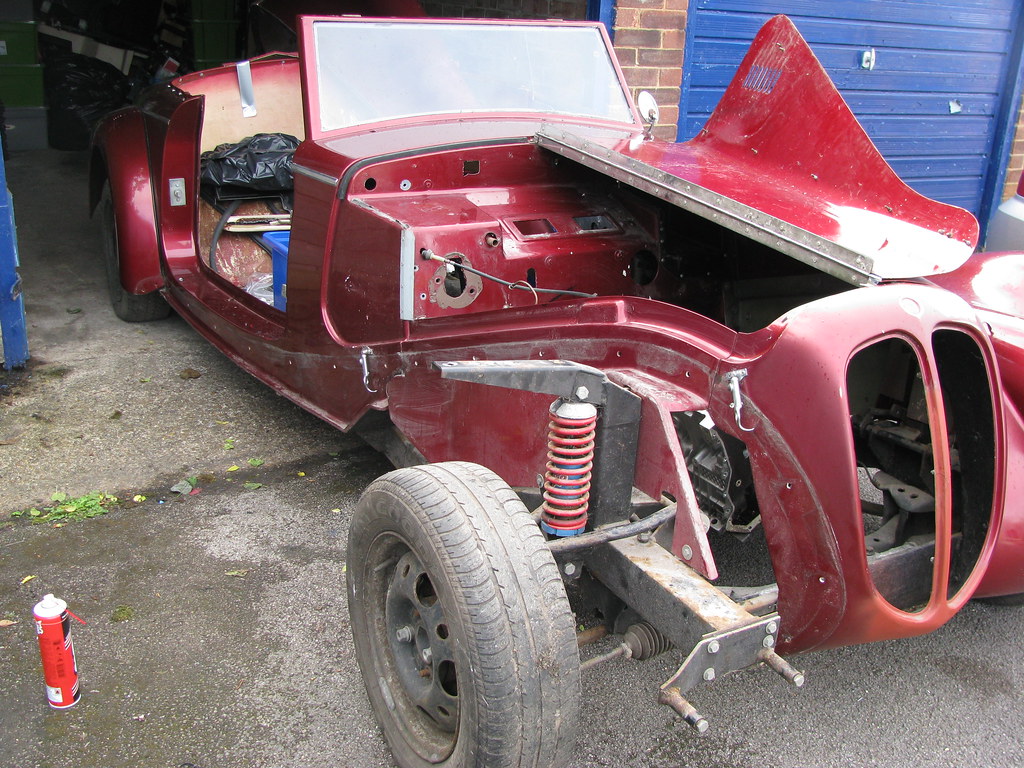
I have removed the drivers door to help access other parts to be removed.


Drivers door off by marlinpeter, on Flickr

You can see in the picture above that I have now removed the heater and windscreen wiper and wheel boxes, etc.

I have also removed the steering wheel and column.....


Steering column removed by marlinpeter, on Flickr

Next, I need to clean up and paint the steering column which has a lot of superficial rust.
I am also going to try to remove the windscreen glass. The screen is BS Kite Marked but not European Type 43 R marked. I believe the IVA has an exemption in place to April 2013 to allow BS marked glass. If this is extended then I will refit the screen glass. If not, I will use the old glass as a template to get a new one made up with the appropriate 'E' mark.

I also need to organise some more storage space as I'm running out of space for storing the body parts removed.

...peter
3 Oct 2012, 9:08am
Week 6 update...........

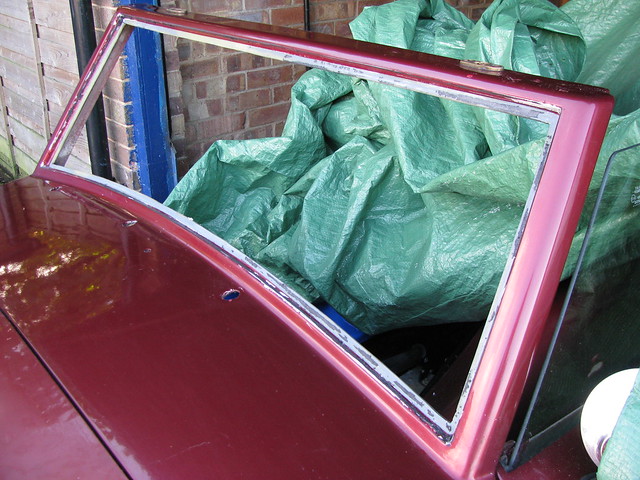
As mentioned in last weeks update, I have now removed the windscreen.


Windscreen out by marlinpeter, on Flickr

I used a variety of knives, blades and Unibond silicone dissolver.


Windscreen marking by marlinpeter, on Flickr

The front windscreen is BS marked but not ECE marked. I believe this is currently allowed as an exemption at the IVA test, but may not be when I get there. The screen is showing some early signs of de-lamination in one corner, so may have to be replaced anyhow.

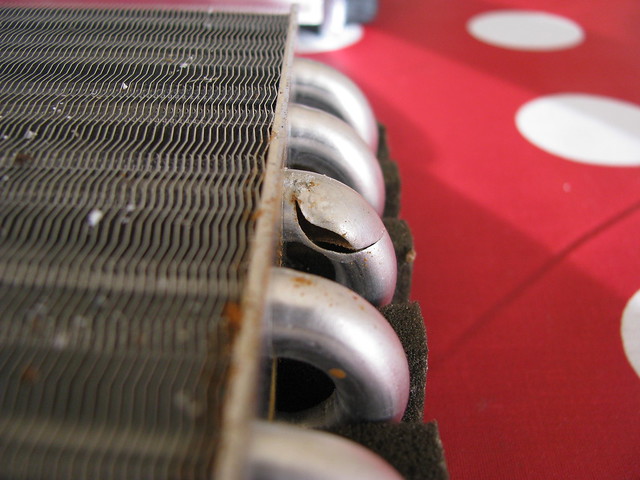
I had decided to replace the heater matrix with a new one as I didn't want a 20 year old clogged up matrix as part of the cooling system. (Another ebay bargain)

Heater matrix by marlinpeter, on Flickr

It was a good job I'd bought a new matrix as the old was frost damaged.


Heater matrix by marlinpeter, on Flickr

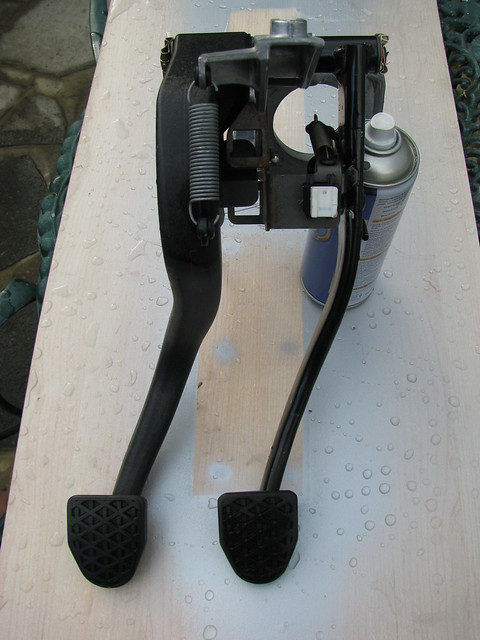
I'm also working on a solution the clutch and brake pedal box. The Sierra is a cable clutch so I need to find a solution for a hydralic clutch master cylinder and pedal box. Whilst searching for an aftermarket peadl box (which seem to start at about £180!!) I came across one of these....


BMW pedal box by marlinpeter, on Flickr

It's from a e46 BMW and is extremely well designed and manufactured.

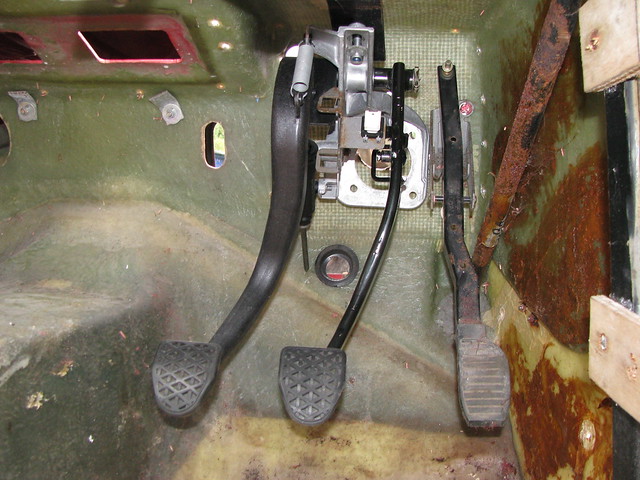
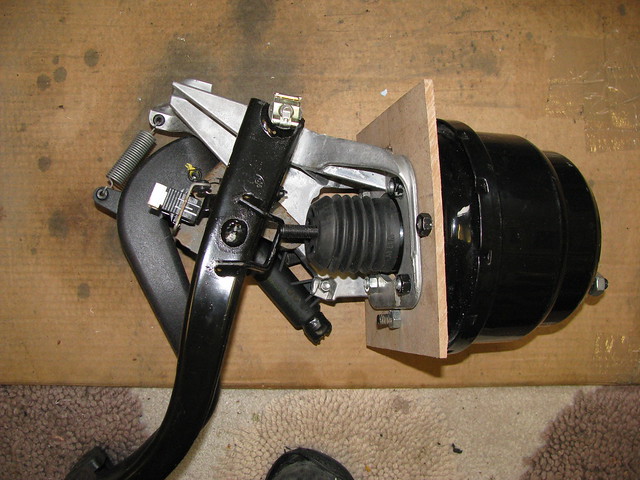
I've done some initial trials and it's looking good......


Pedal box trial by marlinpeter, on Flickr


Pedal box trial by marlinpeter, on Flickr

Here you can see how the brake pedal lines up with the servo input rod. I need to find a suitable threaded eye or rod end to join it together. I also need to notch the pedal box frame to get to all of the servo nuts.

This will be my focus for the coming weeks....

...peter

(more pictures and details if you want on my Flickr site)
3 Oct 2012, 6:21pm
So your using the same dual servo unit that is on the Sportster, that what it looks like anyway. Is this to save space as from previous pics the BMW engine seemed to fit in with the existing servo in place ?

Nice car, love it
3 Oct 2012, 8:14pm
denniswpearce wrote:
So your using the same dual servo unit that is on the Sportster, that what it looks like anyway. Is this to save space as from previous pics the BMW engine seemed to fit in with the existing servo in place ?

Nice car, love it


Hi Dennis,
glad you like the Sabre and I hope you find my rebuild story entertaining.

Yes, that's an MBM dual diaphragm servo in the picture.
Firstly, I needed to get a new Servo as I wouldn't trust a 20 year old servo that's probably corroded or perished internally.
Secondly, if I do go for the BMW M50 engine there isn't enough space for a standard Ford Servo.
It's not so easy to see in the photo's but in the shot below the servo is preventing the engine and cylinder head sitting correctly.

BMW 328i POC by marlinpeter, on Flickr

I'm hoping that the MBM servo will just give me enough space whilst maintaining good performance.
The MBM servo in the picture is in fact just an empty casing that Mike has lent me for the trails.
I also have another brand new unit safely wrapped up in its packaging. :smile:

I need to get the servo mounted in its final position before doing the final checks on the engine fitting.

...peter
10 Oct 2012, 8:57am
Week 7, weekly progress report ...........

Lots of bits and pieces this week....

Firstly, I've finished renovating the Sierra heater box. The flaps have been de-rusted, painted and relined with foam.


Heater box by marlinpeter, on Flickr

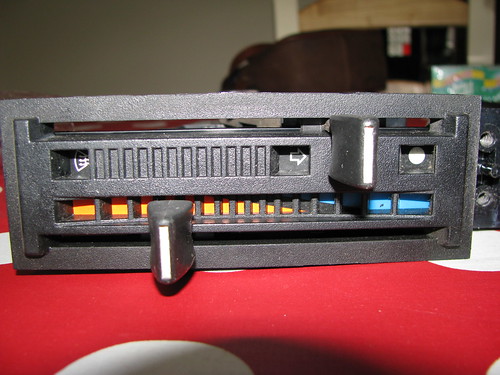
I've also acquired from eBay a complete control unit in perfect condition. The Sabre dashboard is designed to take this mechanism, so now I have a fully complete and functional heater and de-mister unit.


Heater Control by marlinpeter, on Flickr

I'm currently working on connecting the Servo to the brake pedal and have bought theses parts to help.


Servo Linkage by marlinpeter, on Flickr

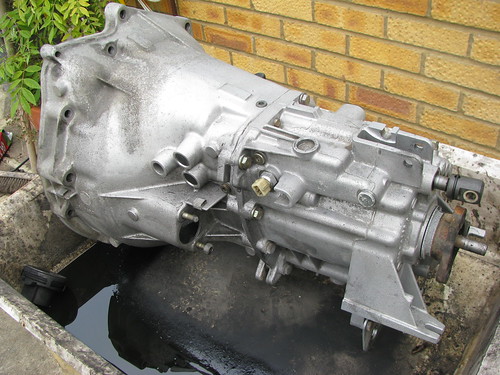
I've also managed to garb a bargain M52 gearbox from a scrapyard in Stevenage. Here it is in the cleaning tank.


Gearbox by marlinpeter, on Flickr

I managed to get the guys to include the gear selector, stick and chassis mounting bracket :smile: The gearbox will be used for more proof of concept work before committing to a new engine.

This weeks plan is to finish cleaning up the gearbox and fettling the pedal box.....

...peter
10 Oct 2012, 9:07am
Nice, 5 speed ZF ?
10 Oct 2012, 12:48pm
Patrick wrote:
Nice, 5 speed ZF ?


Nah, just a bog standard Getrag, but still nice.:wink:
I've got it mainly for checking its physical size in the Sabre, but may keep it depending on which engine I get. It came of an e36 320i which had reportedly only done 74K miles so should be good for a few more miles :smile:
10 Oct 2012, 1:28pm
Low mileage box would be good, I get the feeling the one in the sportster is a bit tired - its a shame the m50's are at a different angle or I could get something much newer. 6 speed would be nice :D
10 Oct 2012, 10:04pm
Patrick wrote:
Low mileage box would be good, I get the feeling the one in the sportster is a bit tired - its a shame the m50's are at a different angle or I could get something much newer. 6 speed would be nice :D


I've not tried but I wonder if it's possible to swap the bell hosing from an e30 'box to an M52 'box. The 'transmission' bit might be the same??

For example only.....

http://www.e12m535i.com/BMW_E12/myM535i/images/engine_removal/tranny7.JPG

Maybe a six speed gearbox in a Sportster is possible :madgrin:

...peter
18 Oct 2012, 6:48pm
Week 8 update......

I've finished off mating the BMW pedal box to the MBM servo. It seems to work well with the stroke of the pedal box matching the servo travel. This is probably as far as I can go without mounting it in the car so it will now be shelved and fitted later.


Pedal box connection by marlinpeter, on Flickr

I also grabbed a bargain Flo-flex diff mount that was on offer at half price!


Poly diff. mount by marlinpeter, on Flickr

Then on to further dismantling of the Sabre bodywork.


Front bodywork removed by marlinpeter, on Flickr


Rear wings removed by marlinpeter, on Flickr

I've run out of space in my lock up so all those body parts were taken home. Washed, wrapped and stored in the garden shed. All the bright work, catches and hinges have been removed.


Cleaned body parts by marlinpeter, on Flickr

Apart from the passenger side door and the boot lid, the remaining bodywork/central tub is all one piece so will require extra space before it can be removed......

...peter
24 Oct 2012, 3:54pm
Week 9 has seen some rapid and dramatic changes to the car. In only about 1.5 days work I was able to finish removing the bodywork and most of the front suspension.

Firstly, I finished removing the passenger door and the boot flap followed by the internal 'A' post supports and approx. 10 bolts holding the body tub to the chassis.
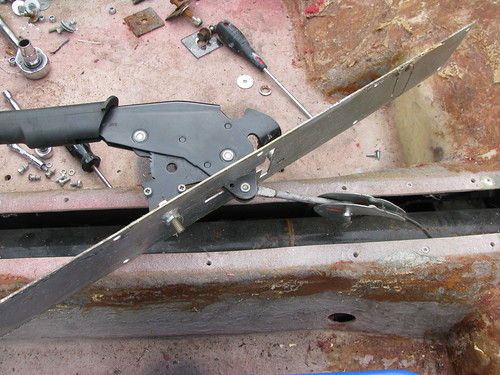
You have to disconnect the handbrake from the cables which was dead simple as this plate just unbolted from the top without having to crawl under the car.


Handbrake mounting by marlinpeter, on Flickr

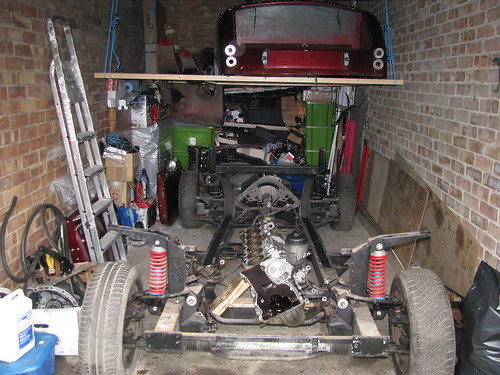
Next, my two sons and I lifted the whole body tub and have stored it above the rolling chassis.


Out of body experience by marlinpeter, on Flickr


Body off! by marlinpeter, on Flickr

My original plan was to rebuild the trolley I used when I built my Sportster and mount the chassis on the trolley so that I can move the chassis in and out of the garage. Luckily the wheels are still in the back of the garden shed. But then it occurred to me that I could work on the front suspension, remove it all, refurbish it at home and then re-fit it to move the chassis around and then do the back end, simples!! So that's the plan and I saved a day or two building another trolley. I'll clean, de-rust and repaint the chassis in two sections.

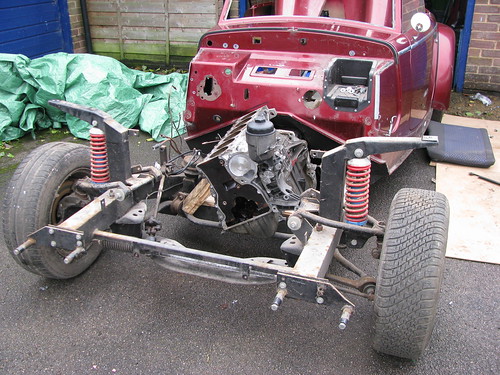
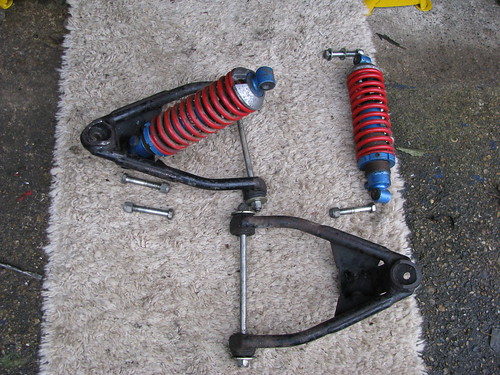
So I set to work with the spanners and removed the front suspension.


Front brakes, hubs, etc by marlinpeter, on Flickr


Front wishbones by marlinpeter, on Flickr


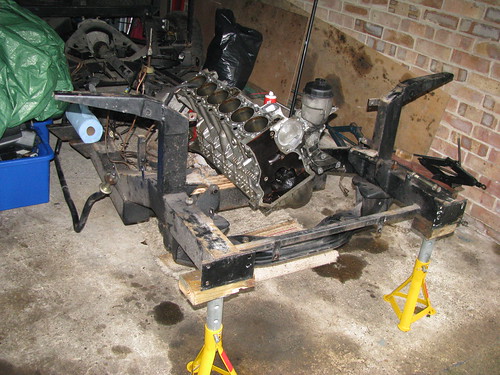
Front suspension gone! by marlinpeter, on Flickr

About three hours later it was all in pieces in the back of my Rover estate.

I've now got a backlog of parts to be cleaned up, de-rusted, refurbished and re-painted.

...peter

P.S. the only reason for that old Ford gearbox and the gash BMW engine still being in the chassis is that I've run out of space and if I remove them, I have nowhere to put them. So they're staying there out of harms way for now :lol: