This is a read-only archive of the old Madabout Kitcars forum. New posts and replies are no longer possible, but every thread is still here to browse and read.
Hi all, been reading most of your build diaries for the past seven months and have been inspired to BUILD A CAR. I currently have two classic cars but I now have the bug to build one, and have selected the MIGLIA.
[QUOTE=Carib Classics;62047]Hi all, been reading most of your build diaries for the past seven months and have been inspired to BUILD A CAR. I currently have two classic cars but I now have the bug to build one, and have selected the MIGLIA.
I will try and keep a diary as I am going to need much help from you guys who have built a number of cars. I will be very honest my keenness is far greater than my car building knowledge.
I have a teaching and lecturing background so I do a lot of planning after which I came up with this as my starting point.
September 2014
I decided to use the spitfire chassis, my research found they were far more sturdy and there a more readily available in good condition. What my research didn't show me was that they are shorter in length. Now anyone who knows about cars would have spotted that one car is a two seater and the other is a four seater. Not me.
And so with the purchase of two chassis the build started. Why two? because my project chassis was solid. It had been already stripped, cleaned and painted and was sold as a bare boned unit, [ATTACH]
[/ATTACH]
That meant I had to get another chassis with running gear.[ATTACH][ATTACH]
[/ATTACH][/ATTACH]
Once I stripped the chassis it was discarded for scrap
hi you wont regret it good fun my miglia is on show at a citroen main dealer showroom so nice and warm for the winter now building a citroen 2cv specia rattlerl
Thanks guys for all the positives.
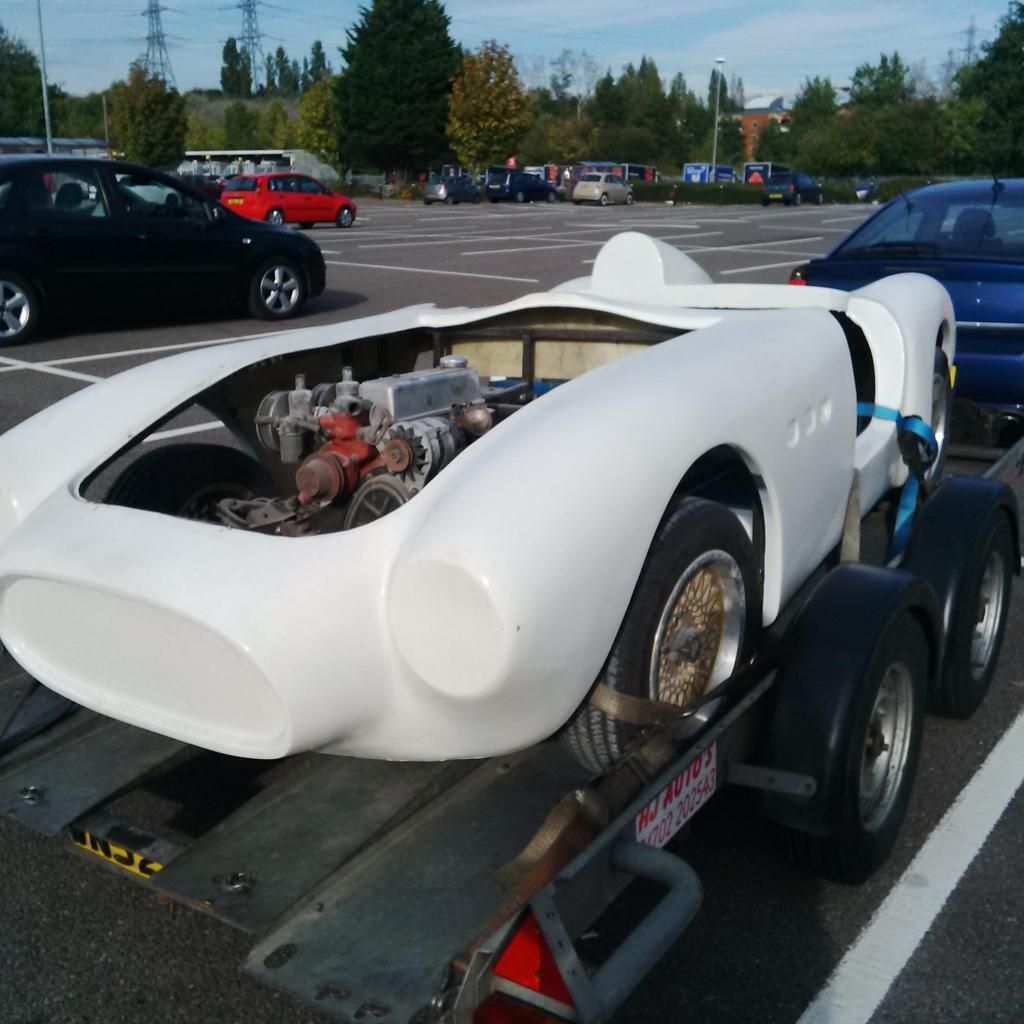
Yes I have spoken to Mike at Miglia , thanks Paul, and he is setting me up with a subframe and body to suit my spitfire chassis.
So that was back in September and much progress since then. My rolling gear came off with very little trouble. I must confess that I am fortunate to be part of a group of enthusiast who think they know everything there is to know about classic cars.
The ring leader is Big Kevin who owns the local garage and is a one of the best fabricator I've ever seen.
He CAN reproduce any shape and size steel panel.
However none of this mad group have ever built a kit car so I'm venturing into territories green for us all.
The great thing about the group is that everyone chips in to help whenever there is something to resolve. Out of hours we have full access to the ramps and extensive snap on tools that belong to Kevin and Chris who work at KW Auto and classics Cars Bromsgrove Worcestershire full time. Although I have my build in a lockup, once the basic rolling chassis is built, and I can get some space? its round to the garage for advice and verbal abuse.
With my two chassis in two different locations, I could get busy. Everything was removed the suspension donating chassis it was all power washed, dried and the long task of cleaning and painting began.
My build chassis was secured in my lockup, which is where all my main bits will be stored as I obtain them.
Attachment could not be found in the archived database.
.
Did someone say whats that under the heavily wrapped polythene sheets? Well thats my 2litre Redtop race prepared engine. I will back a ford type 9 five speed box or a T5 gearbox to it, and as they say, thats all she wrote. YES VERY NICE!!!!
Oh can anyone say whether the standard prop and diff will cope with that monster setup? All those who have build a V8 version, what did you do with your back end?
With all the garage equipment and tools at my disposal, my two large bins of suspension parts were stored at KW Auto. The cleaning of the suspension parts?guys they takes a lot of time, particularly under the eyes of Big Kevin, he is a stickler for detail. All my spare days and evenings were spent with a bench vice. To be honest, it made the final striping and cleaning so much easier. Everything is washed in clutch and brake cleaning fluid,
then given a thorough wire brushing to remove all the rust
before it is either hand painted for the chassis engine mounts
or sprayed the appropriate colour as part of the suspension unit.
With October ending there was still a few parts still to be cleaned and sprayed, and so November arrived and I was still married to the bench vice. However it all ended and all my clean bits of suspension and accessories were transferred to be stored and hung in the lockup.
.
The lockup was also where I was going to do my basic rolling chassis build, but before I could start my build I had to prepare my build chassis in the same way I had addressed the suspension.
So with an electric generator borrowed from Kevin for the tools and light which I had erected, my cleaning and striping began.
I used a flat electric metal sanding disk on the flat areas, to strip it back to the bare metal looking for any holes and a series of wire brushes in the small and tricky areas.
The area is cleaned with brake and clutch fluid to remove any grease and dirt before a thick hand brushed layer of silver metallic paint was applied.
stonking engine to go in there - buy a couple of spare diffs, at the very least some from the 6 cyl GT6. just change them each time they break!
you can also get quaife internals. You could also loose the swing arms and go full independant with cv jointed rear that will unload (laterally) the diff so allowing other diffs to be engineered in (subaru, nissan).
Nice work CC you are well on the way, you mention fitting a type 9 gearbox thats what i have done but used a GT6 engine, did consider a bigger engine but then there was the uprated brakes etc to consider so stuck with a GT6 for now. There is some good sites on subaru diff conversion in triumph chassis plus uprated independent rear suspension.
Good luck and i look forward to following your progress.
Nice cars MT, yes I don't intend to do anything to increase the weight. The type 9 gearbox will add a few ponds but thats it. Did you leave your back end as standard?
My intensions are to keep my first attempt as standard as possible with general upgrades such as vented replacement discs, which I have to change anyway. This route will ensure I get the build completed, then go back and either do another build or gradually make the uprated changes.
The guys at the garage think I should do all the uprated and changes this time around, but as its my first lit build, and no-one else at the garage has ever built a kit car, I intend to keep focussed and have it completed for summer or certainly within 12 months.
.
These are a few of the Bromsgrove garage crew. You can obviously tell who is big Kevin. (blonde mop?)The other two are Nathan who's stag had just won best classic on show that day, and Roger the dodger, he can spray anything.
After much trial and error I have now removed the top four leaves from the rear spring (Vitesse donor), and fitted 150lb Spitfire springs to the front, cut down by 1.5 coils, with new, standard dampers all round.
This gave it a suitable ride height with no lowering block needed and great ride and handling as the tyres now stay on the road instead of hopping about all over the place, which they did with stiffer springs fitted.
As for the brakes, I've got standard drums at the back with grooved, solid discs up front and an aftermarket servo for better feel.
Bearing in mind I have a cast-iron six pot up front, that setup is plenty powerful enough for fast road use. Can't comment on track use as I don't do track days, but Phil J (green Spyder No.2 above) is competitive with early 911's on the track and has standard Vitesse brakes and about 130bhp from his 2.5 six.
Not sure how much modification the Spitfire running gear will need, but I wouldn't think it will take much fettling to make it a mighty fast car.
Wonderful MT, just what I needed to know much appreciated, I will be putting your findings within my build starting with the back end.I already had a remote servo on my shopping list.
As for the front end, didn't think it would have been a problem, but with my engine potentially being lighter than your six pot, I will certainly start with the reduced height springs.
I've just purchased some 15" wire wheels, are they what you used in your build? One of my major concerns is that the wheel arches are filled. I hate to see kits with undersize wheels, it spoils them for me.
Dec 2nd, Turning and Painting the u/side of Chassis
The top of my chassis is de rusted and painted with a thick layer of silver metallic paint and now requires to be turned over so the underside can be addressed.
.
Attachment could not be found in the archived database.
.
My intension is to put at least three coats of paint to the underside giving it as much protection as possible. Once again as previous stripping back the existing paint and any signs of rust to be removed and letting the paint do its job.
Happy days, I've found just one hole which I shall get welded once the rolling chassis is in the workshop for the engine and gearbox fitting.
Attachment could not be found in the archived database.
.
Week two in December and the bottom has had its three layers of paint and is now left to dry.
Christmas is coming and everyone is going shopping, so I may as well join the fun. A set of wheels on ebay, a must have for christmas. Success !!!!!!, I win the set of four 15" Healey wire wheels with tyres. So off I go to collect them with my Buddy Paul. When we get to the seller, we are greeted by a couple of the nicest guys I have ever met since playing with classic cars.
Wayne and Paul at Atkinson Classics in Stoke on trent made us feel like long friends. We could have exchanged stories and ideas about classic cars all day. Plus owner Paul, found two more unused wire wheels with three tyres which he sold me. A brilliant day out. Now its all about stripping, cleaning and buffing them to a polished shine ready for the body fit.
A number of people have mentioned replacing the Trunions, mine seem to be ok, but what do I know.
Attachment could not be found in the archived database.
.
Can anyone tell me what I should be checking? I intend to replace the end caps, oil seals/rings, thought that would be adequate? The bolts seem to be a good tight fit, but they could also be replaced if necessary. Can anyone educate me?
I've just purchased some 15" wire wheels, are they what you used in your build? One of my major concerns is that the wheel arches are filled. I hate to see kits with undersize wheels, it spoils them for me.
I have 4.5x14" MGB wheels fitted to mine - they're cheap, easily available and look the part.
The critical thing looks-wise imho is the tyre sidewall height. In this picture my (silver) car is on 70 series tyres and the other two are on 80's (175/70/14 vs 175/80/14).
Once I saw that picture I upgraded to the higher profile tyres and raised the suspension about an inch and a half to allow clearance as I felt the other two cars just had more fifties 'presence'.
That gave me a stance and look that I'm much happier with -
You'll be fine with 15" wheels so long as you get the tyres and suspension settings right. I use this simple calculator to determine whether tyres will fit and how they'll affect the gearing -
Others may disagree but if I were to fit 15's to my car I'd be going for 155/80/15's which would fit, have similar gearing to the tyres already fitted and give the car an authentic 50's look -
Hey guys, YES !!!!! just when you guys thought I'd given up or put the project on hold I'm BACK.
Ok, BIG question????? All inputs are welcomed.
Can anyone confirm AS FACT the actual difference in the wheel base length between the Herald chassis and a Spitfire chassis.
Its decision time for me. Do I build on my existing spitfire chassis or do I need to make changes in order to keep Mikes great body design proportions, on the Herald chassis setup.