Front Indicator Earth Wire - Extra Photos:
Just a quick follow up to yesterday's post, I should have added extra "before" & "after" photos.
These are from the second indicator that needed to be done, showing where I made the cut...


Which leads me nicely into...
Front Indicator Mounting:
I still need to "mock up" the best location for this, but I already know I want a vertical mounting surface.
Mikmiglia had previously suggested one way of doing this, but this advice actually gave me another idea.
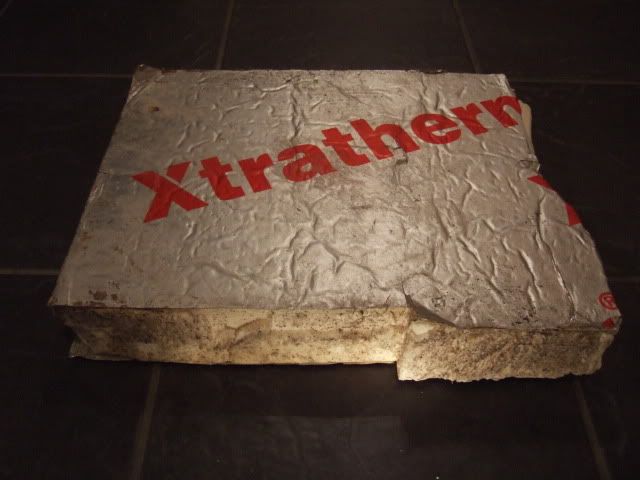
I've already collected some discarded sections of house insulation foam from nearby skips.
As I had a vague idea that I might stuff these inside the doors before adding some sort of interior door panel.
Then I remembered my Fibre Glassing Instruction DVD using foam as a mould to make a particular shape. *
So I decided to have a go at shaping some of this foam into the basis for my indicator mounts.
* OK, technically speaking, the DVD suggested making a fibre glass mould from the foam, then using that.
But that sounds like a lot of extra work to me & I don't have any gel coat to play with anyway.

So it will have a rough fibre glass finish, which be be "smoothed" on the visible bonnet side with some filer.
I just had to bare in mind a few things before I started attacking the foam with a collection of sharp "toys":
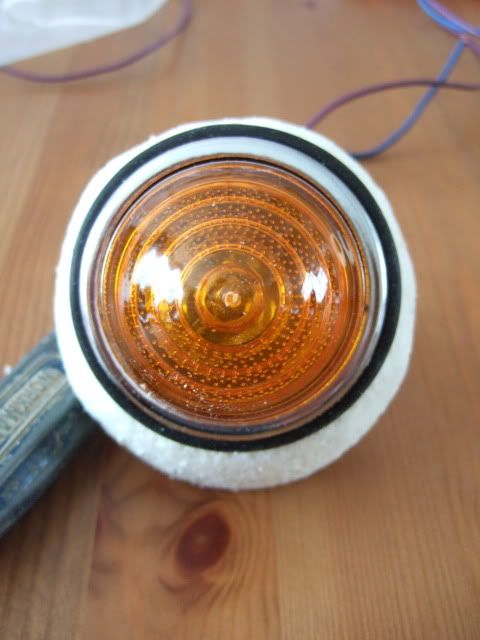
- I wanted it to match the contours of the headlights, which appears shallower above & deeper below.

- I needed to make it deeper than required, so that I can trim the back to blend into the bonnet's contours.
( Although the deepest point will still be less than an inch to keep in step with headlight mounting point. )
- I actually need both a 'left' & a 'right' mould to take account of the bonnet shapes.
So I started by cutting off a slightly over sized cube from the insulation block…

I then used the indicator's outer chrome ring as a basic guide to mark a centre hole for drilling...
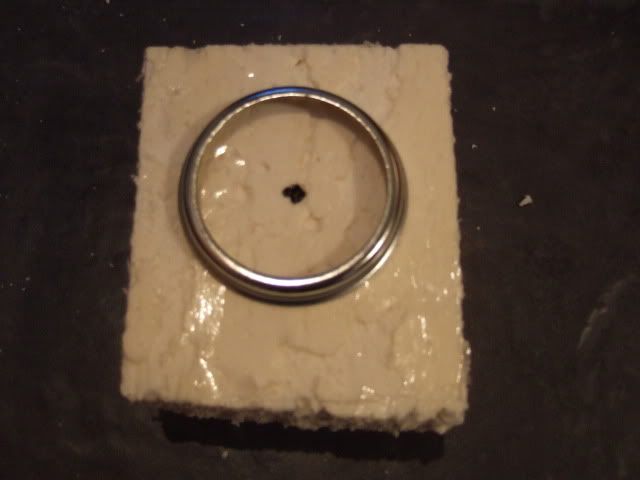
I used a wood working drill bit to cut a hole for the back of the indicator to go through...
 Question:
Has any body used this type of drill bit to cut through their fibreglass bodywork?
Or do you have to use the cylinder type drill bits usually used on metal?
With the indicator's rubber seal pushed in place I could use a marker pen around the outside.
Which gives me the size of the vertical surface to starting working "back" from…

At this point I sliced the block horizontally to give me the two "sides" I would need.
So this left me with two sections that both looked like this to play with...

Then I slowly, but surely, whittled the foam down into something that looked like this...

I figured in the best Sammio tradition it didn't matter too much if it wasn't perfectly symmetrical.

I now need to confirm the final location for the indicators on the bonnet.
( Ideally as close to the "red circle" mock up in the bonnet photo above).
Then I need to do is to shape the foam's flat "bottom" to blend in with the bonnet's contours.
I also must work how thick the fibre glass will end up being after it is applied over the top of the mould.
As I will need to reduce the mould by this thickness, so the fibre glass ends up the required size (
touch wood).
After that, I should be ready to have my first go at making something out of fibre glass.
 Observation - Working With Foam :
This insulation foam is very easy to work with, a bit like a large cheesecake.
But the stuff gets everywhere & sticks to your clothes like iron fillings to a magnet!
I think I've spent more time cleaning up the mess than on the shaping work itself.
So another inch of progress made towards the finishing line.
Until next time, take care, Paul.
 Replies:
Mr T
Replies:
Mr T - At least if you have an electrical problem, chances are it will be a red wire at fault.
