Derby Dreamer – Welcome back Richard.

I made a similar cut to the rear of my car…

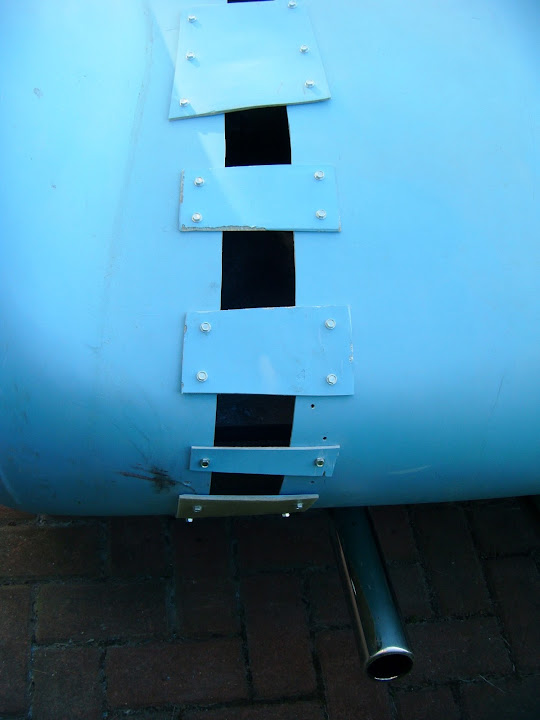
With an extra slice off the driver’s side too.
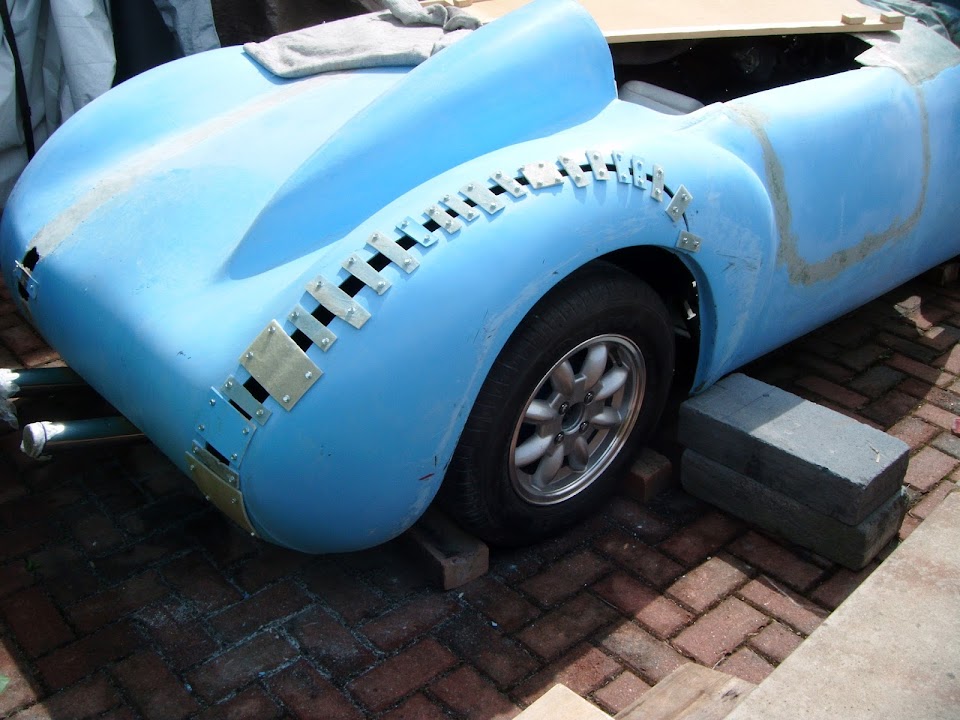
Whilst I initially used fibreglass brackets, I later switched to Builders Band which was much better for this kind of work.

- - - - - - - - - - - - - - - - - - - - - - - - - - - - - - -
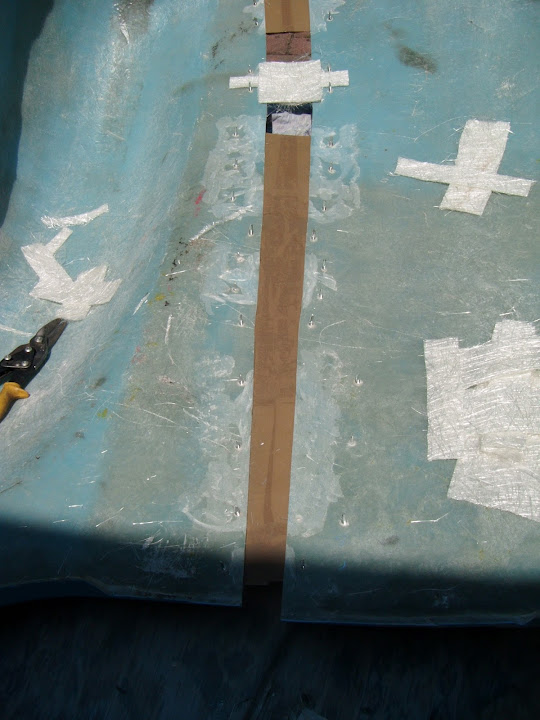
To get a “seamless” join, you will have to tackle the gap from both sides.
I used brown parcel tape as a release agent that the fibreglass matting will not stick to.
You can either simply put it on cardboard, or even some modelling mesh.

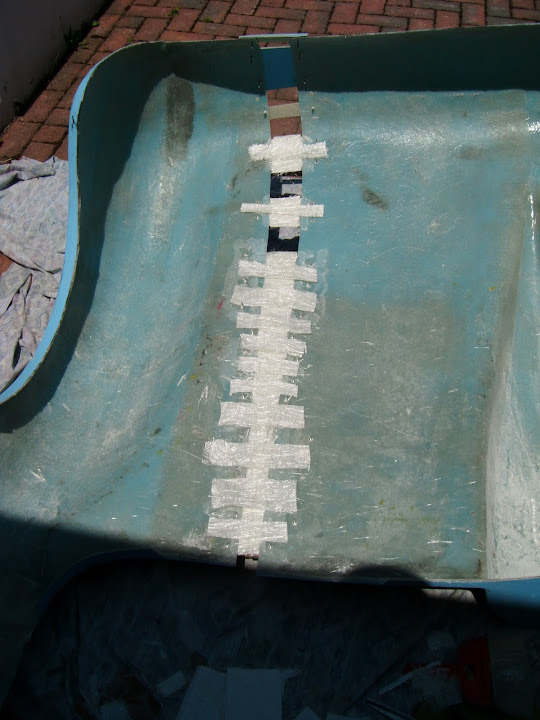
At first, I tried to work inside the gap created by the brackets on the outside.
Before filling both the gap and joining the two sides together.
Note:
This was at an early stage and extra matting was added across the join as the real strength comes from below.
Later on, I put the brown tape across the join from the outside, held in place by the brackets.
Believe it, or not, but this mess gave me a smooth surface to work on the other side.
(Note: The use of parcel tape on a yoga mat to create a curve. )

- - - - - - - - - - - - - - - - - - - - - - - - - - - - - - -
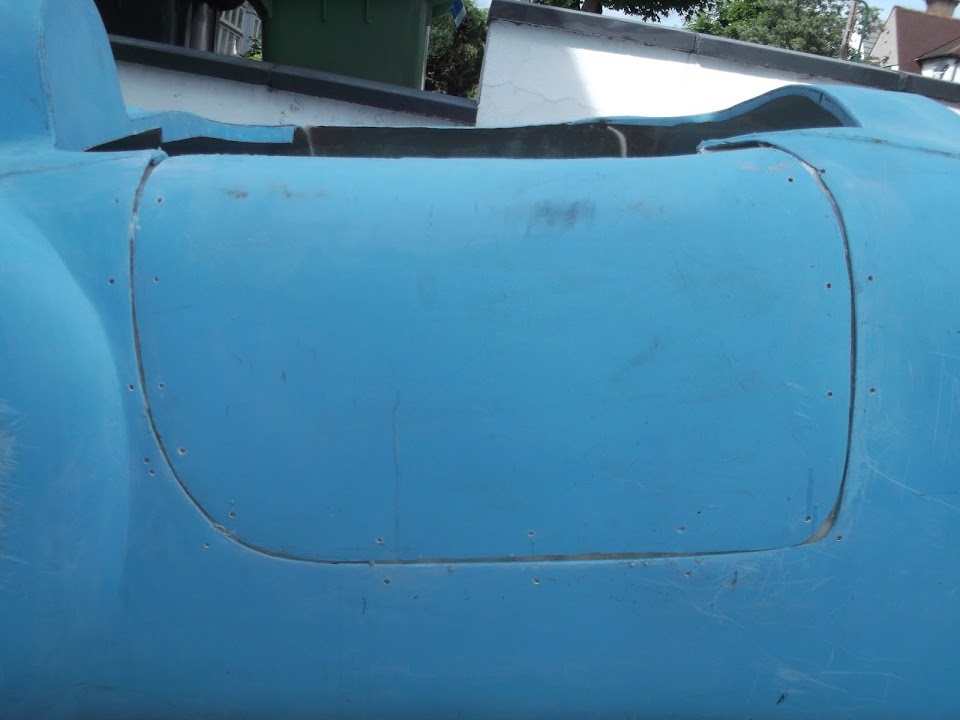
Once you have added strength to the inside surface, you can remove the brackets and tidy up the ‘sunny side’.
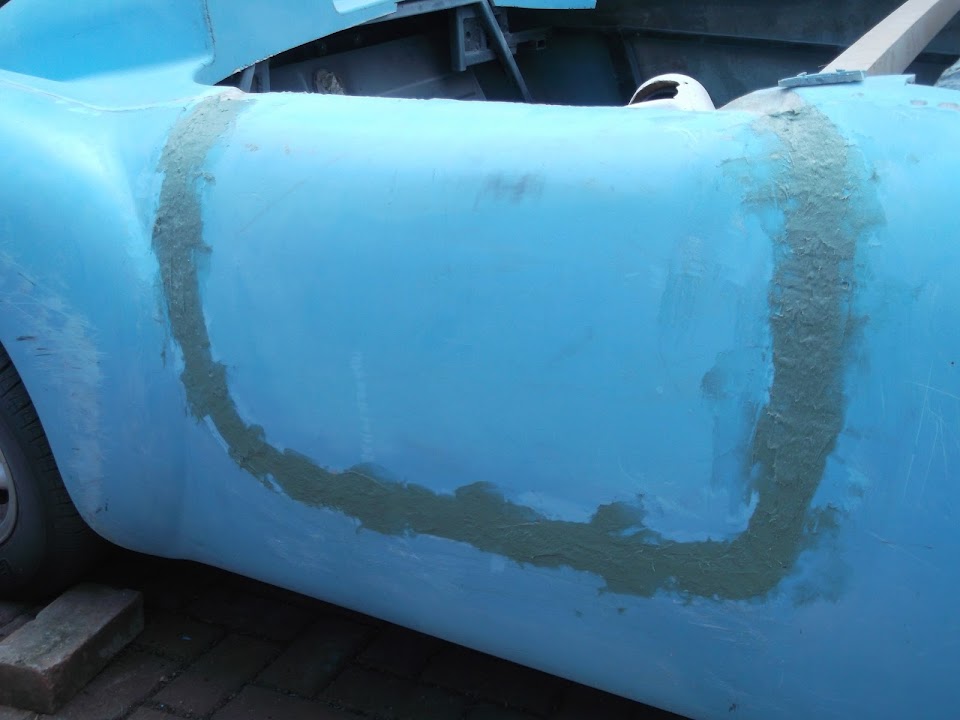
This shows that, initially, you will have ugly joins where the original body shell meets the new extension piece.
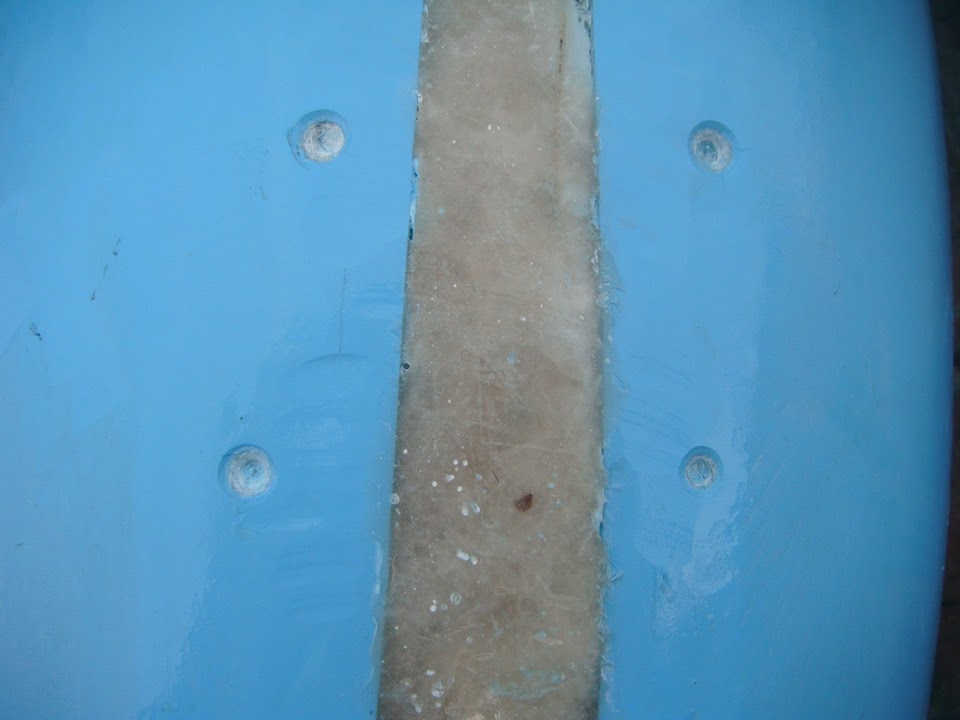
Note: The bracket holes have all been countersunk to help the fibreglass filler work better.
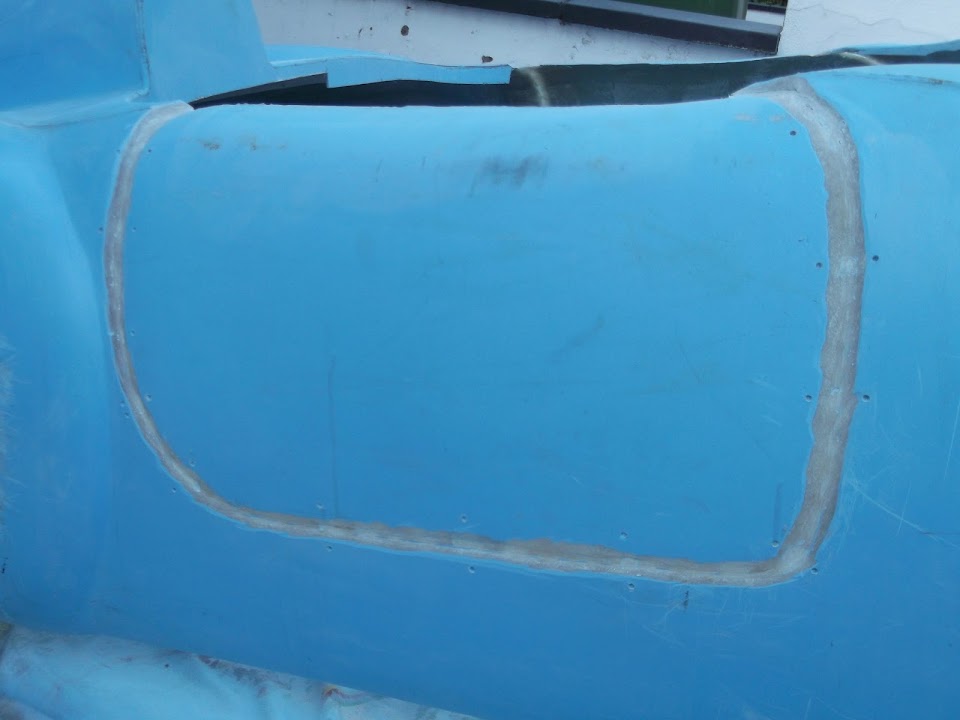
These photos from work on my doors give a better example of tidying up the join.
The small join gap is ground out into a “V” which is narrow and the bottom and wider at the top.
To fill this, I cut out a selection of fibreglass strips in various widths.

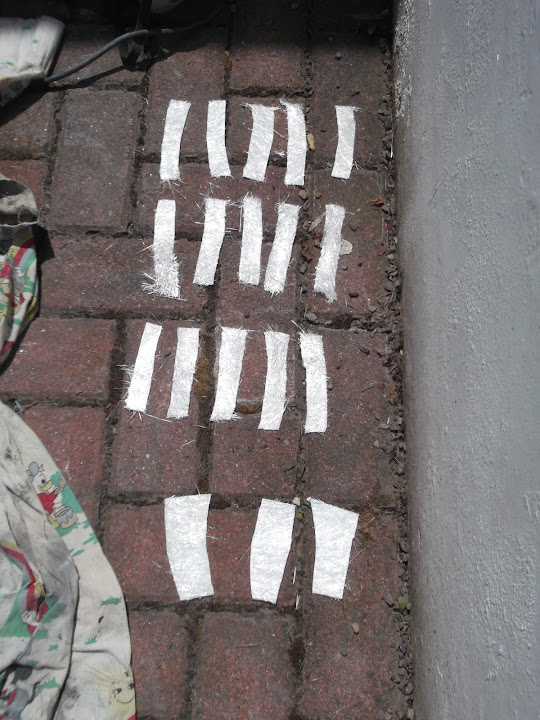
Then I slowly built up the layers of matting in the V.

Before a final layer of filler to tidy things up a bit more.
By the time the sanding is finished and the primer is on, you can’t see the join on the sunny side.
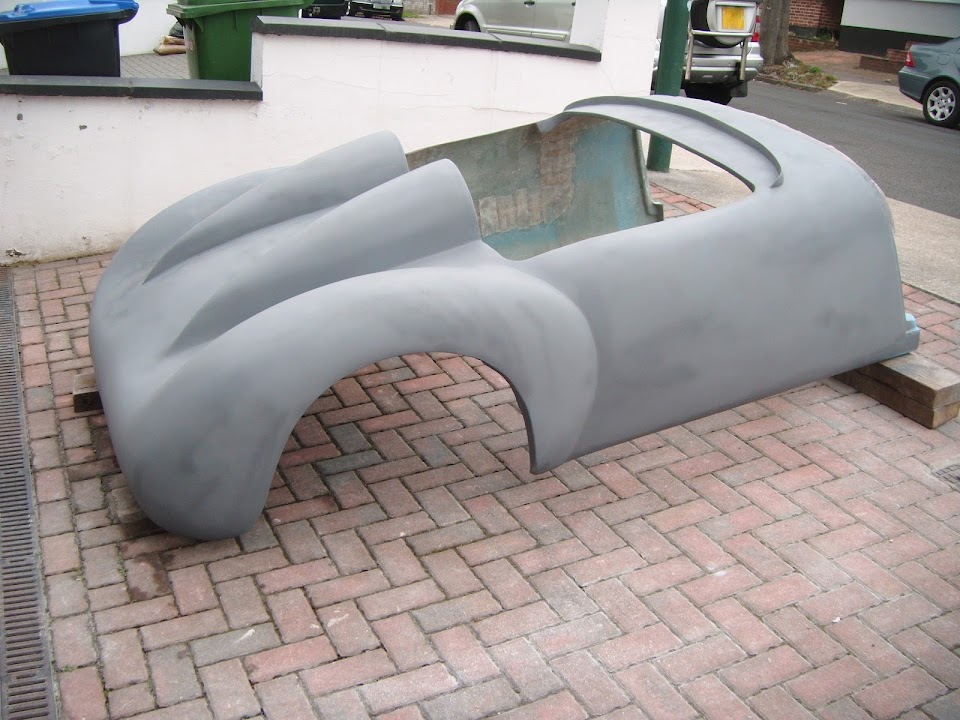
The photo above, also shows how the rear wing chop has also blended in.
- - - - - - - - - - - - - - - - - - - - - - - - - - - - - - -
Anyway, I hope that helps.
Also, as far as I am concerned, it doesn’t really matter how long you build take if you actually finish it.
As that first drive will make all the effort seem worthwhile.
Good luck, Paul.
