Quote:
Originally Posted by IanA

So- the big question I had for Chris at the weekend was... how to drain the boot lid channel and keep the boot dry? I've not sealed round the boot aperture channel yet and periodically have to dry out the battery tray area. then apply some WD40 until the next time.
Well here's the answer:
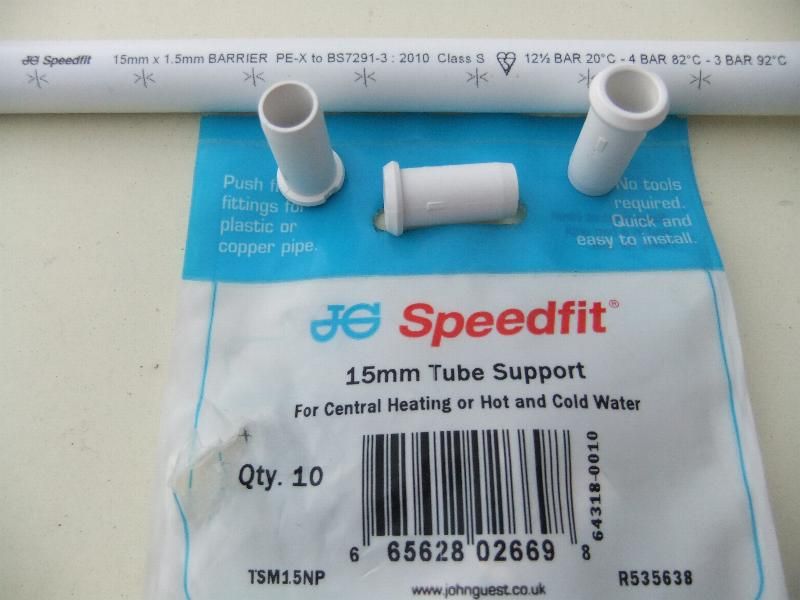
The £7.24 in the title refers to the price of 10of 15mm Tube Supports and 2m matching pipe from B&Q in the plumbing section.
How to: locate the widest area of the channel in the rear corner of the aperture- you can check this out from underneath against the light. The old rear light panel obscures most of the channel but in the corners there is room to drill large enough holes.
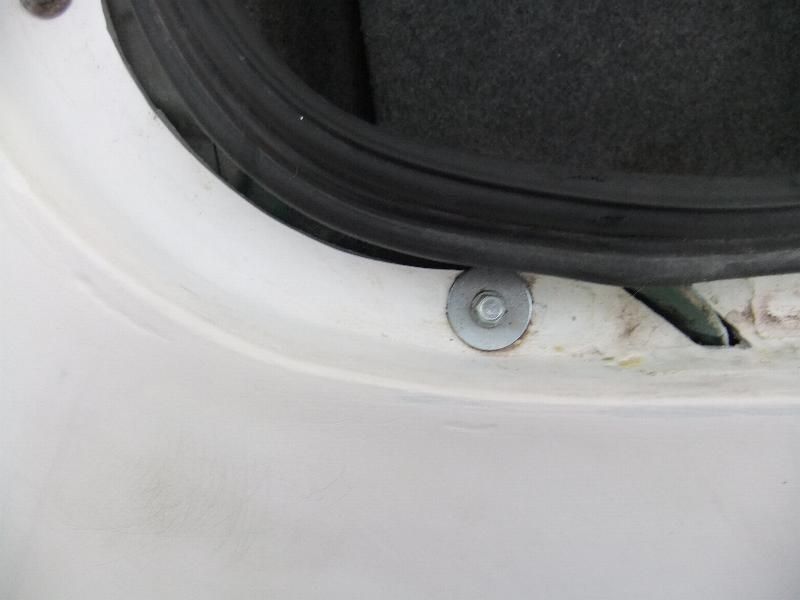
Before:
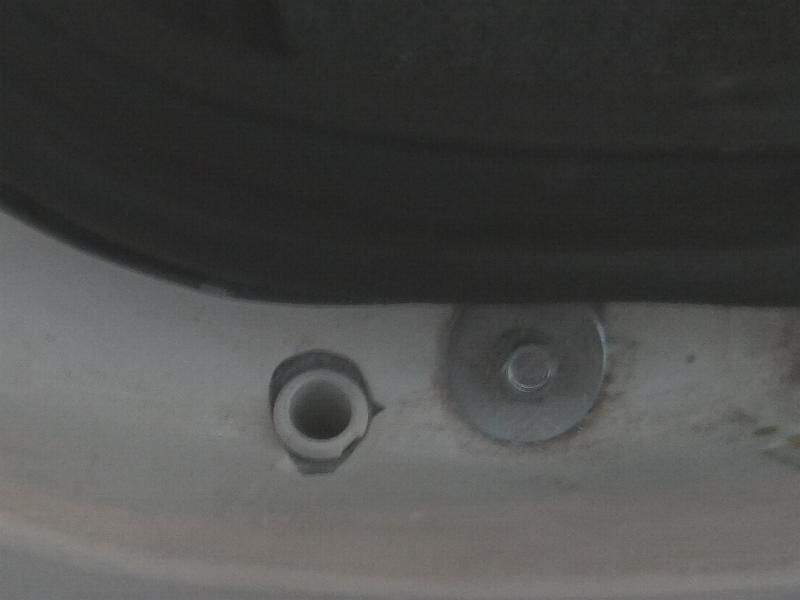
Once the hole is drilled and made large enough for the support, countersink it carefully to get the lip as deep as possible into the hole without it falling through. Then cut a length of pipe to suit. I angle-cut the lower end to maximise the exit area- it sits on the inside of the rear apron just below the rear lights. Feed the pipe through the vacant rear light hole in the rear panel keeping a loop of wire on it so that you can manoeuvre it easily to be under the hole you've made. Then push the tube support into it.
That gives you the dry fit.
And it looks like this:
Remove it all, apply the sealant of choice to the hole in the channel and to the end of the pipe and re-assemble.
My sealant of choice is Sikaflex (or Tiger Seal) but I use so little at a time, I end up wasting half a tube because it goes off. Any tips for stopping it doing that please? |
Would the poly sealants successfully hold and seal the plastic though? Some of the plastics really don't want to stick. Another possibility would be to either get some GRP tube from ECF or other supplier of the correct size for the plumbing tube, and bond the GRP tube in place with resin or specialist bonder for GRP, or ......... Make a female mould of the support 'sleeve', then make your own tube using the female mould. A suitable sized bolt could be incorporated when the final 'tube' is made, or a solid 'peg' made, and then a drainage hole drilled in it (but coat with resin after so no bare GRP fibres to get damaged by water. The main aim being to get a GRP item which will (no question) bond successfully to the GRP, and accept the plumbing tube!