|
|
| Vintage and Classic Roadster Kit Car Builds For Vintage and Classic era kit cars. Post your build reports, problems and progress here |

27th October 2021, 21:09
|
 |
Senior Member
Enthusiast
|
|
Join Date: Mar 2005
Posts: 3,080
|
|

Not a lot of garage time over the last week or so, but I was keen to tick of a couple of items of my task list.
One quick job on the list is to fix a label specifying the type of brake fluid which is required for the IVA.
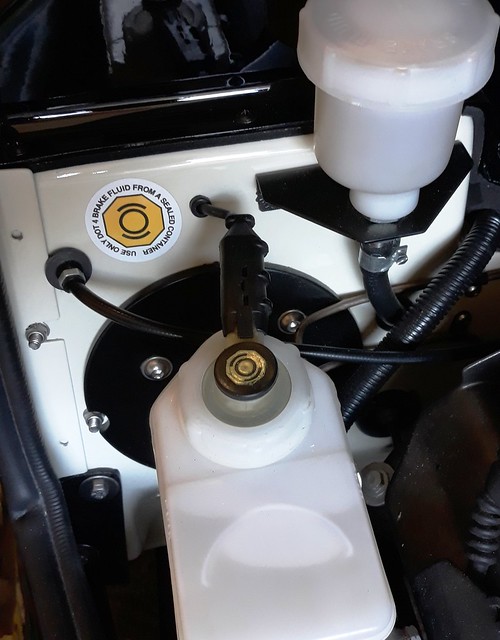 Brake Fluid Label Brake Fluid Label by Sabrebuilder, on Flickr
This is a little bit of 'belt and braces' as the little yellow symbol on the brake reservoir cap should be sufficient but it is a little bit faded and I didn't want a potential failure point for the price of a sticker.
Next, having used the 'new' chrome strips on the doors, I decided to swap the chrome strips on the bonnets to match. I made up some more modified fixing screws but then realised the new strips didn't have any holes for the bonnet catch pins. Luckily, I had found the pins in the box of bits that came with the car.
 Bonnet Catch Pin Bonnet Catch Pin by Sabrebuilder, on Flickr
With the strips in place I could drill the holes for the catch pins through the bonnets.
 Bonnet Catch Bonnet Catch by Sabrebuilder, on Flickr
Very pleased with the end result now they are all in place.
Not exactly huge progress but it's nice to cross another couple of items off my list.
Until next update, stay safe...........
...........peter

|
20th November 2021, 09:39
|
 |
Senior Member
Enthusiast
|
|
Join Date: Feb 2005
Location: Hampshire
Posts: 2,497
|
|
Looks good, like the precision / detail on stuff like this.
|
12th December 2021, 10:42
|
|
Member
|
|
Join Date: Jul 2014
Location: Ealing London
Posts: 54
|
|
Your achievement
Enjoying myself everytime I read about your procedure, reasoning and achievment and wish I was 20 years younger.
Wishing you all the very best with your project, it is wonderful.
Also take this opportunity to wish you your family and all your followers a happy Chrismas and a prosperous 2022 and may we soon get rid of this wretched Virus.
|
22nd December 2021, 19:07
|
|
Senior Member
Enthusiast
|
|
Join Date: Mar 2005
Posts: 3,080
|
|
Quote:
Originally Posted by Amir Manzoori

Enjoying myself everytime I read about your procedure, reasoning and achievment and wish I was 20 years younger.
Wishing you all the very best with your project, it is wonderful.
Also take this opportunity to wish you your family and all your followers a happy Chrismas and a prosperous 2022 and may we soon get rid of this wretched Virus.
|
Hi Amir,
thank you for your feedback and I'm glad you enjoy reading my updates.
May I also wish you a Merry Christmas and a Happy and safe New Year.
Let's hope we all get back to some kind of normal in 2022!
cheers, Peter
Not a lot happening in my garage at the moment but I do have one more update for this year.............(to follow....) |
22nd December 2021, 20:08
|
|
Senior Member
Enthusiast
|
|
Join Date: Mar 2005
Posts: 3,080
|
|
One more update....
Not a lot happening in my garage at the moment but with six grandchildren I've been kept busy helping Santa getting ready for Christmas. 
But I have just time for one more update...
Call it a bumper Christmas edition , if you like......
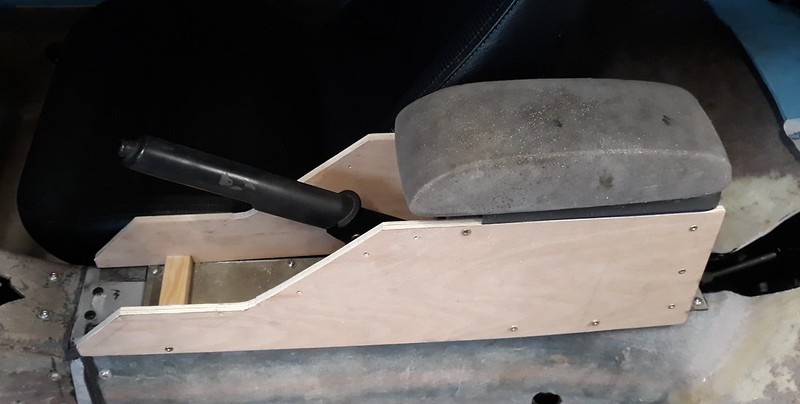
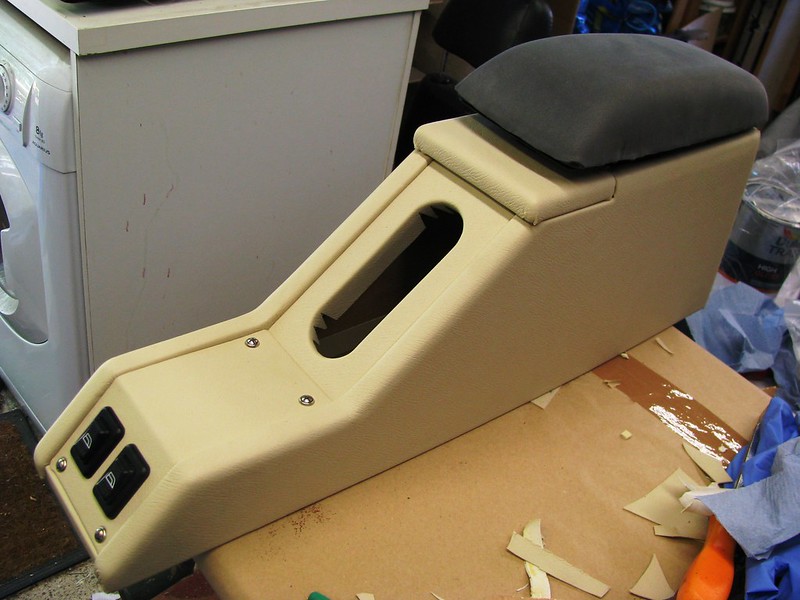
Way back in the first Covid lockdown back in May 2020 (remember that?) I worked on the centre consul but I never got around to putting the pictures on here. I started with this from a Ford Sierra that I picked up from ebay for a few pounds.
 Centre Consul/Armrest Centre Consul/Armrest by Sabrebuilder, on Flickr
It didn't really fit the Sabre but it had a useful armrest and cubby hole/storage compartment. So, I cut two pieces of plywood and balanced the armrest on top to see if it looked okay.
 Centre Consul/Armrest Centre Consul/Armrest by Sabrebuilder, on Flickr
Happy that it looked okay. I carefully cut the plastic storage compartment from the old Sierra part and fitted it between the two plywood sides.
 Centre Consul/Armrest Centre Consul/Armrest by Sabrebuilder, on Flickr
Trying it out with the armrest which is hinged to the cubby hole.
 Centre Consul/Armrest Centre Consul/Armrest by Sabrebuilder, on Flickr
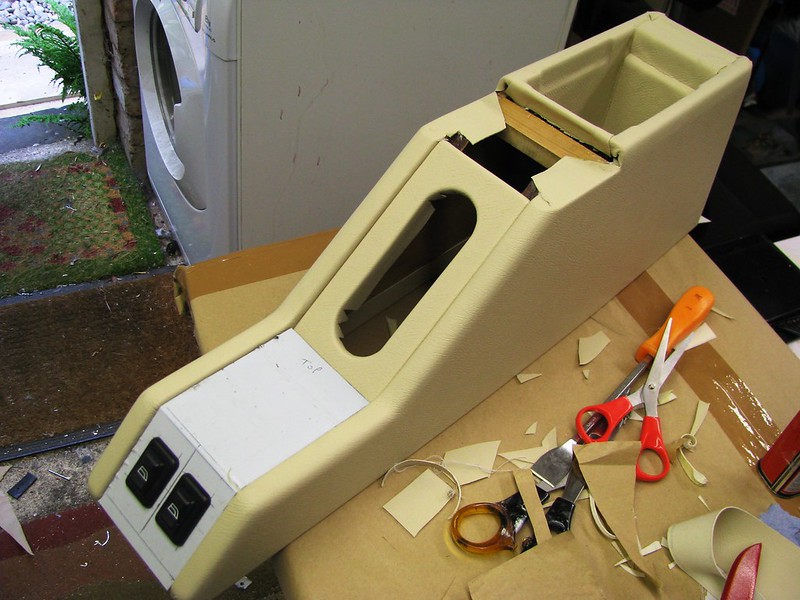
I then cut two more sides to double the thickness of the sides and curved the top edges.
I then made up a piece of plywood with a slot for the handbrake and an aluminium plate to take the window switches.
 Centre Consul/Armrest Centre Consul/Armrest by Sabrebuilder, on Flickr
I then filled the screw holes and smoothed all over. Followed by a coat of quick drying clear varnish.
 Centre Consul/Armrest Centre Consul/Armrest by Sabrebuilder, on Flickr
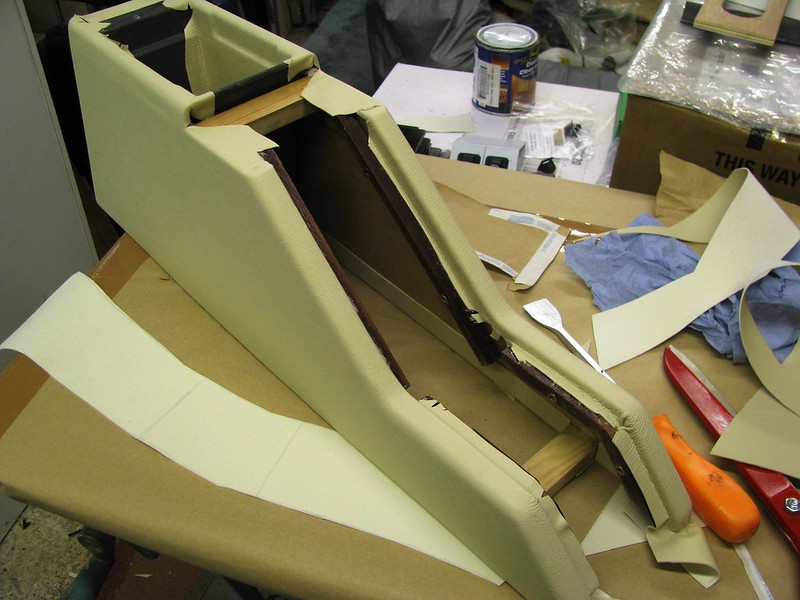
To cover it in vinyl, I started by making a brown paper template. I was keen to cover it in one piece without a join.
 Centre Consul/Armrest Centre Consul/Armrest by Sabrebuilder, on Flickr
The shape of the brown paper template was then transferred to the back of a piece of cream vinyl.
 Centre Consul/Armrest Centre Consul/Armrest by Sabrebuilder, on Flickr
The vinyl was then cut to shape.
 Centre Consul/Armrest Centre Consul/Armrest by Sabrebuilder, on Flickr
I then started gluing with contact adhesive from the back face.
 Centre Consul/Armrest Centre Consul/Armrest by Sabrebuilder, on Flickr
This is the adhesive I used from Woolies.
 Centre Consul/Armrest Centre Consul/Armrest by Sabrebuilder, on Flickr
This is part way through the trimming and gluing.
 Centre Consul/Armrest Centre Consul/Armrest by Sabrebuilder, on Flickr
Looking good......
 Centre Consul/Armrest Centre Consul/Armrest by Sabrebuilder, on Flickr
Lining the storage box was very tricky with glue getting everywhere.
 Centre Consul/Armrest Centre Consul/Armrest by Sabrebuilder, on Flickr
I then covered the handbrake gaiter cover.
 Centre Consul/Armrest Centre Consul/Armrest by Sabrebuilder, on Flickr
 Centre Consul/Armrest Centre Consul/Armrest by Sabrebuilder, on Flickr
I then covered the switch plate and fitted the switches.
 Centre Consul/Armrest Centre Consul/Armrest by Sabrebuilder, on Flickr
I then re-covered the armrest with some closed cell foam.
 Centre Consul/Armrest Centre Consul/Armrest by Sabrebuilder, on Flickr
 Centre Consul/Armrest Centre Consul/Armrest by Sabrebuilder, on Flickr
Progress so far. I need to cover the armrest in vinyl and make a gaiter for the handbrake.
Something for another day when the weather is a little warmer.
 Centre Consul/Armrest Centre Consul/Armrest by Sabrebuilder, on Flickr
Well that's all folks for 2021 
|
24th December 2021, 12:01
|
 |
Senior Member
|
|
Join Date: Jul 2011
Posts: 5,328
|
|
Nice work on the centre console, trimming takes a lot of skill to get it right.
Sadly that's a skill I have yet to acquire - back in '89 I tried to fit a headlining and ended up with my head glued to the inside of my beetle.
Anyway, have a good Christmas and enjoy all your grandkids, especially the bit where you get to give them back  |
24th December 2021, 14:12
|
|
Senior Member
|
|
Join Date: Jun 2015
Posts: 1,401
|
|
Happy christmas everyone!
|
6th February 2022, 19:57
|
|
Senior Member
Enthusiast
|
|
Join Date: Mar 2005
Posts: 3,080
|
|
Aaaaaaargh!!
Sorry folks but this website is broken and it's not possible to post without multiple tries and editing.
JG can you take a look at what's wrong?
'Preview' works fine but when you hit the 'submit reply' it looses most of the post'
Last edited by peterux; 6th February 2022 at 20:05..
Reason: added explanation
|
7th February 2022, 19:55
|
 |
Senior Member
Big Cheese
|
|
Join Date: Sep 2002
Posts: 1,080
|
|
Hi Peter
Are you copying and pasting the content from somewhere else or typing directly?
Is it cutting off on a certain character?
Cheers, John
|
7th February 2022, 21:40
|
|
Senior Member
|
|
Join Date: Aug 2012
Posts: 2,149
|
|
I've had the same problems too ! Simply cuts me off sometimes and can't edit or add anything.
|
7th February 2022, 23:19
|
|
Senior Member
Big Cheese
|
|
Join Date: Sep 2002
Posts: 1,080
|
|
It would seem that there is an issue with some characters, the GBP sign being one of them.
No idea why at the moment as I haven't made any changes.
Please refrain from using the pound sign for now whilst I investigate.
Probably also worth copying and pasting any wording you have to notepad before submitting.
|
8th February 2022, 08:06
|
|
Senior Member
Enthusiast
|
|
Join Date: Mar 2005
Posts: 3,080
|
|
Quote:
Originally Posted by JG
Hi Peter
Are you copying and pasting the content from somewhere else or typing directly?
Is it cutting off on a certain character?
Cheers, John
|
I normally draft my updates in the comments sections of Flickr where I store my pictures. I then cut and paste into your site with some editing, etc. I've being doing it like this for years without a problem.
But your right about the pound symbol as that is exactly where it is truncating.
I will try again.....
thanks, Peter |
8th February 2022, 08:10
|
|
Senior Member
Enthusiast
|
|
Join Date: Mar 2005
Posts: 3,080
|
|
I'm back.........
(Ok, trying again without the pound sign)
---------------------------------------------------------------------------
Well after Christmas and the new year I took a short break from car building to carry out some important home improvements. Still got lots to do but my New Year resolution is to 'finish' my Sabre this year, so I better crack on ......
So, I was back in the garage this week tackling something I wasn't really happy with last year.....
Whilst browsing the internet over Christmas I came across these motorised door lock mechanisms. There are multiple sellers on ebay but this set cost me just 12.95GBpounds including postage which I thought was a bargain and worth a punt.
 Remote door locks Remote door locks by Sabrebuilder, on Flickr
And for an additional 11.36GBpounds, I could add this remote control box and two rather nice control fobs. The box has a number of features including flashing the side indicators when you lock or unlock.
 Remote door locks Remote door locks by Sabrebuilder, on Flickr
They have been sitting on the shelf for a while so it was time to try them out and see if they work.
They are pleasingly well made and came with clear wiring instructions and have a good strong action. They were easily fitted in the Sabre's door and work perfectly.
 Remote door locks Remote door locks by Sabrebuilder, on Flickr
I now have the other door to do and to fit the interconnecting wiring. I also need to find suitable locations for the control boxes.
I've also tested my windscreen washers and wipers against the requirements in the IVA manual.
Bizarrely, you have to simulate the washer jets being blocked and check that the washer pump doesn't fail!
The wipers are required to have two speeds.
One has to be at least 45 cycles per minute. The second has to be between 10 and 55 cycles per minute and at least 15 cycles per minute different to the first.  
Mine passed, phew!
So a good start to the year and next week I'll be fitting the locks to the second door....
....peter
--------------------------------------------------------------------------------------------
Post posting note: well that worked fine, thanks John
Last edited by peterux; 8th February 2022 at 08:12..
Reason: Post posting note added
|
9th February 2022, 08:56
|
|
Senior Member
|
|
Join Date: Jul 2011
Posts: 5,328
|
|
I do like the look of those remote fobs. I'm using the same actuators for the locks in my Speedster's doors but I was going to wire them into a couple of hidden switches in the interior. Having now seen your control box and fobs I think I might just have to go down that route instead 
Keep up the good work! |
11th February 2022, 12:34
|
|
Senior Member
Enthusiast
|
|
Join Date: Mar 2005
Posts: 3,080
|
|
Quote:
Originally Posted by Mister Towed
I do like the look of those remote fobs. I'm using the same actuators for the locks in my Speedster's doors but I was going to wire them into a couple of hidden switches in the interior. Having now seen your control box and fobs I think I might just have to go down that route instead
Keep up the good work! |
Yes, the ones I got are nicely made and not too bulky. This is the ebayer I got them from but he seems to have raised his prices a little since I got mine.
https://www.ebay.co.uk/itm/154653518796 |
11th February 2022, 17:23
|
|
Senior Member
|
|
Join Date: Jul 2011
Posts: 5,328
|
|
I liked it so much I've ordered one, so thanks for the tip |
15th February 2022, 16:20
|
|
Senior Member
Enthusiast
|
|
Join Date: Mar 2005
Posts: 3,080
|
|
Inching forward.....
I've now completed the installation of the second remote door lock.
But...
I had noticed that the coolant level in my reservoir had been dropping slightly and initially I thought it must have been an air lock in the heater that had cleared. But then it dropped again so time to investigate and I found coolant around and below the radiator cap. I ran the engine up to temperature and sure enough it was leaking from the radiator cap, especially after you switch the engine off as it cooled down.
Upon investigation the metal spring under the rubber seal has lost it's springiness so it is not making a good seal under pressure. It appears that the temperature has annealed the spring which is not good as I have only run the engine about a dozen times.
The faulty cap on the right is made by Aeroline and is to be avoided. I've replaced it with a Quinton Hazell cap and hope this one lasts longer.
 Faulty Radiator cap Faulty Radiator cap by Sabrebuilder, on Flickr
Another little job......
I've never heard of anyone failing their IVA on wiper arms but these stainless steel blades and arms do have some quite sharp edges so I've covered them with a short piece of clear PVC hose. 5 minute job to avoid a potential issue.
 Wiper arm cover Wiper arm cover by Sabrebuilder, on Flickr
Next up, I'm making some panels which will cover the ECU that is mounted in the passenger footwell. These will be sealed and covered in carpet.
Here's the first panel.....
 Under dash panelling Under dash panelling by Sabrebuilder, on Flickr
Until next update.............
.............peter
|
3rd March 2022, 19:40
|
|
Senior Member
Enthusiast
|
|
Join Date: Mar 2005
Posts: 3,080
|
|
Cooling off again........
Further pondering on my radiator cap problem I reached the conclusion to eliminate this type of cap as they are not really designed for this application. The flat valveless caps were designed to be used low pressure overflow tanks and not pressurised systems like mine.
I have reverted back to a design I successfully used on my Marlin Sportster.
 Revised Coolant design Revised Coolant design by Sabrebuilder, on Flickr
The small bore coolant pipe now goes from a take off from the top radiator hose to the header tank. The BMW coolant sensor pipe had a spare port lending it to the new design. Unfortunately, it initially clashed with the oil filter casing so I had the move it to the right by 20mm. This meant sacrificing another new BMW top hose.
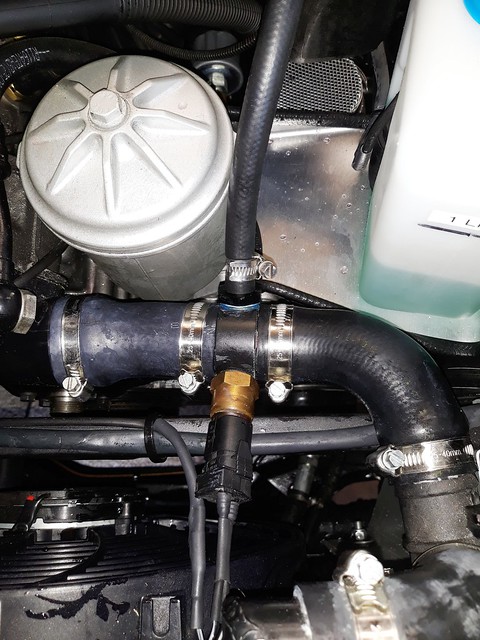 Revised Coolant design Revised Coolant design by Sabrebuilder, on Flickr
I put a couple of rivnuts into intake manifold's webs to support the small hose clips.
 Revised Coolant design Revised Coolant design by Sabrebuilder, on Flickr
The 'flat' valveless radiator cap has now been swapped for a traditional 20 psi rad cap.
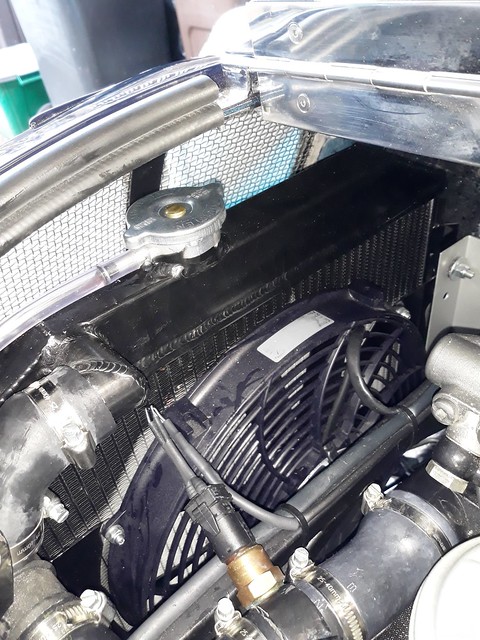 Revised Coolant design Revised Coolant design by Sabrebuilder, on Flickr
I've also fitted the radio/heater part of the dashboard.
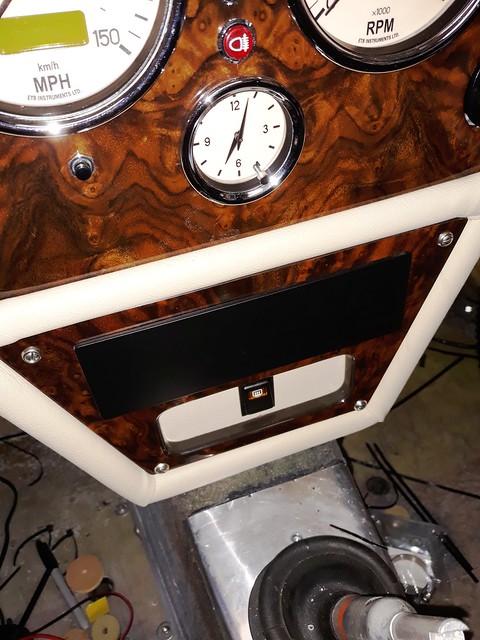 Heater/Radio fascia Heater/Radio fascia by Sabrebuilder, on Flickr
The radio and heater controls will be fitted after the IVA test. For now there is a single switch that controls the heater control valve to switch the hot coolant going through the heater.
that's all for now..............
.........peter
|
12th March 2022, 21:25
|
|
Senior Member
Enthusiast
|
|
Join Date: Mar 2005
Posts: 3,080
|
|
Something different...
This week, I fancied tackling something a bit different so I thought I'd have a go at fixing the hub caps to my wheels.
I'm getting near to the point of getting a set of tyres for my wheels and thought it would be easier to fit the mounting studs for the hub caps before the tyres are fitted. It's much easier to put the bare wheels on the bench for drilling holes, etc without the bulk of the tyres.
I decided to use grease nipples for the mounting studs which is an idea I am copying from other builders.
I chose these 45 degree grease nipples to mount the hub caps to the wheel. I chose these as they have a good shape to match the edge profile of the hub caps and a deeper shoulder than the standard grease nipples.
 Hub Cap fitting Hub Cap fitting by Sabrebuilder, on Flickr
It looked like the tips would unscrew but that turned out not to be the case. I initially tried hack sawing the tips off but this left a nasty scar across the body. I then found drilling them out left a nice clean finish which I filled with a blob of epoxy resin to stop any rusting.
I marked out the positions and then drilled and taped a m6 threaded hole. I did a dry run on a sheet of steel to get the positions right. After trial fitting the nipples, I screwed them in with Loctite threadlock and finished of with paint on the back to seal.
 Hub Cap fitting Hub Cap fitting by Sabrebuilder, on Flickr
Here's the first one fitted. A nice tight fit and unlikely to fall off.
 Hub Cap fitting Hub Cap fitting by Sabrebuilder, on Flickr
The hub caps are for a Singer Super 12. I need to make or find a suitable tool for removing the cap without scratching the wheel's paint finish.
Well that's one done and I now need to do the other 4 wheels......
Next week I've got some new gates to fit so next update in about 2 weeks, hopefully 
....peter
|
12th March 2022, 22:15
|
|
Senior Member
|
|
Join Date: Oct 2013
Location: norfolk
Posts: 695
|
|
Quote:
Originally Posted by peterux
The hub caps are for a Singer Super 12. I need to make or find a suitable tool for removing the cap without scratching the wheel's paint finish.
....peter
|
Maybe bicycle plastic tyre lever(s) used (in preference to steel ones) for removing tyres from aluminium cycle rims! |
|
Currently Active Users Viewing This Thread: 1489 (1 members and 1488 guests)
|
|
jcole1960
|
 Posting Rules
|
You may not post new threads
You may not post replies
You may not post attachments
You may not edit your posts
HTML code is Off
|
|
|
All times are GMT +0. The time now is 12:00.
|


 Linear Mode

