|
|
| Vintage and Classic Roadster Kit Car Builds For Vintage and Classic era kit cars. Post your build reports, problems and progress here |

24th August 2015, 19:09
|
|
Senior Member
|
|
Join Date: Apr 2014
Location: Birmingham, UK
Posts: 545
|
|
Cheers
Thanks for the advice
|
24th August 2015, 19:39
|
 |
Senior Member
|
|
Join Date: Sep 2011
Posts: 1,446
|
|
Quote:
Originally Posted by Car photographer

cheers for the info,
the chassis on these needs to be lengthened slightly so I'm not sure if that would be an issue or not for you on your vitesse chassis,
Ironically I really wanted a miglia too before I found this!
|
If it's not registered don't mention this otherwise it's iva time |
26th August 2015, 01:26
|
|
Senior Member
|
|
Join Date: Apr 2014
Location: Birmingham, UK
Posts: 545
|
|
Yeah understood  |
4th September 2015, 09:25
|
|
Senior Member
|
|
Join Date: Apr 2014
Location: Birmingham, UK
Posts: 545
|
|
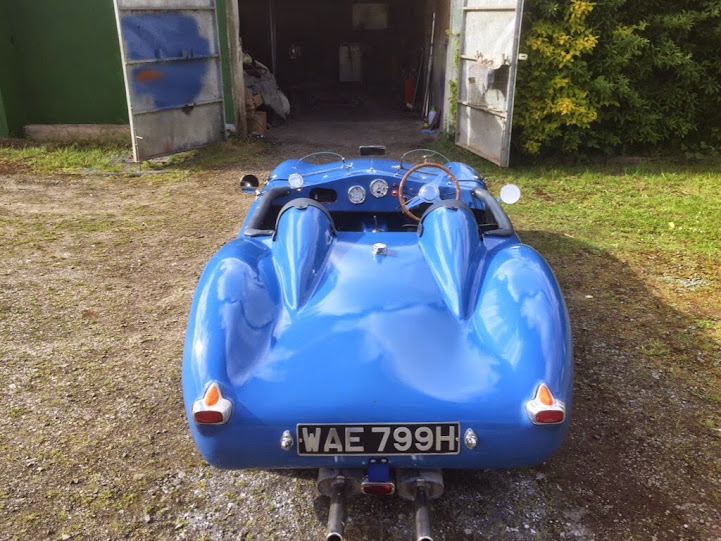
So a bit more progress, although it's slowed down a bit over the last couple of weeks unfortunately.
got a possible grille and am toying with the idea of adding a 'hump' behind the drivers seat - so I made a papier mache mockup ... what do you think?


....
and tried my old spitfire seat in the car - could be a bit wide at the top though as the edge seems to catch on the car slightly.
 |
4th September 2015, 09:55
|
|
Senior Member
|
|
Join Date: Mar 2012
Posts: 1,152
|
|
I think the hump looks really good and it ties nicely with the scuttle and the rear light plinths. If you make it detachable you can cave two cars for the price of one. I'm planning to make mine a little like a Transformer with several different configurations.
|
4th September 2015, 19:27
|
|
Senior Member
|
|
Join Date: Apr 2014
Posts: 198
|
|
Stop the hump with a vertical edge like the wheel arch light bump and put a high level 3rd brake light on. 2 reasons 1 people are so used to seeing 3 lights they seem to forget to see just 2 and secondly it will twist peoples minds when trying to work out what the car is and if its original old or a replica. With a flip down pad the bump could be good quick storage or a home for a tonneu cover. I like the mesh too.
|
4th September 2015, 21:53
|
|
Senior Member
|
|
Join Date: Apr 2014
Location: Birmingham, UK
Posts: 545
|
|
Cool - glad you guys think it looks ok,
I'm thinking of attaching it to the bottled so that I could swap the lid for a regular one if needed
|
5th September 2015, 16:43
|
 |
Senior Member
|
|
Join Date: Feb 2012
Location: Wembley, London
Posts: 5,058
|
|
Car Photographer - I think a slightly smaller hump might work better, stopping short of the end of the boot lid.
I think that would show off the rear curves of the body shell better, a bit like Mac's Navigator/Cordite MkII.
I have longer aero humps on my Cordite MkI.
Notes:
- I absolutely love the way my boot lid cuts through the humps. 
- But it was, without doubt, one of the hardest jobs I've done on my build. 
If you didn't want to have two boot lids (one with a hump and one without), I'd be tempted to hinge the front of the hump.
That way it could be flipped up out of the way when required.
This 2CV Sammio extended that idea a little further and the whole boot lid hinges up too.

Actually, that idea might have been stolen from this design.

Although I could only find a photo of a toy car with the boot open. 

Good luck with whatever option you choice, Paul.
|
5th September 2015, 23:53
|
|
Senior Member
|
|
Join Date: Apr 2014
Location: Birmingham, UK
Posts: 545
|
|
Impressive bit of sculpting Paul!
Unfortunately I don't think my skills will stretch to going that far though ( unless someone wants to give me a hand)  |
11th September 2015, 00:15
|
|
Senior Member
|
|
Join Date: Apr 2014
Location: Birmingham, UK
Posts: 545
|
|
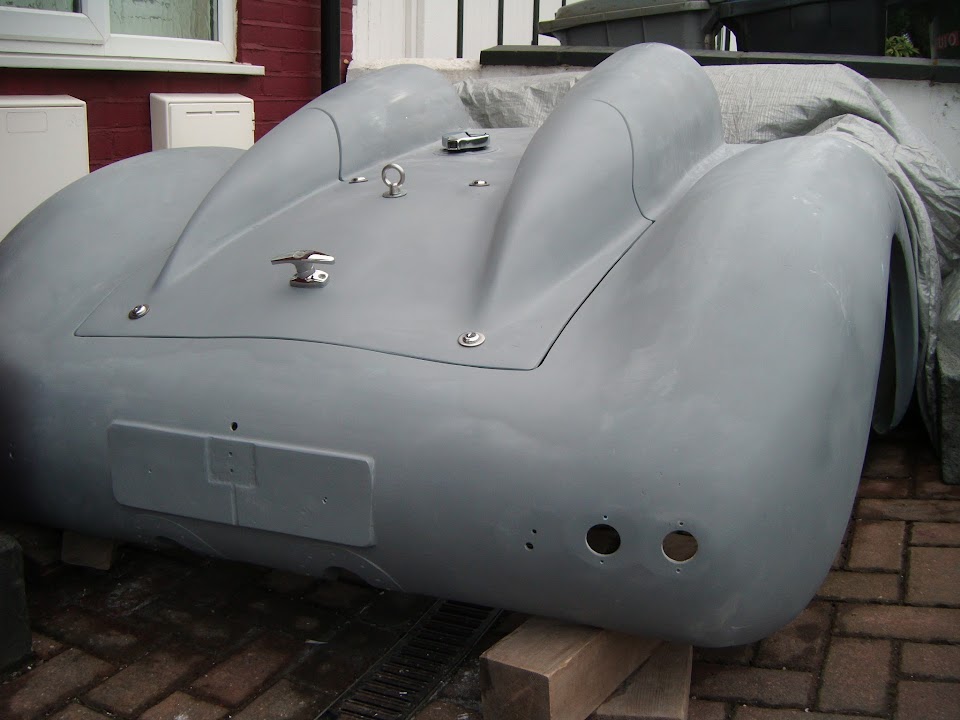
More updates - been cutting into the fiberglass hump to get the shape right -  |
11th September 2015, 00:18
|
|
Senior Member
|
|
Join Date: Apr 2014
Location: Birmingham, UK
Posts: 545
|
|
Last edited by Car photographer; 11th September 2015 at 00:19..
Reason: trying to get image to work properly
|
11th September 2015, 00:20
|
|
Senior Member
|
|
Join Date: Apr 2014
Location: Birmingham, UK
Posts: 545
|
|
then got my laser cut aluminium dashboard back today too - still needs some more holes cutting but looks ok 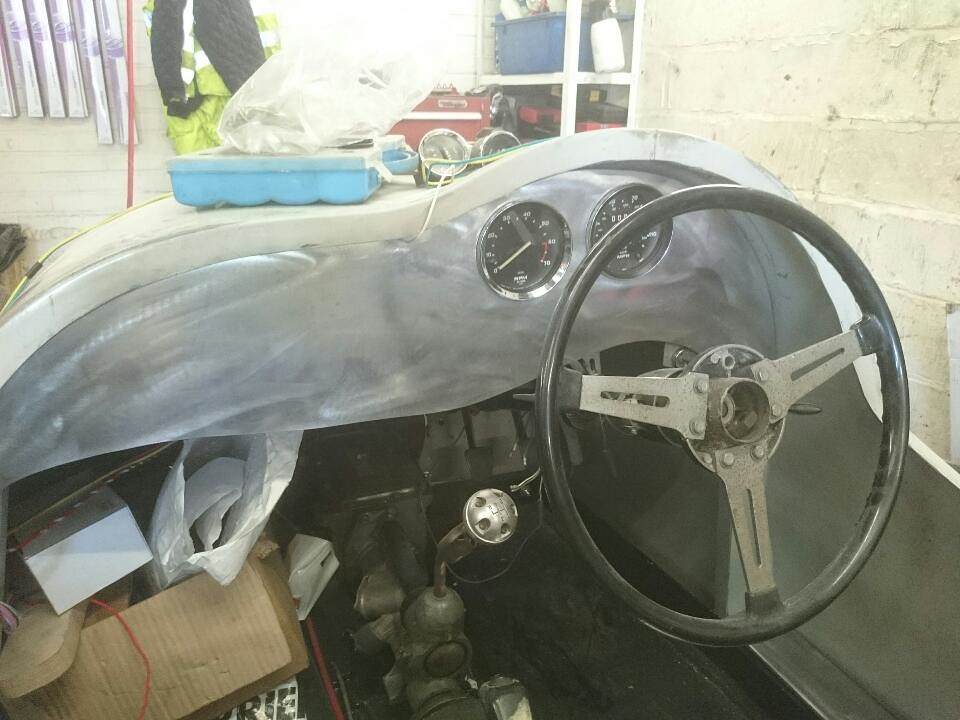 DSC_0722 DSC_0722 by paul ward, on Flickr |
11th September 2015, 00:22
|
|
Senior Member
|
|
Join Date: Apr 2014
Location: Birmingham, UK
Posts: 545
|
|
next - 6mm aluminium panels cut to mount the seats on - 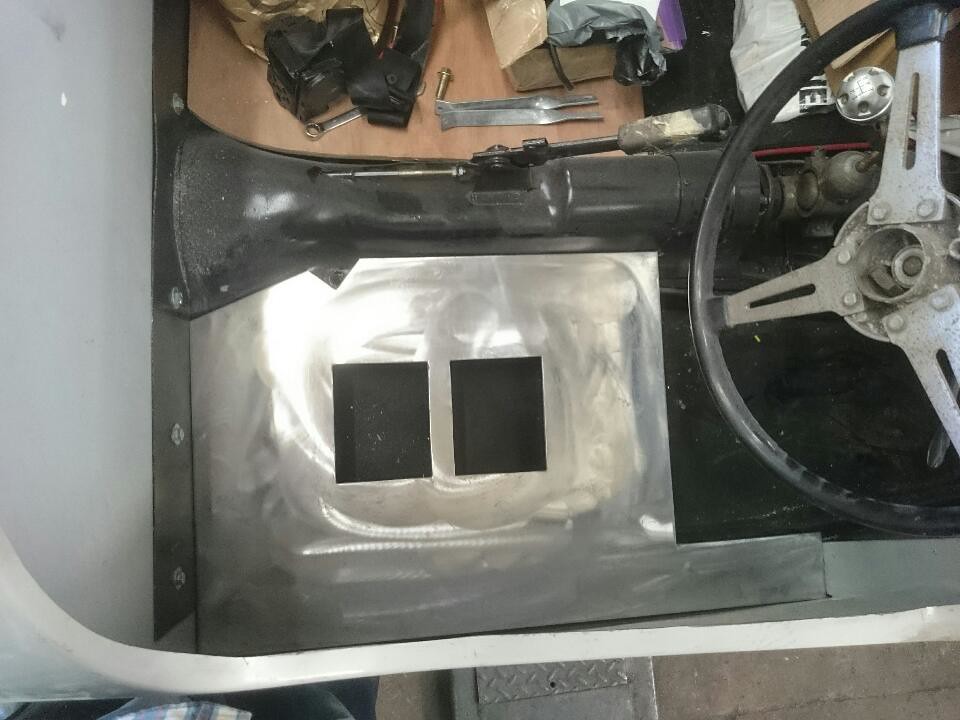 DSC_0723 DSC_0723 by paul ward, on Flickr |
11th September 2015, 00:23
|
|
Senior Member
|
|
Join Date: Apr 2014
Location: Birmingham, UK
Posts: 545
|
|
and lastly we are making a tubular mounting bar for the seatbelt mounts - 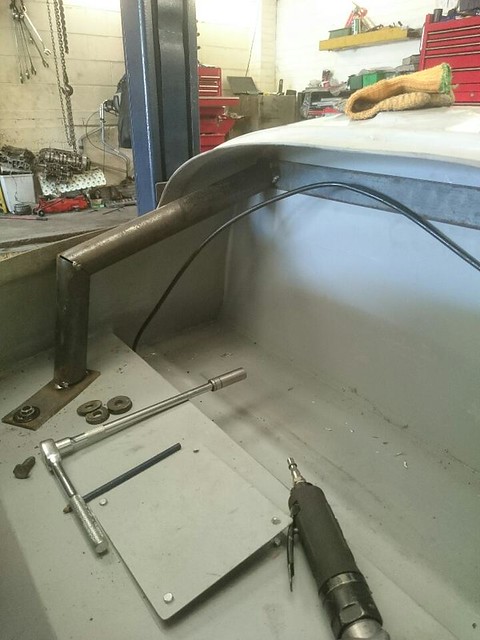 DSC_0728 DSC_0728 by paul ward, on Flickr |
17th October 2015, 11:52
|
|
Senior Member
|
|
Join Date: Apr 2014
Location: Birmingham, UK
Posts: 545
|
|
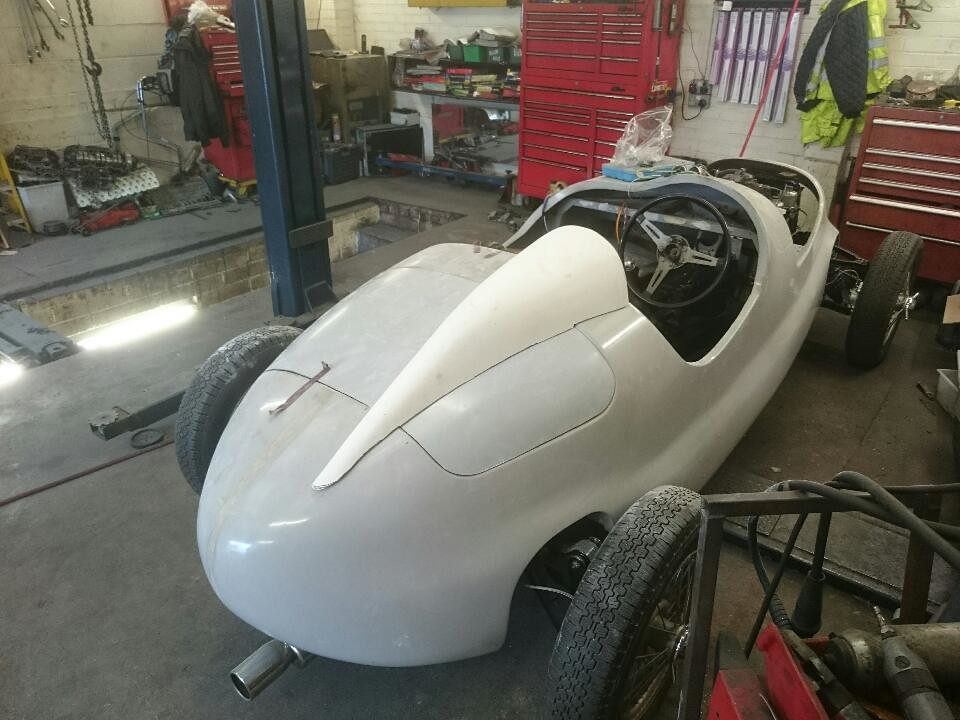
So, now got the petrol tank in, and seatbelts mounted, also got myself a quick release steering wheel for ease of access.
Currently trying to work out seats to fit - bought some from Europa spares, but it now looks like I'll have to make a custom set 
anyone want to buy some apollo style bucket seats??
Last edited by Car photographer; 17th October 2015 at 11:54..
Reason: more text added
|
17th October 2015, 11:57
|
|
Senior Member
|
|
Join Date: Apr 2014
Location: Birmingham, UK
Posts: 545
|
|
|
3rd November 2015, 18:16
|
|
Senior Member
|
|
Join Date: Apr 2014
Location: Birmingham, UK
Posts: 545
|
|
 steering wheel sorted
So a few things have been happening this week - firstly I got my quick release steering wheel fitted and then used an old balti dish to make a billet to fit the badge into
so here's the wheel without the insert -
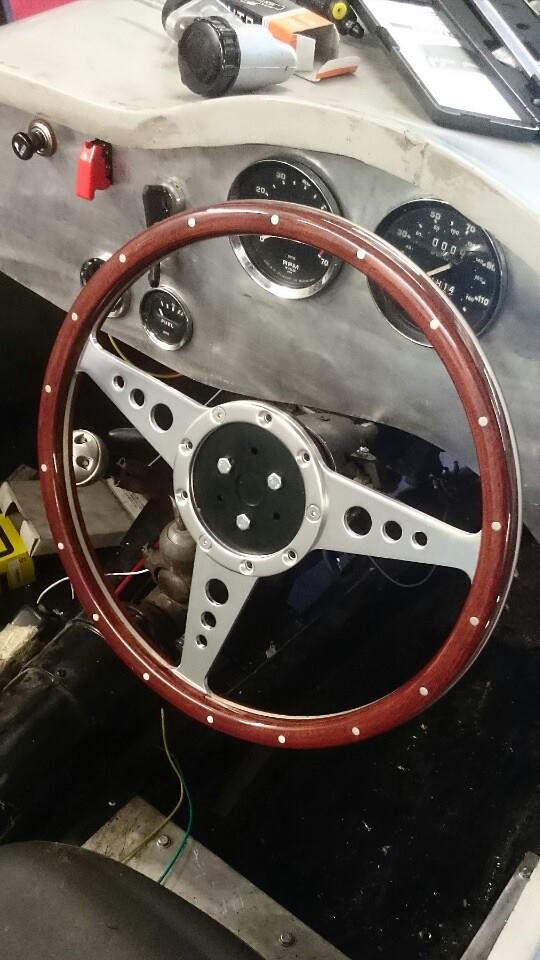 steering wheel 1 steering wheel 1 by paul ward, on Flickr
then I hack up the balti dish -
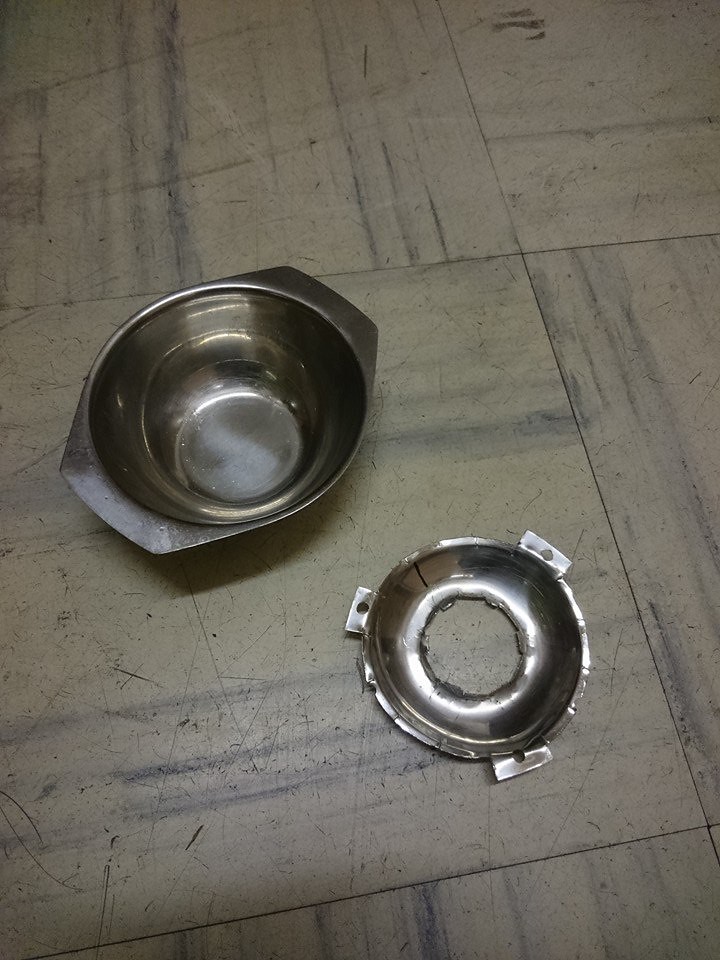 steering-wheel-2 steering-wheel-2 by paul ward, on Flickr
then - hey presto - vintage Ferrari steering wheel
 steering wheel 3 steering wheel 3 by paul ward, on Flickr
Last edited by Car photographer; 5th November 2015 at 10:37..
|
3rd November 2015, 18:23
|
|
Senior Member
|
|
Join Date: Apr 2014
Location: Birmingham, UK
Posts: 545
|
|
seats
So today I finally got my seats sorted out - after the fiasco of my old spitfire seats not really fitting, and then forking out for the Apollo seats from Europa spares (who were very gracious and gave me a refund) - I finally decided to design my own to fit the space - So I made the templates and then got a company called 'Inta Trim' near Telford to make them up for me. - not cheap, but I think they look great considering the circumstances.
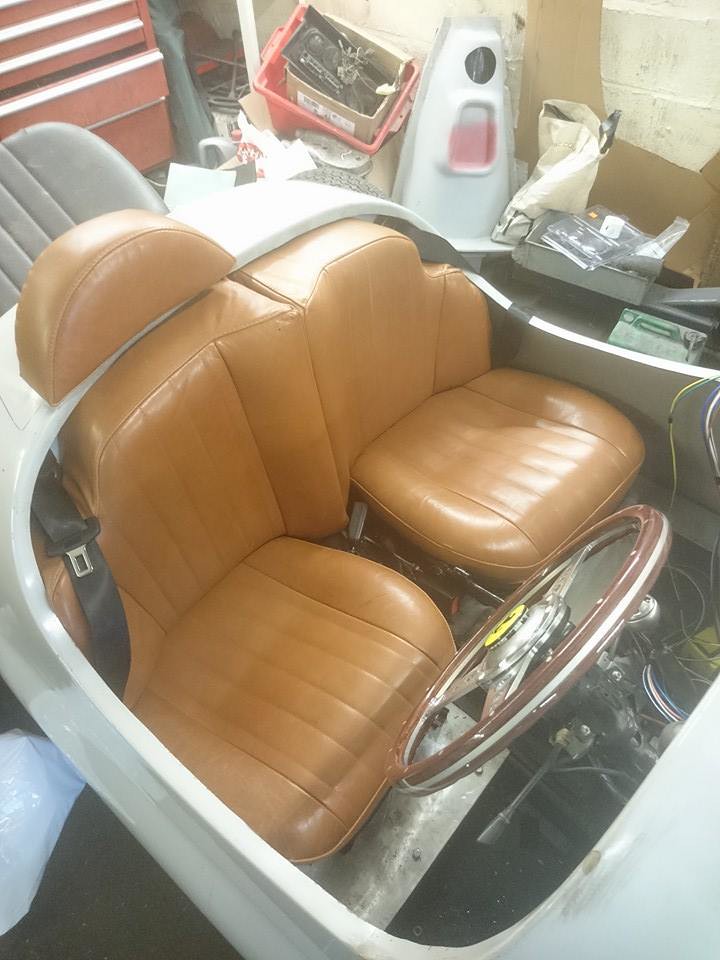 seats1 seats1 by paul ward, on Flickr
unfortunatly as I couldn't get the car there he had to match the base and back without knowing that in the cockpit the bases are slightly offcentre - so they don't match up perfectly, but I think they look pretty cool.
Last edited by Car photographer; 5th November 2015 at 10:38..
|
4th November 2015, 17:49
|
|
Senior Member
|
|
Join Date: Feb 2012
Location: Wembley, London
Posts: 5,058
|
|
Not sure if it is just me, but I can not see the photos in the last two posts. |
4th November 2015, 18:56
|
 |
Senior Member
Enthusiast
|
|
Join Date: Mar 2005
Posts: 3,079
|
|
Quote:
Originally Posted by Paul L
Not sure if it is just me, but I can not see the photos in the last two posts. |
me neither...... |
|
Currently Active Users Viewing This Thread: 26 (0 members and 26 guests)
|
|
|
 Posting Rules
|
You may not post new threads
You may not post replies
You may not post attachments
You may not edit your posts
HTML code is Off
|
|
|
All times are GMT +0. The time now is 07:07.
|


 Linear Mode

