|
|
| Sammio Builds and discussions Sammio bodied car builds and specials |

8th May 2017, 17:45
|
 |
Senior Member
|
|
Join Date: Jul 2011
Posts: 5,328
|
|
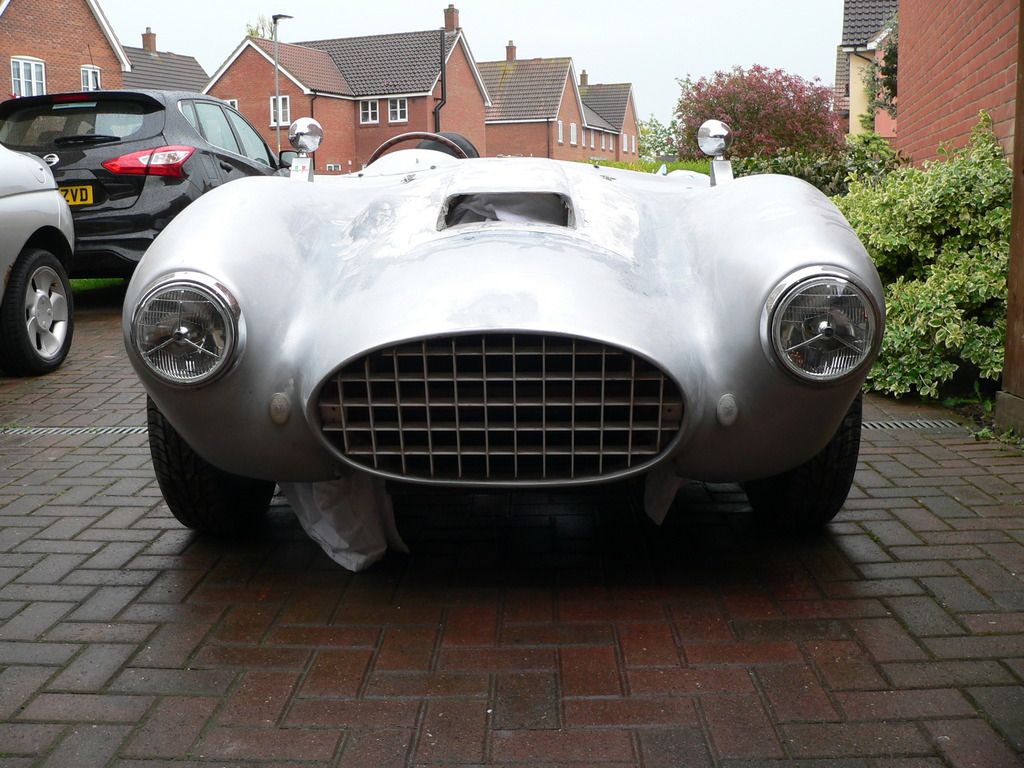
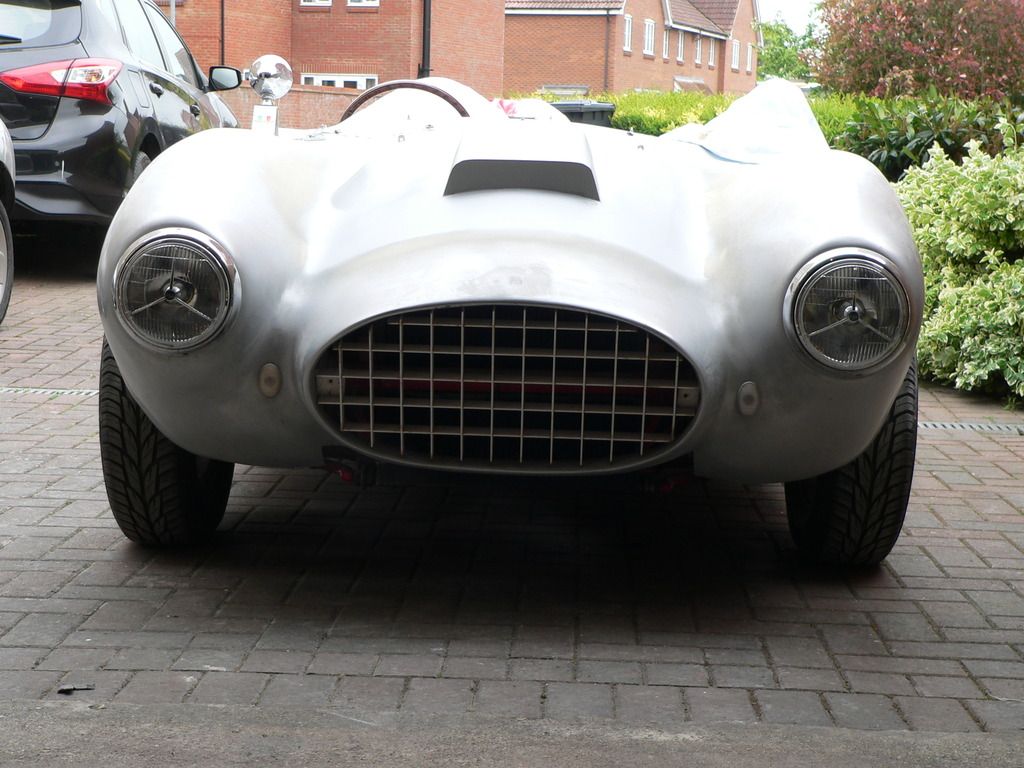
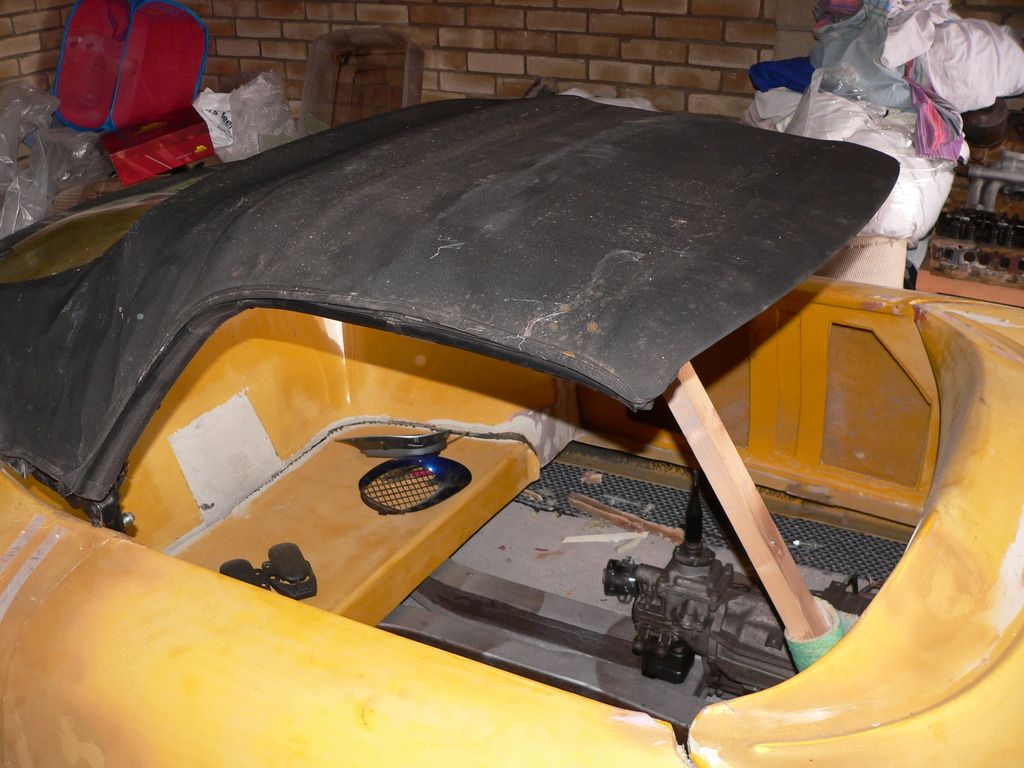
Progress has been slower than hoped for, partly due to some unexpectedly freezing cold weather and partly due to a week out with a bad back.
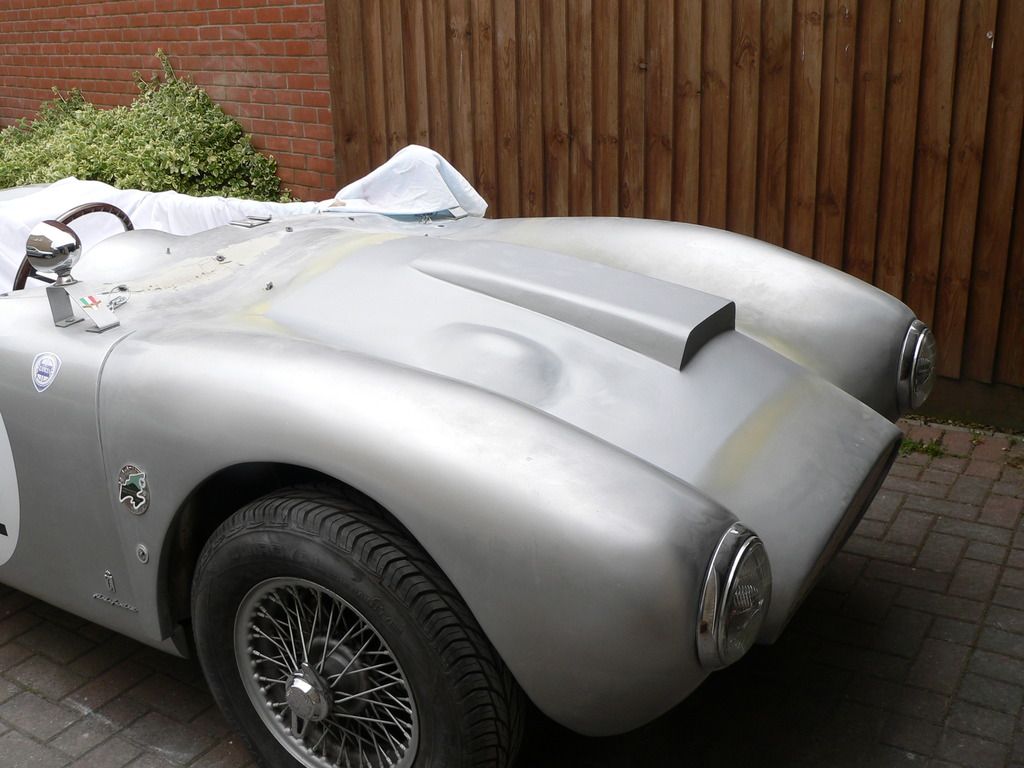
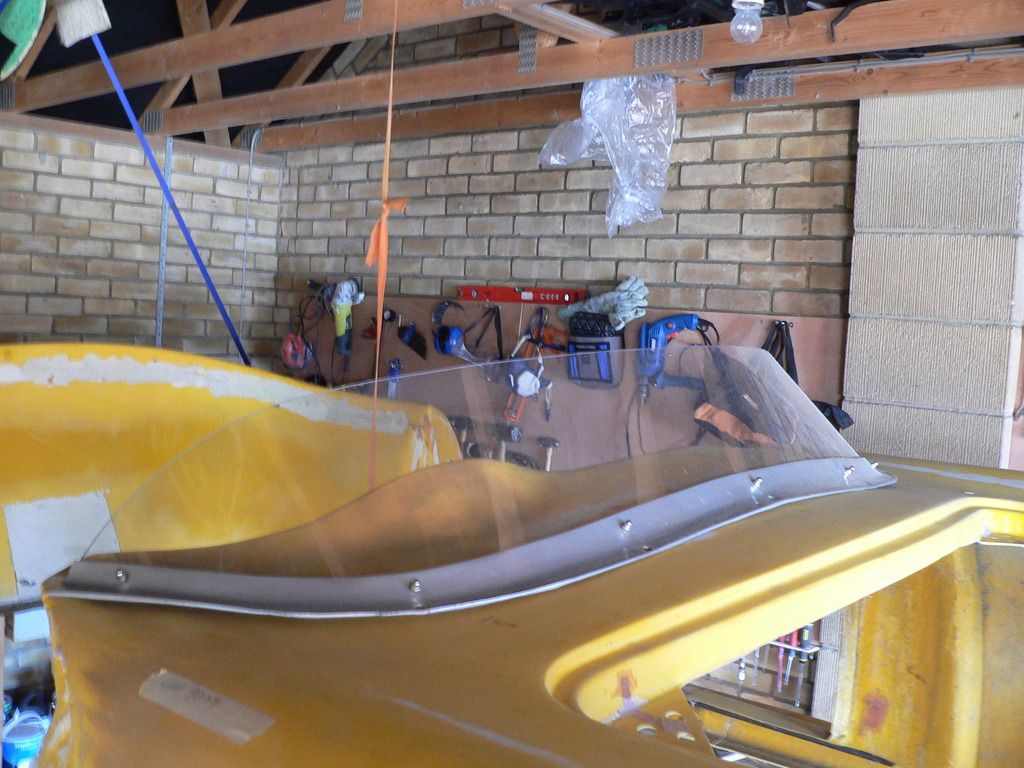
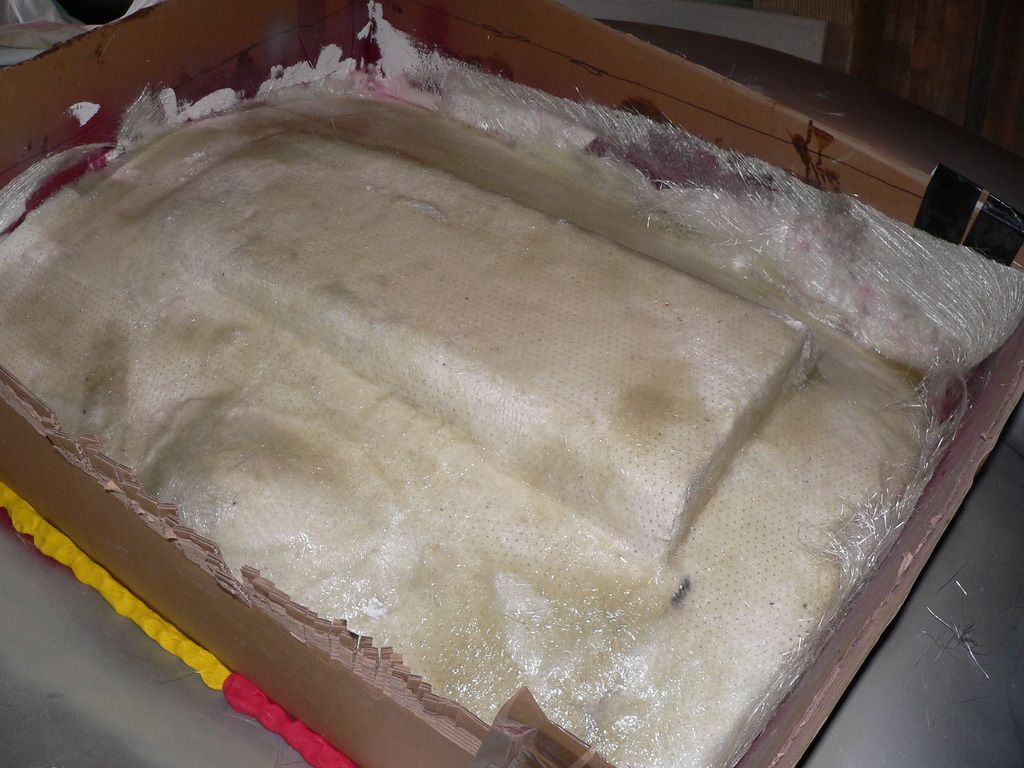
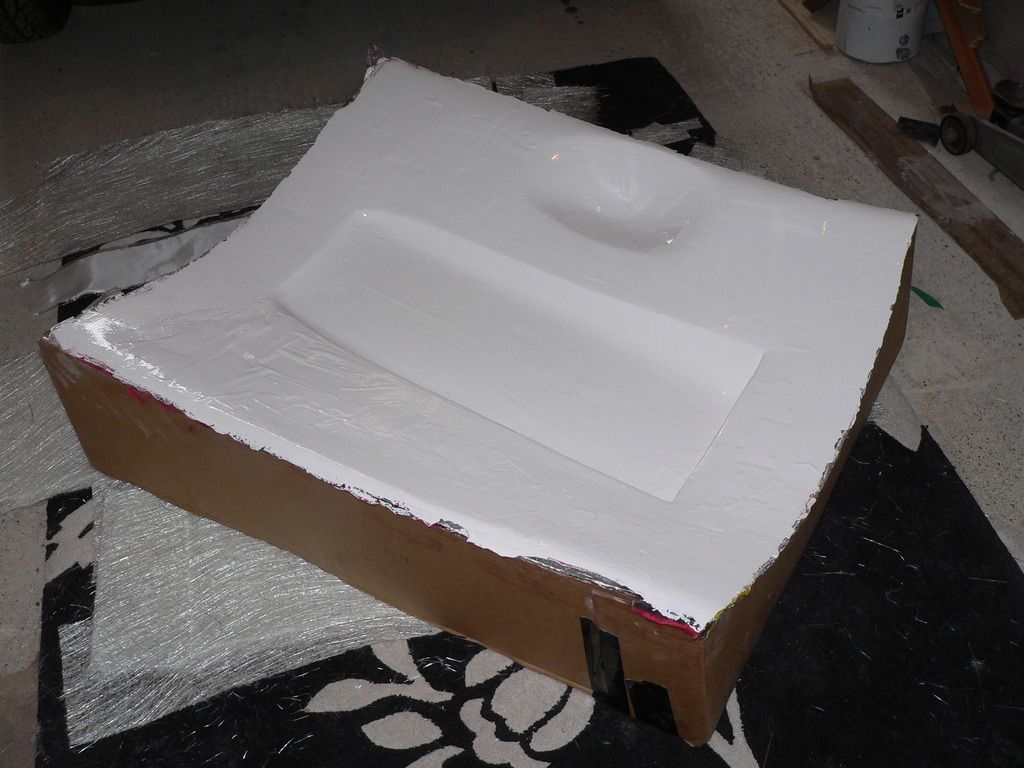
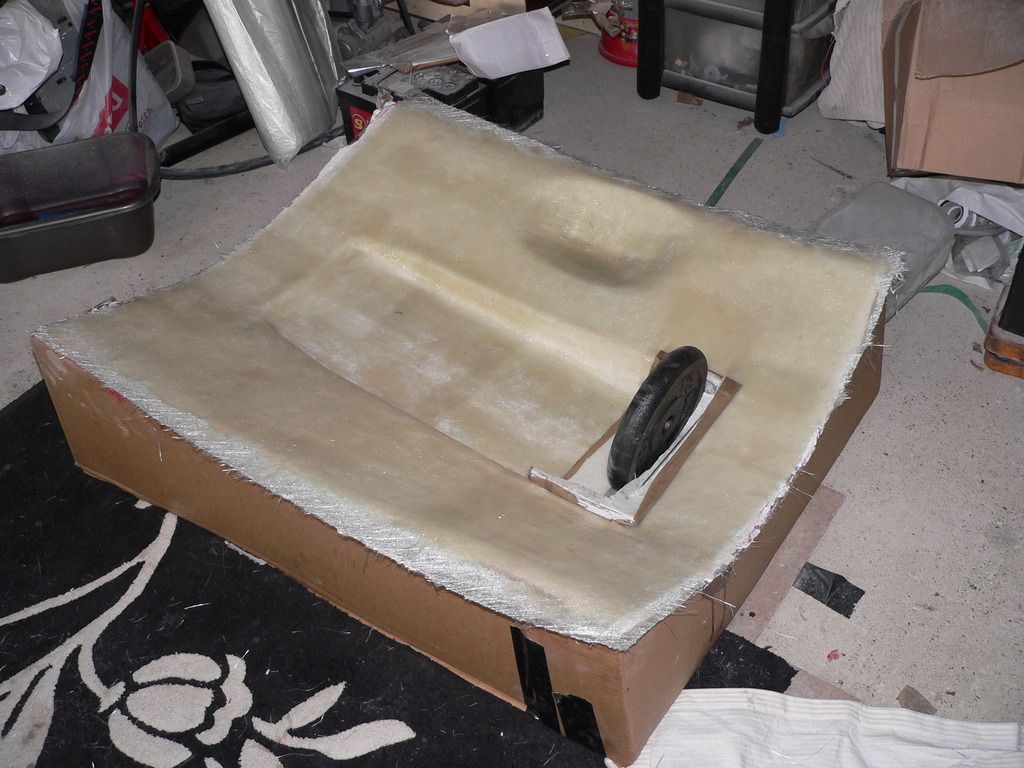
I have managed to spend the last few days working on the bonnet though, getting through five kilos of filler getting the curves right, which has also resulted in a slightly lower profile scoop -
Before
After
Before

And after
And from a few more angles

Nearly ready to take a mould from then laminate the actual new centre section, as this one's all chicken wire and filler under the surface. |
8th May 2017, 19:15
|
 |
Senior Member
|
|
Join Date: May 2009
Location: POOLE , DORSET
Posts: 2,200
|
|
Towed ...A gazillion times better !! I think that looks spot on ......I can tell you now - I never liked the original scoop ...  |
8th May 2017, 19:58
|
|
Senior Member
|
|
Join Date: Mar 2012
Posts: 1,152
|
|
That does look rather good.
|
8th May 2017, 20:12
|
|
Senior Member
|
|
Join Date: Jun 2015
Posts: 1,401
|
|
Great work. Looks much better.
|
8th May 2017, 22:54
|
|
Senior Member
Enthusiast
|
|
Join Date: Jun 2015
Location: Reading, Berkshire
Posts: 688
|
|
Agreed ! As my sons would say. That looks sick.
Dave
|
9th May 2017, 05:37
|
 |
Senior Member
|
|
Join Date: Feb 2012
Location: Wembley, London
Posts: 5,058
|
|
Mr T – Your revised bonnet does look great. 
Despite looking back at your old build thread recently, I’ve only just noticed the vents have gone. 
Finally, could I ask for a close up of the hole in the top of your bonnet for the locking pin?
( Which is another thing on my ‘To Do’ list. )
How much extra space is needed for the pin to pass through the hole?
Cheers, Paul. 
|
9th May 2017, 07:23
|
|
Senior Member
|
|
Join Date: Jan 2016
Posts: 111
|
|
Looks absolutely superb!!
|
9th May 2017, 08:13
|
 |
Senior Member
|
|
Join Date: Jan 2014
Location: Egham, Surrey
Posts: 1,780
|
|
A smaller version of the main grill in the new vent would tie it all together.
It is a vast improvement.
|
9th May 2017, 08:42
|
|
Senior Member
|
|
Join Date: Jul 2011
Posts: 5,328
|
|

Thanks for the positive comments guys, much appreciated.
Gary, I was never 100% happy with my original wide scoop either.
Paul, well spotted - I've removed the vents as they were no longer symmetrical to the new scoop. If you recall they started life as an aluminium double row louvred vent intended for a cupboard door that cost me about three quid from ebay, so I had no qualms about ripping them out. I won't be replacing them as the paint tended to flake off the louvre edges.
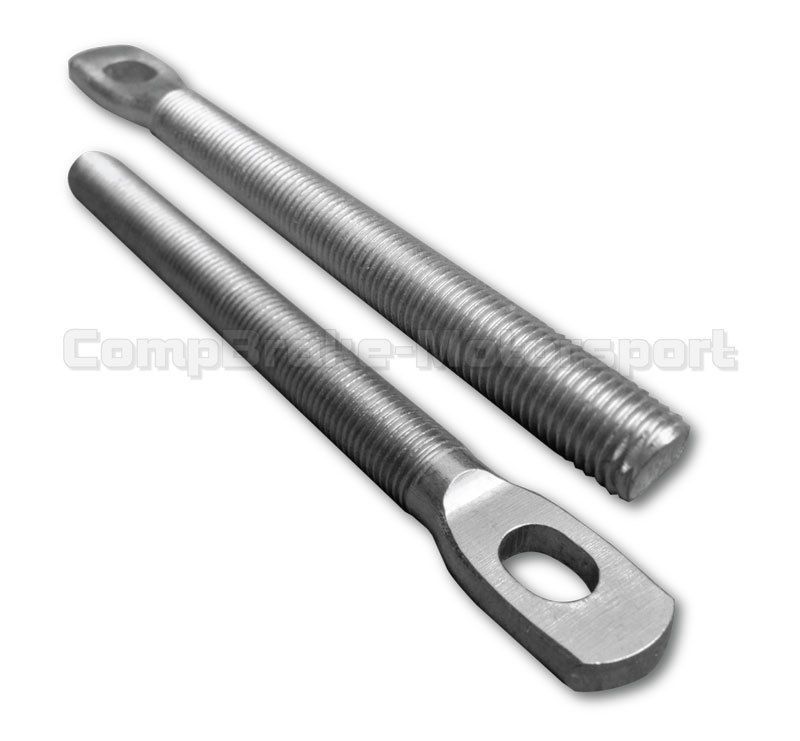
I'm not sure quite what you're asking about the holes for the bonnet pins, as they're just, well, holes. If it helps, these are the bonnet pins I used -
http://www.ebay.co.uk/itm/Universal-...EAAOSwPYZU5M3s -
I've fixed the pins to brackets on the bulkhead and the 'keyhole' escutcheons are screwed down over suitable sized holes directly above the pins. They're adjusted by just screwing the pins in or out as required and locking them off with the nuts provided in the kit. Couldn't be simpler and prevents the back edge of the bonnet from lifting at speed.
Jag - I'll be putting some sort of grille or mesh into the opening of the scoop as it's now very close to the water pump housing which isn't particularly pretty, but haven't fully decided what yet.
Right, back to the grindstone...
Last edited by Mister Towed; 9th May 2017 at 08:47..
|
10th May 2017, 19:13
|
|
Senior Member
|
|
Join Date: Feb 2012
Location: Wembley, London
Posts: 5,058
|
|
Mr T - Apologies for my poor choice of words.
What I meant to say was does the arc of the bonnet closing require a slightly larger hole to slip over the pin?
Cheers, Paul.
PS
I did think of you earlier as I was filling/sanding my own bonnet.
It certainly makes me appreciate how much effort you have put in to get such a smooth result.
Whereas my bonnet looks like the surface of the moon.
|
10th May 2017, 19:42
|
 |
Senior Member
|
|
Join Date: Dec 2013
Posts: 839
|
|
Your new bulge looks great Mr T, ooh er missus.
Joking aside it looks 100% better and was meant to be there. It's great to see that these cars are evolving and due to the rather cheap initial price can be chopped and changed with out to much nail biting.
Hows the other build coming on, it would be good to see pictures.
|
11th May 2017, 07:29
|
|
Senior Member
|
|
Join Date: Jul 2011
Posts: 5,328
|
|
Sorry Paul, didn't mean to be rude. There's no issue with the arc of the bonnet fouling the locking pins.
The 'keyhole' escutcheon plates have a fairly large, oblong slot to take the top of the pin, and you just drill a hole the same diameter as the widest part of the slot. The edges of those holes where they're wider than the slot in the escutcheon are hidden by the aluminium surround and help guide the pin onto the oblong slot.
The tops of the pins are also rounded which helps guide them into the slot while my pins are mounted on stainless (kitchen cabinet) brackets that allow a little movement at the tips of the pins. That wasn't intentional but does make it easy to locate the pins properly by just sliding your fingers under the back edge of the bonnet and moving them into place if necessary.

Swifty, glad you like my more original looking scoop and it's surprising how little details like that can transform the look of the car.
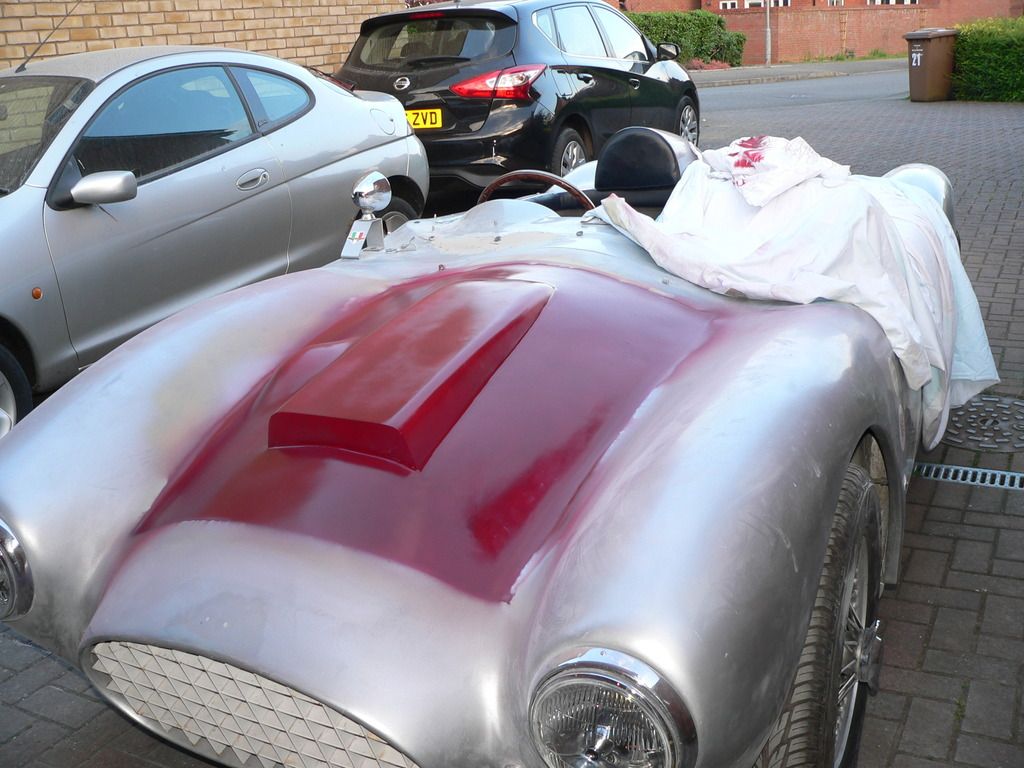
My 356 is on hold while I refurbish my Spyder - after four years on the road in all weathers it was looking a bit tired under the skin - and even though I now have loads of time I only really have the space to work on one car at a time.
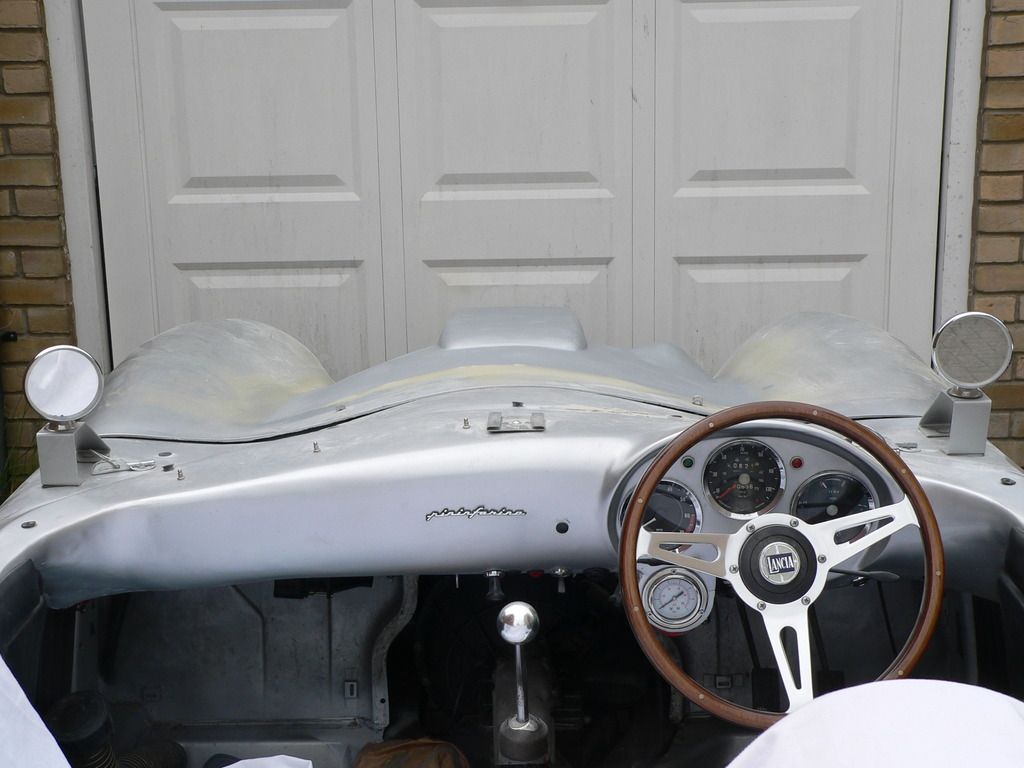
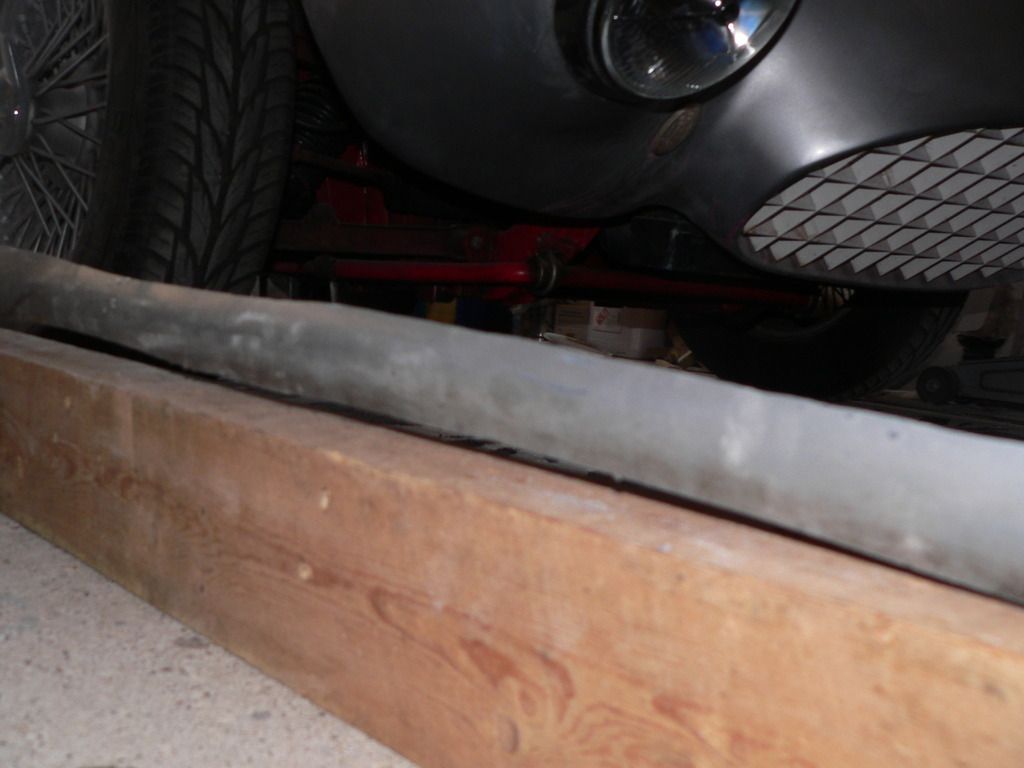
When I do start work on the Speedster I'll do a build thread somewhere, but there doesn't seem to be a forum for German cars on madabout. For the moment it still looks like this -
I had intended to go with a Speedster glass screen and convertible roof when I do build it -

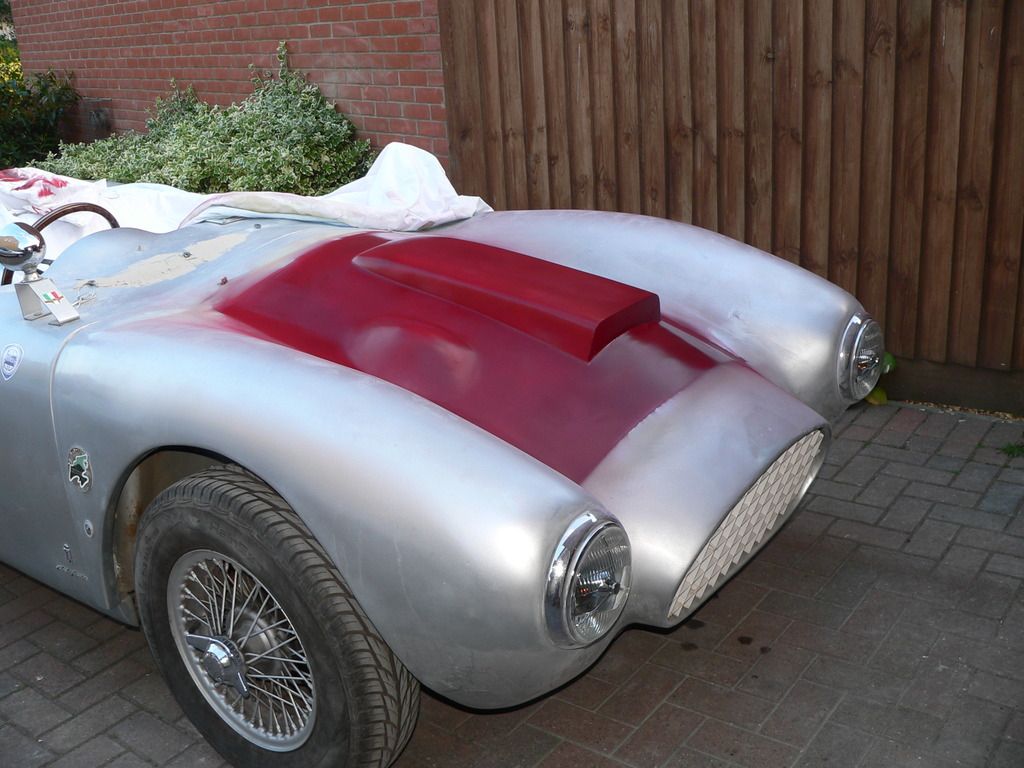
...but the idea of a totally stripped out racer with a Spyder screen and dash is worming its way into my thoughts -
I'll let you know when the 356 build gets under way, but for now I have a Spyder to finish. Again...

|
11th May 2017, 19:01
|
|
Senior Member
|
|
Join Date: Jul 2011
Posts: 5,328
|
|
Hmm, and in a parallel universe where I chose red...
 |
11th May 2017, 20:05
|
|
Senior Member
|
|
Join Date: Feb 2012
Location: Wembley, London
Posts: 5,058
|
|
Mr T - I hope the taking a mould process goes well.
Good luck, Paul.
PS
I'm sure your car would look good in red too.
|
12th May 2017, 06:46
|
|
Senior Member
|
|
Join Date: Dec 2013
Posts: 839
|
|
Is that a test for lancia red Mr T.
|
12th May 2017, 07:56
|
|
Senior Member
|
|
Join Date: Jul 2011
Posts: 5,328
|
|
Quote:
Originally Posted by swifty

Is that a test for lancia red Mr T.
|
Kind of. I needed some rattle-can paint to seal the bonnet buck prior to a dozen coats of release wax so chose Rover Damask Red just to see what a very dark red would have looked like.
Result is that it looks good but shows flaws in the prep that silver doesn't, so silver it shall remain.
I'd recommend metallic silver to any first-time amateur sprayer as it's very forgiving and really sparkles when the sun shines. |
28th May 2017, 09:32
|
|
Senior Member
|
|
Join Date: Jul 2011
Posts: 5,328
|
|
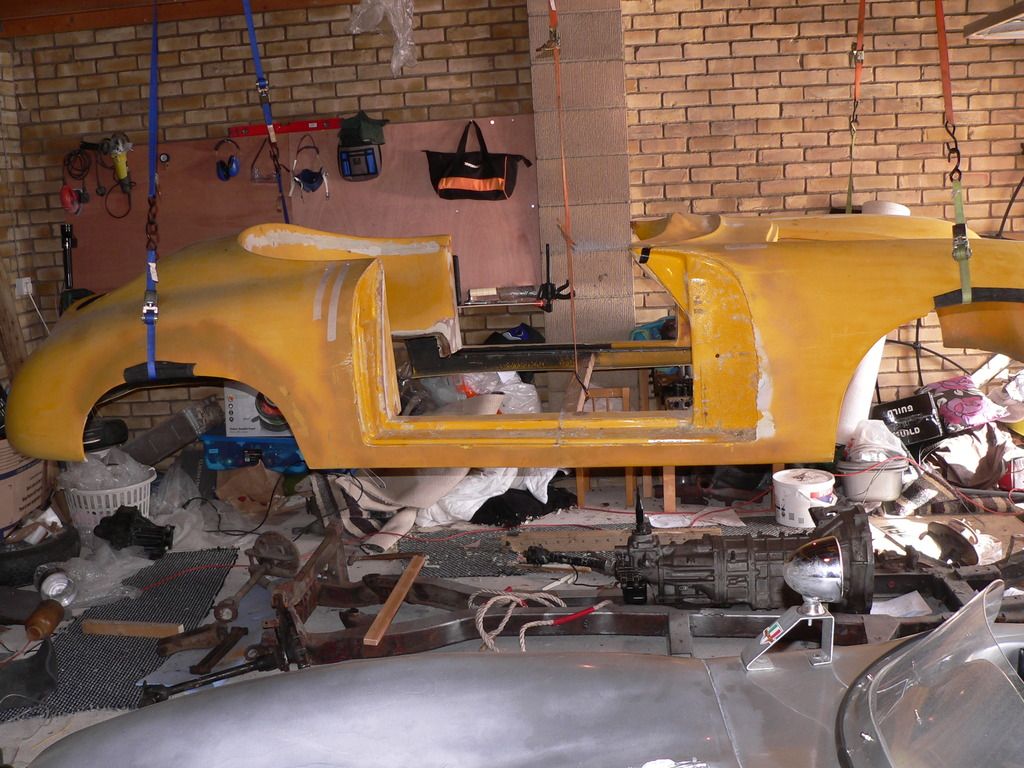
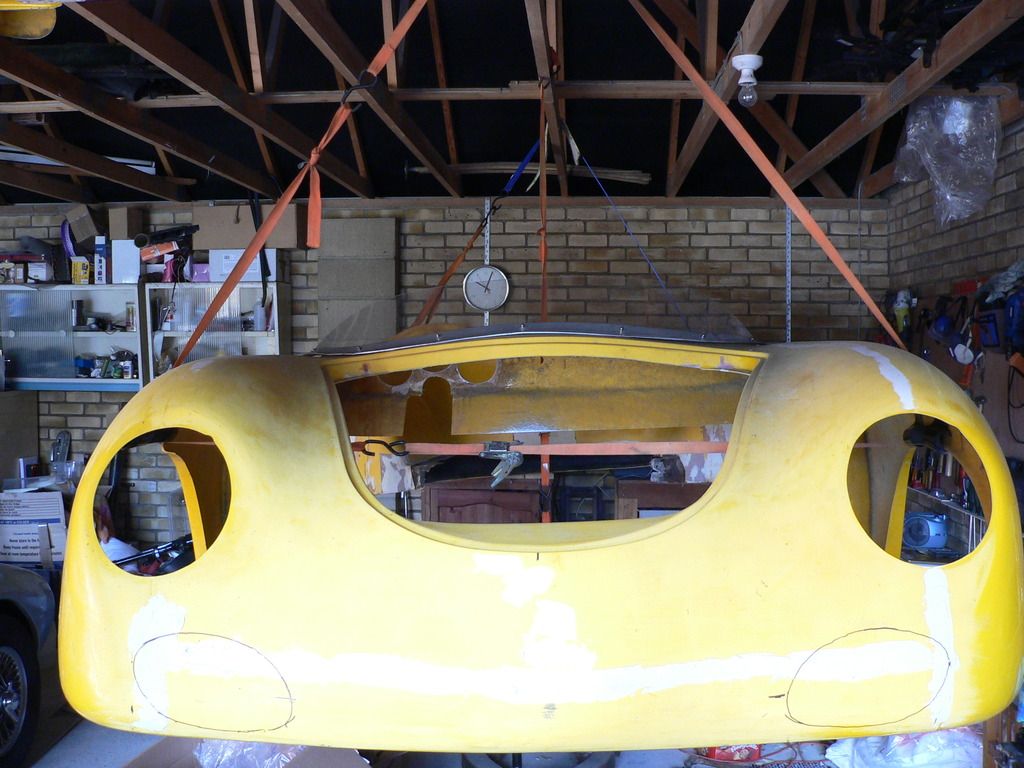
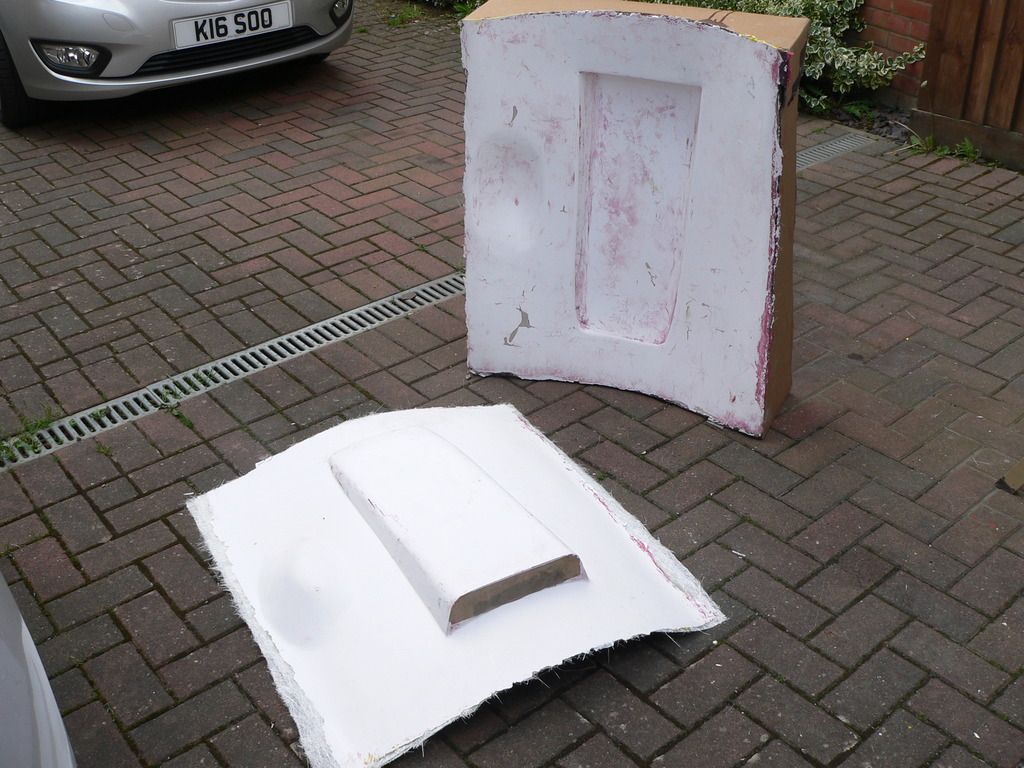
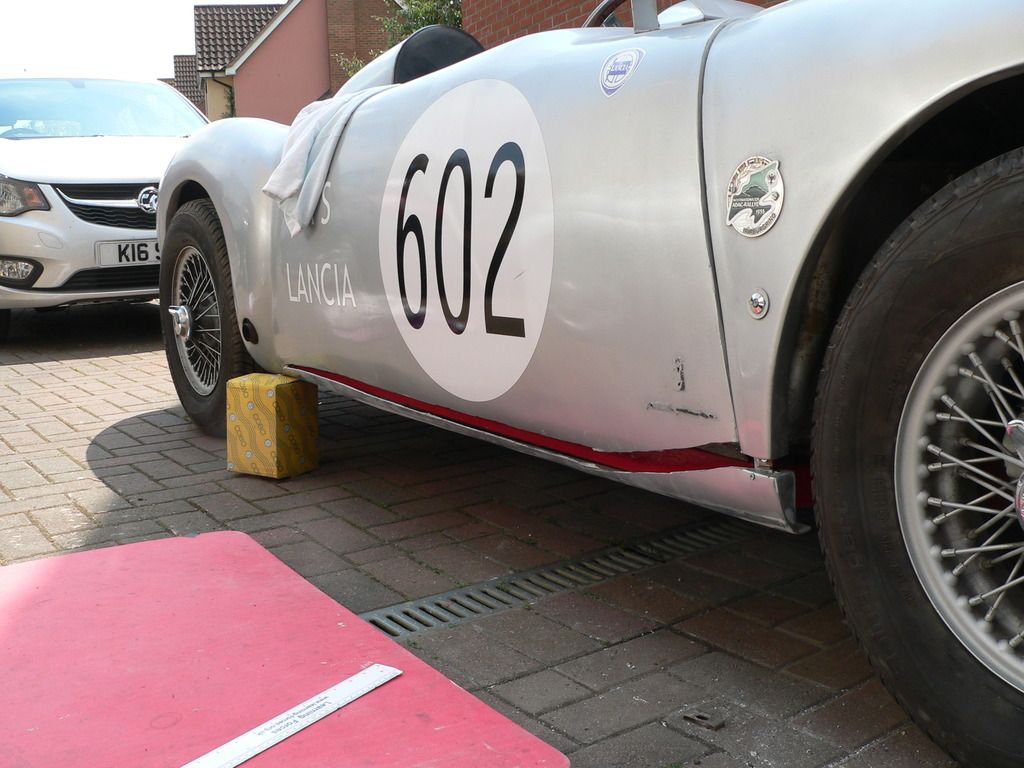
Progress so far -
The finished bonnet scoop plug was given a dozen coats of release wax, two coats of gelcoat then had three layers of 300gsm csm sandwiching core mat to create the mould.
The mould then got a dozen coats of release wax and a thick coat of gelcoat buffed to a sheen.
Followed by three layers of 300gsm csm
24hrs later, tra-laa!
While it was curing I made a start on another issue that affected a number of Sammios, mine included -
Passenger side 'sill' tucks under the chassis.
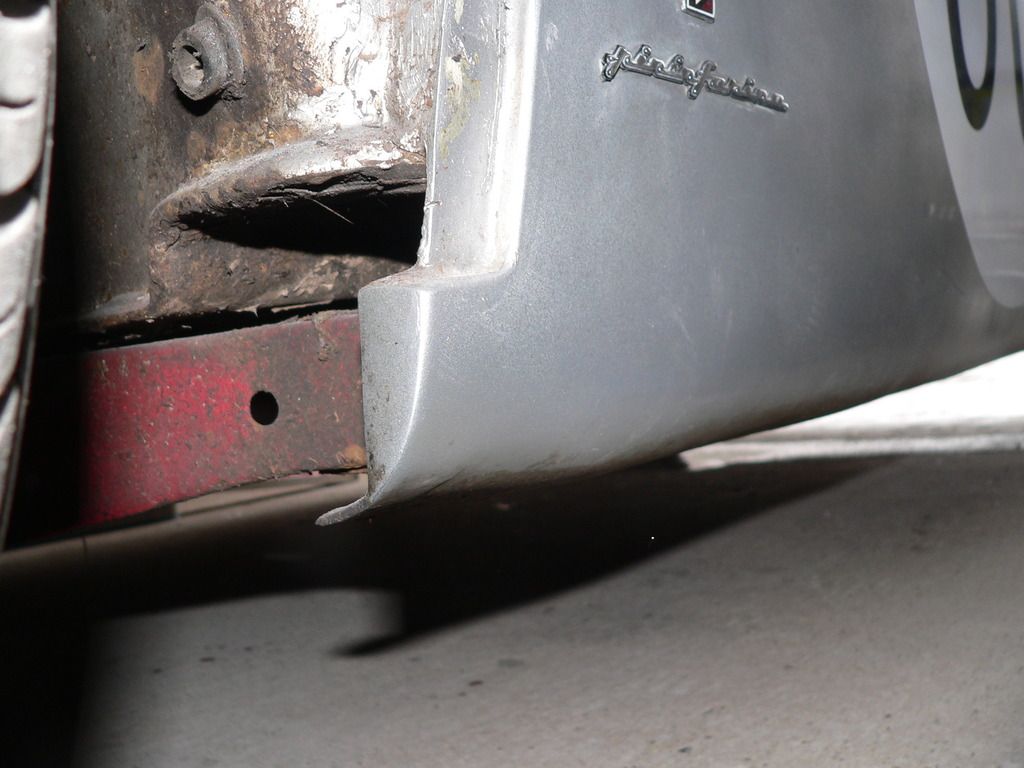
...but on the driver's side
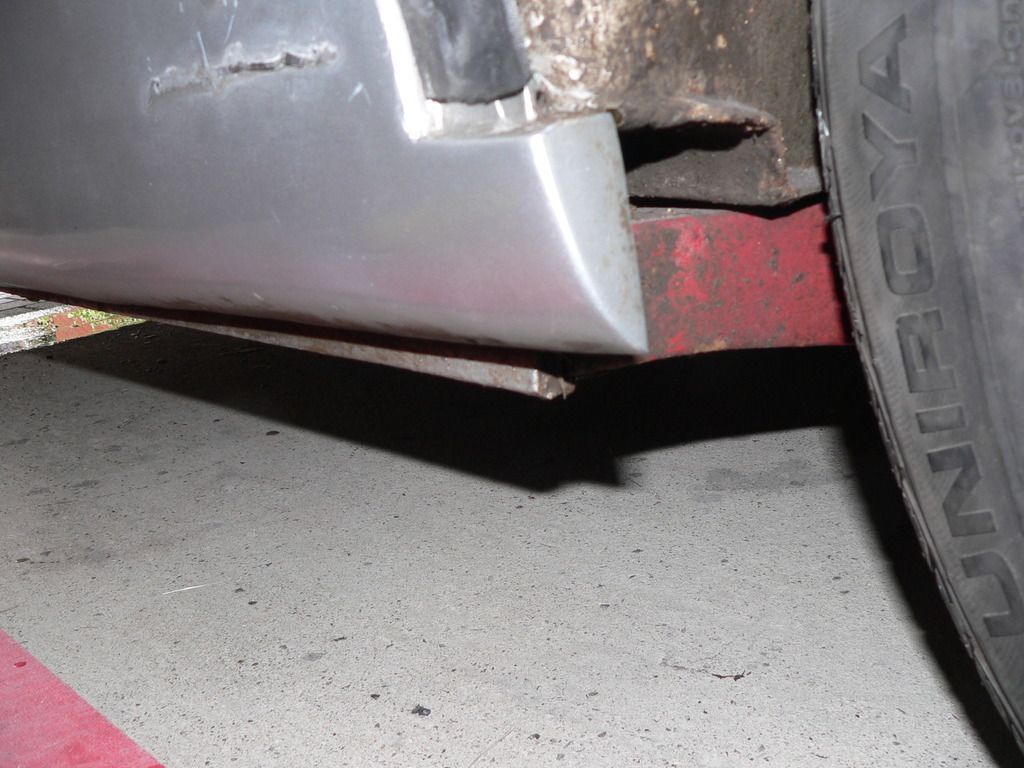
Hmm, looks like the lower part of that side of the shell never got properly moulded. Having cut off the lower section it was clear that it was also far from straight.
So, I've now fabricated a proper tuck under for that sill and am in the process of bonding it back into the shell in the right place.
More later. |
28th May 2017, 14:52
|
|
Senior Member
|
|
Join Date: Feb 2012
Location: Wembley, London
Posts: 5,058
|
|
Mr T – Looks like you’ve done a great job making your replacement bonnet section.
I’m sure it will be a somewhat nerve racking process cutting out the old and ‘stitching in’ the new.
Another brave cut to fix the driver’s side sill too. 
I guess that bridging the gap is a lot harder to do with the body shell bonded into place.
Good luck, Paul.
PS
If you could keep finding extra jobs to do, then I might be back on the road at the same time as you. 
|
4th June 2017, 14:51
|
|
Senior Member
|
|
Join Date: Feb 2012
Location: Wembley, London
Posts: 5,058
|
|
Mr T - I was thinking of you earlier as I was crawling around on my driveway painting my car's sills.
So have you made any progress 'healing' the gap in your body shell?
Good luck, Paul.
|
4th June 2017, 18:02
|
|
Senior Member
|
|
Join Date: Jul 2011
Posts: 5,328
|
|
Quote:
Originally Posted by Paul L
Mr T - I was thinking of you earlier as I was crawling around on my driveway painting my car's sills.
So have you made any progress 'healing' the gap in your body shell?
Good luck, Paul.
|
Hi Paul, yep, it's all beginning to come together nicely but is taking far longer than I intended. Will take some pics in a day or so. Keep up the good work on your car, the light is at the end of the tunnel now... |
|
Currently Active Users Viewing This Thread: 1 (0 members and 1 guests)
|
|
|
 Posting Rules
|
You may not post new threads
You may not post replies
You may not post attachments
You may not edit your posts
HTML code is Off
|
|
|
All times are GMT +0. The time now is 08:27.
|


 Linear Mode

