|
|
| Sammio Builds and discussions Sammio bodied car builds and specials |

20th June 2013, 21:14
|
 |
Senior Member
|
|
Join Date: Jul 2011
Posts: 5,328
|
|
Exciting stuff. Loved the music and commentary...  |
21st June 2013, 08:10
|
 |
Senior Member
|
|
Join Date: Dec 2011
Location: Devon
Posts: 551
|
|
Quote:
Originally Posted by Viatron

|
That's the problem with budget hotels. Tea, coffee making facilities along with vapour blasting and ultrasonic cleaning facilities are just basic requirements. |
21st June 2013, 08:21
|
|
Senior Member
|
|
Join Date: Mar 2012
Posts: 1,152
|
|
I won't stay in a room unless it has a 6 tonne Corby trouser press.
|
21st June 2013, 09:34
|
|
Senior Member
|
|
Join Date: Apr 2012
Posts: 1,163
|
|
What makes it even more annoying is that one stripped its become apparant that the DCOE 45 i bought is in fact a DCOE 40...grrrrr bloody ebay!
I will rebuild it though as it was very cheap and i should make a few quid, luckily i have found a d oe on preloved and am just waiting for pics before i agree to purchase. One step forward 2 steps back :-(
|
21st June 2013, 09:45
|
|
Senior Member
|
|
Join Date: Jul 2011
Posts: 5,328
|
|
Oops, sorry V, didn't realise it was your youtube video and I didn't mean to insult your creativity with the old personal movie record.
I suppose I was a bit spoiled when someone posted this one a while back and I was expecting something similar -
http://www.youtube.com/watch?v=daVDr...ature=youtu.be
To quote The Simpsons comic book guy, 'Best engine rebuild video ever'. |
21st June 2013, 09:45
|
 |
Senior Member
|
|
Join Date: Dec 2011
Posts: 656
|
|
Quote:
Originally Posted by oxford1360
I won't stay in a room unless it has a 6 tonne Corby trouser press.
|
Of course! The 9th article in the Chap manifesto ( http://thechapmagazine.co.uk/content/section_manifesto/)
States:
THOU SHALT ALWAYS WORSHIP AT THE TROUSER PRESS. At the end of each day, your trousers should be placed in one of Mr. Corby's magical contraptions, and by the next morning your creases will be so sharp that they will start a riot on the high street.
 |
21st June 2013, 11:16
|
|
Senior Member
|
|
Join Date: Dec 2011
Location: Devon
Posts: 551
|
|
Quote:
Originally Posted by Mister Towed
Oops, sorry V, didn't realise it was your youtube video and I didn't mean to insult your creativity with the old personal movie record.
I suppose I was a bit spoiled when someone posted this one a while back and I was expecting something similar -
http://www.youtube.com/watch?v=daVDr...ature=youtu.be
To quote The Simpsons comic book guy, 'Best engine rebuild video ever'. |
Not seen that one before! Pure magic.
Maybe Ribble could do a Pilot or Navigator build like that. LOL. |
21st June 2013, 17:19
|
|
Senior Member
|
|
Join Date: Apr 2012
Posts: 1,163
|
|
No offence taken, just used a time-lapse app, total strip down took about half an hour.
|
21st June 2013, 17:29
|
|
Senior Member
|
|
Join Date: Apr 2012
Posts: 1,163
|
|
Just got home and had some nice parcels to open


The Alfins look awesome but i think i will run them through the blast cabinet in the morning with some fine media and then give them a coat of silver VHT paint so that they don't corrode to quickly.
The lamp units i got from Allstyles scooters rather than Ebay as research suggested the ebay ones were made of schromed tin and were quite flimsy. These ones are cast Ali and alyhough not perfect, they have a couple of casting defects in them, i think they will still look nice and a little different.
Being scooter lights they are 6v so have ordered a set of bulb holders fron SVC and i will have to modify the internals to suite.
First time in the workshop in a fortnight tomorrow cant wait! |
22nd June 2013, 18:03
|
|
Senior Member
|
|
Join Date: Apr 2012
Posts: 1,163
|
|
|
22nd June 2013, 18:26
|
|
Senior Member
|
|
Join Date: Jun 2011
Location: birchington, kent
Posts: 1,769
|
|
That reminds me to look for split pins for brakes.
|
9th August 2013, 17:55
|
|
Senior Member
|
|
Join Date: Apr 2012
Posts: 1,163
|
|

Glad to be of service Gary!
Some progress recently but mostly in parts procurement as work is always mental this time of year and I was also asked to help Dave (my racing team mate) to do an engine swap for a mate of his that took longer than anticipated....shocker!!!
thanks to the casino at the Westfield Centre, Stratford and the inability of anyone on eBay to describe used wire wheels accurately I decided to bite the bullet and by a set of new chrome and stainless 14" MGB wheels which were on sale at £575 for a full set of 4 brand new. They are currently at the tyre shop but will hopefully be picking them up in the morning so will post some pics then.
On my return from Sheffield today though a couple of nice items had arrived

14" Motolita along with a polished horn push as the Boss kit I had of the supplier recently came with a plastic black horn push which is now surplus to requirements if anyone needs one.
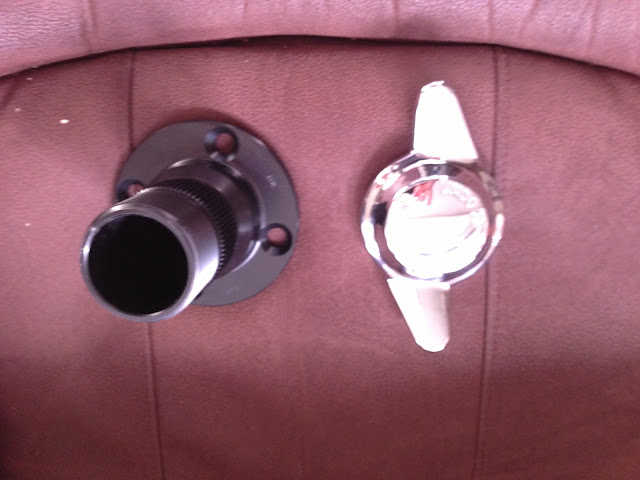
And a set of special wire wheel adaptors from Chic Doig, they are specifically designed to fit a triumph small chassis but allow the use of the wider MG wire wheels, the spinners are nice as well and not bad value at £80 for the set. I did fancy 3 eared spinners but couldn't justify the nearly 3 fold increase in cost.
I am up the workshop tomorrow so am hoping to get the wheels on and the frame bolted into place to start working out how to attach the pedal plate, might even get the body dropped on so some movement at last!

|
10th August 2013, 14:49
|
|
Senior Member
|
|
Join Date: Apr 2012
Posts: 1,163
|
|
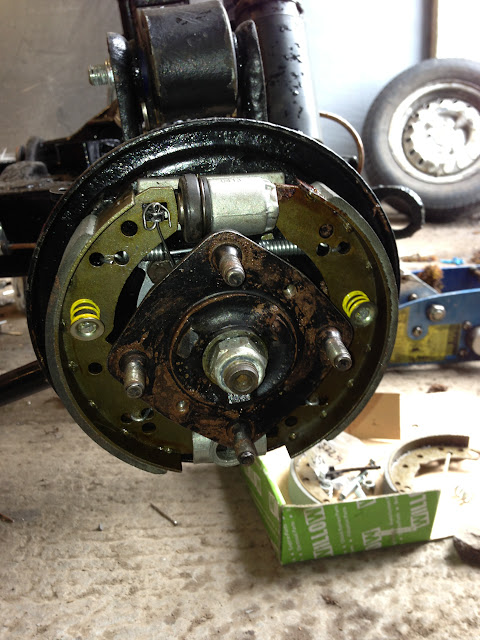
Got to the unit and my bloody trolley jack has given up the ghost! spent a couple of hours diagnosing the issue, a stripped bolt jamming it, given up and used the engine hoist to get the back up, half an hour later an voila!

and the drivers side rear

Very happy I went for the Alifin drums now as I think they look good behind the wires |
10th August 2013, 15:36
|
 |
Senior Member
|
|
Join Date: Jan 2012
Location: Poole, Dorset
Posts: 615
|
|
Wire wheels do look lovely on these cars, so great choice!
Just as another supplier for the adapters, www.mwsint.com also do the 'kitcar' spline adapters for the triumph to mount 14/15 inch wire wheels at £42 for the splined bit and £18 for the 2 eared spinners. They are in Slough, so handy for me as my office is round the corner, but they do post.... |
10th August 2013, 18:22
|
 |
Senior Member
|
|
Join Date: Feb 2012
Location: Wembley, London
Posts: 5,058
|
|
Mac - Wheels look great. 
Your car should really look the part when complete.
Good luck, Paul. 
|
16th August 2013, 19:29
|
|
Senior Member
|
|
Join Date: Apr 2012
Posts: 1,163
|
|
|
17th August 2013, 08:07
|
|
Senior Member
|
|
Join Date: Jul 2011
Posts: 5,328
|
|
Mmmmm, new toy. |
17th August 2013, 17:21
|
|
Senior Member
|
|
Join Date: Apr 2012
Posts: 1,163
|
|
Well good and bad today, bad becuase we didnt touch the Hindenberg in the end as a key snafu meant we couldnt move it......doh!
Good becuase it meant we could work on the Navigator...well sort of good, read on.
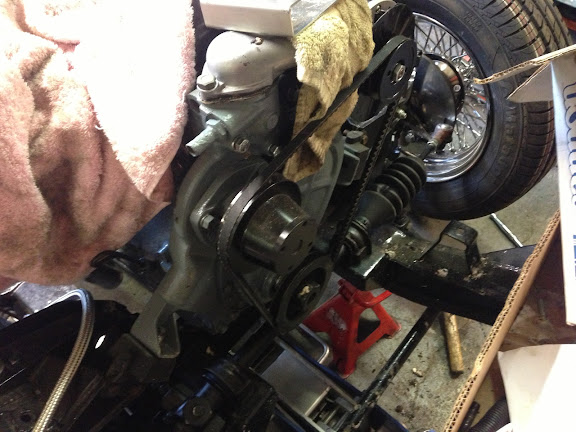
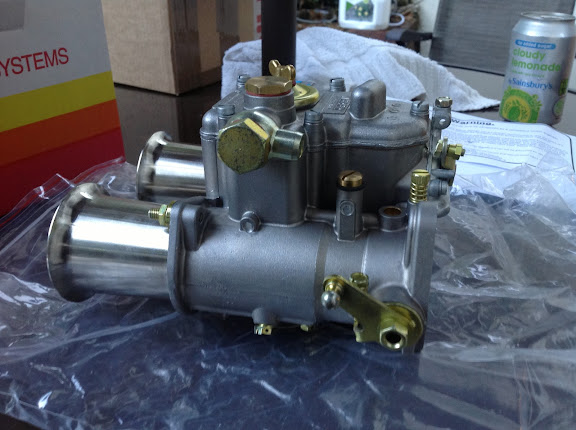
Firstly i managed to get my shiny new Weber mounted and the linkage all fitted and working, i needed to do this before fitting the body so i can check clearance under the bonnet.

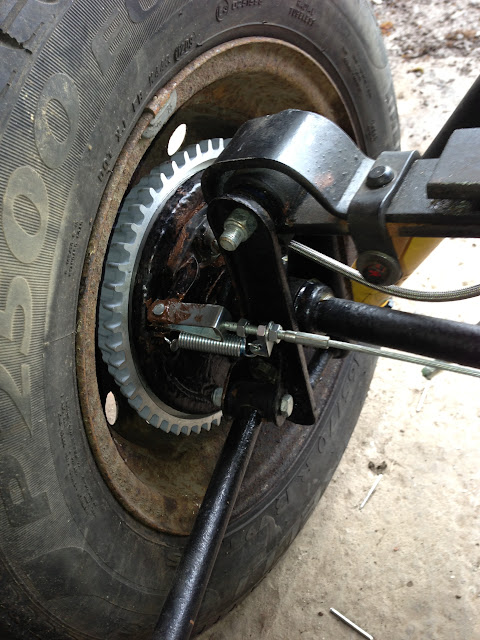
Next we moved onto the front end, i had originally built one good rack out of two worn out ones that came with my donor package but have never been totally happy with it so now have a brand new one to replace it, nice easy job. Next was to fit the natty stainless front disc guards and the wire wheels to the front of the car, the passenger side went fine and ended up thus


Also managed to eventually get the right length fan belt which turned out to be 1025mm long, this is third go at getting the right size as my local factors listed 1050 as the correct length but i ran out of adjustment, it was returned and i tried a 1000mm one which i couldn't even get over the dynamotor pulley, third times the charm!
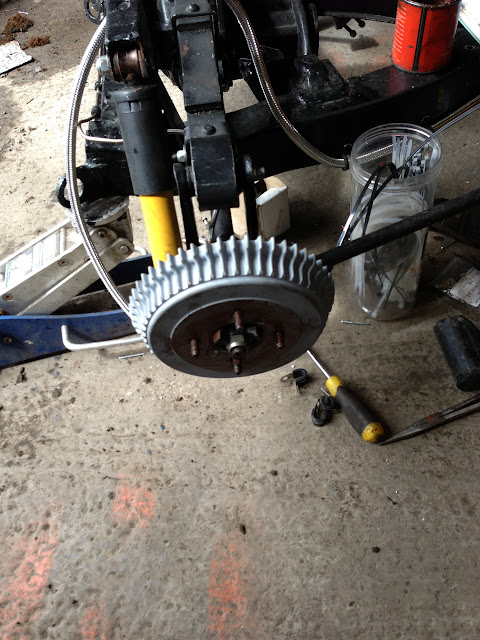
We then moved onto the drivers side front wheel which has aways worried me as it has never ran true, i had presumed i had messed up installing the new front bearings but further investigation showed that the stub axle is actually bent!
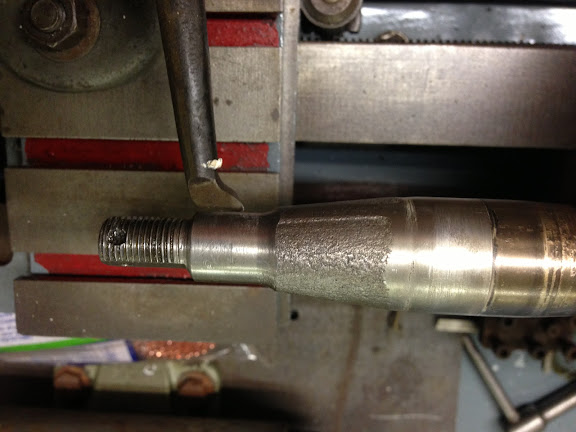

By removing it and mounting it in the lathe i had planned to use a dial gauge to see how far out it was, turns out a dial gauge wasn't really necessary grrrr
Just ordered a new one from Canleys so hopefully replacing it will see the chassis pretty much done and allow me to crack on with the frame.
|
29th August 2013, 20:38
|
|
Senior Member
|
|
Join Date: Apr 2012
Posts: 1,163
|
|
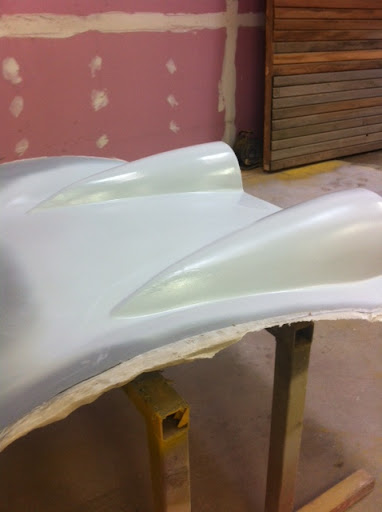
|
29th August 2013, 20:52
|
|
Senior Member
|
|
Join Date: Dec 2011
Posts: 656
|
|
Looking good Mac. Just as I'd imagined it |
|
Currently Active Users Viewing This Thread: 1 (0 members and 1 guests)
|
|
|
 Posting Rules
|
You may not post new threads
You may not post replies
You may not post attachments
You may not edit your posts
HTML code is Off
|
|
|
All times are GMT +0. The time now is 22:03.
|


 Linear Mode

