|
|
| Sammio Builds and discussions Sammio bodied car builds and specials |

26th February 2012, 15:21
|
|
Senior Member
|
|
Join Date: Jun 2011
Location: birchington, kent
Posts: 1,769
|
|
 When you get back, T.
What and where did you get the sandblasting media? I already used the 20kg tub from Machine Mart... £37  |
26th February 2012, 17:14
|
 |
Senior Member
|
|
Join Date: Jul 2011
Posts: 5,328
|
|
Quote:
Originally Posted by garyh

What and where did you get the sandblasting media? I already used the 20kg tub from Machine Mart... £37 |
Ouch, that's expensive.
Try this instead:
http://www.ebay.co.uk/itm/B-25KG-SEA...#ht_3996wt_907
I also used a 'tent' and had a tarpaulin on the floor so I was able to sweep up, sieve and re-use the grit. It loses a bit of its sharpness once it's been through the blaster a few times but it'll still do the job. |
1st March 2012, 08:12
|
|
Senior Member
|
|
Join Date: Jul 2011
Posts: 5,328
|
|
I've spent the last week buying in bits 'n' bobs for the next stage of my build. These have mainly been things I need to plumb the Honda radiator in: flexible coolant hose; pipe clips; elbow joints; in-line filler; etc.
I've also bought the sheet materials for the floor and internal walls, going for a sheet of 12mm resin impregnated non-slip ply for the floor (as recommended by Psycho Pops in his build thread, although he used 18mm) and I've got to say it looks and feels perfect for the job. I also picked up a couple of sheets of 9mm shuttering ply for the internal structure, with the whole lot coming in at just over £50. Bargain.
http://www.economytimber.co.uk/products
I appreciate Syderstone may as well be on the moon as far as many of you South Westerners are concerned but it's really handy for us over here in the Mystic East - the road from King's Lynn to Fakenham is one of the emptiest in the country as there's nowt out that way but a tiny timber yard and a two horse race course. 
Will post pics next week once I've cut the floor panels.

|
1st March 2012, 08:48
|
 |
Senior Member
|
|
Join Date: Dec 2011
Posts: 656
|
|
For those of us 'Up North', I've just done a bit of research  and Preston Plywood (01772 561656) have lots of stock of 12mm Resin Impregnated ply at a cost of £32.95 + VAT  |
8th March 2012, 17:37
|
|
Senior Member
|
|
Join Date: Jul 2011
Posts: 5,328
|
|
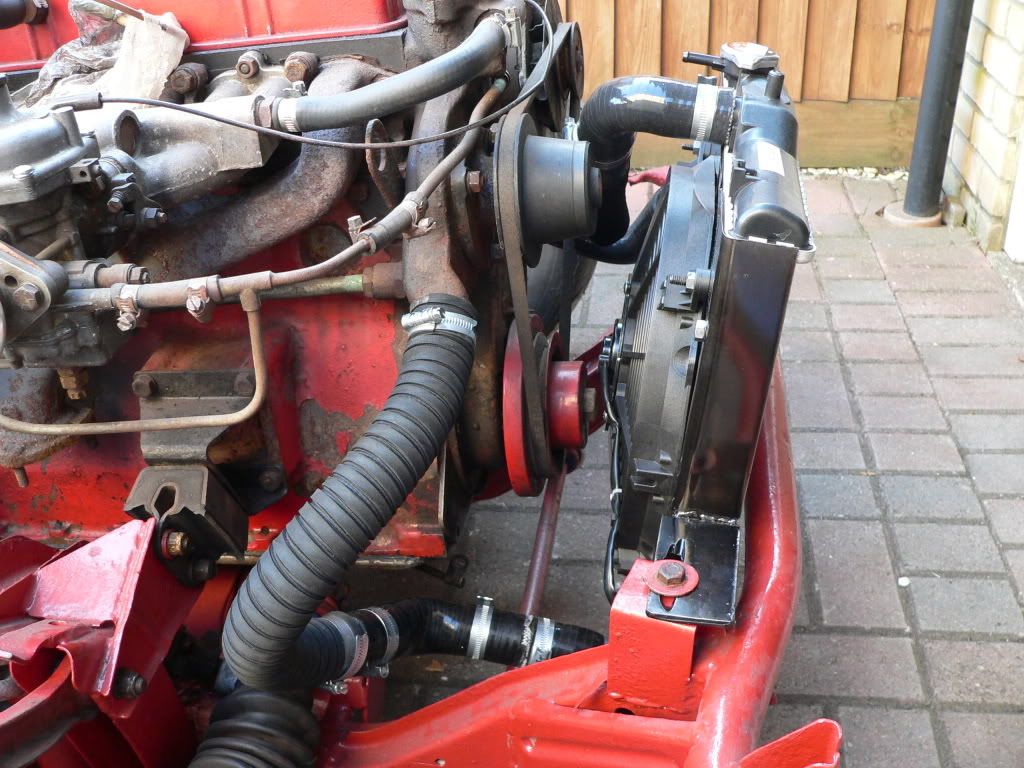
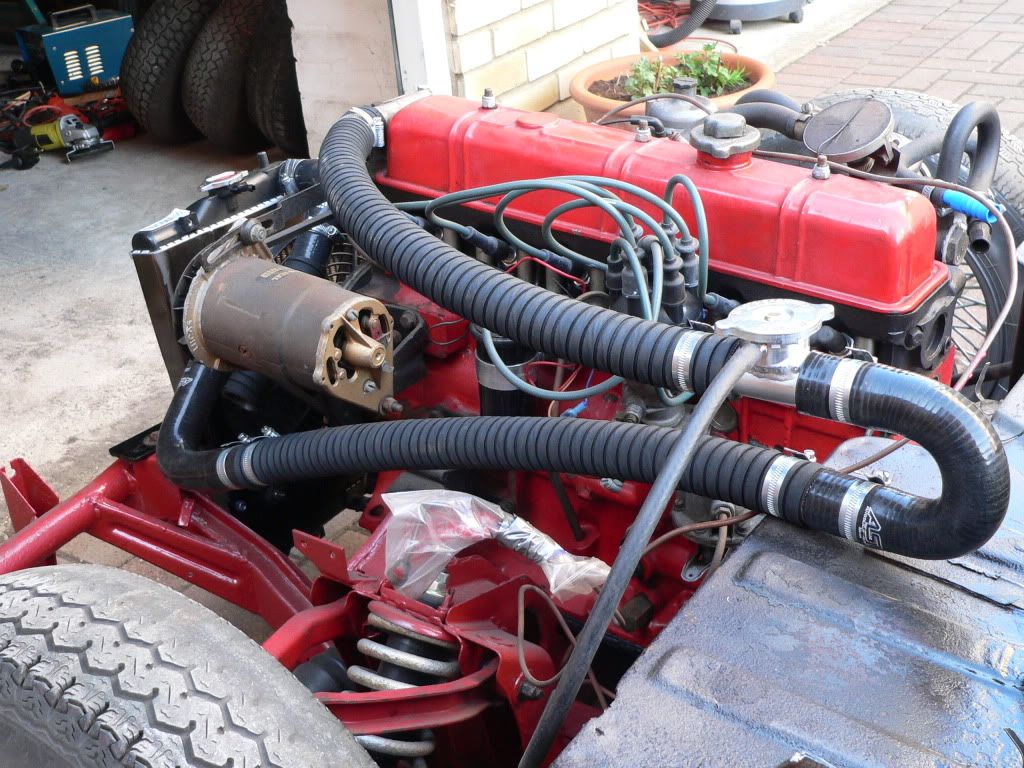
Spent the last couple of days making a fan shroud and mounting brackets for my Honda radiator and sorting out the plumbing -
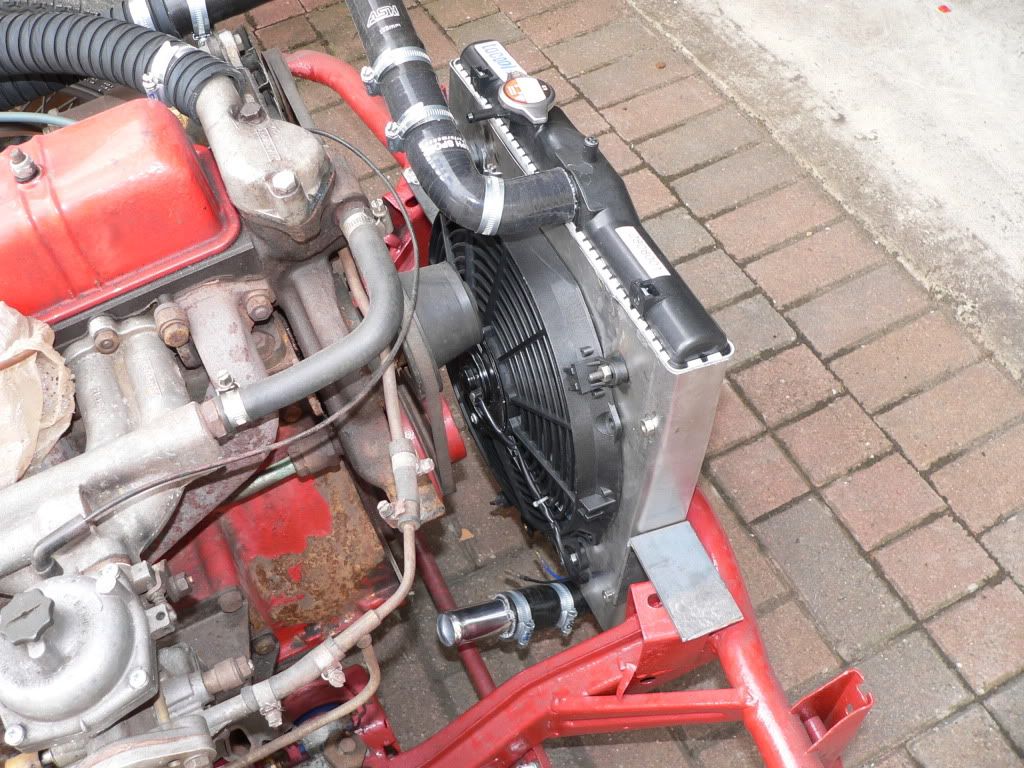
I took a lot longer than expected as I didn't have a big enough bit of sheet metal to make it in one piece so had to fabricate it in sections and weld them together. It's currently hanging in my garage after a good soaking in black Hammerite.
It'll be a while before I get the engine running again so I still don't know if the very thin and lightweight Civic radiator will be up to the job of cooling the straight six. The backup plan if it isn't is to go for an aftermarket competition Civic radiator that's about twice as thick and will still fit my shroud.
http://www.ebay.co.uk/itm/HONDA-CIVI...item2c540e0975
Back to work tomorrow so no progress for a few days I'm afraid.  |
8th March 2012, 17:55
|
 |
Senior Member
|
|
Join Date: May 2011
Location: Somerset
Posts: 1,671
|
|
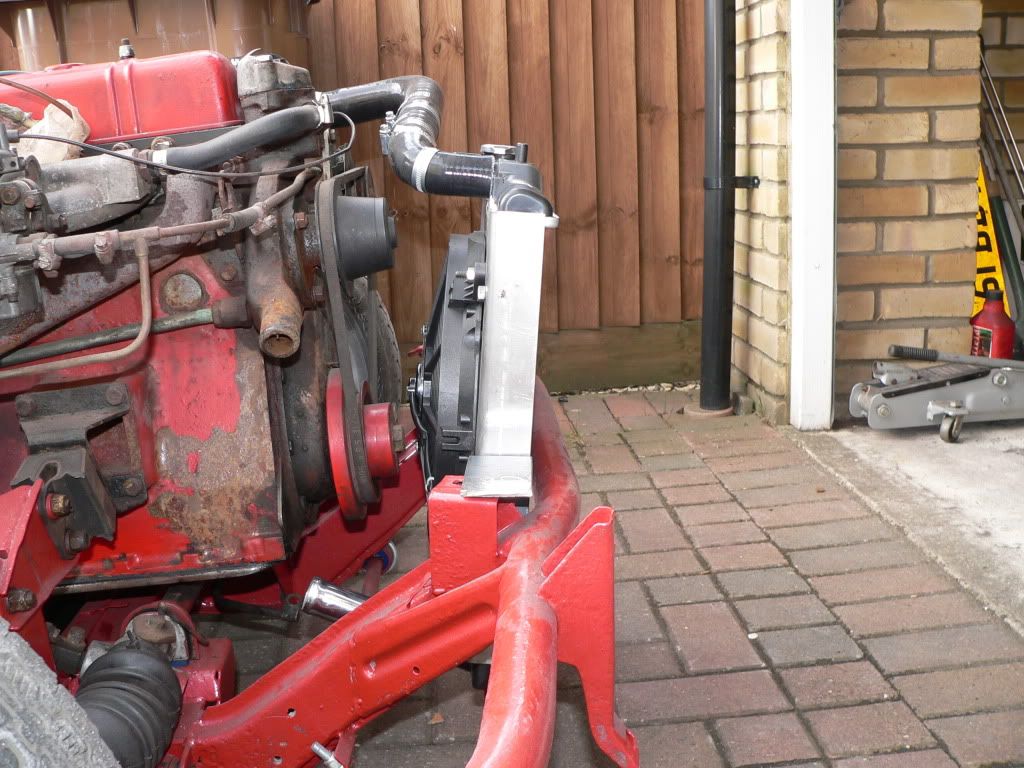
Looks good and very OEM! 
One minor adjustment you may want to make though is to alter the angle of the top radiator hose so that it doesn't go 'up' before it turns back (if you can understand what i mean?)
The only reason i mention that is that was one of the bits that caused me grief when fitting my bonnet to my 6 cylinder as it was rubbing on the bonnet. Amongst other bits  |
8th March 2012, 17:56
|
|
Senior Member
|
|
Join Date: Jul 2011
Posts: 5,328
|
|
Just found a fan shroud for my civic radiator on ebay. Looks like I could have saved myself the effort of making one - for a price!
http://www.ebay.co.uk/itm/Mishimoto-...item35b9d6103f
Think I'll have to start knocking them up in numbers and flogging them... |
8th March 2012, 18:21
|
|
Senior Member
|
|
Join Date: Jul 2011
Posts: 5,328
|
|
Quote:
Originally Posted by davecymru
Looks good and very OEM!
One minor adjustment you may want to make though is to alter the angle of the top radiator hose so that it doesn't go 'up' before it turns back (if you can understand what i mean?)
The only reason i mention that is that was one of the bits that caused me grief when fitting my bonnet to my 6 cylinder as it was rubbing on the bonnet. Amongst other bits |
Hmm, will have to see if there's any fouling on the inside of the bonnet when I get to that bit. Does the bonnet drop that dramatically once it's over the valve cover? I can always re-route the pipes if there is.
Oh, and thanks for the compliment about it looking like an original fitment - I am rather pleased with it! |
11th March 2012, 14:17
|
|
Senior Member
|
|
Join Date: Jul 2011
Posts: 5,328
|
|
|
11th March 2012, 14:42
|
 |
Senior Member
|
|
Join Date: May 2009
Location: POOLE , DORSET
Posts: 2,200
|
|
looking pretty nice Towed...
|
11th March 2012, 16:13
|
|
Senior Member
|
|
Join Date: May 2011
Location: Somerset
Posts: 1,671
|
|
Looking good matey! I loved this stage of the build as things all come together so quickly and it really all starts looking like a Spyder.
|
11th March 2012, 17:19
|
|
Senior Member
|
|
Join Date: Jun 2011
Location: birchington, kent
Posts: 1,769
|
|
Looks like its coming on very well, i will be using your photos as reference when fitting my Honda rad. |
11th March 2012, 18:27
|
 |
Senior Member
|
|
Join Date: Jan 2012
Location: Poole, Dorset
Posts: 615
|
|
great bit of work! I am watching with interest as I am nearly at that stage!
|
12th March 2012, 00:15
|
 |
Senior Member
|
|
Join Date: Jul 2011
Location: Marmande 47200
Posts: 501
|
|
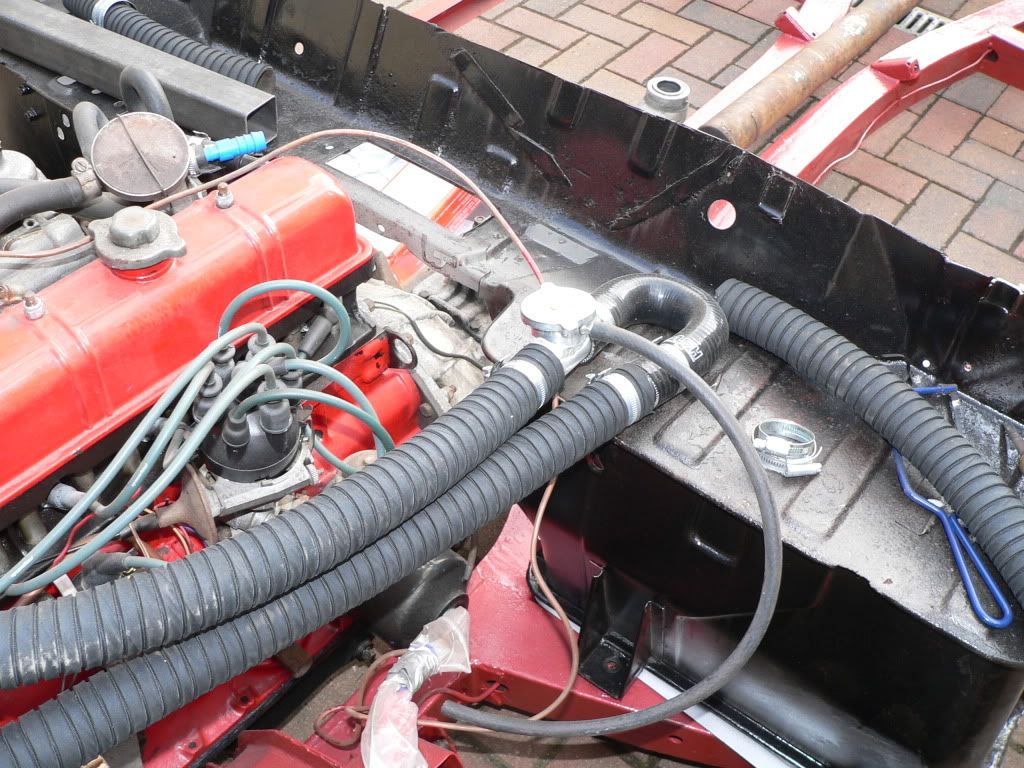
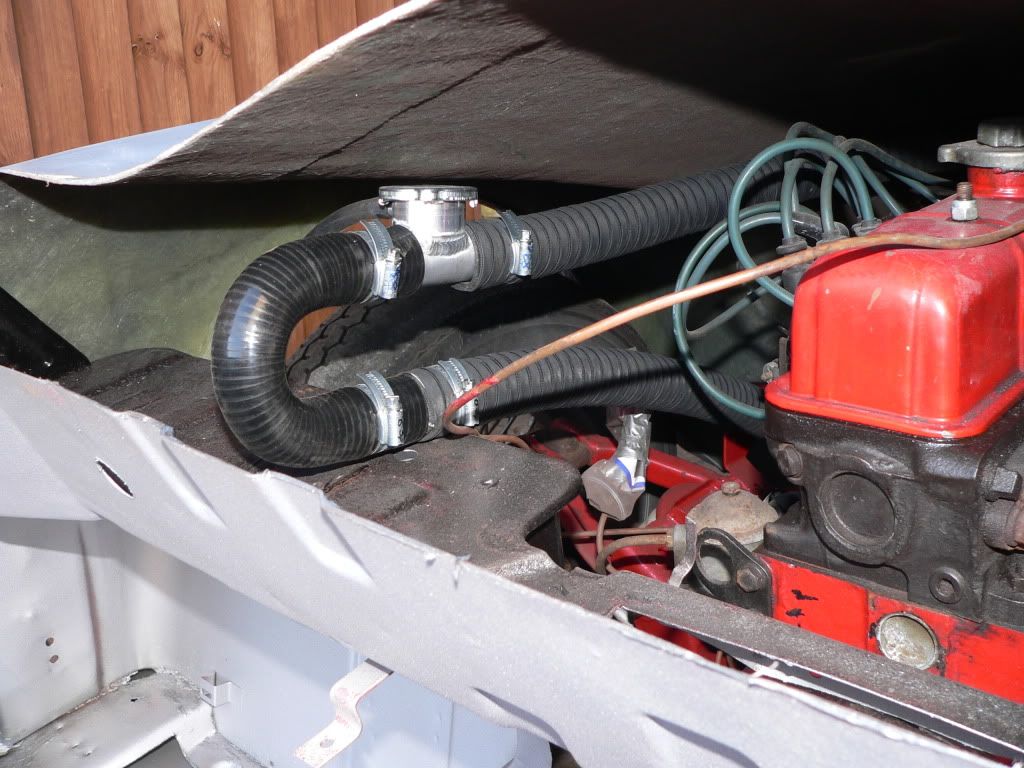
Is the long black hose instead of a header tank..? Looks good
Psycho pops
|
12th March 2012, 10:46
|
|
Senior Member
|
|
Join Date: Jul 2011
Posts: 5,328
|
|
Quote:
Originally Posted by Psycho pops
Is the long black hose instead of a header tank..? Looks good
Psycho pops
|
Thanks for everybody's positive comments, I'm pretty pleased with the way it's coming together - slowly but surely.
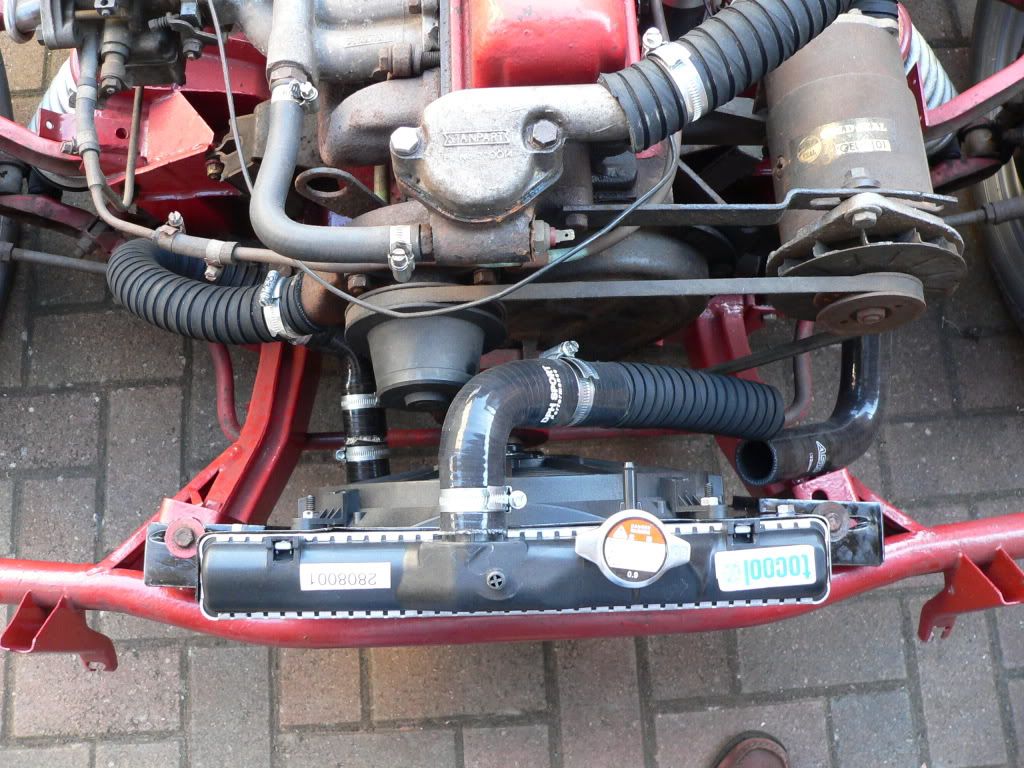
Psycho, yes, although I bought an old Land Rover header tank I decided that it would end up with unnecessarily complex plumbing to install it.
After cribbing ideas from Patoune's French Herald based racer I decided to try just plumbing in an in-line filler which will be linked to the standard Vitesse overflow bottle once I've relocated it. I've got a 7psi cap on the filler while the Honda radiator cap at 0.9 bar is about double so it should effectively remain sealed.
I've run the convoluted hose right back to the bulkhead for several reasons: it means I can put the rotary thermostat control inside the cockpit for adjustment on the fly; it will give extra coolant capacity which is always a good thing on an old engine; and I'm going to add a flip up flap above it in the bonnet to allow for level checks and top ups without lifting the whole front end. If you look at pics of the original D24's they often have a flap in the bonnet near to where mine will be for topping up something or other.
I hope it will all come together as a working solution to the cooling issue but only time will tell and I can always have a rethink if something isn't right.
|
14th March 2012, 13:23
|
|
Senior Member
|
|
Join Date: Jul 2011
Posts: 5,328
|
|
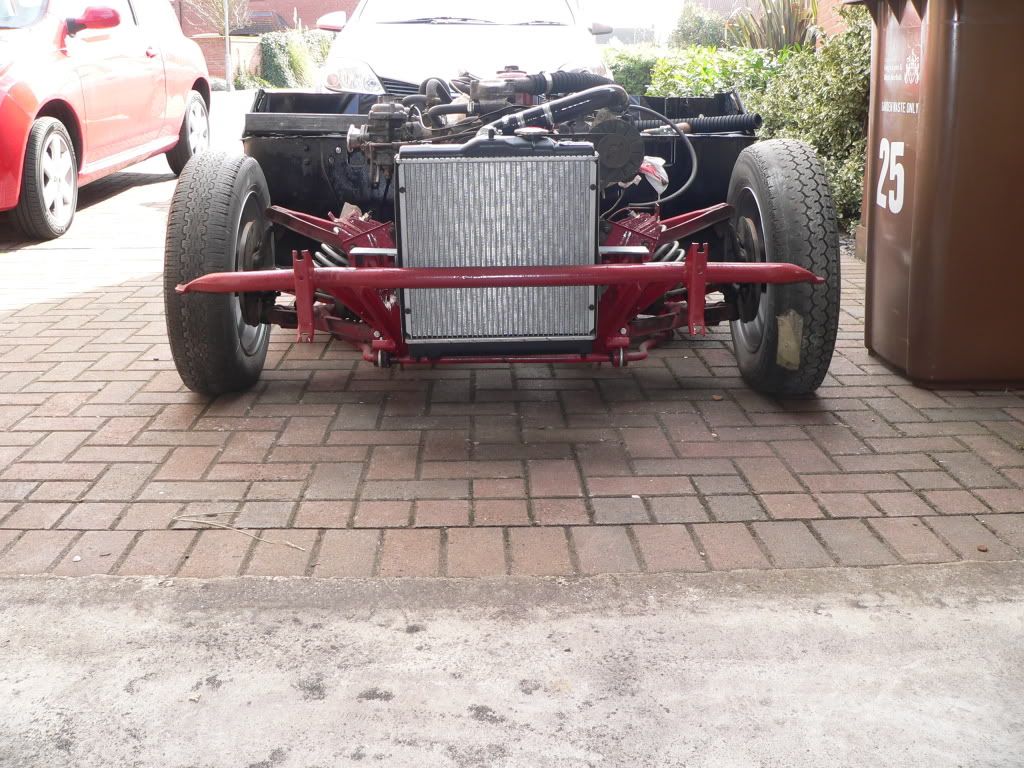
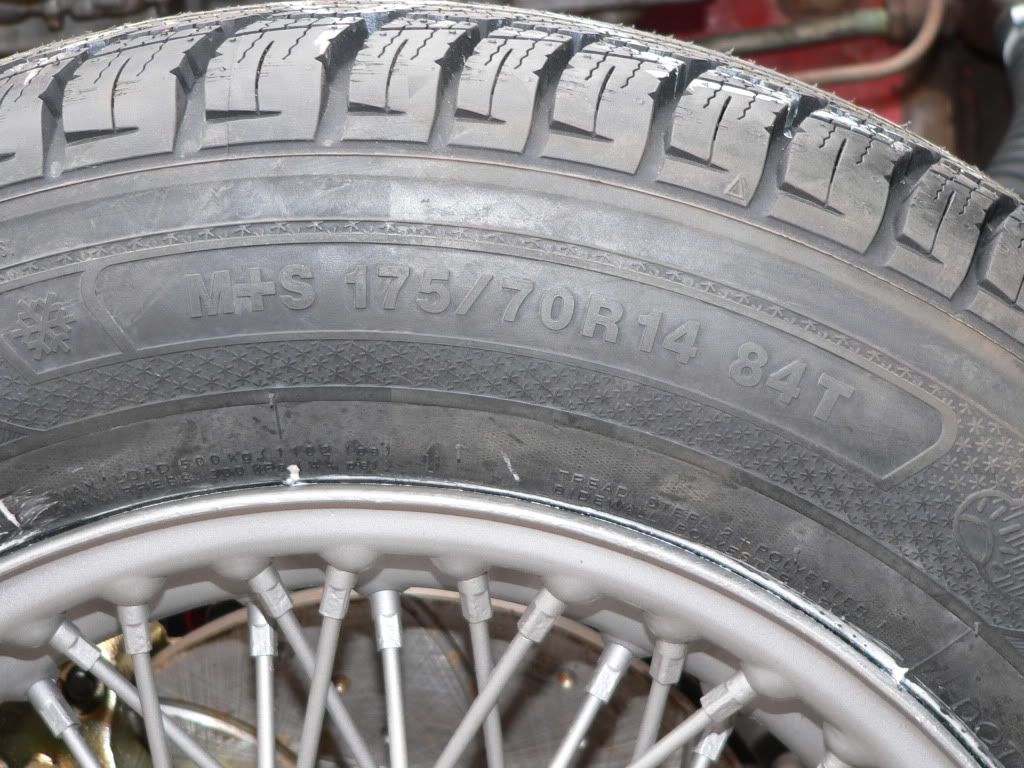
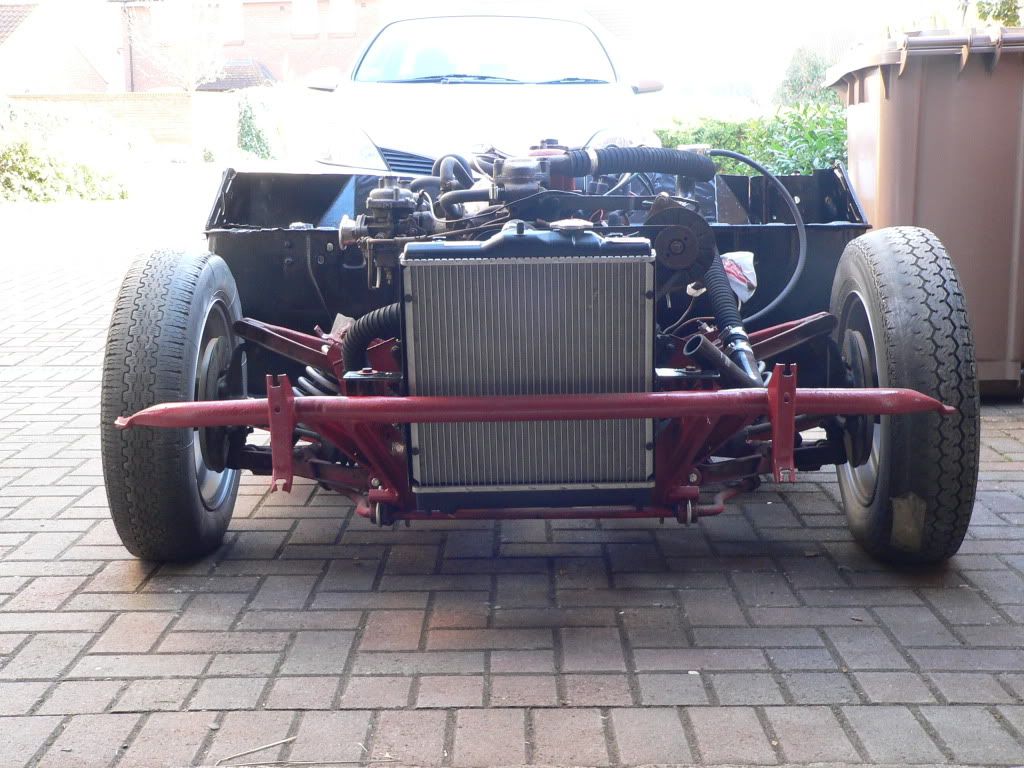
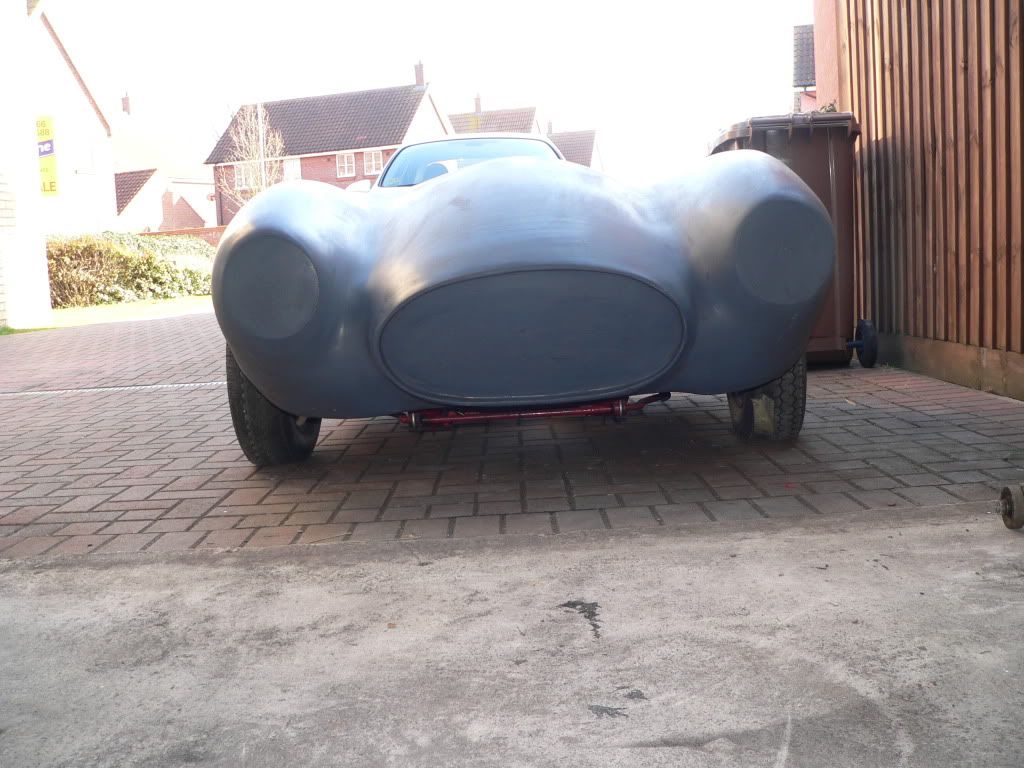
New tyres fitted to my MGB wires this morning. Three out of the four wheels I had them fitted to look shiny and new inside while the last one has a little rust on the ends of the spokes but nothing too serious and I'm really pleased with the way the 175/70/14's look on the chassis.
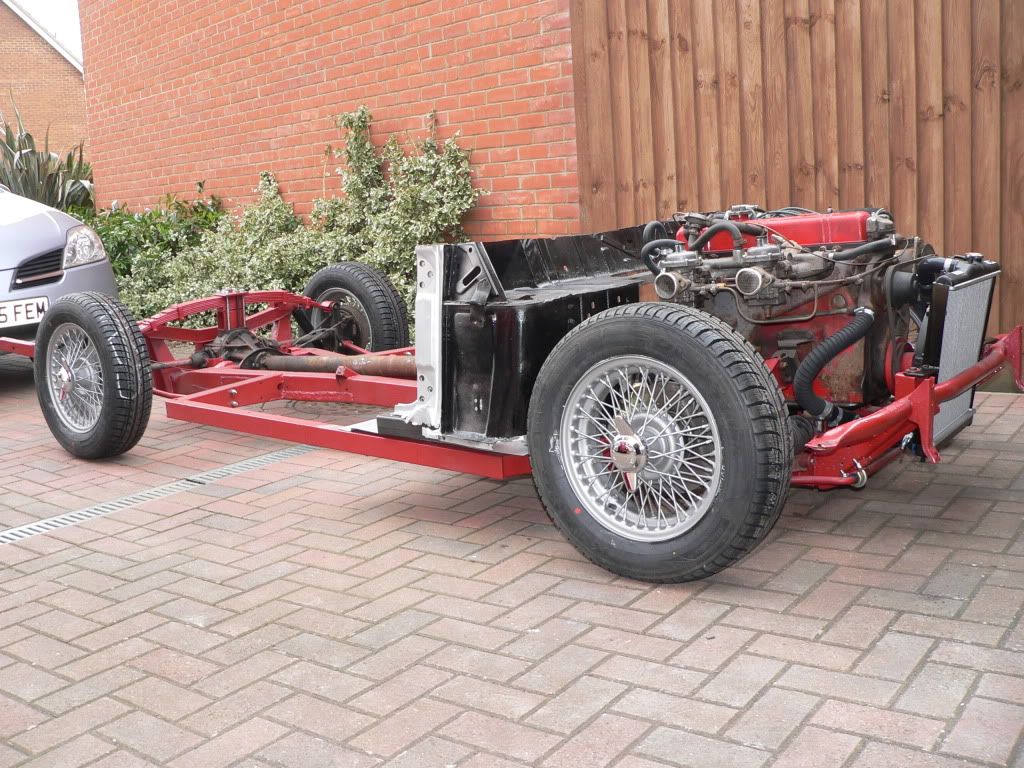
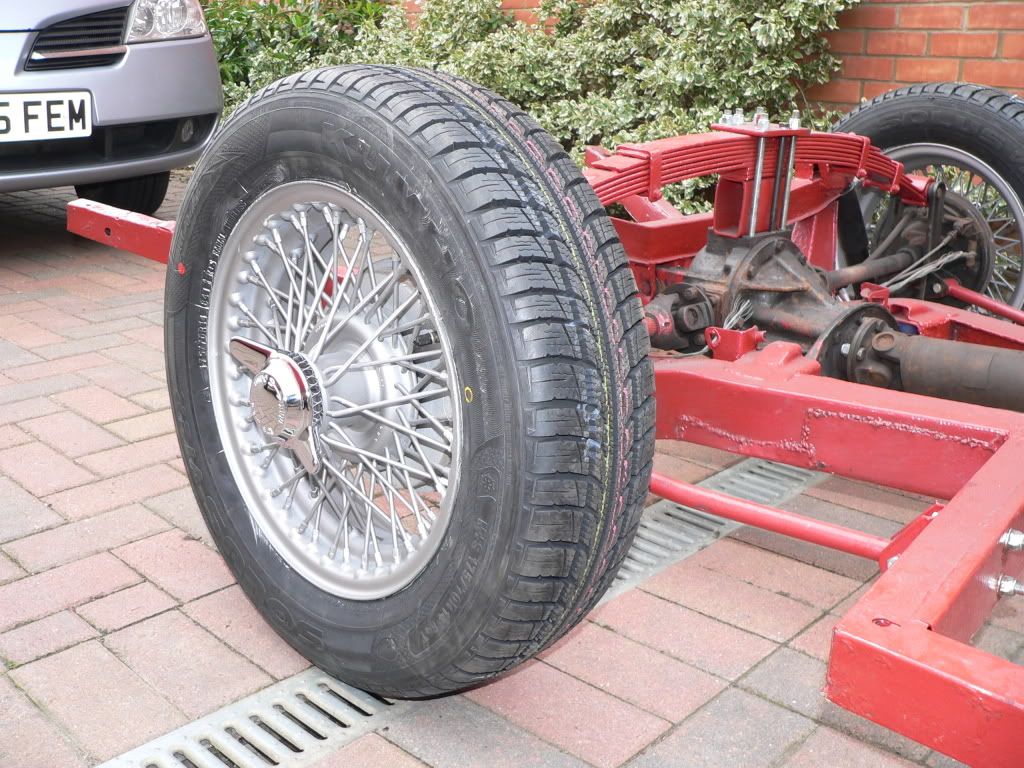
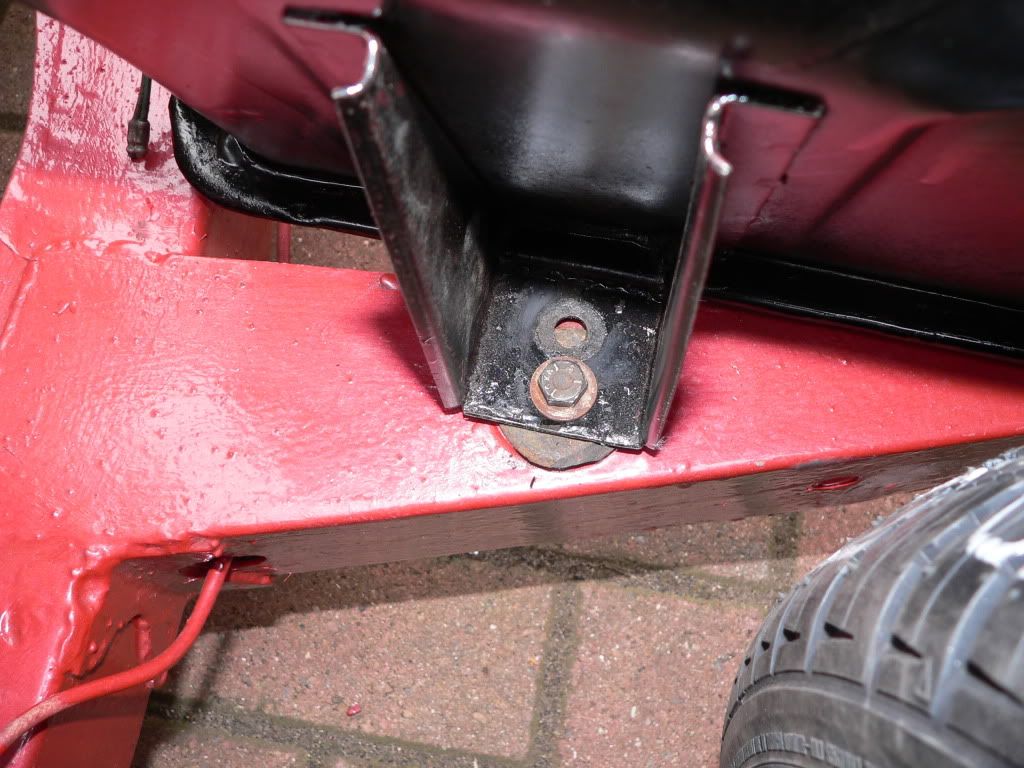
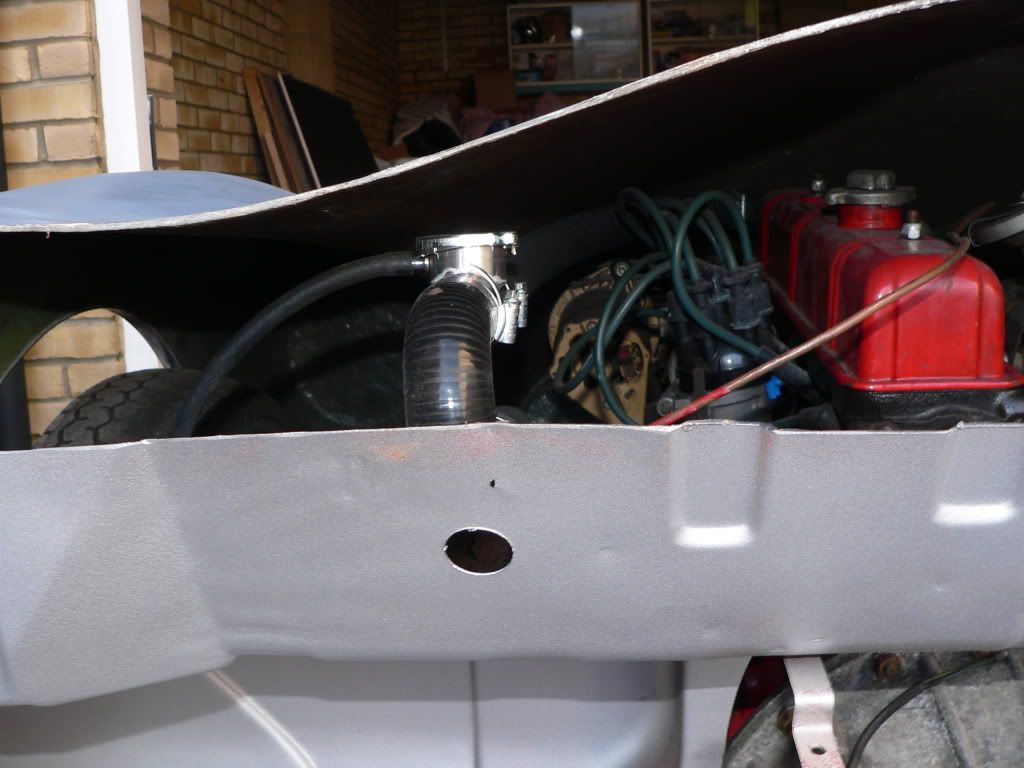
I've been holding off fitting up the floorpans to the bulkhead in case I had any clearance issues: the good news is that the tyres easily clear the chassis on full lock both ways -
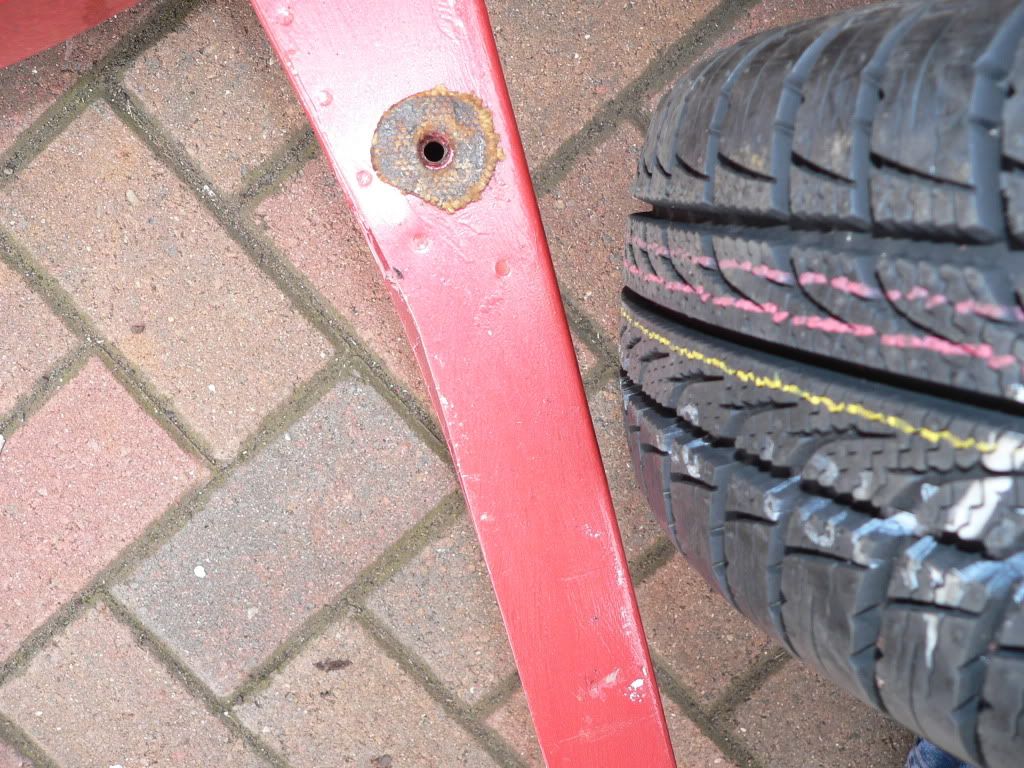
Slightly less good news is that they did foul the bulkhead wall. My fault I'm afraid - I've lowered the front springs so much, 90mm, that the widest part of the tyre is now level with the crease along the mid line of the bulkhead and this is where it's fouling.
So, I've bitten the bullet and re-drilled the mounting holes, moving them forward 20mm. This will mean I'll need to shave a little off the floorpans and may need to fettle the holes for the frame to bolt to the door hangers but I'm hoping there won't be too much of a knock on effect elsewhere... 
Off to work now, hopefully more progress tomorrow.
|
14th March 2012, 14:25
|
|
Senior Member
|
|
Join Date: Mar 2012
Posts: 745
|
|
looking great i have to come and have a look
|
14th March 2012, 14:32
|
|
Senior Member
|
|
Join Date: Mar 2012
Posts: 745
|
|
you can ring me on 07984601904 cheers phil.
|
14th March 2012, 15:19
|
|
Senior Member
|
|
Join Date: Jan 2012
Location: Poole, Dorset
Posts: 615
|
|
Very smart Mr T. The wheels/tyre combo go very well and will look ace on the finished car.
I will be tinkering with the bulkhead and wheels this weekend to see if I can get my 15"s to fit in some sensible fashion..... wish I had gone for 14"s now....
|
15th March 2012, 07:58
|
|
Senior Member
|
|
Join Date: Dec 2011
Posts: 656
|
|
As you are also working with the mark 2 2ltr vitesse, I wondered if you had tackled any theory on how to route the rear handbrake cable as far as the compensator? As you know, the guides on the Vitesse which turn the cable through 90 degrees are on the tub and have obviously gone with the wind. It's apparently very critical to get the wires out of the way of the rotoflex drive shafts and still not tighten/loosen when the rear suspension flexes. I'm nowhere near this stage yet but already pondering... Any thoughts?
|
|
Currently Active Users Viewing This Thread: 6 (0 members and 6 guests)
|
|
|
 Posting Rules
|
You may not post new threads
You may not post replies
You may not post attachments
You may not edit your posts
HTML code is Off
|
|
|
All times are GMT +0. The time now is 06:36.
|


 Linear Mode

