|
|
| Sammio Builds and discussions Sammio bodied car builds and specials |

10th April 2016, 15:59
|
 |
Senior Member
|
|
Join Date: Jul 2011
Location: Marmande 47200
Posts: 501
|
|
Truly wonderful, don't think anything of two years for finishing, I'm knocking on Five now, three different countries and many life events and only now approaching paint. Just hope mine achieve a fraction of the finished look yours has. Enjoy the fruits of your labour now....
|
10th April 2016, 16:34
|
|
Senior Member
|
|
Join Date: Feb 2016
Posts: 112
|
|
Lovely looking car you have, hats off to you, a brilliant job.
Jeff.
|
10th April 2016, 17:37
|
 |
Senior Member
|
|
Join Date: May 2011
Location: Somerset
Posts: 1,671
|
|
Congratulations! The car is looking REALLY good and on the road just in time for summer  |
10th April 2016, 17:46
|
|
Senior Member
Enthusiast
|
|
Join Date: Jun 2015
Location: Reading, Berkshire
Posts: 688
|
|
 Wow
Wow
Looks great !
I'd stop and ask if I saw the such a damn cool looking car. My compliments
Dave
|
10th April 2016, 18:50
|
 |
Senior Member
|
|
Join Date: May 2009
Location: POOLE , DORSET
Posts: 2,200
|
|
VERY PRETTY INDEED ...Some lovely details ..enjoy !!
|
10th April 2016, 18:52
|
|
Senior Member
|
|
Join Date: Dec 2013
Location: thurcroft, Rotherham South Yorkshire
Posts: 196
|
|
absolutely beautiful car, well done, you should be proud of yourself, first class finish, will be mistaken for many a classic.
|
16th April 2016, 17:38
|
 |
Senior Member
|
|
Join Date: Dec 2013
Posts: 839
|
|
Thanks for all the comments guys.
Paul Here's a few pictures of the bonnet brackets i made, they may be of no use to you as all the parts i have are bespoke.
IMG_6653.jpg IMG_5016.jpg
Two taper pads were welded on to the front chassis rail to bring both bracket pivot bores in line with each other, if they were not in line then the bonnet would not pivot correctly if that makes sense, this pictures shows one bracket in place with the taper pad between the bracket and chassis rail.
IMG_5013.jpg IMG_5014.jpg
Made a frame out of 20mm steel tube to sit inside the oval nose profile and bonded in place, two hinge brackets were welded to the tube frame before bonding in place. Second image is of the parts i made.
Hope these help in some way Paul, see you all soon.
|
16th April 2016, 18:45
|
 |
Senior Member
|
|
Join Date: Feb 2012
Location: Wembley, London
Posts: 5,058
|
|
Oops, sorry, I meant the brackets/fixings for the leather straps holding the bonnet at the sides.
Having said that, I might steal your front number plate fixing idea while I'm here. 
As I can't transfer to my "new" 1965 "C" reg number until after my first MOT.
( So I don't want to permanently fix the old number plate in place. )
Thanks, Paul. |
17th April 2016, 20:29
|
|
Senior Member
|
|
Join Date: Dec 2013
Posts: 839
|
|
No probs Paul, will post pictures tomorrow.
Today had the car out and have noticed the brakes are not the best, no servo and bog standard front pads, the calipers were stripped with new seals and pistons fitted.
Has anybody found a good fast road pad that is suited to standard brake's and wheel set up, the discs are solid and i have drums on the rear.
I was thinking of trying Mintex 1144, any body got these fitted if so did they make any difference.
Last edited by swifty; 17th April 2016 at 21:14..
|
18th April 2016, 18:46
|
|
Senior Member
|
|
Join Date: Dec 2013
Posts: 839
|
|
Paul Pictures as promised but to be honest they don't show a great deal.
IMG_6656.jpg IMG_6655.jpg
The straps are fastened to some 3mm ally plate bonded to the inside of the bonnet, the plate acts as a alignment edge to keep the bonnet in line with the body, i tapped the 3mm ally plate for the top strap three screws to fasten to and the bottom strap is fastened to another ally plate bonded inside the lower body.
IMG_5084.jpg IMG_6064.jpg
These pictures show the ally plate on the bonnet and the angle plate attached to the body which interconnect with each other when closing the bonnet.
Hope that is of help, basically it takes a little forward planning to place the ally plate in the correct position before finishing the body prep work.
|
18th April 2016, 19:05
|
|
Senior Member
|
|
Join Date: Feb 2012
Location: Wembley, London
Posts: 5,058
|
|
Swifty - Thanks for posting that. 
I think the way your bonnet "slots" into the body shell is a great idea.
So I will certainly be trying to do something similar when I finally tackle my own.
Cheers, Paul.
|
20th April 2016, 20:15
|
|
Senior Member
|
|
Join Date: Dec 2013
Posts: 839
|
|
Paul If it make the build that little bit easier then fill your boots.
Finally made a grill to fit in the scoop opening, i had originally made the trim out of square punched sheet but it some how did not look correct so went back to the drawing board and came up with Mk2.
IMG_6646.jpg
Made in two parts with four angled brackets. The silver outer was machined from 3mm ally sheet with mesh for the center infill. The slight miss shape in the outer frame is due to the misshape in the bonnet, one of those Ribble problems!
IMG_6657.jpg
Scoop grill attached to the bonnet, its held in place with polyurethane sealant and the four angle brackets, all hidden inside the bonnet.
Tomorrow the car is booked in with a local tuning guy for him to check the carbs etc out and see if he can squeeze a little more power out of the straight six. He is old school who knows his way around Strombergs and triumphs so hopefully i can learn some tips. IF the weather stays dry then i will also call in to the guy who is making the decals and see what progress he's made.
Had the car out on a number of occasions now and you certainly get a good reaction from people smiling and making positive comments which you clearly hear in the open top to thumbs up from passing motorist, it's one of those cars that you get noticed in so not for the shy retiring type.
Well that's it for now see you all soon.
Last edited by swifty; 20th April 2016 at 20:32..
|
26th April 2016, 20:26
|
|
Senior Member
|
|
Join Date: Dec 2013
Posts: 839
|
|
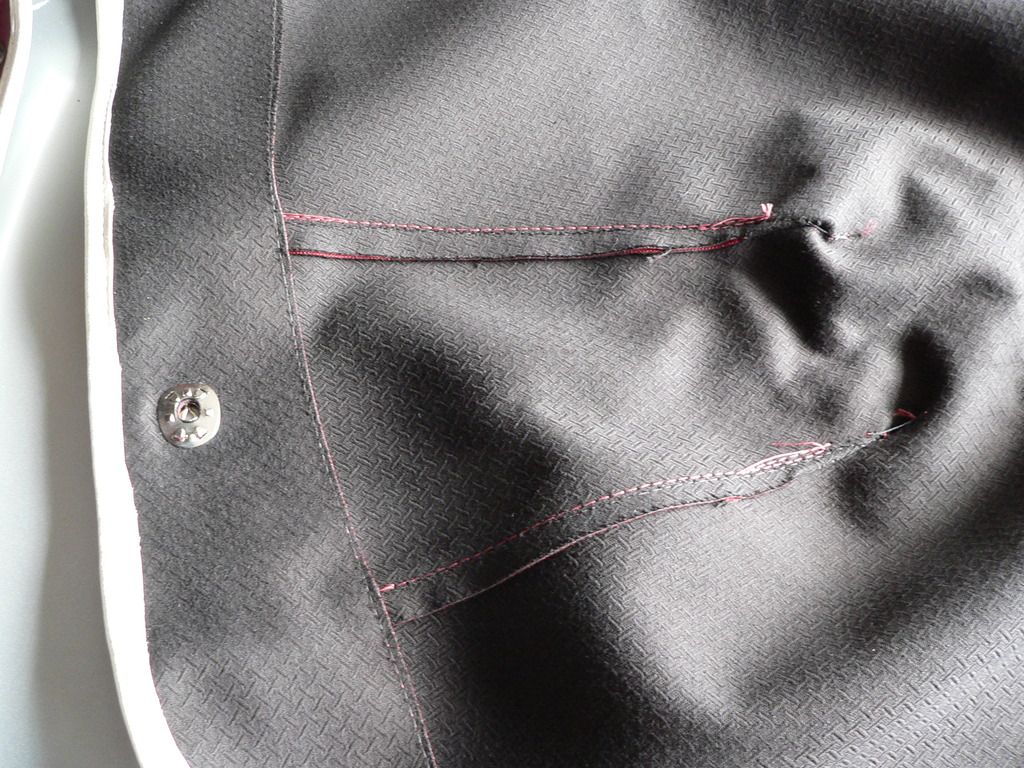
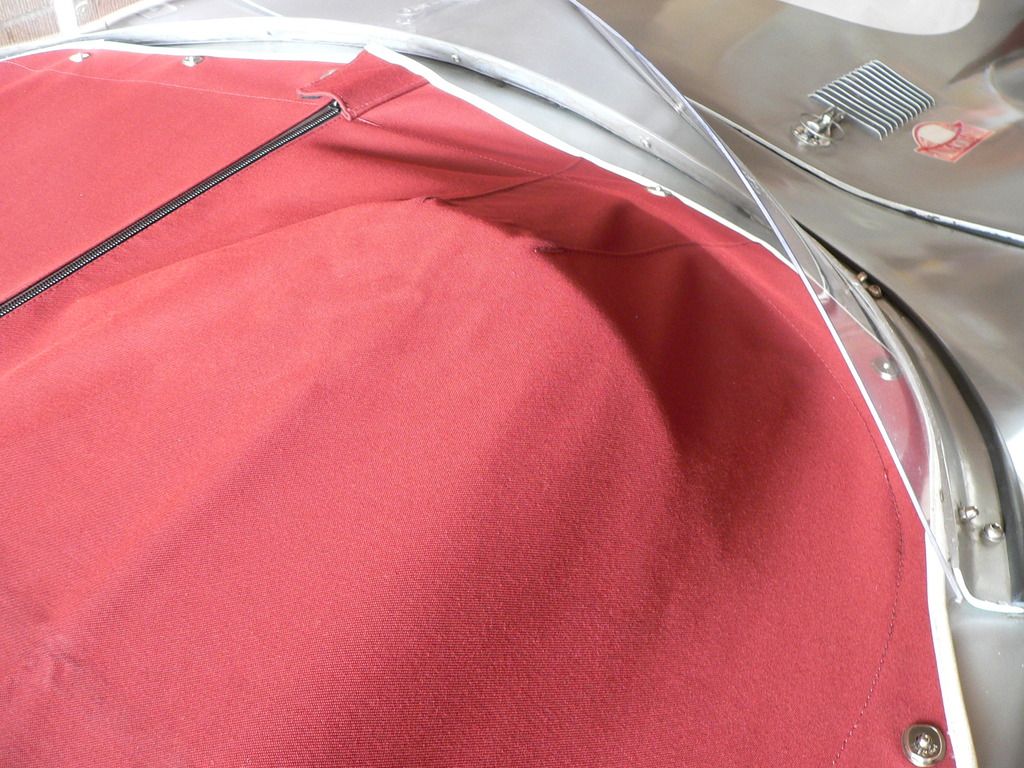
Today the tonneau cover fabric along with the fasteners arrived so after much thought on the best way to start i decided to mark out the area to use as a template.
IMG_6647.jpg
Masked off the edges.
IMG_6648.jpg
Made a small tool out of ally sheet to act as a guide marking out where the tonneaue cover edge will be, drilled a small hole in the guide tool for the pen nib to sit in then ran the tool around the cockpit edges to give an even overlap.
IMG_6650.jpg IMG_6651.jpg
Cut the template out of thick polythene by first rough cutting to shape then taping it to the body then cutting to the correct shape following the pen lines previously marked out on the masking tape. The center tape is where the join will be.
I did try to find a piece of clear poly sheet as it would of been much easier to see the pen lines through clear sheet rather than working in the dark with black poly sheet.
Next job is to cut and stitch the cover fabric followed by fitting the fixings to the shell.
|
26th April 2016, 20:38
|
|
Senior Member
|
|
Join Date: Jun 2015
Posts: 1,401
|
|
Fantastic!
|
27th April 2016, 06:09
|
 |
Senior Member
|
|
Join Date: Jul 2011
Posts: 5,328
|
|
So far so good. You're probably aware already, but I believe the way you tackle the centre zip is to fit the whole cover as one piece secured in place with all its fasteners, then cut down the centre and tack the zip in place with the cover fitted to the car still.
Keep up the good work!
|
27th April 2016, 06:52
|
|
Senior Member
|
|
Join Date: Feb 2012
Location: Wembley, London
Posts: 5,058
|
|
Swifty - Good luck with this, I'm looking forward to seeing how it turns out.
Like Mr T, I'm sure you have this all under control, but just a gentle reminder of one of his earlier posts on your thread…
Quote:
Originally Posted by Mister Towed

...There's a fillet let into the driver's side which creates a bulge for the steering wheel to sit in -
 |
It is not easy to tell with the black plastic, but your steering wheel appears to be "lifting" the cover in the middle.
Just a thought, Paul.
|
27th April 2016, 06:54
|
|
Senior Member
|
|
Join Date: Dec 2013
Posts: 839
|
|
Cheers Mr T good point on the center zip, i am going to make it as one first off and see how it rolls up in the center and if i can keep as one then thats the way ill go, only concern is how big the roll will be and if it fits between the dash and screen, then there's the storage in the car, will two rolls be easier to store than one large roll of cover.
|
27th April 2016, 07:02
|
|
Senior Member
|
|
Join Date: Dec 2013
Posts: 839
|
|
Cheers Paul we must of posted at the same time as i missed yours while answering MrT, my steering is removable for anti theft so car will be parked up minus steering wheel, the bump in the template is the dash eye brow which may or may not require a fillet sowing in which i will know once the fabric is roughly in position, my gut feeling is for it to look right a fillet will be required.
|
7th May 2016, 20:28
|
|
Senior Member
|
|
Join Date: Dec 2013
Posts: 839
|
|
Cars booked in for the decals to be fitted on Monday which will change the whole look.
Took the car into work yesterday parking it right out side of the building i work in which i must say was not for vanity reason's but because i still don't have a tonneau cover.
Through out the day it created a lot of attention from both young and old, a lot of the younger ones took pictures and # tagged it but overhaul the comments were very positive and to be quiet honest overwhelming, one guy asked what it was to which i said what do you think it is he thought it was an old race car from the higher end Italian breed that must have a value of at least 40k plus which stunned me, a lot made the comment on how they liked the body shape along with the interior and were amazed when i said it started off as a spitfire, then there was the petrol heads who loved the sound so all in all not much work done that day but a lot of happy faces.
Last edited by swifty; 7th May 2016 at 21:50..
|
7th May 2016, 20:55
|
|
Senior Member
|
|
Join Date: Feb 2012
Location: Wembley, London
Posts: 5,058
|
|
Looking forward to seeing what decals you have chosen and how it all looks.
I am sure there is not a single person who has read your build thread who is surprised by the positive reaction your car got.
You have, without question, one of the best built/engineered cars on here.
Although you still need to go to the back of the class for not taking any photos! 
Take care, Paul. |
|
Currently Active Users Viewing This Thread: 2 (0 members and 2 guests)
|
|
|
 Posting Rules
|
You may not post new threads
You may not post replies
You may not post attachments
You may not edit your posts
HTML code is Off
|
|
|
All times are GMT +0. The time now is 18:52.
|


 Linear Mode

