Are you madabout kit cars      
 "We've Got Kit Cars Covered" Information about Madabout-Kitcars.com Contact Madabout-Kitcars.com         Home of UK kit cars - madabout-kitcars.com Various kit car write ups All the latest kit car news Kit car related and general discussion

Search
Manufacturers
Kit Cars
Kit Car Data sheets
Picture Gallery
SVA Knowledgebase
Clubs & Communities
Build cost estimator
Kit cars for sale
Knowledge Base 
KitcarUSA.com
Classic-Kitcars.com
 

Go Back   Madabout Kitcars Forum > Mad Build Area > Tribute Automotive Builds

Tribute Automotive Builds Discuss your Tribute kit build

Reply
 
Thread Tools Display Modes
  #1  
Old 12th August 2015, 18:58
deggsy deggsy is offline
Senior Member
 
Join Date: Mar 2015
Posts: 395
deggsy is on a distinguished road
Default

Scottie I am fitting all stainless jubilee clips to mine much better also all non stressed bolts will be stainless
Reply With Quote
Available from eBay
  #2  
Old 12th August 2015, 19:21
Scottie22 Scottie22 is offline
Senior Member
 
Join Date: May 2013
Posts: 2,161
Scottie22 is on a distinguished road
Default

I agree Degs, I am doing the same. Most of the nuts and bolts on my car are all stainless, well worth the little bit extra I think.
Reply With Quote
  #3  
Old 12th August 2015, 21:05
deggsy deggsy is offline
Senior Member
 
Join Date: Mar 2015
Posts: 395
deggsy is on a distinguished road
Default

absolutely I am also planning on changing all brackets' heat shields and dust shields for stainless as well (as much shiny bling as possible)
Reply With Quote
  #4  
Old 21st August 2015, 10:53
deggsy deggsy is offline
Senior Member
 
Join Date: Mar 2015
Posts: 395
deggsy is on a distinguished road
Default

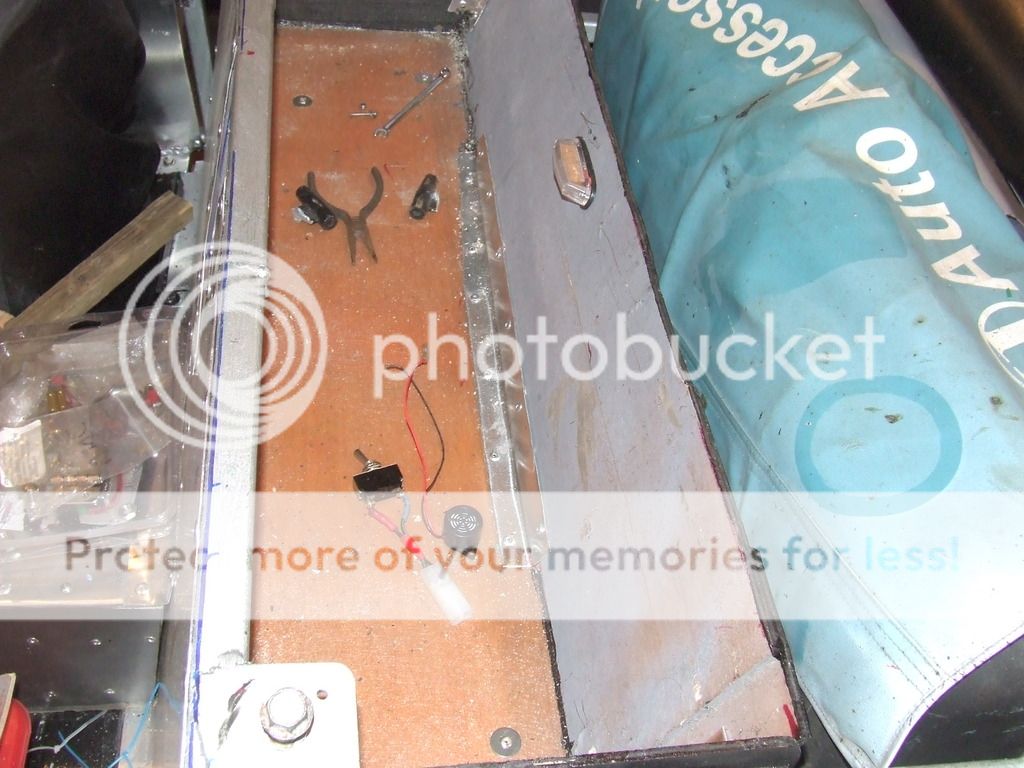
The boot box in front of the fuel tank is now done but I chickened out of cutting the boot support outriggers? but I have a devious plan where I cut them off and re weld them on at a new angle to support the boot and keep the DVLA happy.

[IMG][/IMG]

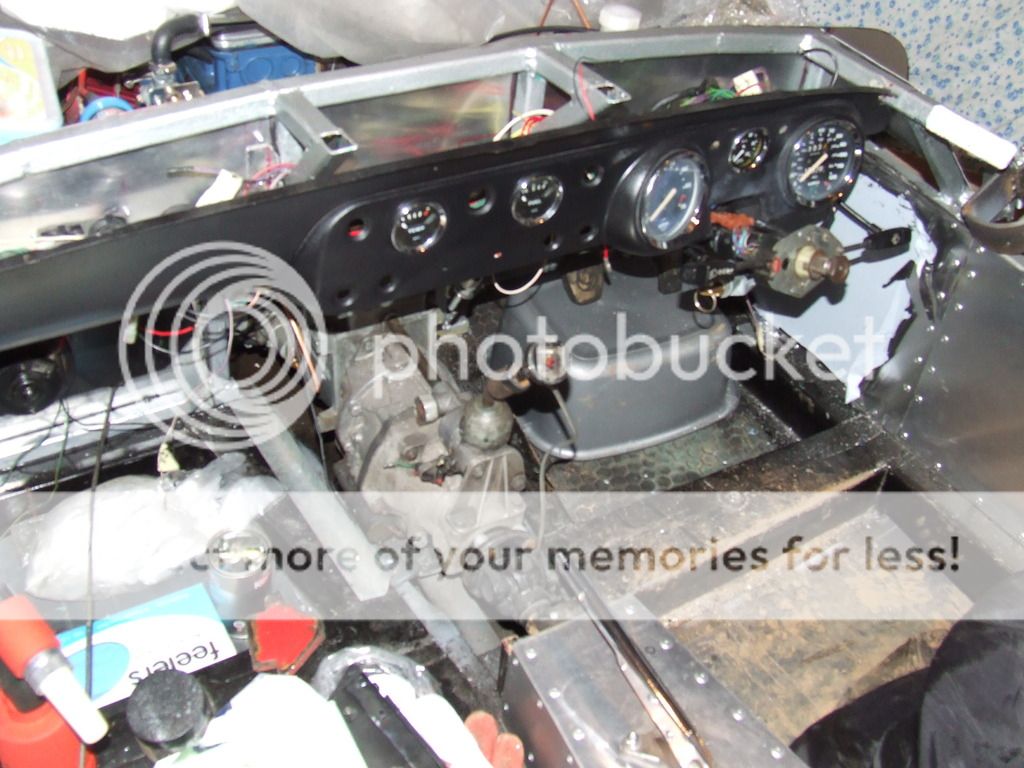
I would like to get the car running before the body goes on So I stared on the electrics I had to re-modify the modified dash. And fitted in place with a grate deal of very accurate guesswork

[IMG][/IMG]

[IMG][/IMG]

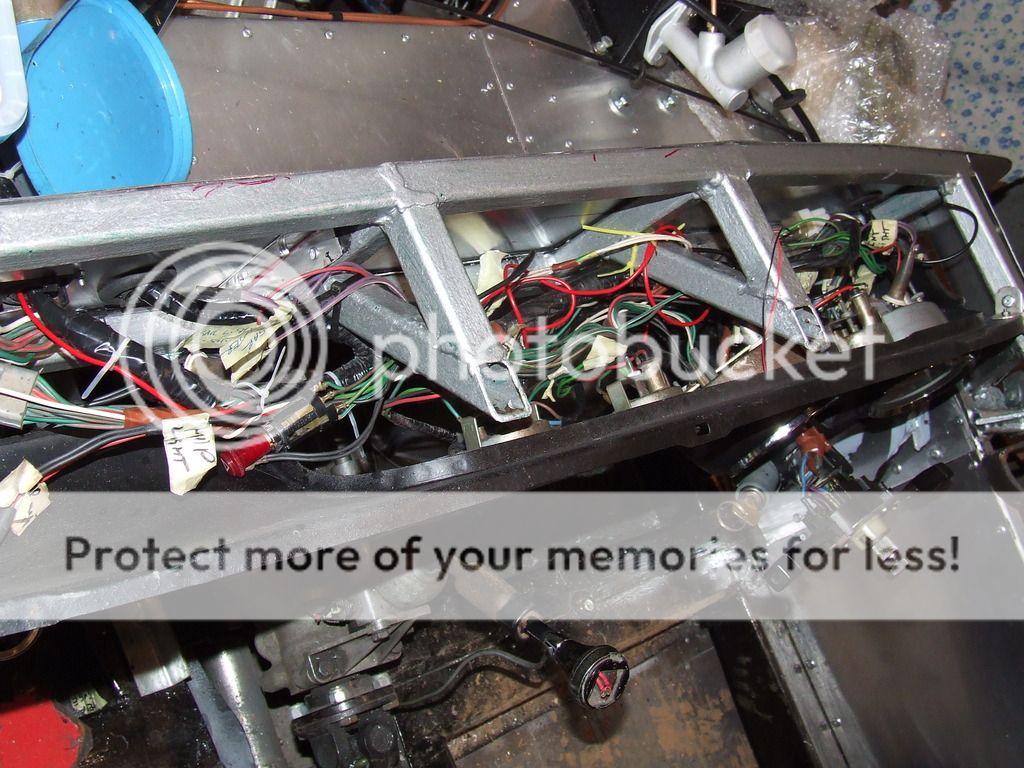
This makes the wiring behind the dash much easier to install as you can see.

[IMG][/IMG]

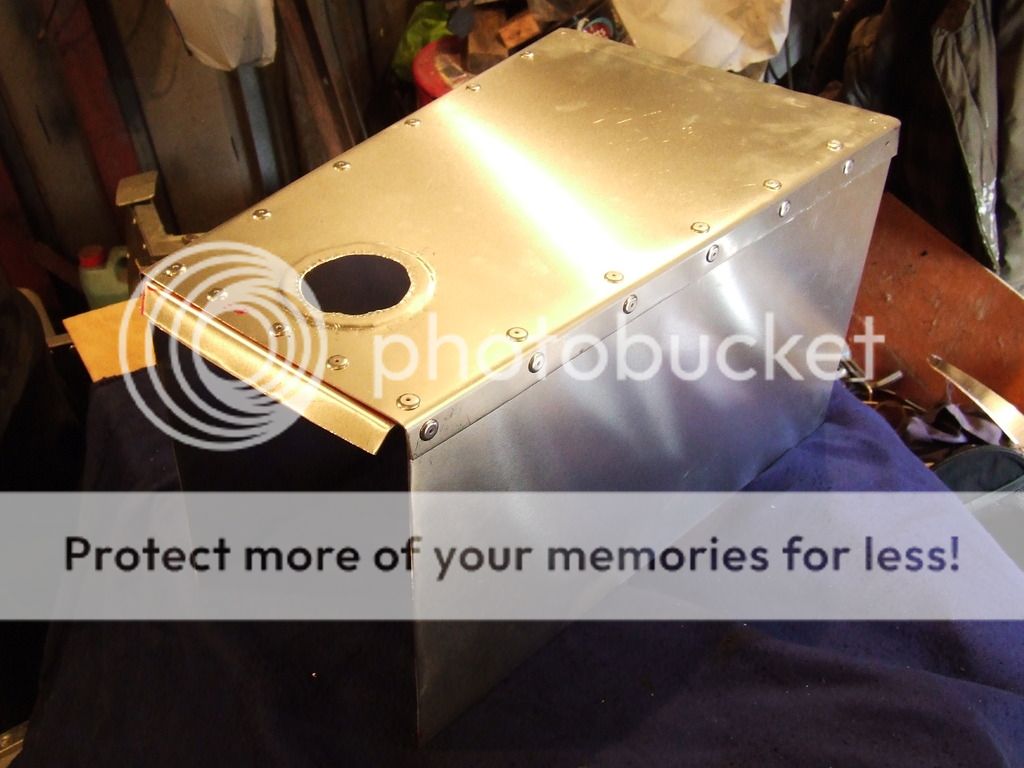
But I realise that the gear box cover will be very awkward to make/fit when the dash is fully installed so I have also made a start on that.

[IMG][/IMG]

I also worked out that the brake master cylinder will be too tall for the body so I have sent for a later tandem unit which will mean a little bit of re-pluming Doh
Reply With Quote
  #5  
Old 25th August 2015, 13:03
Scottie22 Scottie22 is offline
Senior Member
 
Join Date: May 2013
Posts: 2,161
Scottie22 is on a distinguished road
Default

All this pre-planning may be a pain Degsy, but well worth it in the end!
Reply With Quote
  #6  
Old 25th August 2015, 18:36
deggsy deggsy is offline
Senior Member
 
Join Date: Mar 2015
Posts: 395
deggsy is on a distinguished road
Default

yes I agree and to top it all my chepo ebay air riveter died on me yesterday after only about 150 rivets s#!t and b%%ger it I'll have to buy a decent one now!
Reply With Quote
  #7  
Old 31st August 2015, 16:30
deggsy deggsy is offline
Senior Member
 
Join Date: Mar 2015
Posts: 395
deggsy is on a distinguished road
Default

Not a lot happening I have been trying to sort out the wiring and cabling making holes for the grommets etc.
Then I decided to have a go at the boot supports and in the process tried to decapitate my left middle finger with my angle grinder luckily I failed but it looks as if I have been at it with a cheese grater so I have retired to my favourite chair and pain killers (vodka) hic
Reply With Quote
  #8  
Old 8th September 2015, 20:20
deggsy deggsy is offline
Senior Member
 
Join Date: Mar 2015
Posts: 395
deggsy is on a distinguished road
Default

Managed to get a bit more done this weekend I finally cut down the rear boot supports I have welded a blanking plate in with a nut on the inside so I can bolt or weld the supports back in place once the body is on.
[IMG][/IMG]

[IMG][/IMG]

I also remade the exhaust rear support hopefully the body should clear it ok!

[IMG][/IMG]

I am still playing with the electrics having problems with the overdrive and 2 speed heater wiring what wires I have are the wrong colour codes and I have 2 inhibitor switches on the gearbox all the diagrams show only one?????
Reply With Quote
  #9  
Old 15th September 2015, 08:22
Mick O'Malley Mick O'Malley is offline
Senior Member
 
Join Date: Nov 2012
Posts: 845
Mick O'Malley is on a distinguished road
Question Gearbox Switches

Quote:
Originally Posted by deggsy
I have 2 inhibitor switches on the gearbox all the diagrams show only one?????
I think one is for limiting overdrive selection to third and top, the other is the reversing light switch. Maybe.
Reply With Quote
  #10  
Old 15th September 2015, 16:10
deggsy deggsy is offline
Senior Member
 
Join Date: Mar 2015
Posts: 395
deggsy is on a distinguished road
Default

Thanks Mick I wish it was that simple as you can see from the photos below (just) there is a inhibitor switch in front of the gearstick the reverse light switch is just behind the gearstick (two wires going to it) at the front on the top of the gearbox there is another inhibitor switch? this is where the selectors should be so I have wired up to that one.
[IMG][/IMG]
[IMG][/IMG]
It may or may not be right I'll find out the first time I drive it?

today I installed the bottom fillets to the frame these will be sealed with P.U. adhesive once the body is on
[LMG][/IMG]
Reply With Quote
  #11  
Old 16th September 2015, 16:42
deggsy deggsy is offline
Senior Member
 
Join Date: Mar 2015
Posts: 395
deggsy is on a distinguished road
Default

T checked them today and you're right the one by the gearbox would have power going through it in all gears the one at the front only in 3rd and top so hopefully that should do the trick
Reply With Quote
  #12  
Old 17th September 2015, 21:03
deggsy deggsy is offline
Senior Member
 
Join Date: Mar 2015
Posts: 395
deggsy is on a distinguished road
Default

I bled the clutch today it wont work? it's all new but won't disengage $#it
Reply With Quote
  #13  
Old 18th September 2015, 13:48
Scottie22 Scottie22 is offline
Senior Member
 
Join Date: May 2013
Posts: 2,161
Scottie22 is on a distinguished road
Default

The trials and tribulations of kit car ownership keep up the good work you'll get there in the end.

Now where have I heard that before........... :-)
Reply With Quote
  #14  
Old 18th September 2015, 17:12
deggsy deggsy is offline
Senior Member
 
Join Date: Mar 2015
Posts: 395
deggsy is on a distinguished road
Default

hmmmm I wonder who that was hoo!
Reply With Quote
  #15  
Old 22nd September 2015, 19:07
deggsy deggsy is offline
Senior Member
 
Join Date: Mar 2015
Posts: 395
deggsy is on a distinguished road
Default

Well I still can't get the clutch to disengage so I'll have to take it out but I have to do it the hard way as the bell housing won't go back past the new frame! engine out bl@@dy ell
Reply With Quote
  #16  
Old 22nd September 2015, 19:59
IanA's Avatar
IanA IanA is offline
Senior Member
 
Join Date: May 2014
Location: Oxon
Posts: 1,124
IanA is on a distinguished road
Default

Quote:
Originally Posted by deggsy View Post
Well I still can't get the clutch to disengage so I'll have to take it out but I have to do it the hard way as the bell housing won't go back past the new frame! engine out bl@@dy ell
Been there. I rebuilt a Lotus Seven Series 1 with a Ford crossflow engine and gearbox. The clutch hydraulics were working- the slave arm was moving the right amount but not disengaging. Turns out the D-spacer between the arm and the thrust bearing carrier had come adrift.
Reply With Quote
  #17  
Old 23rd September 2015, 05:54
Mick O'Malley Mick O'Malley is offline
Senior Member
 
Join Date: Nov 2012
Posts: 845
Mick O'Malley is on a distinguished road
Lightbulb

Quote:
Originally Posted by deggsy
Well I still can't get the clutch to disengage so I'll have to take it out but I have to do it the hard way as the bell housing won't go back past the new frame! engine out bl@@dy ell
If it's some time since it was fitted, it's more than likely that the driven plate is stuck to the flywheel. Wedge the pedal down with a long stick (in neutral!) and leave the beast ticking over. Once the heat gets to the flywheel it'll free itself. Maybe.

Regards, Mick
Reply With Quote
  #18  
Old 22nd September 2015, 21:06
deggsy deggsy is offline
Senior Member
 
Join Date: Mar 2015
Posts: 395
deggsy is on a distinguished road
Default

probably something similar going on here I've got pressure and the lever arm is moving but nothing happens???????
Reply With Quote
  #19  
Old 23rd September 2015, 08:02
Alpha Alpha is offline
Senior Member
 
Join Date: Jul 2011
Location: Belgium
Posts: 103
Alpha is on a distinguished road
Default

Though it may sound painfull, one trick is to let the car warm up, as Mick said above, and then just slam the gear lever into third - that got the clutch freed on my Triumph GT6 after it had been standing for a year and a half.
Reply With Quote
  #20  
Old 23rd September 2015, 09:12
IanA's Avatar
IanA IanA is offline
Senior Member
 
Join Date: May 2014
Location: Oxon
Posts: 1,124
IanA is on a distinguished road
Default

Quote:
Originally Posted by Alpha View Post
Though it may sound painfull, one trick is to let the car warm up, as Mick said above, and then just slam the gear lever into third - that got the clutch freed on my Triumph GT6 after it had been standing for a year and a half.
My suggestion- at your own risk of course- is to warm the engine in neutral then restart it in 1st gear. With the car idling down the road- stamp on the clutch and brake pedals simultaneously. Does need the space to do it though.
Reply With Quote
Reply


Currently Active Users Viewing This Thread: 1 (0 members and 1 guests)
 

Posting Rules
You may not post new threads
You may not post replies
You may not post attachments
You may not edit your posts

BB code is On
Smilies are On
[IMG] code is On
HTML code is Off

Forum Jump


All times are GMT +0. The time now is 02:24.

copyright © madabout-kitcars.com 2000-2024
terms and conditions | privacy policy