|
|
| Tribute Automotive Builds Discuss your Tribute kit build |

19th November 2015, 20:46
|
|
Senior Member
|
|
Join Date: Nov 2015
Posts: 278
|
|
Whereabouts in the Midlands are you? I'm thinking of buying a kit, and would like to see one in the flesh
|
20th November 2015, 18:22
|
 |
Senior Member
|
|
Join Date: Feb 2012
Location: Wembley, London
Posts: 5,058
|
|
Jones - Great news on the shed/garage. 
It got very cold this afternoon & I hear the weekend will be worse.
Good luck, Paul. 
|
18th December 2015, 19:14
|
|
Senior Member
|
|
Join Date: Apr 2014
Location: Midlands
Posts: 405
|
|

Thanks PAUL
Not much to report of late, although the shed was quite an ordeal, living on what is the worst clay ground I have had the pleasure of digging and living on ground that is quite a nice gradient meant some good exercise shifting dirt to get a level platform to lay the slabs. Eventually by last weekend the shed was up and water tight - this is 8'x6'.
With shed built great enthusiasm ensued and 3 trips to the tip and a now very full garden shed there appeared to be enough space for the car. I removed the cover one last time jumped the car and drove it in... as I got it close to the workbench along the back wall I slowed to a crawl until a carefully place sheet of cardboard moved signally me to hit the brakes. there I was sat there in the car all smiles thinking this is the corner that now the project will turn into high gear went to open the door -  barely enough space for me to even get out. not to worry I thought I can make do. moved round to the rear and I was still too far out for the door to close! This car is much longer than it looks and wider, I had the donor in the garage when I first got it and thought there would be a luxurious amount of space, how wrong can one man be!?!? 
This weekend - more trips to the tip and will dismantle the work bench for now and see if that solves the problem. If it does I will build a folding bench. Fingers crossed I can crack on a bit, the immediate to do list:
- I need to drain the coolant and fit some new pipes and a new radiator
- bond new inner boot skin to outer whilst mounting the shortened boot hinges
- be brave and cut the bonnet hinges mount to inner bonnet skin and bond the two layers together when happy
- Bond the rear clam to body
- rub, fill, sand and repeat process for a few hundred hours until happy
- fabricate exhaust (never done this before but hey why not give it a try?)
- welcome the first day of spring by taking to MOT centre for its first MOT since it came off the road in November 2014
- drive it for a bit and smile
- PAINT
- complete interior touches
- DONE
Last edited by jones; 28th March 2016 at 22:25..
|
22nd December 2015, 15:58
|
|
Senior Member
|
|
Join Date: Feb 2012
Location: Wembley, London
Posts: 5,058
|
|
Jones- Sorry, I seemed to have missed the news that your car doesn't fit in your garage. 
I also know what a pain it is to work with heavy clay, this was the mess I was in building my Summer House base. 

Good luck, Paul.
|
6th February 2016, 18:20
|
|
Senior Member
|
|
Join Date: Apr 2014
Location: Midlands
Posts: 405
|
|
So I thought the thread might be overdue an update, so here it is.
Since Christmas I have managed to grab very little spare time but managed to fit the new radiator and hoses. At the same time I managed to fit the outstanding front lowering springs too.
Today I managed a few hours and it was final mock up of the rear for marking out the holes to be drilled for rivets and self tapping bolts. Then proceeded to strip the rear lights out and then whilst I had good access did a fiddly job I didn't fancy doing once the long overdue bonding has been completed, that was to trim the boot lip for the seal to sit nice and snug.
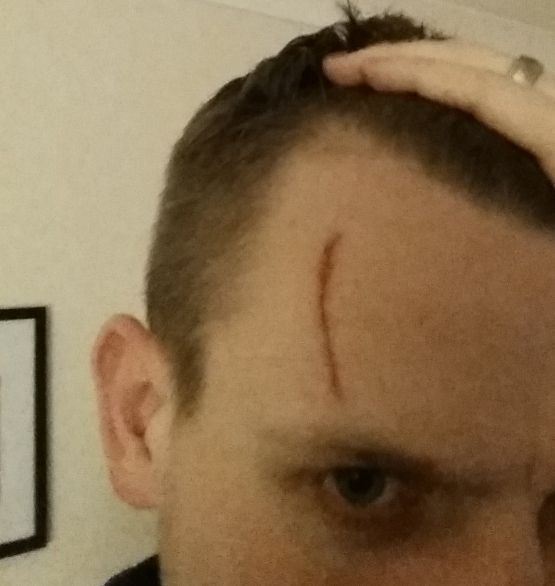
No pictures of the afternoons antics other than the first kit car based wound... Well I know compared to others on this forum it's not major plus scars add character apparently.
Last edited by jones; 28th March 2016 at 22:26..
|
6th February 2016, 19:00
|
 |
Senior Member
|
|
Join Date: Apr 2013
Location: Swansea
Posts: 803
|
|
Good effort. What happened?
|
7th February 2016, 08:35
|
 |
Senior Member
|
|
Join Date: Oct 2010
Posts: 1,622
|
|
My guess is that a cutting disc on your grinder shattered? Or was is a kit car related knife fight with the wife?
|
7th February 2016, 09:24
|
|
Senior Member
|
|
Join Date: Apr 2014
Location: Midlands
Posts: 405
|
|
If only it was that exciting Chris! I was on my back doing up the rear wheel arch body kit bolts in my micro machine sized garage when the fibreglass headlining decided that leaning upright was not it favoured position. Instead it was on the express route of joining me on the floor via a pit stop visit to my head.
|
7th February 2016, 09:35
|
|
Senior Member
|
|
Join Date: Nov 2015
Posts: 278
|
|
On the flipside, you now look like geralt of rivea (well a bit)
|
7th February 2016, 10:34
|
 |
Senior Member
|
|
Join Date: Jul 2011
Posts: 5,328
|
|

Battle wound? No, actually a bit of fibreglass kit car trim fell on me, but I don't like to talk about it... |
7th February 2016, 10:38
|
|
Senior Member
|
|
Join Date: Nov 2015
Posts: 278
|
|
Lol awesome, I wasn't sure if anyone would get the reference....
|
7th February 2016, 16:22
|
|
Senior Member
|
|
Join Date: Jul 2011
Posts: 5,328
|
|
Quote:
Originally Posted by mazdarazmataz

Lol awesome, I wasn't sure if anyone would get the reference....
|
I had to Google it as I'm far too old for computer games.  |
7th February 2016, 16:24
|
|
Senior Member
|
|
Join Date: Nov 2015
Posts: 278
|
|
Never too old for computer games! My 73 yo mum plays them!
|
13th February 2016, 13:31
|
|
Senior Member
|
|
Join Date: Apr 2014
Location: Midlands
Posts: 405
|
|
Haha as I can't carry off that look I have aided best I can the healing process to minimise scaring. Timing couldn't have been worse as the beginning of next week I have some critical presentations to potential clients in the conservative world of financial services consulting. Ah well
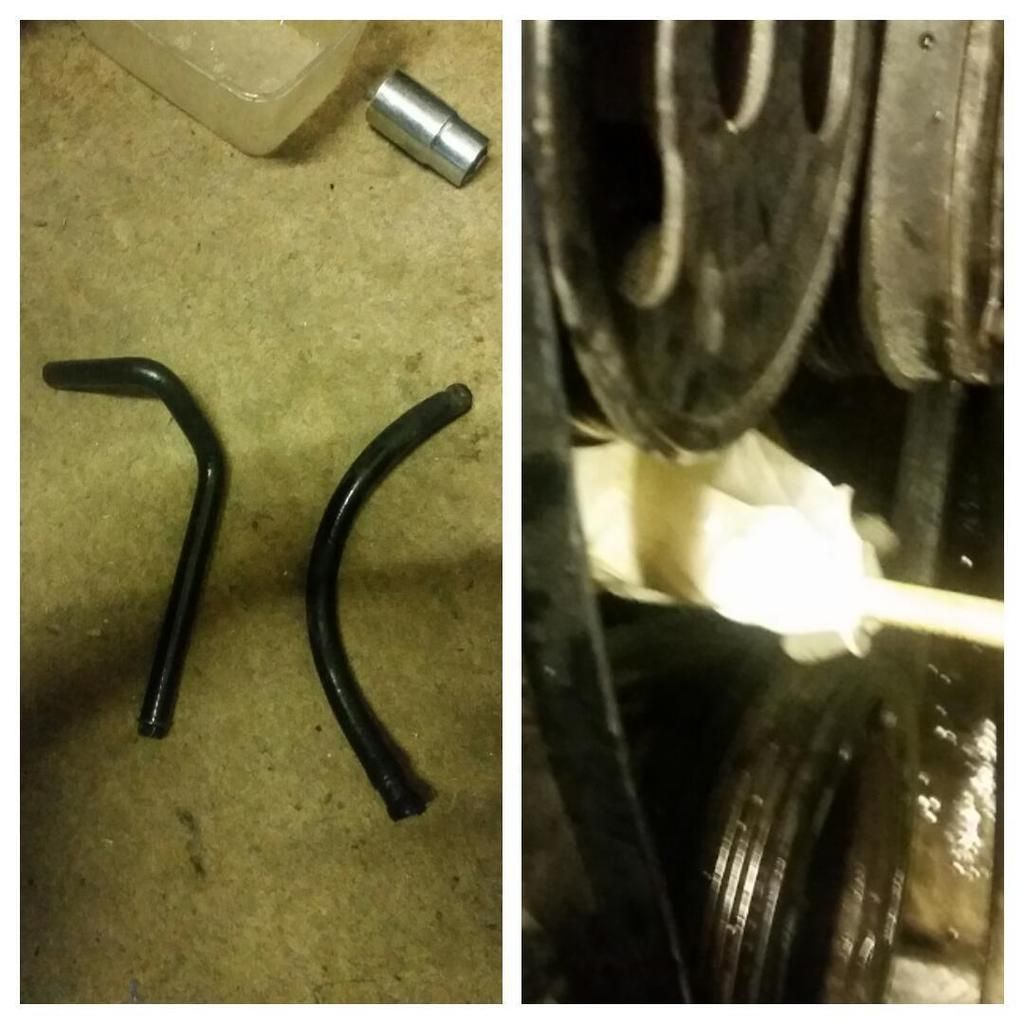
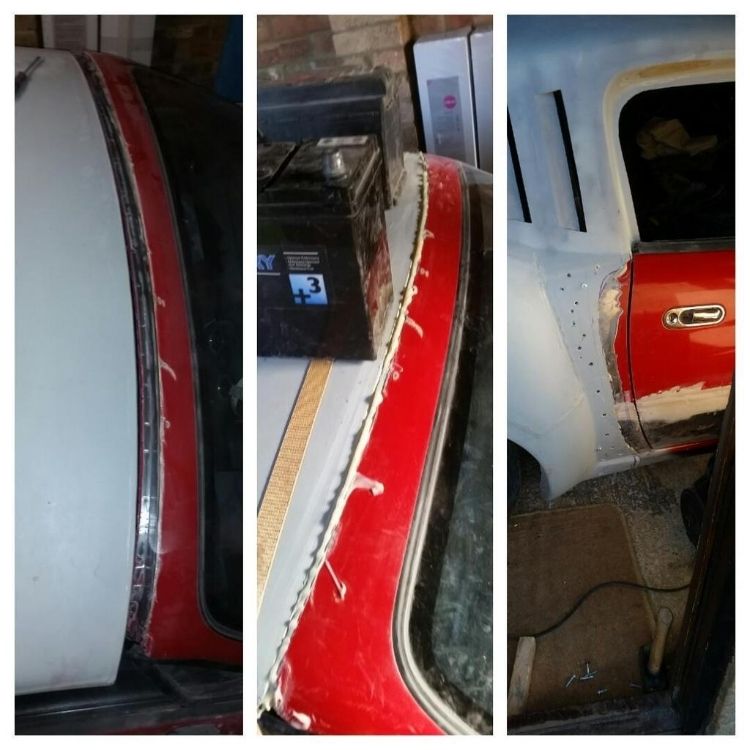
So unfortunately whilst changing the belts there was a hose that didn't look quite right upon further inspection I noticed it also was rubbing against a belt. As I investigated further there was a small 'ting' noise as it popped off and with it the metal pipe it was attached to. Followed by a gushing of fresh coolant across the cramped garage floor! Needless to say some choice language ensued.
Once I had stopped the cars bleeding I was able to look in more detail, some muppet had fudged a repair and rather than replacing the bypass pipe and inlet pipe when it had broken originally they used a thick fuel pipe and forced it onto the remains of the mounting on the unit. It had corroded through. So a week shopping about I have bought the correct new parts and when this unexpected hangover finally subsides I will fix the unit and top again with new coolant. Just annoying that I have to replace the coolant that is only 7 days old! Things brake and on a car that is over 25 years old it's part of the course just wish it had happened when I was replacing the radiator and hoses and thus coolant-less.
No pictures as of yet but if I remember I will take some and retrospectively post some.
Have a good weekend all
Added picture - as you see a bit of difference from the new one on the left and the any bit will do piece on the right. The right picture was my quick bodge of how to plug the leak with anything in arms reach, as you can see a pencil and a latex glove.
Last edited by jones; 28th March 2016 at 22:43..
Reason: Typo
|
12th March 2016, 20:44
|
|
Senior Member
|
|
Join Date: Apr 2014
Location: Midlands
Posts: 405
|
|
Sooooo firstly ashamedly I have failed yet again to take pictures, my phone and tablet had both died but having spent the morning sorting out the first mow of the lawn this year and servicing the mower I pressed on to the reward... working on the car.
I was determined to get the boot finally sorted and I can say that today I am pleased to say I have completed the task! So very pleased, I have created a KISS solution for the hinges but they are just as a mock up the final ones will be much smarter and welded. I am determined to get this on the road by Stoneleigh and I will tweak everything once it's on the road.
I'll post pictures tomorrow...
Picture added not quite tomorrow as promised but a few weeks later, appears I didn't take many photos. The reason for the ballast is I had bonded the inner skin to the boot lid to give back the subtle curve.

Last edited by jones; 28th March 2016 at 22:47..
|
26th March 2016, 13:58
|
|
Senior Member
|
|
Join Date: Apr 2014
Location: Midlands
Posts: 405
|
|
My wife is up north today (Saturday) so I have decided despite the weather I will try and get some work done on the car.
The first job was to get the car turned around and top off, for today is about the rusty sill repair. That done got the car in at an angle to give me as much rear room as possible - the joke is some plum in his haste removed the wing mirrors! Luckily no mishaps 😃
So to work I want grinding the paint back to see how far the rot went, this was a nice surprise a) turns out it's an original panel b) the panel was actually not bad and the rot was on the outside panel with just surface rust on the structural inner panel. I drilled out the spot welds, then cut the rusty panel out. Next I cleaned the surface rust off slapped on some Kurust and made a quick trip to halfords for some zinc primer to stop the rust coming back and some weld through primer.
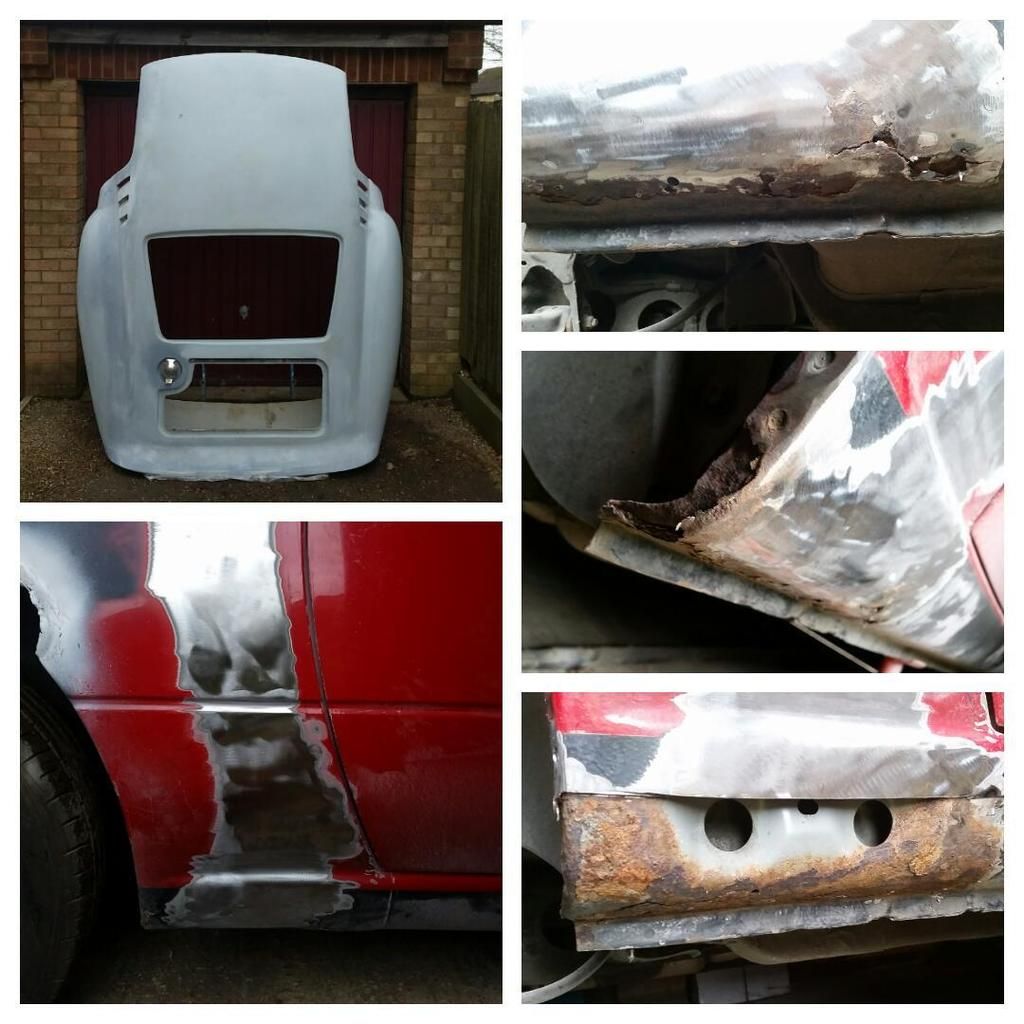
So first I taped off the area that I will be welding too, sprayed the remainder with the zinc primer in thick coats. Removed the tape and sprayed that area with the weld through primer. Next I got the new panel and started to drill the new spot weld holes.

Now was the time for a break, next up cutting the panel for a snug fit and then weld up the new panel... end of part 1 and time for lunch and a good cuppa
Last edited by jones; 26th March 2016 at 18:13..
|
26th March 2016, 21:58
|
|
Senior Member
|
|
Join Date: Apr 2014
Location: Midlands
Posts: 405
|
|
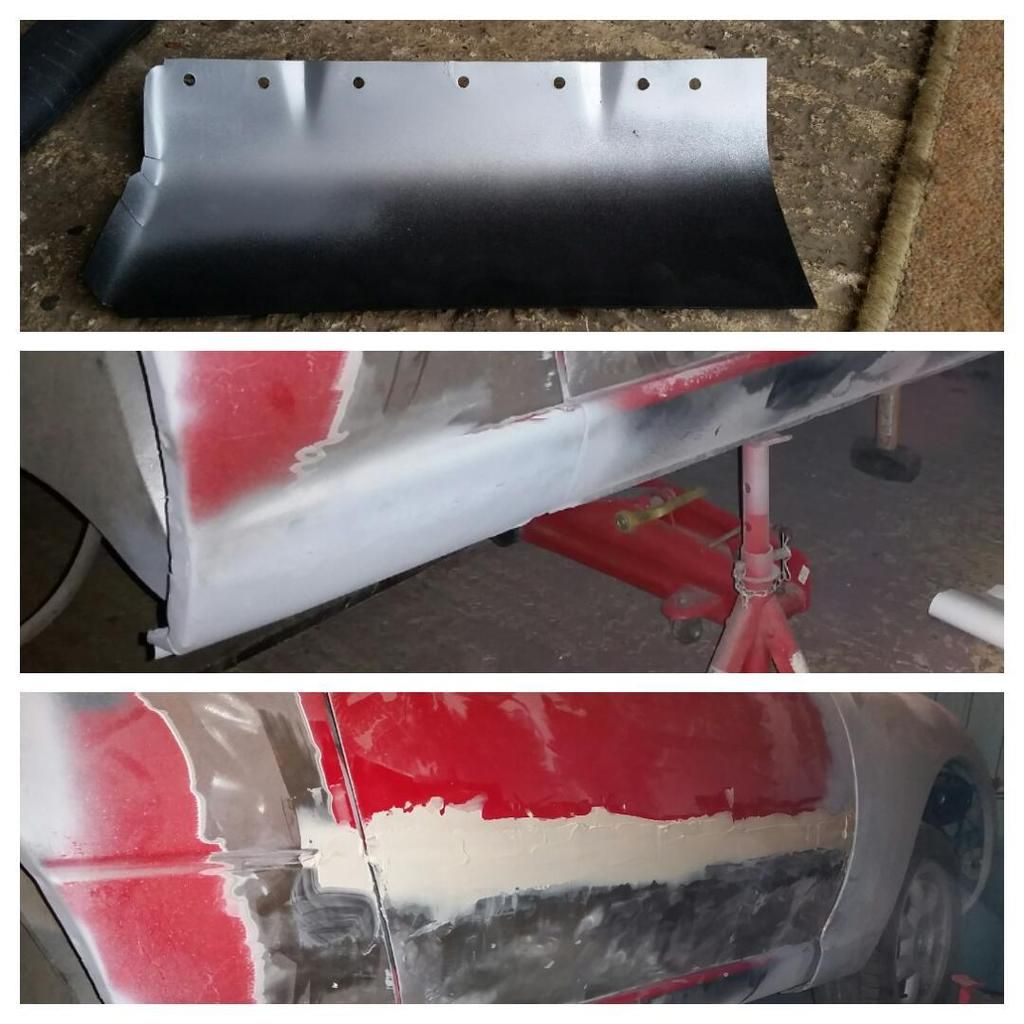
Part 2 - Slow & Steady
Our ventured back outside to tackle the next steps, I spent my time trimming and offering up and then re trimming etc. I remembered something that I had heard before, it's easy to trim a bit off but very difficult to add a bit back on. Eventually I was happy and I was ready to apply my novice welding skills to the challenge. I went with lots and lots of butt welds along the top and good solid plug welds along the bottom and down the sides. It's not perfect but that's okay as it's no longer going to be on show but if it had a been a quick skim of filler would have sorted it I guess.
Next jobs completed were welding up the old wing mirror mounting holes in the door and a skim of filler. Following that the dreaded task of removing the lower door rubberised stone chip protection. Once complete I did the first round of filling in the swage line, once completed I decided to down tools for the evening wanted to watch the footy and glad I did! A great England comeback in the 2nd half.
Well that's it for now, got some house DIY to complete too this weekend so not sure if I'll be able to get back out there again.
Next job to tick off is the final bonding! Finally!
Last edited by jones; 28th March 2016 at 00:08..
|
27th March 2016, 06:27
|
|
Senior Member
|
|
Join Date: Feb 2012
Location: Wembley, London
Posts: 5,058
|
|
Jones - Good to see you were able to do your own welding repairs.
Good luck with the bonding, Paul.
|
28th March 2016, 17:37
|
|
Senior Member
|
|
Join Date: Apr 2014
Location: Midlands
Posts: 405
|
|
So today is the day...
...well I only bl**do gone and done it!
Thanks Paul I needed that for today.
Yep that's right I bit the bullet and bonded it all together. Now for those experienced of you will say so what? Truth be told I had been putting it off and putting it off. There was a huge sense of no turning back and I kept wondering if that's right and this has been going on for a while. Yesterday I did a dry run through but it did not prepare me for just how rapid the epoxy went off. Some might recall that I had purchased some different bonding epoxy than that was supplied by Tribute. A superior product? yes. A ridiculously quick setting time... ummm yeah. I was lucky I had planned to do the two sides separately otherwise it would had been crazy!
Not much camera action today so this all I got, I had already started removing the tec screws in case you think I had gone crazy with the drill.
Last edited by jones; 28th March 2016 at 18:08..
|
28th March 2016, 18:12
|
|
Senior Member
|
|
Join Date: May 2013
Posts: 748
|
|
That's a good start
|
|
Currently Active Users Viewing This Thread: 1 (0 members and 1 guests)
|
|
|
 Posting Rules
|
You may not post new threads
You may not post replies
You may not post attachments
You may not edit your posts
HTML code is Off
|
|
|
All times are GMT +0. The time now is 04:01.
|


 Linear Mode

