|
|
| Sammio Builds and discussions Sammio bodied car builds and specials |

9th June 2019, 14:50
|
|
Senior Member
|
|
Join Date: Mar 2017
Posts: 127
|
|
Looking at all that dirt in the filter, I would flush out the line back to the tank.
Did you flush & reseal the tank during the build-up?
|
9th June 2019, 16:18
|
 |
Senior Member
Enthusiast
|
|
Join Date: Dec 2006
Posts: 1,130
|
|
Hi Paul, fuel should not just sit in the delivery line, it should syphon out as the feed from in top of the fuel tank is higher.
Because there is fuel sitting in the delivery line I would check the connecting pipe between the petrol tank outlet and the delivery line.
If air is getting into the line it would explain the lack of a syphon and the pumps inability to pump.
From what you say it sound like you started and moved your car on what fuel was left in the carburettors float bowls.
|
10th June 2019, 19:07
|
|
Member
|
|
Join Date: May 2015
Posts: 71
|
|
 fuel
fuel
I have a back up pump in the line ( facet) I use it when the car has been stood, a good move i think Ac used to do the same, befor I had it I would crank the car for ages to get action, a papal of mine gave me an old glass bowl filter and I canged several timems after the car was first on the rooad, got loads of crud out of the system, good filter is a must,
|
11th June 2019, 08:38
|
 |
Senior Member
|
|
Join Date: Feb 2012
Location: Wembley, London
Posts: 5,058
|
|
Thanks for the replies gentlemen. 
Colin - The tank was rinsed out, but not resealed, which (with hindsight) may have been an error.
Mike - I will have a looks at the fuel line from the tank when I get the chance.
Wharfdale - Due you have any more details about your extra pump?
( Like where is located, how is it wired up, etc. )
Cheers, Paul.  |
25th June 2019, 08:41
|
|
Senior Member
|
|
Join Date: Mar 2012
Posts: 1,152
|
|
Nice one, Paul. What is that finish called?
|
25th June 2019, 09:12
|
|
Member
|
|
Join Date: Jul 2016
Location: San Diego, California
Posts: 36
|
|
Those look really good, can't wait to see them fitted
|
25th June 2019, 20:50
|
|
Senior Member
|
|
Join Date: Feb 2012
Location: Wembley, London
Posts: 5,058
|
|
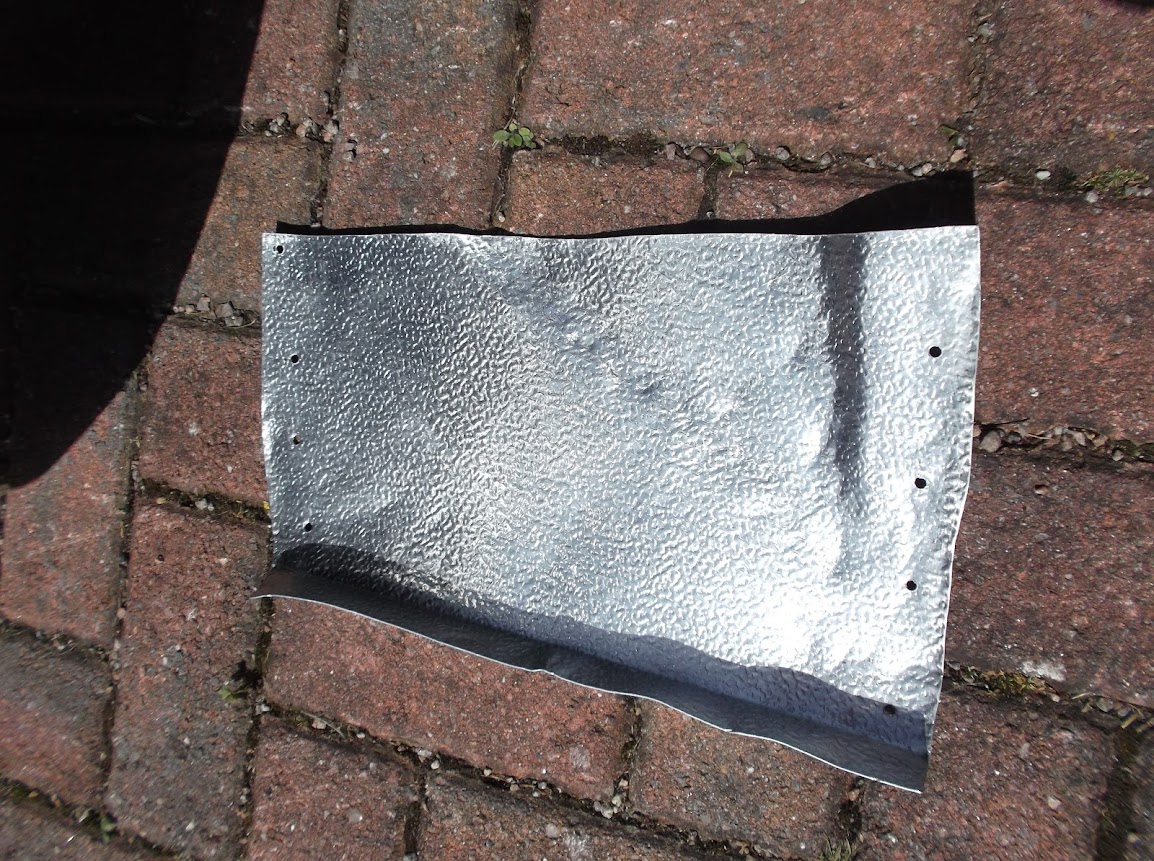
Oxford - The finish is called 'stucco' and these were left over sections from a building site.
( Think the air conditioning ducting that Bruce Willis always seems to find himself in.  )
My hope was that this surface would 'absorb' the lumps in the cockpit walls better than milled alloy.
Check the post below to see if you think this has worked in practise.
- - - - - - - - - - - - - - - - - - - - - - - - - - - - - - -
Piguin - Cheers and I was able to take a big step towards getting these panels installed today.
- - - - - - - - - - - - - - - - - - - - - - - - - - - - - - -
Tuesday
Confession time…
The back of the cockpit wall has a small unfinished section, see the grey strip in this photo.

This is because when the car was in primer, I was planning to paint this section BRG.
But when I started painting, I realised it should be part of the cockpit walls and be painted black.
Unfortunately, by this time, the seats were fitted and I didn't want to remove them to get some black paint on.
( As fitting them almost broke me at the time.  )
So I need to touch up the black paint (Tetroseal) before the panels are fitted.
However in the meantime, I make a start on fitting and shaping the rear panel.
This involved testing/marking/trimming/hammering/etc.
Here is the work in progress along the top edge of this panel.
Which will tuck in under the painted edge of the cockpit.
( This photo is from the passenger side. )

Obviously, I can't get a tight fit until the panels are screwed into place, but this gives you the general idea.
Hopefully, the black Spitfire edge at the bottom of the rear cockpit wall matches the start of the Spitfire bulkhead at the front.

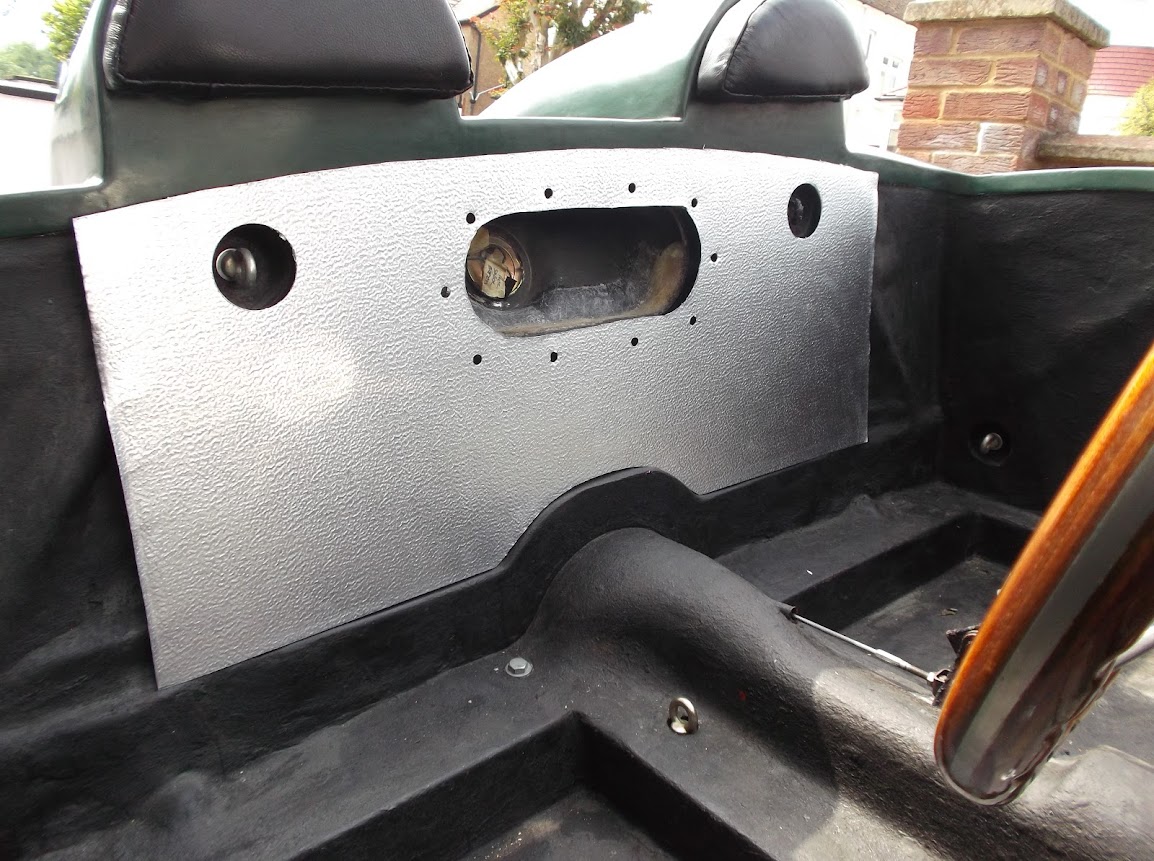
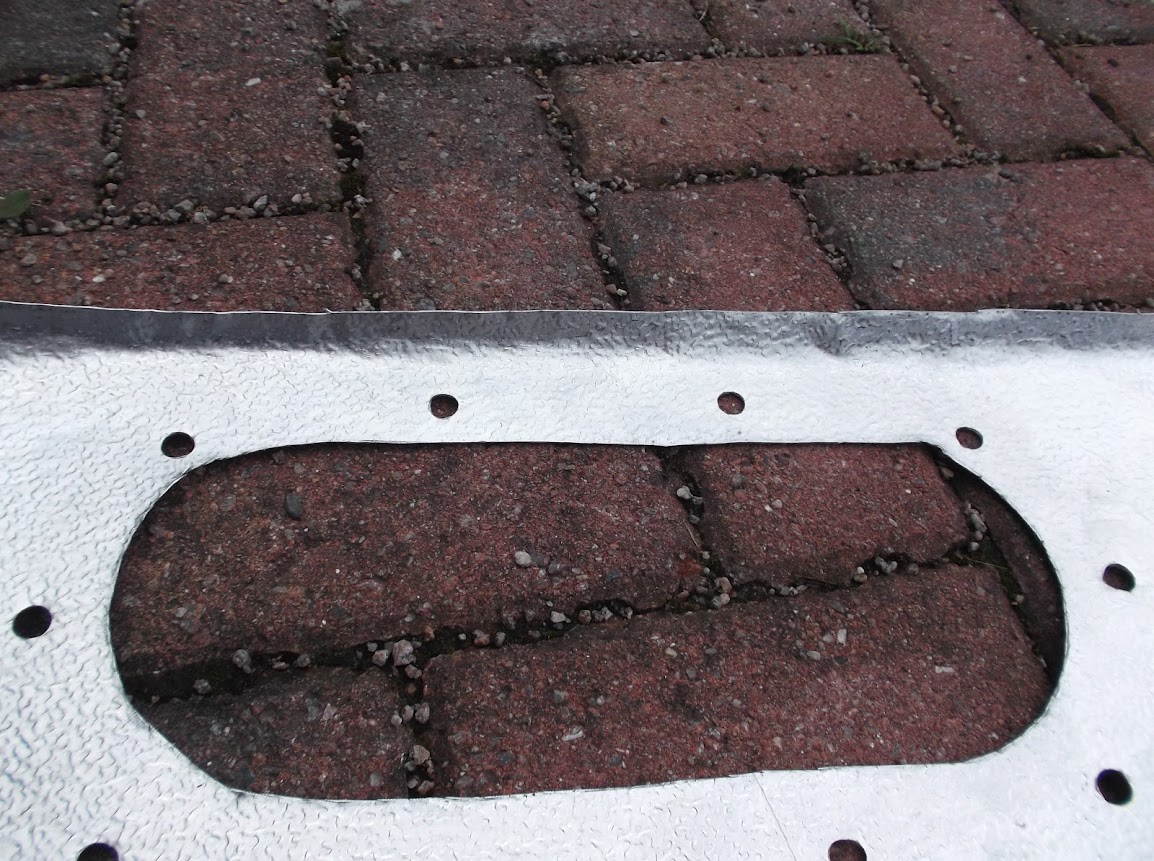
Note: I still need to make access panels for the side mirror bolts.
These two photo show the lumpy nature of the rear cockpit walls.


And this gives you an idea of the alloy trimming required.
The next step for these panels is to tidy up all the edges, but that is a job for another day.
So until next time, take care, Paul.

|
25th June 2019, 21:40
|
|
Senior Member
|
|
Join Date: Jun 2015
Posts: 1,401
|
|
Looking good Paul, will you paint these panels?
|
26th June 2019, 07:35
|
|
Senior Member
|
|
Join Date: Feb 2012
Location: Wembley, London
Posts: 5,058
|
|
Molleur - The plan is to leave the alloy panels as they are.
But I may add some of the 'sponsor' stickers I didn't add to the outside of the car.
( Assuming they stick to the stucco surface. )
Cheers, Paul.
|
26th June 2019, 08:46
|
|
Senior Member
|
|
Join Date: Jun 2015
Posts: 1,401
|
|
Quote:
Originally Posted by Paul L

Molleur - The plan is to leave the alloy panels as they are.
But I may add some of the 'sponsor' stickers I didn't add to the outside of the car.
( Assuming they stick to the stucco surface. )
Cheers, Paul.
|
That will look good, so with the stickers. |
26th June 2019, 20:48
|
|
Senior Member
|
|
Join Date: Feb 2012
Location: Wembley, London
Posts: 5,058
|
|
Molleur - Cheers.
- - - - - - - - - - - - - - - - - - - - - - - - - - - - - - -
Wednesday - Part 1
The two parcels that arrived in the the post lead to a slight change in plans…


But before I tried to fix my fuel line problem once and for all, I did a bit of painting.
I started by masking off the BRG edge of the rear cockpit wall.

Before slapping on some Tetroseal.

I also covered the fibreglass between the cockpit wall and the petrol tank.

I then removed the masking tape to let the Tetroseal dry.

Note:
Most of this will be covered by the alloy panel, but any gaps at the edges will now look black rather than grey.
Then I started replacing the rubber fuel lines in the engine bay.
This is the new hose from the fuel pump to the carb.

The new hose was longer than the one I replaced to allow a better routing.
I also split the old hose to cover the braided oil line to prevent any potential rubbing.
Two new sections of hose connected the fuel filter to the hard line.

So far, so good.
End of Part 1…
|
26th June 2019, 20:48
|
|
Senior Member
|
|
Join Date: Feb 2012
Location: Wembley, London
Posts: 5,058
|
|
Wednesday - Part 2:
For the new copper fuel line I had to use my cheap and cheerful pipe bender.

I then cut the old fuel line a bit further back to mock up the position of the new.
( As I wanted the end of the new pipe to be held by the P-Clip. )

At this point the rest of the pipe was just sticking up in the air.

After some more pipe bending, it was time to cut it to length.

Then I could fix it all into place, with just a very short rubber hose join.

Followed by a nice curve up into the boot floor.

To another P-Clip inside the boot.

Before cutting the new rubber hose (also seen above) to the right length.

Note:
The rubber hose is zip tipped to the framework, but I couldn't get a decent photo.
Then it was the moment of truth as I tried to start the engine.
The good news is that is fired up and ran without any problems.
So this photo is just like the last one except there is no petrol can in the shot.

Obviously, I couldn't take the car out for a test ride as there are no seats in it.
I also remembered that I need to make the alloy access panels for the side mirrors before I fit the panels.
As I need to drill some holes in the cockpit side panels for the access panels' fixing screws.
So until next time, take care, Paul.
|
27th June 2019, 19:38
|
|
Senior Member
|
|
Join Date: Mar 2015
Posts: 395
|
|
Paul Glad to see you'v fixed the fuel supply problem and the paneling is coming along nicely. I'v found that a small surform plane works very nicely on the edges of thin alloy sheet.
Cheers
Derek
|
29th June 2019, 05:49
|
|
Senior Member
|
|
Join Date: Feb 2012
Location: Wembley, London
Posts: 5,058
|
|
Deggsy - Cheers Derek.
- - - - - - - - - - - - - - - - - - - - - - - - - - - - - - -
[Meatloaf] Two outta three ain't bad [/Meatloaf]
Started off by tidying up the edges of the two side panels.

Then overlaid my simple guide to where the framework sits behind the panels.

Before marking up and drilling a lot of holes, all of which had to be de-burred.

Then I started the process of fixing the main rear cockpit wall panel into place.
At the time, it seems to make sense to start at one end and work my way across.

Unfortunately, I should have started in the middle and worked my way out instead.
The reason I know this?
Well, as I hammered the panel flat and screwed it into position, the 'center' moved to the left.
Which meant a lot of the holes I'd made for the access panel were now in the wrong place. 

Thankfully it was easy enough to enlarge some of the holes.

But for others, I ended up cutting out a 'path' from the main access panel hole.
So at this point, it looks a bit of a mess, but none of this will be seen when the access panel goes back on.

Note:
Thankfully, I remembered to leave the final few screws from the left hand edge at this point.
As I needed to test fit the driver's side corner panel.

This allowed me to mark up and drill some more holes in this panel.
By this point' I had learnt not to pre-drill the holes where the two panels would overlap.
Instead, I simply started at the top of the overlap and worked down one screw at a time.
- Carefully drilling out the alloy on the lower panel through the top panel hole.
- Then drilling the pilot hole in the plywood wall.
- Fix screw in place.
- Hammer panel flat and repeat.
By working my way down from the top edge, this was the final 'lumpy' join at the bottom.

End of Part 1…
|
29th June 2019, 05:50
|
|
Senior Member
|
|
Join Date: Feb 2012
Location: Wembley, London
Posts: 5,058
|
|
Friday - Part 2:
Next I had a look at the side mirror mounting point on the passenger side.

Note:
You can see another 'edge' than I thought was going to be BRG, but should have been black and ended up a messy grey.
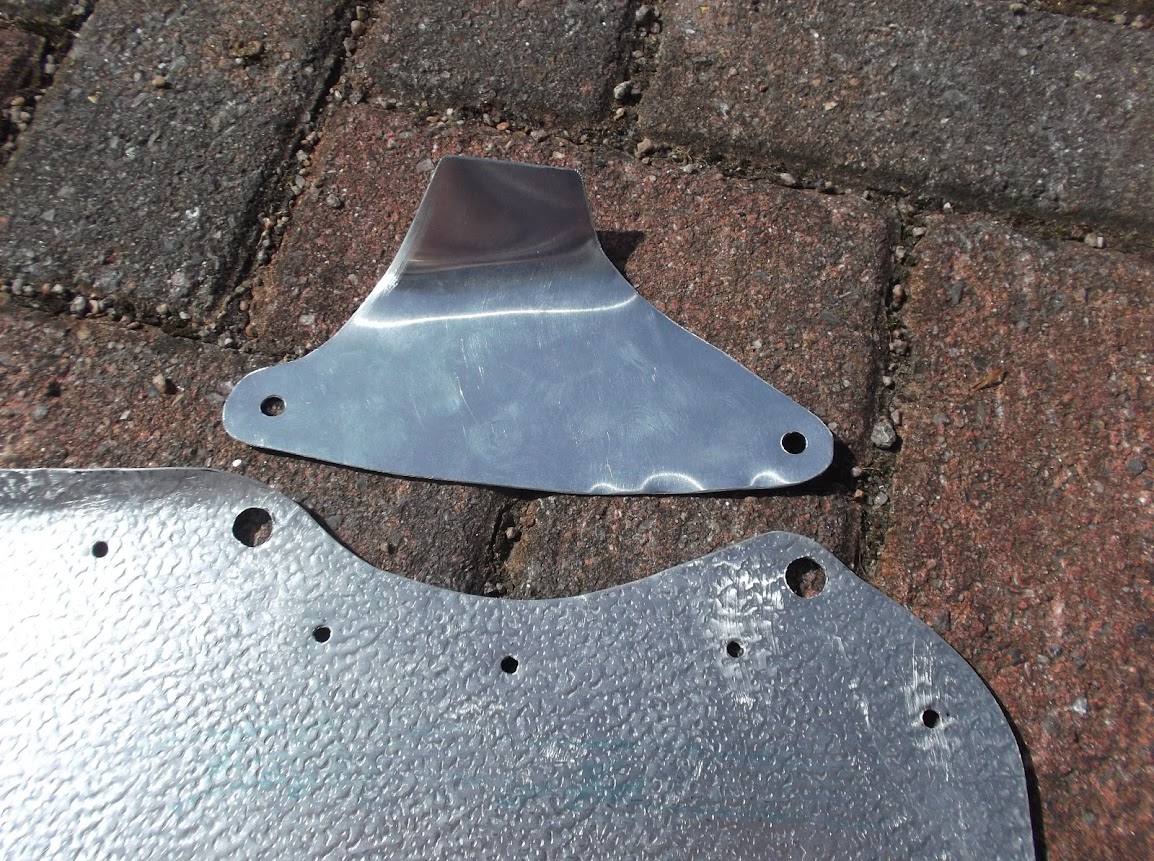
Made an initial cardboard template for the access panel and marked up the main panel for a slight trim in the corner and some fixing holes below the panel.
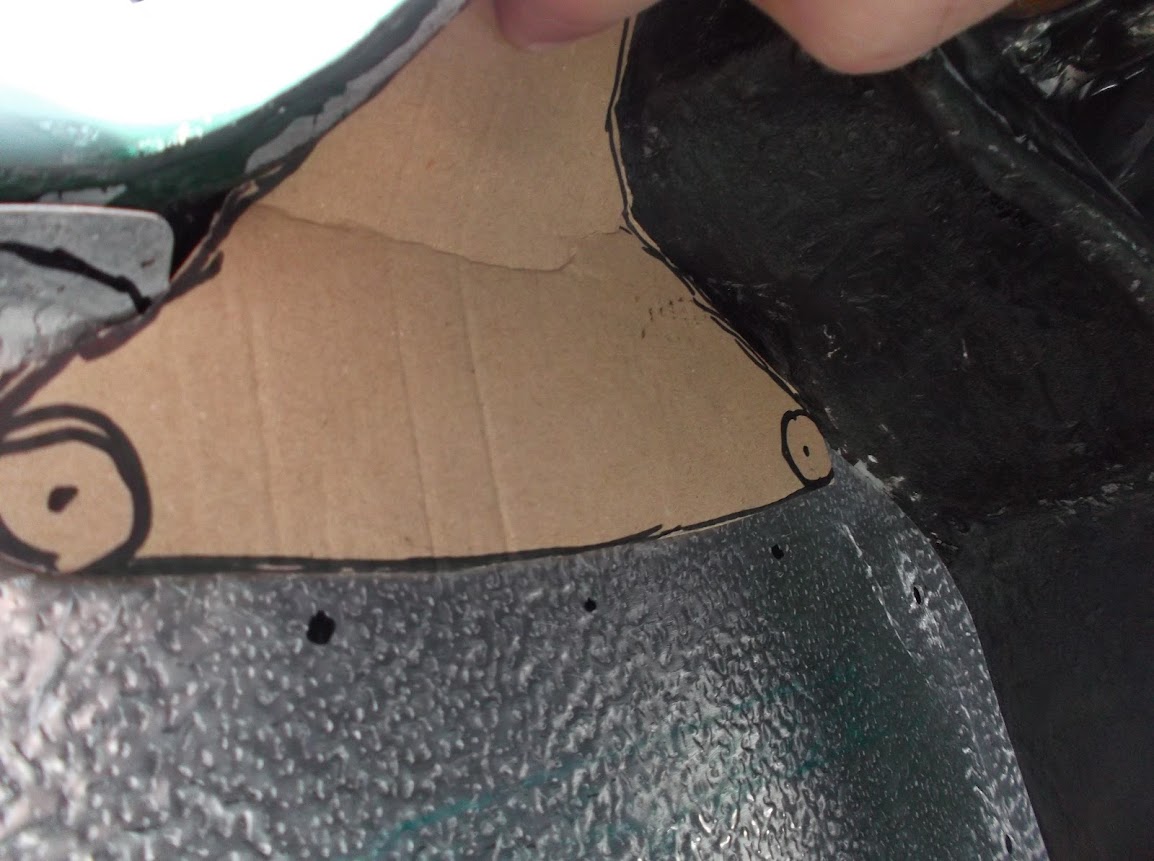
Cut the access panel out of milled aluminium and drilled all the holes required in both panels.
Despite giving the main passenger side panel an extra trim before I started, I still ended up with a problem corner. 
Not a great photo angle, but this is leaning over and looking down on to the top edge of the rear corner of the passenger side.

Part of the problem is that at this point, the join of the cockpit wall and the body shell is almost flush.
So I needed to trim a bit more off, which was tricky as the rest of the panel was already screwed in place.
Thankfully, I was able to carefully tidy the edge up without accidentally running a metal file across the body shell's paintwork.
By this point, I'd spent many hours cooking in direct sunlight, bend over the body shell trying to fit everything as best as I could.
The fact that in some cases, each screw was taking three drill bit changes to fit was not certainly helping.
So when my wife suggested we ate out, I gratefully took that as a sign to pack up for the day.
Before I post the 'reveal' shots, remember this build is not a quest for perfection.
So whilst these panels may not be perfect, they are miles better than the Tetroseal finish I had before.


Notes:
- I didn't actually notice the fold line where I had to trim the corner edge, so I'll try to hammer that flat next time.
- I will be adding an extra horizontal row of screws along the middle of the panels to eliminate any possible vibration issues.
So 'two outta three' sides completed, but technically ' four outta five' panels fitted.
Until next time, take care, Paul.
|
29th June 2019, 07:49
|
 |
Senior Member
|
|
Join Date: Sep 2011
Posts: 1,447
|
|
Will you add a small rubber slip on edging to protect your self from the sharp edges???
|
29th June 2019, 14:07
|
|
Senior Member
|
|
Join Date: Feb 2012
Location: Wembley, London
Posts: 5,058
|
|
RedRatBike - The current plan is see how I get on.
As I've spend a lot of time making sure the edges are smooth to the touch. 
- - - - - - - - - - - - - - - - - - - - - - - - - - - - - - -
It ain't half hot mum.
Made a few adjustments to the remaining side panel where it met the rear corner panel, as it seems too long.

As it turned out, by the time I'd got to fixing this edge in place it ended up being slighty too short.
One day I will trim the bolts holding the driver's side mirror in place.

But for now, I just needed to make a template for the cover panel.


As before, this allowed me to mark up and drill the final holes needed on the side panel.


End of Part 1…
|
30th June 2019, 18:31
|
|
Senior Member
|
|
Join Date: Jun 2015
Posts: 1,401
|
|
The effort pays off! Looking fantastic Paul.
|
30th June 2019, 18:50
|
|
Senior Member
|
|
Join Date: Apr 2014
Location: Midlands
Posts: 405
|
|
Looks great Paul, I love the continual evolution of your build.
|
|
Currently Active Users Viewing This Thread: 5 (0 members and 5 guests)
|
|
|
 Posting Rules
|
You may not post new threads
You may not post replies
You may not post attachments
You may not edit your posts
HTML code is Off
|
|
|
All times are GMT +0. The time now is 02:02.
|


 Hybrid Mode
