Are you madabout kit cars      
 "We've Got Kit Cars Covered" Information about Madabout-Kitcars.com Contact Madabout-Kitcars.com         Home of UK kit cars - madabout-kitcars.com Various kit car write ups All the latest kit car news Kit car related and general discussion

Search
Manufacturers
Kit Cars
Kit Car Data sheets
Picture Gallery
SVA Knowledgebase
Clubs & Communities
Build cost estimator
Kit cars for sale
Knowledge Base 
KitcarUSA.com
Classic-Kitcars.com
 

Go Back   Madabout Kitcars Forum > Mad Build Area > Marlin Sportster, Cabrio, Berlinetta and Roadster builds

Marlin Sportster, Cabrio, Berlinetta and Roadster builds Enthused or Confused about your vintage Marlin build? Ask away here or show off your build.

Reply
 
Thread Tools Display Modes
  #1  
Old 10th April 2009, 16:01
Patrick's Avatar
Patrick Patrick is offline
Senior Member
Enthusiast
 
Join Date: Feb 2005
Location: Hampshire
Posts: 2,497
Patrick is on a distinguished road
Default Final Assembly

I thought I'd create a thread for the final assembly of the car rather than put it in the build progress Shame about the rubbish weather, but today's job was mostly done on the kitchen table anyway!

Interior and rear lights


Dash board re-trim without glove box (wiper motor in the way)


Rear of re-trimmed dash showing pod for speaker


Divers side behind the dash


Test fit on car, the mount holes needed drilling out as the paint had filled them a bit.


The speakers could do with a grille mesh to finish them off but other than that it is coming together.


Rear lights installed with new waterproof plugs - a bigger job than you might expect!
Reply With Quote
Available from eBay
  #2  
Old 11th April 2009, 20:00
Patrick's Avatar
Patrick Patrick is offline
Senior Member
Enthusiast
 
Join Date: Feb 2005
Location: Hampshire
Posts: 2,497
Patrick is on a distinguished road
Default

Speakers, hazards and other stuff

Got quite a lot done today, the stainless piano hinge has been drilled to fit the bonnet, the end pieces cut and drilled to fit to the nose cone and scuttle. The hinges on both doors are painted and fitted also the door latches are installed. The doors have also been lined with damplifier pro to give them a bit more weight and less tinny sound when closed. The rear lights on the passenger side have been installed and rewired with a waterproof plug. The new chrome surround side repeaters are also wired in.
Finally some finishing touches to the dash:

Final touch to the passenger speaker is grill chopped up from a larger speaker.

Final touch on the hazard button is a chrome surround - now the leatherette is cut properly the switch does not need the large ali surround we made for the last dash.

The driver side speaker also gets a speaker grill. The grill also acts as a barrier to keep the speaker inside the ali pot.
Reply With Quote
  #3  
Old 12th April 2009, 18:25
Patrick's Avatar
Patrick Patrick is offline
Senior Member
Enthusiast
 
Join Date: Feb 2005
Location: Hampshire
Posts: 2,497
Patrick is on a distinguished road
Default Speakers, hazards and other stuff

Nose cone and centre console

Nose cone fitted.

hmm pretty colours

Starting to piece together the centre console

Two supports cut and shaped to get the angle of the radio correct with enoughclearance for the rear of the radio.

Radio supports glued.

Just need to make up some sides to hold the midbass speakers under the dash.
Reply With Quote
  #4  
Old 12th April 2009, 21:49
peterux's Avatar
peterux peterux is offline
Senior Member
Enthusiast
 
Join Date: Mar 2005
Posts: 3,077
peterux is on a distinguished road
Default

Looking really good!
Reply With Quote
  #5  
Old 13th April 2009, 18:20
Patrick's Avatar
Patrick Patrick is offline
Senior Member
Enthusiast
 
Join Date: Feb 2005
Location: Hampshire
Posts: 2,497
Patrick is on a distinguished road
Default

Thanks Peter


Mk 2 fuse holder bracket


This bracket also holds the wiper motor. The clamp has been moved up a bit to reduce flexing.


The centre console is taking shape with a small recess to keep your glasses.


Managed to find some room to fit a speaker above the steering column.


There's some sides and top to try and keep the front and back separated as much as possible.


Once the dash is in you can't see it any more.
Reply With Quote
  #6  
Old 14th April 2009, 16:32
Patrick's Avatar
Patrick Patrick is offline
Senior Member
Enthusiast
 
Join Date: Feb 2005
Location: Hampshire
Posts: 2,497
Patrick is on a distinguished road
Default

Had a day off so I had some time to do a bit more today:


Passenger side speaker and also hidden underneath the amp that runs it all.


Driver side done now covered and a grill on to protect it.


This side still needs some more brackets so it's all solid.
Reply With Quote
  #7  
Old 19th April 2009, 10:52
Patrick's Avatar
Patrick Patrick is offline
Senior Member
Enthusiast
 
Join Date: Feb 2005
Location: Hampshire
Posts: 2,497
Patrick is on a distinguished road
Default

The centre console coming together, this will also act as a duct for heater down to your feet. There's also a 12V supply in the side of it for the all important sat nav (or I'd get very lost all the time):


Here is is from a higher vantage point:


The 77MP's styling fits the car quite well:


It's all wired up now and been quickly finger in the air setup and it's better then I thought it would be. Those little BB 2.01's sound bloody brilliant. The midbasses are a bit fluffy but then I'm used to Dynaudio's in my daily driver. I need to get the scope on it, set the gains properly and do a bit of mic work just to confirm the XO points and levels.

All the wiring needs a final tidy up after settings are finalised.


Door hinge bracket, one of four. The metal the door is bolted to is far to thin, it flexes all over the place. Hopefully these will add enough structure to fix this.


Exhausts bolted up, bumpers fixed in place, rear lights in place and working. Just needs the other wing and a number plate.
Reply With Quote
  #8  
Old 19th April 2009, 16:26
Patrick's Avatar
Patrick Patrick is offline
Senior Member
Enthusiast
 
Join Date: Feb 2005
Location: Hampshire
Posts: 2,497
Patrick is on a distinguished road
Default

I was hoping that the car would get finished today, but as always there were more and more little things to do!

The centre console now has bracketing to hold it securely in place, the tub is secured and positioned right for the doors. The doors with re-enforcement brackets are on but not adjusted yet. The demister vent connections are nearly done. I tried setting up the amp with the scope but either the amp is chucking out some funny signals or the scope is on the blink (the scope is from the 60's complete with 11 valves ). Headunit has clean output to setting 60 of 62. Higher than 60 and you get a tiny bit of distortion creep in.

Once the demister vents are sort the scuttle can go on and the doors adjusted. After that it's just bonnet side panels and head lights.
Reply With Quote
  #9  
Old 26th April 2009, 00:07
Patrick's Avatar
Patrick Patrick is offline
Senior Member
Enthusiast
 
Join Date: Feb 2005
Location: Hampshire
Posts: 2,497
Patrick is on a distinguished road
Default


Demister vent tubing made out of some drain pipe


Scuttle vents, these are from a mini with some stainless mesh added.


Plastic tubed sprayed black and glued to scuttle. Some black rubber acts as a connector to the pipe that came with the heater


a view of the rubber connection on the heater vents


Centre console covered with heater vent built in to direct the warm air at your feet.


Scuttle on with heater pipes attached


Vent pipes attached to scuttle


Bracket to attach screen wash bottle


Screenwash bottle holder


Screen wash tube going through the firewall


Screen wash bottle and motor installed.


12V accessory socket for the GPS


Bodywork coming together


Sorting out the wiring under the scuttle


Sorting out the wiring under the scuttle


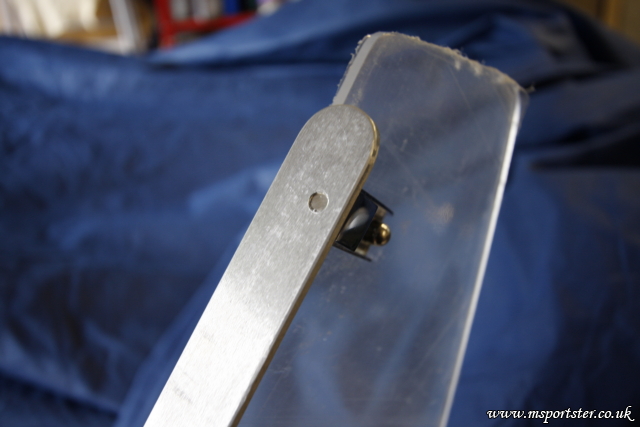
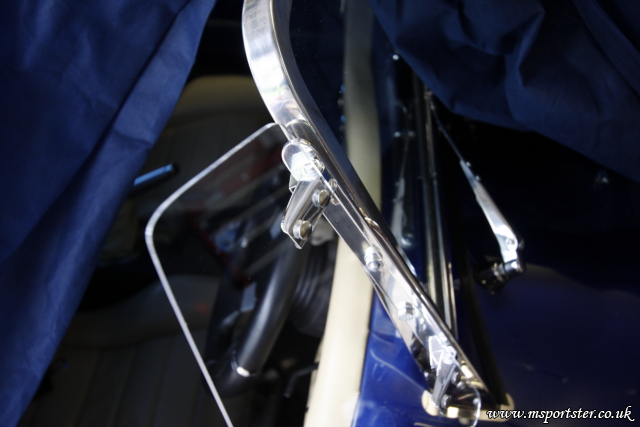
Wiper motor and connections.
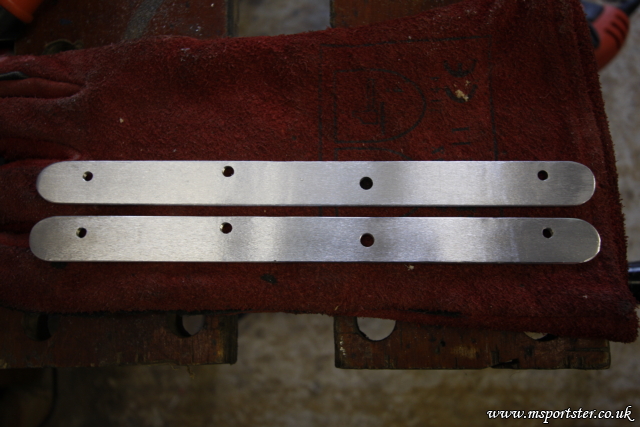
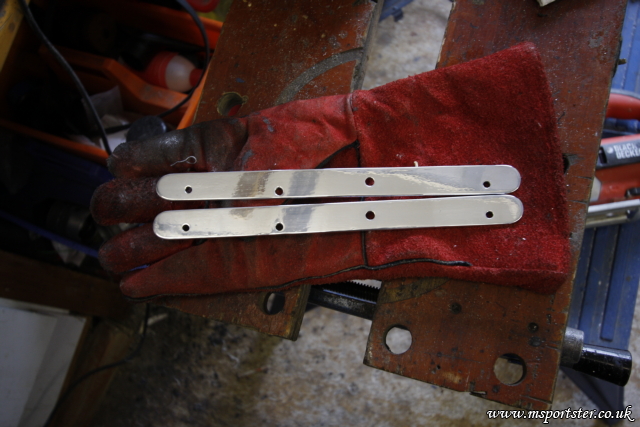
Reply With Quote
  #10  
Old 2nd May 2009, 21:08
Rich's Avatar
Rich Rich is offline
Member
Enthusiast
 
Join Date: Apr 2006
Posts: 61
Rich is on a distinguished road
Default Side screens

Side screen are mounted to aluminium brackets via a threaded hole and cut screw.


Aluminium brackets cut & drilled.


Many, many hours of polishing later brackets ready for mounting.


All done.

Reply With Quote
Reply


Currently Active Users Viewing This Thread: 1 (0 members and 1 guests)
 

Posting Rules
You may not post new threads
You may not post replies
You may not post attachments
You may not edit your posts

BB code is On
Smilies are On
[IMG] code is On
HTML code is Off

Forum Jump


All times are GMT +0. The time now is 00:48.

copyright © madabout-kitcars.com 2000-2024
terms and conditions | privacy policy