|
|
| Sammio Builds and discussions Sammio bodied car builds and specials |

5th August 2013, 06:17
|
 |
Senior Member
|
|
Join Date: Feb 2012
Location: Wembley, London
Posts: 5,058
|
|
Oxford - At least the sound of the metal cutter will not disturb the neighbours. 
Good luck with building your framework, Paul. 
|
5th August 2013, 08:38
|
 |
Senior Member
|
|
Join Date: Aug 2012
Location: Surrey/Sussex border
Posts: 169
|
|
 Talking of metal cutters ....
Hi Paul ...
Talking of metal cutters waking the neighbours ..... I got the "angry grinder" out this week end .... NOT to cut off the wheel hub, but to cut the bulkhead down. Will upload some photos this evening.
Thanks for the offer of the hub puller once again but it's going to work out easier to borrow Tony's in Poole. A mate of mine is going to Poole for a week's holiday this Friday .... and you'll not believe this, but Tony's brother lives only a few miles from me, so I'll drop the puller back to him when I've finished with it.
Tony: I've given my work colleague (Mark) your details and he'll contact you when he's down your way.
Cheers all round
Slarti
|
5th August 2013, 09:00
|
|
Senior Member
|
|
Join Date: Mar 2012
Posts: 1,152
|
|
That sounds like the path of least resistance - which is always attractive to Rammio and Sibble builders.
I find pullers very rewarding to use. Anything that makes an impossible job almost effortless is all right by me.
I did some cutting this weekend and used my step drill bit in an old pillar drill. I'm quite pleased with my first attempts at "engineering", considering they have been achieved using nothing more than over-sized and noisy domestic power tools.
Might get to do the first welds on the frame tonight.
|
6th August 2013, 21:40
|
|
Senior Member
|
|
Join Date: Mar 2012
Posts: 1,152
|
|
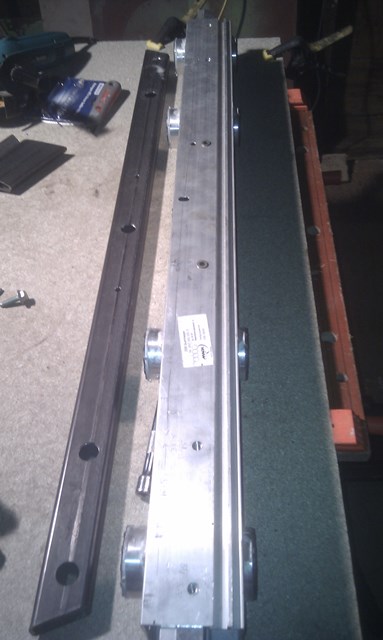
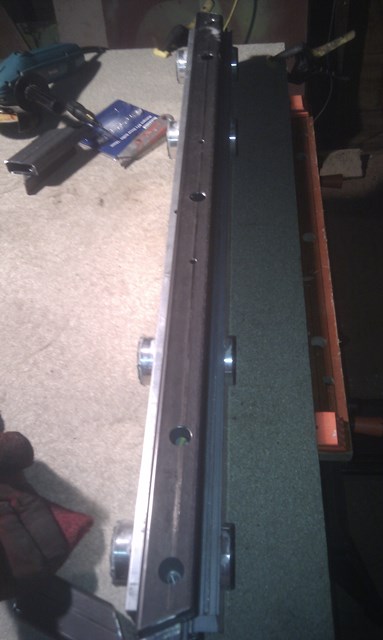
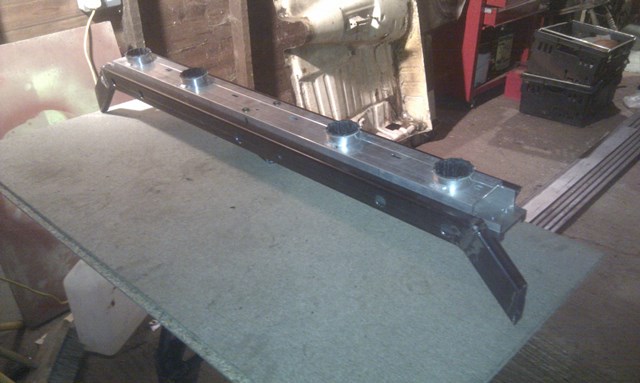
Just over an hour down at The Glade this evening. I continued work on the rear bulkhead.
The Audi crosssmember will form the top. This will be sandwiched between two lengths of 50x25 box.
The two pictures below show the aluminium crossmember and the front length of box.
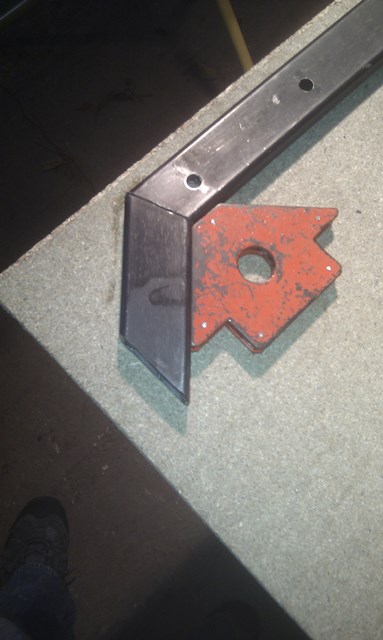
The two below show before and after welding.
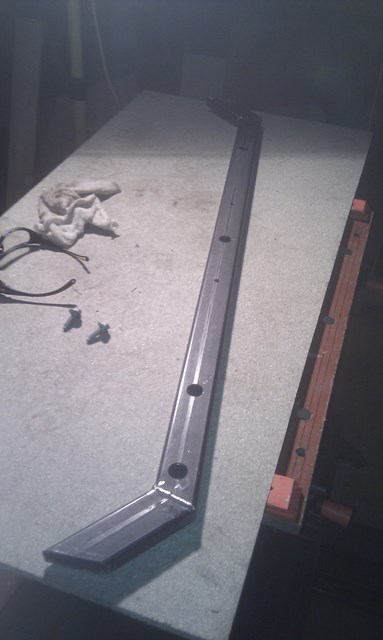
The final one shows the three pieces of box that form the top of the front of the bulkhead welded together. An identical one will attach to the rear. Vertical lengths of box will attach this to the ends of the rear outriggers.
The bolts are recessed so that a sheet of ally can be riveted to it to line the rear of the cockpit.
Last edited by oxford1360; 6th August 2013 at 21:42..
|
7th August 2013, 08:22
|
|
Senior Member
|
|
Join Date: Jun 2011
Location: birchington, kent
Posts: 1,769
|
|
The cut-off saw does a neat job, and the welding looks very neat.
|
7th August 2013, 09:00
|
 |
Senior Member
|
|
Join Date: Jan 2012
Location: Poole, Dorset
Posts: 615
|
|
I like this, can't wait to see it with the rest of the frame and the how the hoops look with the body on.
Good job!
|
21st August 2013, 15:43
|
|
Senior Member
|
|
Join Date: Jun 2011
Location: birchington, kent
Posts: 1,769
|
|
Afternoon O, i got myself a cut off saw on ebay. Have you done some more yet?
|
21st August 2013, 16:30
|
|
Senior Member
|
|
Join Date: Mar 2012
Posts: 1,152
|
|
Just got back from holiday today. Time well spent thinking about chopping the back off and how it will hinge.
I should get some time down The Glade in the next few years.
Be sure to wear your ear defenders when you use the chop saw......and eye protection of course. And, don't have any rags close by that have had white spirit on them......that was fun.
|
22nd August 2013, 06:46
|
|
Senior Member
|
|
Join Date: Mar 2012
Posts: 1,152
|
|
While on holiday I saw a sign for a Steam Rally and........Autojumble......well, what is a man to do?
I picked up this fire extinguisher which I shall mount inside the cockpit as a period prop. It is stamped "1960". Just a year before mankind put one of its own into space, this was the type of kit that people used to fight fires - a lump of brass filled with a dodgy chemical.
The other item I bought was a set of gauges. I doubt I will use them on this build but I just liked them. I feel they look older than they are. And, what is more, they all work. Can any former boy-racer recognise which iconic 70s vehicle it comes from?
Whilst at the show, my teenage son fell for a Lomax. I've always fancied building a Morganesque three-wheeler and I am a fan of the 2CV lump. So, next project decided. |
22nd August 2013, 07:48
|
|
Senior Member
|
|
Join Date: Aug 2012
Location: Surrey/Sussex border
Posts: 169
|
|
 Gauges
Something LHD? ... Something American? .... Corvette?
|
6th October 2013, 16:22
|
 |
Senior Member
Enthusiast
|
|
Join Date: Dec 2006
Posts: 1,130
|
|
Whilst at the show, my teenage son fell for a Lomax. I've always fancied building a Morganesque three-wheeler and I am a fan of the 2CV lump. So, next project decided.[/QUOTE]
How about this, much better than a Lomax and for sale 
 |
8th October 2013, 21:17
|
|
Senior Member
|
|
Join Date: Mar 2012
Posts: 159
|
|
It looks very good. Very thoroughly. I wonder how you are going to make the inside panelling of the interior, since your build is so excellent so far.
Regards,
Michiel
|
8th October 2013, 21:43
|
|
Senior Member
|
|
Join Date: Mar 2012
Posts: 1,152
|
|
More mucking about
Michiel - thanks for your kind comments. I am not sure how I willl line the tub but I do not plan to use plywood on the car. One idea is to not line it at all - an extension to the frame will go around the underside of the cockpit opening, and I will strengthen the bodywork with fibreglass ribbing. As I said, still undecided. The rear bulkhead will probably be aluminium.
Tonight I spent an hour or so at The Glade to tackle the problem I mentioned earlier.......
In order to fit the crossmember (with removable roll hoops), I need the rear deck to be flat behind the cockpit. This is the case on the driver's side, but the passenger side really drops away.
I laid the crossmember (upside down) to show the problem.
Driver's side -
Passenger side -
So, I made some initial cuts -
You can see the difference in these two pics -
Then I added some further fillets to get a similar profile on each side.
I need to tweak the fillets and then flip the body and glass it in place at the weekend. Once I have cut the four holes in the rear deck I can get on with finishing the frame. One step at a time..........
Last edited by oxford1360; 8th October 2013 at 21:47..
|
9th October 2013, 13:28
|
 |
Senior Member
|
|
Join Date: Sep 2011
Posts: 1,446
|
|
Quote:
Originally Posted by micky1mo

Whilst at the show, my teenage son fell for a Lomax. I've always fancied building a Morganesque three-wheeler and I am a fan of the 2CV lump. So, next project decided.
|
How about this, much better than a Lomax and for sale
[/QUOTE]
Like the rear end ,front not to good in my eyes but I love these 3 wheelers
I take it you are replica rides after looking at the website?
Last edited by redratbike; 9th October 2013 at 13:32..
|
13th October 2013, 16:36
|
|
Senior Member
|
|
Join Date: Mar 2012
Posts: 1,152
|
|
Chipping away
I'm trying to keep some momentum going so I was down at The Glade this week preparing my rear end for improvements.
I glassed beneath the series of cuts and left it to cure.
This is what the top-side looked like.
This was after the supports were removed and I had smoothed/roughed the surface.
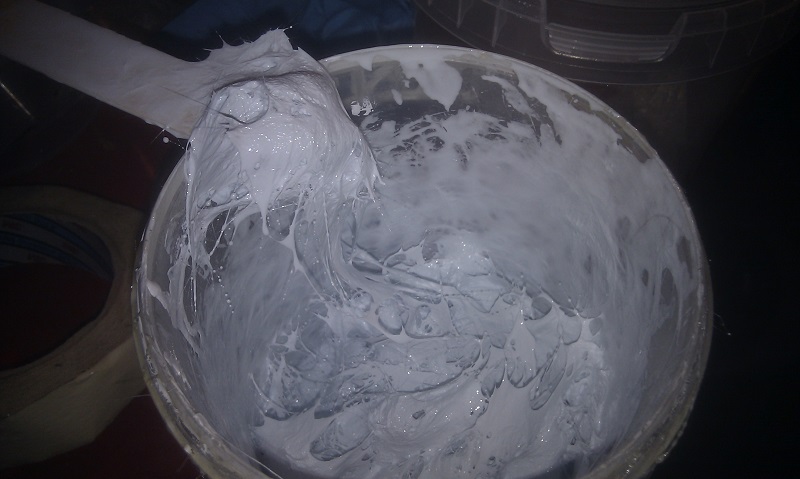
I mixed some home-made (and much cheaper) P40 using 150ml of resin, 50ml of white gel coat for some colour, and ~20g of CSM. After lots of mixing I added the hardener and mixed some more.
I then applied a very rough layer to get things a little closer to the profile I want.
It looks like I have applied a massive gob-bomb (chew a piece of A4 for a very long time and, when it is thoroughly wet, fire it skyward so that it sticks on the ceiling of the classroom and then blame it on somebody else).
I will give this a mild blast with a flap wheel before applying P38.
The good news is, the rear deck is flat and perfect for the crossmember.
Last edited by oxford1360; 28th October 2013 at 09:38..
|
22nd August 2013, 07:56
|
|
Senior Member
|
|
Join Date: Jun 2011
Location: birchington, kent
Posts: 1,769
|
|
Capri?
|
22nd August 2013, 08:17
|
|
Senior Member
|
|
Join Date: Mar 2012
Posts: 1,152
|
|
Spot on. Capri GT MkI.
|
22nd August 2013, 09:02
|
|
Senior Member
|
|
Join Date: Feb 2012
Location: Wembley, London
Posts: 5,058
|
|
Oxford - I love the vintage fire extinguisher. 
Plus the framework is coming together nicely too.
Good luck, Paul.
|
25th August 2013, 08:27
|
|
Senior Member
|
|
Join Date: Mar 2012
Posts: 1,152
|
|
Well, yesterday I introduced the bodywork to a tape measure and realised quickly that it was a bad idea and that all body-alignment will have to be done by eye and with plenty of compromise.
I haven't lowered the suspension a great deal and my plan is to attain the stance that I am looking for by mounting the body lower in relation to the chassis. I trimmed 50mm from the return on the front of the tub (where it sits on the bulkhead). I then put a wooden stretcher across the chassis and self-tapped some blocks to the inside of the body so that I could play with heights.
I managed to get the main tub sitting OK - one wheel arch sat higher than the other but a bit of tweaking got it to a position where both sides are close enough. The bottom edges of the tub sit about 40mm below the side rails.
The original floorpan gives me enough drop to allow me to sit (at an angle) with my head no higher than the hump. All good so far.
The challenge comes with the bonnet. Losing 50mm means that there will have to be a few bumps and humps to clear the thermostat housing and carbs, and I am now looking for a smaller alternator and a way to mount it. I did expect this, but I sort of wish that I had swapped the suspension towers and mounted the engine further back.
My plan is to have a bonnet within the flip front and this will house the humps. It means that I can cut it out, get the front how I want, and return to it when tub and front are sorted.
Another outcome of lowering the body is the reduced space in the rear. Fitting the MX5 fuel tank will be a challenge.......
Who said life should be easy?
Hmmm, I've just been looking at pics of finished cars and the back needs to go lower. I think I shall be buying another lowering block and some adjustable ride height front shocks.........
Last edited by oxford1360; 25th August 2013 at 08:47..
|
29th August 2013, 15:22
|
|
Senior Member
|
|
Join Date: Mar 2012
Posts: 1,152
|
|
Two very large boxes of fibreglassing consumables and tools arrived today. I love the smell of resin in the morning.
The next phase of work should start this weekend with the removal of the hump (it will return later, in line with my head). I hope to glass-in the gap before Sunday. Let this warm weather continue.
And, I have made the decision to go with some shallow doors. I may even have come up with a novel method for hingeing them, but we shall see.
|
|
Currently Active Users Viewing This Thread: 3 (0 members and 3 guests)
|
|
|
 Posting Rules
|
You may not post new threads
You may not post replies
You may not post attachments
You may not edit your posts
HTML code is Off
|
|
|
All times are GMT +0. The time now is 01:49.
|


 Hybrid Mode
