|
|
| Sammio Builds and discussions Sammio bodied car builds and specials |

4th April 2015, 14:09
|
|
Senior Member
|
|
Join Date: Apr 2012
Posts: 1,163
|
|
Hi guys, I'm back! unfortunately my lupus flared after coming back from the cold. Combined with having to try and work for a living as I didn't win the lottery I have let things slip. The good news is that progress though limited has been made and I am typing this from the workshop where I will hopefully be all weekend, and maybe overnight tonight as well as I am an Arsenal supporter and my wife is a Liverpool supporter.....nuff said.
Check back later tonight or in the morning and hopefully I will have completed a major update to my build thread.
TTFN
Mac
|
4th April 2015, 16:07
|
|
Senior Member
|
|
Join Date: May 2013
Posts: 2,161
|
|
Welcome back Mac!
We were getting worried!
Scottie
|
4th April 2015, 20:13
|
 |
Senior Member
|
|
Join Date: Dec 2013
Posts: 839
|
|
Welcome back Mac and looking forward to your update.
|
5th April 2015, 17:47
|
|
Senior Member
|
|
Join Date: Apr 2012
Posts: 1,163
|
|

The next few posts are not in any necessary order just trying to catch up on jobs that have been completed, so without further ado..
Ignition System
Ran into a few issues with the Nodiz, I'm still a big fan but the latest issue meant the unit had to go back again. Have to stress that this was an early adopter unit I purchased at a bargain price and reviews of the latest ones are very good. Anywhoooo. decided that with time marching on I purchase something a little more tried and tested and period correct to boot so a quick trip down to Powerspark in Bromsgrove and a 15 minute wait whilst they built it for me resulted in this:

Its a brand new fixed advance distributor with magnetic pickup, a high output coil, set of new plug leads and a new Aldon Amethyst ignition box. Have to say I was very happy with it, had to use part of the existing distributor clamp and part of the one that cam with the new distributor and weld the 2 bits together but apart from that it all went together very easily...until I was a tad heavy handed getting the distributor pedestal removed and this happened:

Bugger! looked around and the likes of Canley only have second hand and wanted up to £35!!! WTF!!! Spitbitz found me one for £8...much better.
So why was I trying to remove the pedestal you may ask? well when we had the engine running originally there was a worrying rattle and I thought it sensible to check the distributor drive end float which is set using different thickness gaskets:

A short delay waiting for the new pedestal though resulted in this:
https://www.youtube.com/embed/uVJQo5ZigbM
Very happy as it sounds very fruity. more in a bit.
TTFN
Mac

|
5th April 2015, 17:54
|
|
Senior Member
|
|
Join Date: Apr 2012
Posts: 1,163
|
|
More pics here of the install:


The total install once the new pedestal arrived was about 2 hours start to finish and it fired first time so was very happy. The Aldon box sits between the distributor and the coil and basically allows you 2 1/2D mapping with in my case a TPS or a vacuum sensor version if you prefer.
TTFN
Mac |
5th April 2015, 18:02
|
|
Senior Member
|
|
Join Date: Apr 2012
Posts: 1,163
|
|
Worrying Rattle
Those of you with bat like hearing will have picked up that re shimming for distributor drive end float had no effect on the rattle. It was eventually tracked down to the starter motor that was engaged permanently, a little judicious shimming has now solved the issue and it runs rattle free. Oil pressure is 90 PSI cold but when up to temp sits at about 30psi at tickover and peaks at about 65 psi so very healthy!
Have also now finished plumbing in the radiator which was a pain as every time I though I had it sorted I found yet another missing drain plug. Have just finished fitting a fan controller for the electric fan:
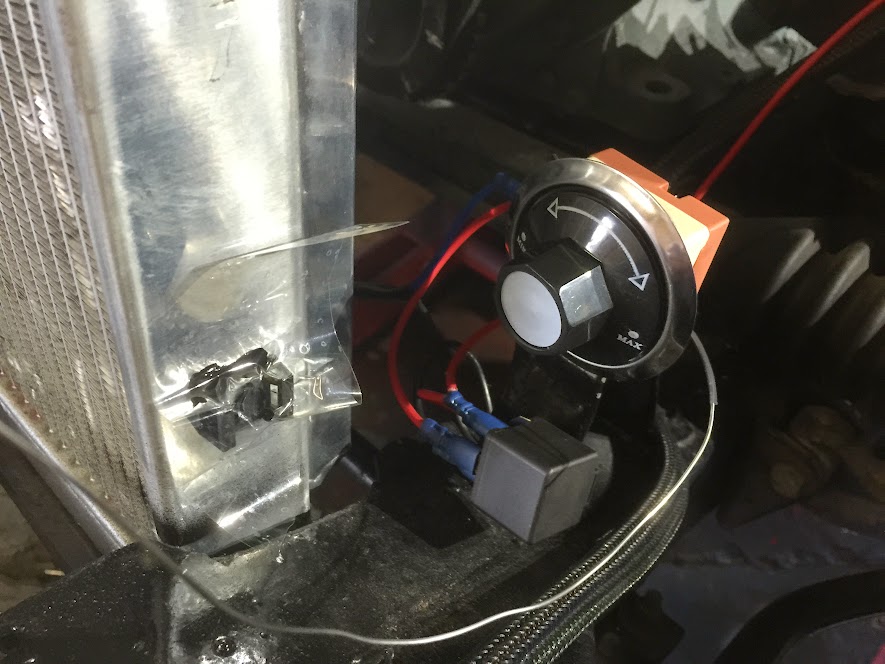
Only problem seems to be that it doesn't go down low enough! The rad is so efficient that set at its lowest setting it kicks in at 95 deg and stays on all the way down to 75 deg.
More in a bit
TTFN
Mac |
5th April 2015, 18:06
|
|
Senior Member
|
|
Join Date: Apr 2012
Posts: 1,163
|
|
Brooklands Screens:
Done!

Didn't like the though of only fibreglass supporting these as they are heavier than you would think so for each stand up I made one of these:

These were bonded in underneath the scuttle using my favourite black jollop (PU Adhesive) and seem to havedone the job nicely.
More in a bit when I sort through my photos
TTFN
Mac |
5th April 2015, 18:12
|
|
Senior Member
|
|
Join Date: Apr 2012
Posts: 1,163
|
|
Gauges
The leather clad gauge surround didn't work out so I ditched it and have just gone for mounting the gauges in the dash without a surround.

they work very nicely, not fully setup yet hence the warning lights being on most of the time.
https://youtu.be/tCJrxbH8Erc
that's it for now ill sort through the photo backlog and see if there is anything else and do another update tomorrow.
TTFN
Mac |
5th April 2015, 18:37
|
 |
Senior Member
|
|
Join Date: Feb 2012
Location: Wembley, London
Posts: 5,056
|
|
Mac - Great to have you back. 
Your car is coming together very nicely.
Good luck, Paul. 
|
6th April 2015, 11:25
|
|
Senior Member
|
|
Join Date: Apr 2012
Posts: 1,163
|
|
Cheers Paul,
Exhaust
After modifying my exhaust Y section I needed to figure out how to hang the rear boxes. some nice thick 5mm Ali plate and a bit of shaping and drilling later:
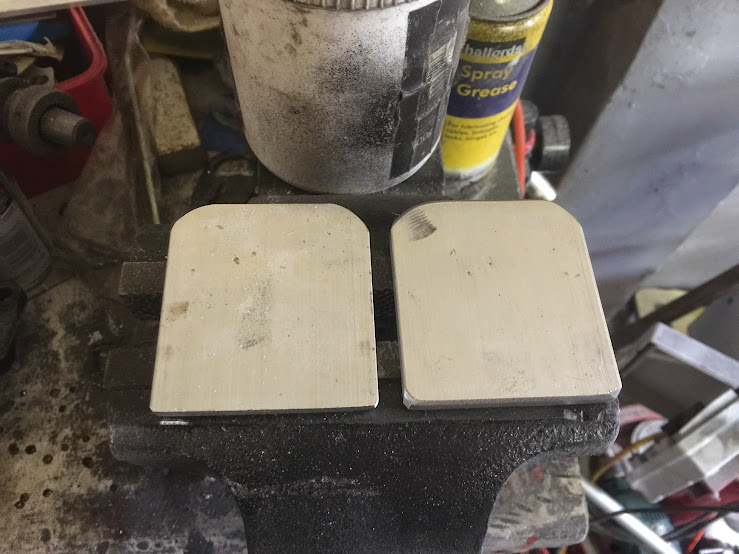


A quick fit up showed the standard box mount needed moving as well:

Folded up some new brackets and welded them on:

And the finished setup installed:

TTFN
Mac |
6th April 2015, 14:36
|
|
Senior Member
|
|
Join Date: Apr 2012
Posts: 1,163
|
|
Just thought I would share.
Am trying to use period light fittings wherever possible and found some lovely new Lucas L534 number plate lamps in the workshop clearance I did last year. Only problem is that the lamp has a flat base and the location it needs to go on is curved, considered trying to hand carve a rubber gasket but then came across this stuff:
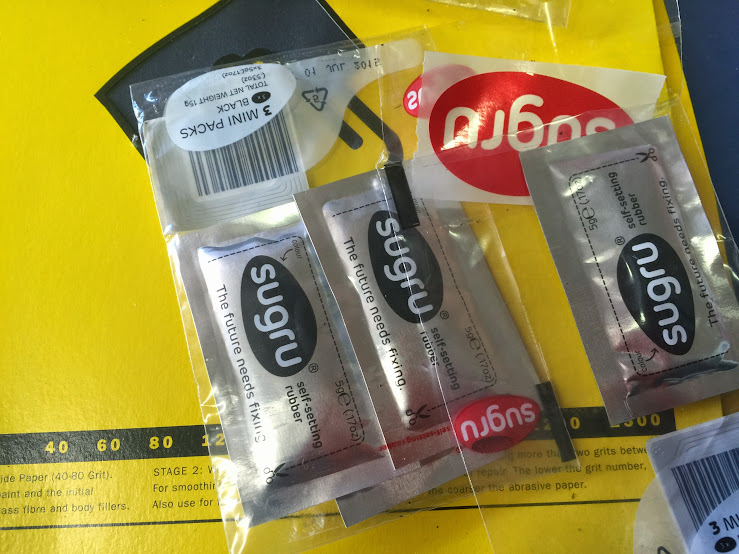
Its a pliable silicone putty that when left for 24 hours air cures into solid silicon. Have played with it a bit and it does indeed exactly what it says on the tin!
Its not exactly cheap but for the ease of use on a small but time consuming job like this worth every penny. Just used 4 packs (3 in each pack you buy) and moulded it roughly under the lamp base them fixed the lamp in place letting the excess squash out. Cleaned it up using a couple of scraps of plastic just gently scraped around the edge then finished it by running a clean finger around. Very happy with the result and took about 10 minutes whereas carving or casting a custom gasket / plinth would have taken hours.
The end result:


Also just about to final fit the rear plate and as you will be able to see the back of it gave it a couple of coats of gloss black. The plates are the original ones off the donor and I quite look the used look they add to the car.

If anyone wants to find Sugru you can order online or just go to B&Q like I did, its available in a range of colours.
TTFN
Mac
|
6th April 2015, 21:50
|
|
Senior Member
|
|
Join Date: Dec 2013
Posts: 839
|
|
Nice tip on the sugru Mac i may try it out on the rear number plate light fitting i have that's is made to mount onto a flat surface.
Cheers Matey.
|
7th April 2015, 07:42
|
 |
Senior Member
Enthusiast
|
|
Join Date: Dec 2006
Posts: 1,130
|
|
Welcome back Mac, I wondered where you had been hiding. 
I think your engine looks better with a set of pug lead in place. |
15th April 2015, 19:00
|
|
Senior Member
|
|
Join Date: Apr 2012
Posts: 1,163
|
|
Swifty: I can report it sets good and hard but still pliable and the finish is good as long as you take the time to smooth it out a lot during application.
Micky: It runs much better as well!
|
15th April 2015, 19:05
|
|
Senior Member
|
|
Join Date: Apr 2012
Posts: 1,163
|
|
Not much in the way of pics but getting close now!
1. Chased down an annoying small collant leak, it was the o ring on the bottom rad drain that had perished, new o ring and bobs your uncle.
2. Rear number plate finally fitted.
3. All rear lights are now wired and tested, just got to fit the one lamp cover and I will post some pics.
Next task is to give the inside a good clean out then top up the gearbox and overdrive oil and run 2 wires for the overdrive switch and then the tunnel cover can go on. Once that's done the interior will get its final coat of bed liner I preparation for fitting the seats.
Bonnet should be on tomorrow
just waiting on a throttle cable pedal block and I can then fit the throttle cable which will make it driveable.
TTFN
Mac
|
15th April 2015, 21:21
|
|
Senior Member
|
|
Join Date: Feb 2012
Location: Wembley, London
Posts: 5,056
|
|
Mac - Sounds like you are really on the home straight now.
Good luck with the next steps, Paul.
PS
Quote:
Originally Posted by Viatron

... then the tunnel cover can go on...
|
I look forward to seeing how you fit / seal this, as I need to sort my own cover out.
|
20th April 2015, 18:17
|
|
Senior Member
|
|
Join Date: Apr 2012
Posts: 1,163
|
|
Bit more progress, riveted the poppers on the humps for the head rests.

If your going to rivet these you will need to turn down the rivet head so that it fits down inside. I just clamps the rivet in a drill and then spun it up against a file.

A shot of the rivet before turning down, it sort of sits inside but is too high and the female part of the popper wont click down with it like this

With the rivet turned down it sits nicely down inside.

First headrest fitted!

and shortly after they were both on

More in a bit
TTFN
Mac |
20th April 2015, 18:22
|
|
Senior Member
|
|
Join Date: Apr 2012
Posts: 1,163
|
|
Got the bonnet re fitted and the grill trimmed

Fitted the risers for the seats, they are Ali box section approx. 40mm X 15mm. With the seats flat on the floor the front of the seat was too low so ended up using one riser at the back and 2 at the front which was just right. These have now been bonded and riveted to the floors so tomorrow I will be drilling and test fitting the seats then removing them before hopefully applying the final bed liner coat to the cockpit in preparation to the final fitting of the seats at which stage........ brmmmm brmmmmm
TTFN
Mac |
20th April 2015, 18:39
|
|
Senior Member
|
|
Join Date: Feb 2012
Location: Wembley, London
Posts: 5,056
|
|
Mac - Looking very good.
Good luck with ticking off the last few jobs, Paul.
|
20th April 2015, 18:59
|
|
Senior Member
|
|
Join Date: Dec 2013
Posts: 839
|
|
Liking the look of the seats and headrest, D day is looming ever near Mac.
Mac i've sent you a PM.
Last edited by swifty; 20th April 2015 at 19:02..
|
|
Currently Active Users Viewing This Thread: 1 (0 members and 1 guests)
|
|
|
 Posting Rules
|
You may not post new threads
You may not post replies
You may not post attachments
You may not edit your posts
HTML code is Off
|
|
|
All times are GMT +0. The time now is 13:47.
|


 Linear Mode

