|
|
| Sammio Builds and discussions Sammio bodied car builds and specials |

30th March 2016, 17:00
|
 |
Senior Member
|
|
Join Date: Feb 2012
Location: Wembley, London
Posts: 5,056
|
|
DaveP - Cheers, thankfully the worst of the high winds had passed.
- - - - - - - - - - - - - - - - - - - - - - - - - - - - - - -
Bonus Afternoon:
The bad news is that I actually started work at 5.20am this morning. 
The good news is that at least this meant I was able to head home early to work on the car. 
Removed the last of the brackets from the wheel arch and tidied up the join, both inside and out.

Then I added more layers of fibreglass matting to both sides of the join.

Unfortunately, it looks like the edge section at the top of the arch twisted slightly when it was fixed back into place. 
Not easy to see in the photo, but one area is sitting proud of the others.

I've started building up the inside edge of this area, so I can grind it down flush later on.
Thankfully the sun is still shining outside, so I will leave that to set a bit longer before I cover it all up.
Until next time, take care, Paul. 
|
30th March 2016, 18:17
|
 |
Senior Member
|
|
Join Date: Dec 2013
Posts: 839
|
|
Ohh happy days Paul, i remember reshaping the rear arches which i found to be good for the morale as you start to see major things changing with the build.
Good luck and keep posting.
|
30th March 2016, 20:43
|
 |
Senior Member
Big Cheese
|
|
Join Date: Sep 2002
Posts: 1,080
|
|
Keep up the good work Paul. 200,000 views coming up!....
|
31st March 2016, 06:52
|
|
Senior Member
|
|
Join Date: Feb 2012
Location: Wembley, London
Posts: 5,056
|
|

Swifty - Thanks.
Hopefully, this rear arch re-shaping work will allow me to finish off a number of jobs at the back of the car:
- Extend the 'boot floor to body shell' panels to meet the rear arches.
- Extend the Spitfire inner wheel arches to meet the body shell.
- Finish joining the body shell to the Moon Rover along the bottom edge.
- Fit the internal cockpit panels.
Whilst all of these jobs will take a bit of time, they will make a big difference to the overall project.
Because, if I ignore the gaping hole over the cockpit, the car will finally be "water tight" underneath.
Given how long it has taken me to reach this point, it will be nice to have some more bits completely finished.
- - - - - - - - - - - - - - - - - - - - - - - - - - - - - - -
JG - Cheers.
Although I am never quite sure how the forum view counter works, as it seems very optimistic to me.
To be honest I am more grateful for the number of people who have taken the time & trouble to reply to this thread.
As it is fair to say this build has been a bit of a roller coaster of highs and lows over the years.
However, the support and encouragement I've received has really helped me keep plugging away.
So even if I don't know when it will be, I do know that this car will be on the road one day. 
- - - - - - - - - - - - - - - - - - - - - - - - - - - - - - -
Another Cordite is MOT'd:
Great to see nellieb has just got one of the original Sammio Cordite kits on the road.
It also looks like Swifty's 2nd generation Ribble Navigator will be next up for an MOT.
Which would just leave me as the last Cordite/Navigator builder still regularly posting on here.
Obviously, if any of the other builders are reading this, it would be great to hear how you are getting on.
- - - - - - - - - - - - - - - - - - - - - - - - - - - - - - -
Until next time, take care, Paul.

|
31st March 2016, 18:46
|
|
Senior Member
|
|
Join Date: Feb 2012
Location: Wembley, London
Posts: 5,056
|
|
Evenin' all:
Seemed a shame not to take advantage of a lovely evening after work…
I keep forgetting to show you the "protection" I have to leave in front of the car.

Because when I moved it closer to the wall, I forgot about the porch door opening.

Without the plank, these is a risk the door could swing open and smash my headlight.
In the end, I only had enough time to clean up the fibreglass work I did the other day.

The good news is that the "sunny side" now had enough strength built back into it.
So next time I will add some fibreglass filler to this side to start smoothing out the rough join.
I will also add the final bit of extra matting on the inside of the join.
- - - - - - - - - - - - - - - - - - - - - - - - - - - - - - -
April Plans:
The first phase of the project I was working on ended today, so I will definitely have a few "car days" in April.
Although it now looks like I will also be involved in the next phase which may start sooner rather than later.
So I will try to make the most of the time I have and see how far I can get.
Having said that, I have some domestic priorities over the weekend that must come first.
So until next time, take care, Paul.
Last edited by Paul L; 31st March 2016 at 21:16..
Reason: Typo
|
4th April 2016, 15:38
|
|
Senior Member
|
|
Join Date: Feb 2012
Location: Wembley, London
Posts: 5,056
|
|
A Little Bit More:
Came back from a weekend away with my family this afternoon and got a bit more done.
Started by sanding down the join on the "sunny side" of the wheel arch & cleaning the area.

Then I added some fibreglass filler over the join and in the screw holes.

By now the sky was not looking very promising.

Thankfully the rain held off while the filler started to set.
Then I sanded it all back down again.

With the template quickly propped into position, you can see the arch isn't far off.
( And remember the template itself isn't a perfect arch. )

But as it felt like rain was imminent, I decided not to push my luck and add the next round of filler.
Instead, I put the wheel back on and swept up most of the mess I had just made.

A quick hose down later and everything was looking a lot better.
( Sorry the photo is a bit blurred. )

I had just stepped back indoors when the rain started and it is still going now.
So I am happy the timings worked in my favour today.
Until next time, take care, Paul.
|
4th April 2016, 19:22
|
 |
Senior Member
|
|
Join Date: Jun 2011
Posts: 935
|
|
It must be satisfying Paul with each round you are getting closer to the end.
Whats next after the rear arches?
|
5th April 2016, 08:34
|
|
Member
|
|
Join Date: Apr 2015
Posts: 66
|
|
Hi all, I drove the Cordite around my local village and beyond! What a magnate the little special is! I have driven quicker cars mainly kit cars with Ford running gear but for grin factor, nothing gets near to the Triumph Cordite. Lots of jobs still to do! But if the sun is shining I'll be buzzing around in my recoated classic Cordite. I will post pics soon!  |
5th April 2016, 08:37
|
|
Member
|
|
Join Date: Apr 2015
Posts: 66
|
|
Paul my e mail is cathbuxton@lineone.net and see me in the Cordite! This should push you on to complete your lovely Cordite. |
5th April 2016, 12:06
|
|
Senior Member
|
|
Join Date: Feb 2012
Location: Wembley, London
Posts: 5,056
|
|
Roadster - It is certainly nice to see the arch looking a bit more respectable after the initial "butchery".
Once the rear arches are done, I can finish the remaining "joins" from the Moon Rover to the body shell.
You may recall my patch work quilt approach to joining the original Spitfire boot floor to the Cordite body shell.
Thankfully this looked a lot better by the time I'd finished it.

Well, I stopped all that panel work short of the wheel arches so I could cut them out and reshape them.

So the panel work will be extended to meet the body shell and the Spitfire inner wheel arches.
I also need to finish the join between the internal framework and the sides of the body shell.

Finally, when all that fiddly work has been completed, I can start installing the internal cockpit panels.
- - - - - - - - - - - - - - - - - - - - - - - - - - - - - - -
Neil: - I am sure your car turns heads and a key point of these builds are that you will stand out from the crowd.
There was a time when I really couldn't see how my build would ever get finished, so I didn't picture myself driving it at all.
But now, even though there is still a lot of work to do, I can't wait for the day when I can take it for a spin.
- - - - - - - - - - - - - - - - - - - - - - - - - - - - - - -
Tuesday - Part 1:
Although you can hardly notice it, I've added the final round of fibreglass filler to the wheel arch.

There was one screw hole to fill.

Plus some of the "bumps" along the inside edge were covered.

Once that was set, it was sanded down.

Then the depth of the return lip was trimmed/tidied.


Some fibreglass filler was added to the odd "hole" along the inside surface of the arch.

Once this has been sanded down, a final layer of fibreglass matting will be added.
Then a layer of normal body filler was added to the outside edge.

I left the filler to set while I prepared this first update.
So I'm heading back outside now for the next round of sanding…
|
5th April 2016, 14:32
|
|
Senior Member
|
|
Join Date: Mar 2012
Posts: 1,152
|
|
That arch is a very pleasing shape. Nice one, Paul.
|
5th April 2016, 19:26
|
|
Senior Member
|
|
Join Date: Feb 2012
Location: Wembley, London
Posts: 5,056
|
|
Oxford: - Cheers Rob.
A throw away comment you made a long time ago has now become my path to finishing this build.
…like a 50 year-old race car that has been into the hay bales a few times in its life…
So whilst the arch isn't perfect, it doesn't need to be & I can keep moving forward.
- - - - - - - - - - - - - - - - - - - - - - - - - - - - - - -
Tuesday - Part 2:
It actually took quite a bit of effort to sand down the body filler.

Obviously I just couldn't resist putting some etch primer on to see how it really looked.

At this point, I put the wheel back on, jacked the car up, removed the blocks and let it back down.
Before:

During:

After:

Note:
My sloping driveway is extending the gap between the tyre and the arch in this photo.
I pushed the car to the other end of the drive and the different angles there, squeezed the gap.

And here is the "Before" for this photo too.

While the car was out of the way, there was a bit of cleaning up to do.


End of Part 2…
|
5th April 2016, 19:27
|
|
Senior Member
|
|
Join Date: Feb 2012
Location: Wembley, London
Posts: 5,056
|
|
Tuesday - Part 3:
A while back I bought a rubber strip to cut down and use to mount the twin tail pipes a bit lower than before.

Because the rear of body shell is actually bonded on a bit lower than I originally planned.
I dusted off the tail pipes (as the boot isn't sealed off yet).

But quickly realised that I needed the car jacked up again to get better access to the mounting brackets.
So I pushed it back into a more central position, jacked it up again and supported it on blocks.


However, I will come back to this job another day.
Instead, I spent ages crawling around under the car trying to work out the best way to extend the panelling.
Initially, I was going to continue from the bottom like so.

Then I though I should follow the lines of the Spitfire boot.


In the end I decided on a mix of the two options, when I remembered to check what the other side looked like.

I also made a couple of templates for the driver's side.

Unfortunately, other domestic chores prevented me from doing any more car work, but it was still a good day.
So until next time, take care, Paul.
|
7th April 2016, 16:56
|
|
Senior Member
|
|
Join Date: Feb 2012
Location: Wembley, London
Posts: 5,056
|
|
Nothing Much:
Looks like I'm back to the old tradition of having time available for car work, but not the weather.
But in between the wind, rain & hailstones (& other chores) I have cut out the first fibreglass panel for the wheel arches.

Which doesn't leave much left of the original Cordite bulkhead.

I've also ordered an off cut of aluminium sheet which I plan to use for part of the inner wheel arch join too.
The current plan is to use fibreglass for the joins at the bottom edges of the wheel arch (on both sides) & the aluminium for the rest.
This will require some sort of riveting / bonding / fibreglass work to connect the Spitfire inner wheel arch to the body shell.
Thankfully, the gap I need to bridge is just a few inches wide.
With a bit of luck I will get a chance to at least start this work tomorrow.
So until then, take care, Paul.
|
7th April 2016, 21:53
|
|
Senior Member
Enthusiast
|
|
Join Date: Jun 2015
Location: Reading, Berkshire
Posts: 688
|
|
Looking great Paul
Loving the details in your thread
Dave
|
8th April 2016, 17:54
|
|
Senior Member
|
|
Join Date: Feb 2012
Location: Wembley, London
Posts: 5,056
|
|
DaveP - Thanks.
I've always liked reading build threads with lots of detail, so I figured I would do the same.
It also acts as a reminder of why the build has taken so long, as even small jobs can take a lot of time.
- - - - - - - - - - - - - - - - - - - - - - - - - - - - - - -
Fiddly Friday - Part 1:
First of all, apologies for not spotting the smear on the camera lens, so the first few photos appear as "soft focus".
Started the day with a quick tidy up of the Summer house.


The good news is that I found the second original tail pipe rubber mounting (which was buried under other stuff).
The bad news is that I didn't have as many plastic containers as I thought for use with resin & bonding paste.
Even worse, the recycling had just been collected, so I ended up having to decant some milk to use the container.

Once outside, I removed the rear wheel on the driver's and quickly spotted a school boy error.

Don't ask me why I left this in place and therefore didn't cut out this panel in fibreglass yesterday.
Not easy to see in the photos, but I needed to clean the inside surfaces of the existing 'boot floor to body shell' panels on the drivers side.

Then I added some fibreglass matting along the joins (again, not easy to see).

I also 'glassed in the following:
- Two panels on the leading edge of the rear wheel arch on the driver's side.

- Two panels on the trailing edge of the arch on the passenger side.

Note:
I had struggled to work out the best way of sealing this gap, as there were too many angles to play with.
So I figured that fixing these panels in position would make it easier to see how to finish the job.
At this point, I could see blue sky over my right shoulder...

And dark clouds over my left.

So I quickly cut out the next series of panels that I would need, including the one I forgot yesterday, before getting the covers back on.

Note:
I ended up cutting the biggest panel into two pieces, to help it follow the curve of the arch better.
End of Part 1…
|
8th April 2016, 17:55
|
|
Senior Member
|
|
Join Date: Feb 2012
Location: Wembley, London
Posts: 5,056
|
|
Fiddly Friday - Part 2:
Later on I did my second round of fibreglassing:
- The panel I missed on the leading edge of the driver's side.
( Which could now be joined to the panel above it, that I put in this morning. )

- Two panels on the trailing edge of the driver's side.

- The big panel (now two pieces) on the leading edge of the passenger side.

- An "in fill" panel between the bottom edge of the framework on the passenger side and the body shell.
( The rest of this gap is much narrower and was sealed with bonding paste. )

Once this is finished I'll try to take a photo from underneath than should make more sense.
Unfortunately, by now, the dark clouds had returned, so I put the covers back on so everything could set without fear of rain hitting it.
As it turned out, other things then got in the way of me doing any more today.
Despite the fiddly nature of this work, at least it is slowly starting to take shape.
So until next time, take care, Paul
|
9th April 2016, 13:36
|
|
Senior Member
|
|
Join Date: Feb 2012
Location: Wembley, London
Posts: 5,056
|
|
Saturday:
It was a very wet start to the day, so it was mid-morning before it was dry enough to work outside.
Thankfully, all the fibreglass work done yesterday had set solidly over night.
Although I knew that resin & bits of matting ended up on some of the tape I used to temporarily hold the panels in place.

So I needed to use my Dremel lookalike tool to carefully clean this off before I could remove the tape completely.
( I also ground down any other areas with stray pieces of matting. )

I then spent some time making more cardboard templates for the remaining panels that I need.


In the end, I abandoned any thoughts of keeping the panel designs vaguely symmetrical on both sides.
To be honest, given how much work this has been already, I will be happy just finishing the job.
( Especially as many, if not most, Sammios have absolutely nothing in this area at all. )
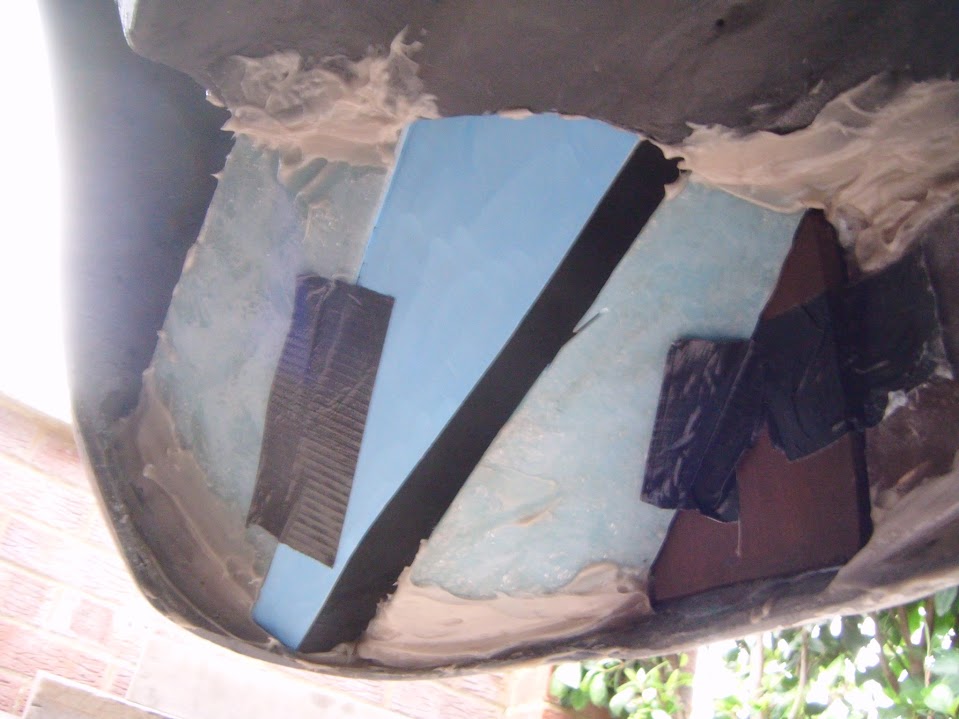
In this photo you can see two separate panels on the leading edge of the passenger side arch.

The "inner" panel was put in place when I initially bonded the body shell to the Moon Rover.
So I intend to join the two panels together, as the aluminium sheet will continue from here.
Next I added fibreglass matting to the areas where the tape had been on yesterday's panel work.
Driver's Side: Leading edge & trailing edge


Passenger Side: Leading edge & trailing edge


Next job was cutting the next batch of panels out of my fibreglass scrap pile.

By now, the sky was telling me that it was time to get the covers on.
So that is as far as I've got and it is raining outside as I type this.
If I can't get back out today, hopefully I can carry on tomorrow.
So until next time, take care, Paul.
|
9th April 2016, 18:10
|
|
Senior Member
|
|
Join Date: Feb 2012
Location: Wembley, London
Posts: 5,056
|
|
Saturday - Part 2:
The rain eventually stopped and the sun came out, so I continued working on the car...
Started by tidying up any stray bit of fibreglass and then had a slight change of tack.
Initially, I was planning to add some more matting to the inside edges of the latest panels.
However, access is really restricted, so I mixed up some bonding paste instead.

Using my (gloved) fingers to apply this paste was still tricky and very messy indeed.
( Sorry, I couldn't get any decent photos of the inside edges either. )
Then it was a bit of a race against time to tape the new panels into position and start fibreglassing.
Especially as the sky was looking like this, with the dark clouds heading towards me.

Still, I managed to make a good start on the remaining three sides.
( The trailing edge on the driver's side is now completed. )


- - - - - - - - - - - - - - - - - - - - - - - - - - - - - - -
Top Tip:
Covering the wheel hub with a dust sheet does not protect your head from any impacts!

Ouch! 
- - - - - - - - - - - - - - - - - - - - - - - - - - - - - - -
Well the rain has started again as I finish typing this, so good timing today.
So until next time, take care, Paul.
|
10th April 2016, 11:47
|
|
Senior Member
|
|
Join Date: Feb 2012
Location: Wembley, London
Posts: 5,056
|
|
Sunday Service - Part 1:
I quietly removed the tape holding the last batch of panels in place & sanded down the fibreglass.
( As I wasn't going to use any power tools at this time of the morning. )

There is small panel left to fit to close this "hole".
( I couldn't fix this yesterday, as I needed the access to 'glass the "floor" panel into position. )

I have now completely, run out of recycled containers for mixing resin, so this was the best I could do.

After 2 x 100ml sessions I came up a little bit short, so these last few pieces will be added later.

Still, at least most of the matting was now been added to the arches and they are shaping up nicely.


Note:
Obviously, these inner arches will all look a lot better when they have been painted black.
( I just hope the MOT tester appreciates the effort, as no one else is going to see this.  )
I'm just going to grab a bite to eat while that sets and will be back later...
|
|
Currently Active Users Viewing This Thread: 8 (0 members and 8 guests)
|
|
|
 Posting Rules
|
You may not post new threads
You may not post replies
You may not post attachments
You may not edit your posts
HTML code is Off
|
|
|
All times are GMT +0. The time now is 22:59.
|


 Linear Mode

