|
|
| Sammio Builds and discussions Sammio bodied car builds and specials |

16th January 2014, 08:59
|
 |
Senior Member
|
|
Join Date: Dec 2011
Posts: 656
|
|

A good move Paul.
The decision to remove the doors in the Navigator redesign was made for two reasons. The first was that the original door design was an abomination, was asymmetric and couldn't be made to fit with a bucket of filler and also that, once fitted, actually made entrance and egress to and from the cockpit harder as there wasn't a structural part you could hold on to whilst lowering yourself in to the seat. I'm not saying doors couldn't be made to work, just that in my opinion, they shouldn't 
Being at the stage you are at, rather than with '56' that already had the door shut fabricated, it would be an easy job to remove (If they haven't already dropped off) the inner door structure, tack the skins in place on the outside in a few places with strips of ally / wood or whatever and self tappers to retain the position then lay a couple of layers of glass mat overlapping the join by a few inches on the back to regain the structural integrity of the cockpit side. From there, after removing the strips, it's a filler job to suit.
You have the right idea about the frame side of it. Steel bars from front to rear door shut members should do the trick.

|
16th January 2014, 16:46
|
 |
Senior Member
|
|
Join Date: Feb 2012
Location: Wembley, London
Posts: 5,056
|
|
Mac - My initial thoughts were along the lines that Andy suggested above (more detail below).
Jim - I will be adding some box section (see below).
Mike - I feel your pain.  Andy
Andy - That is the basic plan and I'll also touch on the support element below...
- - - - - - - - - - - - - - - - - - - - - - - - - - - - - - -
Frame Work:
In theory the Cordite frame has extra strength built in at the bottom, to take account of the door opening.

But I will still run some extra box section across the top of the door opening like so...
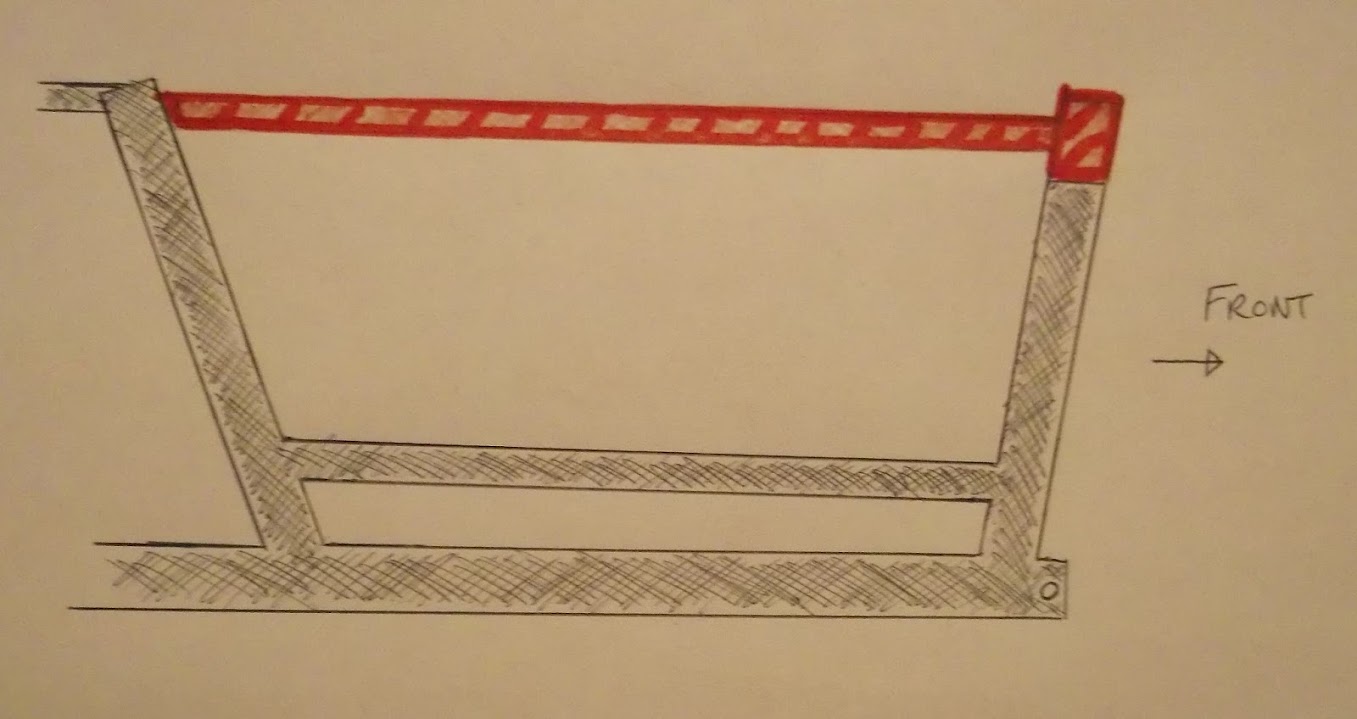
I may also add another length of box section vertically, or diagonally, between the top and bottom.
Although in reply to Jim's point about side impact protection, a safety cage this isn't.
I'll work out the best design for the "join" when the bulkhead has been fitted.
I went back and double checked Mister Towed's build about the height of the frame rail.
It is clear that there is a gap above the frame before you reach the body shell.
So I guess it is the plywood cockpit panels that support the side of the body when people climb in.
As for the sealing the doors up, I was planning a proper "temporary" fix of the outer door skins.
( This was just an earlier test fit. )

After they were fixed, I would cut out the door opening "return edge".
( If that is what it is called.  )
This should allow me to make a wide fibre glass join from inside the body shell.
I'd then add an extra layer (or two) of fibreglass across the whole area.
( A bit like the way Mac re-enforced the side of his Navigator body shell. )
My free time is disappearing fast these days.
But I hope to start working on the panel for the heater controls next.
Cheers, Paul. 
|
17th January 2014, 03:22
|
|
Junior Member
|
|
Join Date: Jan 2014
Location: Canada
Posts: 15
|
|
Quote:
Originally Posted by WorldClassAccident

Timmy's or Tim's or Timmy Ho's or Up the Horton's - Slang for Tim Horton's, a chain of doughnut and coffee shops named after a famous hockey player.
I am guessing the Double-Double is coffee not beer
|
You are correct,eh. Two milk, two sugars.
Sorry aboot high jacking your tread, I will start one of my own and put my townie's worth there, if I can figure it, eh? |
17th January 2014, 15:43
|
|
Senior Member
|
|
Join Date: Feb 2012
Location: Wembley, London
Posts: 5,056
|
|
Dougie - No worries, there was a after the Batman photo.
If you want start your own build thread, just hit the "New Thread" button on the top left of the forum.
Also if you have a look at the "Sticky" there is a guide to loading photos too (from your "Which kit?" post).
- - - - - - - - - - - - - - - - - - - - - - - - - - - - - - -
Heater Controls Panel:
I added some "tabs" to my original cardboard template.

Three sides will have an edge around an inch deep as a bit of protection for the "workings" behind the control dials.
The top edge is over two inches deep as this is where I will be bolting it to the existing dash.

When my mate leant me his welder he also donated a sheet of steel to the project.
So rather than recycle some of the Spitfire, I had nice clean metal to play with. 

Once the template was cut out, edges cleaned for welding and the fold lines drawn on, I was good to go.
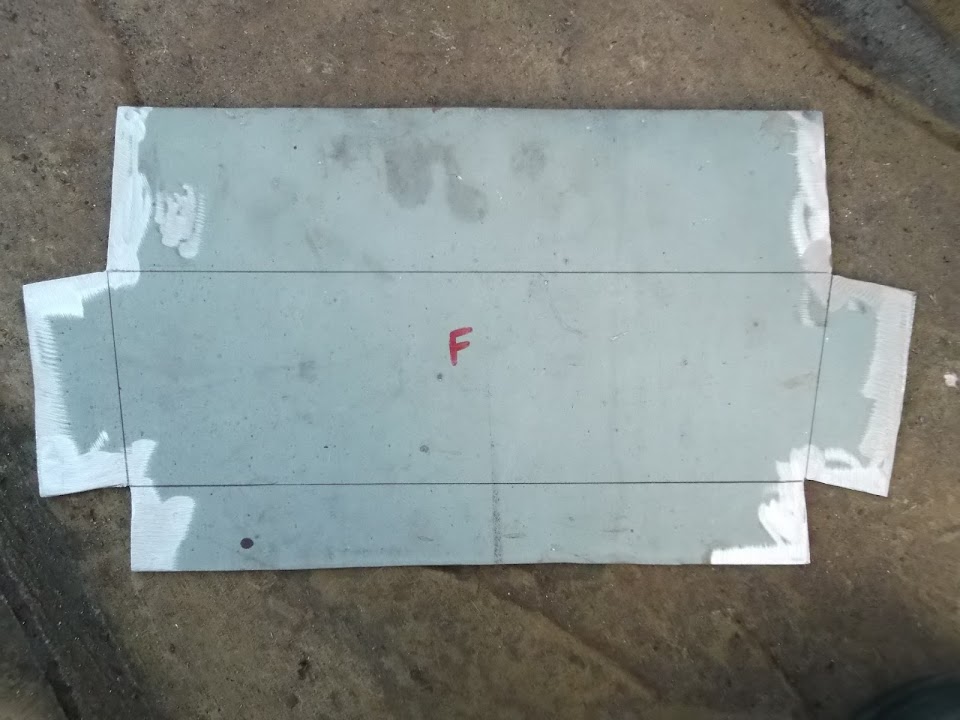
I hadn't quite finished all my hammering when it started to rain.
So whilst there is still a bit of fine tuning to do on the edges, you can still get the idea.

Similarly, I need to measure and mark up the holes for the controls properly.
But it will end up looking something like this, but painted black.
Once I've finished straightening it all out, I will then weld the edges of the tabs together.
Until then, take care, Paul.
|
18th January 2014, 16:07
|
|
Senior Member
|
|
Join Date: Feb 2012
Location: Wembley, London
Posts: 5,056
|
|
More Panel Work...
After some more hammering and cursing, the panel was as straight as I could make it with my limited skills/tools.
Then it was time to get the welder out and test/adjust the settings on some of the off cuts from the panel.

Then I welded up the all the inside edges of the panel.

Before adding a thin line of weld on the outside edges, which I then ground back flush.
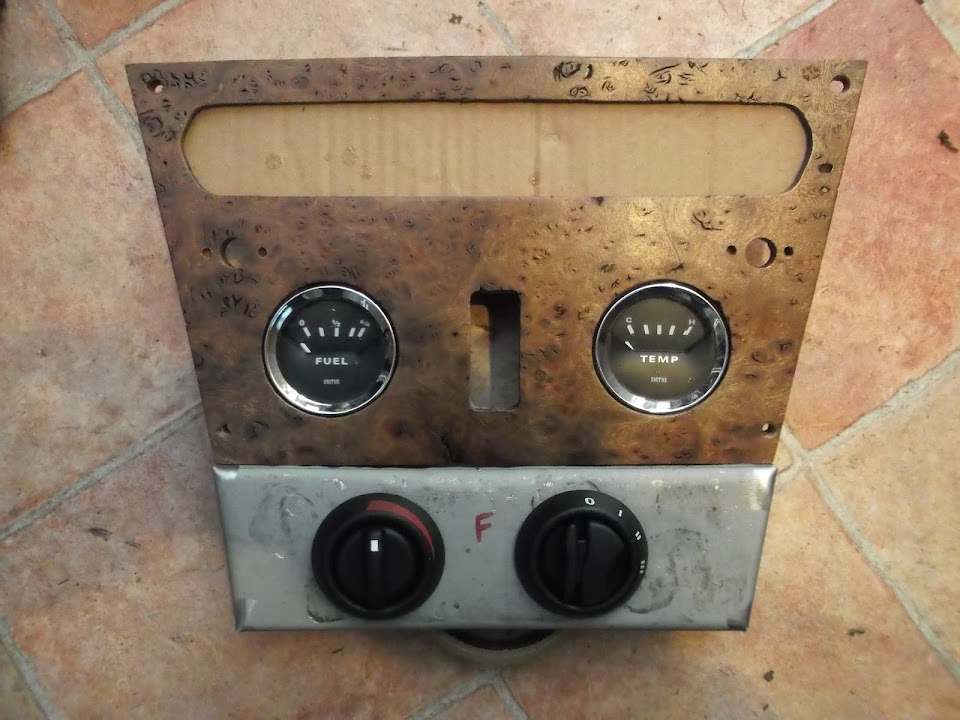
I then marked up where I needed to drill the holes for the control dials.
This is the first time I've used one of my new step drill bits, what a great piece of kit.

So now the back of the dials can fit through (sorry the photo is blurred).

But the dials themselves have two small locating lugs.

After making another template to make sure the dials were facing the correct way, I marked & drilled the holes.


Now the dials fit flush against the panel.

And this is what the panel now looks like under the dash.

I quite like this "metal" finish, so next time I will replace the cardboard with metal and see what it looks like.
(Although I'm not sure how you would protect the bare metal, so will probably still paint it black.)
Also I am quite pleased that I am now capable of making something like this in the first place.
All that remains to do now is sort out mounting this to the dash.
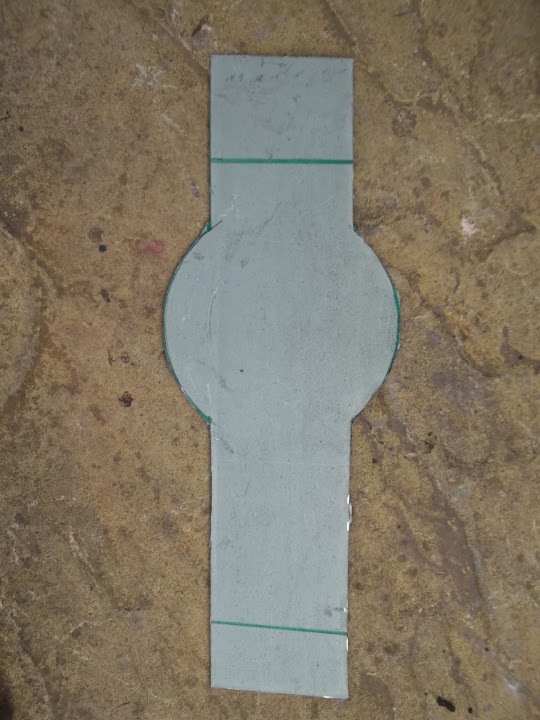
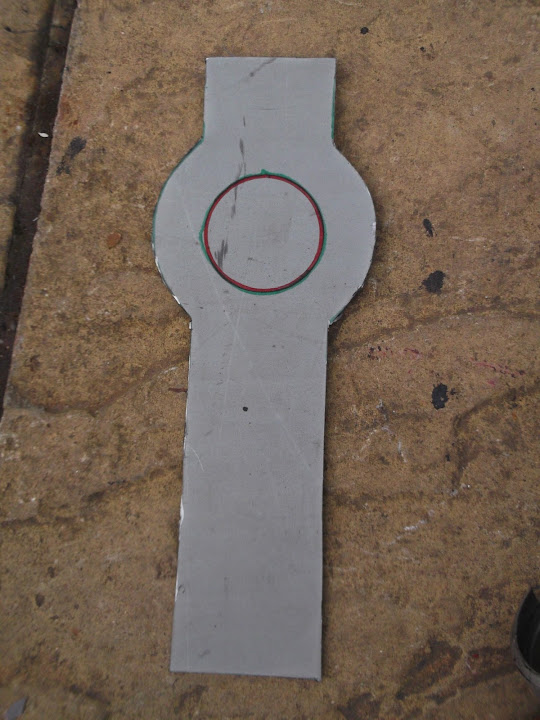
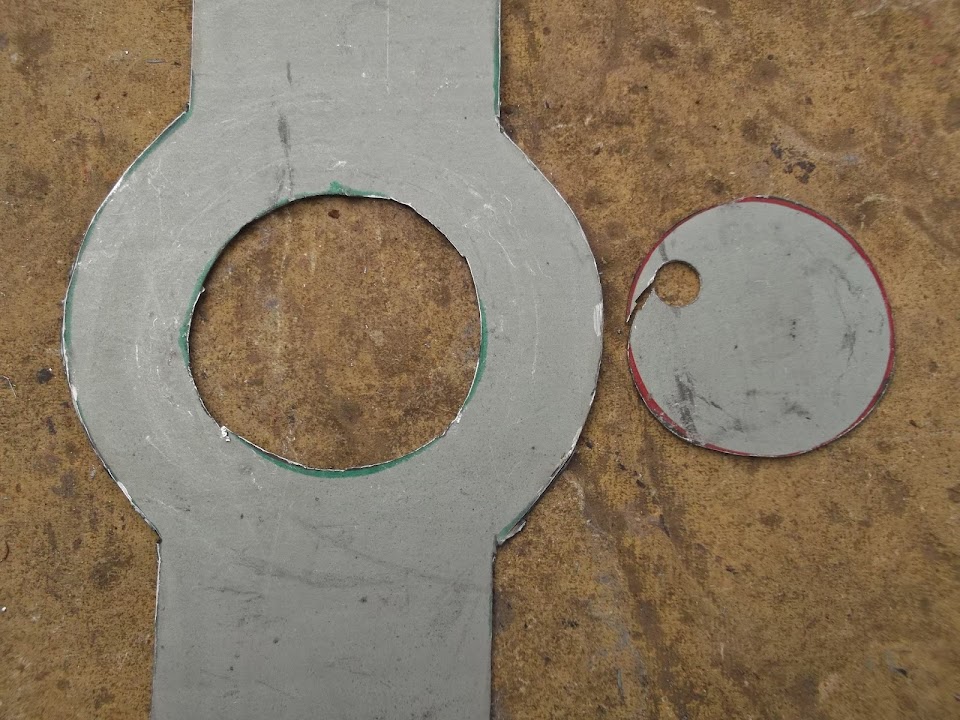
Vent Panels:
I've had another idea for the panels to hold the vents in place and they will now look more like the one on the right.

Note:
I will make the circle of metal around the vent a bit bigger when I cut it out in metal.
( The only thing I had to hand to draw around when I was playing around with this was a roll of tape. )
Until next time, take care, Paul.
Last edited by Paul L; 19th January 2014 at 07:17..
Reason: Typos
|
19th January 2014, 16:40
|
|
Senior Member
|
|
Join Date: Feb 2012
Location: Wembley, London
Posts: 5,056
|
|
Chasing the light...
Only had the chance to get a brief session outside, but at least I chipped away a bit more.
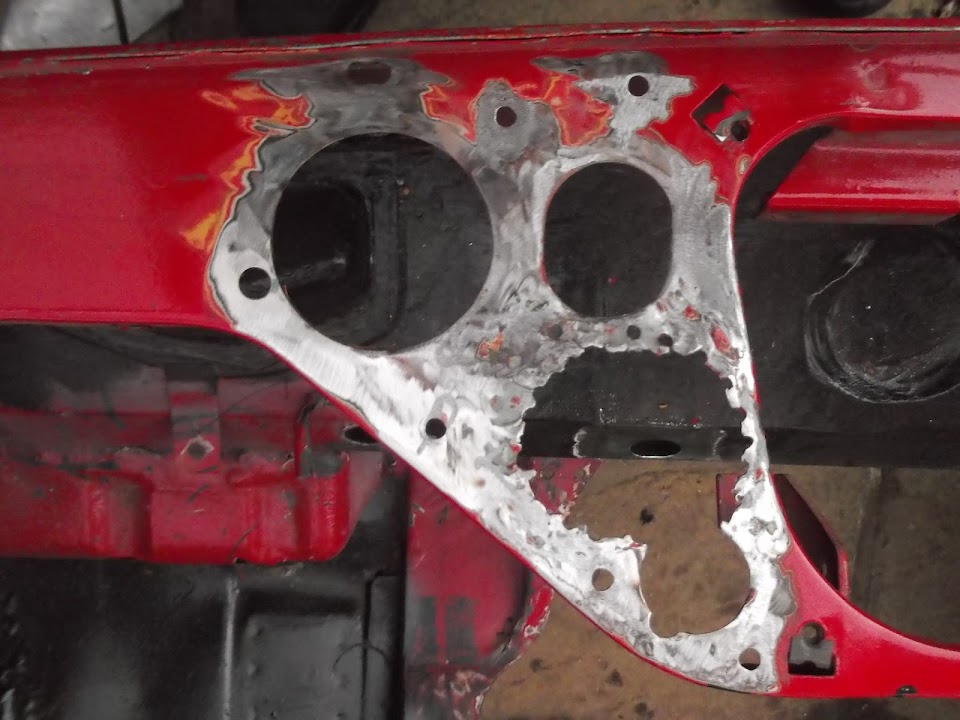
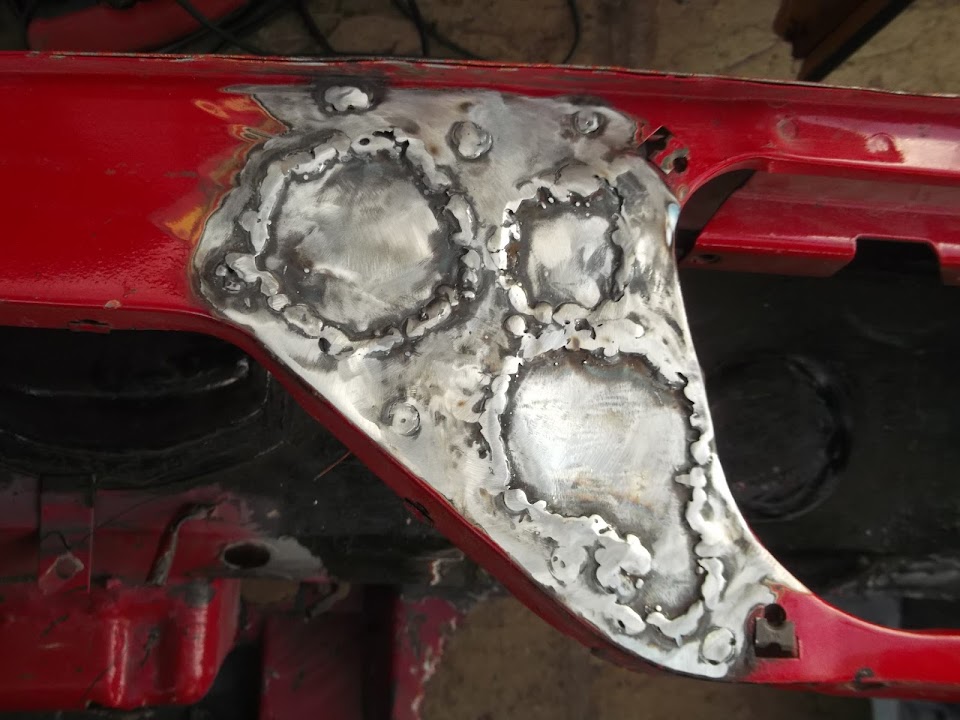
I cut out and cleaned up the panel to blank off the old heater controls "hole".

I then cut out the repair panel for the left hand side of the dash board.
( Although it will be welded in behind the existing dash metal work. )

I just need to tidy up this mess first, including the return lip of one of the holes.

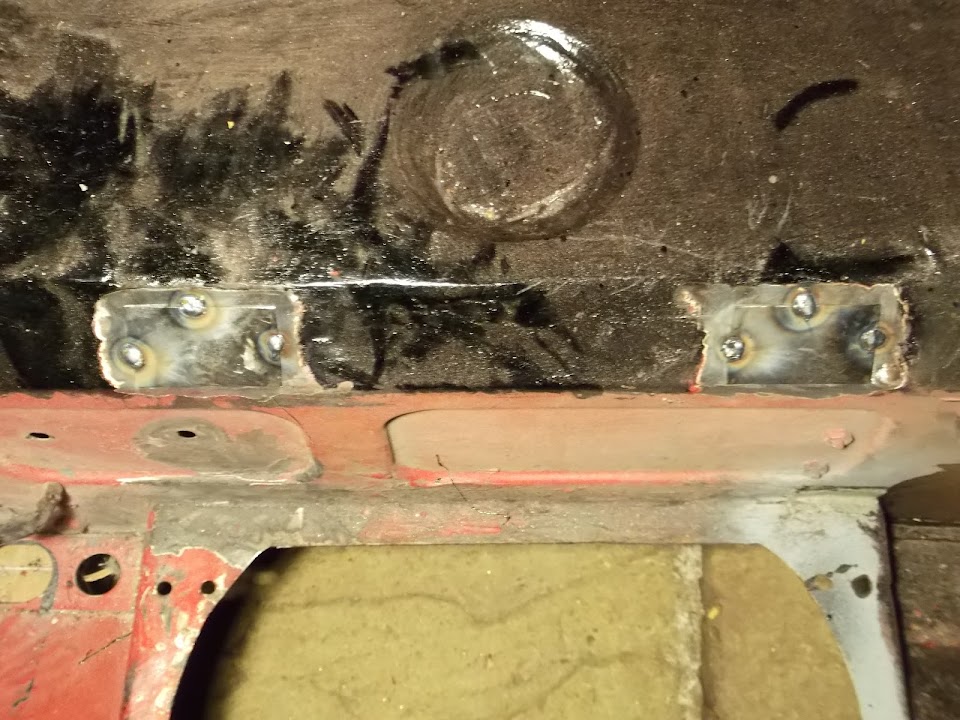
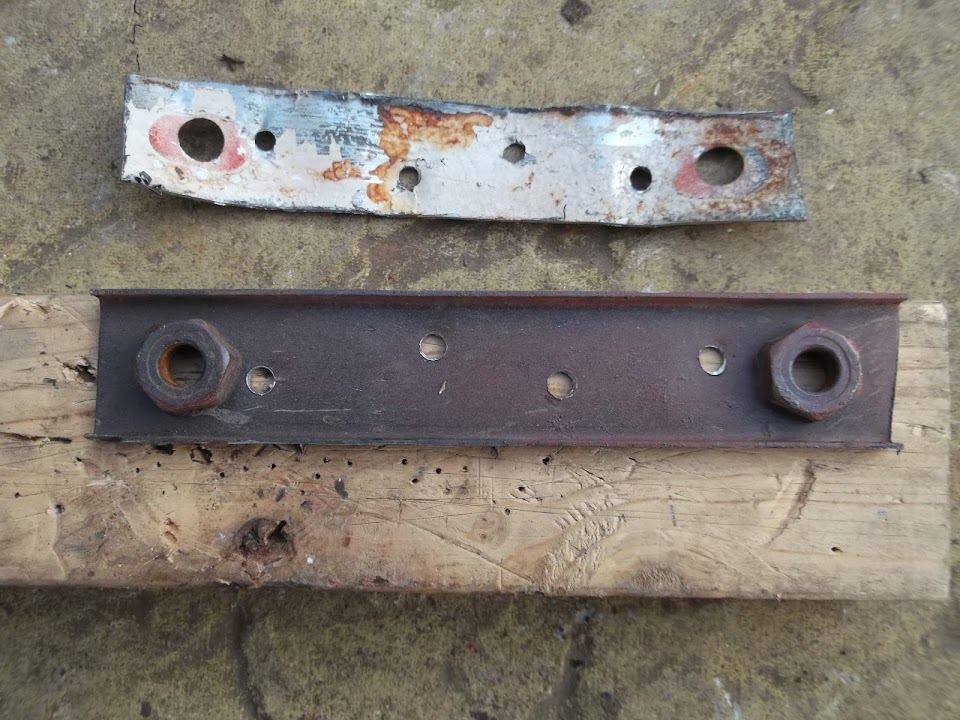
I saw this piece in my scrap pile and though I could use the "nuts".

So I cut them out and compared it to the holes in the dash I planned to bolt the heater control panel to.
( Sorry the light was fading fast and messing up the photos. )

I will just need to open the holes a bit and they should work a treat.

I then cut out another piece from the same section as I had another idea.

After a bit more cutting and shaping this could be used to join the dash to the steering column.


OK, by now it was getting both dark and cold, so I had to be quick.
Currently the wooden dash comes in 3 sections and only has one small bracket linking two sections.

I plan to join all three sections together to form a single piece.
This will be mounted by the existing 4 screws used for the centre section.
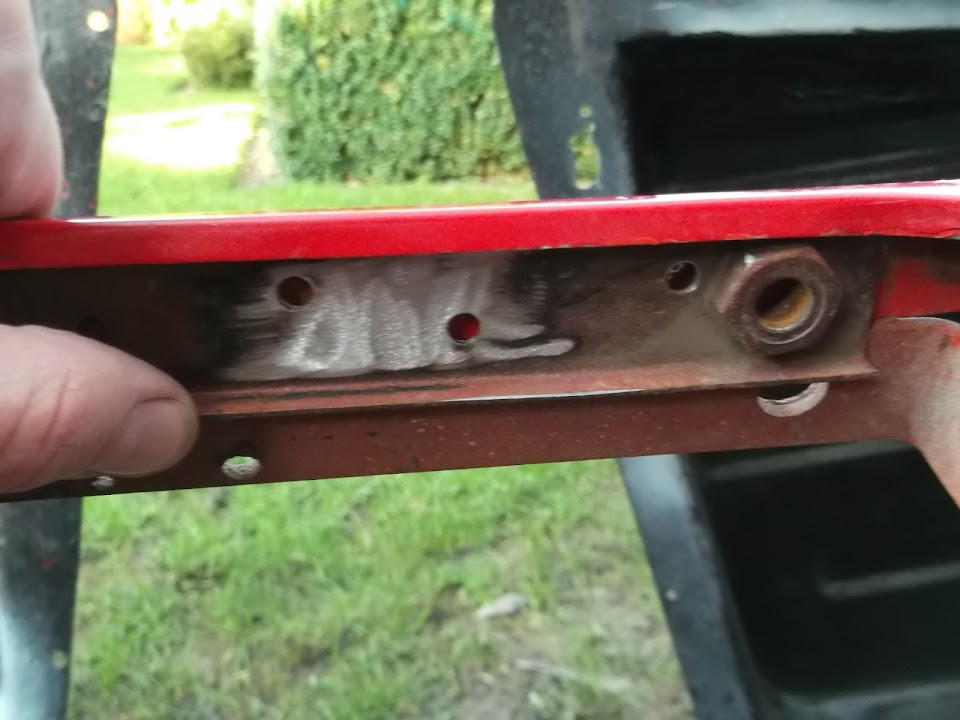
Plus the existing mounting points at each end that look like this.

I will then use some glue and brackets to join the three sections together from behind.
I had these "L" brackets lying around, but I will have another think about the best way to do this.

As long as the whole dash can be still be removed I cant see the problem with it being a singe piece.
The existing join already prevents you removing the speedo section unless you remove the centre section first anyway.
That's all for now, take care, Paul.
|
19th January 2014, 16:48
|
 |
Senior Member
Enthusiast
|
|
Join Date: Dec 2006
Posts: 1,130
|
|
Hi Paul, my advise would be to keep the 3 sections as they are.
The centre section is removed with ease and does allow you to access the heater controls and most of the wiring behind the clock section with-out having to remove anything else  |
19th January 2014, 18:52
|
|
Senior Member
|
|
Join Date: May 2013
Posts: 2,161
|
|
Bloody hell Paul! I've missed so much! Starting to look good now.
|
20th January 2014, 17:29
|
|
Senior Member
|
|
Join Date: Feb 2012
Location: Wembley, London
Posts: 5,056
|
|
Micky1mo - Thanks for the feedback, I'll keep the dash as three separate sections.
Scottie - Cheers, it does look like I will be able to make this bulkhead work for my build.
- - - - - - - - - - - - - - - - - - - - - - - - - - - - - - -
Another short session...
Too many other things going on at the moment, but I did spend a bit of time outside today.
Started by cleaning up the holes in the bulkhead where the original heater pipes went.

I also cleaned up the left hand section of the dash mounting and added a few extra holes for welding.
Then it was simply a case of clamping, welding, moving the clamps & repeat.

As it got dark, I had to admit defeat as I couldn't see what I was doing.
I've tried using a spot light to help me weld, but it seems to trigger the mask meaning I still can't see.
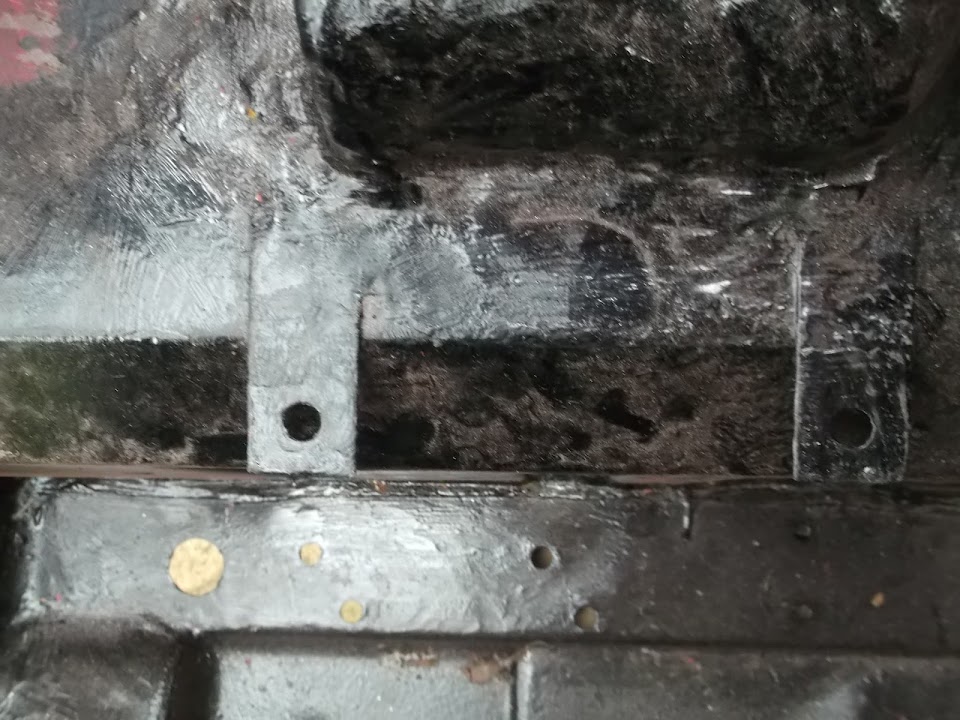
Just to give you an idea, this was "knocking off time" without using the camera flash...
And this is with the flash...
( Note the "fog" in the top right of the picture is my breath, as it was now pretty cold out. )

Obviously I can use my work lights to help me tidy the mess up and not leave any tools outside over night.
I also used the light to help take these last two photos.

Plenty of work to do in both areas, but at least it is a start.
Until next time, take care, Paul.
|
20th January 2014, 21:10
|
|
Senior Member
|
|
Join Date: May 2013
Posts: 2,161
|
|
Thank goodness for that Paul!
I should hope so after all that hard work!
Crack on mate. :-)
|
21st January 2014, 16:31
|
|
Senior Member
|
|
Join Date: Feb 2012
Location: Wembley, London
Posts: 5,056
|
|
Scottie - Sorry, I don't think I worded my previous reply very well.
I was always going to use the bulkhead once I'd committed to repairing it.
But it is only now that I finally believe I will be able to make the heater, vents, etc. work too.
After today's work, it is clear to me that the vent panels will stiffen the whole dash area nicely.
- - - - - - - - - - - - - - - - - - - - - - - - - - - - - - -
Odds & Ends...
Managed to time my availability with proper day light for a change.
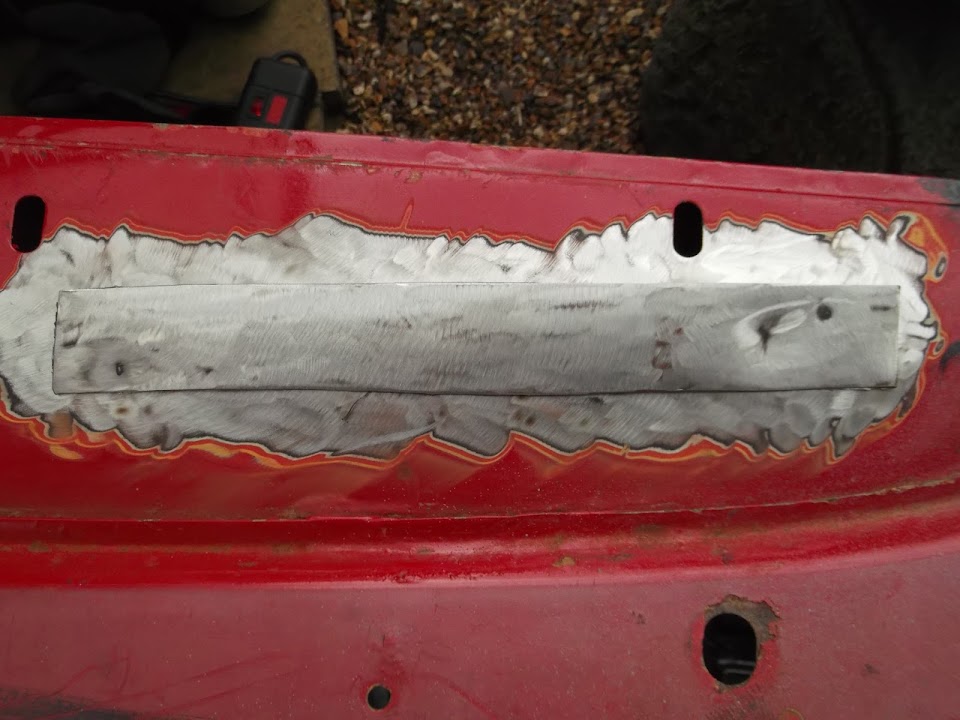
Finished welding up the small panels covering the original heater pipe work holes.

Also finished welding up my dash repair panel.
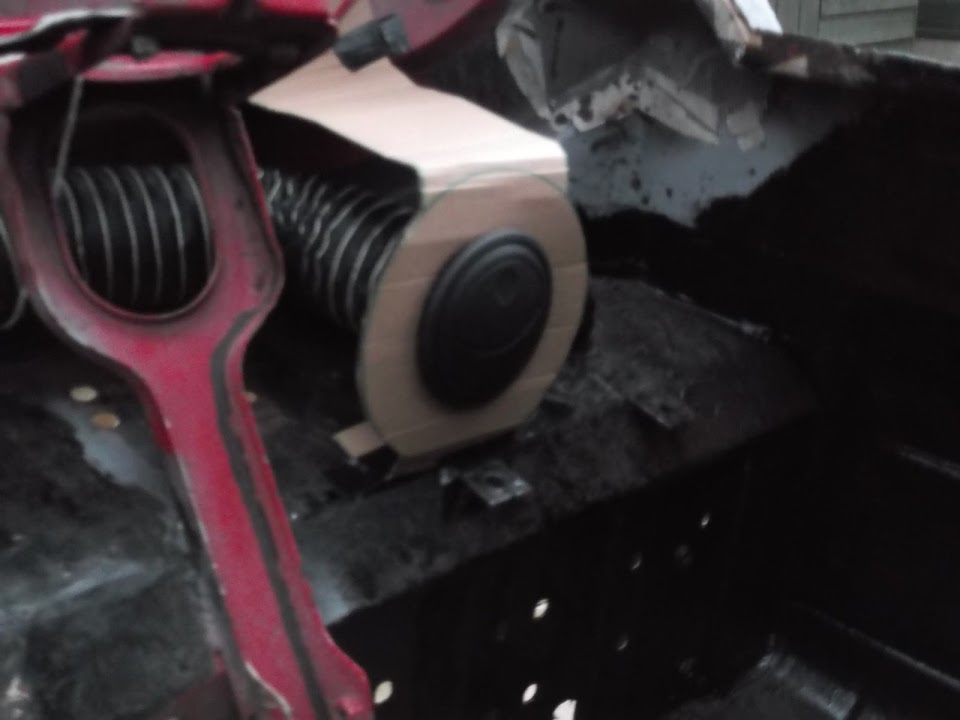
I've had another thought about the battery cut off switch and I will not use the cigarette lighter hole.
Instead I will used some wood filler to seal up the hole & fit the cut out switch somewhere around here...

This recess would be a handy place for the wiring on the other side as it is close to the battery.
I'll have a look at the best place and best way to mount the switch another day.
I also had another thought about how to mount the heater control panel to the dash.
But first I drilled out the four spot welds that held the nuts to the main panel.
This will now line up with the lip in the dash.
However, to avoid having too many holes close together, I needed to bring the nuts nearer to each other.
So I just cleaned this up, marked it, cut it & welded it back together.


This is what the bracket looks like now when held in position.

I still need to drill the corresponding holes in the dash & panel.
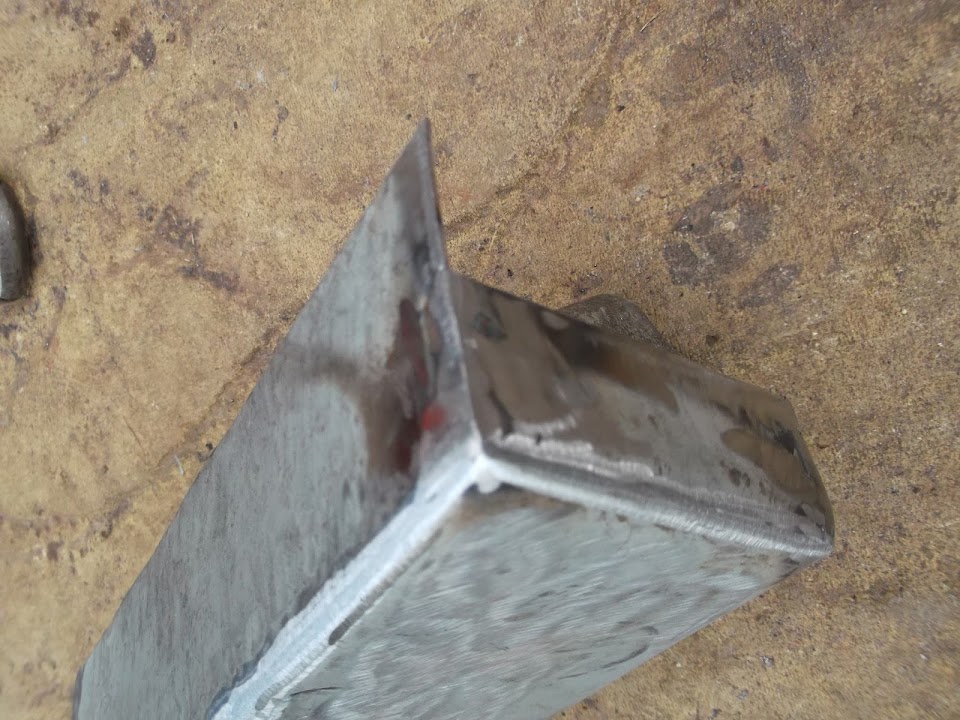
Next job was to finish the bracket linking the dash to the steering column mounts.
Thankfully the width of the bracket was the same size as this box section off cut.

This allowed me to hammer the edges of the connecting bracket around the box section, before I drilled holes at each end.

Which in turn meant the bracket was a much better fit.

This holds the section of dash I'd previously bent back in the right position.

Now I just need to find a suitable off cut to make a bracket for the other side.

Then once everything is held in position, I will take final measurements for the two vent panels.
Once these have been welded into position the whole dash area will be very solid.
Until next time, take care, Paul.
|
22nd January 2014, 15:53
|
|
Senior Member
|
|
Join Date: Feb 2012
Location: Wembley, London
Posts: 5,056
|
|
Smoke gets in my eyes...
Well I can now add bonfires to the long list of things that has prevented me doing work on this project.


I did wait until it had completely died down before going outside and whilst some smoke still lingered, it wasn't too bad.
It was only after I had set everything up and started working that they stoked the fire up again, blanketing the area (& me) in smoke. 
So this is another short update and I still have a sore throat from it as I sit indoors typing this.
I was playing with the cardboard template for the passenger side vent panel and needed a bigger circle.
( I'd forgotten to borrow a drawing compass from the children before they went to school. )
In my best Goldilocks tradition, the tape was too small, the bowl was too big, but the cutting disc lid was just right.

I then marked up the panel & cut it out.
Note: I still need to tidy up the edges a bit.
I then hammered the bottom edge to match the angle of the bulkhead where it will be mounted.


Thankfully I have learnt that it is always worth double checking metal rather than relying on a cardboard template.
Sure enough, the line I'd marked for the top bend appears to be in the wrong place.

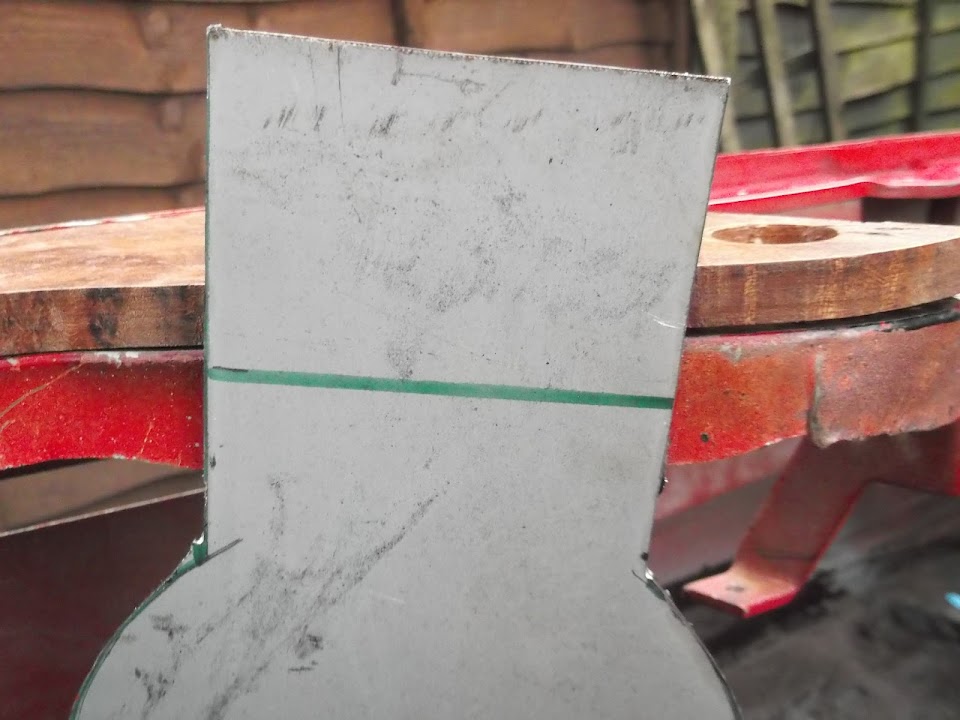
But before I re-draw the line and hammer the panel into shape I want to double check the whole dash area.
However, by this point I was coughing due to the smoke and decided to call it a day.
My final job was to copy a trick I learnt from Mark Evan on "A Racing Car Is Born"...
I have the cardboard circle I used to mark up the steel and need to find the centre point.
As this will be used to drill out the hole for the vent itself.
The steps are:
- Starting at 'Point A' draw a line to 'Point B'
- Draw a line from A to C that is the same length A to B.
- Finally draw a line between B & C.
- Next mark the mid-points of all three lines.
- Then draw 3 lines perpendicular to each of these mid points.
- Where these lines meet is the centre of the circle.
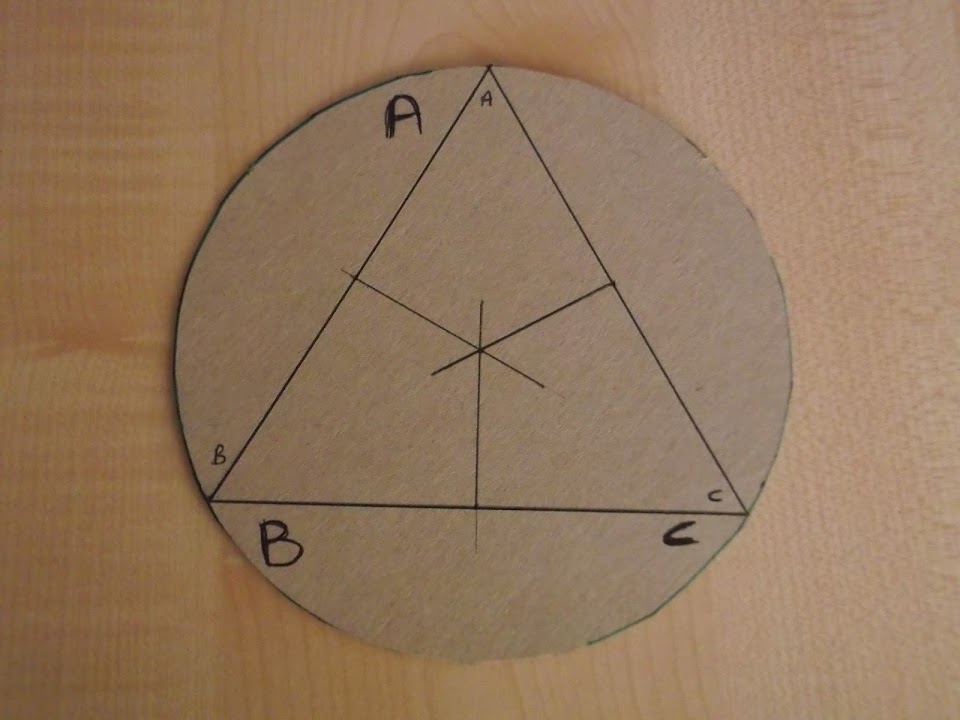
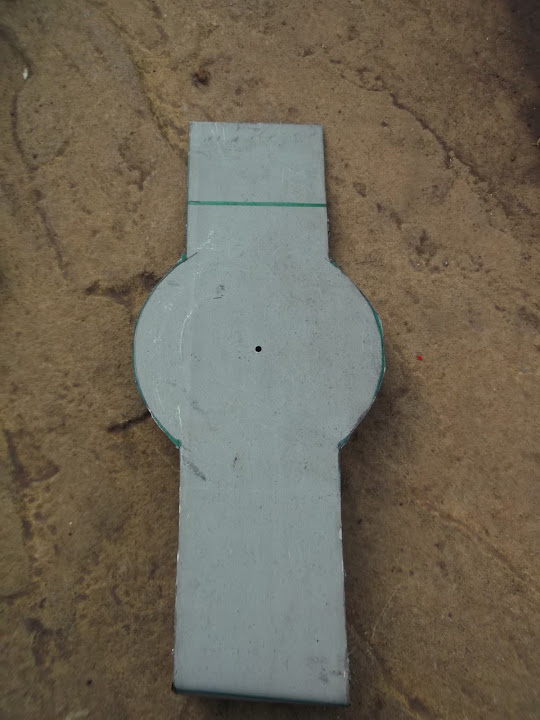
So all I need to do now is put a hole in the card & mark up the metal.
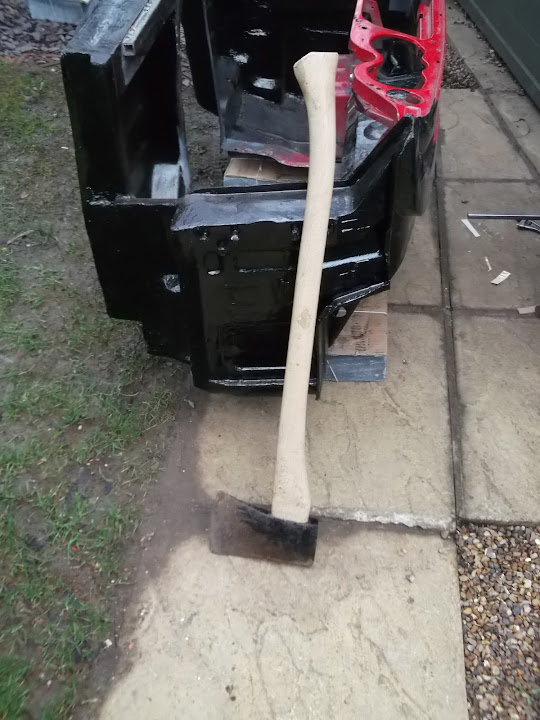
And finally, a bit of fun based on WorldClassAccident's painting post yesterday...
[Crocodile Dundee] "That's not an axe... this is an axe!" [/Paul Hogan]
Until next time, take care, Paul.
|
22nd January 2014, 16:22
|
|
Senior Member
|
|
Join Date: May 2013
Posts: 2,161
|
|
As ever, nice one Paul.
|
22nd January 2014, 21:04
|
|
Senior Member
|
|
Join Date: Jun 2011
Location: birchington, kent
Posts: 1,769
|
|
I wonder what's burried next door...
|
23rd January 2014, 16:29
|
|
Senior Member
|
|
Join Date: Feb 2012
Location: Wembley, London
Posts: 5,056
|
|
Scottie - Cheers. I know I just have to keep chipping away.
Plus I have to accept that some days are more productive than others.
GaryH - I think that is where the last person to have a big bonfire ended up! 
- - - - - - - - - - - - - - - - - - - - - - - - - - - - - - -
Small Progress on Vent Panel...
I used my centre guide to mark the passenger side vent panel and then drill a pilot hole.

Unfortunately my new hole saw set is absolutely pants and simply tried to rub its way through. 

Clearly the supplier's definition of thin steel differs from mine.
So I switched to my step drill bit and opened up the pilot hole so I could get a jigsaw blade in.
This gave me a slightly rougher hole than I was originally hoping for, but it will do.
But before I tidied up the hole in the vent panel I needed to take a file to the "official" vent mount.

I intend to use this as a big washer behind the panel to help lock the vent into place.
It only needed a bit of work on the inside edge to go from this...

To this...

Then I filed away the inside edges of the vent panel until the vent fitted neatly there too.

Then I gave all the edges of the panel a quick clean / tidy up / final shaping.
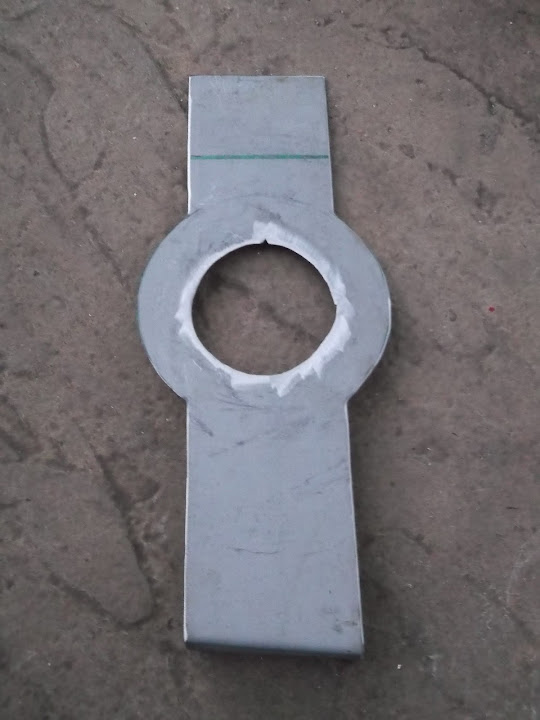
Notice I needed to file a "V" at the top to match a locating lug on the vent itself.

This is the view of the panel from the front, which I think looks pretty good.

Until next time, take care, Paul.
Last edited by Paul L; 24th January 2014 at 06:15..
Reason: Typo
|
24th January 2014, 06:14
|
|
Senior Member
|
|
Join Date: Apr 2012
Posts: 1,163
|
|
Nice work Paul, cheap hole saw sets are a waste of money on anything except maybe plastic or fibreglass. Buy yourself a decent Starrett Arbor from any decent engineering supplies place then just buy the sizes you need. Starrett stuff isn't as expensive as you would expect and last much longer and give much better results. Also when cutting holes its best to use a variable speed drill and cut slowly whilst using oil as a lubricant.
HTH
Back to the beach...
Mac
|
24th January 2014, 06:21
|
|
Senior Member
|
|
Join Date: Apr 2012
Posts: 1,163
|
|
Or for larger holes just get yourself an adjustable hole cutter, this along with your stepped cone cutter should cover most stuff
https://www.cromwell.co.uk/KEN5974520K |
24th January 2014, 06:58
|
 |
Senior Member
|
|
Join Date: Jul 2011
Posts: 5,328
|
|
Quote:
Originally Posted by Viatron
Nice work Paul, cheap hole saw sets are a waste of money on anything except maybe plastic or fibreglass. Buy yourself a decent Starrett Arbor from any decent engineering supplies place then just buy the sizes you need. Starrett stuff isn't as expensive as you would expect and last much longer and give much better results. Also when cutting holes its best to use a variable speed drill and cut slowly whilst using oil as a lubricant.
HTH
Back to the beach...
Mac
|
Sage advice V. My cheap hole saw set coped adequately with fibreglass but the teeth all rounded off in seconds trying to cut thin steel sheet. Aluminium was a bit better but they still struggled. Cheap tools have their uses but also their limitations.  |
24th January 2014, 16:27
|
|
Senior Member
|
|
Join Date: Feb 2012
Location: Wembley, London
Posts: 5,056
|
|
Mac & Mr T - Thanks chaps, I'm always grateful for your feedback and advice.
- - - - - - - - - - - - - - - - - - - - - - - - - - - - - - -
Odd Jobs...
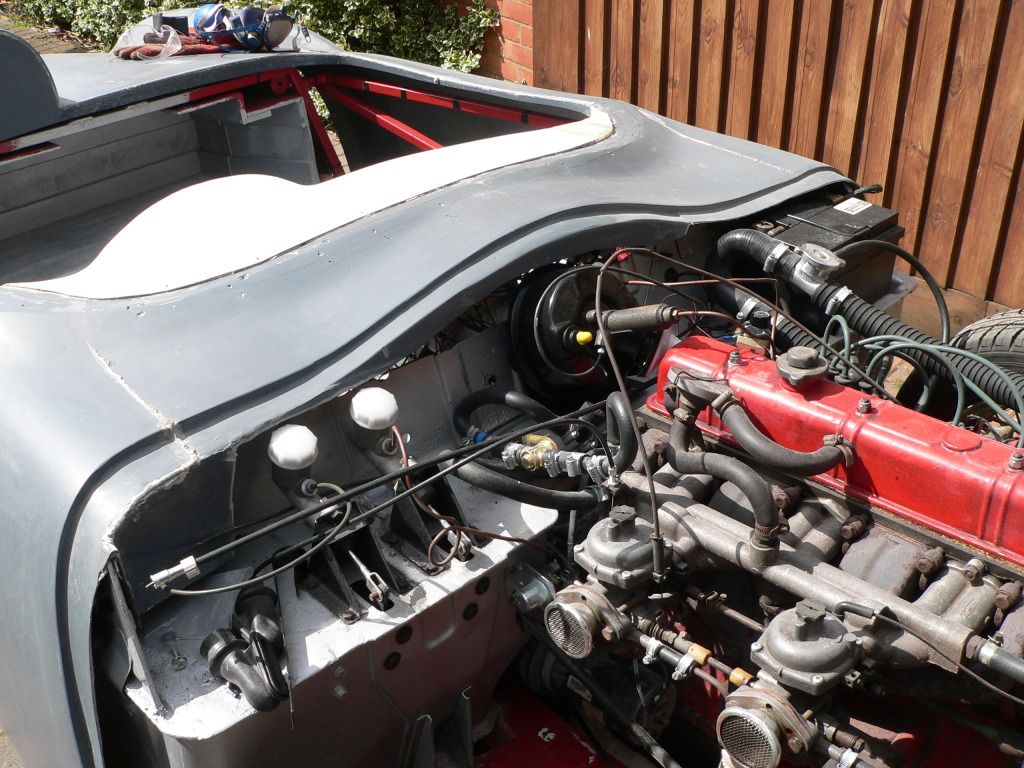
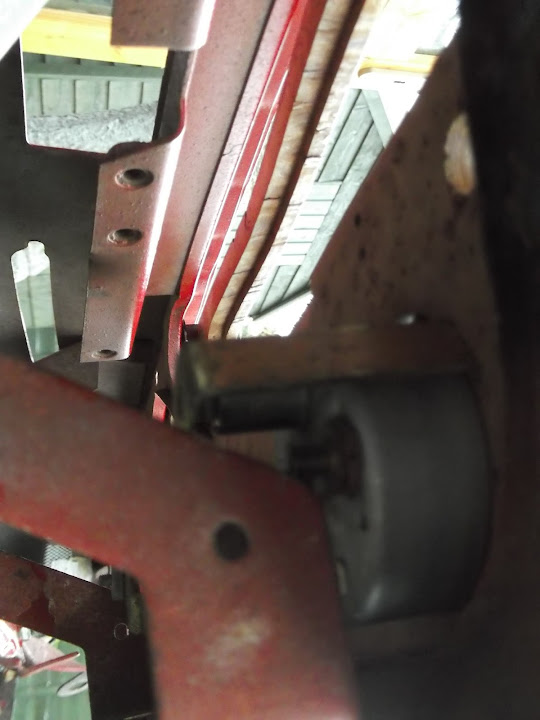
I marked up the bulkhead & drilled the two holes I need to mount the heater.

But I had enlarge the holes in the heater mount slightly to take the mounting bolts supplied.
( In the photo, the right hole has been done, but the left hole is next. )
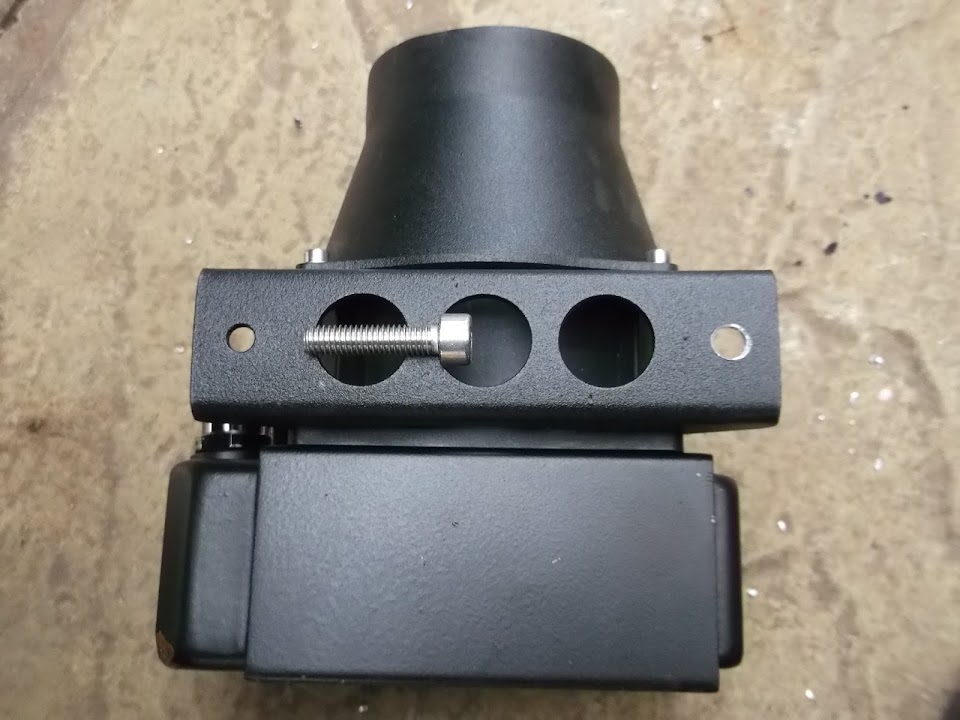
So the heater will mounted like this.
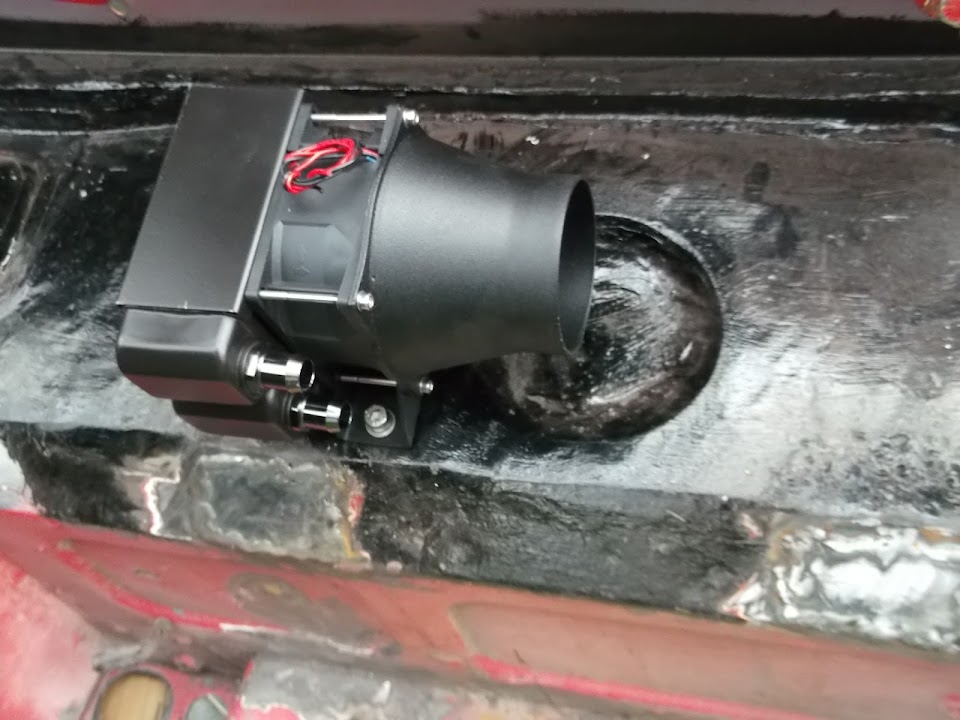
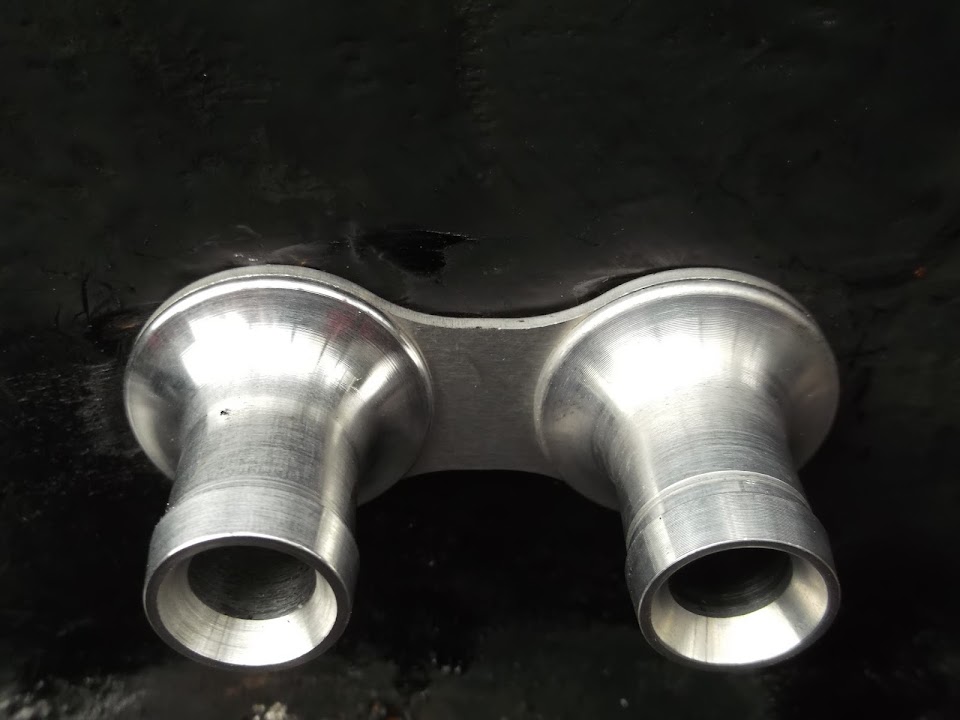
Next I marked up the bulkhead for connector for the heater hoses.

After drilling the holes the fittings could be pushed through like this.
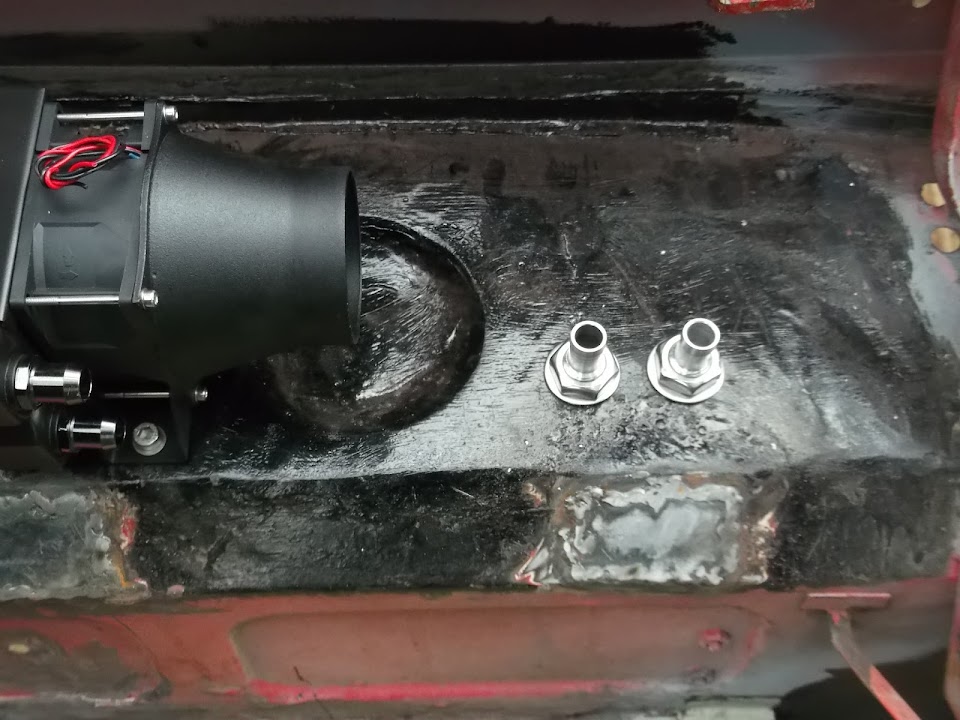
And this is what they look like on the engine bay side of the bulkhead.
I finished making the second bracket to support the dash, where I had bend the bracket back through 90 degrees.

It connected the bottom of the dash to one of the original heater switch mounting points.

After tightening up all the nuts and bolts on both brackets the dash felt pretty solid.
I then double checked the wooden dash board on top of the metal.
( It would look a lot neater / straighter if I could find the box with the screws for the dash centre section in!! )

I just needed to adjust the angle of the brackets that hold the dials in place to avoid the bracket.
( Sorry not a great photo. )
There is also a gap above the whole length of the wooden dash where a piece of Spitfire trim would have fitted.
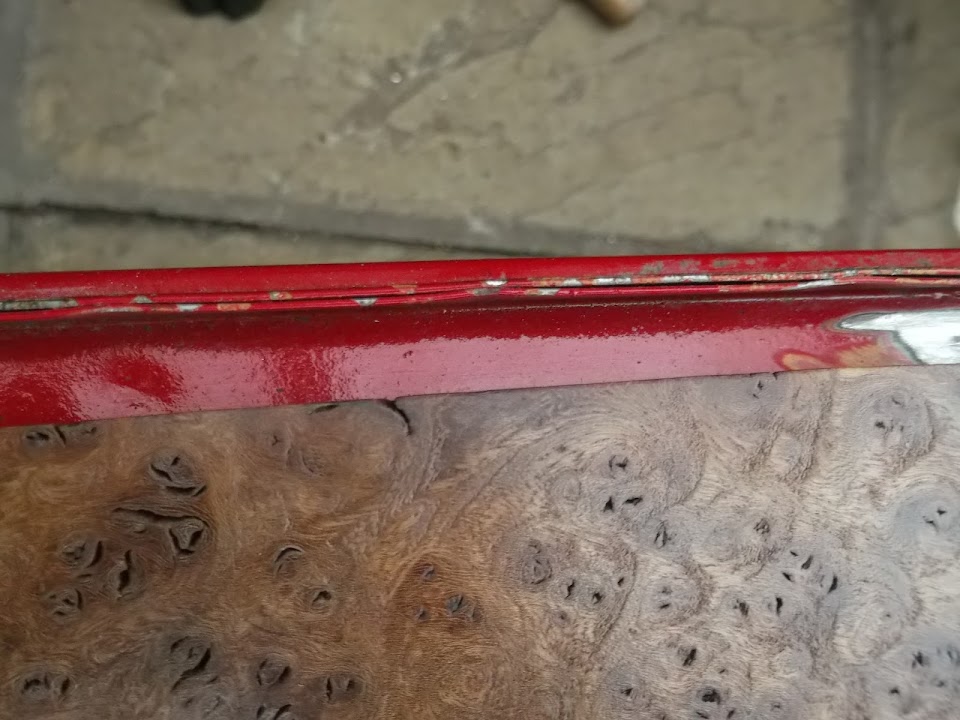
But I'll worry about what I'm going to do with that another day.
I then marked and bent the passenger side vent panel to the correct angle to sit underneath the front of the dash.

This now sits neatly in position like this.

I just need to drill a few holes and clean the metal up before I weld it into position.
I then spent a while beard scratching about how the driver's side vent panel would work.
My original plan was to have a panel that joined the dash to the bulkhead as per the passenger side.
But when I tried to finalise the cardboard template I kept running into "fouling" problems.
Eventually I came up with this design:


This effectively mounts the vent panel on two sections of the bulkhead and ignores the dash all together.
This means the dash will not fully cover the bracket when you look straight at the dash.

However, once the panel is painted black it will not be very easy to spot.
So the next steps are to cut this out of metal and make sure it feels solid after I put the bends in.
( Note: The bends will be a lot neater / straighter in metal than they appear in the cardboard template. )
Until next time, take care, Paul.
|
25th January 2014, 16:24
|
|
Senior Member
|
|
Join Date: Feb 2012
Location: Wembley, London
Posts: 5,056
|
|
More Odd Jobs...
First job was to mark up and cut out the metal for the driver's side heater vent panel.
I didn't need to mark the centre of the circle, as I used my jigsaw to cut out the hole.
( Without a doubt a decent hole saw would make a much neater job. )
I then needed to fine tune the hole in the panel and the "official" vent mount with hand files as before.
Then it just needed a quick tidy up of the edges with the grinder and it was looking like this.

I removed the left hand bracket, dropping below the bulkhead, as the bottom of the panel will be welded on here.
Then make a low tech "angle guide" for the first bend in the panel.

After putting two more bends in the panel, it now looked like this.

Which allows it to fit into place like so.

But before I start welding it in, I need to remove the flex in the dash caused by the de-mister vent holes.

I cleaned up the vent holes on both sides of the bulkhead.

Then cut out two strips of metal to weld over the top of the holes.
However, by this time the wind was howling a bit and the skies were darkening quickly.

My spider senses told me that my luck with the weather was about to rapidly run out.
So I put the bulkhead back under its tarpaulin & dumped everything else into the summer house.
And I do mean "dumped".

I just managed to squeeze myself in here too, before an epic thunder & lighting storm hit. 
The only good news was that I found two old bolts that will fit my retaining nuts panel.
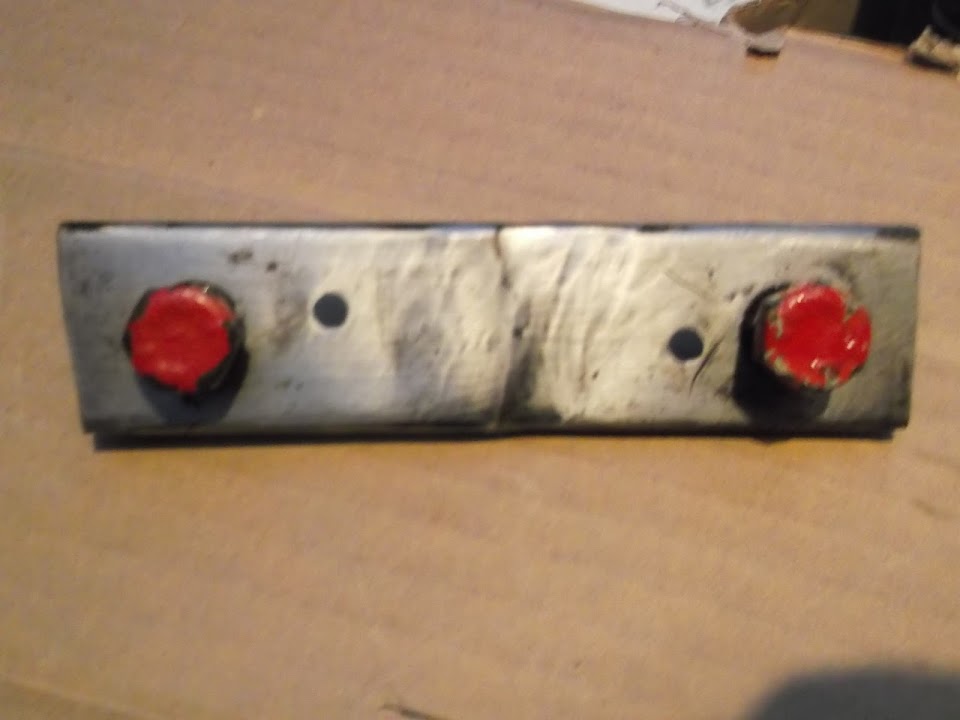
I then spend some time tidying up.

By which point the rain had died down quite a bit, so I headed back to the house.
( As there was no hope of doing anything more outside today. )
Until next time, take care, Paul.
|
|
Currently Active Users Viewing This Thread: 5 (0 members and 5 guests)
|
|
|
 Posting Rules
|
You may not post new threads
You may not post replies
You may not post attachments
You may not edit your posts
HTML code is Off
|
|
|
All times are GMT +0. The time now is 18:05.
|


 Linear Mode

