|
|
| Sammio Builds and discussions Sammio bodied car builds and specials |

23rd September 2015, 18:23
|
 |
Senior Member
|
|
Join Date: Feb 2012
Location: Wembley, London
Posts: 5,056
|
|

One Of Those Days - Part 2:
When I started doing the drilling work for the headlights, I was just sitting on the driveway as usual.
Unfortunately, it took a while for me to notice that my jeans were soaking up a lot of moisture. 
Then I remembered this photo I had seen EricHolm post on his 250SWB thread next door.

A quick trip to the Summer House later and I had what is left of the yoga mat to sit on.

I can't believe what a big improvement this made, or why I didn't think of this before. 
- - - - - - - - - - - - - - - - - - - - - - - - - - - - - - -
The postman delivered the reducing connector I ordered.

So I set about joining the two different sized radiator hoses together and this took ages too.
As initially I used a short section of the thinner pipe like so.

But no matter what route, or length of pipe I used I couldn't get a nice bend in the thick pipe. 
So I switched tactics and used a short length of the thicker pipe instead.
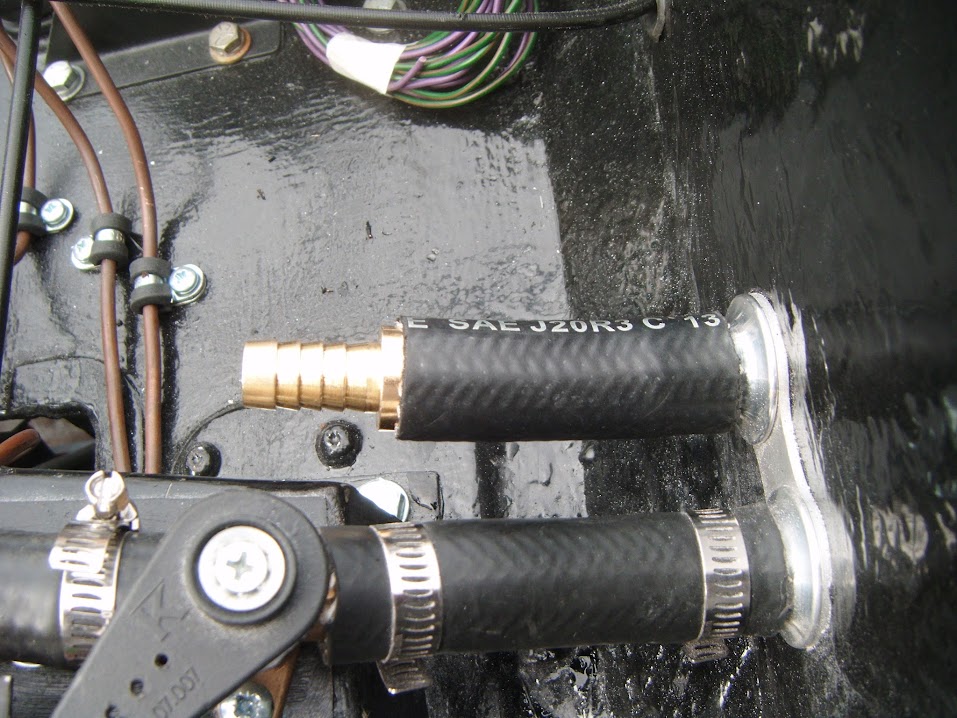
This allowed me to put a better bend in the thinner pipe.

- - - - - - - - - - - - - - - - - - - - - - - - - - - - - - -
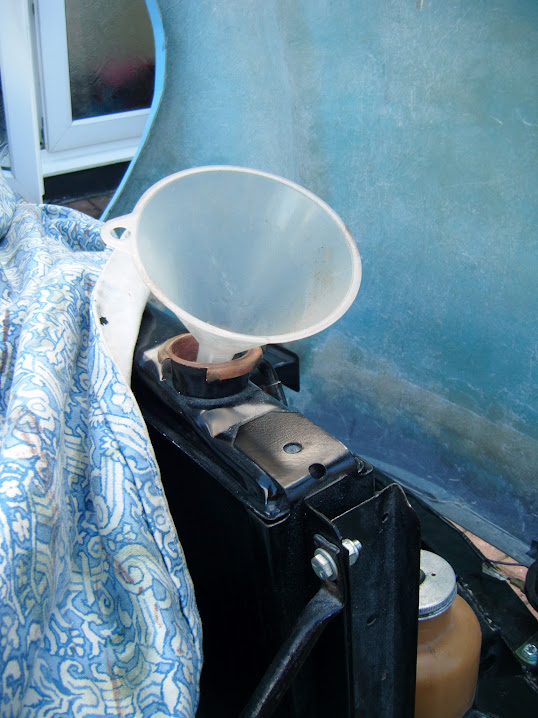
Then I rigged up a glass fuel filter on a temporary basis, just so I can visually see if fuel is reaching the carbs.
( When I am finally ready to restart the engine. )
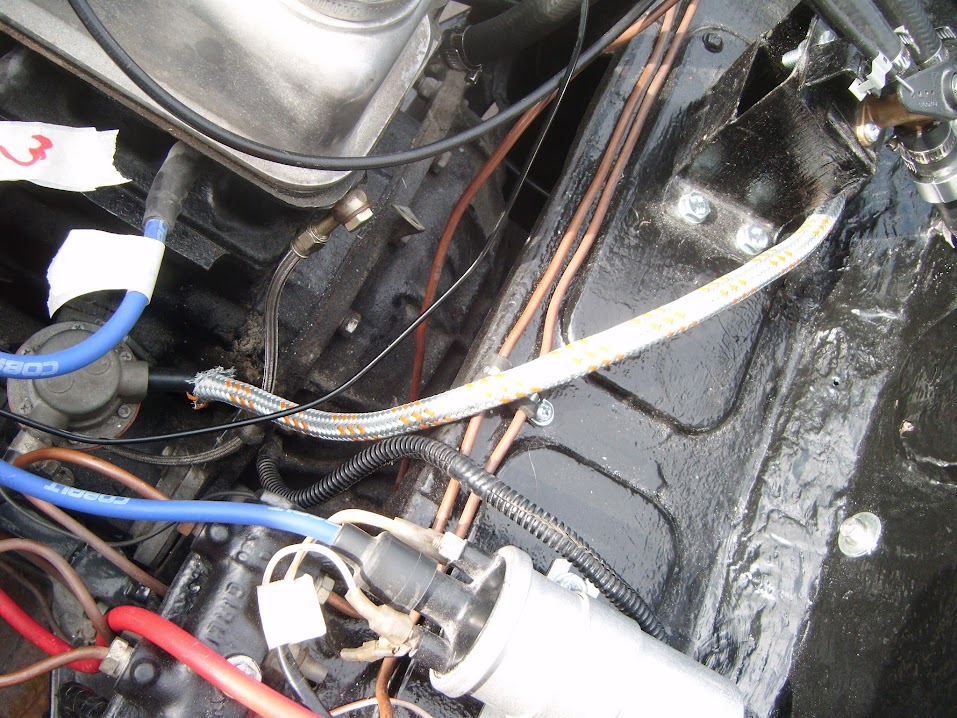

Notes:
- I need to order some new jubilee clips for these sections of fuel line.
- I also need to finalised how I am permanently going to run the fuel line in this area.
- - - - - - - - - - - - - - - - - - - - - - - - - - - - - - -
During the next task I really did lose the will to live, as what should have been a simple task took forever.
Now I know I don't have the best record of sticking to a KISS solution, but I could not work out a better way...
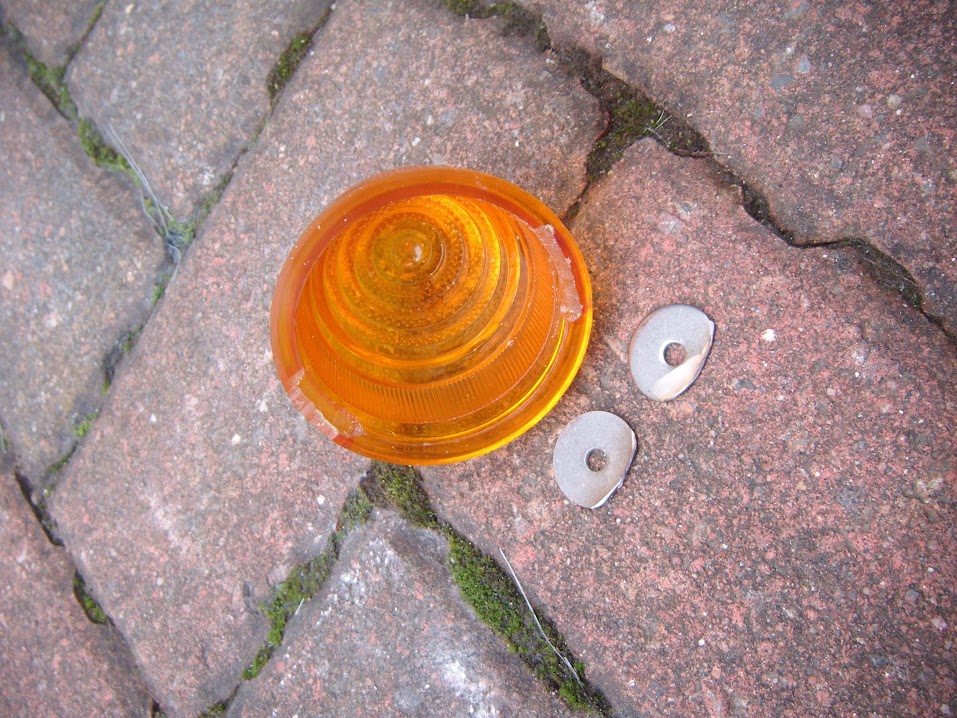
All I wanted to do was fix the front indicators into position.
I had used one of the bolts supplied to earth the indicator.

But these three bolts were too close to "hole" required to thread the indicator wires through the bonnet.

Excuse the blurred photo, but if I put a bolt through a bit further out...

The indicator lens wouldn't sit correctly.

So I decided to use some bigger washers to move the bolt in a bit.

Initially, this approach seemed to work, so I drilled the corresponding holes in the bonnet.
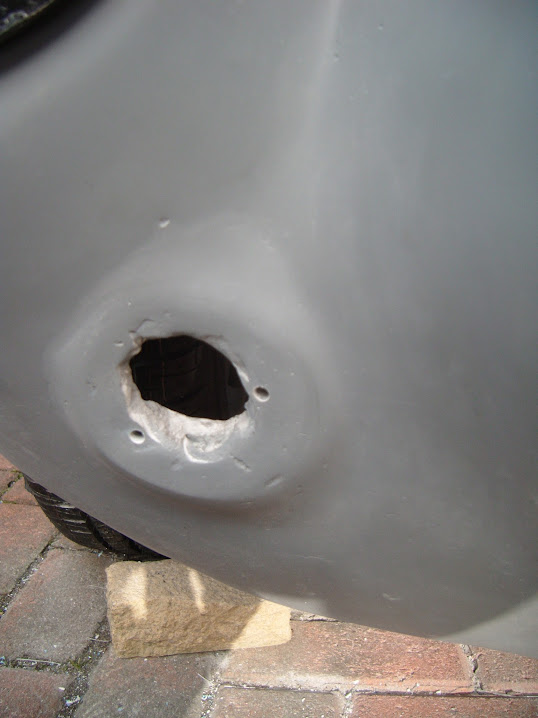
Note:
Tidying up the hole is on my "To Do" list.
Then the wheels came off as when the indicator was pressed into the bonnet, the lens stopped fitting.
In the end I had to grind down the washers and file a couple of notches on the inside of the lens.
End of Part 2...

|
23rd September 2015, 18:24
|
|
Senior Member
|
|
Join Date: Feb 2012
Location: Wembley, London
Posts: 5,056
|
|
One Of Those Days - Part 3:
This seemed to do the trick as it all went back together OK.

So I bolted it to the bonnet.

So despite working on just this one thing for almost two hours solid, I only had one indicator in place to show for my troubles.

To be honest, I just couldn't face starting on the other side, so I'll come back to that.
- - - - - - - - - - - - - - - - - - - - - - - - - - - - - - -
Instead I found one list "simple" job to do and thankfully, it was simple as I fitted a grommet to the boot floor.


- - - - - - - - - - - - - - - - - - - - - - - - - - - - - - -
Then, just to cheer myself up a bit, I took another photo of the bulkhead, as that is almost complete now.
And that is the positive I take away from today, as despite all the frustrations, my Moon Rover is slowly, but surely, coming together. 
So until next time, take care, Paul. 
|
24th September 2015, 15:04
|
|
Senior Member
|
|
Join Date: Feb 2012
Location: Wembley, London
Posts: 5,056
|
|
Lights, Music, Action:
Once again, the day started with painting the steering column cover & number plate light bracket.

Then, using the lessons learnt from yesterday, I tackled the passenger side's front indicator.
I will need to comeback and add some fibreglass filler to the "big hole" as one of my fixing screw holes broke through.

The only good news is that I can sort all of this out after the Moon Rover testing and before getting to paint.
It was a big improvement over yesterday, as it only took me just under an hour to get this indicator fitted.

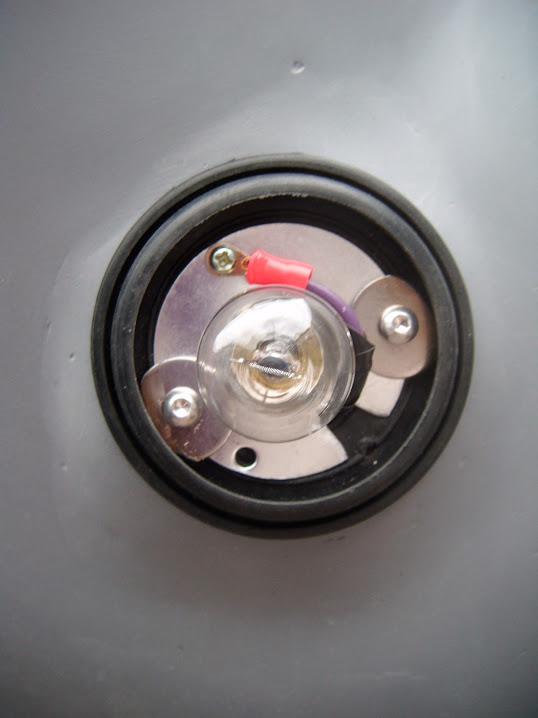
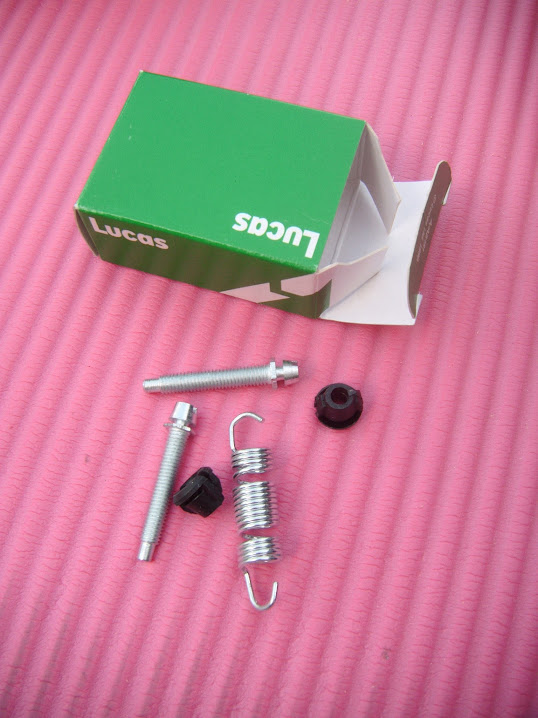
Then it was back to the headlights and the new fitting kits I had to play with.
I had already put together the various parts of each headlight.

But I had to take the inner shell off in order to hook up the retaining spring.

I then had to take the inner shell back out again and modify the hole I made for the side light wiring.
( As there wasn't quite enough room between the inner & outer shells for the bulb & wires. )
Eventually the passenger's side headlight was wired up and in place, ready for testing.
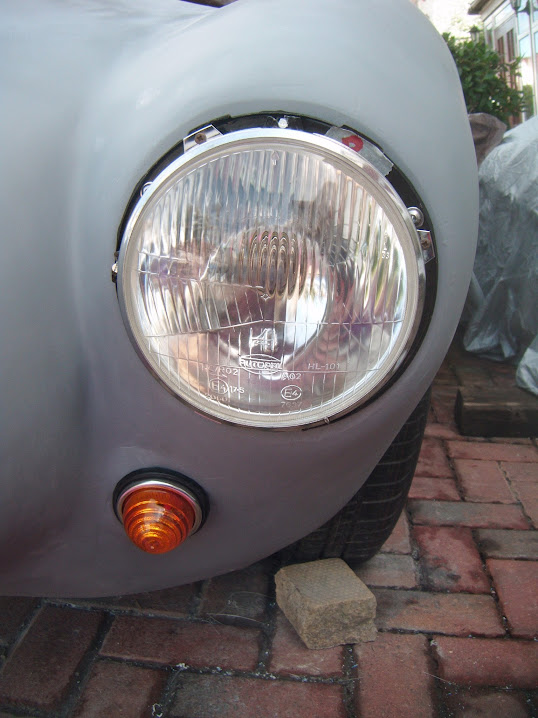
It didn't take too long to repeat the same process on the driver's side.
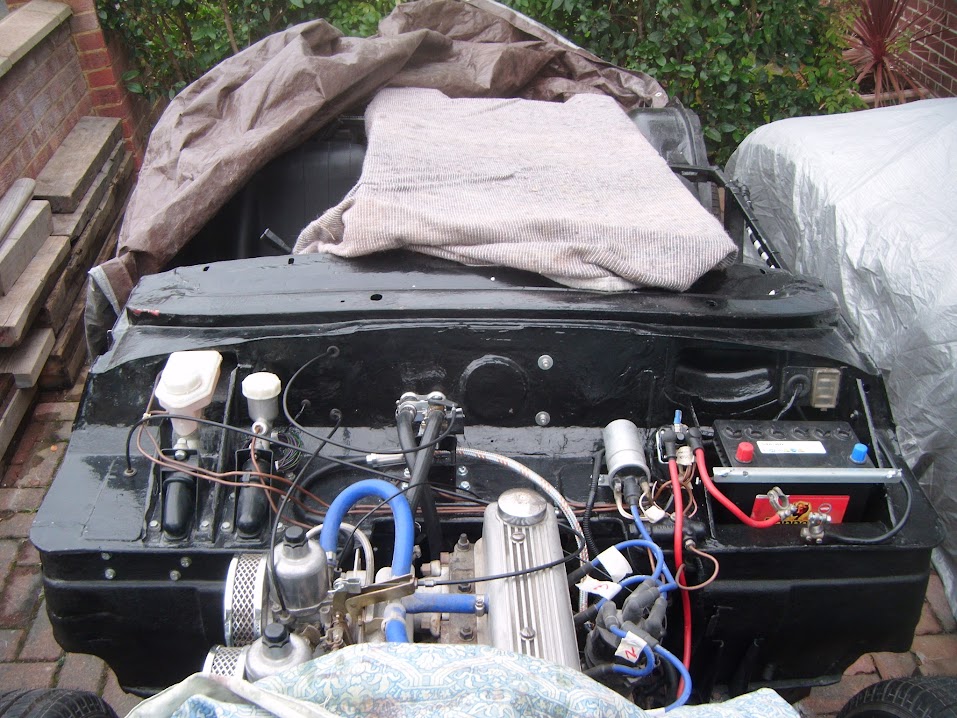
So for the first time ever, all the front lighting is actually fixed into position, rather than held in place with some tape.

I originally painted those headlight shells over 3 years ago, so seems like a big step forward to see them in position.
( Even if I know they will have to come off again for painting. )
I only had time for a couple of other quick jobs.
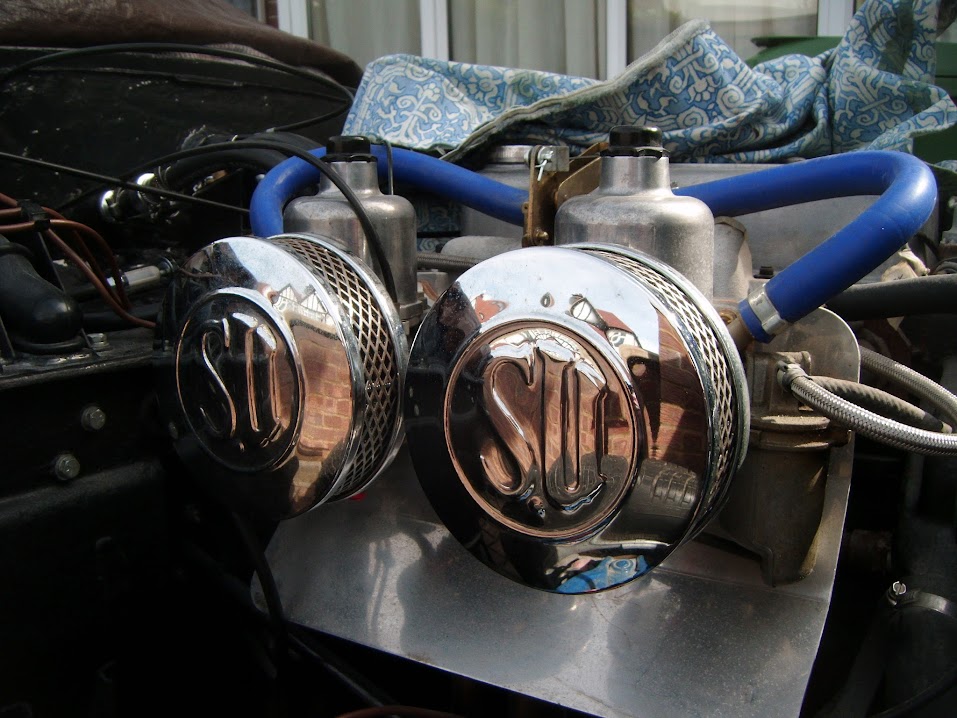
I removed the air filters, so I can clean the foam before I attempt to restart the engine.


I then very roughly laid out the front wiring loom and connected a few things up.

I am planning to fibreglass a fixing point where the black tape is to help keep the wiring away from the hinges.

I just need to do a bit more testing before I commit to the final position on this.
The last job for today was to remove the masking tape from the steering column cover.

Clearly the etch primer got under the masking tape and the paint is still very shiny.
Hopefully it will look a little better once the paint has fully set and I have sand it all down a bit.
Until next time, take care, Paul.
|
25th September 2015, 17:27
|
|
Senior Member
|
|
Join Date: Feb 2012
Location: Wembley, London
Posts: 5,056
|
|
Roadster - Rather than reply on Deggsy's thread, I'll say thanks on here for the offer of some extra "force" on my clutch. 
- - - - - - - - - - - - - - - - - - - - - - - - - - - - - - -
Frustrating Friday - Part 1:
In the cold light of day, the painted steering column cover looked even worse than it did last night.
So I've sanded all the paint completely off and will simply leave it as a grey panel for now.

I attached the number plate light to the painted bracket.

Dug out the hand brake lever.

And removed the warning light sensor, as I've already removed the warning light itself from the dash.

There was something bugging me after I laid the wires out yesterday.
( As I was sure there was more slack when I tested the layout before. )
So a quick check on some old photos reminded me that I needed to lay out the wires this way instead.
Then I turned this fibreglass off cut...

Into 6 fixing brackets for the front lighting wiring loom.

Now what I should have done was mix up some fibreglass filler and stick these brackets into a big blob of that.
Unfortunately, what I actually did was attempt to use fibreglass matting to hold then in place.

What I had not taken into account was the fact that these brackets were not supported, so wanted to fall over all the time.
In the end it took all of the matting shown in the photo above (and a bit extra) just to get the three brackets on one side in place.

So I had to do it all again to get the other side done and this was a seriously messy process.

Note:
Both the fibre glassing sessions had sudden gusts of wind blow the small bits of matting all over the place. 
While I was waiting for that to set, I refilled the radiator.
I also refitted the steering column cover.

End of Part 1...
|
25th September 2015, 17:28
|
|
Senior Member
|
|
Join Date: Feb 2012
Location: Wembley, London
Posts: 5,056
|
|
Frustrating Friday - Part 2:
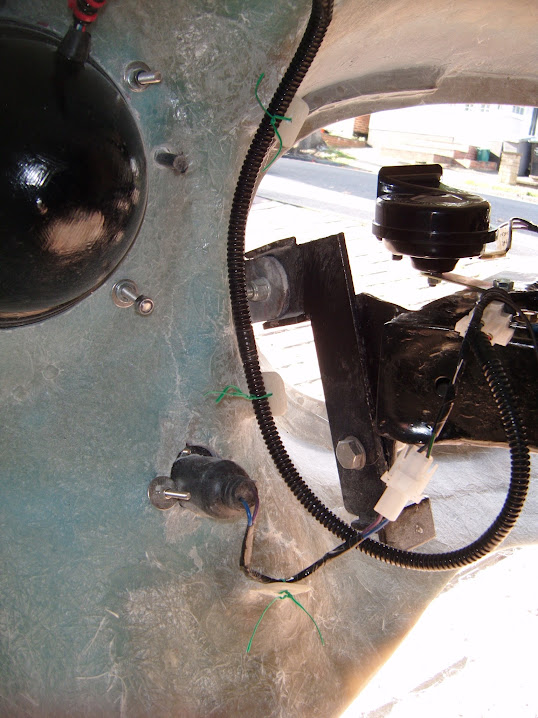
I've decided to fit a P clip to "steer" the wiring loom away from the hinges & this will also act as an earthing point.


I did the same thing on the other side, where I also had to add an earthing ring to the end of this wire.


I'd rather not talk about just how long it took me to clean up the mess I made around the fixing brackets using hand files and sand paper.
( Couldn't risk putting my angle grinder anywhere near my lights. )

The only good thing was they had set solid and this allowed me to use temporary ties to hold the loom in place.
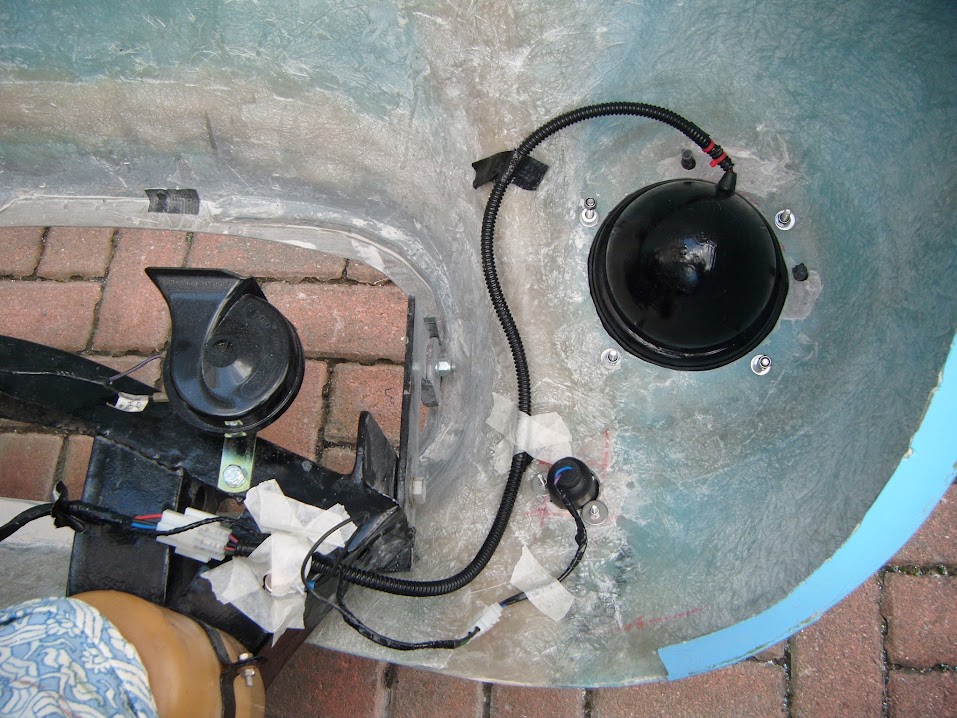
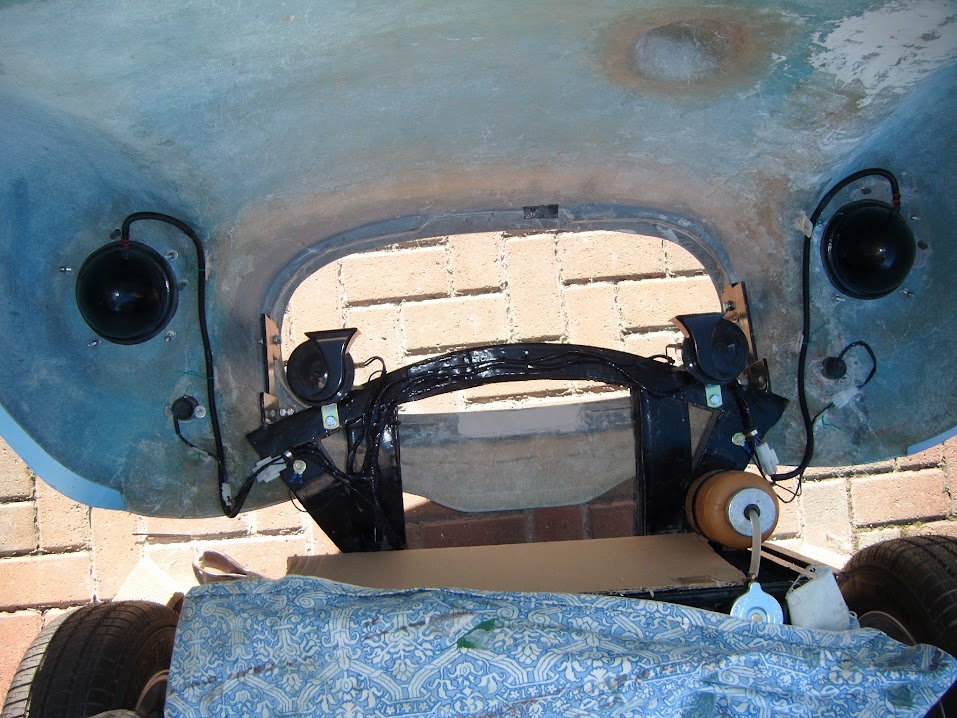
Bonnet Open:

Bonnet Closed:
I just need to add some foam padding underneath the connection block to protect it from vibration.

The only way I could get a half decent photo of the whole of the front loom in position was by standing on the front wheel. 
Next Steps:
- Sort out the earthing points in the boot area for the rear wiring loom.
- Fix the wiring for the number plate light.
Whilst it was frustrating that the time burnt on the fibreglass work, meant I ran out of car time to finish those last few couple of wiring jobs today.
But overall, I am pretty pleased that I am now very close to connecting the battery and testing all the lighting in situ.
So until next time, take care, Paul.
|
25th September 2015, 19:27
|
 |
Senior Member
Enthusiast
|
|
Join Date: Dec 2006
Posts: 1,130
|
|
All looking very neat |
26th September 2015, 15:59
|
|
Senior Member
|
|
Join Date: Apr 2014
Posts: 198
|
|
Paul just give both halves of your binnicle a light dusting of satin black spray you will be surprised how well it take's. Ed.
|
26th September 2015, 16:36
|
|
Senior Member
|
|
Join Date: Feb 2012
Location: Wembley, London
Posts: 5,056
|
|
[Dr Frankenstein] "IT IS ALIVE! ALIVE!" [/Dr Frankenstein]
https://youtu.be/t64KxhCcCoo

- - - - - - - - - - - - - - - - - - - - - - - - - - - - - - -
Unfortunately, the full report will have to wait until later today, or possibly even tomorrow morning.
As I now have a huge mess to clear up, a ton of other "non car" stuff to do and I stink of petrol.
But despite all that, I am still one very happy bunny.
Cheers, Paul. |
26th September 2015, 18:30
|
 |
Senior Member
|
|
Join Date: Dec 2013
Posts: 839
|
|
Congratulations on starting the engine Paul, one step closer.
|
26th September 2015, 21:36
|
 |
Senior Member
|
|
Join Date: Jul 2011
Location: Marmande 47200
Posts: 501
|
|
Congratulations, it's a great feeling when it starts again isn't it 
Wiring looking very neat as well, great attention to detail.. |
27th September 2015, 08:06
|
|
Senior Member
|
|
Join Date: Feb 2012
Location: Wembley, London
Posts: 5,056
|
|
Friday Replies:
Micky1Mo - Cheers.
Whilst it was a pain to fibreglass those brackets into place, at least now the hinges won't accidentally cut the loom in half!
Ed - Thanks for the tip, but I don't have any satin black to hand, so I will add that to the "come back to later pile".
- - - - - - - - - - - - - - - - - - - - - - - - - - - - - - -
Saturday Replies:
Swifty - Cheers, and it certainly feels like a BIG step forward.  Psycho Pops
 - Thanks Stewart and it is nice to see you back posting again.
As I was thinking about you and your car the other day, when I posted a photo of your tail pipes on Swifty's build thread.
- - - - - - - - - - - - - - - - - - - - - - - - - - - - - - -
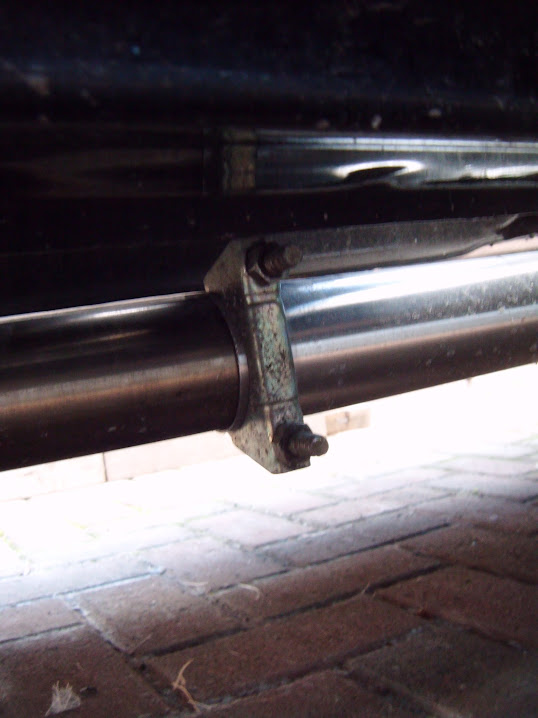
Landmark Afternoon - Part 1:
It had already been a busy morning before I finally got a chance to work on the car.
I started by drilling some holes along the length of my exhaust support bracket.

Some of these will act as earthing points and others will allow me to zip tie the loom into position.
Although it was only after I fixed the first (of three) earth leads in place that I remembered this was "testing".
So the next two earth leads were fixed to a single hole like so.

Then it was time to change the number plate wiring, originally set up for 3 x LEDs.

I had to be very careful unpicking and removing this lot.

But eventually the number plate light could be left in front of the rear lighting board, so I could see the lights from the driver's seat.
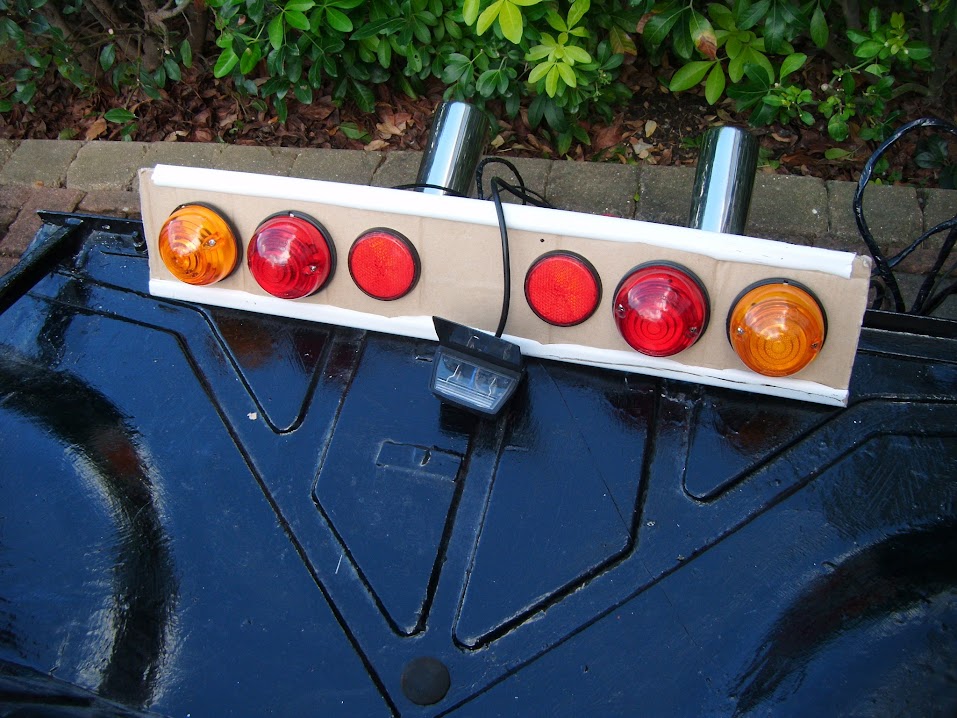
Did I mention testing? As obviously this isn't the final rear wiring loom layout.

Then it finally was time to connect the battery and see if everything worked.

I even added my new key ring to the ignition key, so it was "dressed up" for the occasion.

At this point my wife & children were all out, which meant some of the testing was harder to do that others.
But here are the results:
Ignition Light - Turned the key and the red warning light in the speedo came on - Pass
Rear Lights - Noticed these were on before I had even started testing - Fail
( Decided to keep going for now and see how everything else was doing. )
Indicators
- Left signal - Pass
- Right signal - Pass
- Hazard switch - Pass
- Dash board green warning light - Pass
Fog Lights - Pass
Car Horn - Pass
( Although these worked a little too well, as I sounded like an inconsiderate minicab driver! )
Headlight Switch (Position 1)
- Side lights in headlights - Pass
- Number plate light - Pass
At this point I realised it was the brake lights that were on, not the rear lights, so I simply unplugged the brake light switch.
- Rear light (Driver's Side) - Pass
- Rear light (Passenger Side) - Fail
Headlight Switch (Position 2)
- Main Headlights - Pass
I then pulled a wheelie bin (with black sides) in front of the headlights, so I could see the reflections of the lights...
High Beam Lever
- Headlights - Pass
- Blue warning light - Forgot to check.
- High beam "Flash" - Something else I forgot to check.
Sorry there are no photos, but I didn't want to waste the battery climbing in and out of the car with the lights on to take them.
Overall, I was quite pleased with these results, but there was one epic fail.
Heater Fan Speed Switch
- The fan burst into life with an annoying noise at position I, then blew a 25A fuse in position II - Fail
I'll have to come back to the problem with the fan, but for now I started trouble shooting the lights...
I removed the brake light switch and adjusted the bracket to ensure it was completely square facing the pedal.

But no matter where I set this up, the brake lights would come on before I pressed the pedal.
Thankfully my family returned at this point, when I had my head buried upside down in the foot well.
So I removed the switch from the bracket (again), wired it up & operating the "plunger" by hand, while my wife checked the lights.
It only took a few seconds to realise that somehow I have ordered/bought the wrong type of switch.
This one operates the lights when the plunger in depressed, whereas I need one that operates the lights when the plunger is released.
( As the mounting bracket is in front of the brake lever, which pushes against the plunger when at rest. )
Clearly, I can't fix that now, so I switched to the rear lights...
Swapping the connections over highlighted that the problem was with the passenger side light, not the loom, which was a good result.
So I put a new bulb in, but that still didn't fix the problem, but a closer inspection of the bulb fitting did explain it.

Unfortunately, the bulb holder part is broken, so I've have to order another light to fix that problem.
That concluded all the simple electrical tests, but there was one more dash board dial I wanted to check...
End of Part 1...
|
27th September 2015, 08:09
|
|
Senior Member
|
|
Join Date: Feb 2012
Location: Wembley, London
Posts: 5,056
|
|
Landmark Afternoon - Part 2:
On my way back from Sainsburys in the morning, I did stop off at the petrol station to stick some fresh petrol in this.
So I found all the parts for the filler cap, removed the tape that had been sealing the tank and poured it in.

This arrangement will certainly do for testing the fuel gauge.

You have no idea how relieved I was to see the gauge slowly move over a bit.
( As I had to remove the fuel gauge sensor in order to change the direction the fuel pipe left the petrol tank. )

Note:
I was very happy at the time, but I have now had the chance to think about that gauge reading a bit more...
I put about 18 litres in, so either my tank has a capacity of 144 litres, or the gauge is reading low/not working properly after all.
- - - - - - - - - - - - - - - - - - - - - - - - - - - - - - -
Engine Re-Start - Part 1:
Well I can hardly build up the suspense about how the rest of my afternoon went, given that I'll already let the cat out of the bag.
But it is worth going back a few steps to put this in context...
21st July 2012 - Last time I could drive my donor car.
9th December 2012 - Last time I actually got the engine to run.

29th April 2013 - Last time I connected everything in order to attempt to start the engine.
6th May 2013 - All my attempts at restarting the engine had failed.
At which point I had to strip everything down to begin my Frankenstein build, remember this chaos?
Now what I should have done, it prepare the engine to stand idle for a long time, but I didn't.
So rather belatedly, I have recently been preparing for another attempt at bringing the engine back to life.
I marked up the HT leads, so I didn't get them mixed up.

Was very annoyed to find the only way to get access to the front cylinder was by moving the alternator.

But eventually I was able to put a little oil in the plug holes and just had to hope for the best. 
Either way, I was determined to take things slowly, keep checking things and not make a mess of this if I could.
Then, during the testing of the lights I turned the key the wrong way by accident and the starter motor kicked in.
At which point I figured I now had nothing to lose by seeing what would happen if I tried to start it properly.
So I removed the fan belt (as the alternator was still loose) and all the spark plugs, which were only finger tight after putting the oil in.
Then I turned the starter motor on a few times, keeping an eye on the fuel filter.
Again, I was really pleased to see this finally fill with fuel.

At which point I stopped and re-grouped, because the oil in the bores was now all over the engine & the nearest wheelie bin.
|
27th September 2015, 08:10
|
|
Senior Member
|
|
Join Date: Feb 2012
Location: Wembley, London
Posts: 5,056
|
|
Engine Re-Start - Part 2:
Then I refitted the spark plugs, fan belt & alternator and double checked that everything was connected.
The noise of the starter motor brought one of my neighbours over to have a look / chat and this turned into a big stroke of luck.
As he was able to see, and point out, I had a fuel leak when I made my first attempt to properly start the car.
It turned out that in my haste to fit the new jubilee clips to the temporary fuel line arrangement I'd made a mistake.
I had accidently fitted the fuel line to the carb overflow pipe, not the inlet pipe.
I now realise that this pipe should have a drain pipe fitted (as per the front carb), but at least it was an easy mistake to fix.
I had also put a few squirts of this in the carbs before I started and kept the air filters off.

It took a few attempts before it burst into life, but when it did I was so happy, it was an unbelievable feeling of deep joy.
But it wasn't all rosy as I realised the throttle cable had come away from the accelerator pedal.
This actually happened a couple of times during my attempts to restart the engine and I think there may be a layout problem.
As I have a pedal from a 1500 and a MkIV bulkhead, so the "factory" hole for the cable may be in the wrong place.

But it should be possible to fix this properly with a bit more thought & research
Going back to the engine firing, you can see the smoke in the video clip where the oil from the bores was being burnt off.
Also the engine appeared to want to rev all by itself, rather than idle, without me doing anything.
I can't say what the revs were, because by now I had worked out that the rev counter wasn't working.
So I did keep turning the engine off, but thankfully it did restart every time I tried it.
The way I look at it, even if the engine runs like a bag of old nails, at least it runs.
( I will get a professional to set everything up properly for me at a later date. )
All things considered, if really was a land mark day for my build.
There will be no car time for me today, so until next time, take care, Paul.
Last edited by Paul L; 27th September 2015 at 09:23..
Reason: Typo
|
27th September 2015, 10:10
|
|
Senior Member
Enthusiast
|
|
Join Date: Dec 2006
Posts: 1,130
|
|
It's all coming together nicely  |
28th September 2015, 08:39
|
|
Senior Member
|
|
Join Date: May 2013
Posts: 2,161
|
|
It seems ages since I read your thread Paul, and my oh my, you have come a long way!
I can identify with you on the front indicators, as my two had almost identical problems as you did.
One of my drill-holes broke though, and I was so peed off at the time, I just put a washer on the other side of the self tapper and its been like that ever since.
Congrats on the engine start. You'll soon be done!
|
28th September 2015, 13:39
|
|
Senior Member
|
|
Join Date: Feb 2012
Location: Wembley, London
Posts: 5,056
|
|
Micky1Mo & Scottie - Cheers chaps.
I've had a good run at it recently and have completed lots of jobs since building the bonnet bulge.
- - - - - - - - - - - - - - - - - - - - - - - - - - - - - - -
Sunday:
No car work, but got second coat of oil on the garden furniture in preparation for winter storage.
Followed by a family trip "down the road" to watch a bit of rugby.


Apparently we were part of a record attendance for a Rugby World Cup match.
- - - - - - - - - - - - - - - - - - - - - - - - - - - - - - -
Shopping Update:
I've now ordered the following:
- A new rear light.
- Some 35 amp glass fuses, as there shouldn't have been a 25 amp one there in the first place.
- A clip for the accelerator pedal to hold the cable in place, which was missing from my donor.
- A drain hose for the rear carb, also missing from my donor.
- - - - - - - - - - - - - - - - - - - - - - - - - - - - - - -
Falling In Love Again:
A passing estate agent stopped for a chat today and, like many before him, described my efforts as a "labour of love".
Well, there have been times when I felt this project had become a huge millstone and a joyless chore.
But after getting the engine started on Saturday and a nice day out my family on Sunday, things are really looking up.
I know there is still a long way to go, but it really does feel like this project is firmly heading in the right direction now.
So even though I could only get a short time on the car today, it is all good.
Got the hand brake refitted, but not properly adjusted yet.

This was a bit of a pain to do when I dropped it and the spring loaded button popped out.
But eventually I managed to get all the various bits to line up and it does operate the way it should.
Then I jacked the car up and set the rear up on two sets of wooden blocks, either side of the exhausts.

There were two reasons for doing this, the first was to give me access to tighten up the exhaust claps.
See "Clutch Problems" below for the second.
In the absence of an accelerator pedal clip, I re-drilled the fitting hole to at least align the cable properly.

This was enough to keep the cable attached for today's attempt at restarting the engine.
Some on line research suggested the rev counter might need nothing more than a gentle tap to bring it back to life.
Initially tapping it made no difference, but a little while later it was working again.

The fact the engine started up again today really does lift my spirits, so here is a slightly longer video clip.
https://youtu.be/NjJ0lml53uI
Not as much smoke from the engine today, but lots coming out of the tail pipes, hitting the hedge and then blowing back over me.
- - - - - - - - - - - - - - - - - - - - - - - - - - - - - - -
Clutch Problems:
The other reason for getting the rear of the car on blocks, with the wheels off the ground, was to test the clutch.
I still can't budge the pedal, but one tip on Deggsy's A352 build was to "throw it into 3rd" so see if that would help.
So with the engine running, and the brakes covered, I threw it into 3rd and absolutely nothing happened.
In fact, I can happily move the gear lever through all 4 gears and it makes no difference what so ever.
So I am definitely stuck in neutral for now.
- - - - - - - - - - - - - - - - - - - - - - - - - - - - - - -
Got to go now, but I will try to reply to other build thread this evening, cheers, Paul.
|
29th September 2015, 17:55
|
|
Senior Member
|
|
Join Date: Feb 2012
Location: Wembley, London
Posts: 5,056
|
|
Not Much:
Domestic chores were the order of the day, but I did manage a small experiment this morning.
As I am slightly concerned that I have had my tin of bonding paste for a few years now.
So I mixed some up and attempted to join some "left over" box section and fibreglass.

When I went to check on them at the end of the day they appeared to be solidly joined together.
But I'll leave this to set for at least another 24 hours before really putting the join to the test.
- - - - - - - - - - - - - - - - - - - - - - - - - - - - - - -
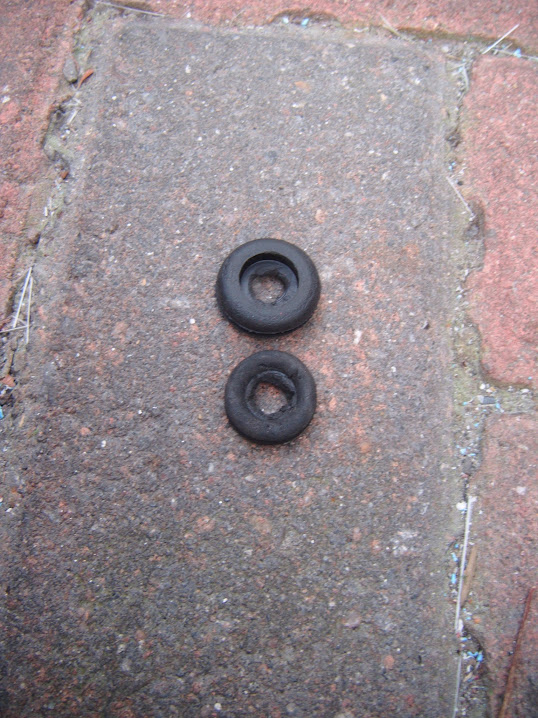
I also made a bit of progress on the battery cut off switch.
You may recall that I decided to fit bigger fittings to the ends of the cables that attached to the switch.

But first I had to thread the cables through the bulkhead and seal them with some rubber grommets.
It took me a while to work out that the smaller grommets I started with were no good, so I used some slightly bigger ones.

One cable goes to the battery terminal and the other goes to the earthing point.

With that side done, I could cut off the old connectors, fit the new ones & connect them to the cut off switch.
( Apologies for the poor photo. )
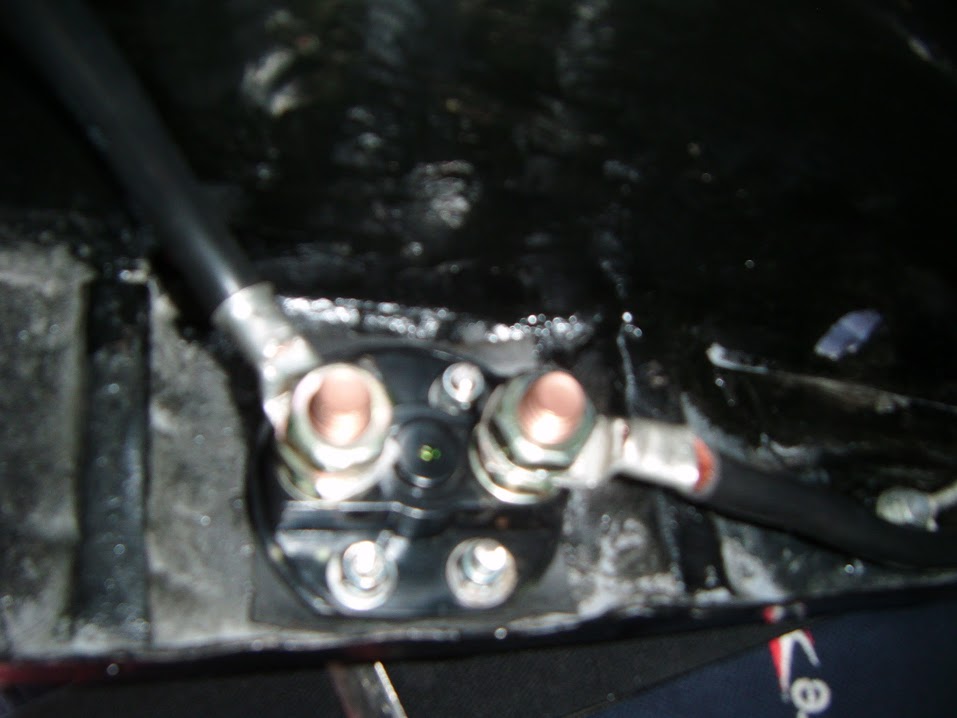
Note:
The cables are long enough for me to route them in opposite directions until they meet at the switch.
With a bit of luck, I'll get a chance to restart the engine tomorrow and then switch the connections and see if it still runs.
- - - - - - - - - - - - - - - - - - - - - - - - - - - - - - -
The only other bit of car related work I managed to get done today concerned my racing roundels.
As I decided that getting the engine restarted should be rewarded with something shiny for the build.
By chance there is a graphics place in the local business park, so I thought I'd pop in just to ask for a quote.
I went armed with this photo of christinedmc's beautiful #47, as I also want yellow roundels.

My Cordite kit was #7, so I've always wanted to use this style of "7" as a tribute to Barry Sheene.

The guy in the shop wanted to know more about Michiel's car, what I was building, my interest in bikes, etc.
So we had a great chat and it turns out he is taking his classic Alpha to a track day at Goodwood on Thursday.
( Something he built up himself, partly on his driveway, as his garage was too small to do much work. )
With a bit of luck, they should be ready for collection tomorrow.
- - - - - - - - - - - - - - - - - - - - - - - - - - - - - - -
Until next time, take care, Paul.
|
29th September 2015, 19:14
|
|
Senior Member
|
|
Join Date: Jan 2015
Posts: 168
|
|
Paul i assume you connected the cable on the battery at the negative terminal?
René
p.s. if you connected it to the positive terminal you be called "sparky"
|
30th September 2015, 19:15
|
|
Senior Member
|
|
Join Date: Feb 2012
Location: Wembley, London
Posts: 5,056
|
|
Rene - Sorry, I should have said the other ends of the cables were NOT attached when I connected the switch.
( As I'd only temporarily put them in place to set the length of cable required through the bulkhead & take a photo. )
In fact, until I finish all my electrical tests, I have been disconnecting the battery before putting the covers back on.
- - - - - - - - - - - - - - - - - - - - - - - - - - - - - - -
A bit more, but still not a lot:
The clip for the accelerator pedal arrived.

So that was fitted.

The post has also brought the new stop/tail light and some 35 amp fuses.


I'd also ordered an overflow pipe to the rear carb, which sits inside a section of "normal" fuel line.
( Which I then forgot to take a photo of. )

Started the engine without any easy start spray.
Then promptly forgot that I was supposed to be testing the battery cut off switch.
So disconnected the old battery earth lead and attached the new leads to the cut off switch.
The first test was to turn the ignition on & see what happened when the switch was turned "off".
The red ignition light went out, so this seems to be doing what it is supposed to be.
Then I put the switch into the "on" position.
( Note: The battery cables still need to be zip tied into position. )

And once again the engine started up, although it now has a seriously loud mis-fire/back fire.
So I decided to turn the engine off before the police were called due to the sound of gun fire.
With the new fuses fitted I decided to run a few more electrical tests:
- Blue high beam warning light - Pass
- Front side lights - Previously a pass, now a Fail
- High beam "flash" - Did the Spitfire 1500 have this option? As I can't get the headlights to flash when they are not switched on.
- Heater - Managed to get to Position III before blowing the fuse this time - Epic fail
- Temperature gauge - Noticed that this is not moving at all - Fail
- Rev counter - Has gone back to not working again - Fail
So I've still got a bit of work to do to sort out the wiring loom.
But at this point I covered up the Moon Rover and turned my attention to the body shell.
This is not a great photo, but some sections of the outside of the bottom edge of the body still have a bit of the moulding lip.

So tidying these edges up has been on my list of things to do for a very long time.

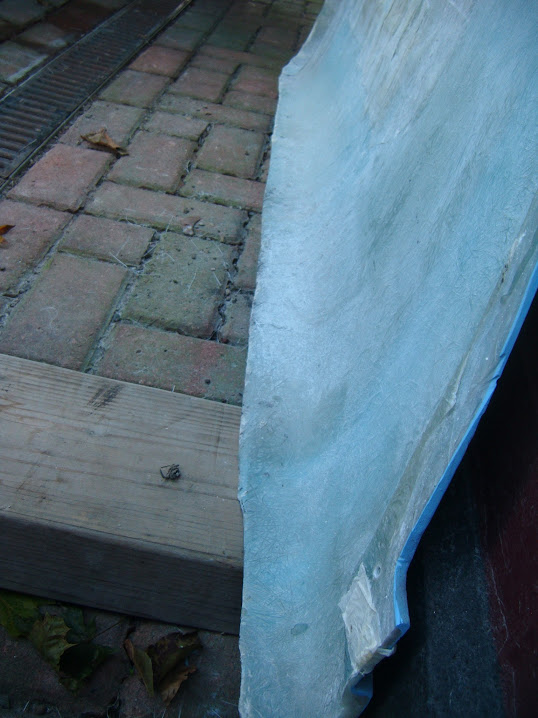
I marked up some straight(ish) lines that would remove what was left of the lip.
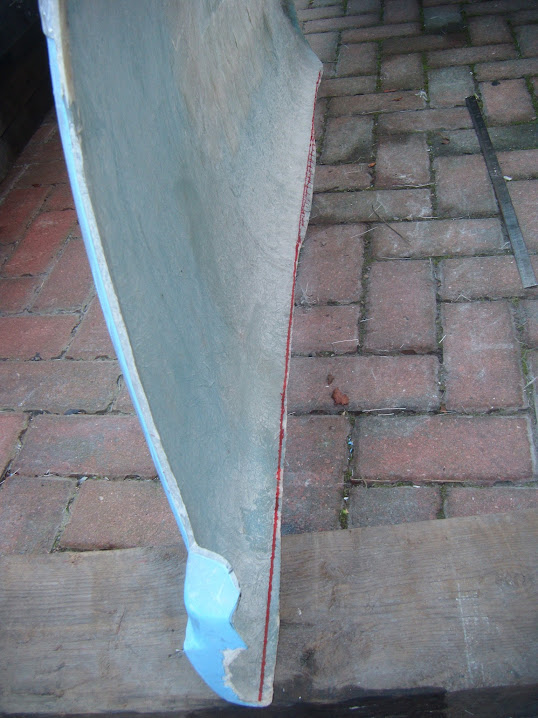

Then trimmed the edges, so there are at least a bit better than when I started.

End of Part 1...
|
30th September 2015, 19:17
|
|
Senior Member
|
|
Join Date: Feb 2012
Location: Wembley, London
Posts: 5,056
|
|
Part 2:
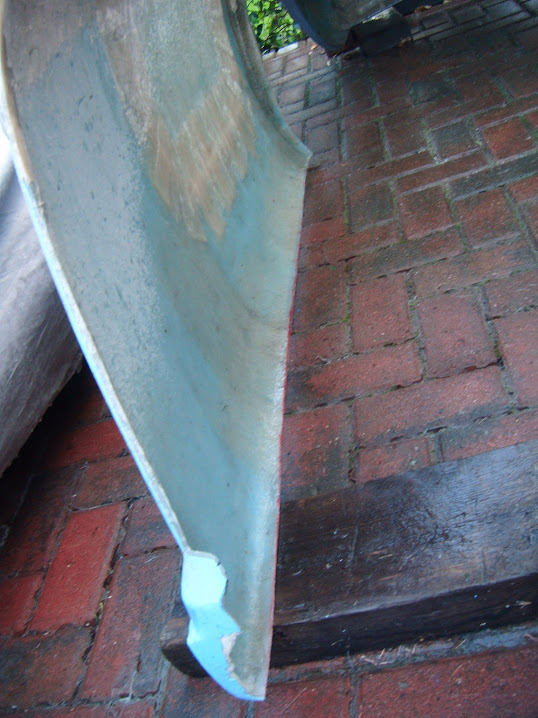
While I had the angle grinder out, I also trimmed down the edges along both cockpit corners.


I also ground a bit more off the back edge of the boot lid rain channel to give better clearance to the framework.
( But, again, I forgot to take a photo. )
Unfortunately, that was all I had time for today, apart from collecting my racing numbers in the afternoon.


I know that these are not how traditional car racing numbers should look, but I still like them.
Until next time, take care, Paul.
|
|
Currently Active Users Viewing This Thread: 1 (0 members and 1 guests)
|
|
|
| Thread Tools |
|
|
| Display Modes |
 Linear Mode Linear Mode
|
 Posting Rules
|
You may not post new threads
You may not post replies
You may not post attachments
You may not edit your posts
HTML code is Off
|
|
|
All times are GMT +0. The time now is 21:09.
|


