|
|
| Sammio Builds and discussions Sammio bodied car builds and specials |

15th April 2012, 12:05
|
 |
Senior Member
|
|
Join Date: Jul 2011
Posts: 5,328
|
|
Fitted the micro heater this morning as I'm still waiting for the underseal on my lowered floors to dry.
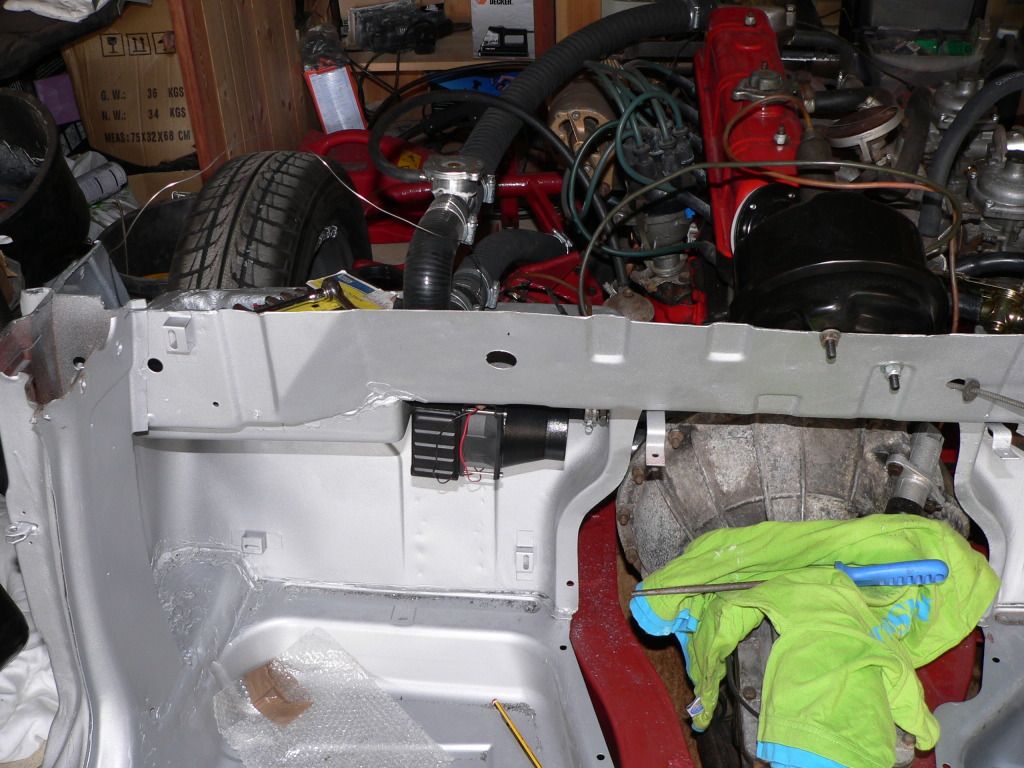
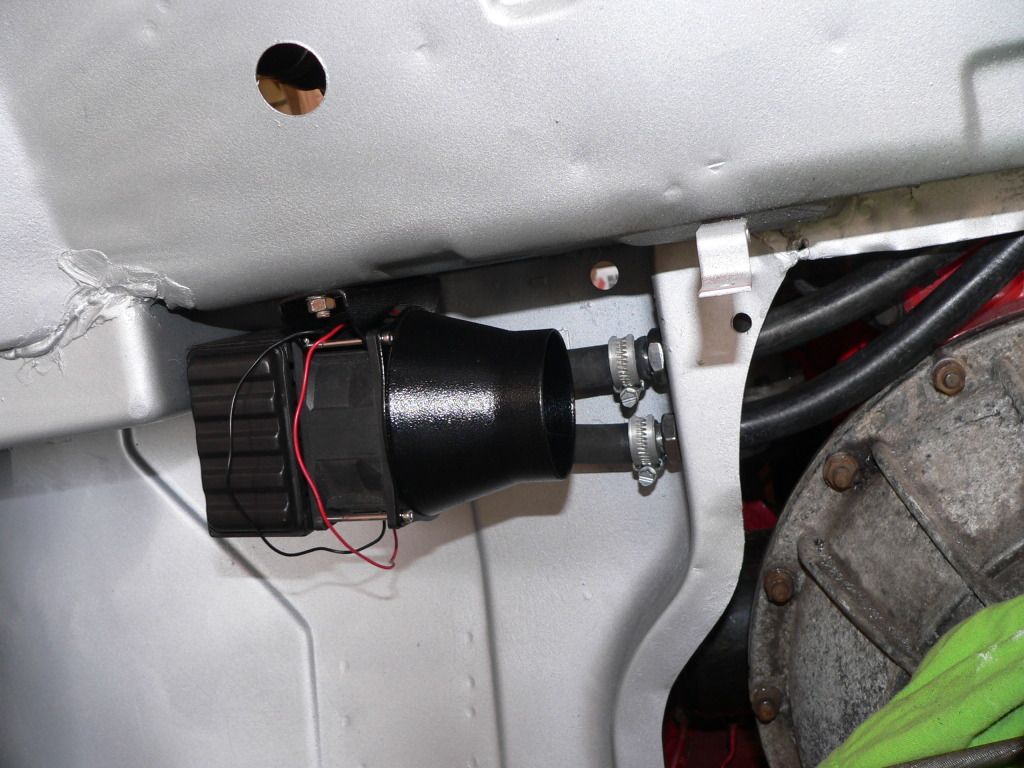
I'll be leaving the ducting and vents until I'm ready to fit the dash as I'm not sure where I'll route them yet. Ideally I want them under the dash heating the footwells as I don't really want the modern, plastic vents on the face of the dashboard. They just look too modern. |
15th April 2012, 13:38
|
 |
Senior Member
|
|
Join Date: May 2011
Location: Somerset
Posts: 1,671
|
|
Quote:
Originally Posted by Mister Towed

I priced up a mota-lita wheel with a boss and a polished trim ring and screw set but that was the wrong side of £300.  |
Blimey!! I've got one of those on mine and im sure, sort-of, that i only paid 150ish.... possibly... |
15th April 2012, 13:45
|
|
Senior Member
|
|
Join Date: Jul 2011
Posts: 5,328
|
|
Quote:
Originally Posted by davecymru
Blimey!! I've got one of those on mine and im sure, sort-of, that i only paid 150ish.... possibly...
|
That sounds like a bargain - I've just checked the price of what I wanted again and it came to £299.10
http://www.moto-lita.co.uk/our-produ...1.aspx?WH_ID=3 |
15th April 2012, 13:53
|
|
Senior Member
|
|
Join Date: Jan 2012
Location: Warrington
Posts: 383
|
|
I bought myself a steering wheel just last week and got one of these
http://www.ebay.co.uk/itm/13inwoodri...item4ceeffcaa3
They have some that look almost the same for under £100 with free postage but they are 14" and I wanted 13" to give me a little more room for my long legs. |
15th April 2012, 14:03
|
|
Senior Member
|
|
Join Date: Jul 2011
Posts: 5,328
|
|
That's nice, probably made in the same Chinese steering wheel factory as mine!
Funny things, steering wheels, there's a great deal of difference in personal taste - I like thin slots while others prefer holes. I ended up with teardrops but only because I couldn't justify the extra £200 for a moto-lita with thin slots.
I also usually prefer a 13" size for the slightly quicker steering response you get, I just felt that the 14" one fitted the period better as most cars of that era had huge steering wheels.
There's also the slight issue of putting wider tyres on a car with no power steering and actually being able to have some input on the direction of travel at low speeds. With a 13" wheel fitted if you haven't already got big biceps you soon will have!
|
16th April 2012, 19:57
|
|
Senior Member
|
|
Join Date: Jul 2011
Posts: 5,328
|
|
I was hoping to get my floors and frame fully fitted this afternoon.
Things were going pretty well until I came to line up the holes in the frame with their various counterparts on the chassis. I got two bolts in on one side: one of the original ones that secures the frame to the diff housing and one through the back of the floor where the rear outrigger meets the end of the side-rail, but the corresponding two holes on the other side are about two inches away from where they need to be.
The back one looks like it will spread if enough force is applied but the floorpan one is held by the cross brace that did secure the two rails that were to be the prop-shaft tunnel until I cut them off. I guess I'll have to cut through the cross brace then weld a bridging piece in to fill the gap once I've got the holes lined up.
I'll take some pictures in the morning, I ran out of daylight today I'm afraid. |
17th April 2012, 07:14
|
|
Senior Member
|
|
Join Date: Aug 2011
Location: Emsworth
Posts: 119
|
|
We had to cut off the drivers side frame foot that bolts to the diff housing, remove about a centimetre in height from the box section and weld it back on further outboard. Likewise I seem to recall moving the plate to the drivers side side rail a bit further out too. I just assumed it was a quirk in our 40 year old chassis's past life.
Also the bolt holes mounting the frame to the bulkhead door hinge points needed adjusting, the top and bottom ones fitted o.k. with a little filing, but the middle one was about half a bolt hole out. Got there in the end with lots of elbow grease and a new round file, then tack welded the plates onto the bulkhead for extra security once it was all lined up and bolted down.
None of it is difficult, just a bit of a challenge! If yours is two inches out it might be worth opening up the bolt holes before cutting to see if you can wiggle things around a bit into a better position first.
|
17th April 2012, 07:49
|
|
Senior Member
|
|
Join Date: Jul 2011
Posts: 5,328
|
|
Yep, I'm not blaming whoever made the frame for the fitment issues, I'm guessing that the imprecise sixties manufacturing tolerances are responsible for the poor fit.
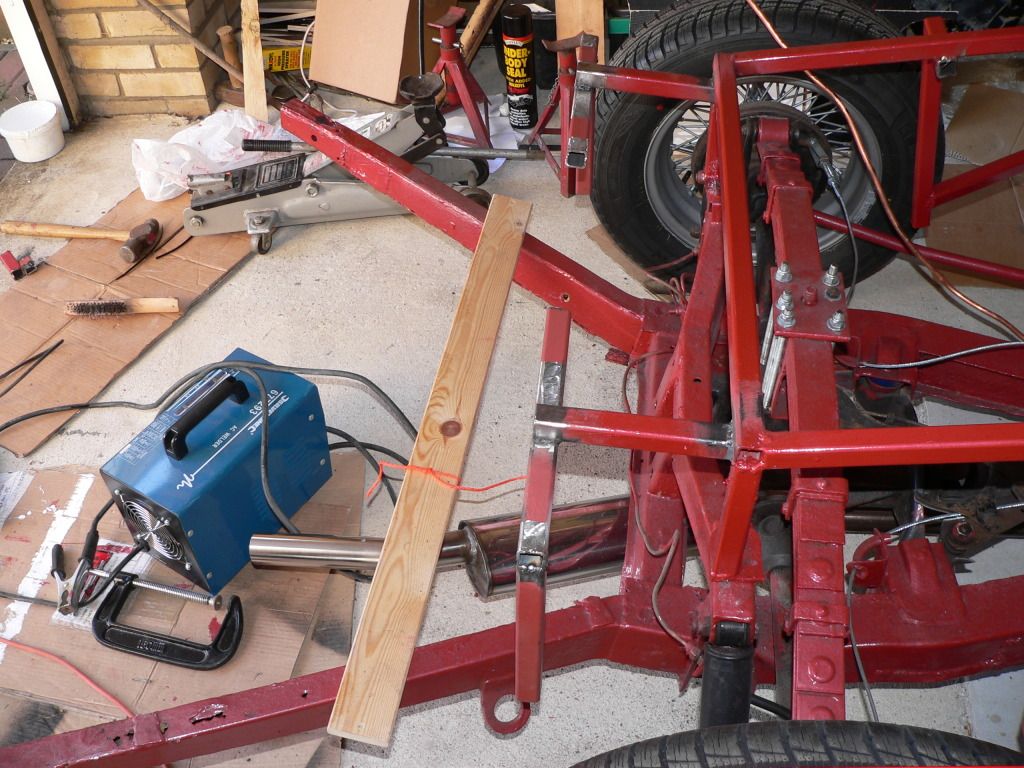
Will be attacking the frame with a screw jack and a sturdy length of timber this morning to see how flexible it is before doing any cutting. That'll also give me a good indication of the quality of the welding at the joins - if it holds it's pretty good!
|
17th April 2012, 08:24
|
 |
Senior Member
|
|
Join Date: Jan 2012
Location: Poole, Dorset
Posts: 615
|
|
I used a couple of ratchett straps and a few well placed cuts to fit my frame. I was modifying it anyway, so added in a couple of extra cuts so I could line it all up. Also check the top rail along the sides, my drivers side rail needed moving outwards so I could get my boarding in and lip under the body at the top.
|
17th April 2012, 11:25
|
|
Senior Member
|
|
Join Date: Jul 2011
Posts: 5,328
|
|

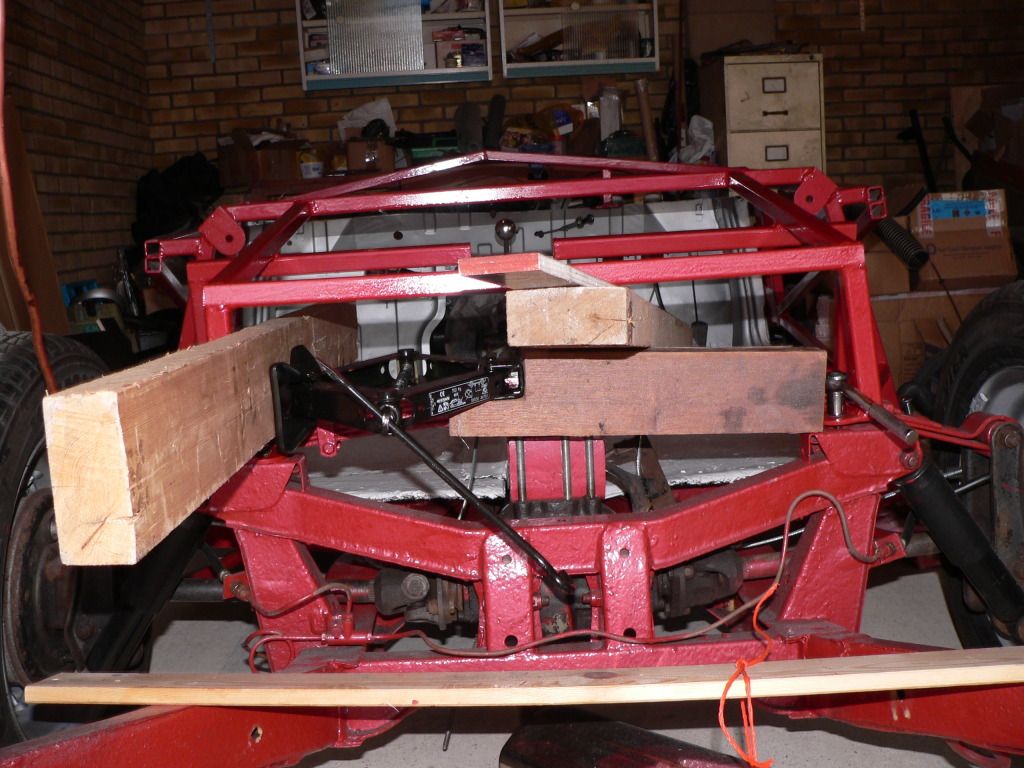
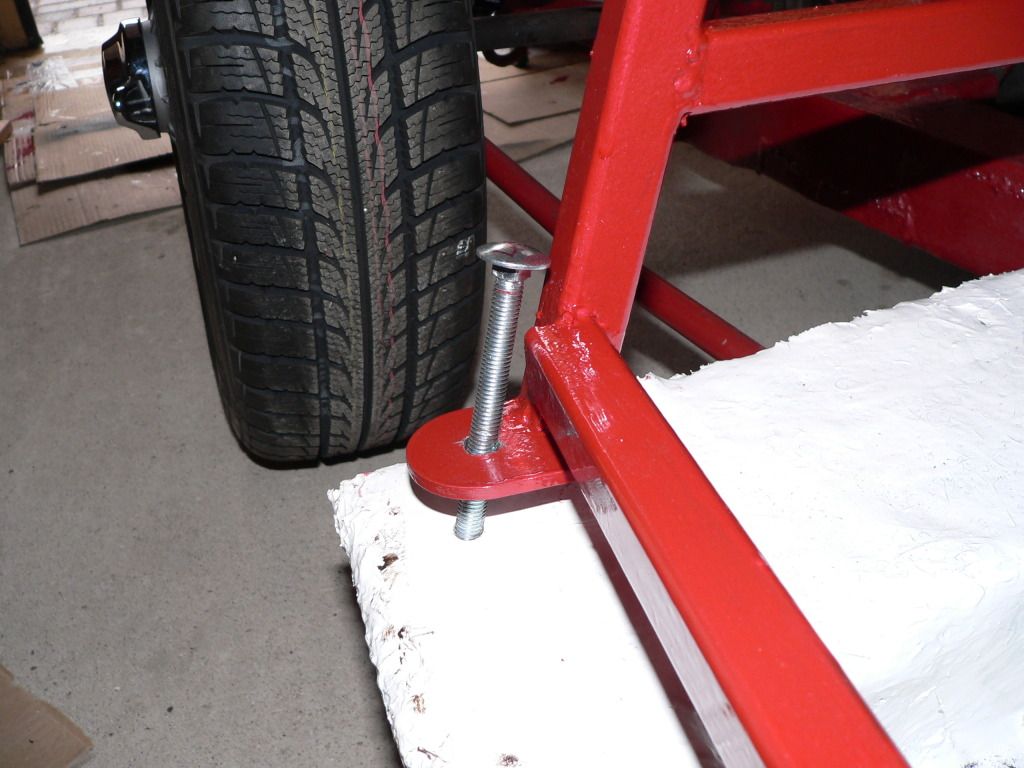
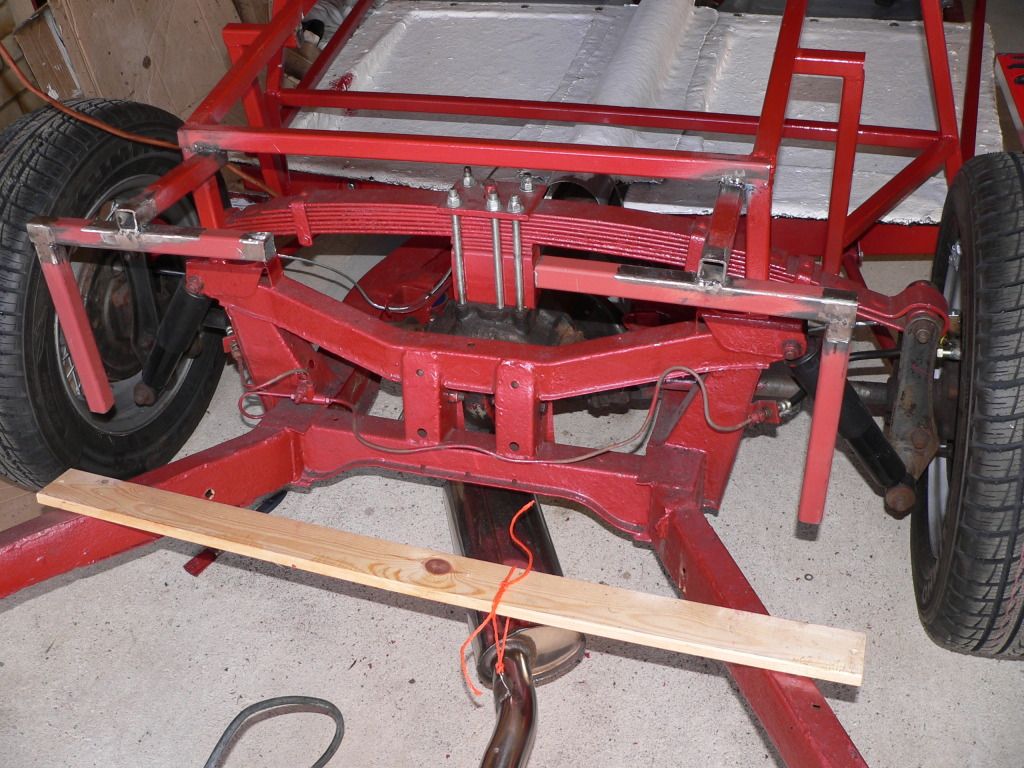
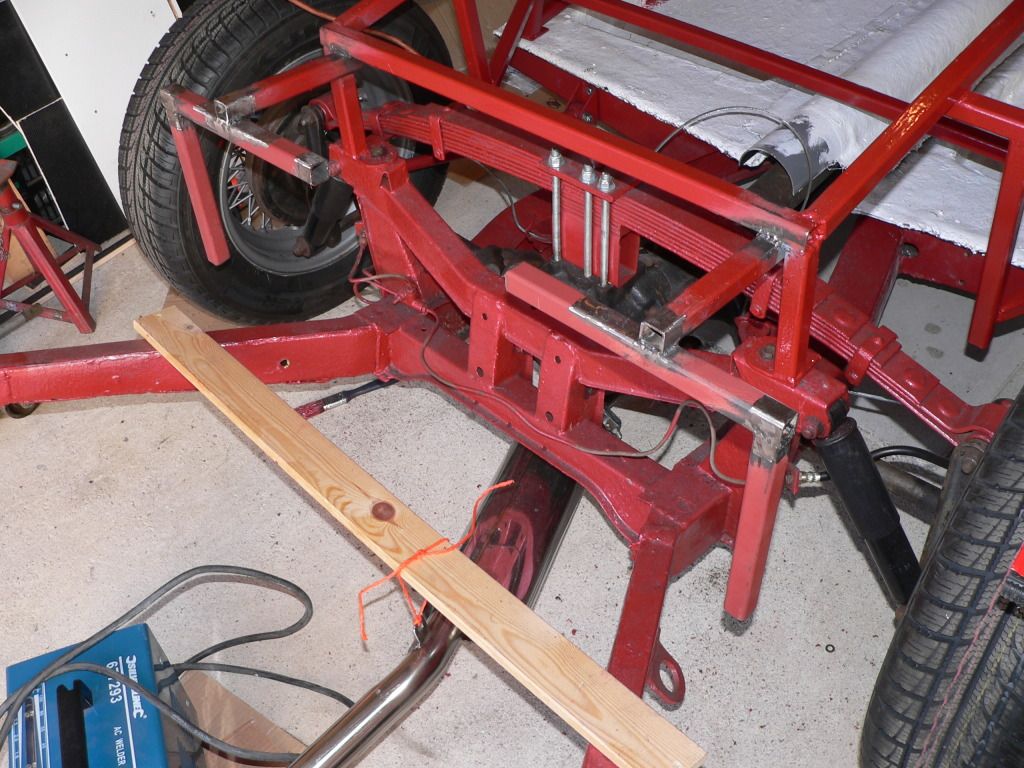
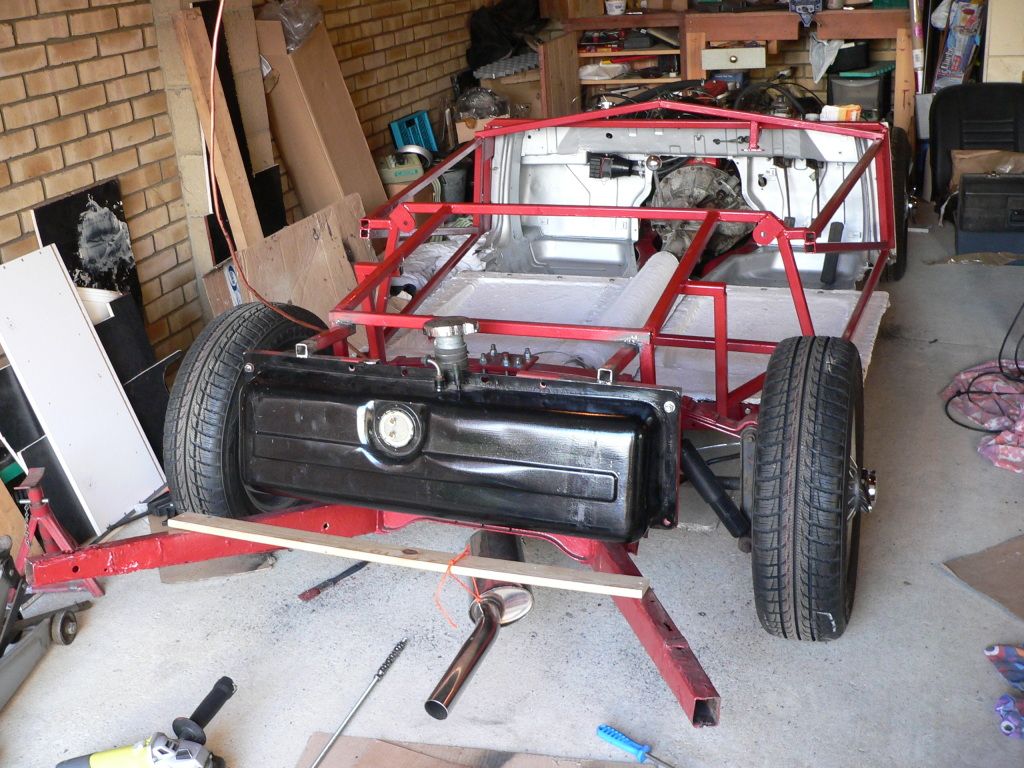
Thanks for the tips guys. After quite a struggle I've now got my frame bolted into place. The rear bolt that goes into the top of the diff carrier was quite a way out -
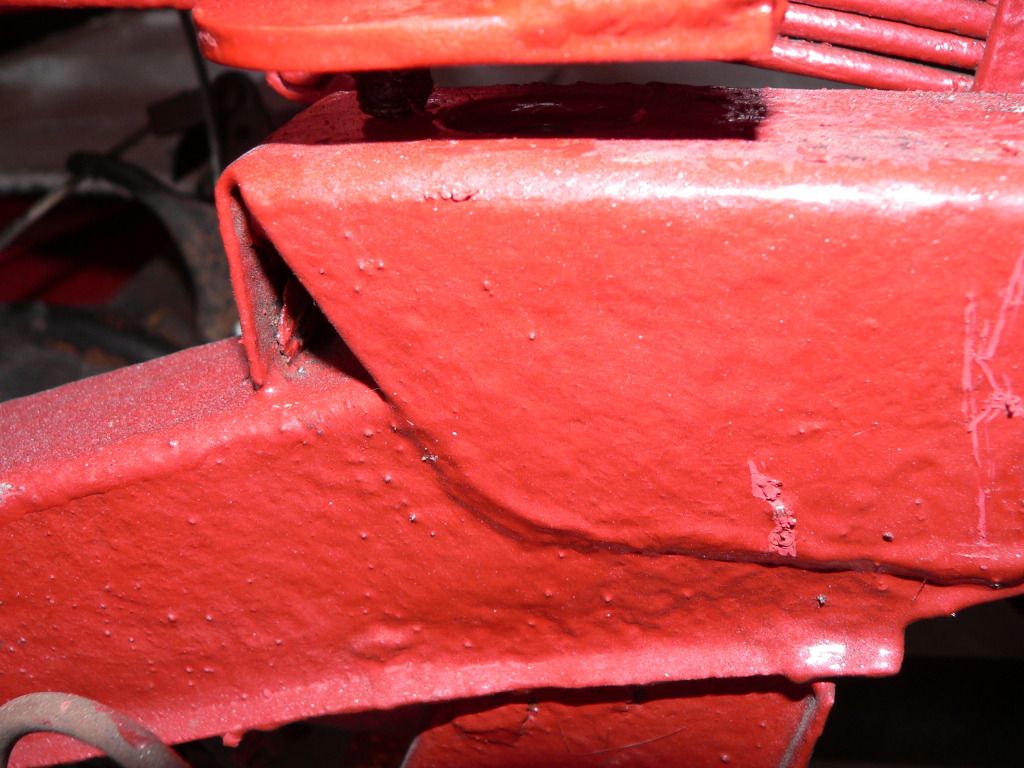
But judicious use of a screw jack and some timber eventually got it to line up -
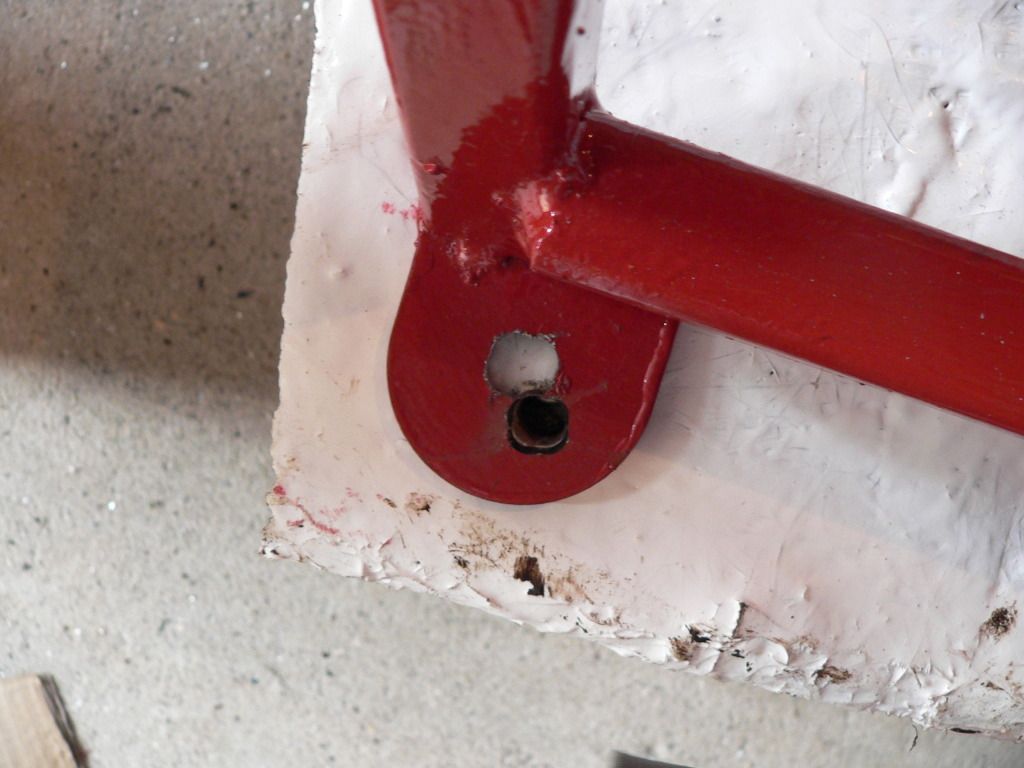
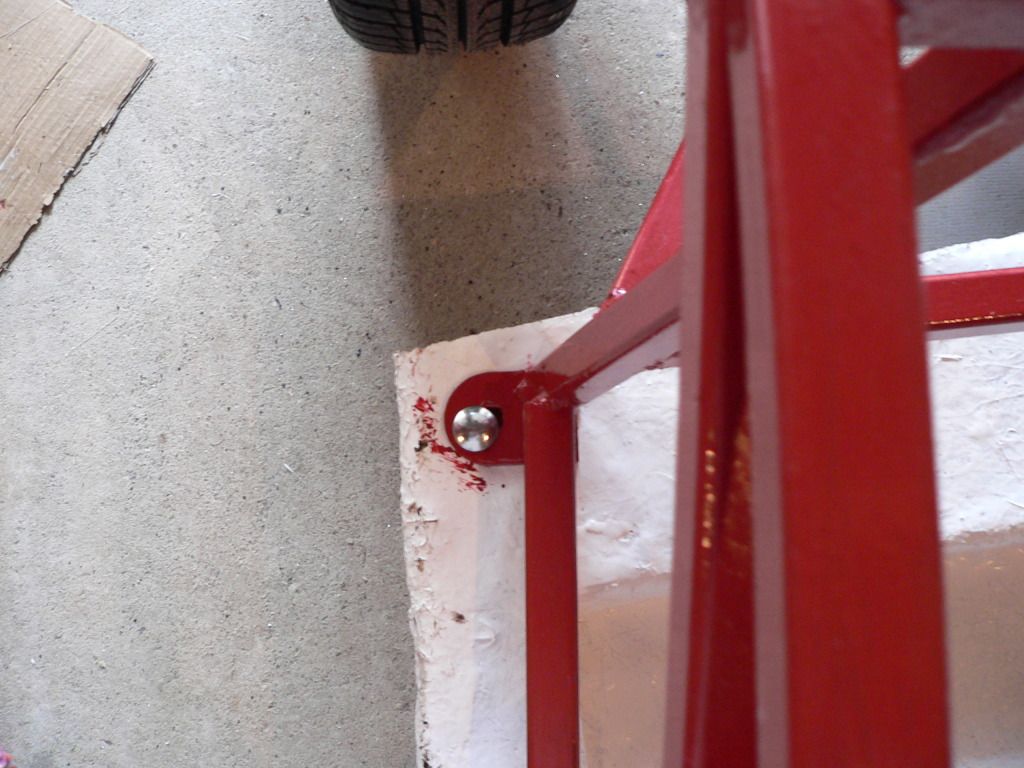
Once the jack was released it left the rear corner bolt only about 3/4" out, so I decided just to redrill the hole as everything else lined up ok -
That just left the front mounts that are supposed to line up with the door hangers. I guessed that these would be a problem as I'd moved my front bulkhead back 20mm for extra tyre clearance. In reality it wasn't too bad, I got three of the original bolts into their respective tapped holes in the door hangers on each side, then drilled through a fourth one on each side and put a bigger bolt and nut in as a belt and braces measure -
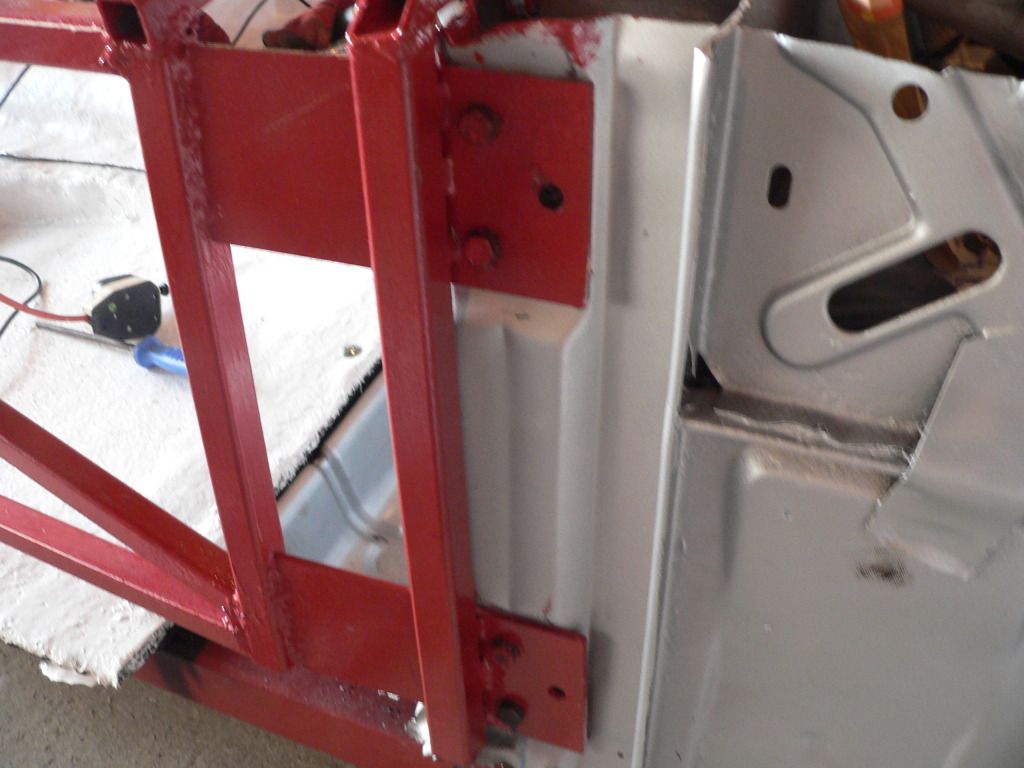
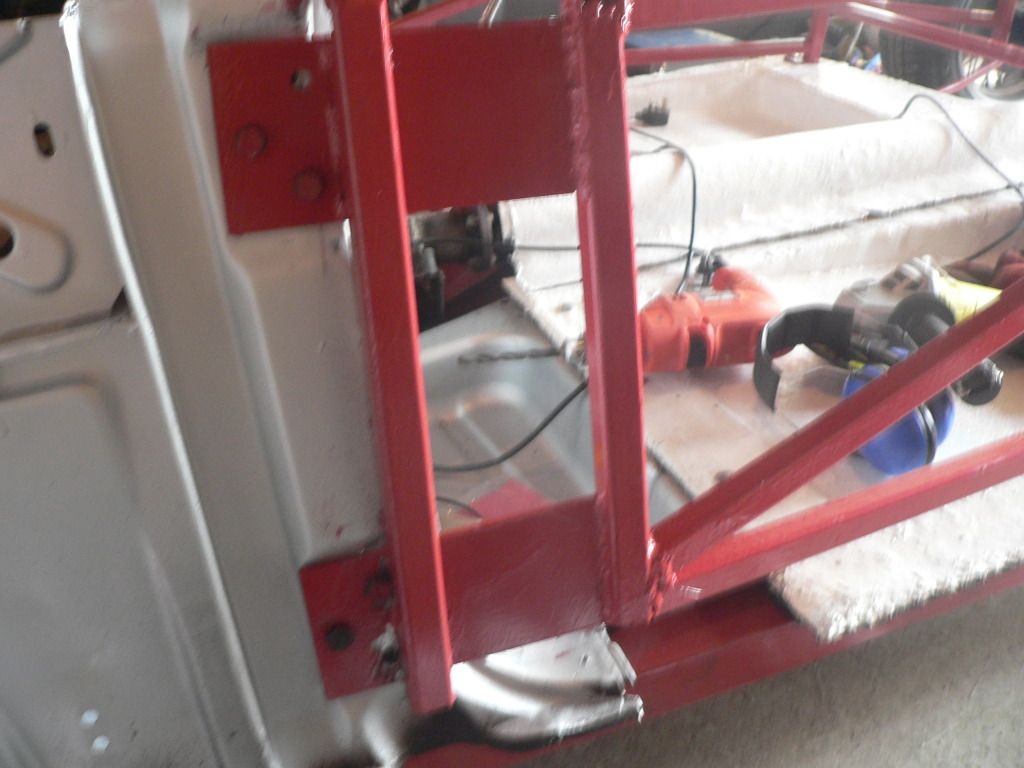
Although it hasn't got six fasteners on each side it all seems to line up and I really don't think it's going to come adrift.
So, now I need to modify the frame to accept the fuel tank behind the rear axle line...

|
17th April 2012, 12:13
|
|
Senior Member
|
|
Join Date: Jan 2012
Location: Poole, Dorset
Posts: 615
|
|
looking good Mr T.
|
17th April 2012, 12:29
|
|
Senior Member
|
|
Join Date: May 2011
Location: Somerset
Posts: 1,671
|
|
Agreed, looking good.
All of the main fabrication starts to come together quite quickly from this point so i look fwd to seeing how you tackle bits n bobs.
fyi, both Trevor and I had similar rear end frame issues. Trevor used ratchet straps on his, i just cut the leg off and re-welded it.
|
17th April 2012, 18:55
|
|
Senior Member
|
|
Join Date: Jul 2011
Posts: 5,328
|
|
Quote:
Originally Posted by davecymru
Agreed, looking good.
All of the main fabrication starts to come together quite quickly from this point so i look fwd to seeing how you tackle bits n bobs.
fyi, both Trevor and I had similar rear end frame issues. Trevor used ratchet straps on his, i just cut the leg off and re-welded it.
|
I'm thinking I should've cut mine off and re-welded it but it's done now so that's that.
I spent the afternoon fabricating a new fuel tank carrier for my Spitfire tank to fit behind the rear axle line in similar fashion to Tirtone's -
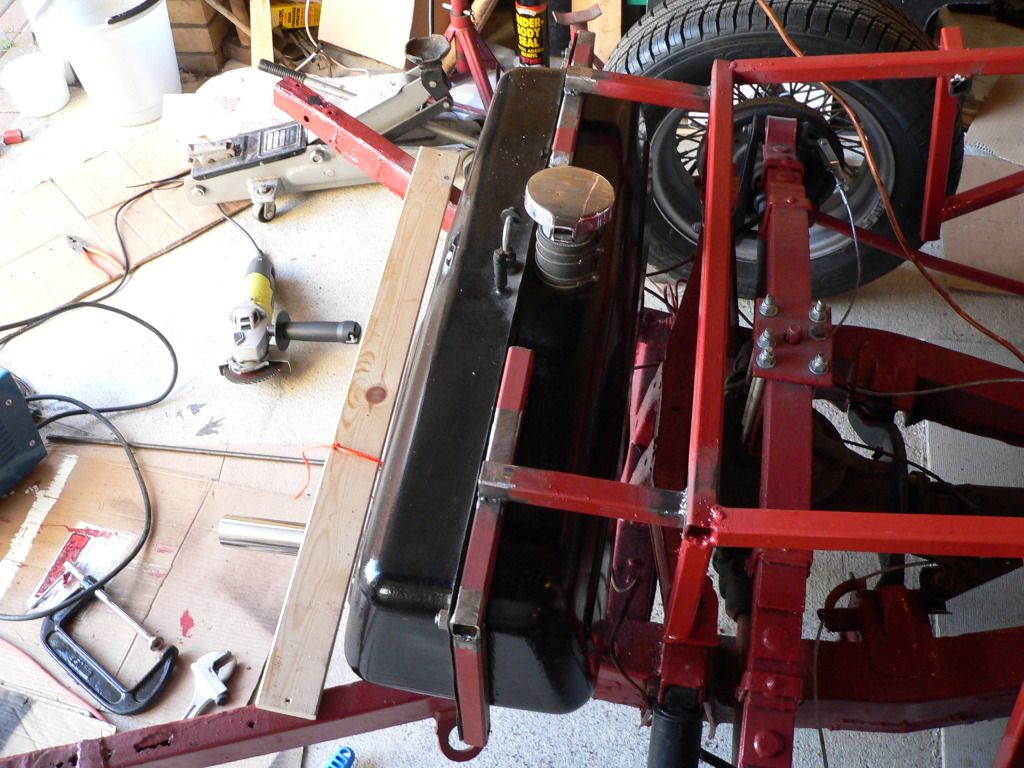
It isn't quite finished yet, I ran out of time once I'd welded on two of the six lengths of threaded bar I'm using to bolt the tank up to so there's four more to go before it gets a lick of Hammerite.
Back to work again tomorrow so no more progress for a day or two.  |
17th April 2012, 20:14
|
|
Senior Member
|
|
Join Date: Jan 2012
Location: Poole, Dorset
Posts: 615
|
|
Looks good Mr T, are you putting on any other supports?
When it is full of fuel, it will weigh quite a bit (assuming 37.6 litres and 0.739kg/litre, gives you around 28kg when full - ie a bag of cement!) , so it will need supporting underneath! I went for the belt and braces approach and welding a complete cage and feet....I mean, when I am cornering are high velocity I want it to stay put!  |
17th April 2012, 20:23
|
|
Senior Member
|
|
Join Date: Jul 2011
Posts: 5,328
|
|
Quote:
Originally Posted by tlrtone
Looks good Mr T, are you putting on any other supports?
When it is full of fuel, it will weigh quite a bit (assuming 37.6 litres and 0.739kg/litre, gives you around 28kg when full - ie a bag of cement!) , so it will need supporting underneath! I went for the belt and braces approach and welding a complete cage and feet....I mean, when I am cornering are high velocity I want it to stay put! |
Good point, hadn't thought of that. On looking at the original tank support I see it's connected to the bottom of the frame. Will be adding some sort of extra support when I've got the time. |
20th April 2012, 14:00
|
|
Senior Member
|
|
Join Date: Jul 2011
Posts: 5,328
|
|
Just had a couple of hours to spare today before getting ready for work this afternoon so I thought I'd make a start on the handbrake.
Original plan was to have it to the left of the steering wheel next to the gear lever with the cable running down into the side of the gearbox cover before doubling back along the side of the spine. After a cup of tea and dangling the handbrake from various locations off the frame with orange string I ended up mounting it on the right hand side of the steering wheel -
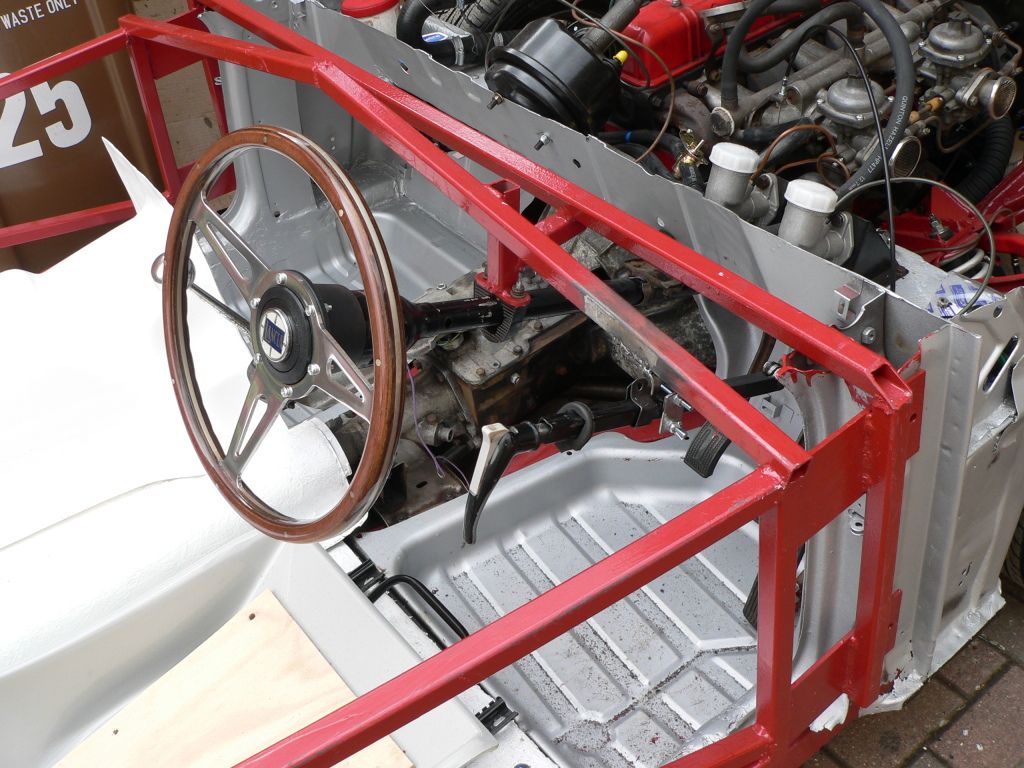
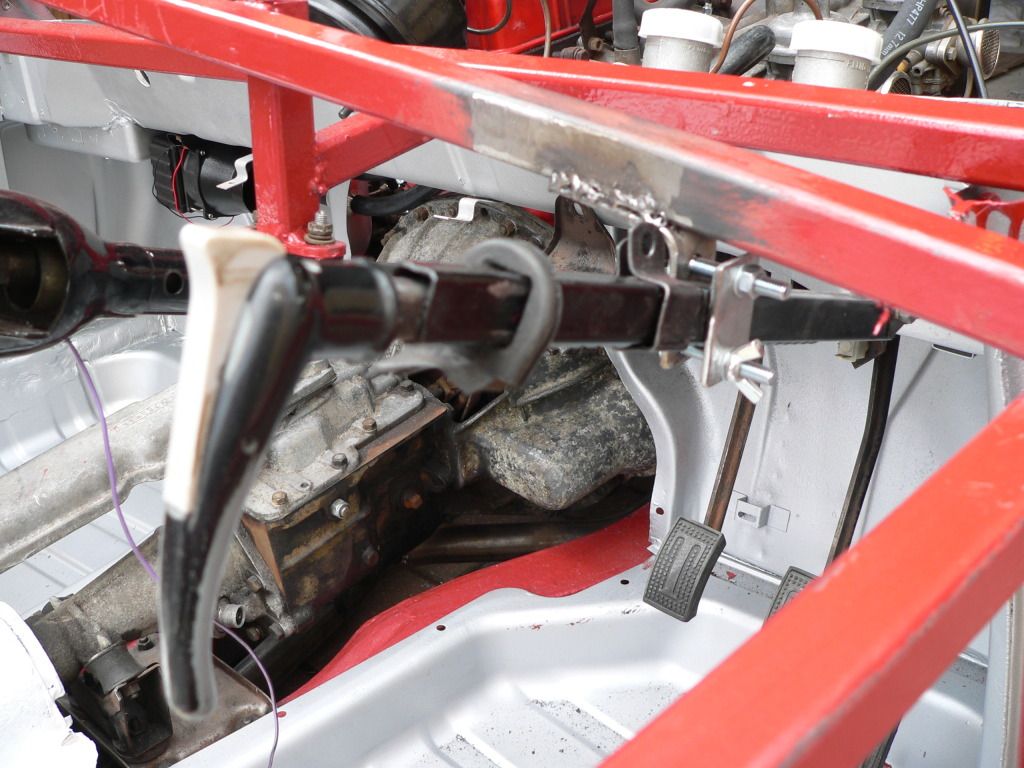
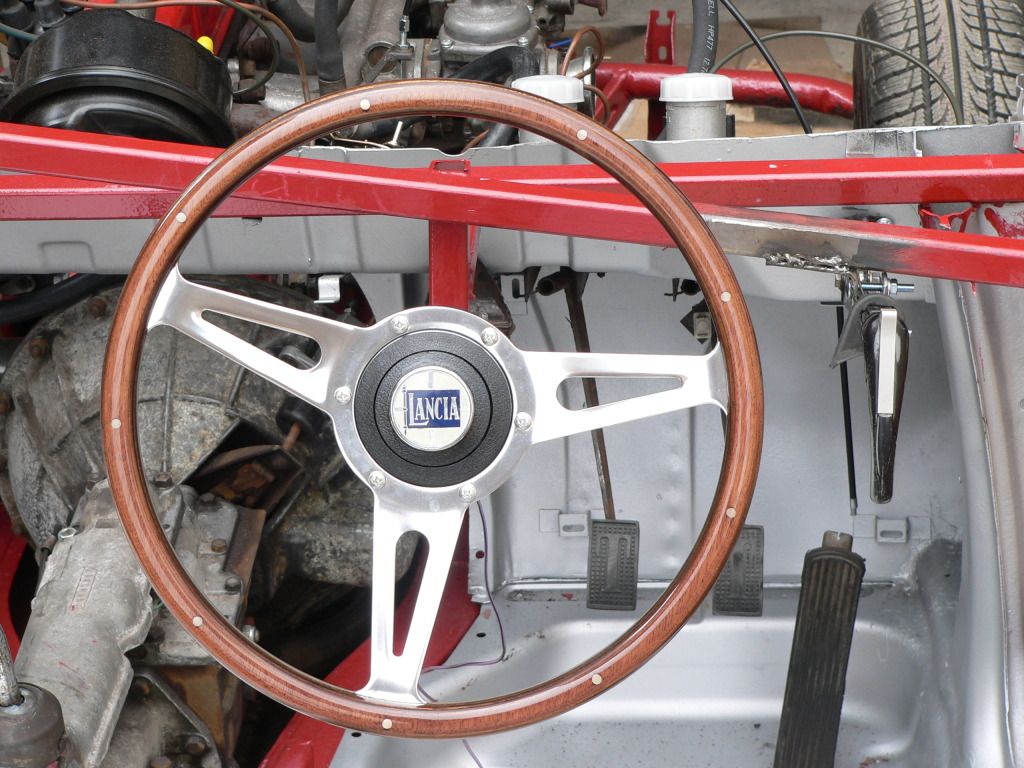
It falls nicely to hand there and doesn't get in the way, there's just the small matter of rigging up some means of it actually operating the rear brakes.
I have a few ideas as to how to do this but it's going to need a bit of imagination and plenty of trial and error.
Anyway, I'm working Friday, Saturday, Sunday and Monday nights so I don't think there'll be much progress until at least Tuesday now. |
20th April 2012, 17:51
|
|
Senior Member
|
|
Join Date: Sep 2011
Location: Stanley, Durham
Posts: 104
|
|
Hi MT,
Have you considered using the vitesse handbrake mounted to the right of the seat where it might be able to bolt through to the chassis side rail. Old hillman hunters were like this but I think the handbrake could get in the way getting in and out but you wouldn't have this problem, not having any doors! The cable could head rearwards then arc through 90 degrees to point towards the nearside wheel. The inner cable would fix to the nearside lever and the outer would end at the end of the arc. A bracket fixed to the outer at this point and joined to the offside lever by a straight rod would apply the same force to the offside lever that the inner would to the nearside one. Just an idea for you to consider if you want. Good to see your progress as it gives great encouragement, I am bogged down in modern engine electronics and wiring at the moment.
|
20th April 2012, 21:06
|
|
Senior Member
|
|
Join Date: Jun 2011
Location: birchington, kent
Posts: 1,769
|
|
you could put the handle sideways? close to the dash.
|
21st April 2012, 08:31
|
|
Senior Member
|
|
Join Date: Jul 2011
Posts: 5,328
|
|
Thanks for the ideas guys.
Andy - I'd be happy with a floor mounted handbrake to the right of the driver's seat as I often use a Peugeot van at work that has that set-up. I don't believe there will be enough room down the side of the seat though - the Spyder cockpit is a pretty snug fit (to say the least!) which is one of the reasons I didn't want a 'big' centre tunnel in the first place. I'm also aiming to include the standard Vitesse compensator as the final stage of the mechanism to make sure it works evenly on both sides.
Gary - I had considered the option of using a traditional lever mounted vertically next to the gear lever so it would work in a fore and aft plane rather than vertically, but once I found a 'spares' diagram for the Porsche 356 showing an exploded view of its under-dash umbrella handle connected to the brakes via a series of cables and levers I decided that's what I wanted to emulate.
http://www.autoatlanta.com/porsche-p...-65/701-20.php
The plan that's currently in my head is to run the A50 cable forwards through the bulkhead, over a roller to turn it through 90 degrees taking it down through the top of the bulkhead next to the throttle cable. It'll then pull up on a solid length of threaded bar (which will include the adjustment mechanism). This will lift an 'L' shaped lever to turn the vertical movement through 90 degrees again and pull on a sheathed cable running along the floor to the right of the driver's seat. The far end of that cable will be connected to another 'L' shaped lever turning the movement sideways across the car to the centre, where a final one will turn it towards the compensator.
It's so simple it might just work. 
|
21st April 2012, 15:09
|
|
Senior Member
|
|
Join Date: May 2011
Location: Somerset
Posts: 1,671
|
|
Quote:
Originally Posted by Mister Towed
the Spyder cockpit is a pretty snug fit (to say the least!)
|
I have to say that i'm quite getting used to it (don't worry, you'll be there soon!), but i'm glad that i bonded my walls in the way i did in order to get a few cm more on each side! |
|
Currently Active Users Viewing This Thread: 1 (0 members and 1 guests)
|
|
|
 Posting Rules
|
You may not post new threads
You may not post replies
You may not post attachments
You may not edit your posts
HTML code is Off
|
|
|
All times are GMT +0. The time now is 06:09.
|


 Linear Mode

